Colony Flow Level 1014 Walkthrough Solution & Guides | How to solve Colony Flow 1014

Guide By Liam Stone
Updated on August 8, 2026
You don't have to read the whole guide. The video above shows you exactly how to clear Level 1014.
Video doesn't match your screen?
Game updates frequently scramble layouts! Try our AI Screenshot Solver first to find your exact board instantly, or report broken guides to our team.
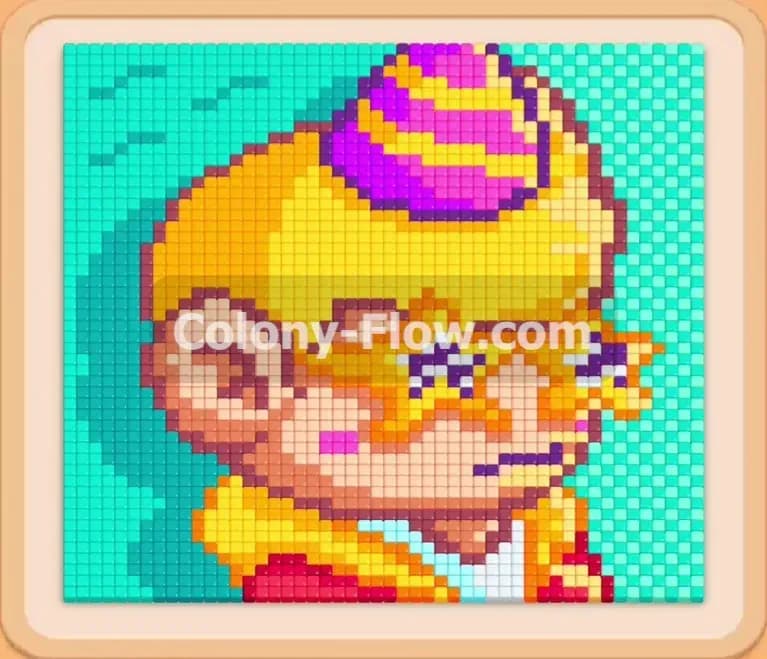
Welcome to Colony Flow Level 1014. This specific puzzle features a bright pixel art portrait of a character with spiky yellow hair and vibrant star glasses. You will need to carefully orchestrate your moves to peel away the thick outer background while keeping your tray organized. The key to winning is managing your limited waiting area so the ants always have a job to do.
Colony Flow Level 1014 Overview
What You Are Working With
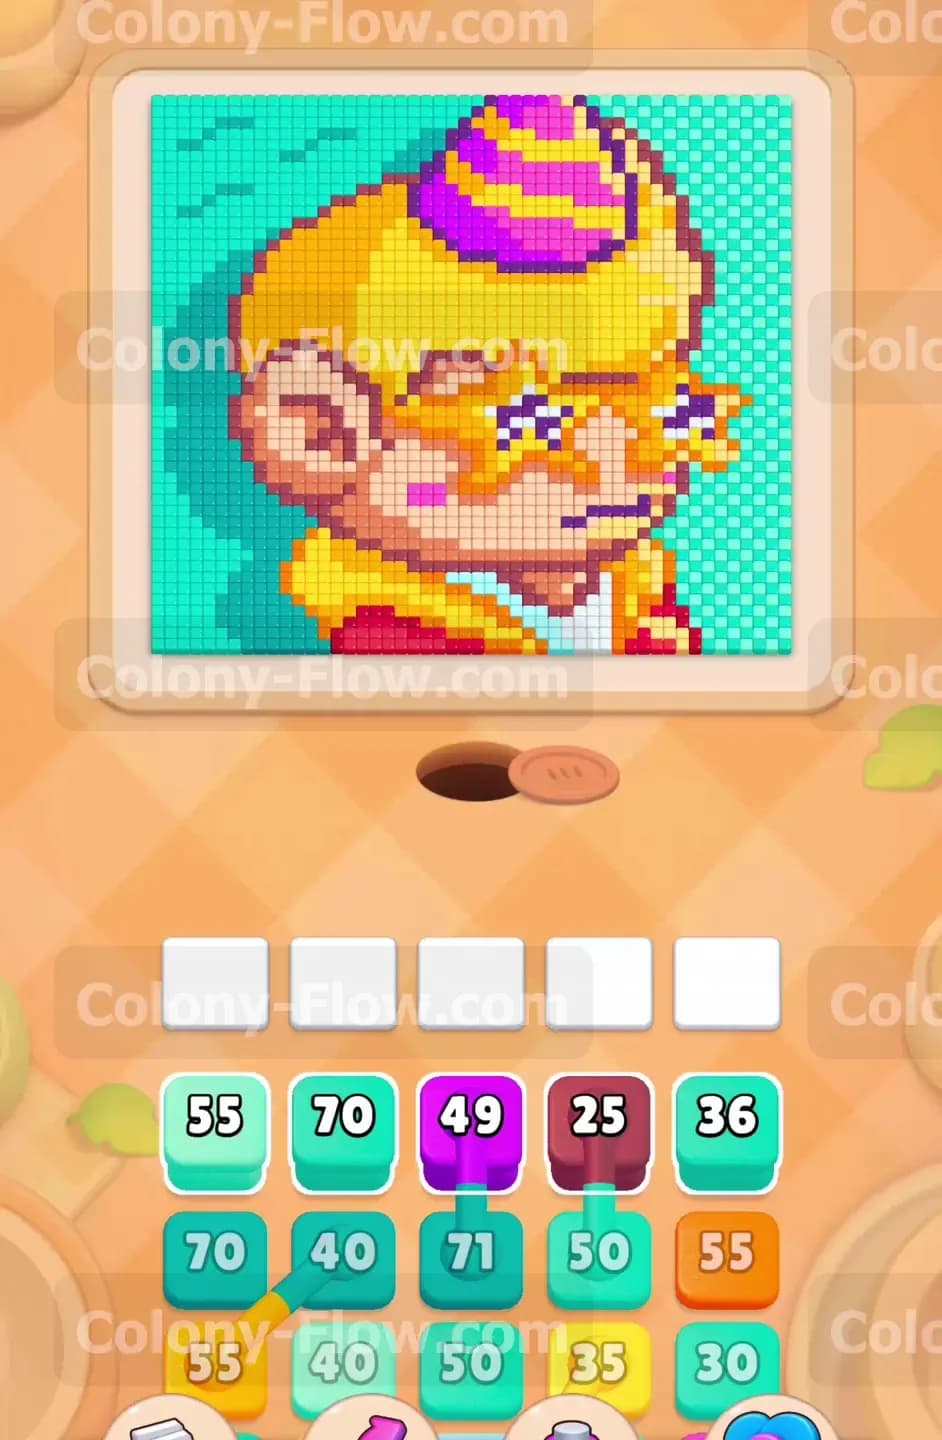
The puzzle board displays a dense pixel art face right in the center. The character has bright yellow hair and wears a striped hat made of purple and pink pixels. Large orange star glasses dominate the middle of the face. A solid border of cyan pixels frames the entire character. Down below the board your tray holds a massive stack of numbered colored blocks. You will see large numbers like a cyan 70 and a yellow 80 mixed with smaller numbers. The tray also includes connected boxes that link multiple colors together. You must pull these connected boxes as a single unit which takes up significant space in your waiting slots.
What It Takes to Clear Level 1014 Board
Beating this level requires a strict outside to inside approach. The ants spawn from their nest hole at the bottom and must travel upward to reach the food tiles. Because the cyan background completely surrounds the portrait the ants cannot reach the hair or the hat right away. You must clear a path through that teal barrier first. The real danger comes from burying the colors you actually need under blocks you cannot use yet. Every time you pull a block that has no open path on the board it sits in one of your five waiting slots. If you fill all five slots and the ants have nothing to eat you lose the level instantly. You win by carefully digging through the tray to match the right colors in the exact right order until the board is completely empty.
Colony Flow Level 1014 Step by Step Solution
Step 1: Break through the thick outer cyan border to open paths for the ants
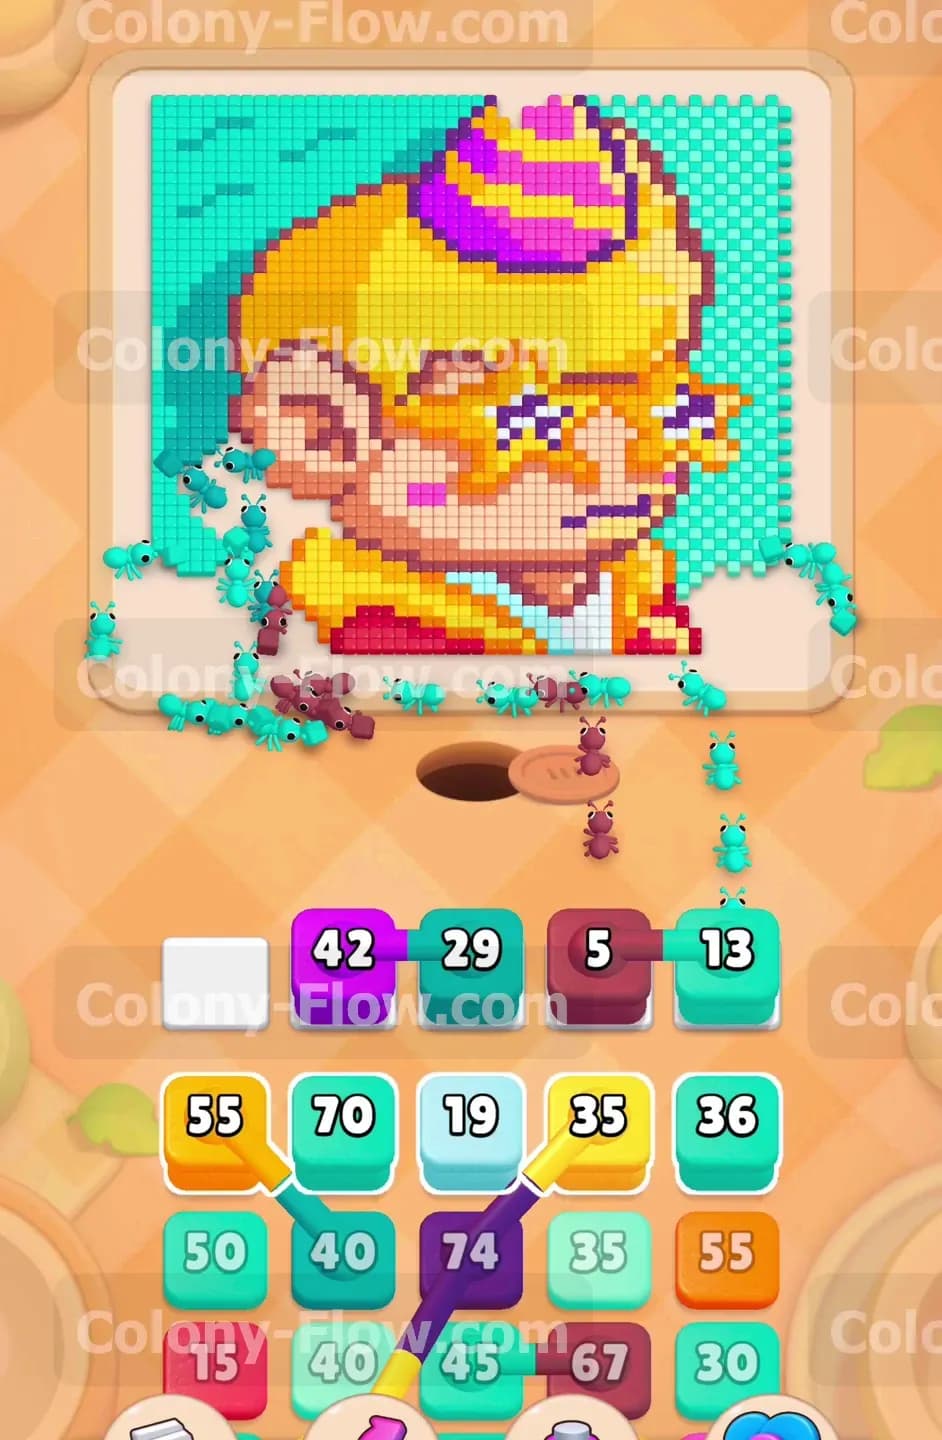
Your first major goal is to eliminate the thick cyan wall surrounding the character. Look at the top row of your tray and pull the cyan 55 block. The ants will immediately stream out of the nest and start devouring the bottom edge of the cyan background. Follow this by pulling the cyan 36 block on the right side of the top row. The colony will branch out and start eating the right side of the border. Keep your eyes on the numbers inside those blocks. As the ants carry away the cyan food tiles the numbers decrease. You want to maintain a steady flow of hungry ants to keep the board active. Let them chew away enough of the background to expose the yellow hair tiles underneath.
Step 2: Store blocking colors in the waiting area to uncover the lower cyan blocks
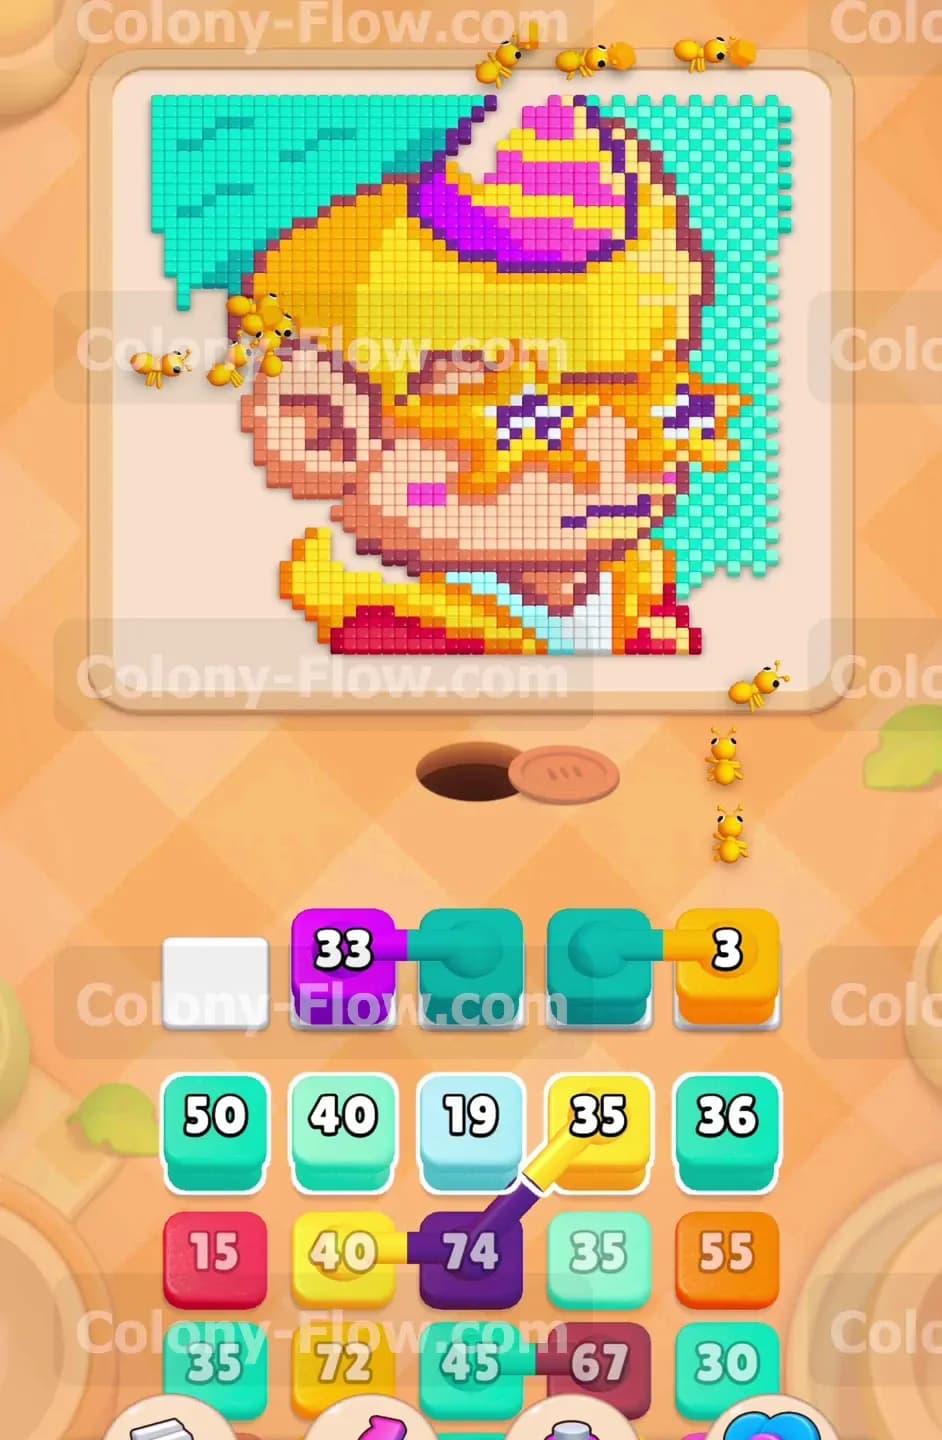
You will quickly notice that you need more cyan blocks to finish the background but they are buried in the second row of the tray. This is where you must use your waiting slots strategically. Pull the purple 49 block and the maroon 25 block from the top row. The ants cannot reach the purple hat or the maroon shirt yet so these blocks will drop down into your waiting area. This move is necessary because it reveals a massive cyan 70 block and a cyan 40 block hidden directly below them. Pull those newly revealed cyan blocks immediately. The ants will swarm the massive new food source and tear through the upper left section of the background. Your waiting slots are now holding two blocked colors but your active ants are perfectly safe from jamming.
Step 3: Unleash the main colony to chew through the massive yellow hair sections
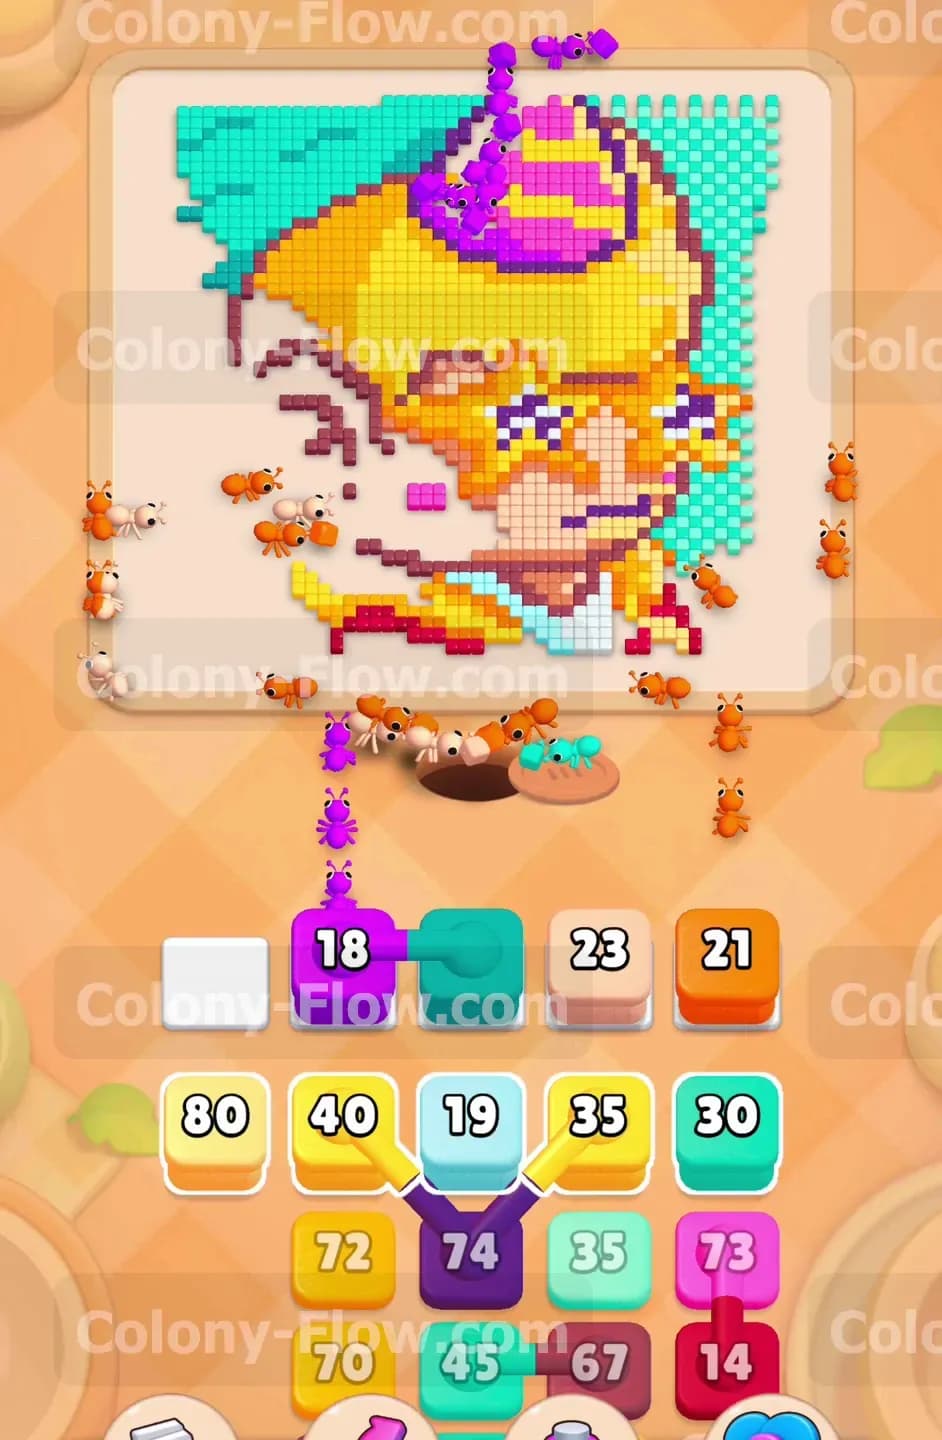
With the left and right sides of the cyan border gone the yellow hair is finally exposed. Look into your tray and locate the yellow 55 block and the yellow 35 block. Pull them up to the active area. A massive wave of ants will march straight up the middle of the board and attack the bottom edges of the spiky hair. The hair takes up a huge portion of the pixel art so you need a lot of blocks to clear it. While the ants work on the yellow tiles you will notice a connected box set in your tray. This set features a purple block connected to a cyan block. Ignore this connected set for now. Pulling it too early will trap it in your waiting slots because the purple hat tiles are still blocked by the upper hair tiles. Focus entirely on feeding yellow blocks to the colony.
Step 4: Clear the purple hat stripes and begin draining the orange star glasses
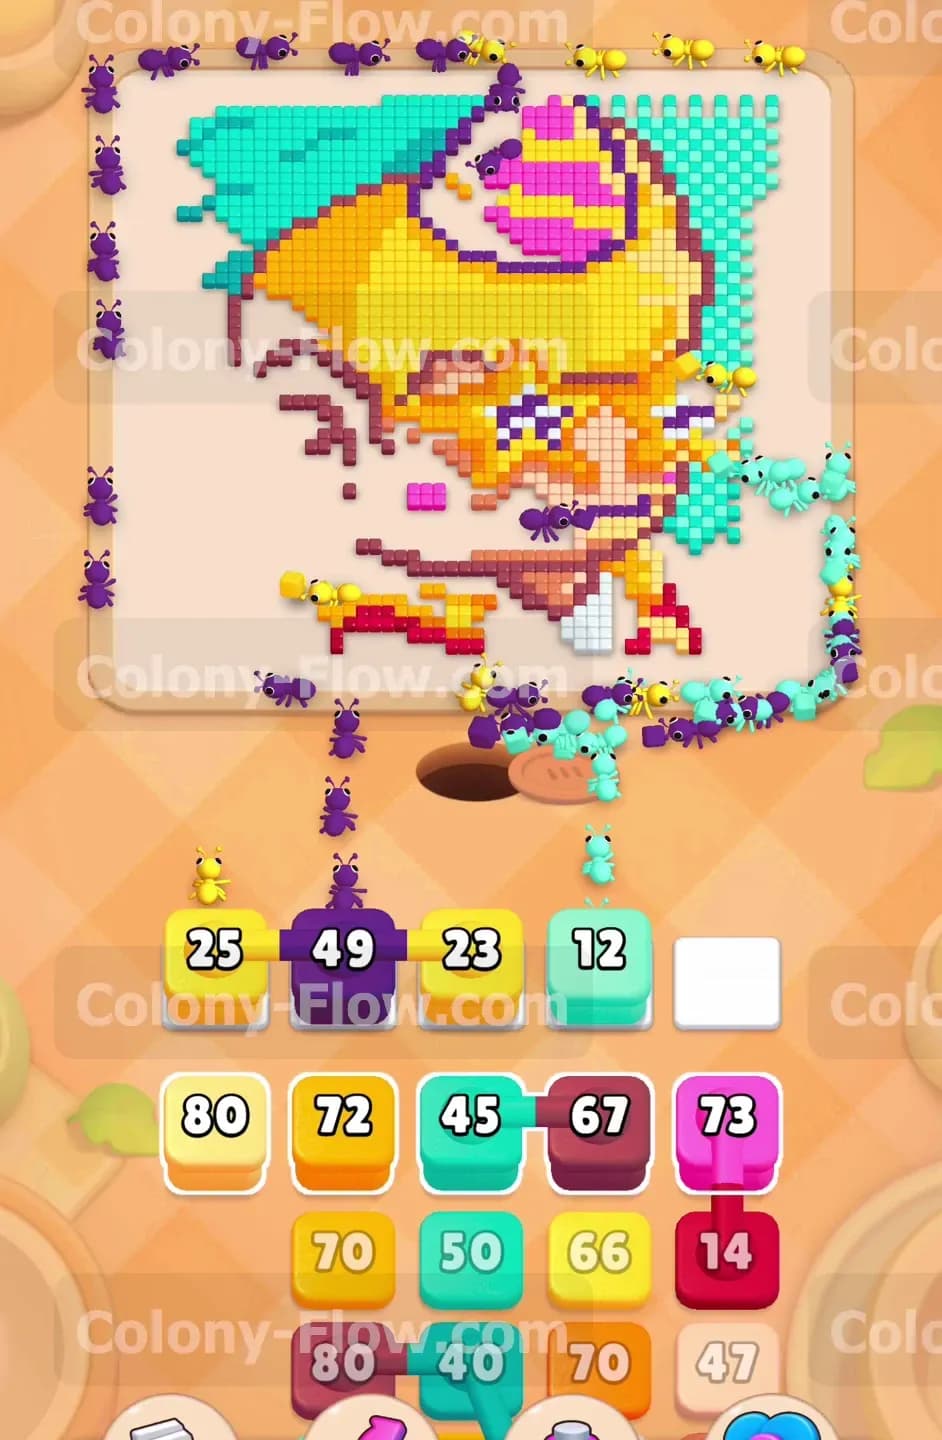
As the yellow hair melts away the purple and pink stripes on the character hat become accessible. Now is the perfect time to pull the purple 74 block and the pink 73 block. The ants will march past the empty space where the hair used to be and begin eating the hat. At this exact moment you should also start working on the large star glasses. Pull the orange 72 block to send a second stream of ants toward the center of the face. Your board will look very busy right now with multiple colors draining at once. You might have a flesh colored 23 block sitting in your waiting slots during this phase. Let it sit there safely while the purple and orange blocks keep the main colony moving.
Step 5: Maneuver the large connected boxes out of the center tray space
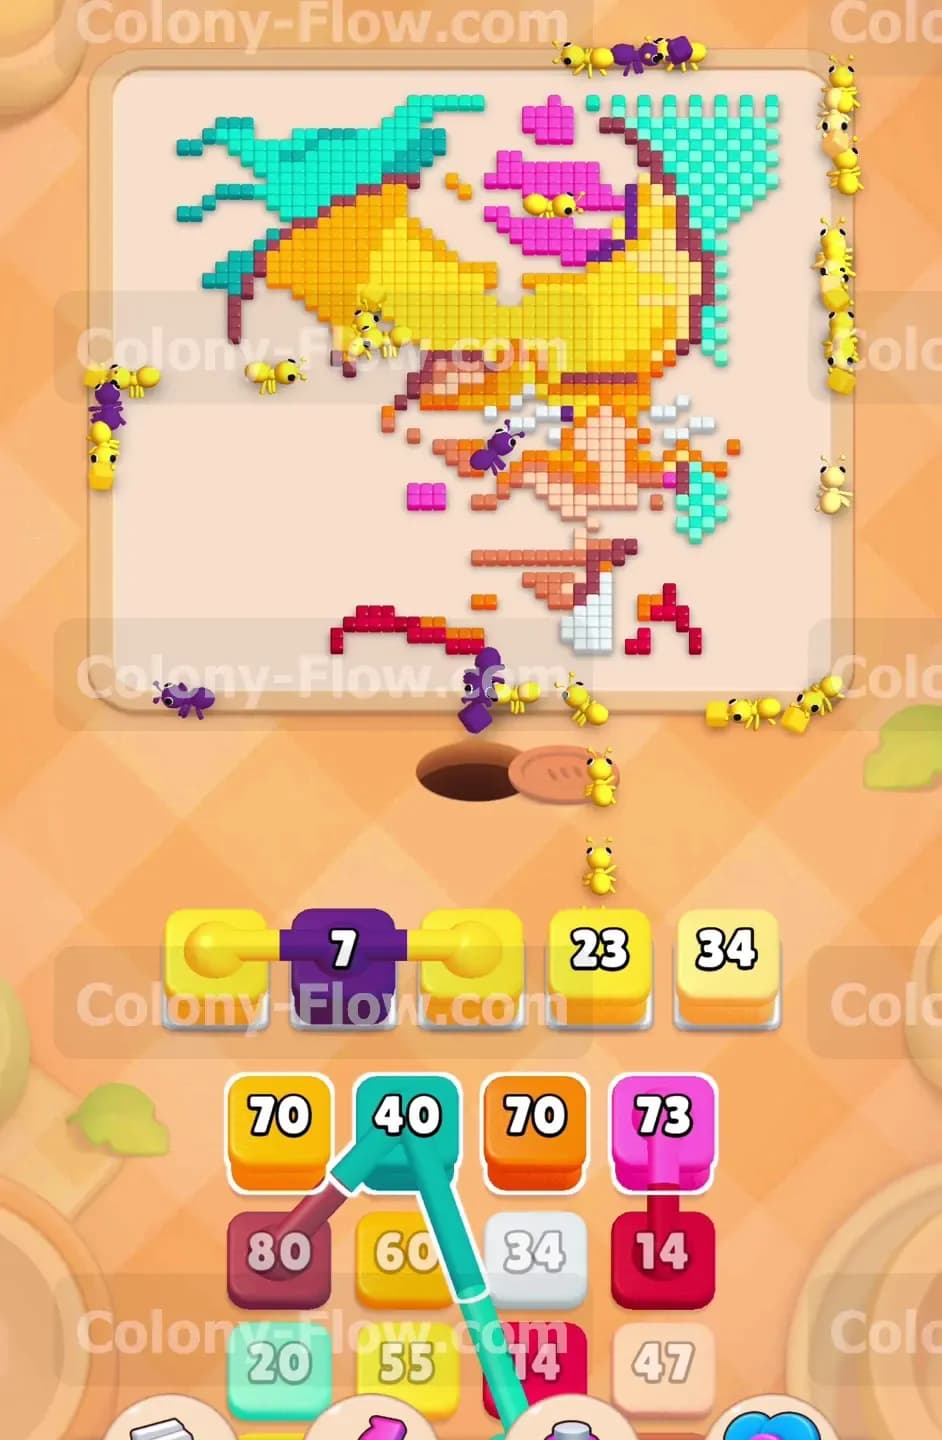
The center of your tray is heavily blocked by a large connected group of boxes. This group links a yellow block to a purple block. Because you cleared the outer sections of the hair and the top of the hat earlier both of these colors now have open paths. Pull the entire connected unit out of the tray. The game requires both colors to have an active path to drain properly. The ants will split their attention and eat the remaining yellow hair and purple hat tiles simultaneously. Clearing this bulky connected item is a huge relief for your board management. Getting it out of the way finally exposes the deep maroon 80 block and the flesh 34 block resting at the very bottom of the tray.
Step 6: Devour the isolated facial structures and scattered skin tone tiles
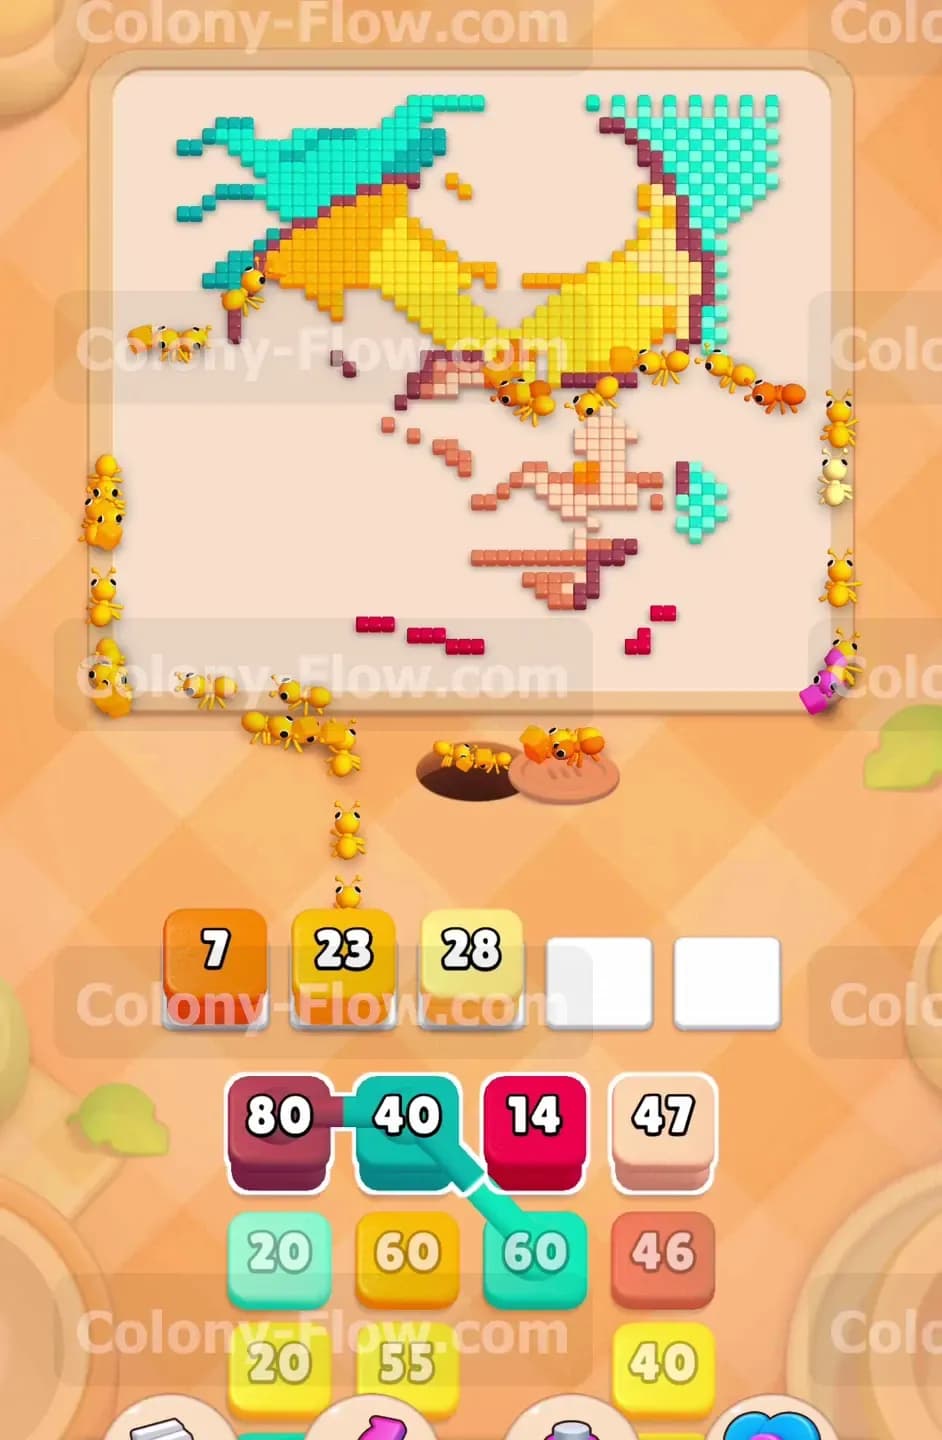
The portrait is now missing its hair and hat completely. The remaining pixels form the skin of the face and the bright orange star glasses. Pull the massive orange 70 block to finish off the glasses. Once the glasses vanish you have full access to all the skin tone tiles. Pull the flesh 34 block and the flesh 47 block to command the ants to eat the cheeks and forehead. Pull the red 14 block to clear out the small mouth detail. You need to exercise extreme caution with your waiting slots right now. The remaining food tiles are broken up into tiny scattered islands across the board. The ants take much longer to walk to these isolated spots. Only pull a block when you know exactly which tiles it will connect to.
Step 7: Sweep up the final remaining pixel fragments across the empty board
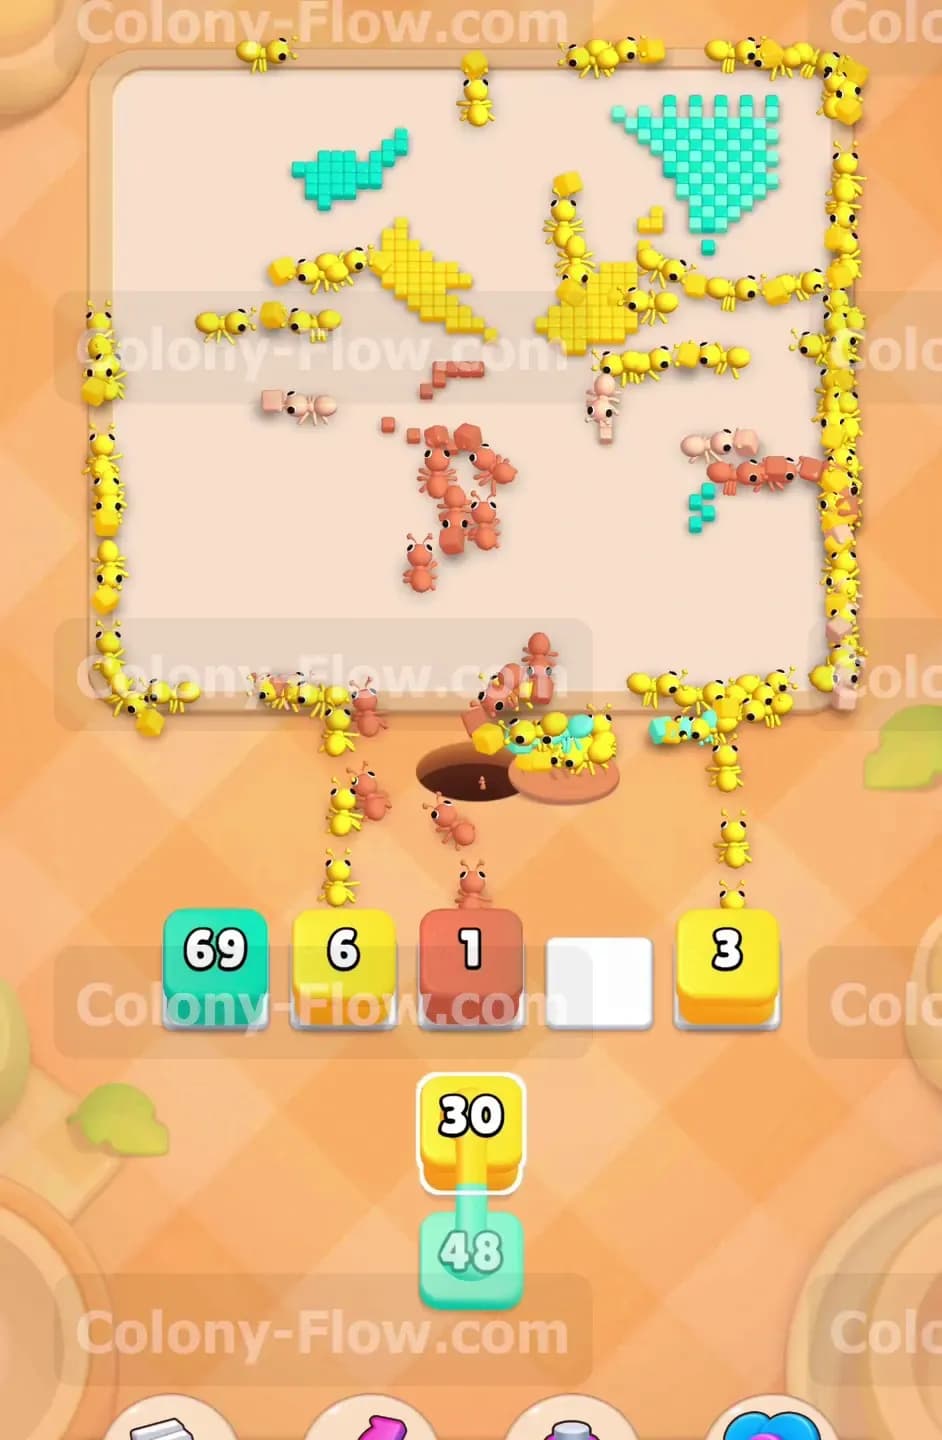
You are now in the final phase of the level. Only a few stray bits of color remain on the empty canvas. You will see a tiny patch of cyan background in the top corner and a few isolated yellow hair pixels. Pull the cyan 69 block and the yellow 30 block to target these final pieces. Your waiting slots might be holding a cyan 48 block and a tiny yellow 3 block. Just leave them in the waiting area. The ants will take a long walk across the completely empty board to reach the last remaining pixels. Be patient and watch the numbers drop to zero. Do not touch anything else in the tray. Once the ants consume the very last pixel on the board you have officially beaten the level.
Final Thought
Level 1014 demands careful planning and strong tray management. The biggest trap is pulling those connected boxes before the paths are fully open. Always prioritize clearing the outer barriers first so your waiting slots stay clear for the deep tray items. If you find any of these written steps difficult to picture in your head please watch the video above this article. Seeing the precise block order and ant paths in action makes the strategy incredibly easy to follow.