Colony Flow Level 1254 Walkthrough Solution & Guides | How to solve Colony Flow 1254

Guide By Liam Stone
Updated on August 12, 2026
Prefer to watch rather than read? The Level 1254 walkthrough video sits right above this guide.
Video doesn't match your screen?
Game updates frequently scramble layouts! Try our AI Screenshot Solver first to find your exact board instantly, or report broken guides to our team.
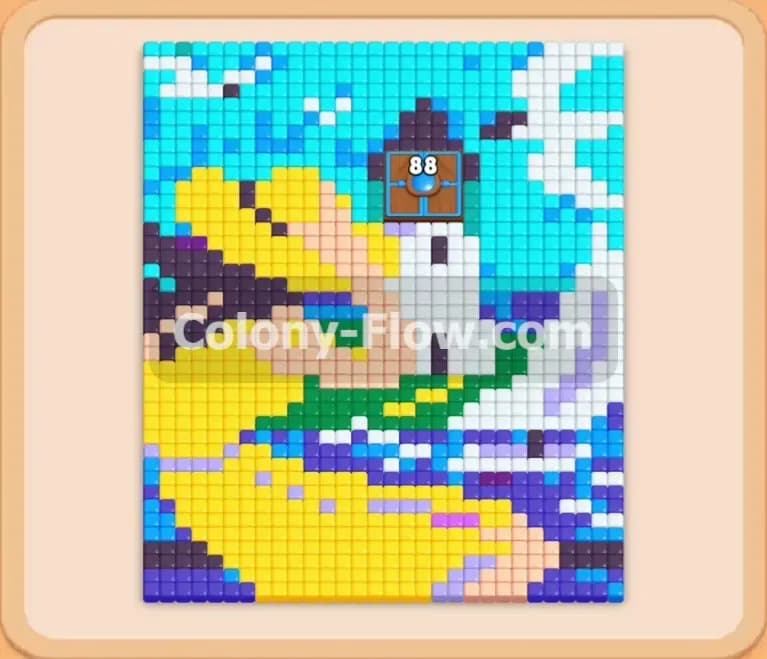
Welcome to Colony Flow Level 1254 where we tackle a beautiful pixel art picture of a pelican. This level tests your patience and your ability to manage connected blocks without jamming your waiting slots. You will need to carefully peel back the sky and water before you can clear out the massive yellow beak and the white feathers. I played through this one and found the perfect sequence to keep the ants moving and the board open.
Colony Flow Level 1254 Overview
What You Are Working With
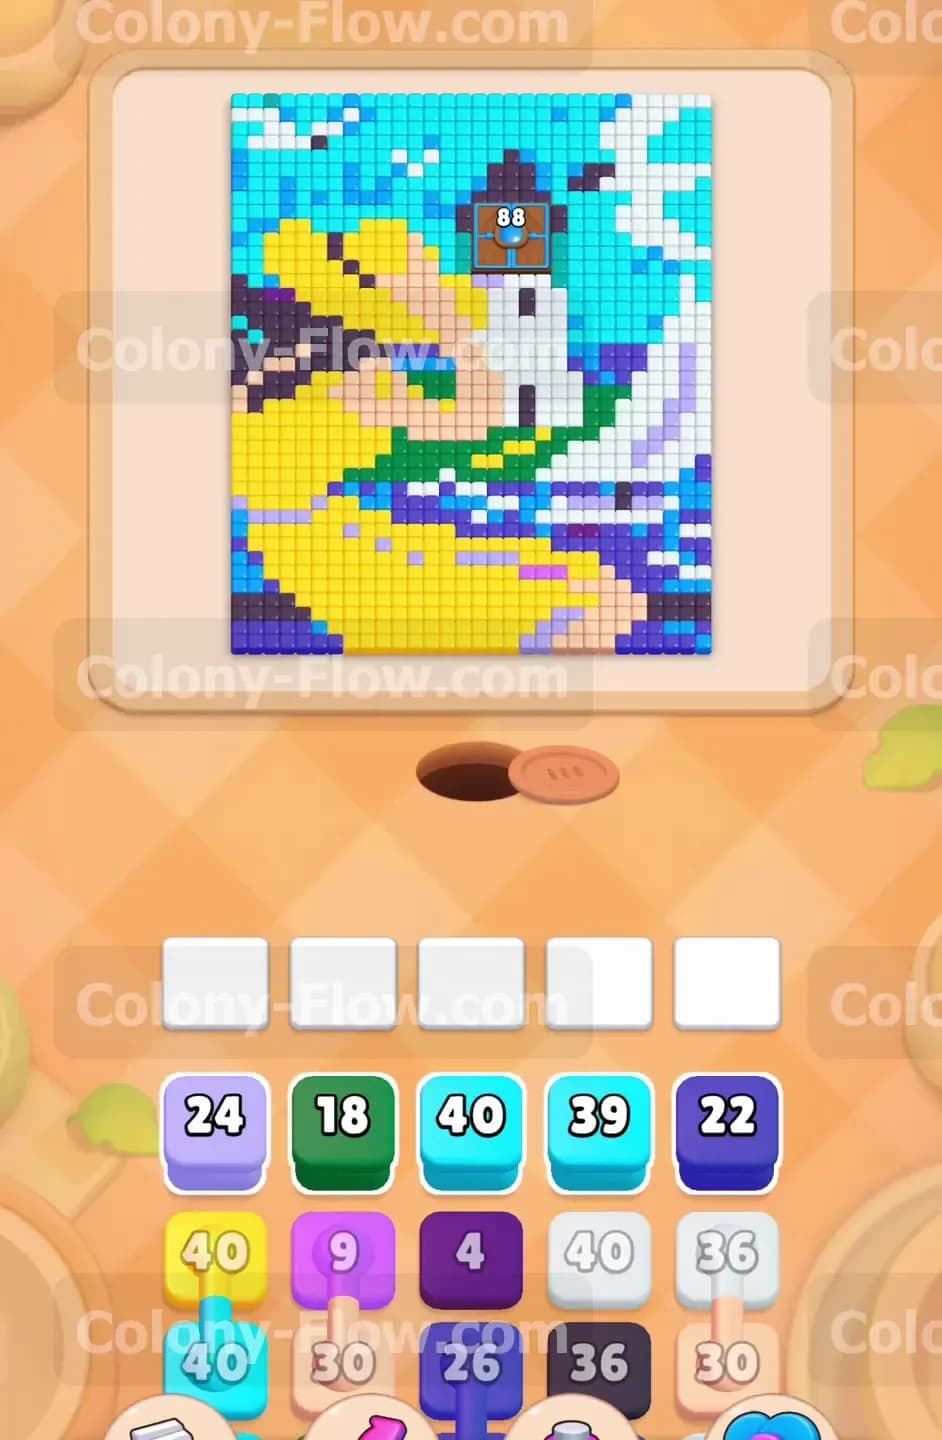
This level presents a large pixel art canvas of a pelican sitting by the sea. The bird features bright white feathers and a very prominent yellow beak. The background contains a light blue sky and a dark blue ocean base. Scattered throughout the picture you will find light pink shadows light purple highlights and dark purple outlines. The wooden post the pelican sits on provides a nice brown grounding element at the center. In your block tray you face a wide variety of colors carrying very high numbers. You have light blue blocks holding 40 charges and yellow blocks also holding 40 charges. The sheer volume of tiles means you must maintain a steady flow of ants.
The primary mechanic you have to manage here is the connected boxes. You will see lines linking two blocks together in the tray. When you tap one of these blocks both of them move into the waiting slots at the same exact time. This instantly occupies two of your five available slots.
What It Takes to Clear Level 1254 Board
To clear this board you must strip the picture down from the outside edges inward. The ants always take the shortest open path to a matching color tile. If you tap a block and the ants cannot reach that color the block sits dead in the slot. Do this enough times and all five waiting slots fill up completely. When the slots jam and the ants stop moving you fail the level instantly. You have to visually map out which colors are touching the open background area. You win by feeding the outer sky and water tiles first to carve out highways into the center. Once you expose the dense inner clusters of yellow and white tiles you can unleash your massive blocks safely.
Colony Flow Level 1254 Step by Step Solution
Step 1: Target the outer dark blue water and yellow beak tiles to open the map
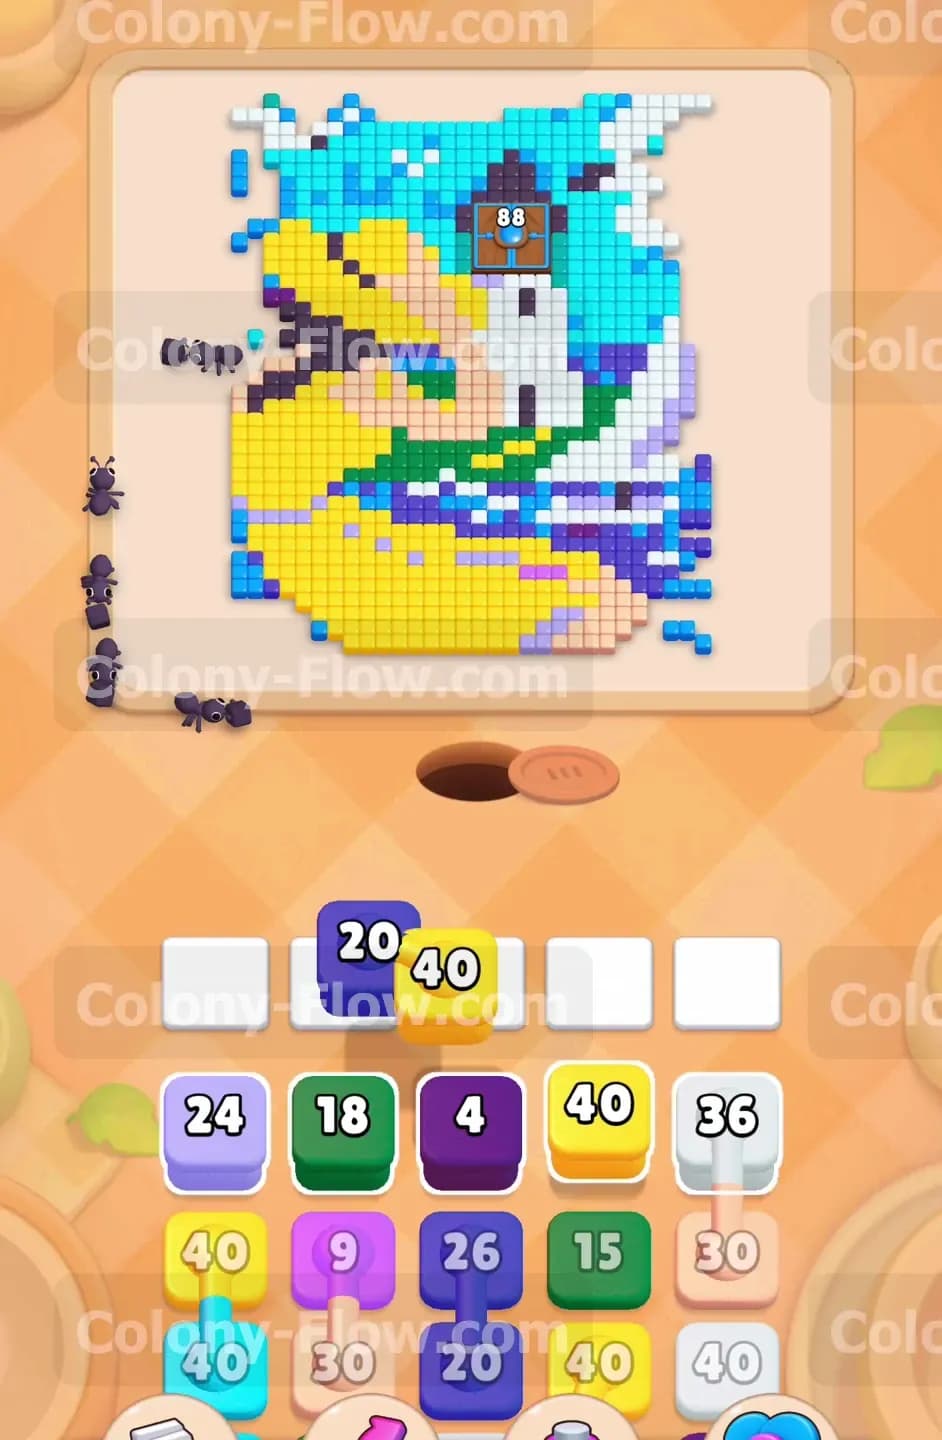
To get things moving you need to target the most accessible colors on the outer edges of the picture. The dark blue tiles make up the water at the bottom and right side of the pelican. The yellow tiles form the massive beak on the left side. Tap the dark blue block with a count of 22 and the yellow block with a count of 40. These blocks drop into your waiting slots. The ants immediately stream out of the nest and branch off in two distinct directions. One group heads downward for the dark blue water while the other group marches left toward the yellow beak. Because these tiles sit right on the outer boundary of the picture the ants reach them without bumping into any obstacles. This opening move safely burns down the block counts and keeps your waiting slots flowing freely. You establish clear paths right away.
Step 2: Deploy the connected white and pink boxes to clear the belly feathers
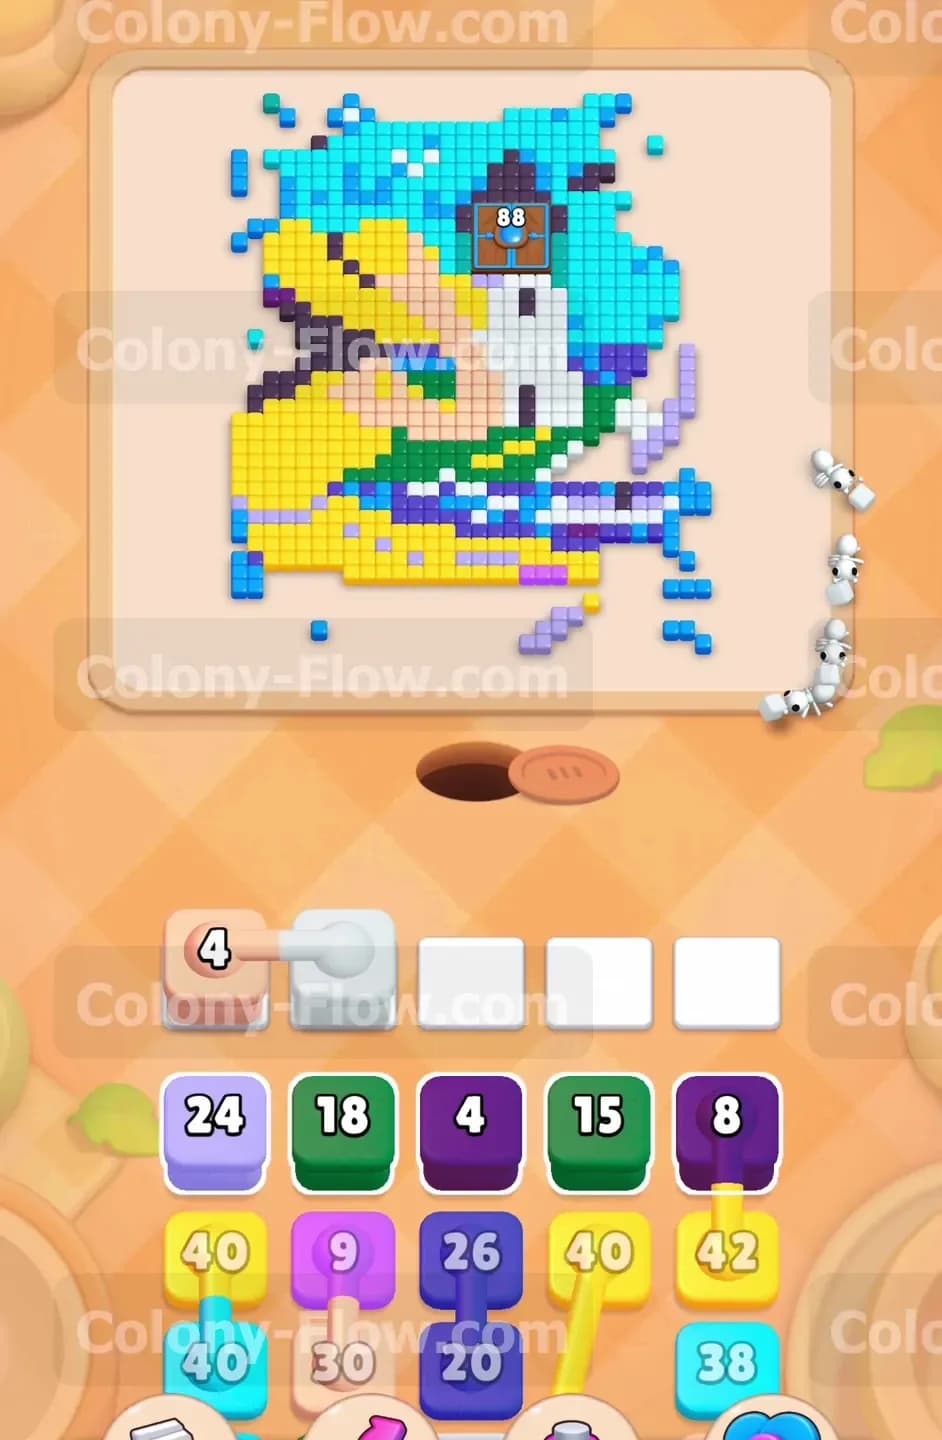
As the dark blue and yellow blocks finish up you will see an opening for the white feathers and the light pink shading. Look at your tray and locate the connected boxes featuring a white block and a light pink block. When you tap one both blocks slide into your waiting slots together. This action takes up two of your five available spaces instantly. You must make absolutely sure both colors have an open path before you tap them. The previous step opened enough space around the pelican belly and the background shading to allow safe passage. The ants swarm the white body feathers and quickly consume the light pink tiles nested nearby. The numbers on the blocks drop steadily. You must wait for these connected blocks to completely leave the slots before you pull anything else. Managing your physical space in the waiting area is the only way to survive this connected box mechanic.
Step 3: Tackle the light blue sky and continue reducing the large yellow beak
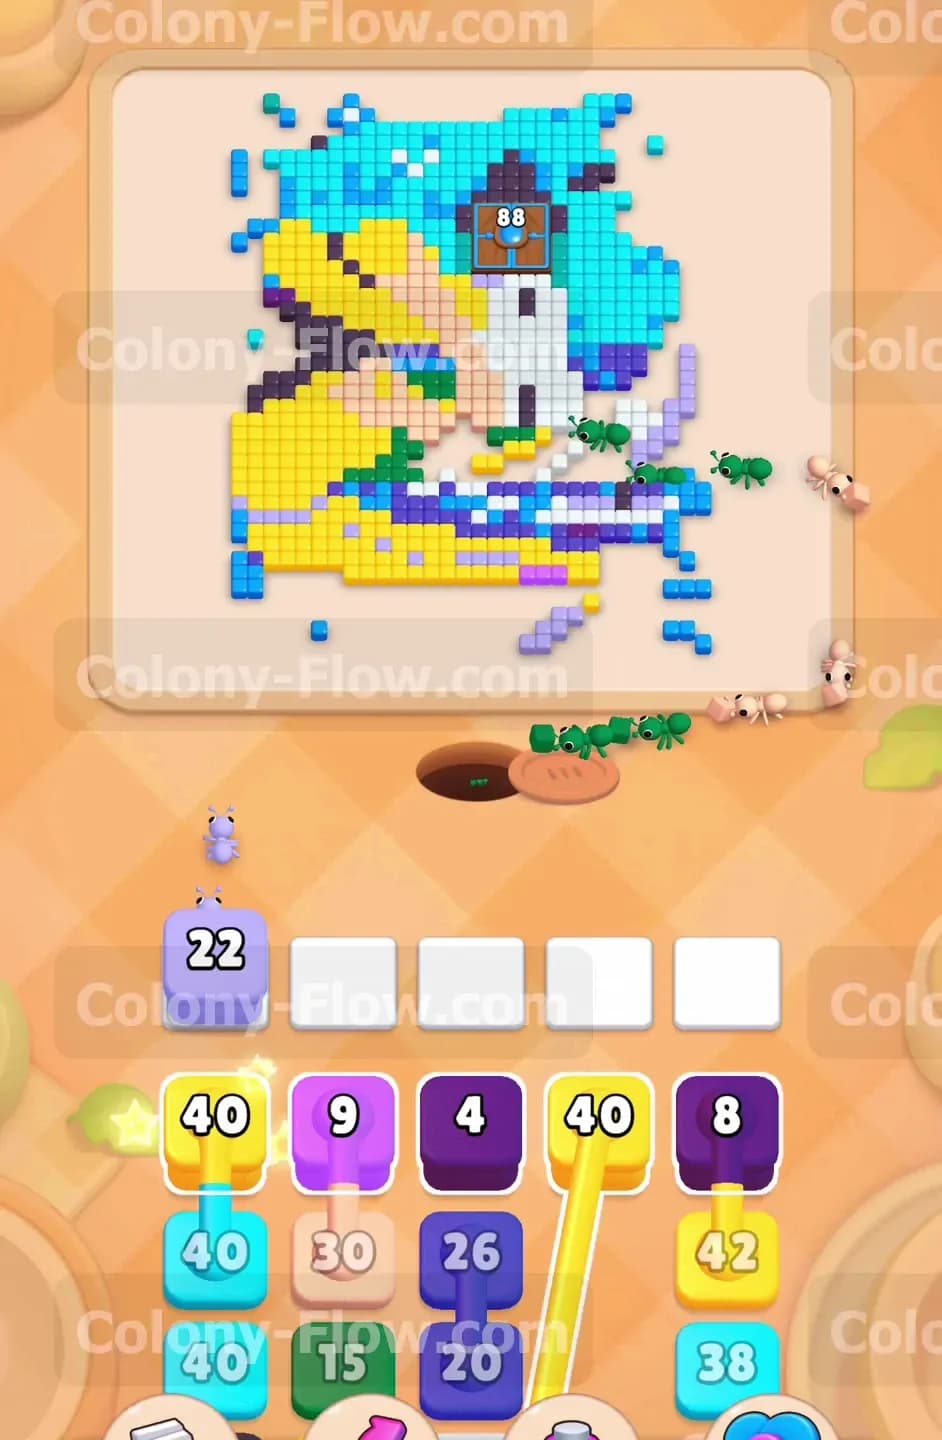
The sky surrounds the top of the pelican head and requires a massive amount of light blue blocks. You also have plenty of yellow beak left to clear. Tap a light blue block with a count of 40 and send another yellow block with a count of 40 up to the slots. The ants march upward into the sky section and start chewing away the light blue background. A second solid stream of ants continues the relentless assault on the yellow beak. You want to keep the beak reduction going constantly because it contains so many tiles stacked together. By pairing a background color like light blue with a foreground color like yellow you ensure the ants do not bump into each other on the paths. This keeps the travel speed fast and prevents any traffic jams near the nest hole.
Step 4: Clear the light purple shading and dark purple outlines to expose the core
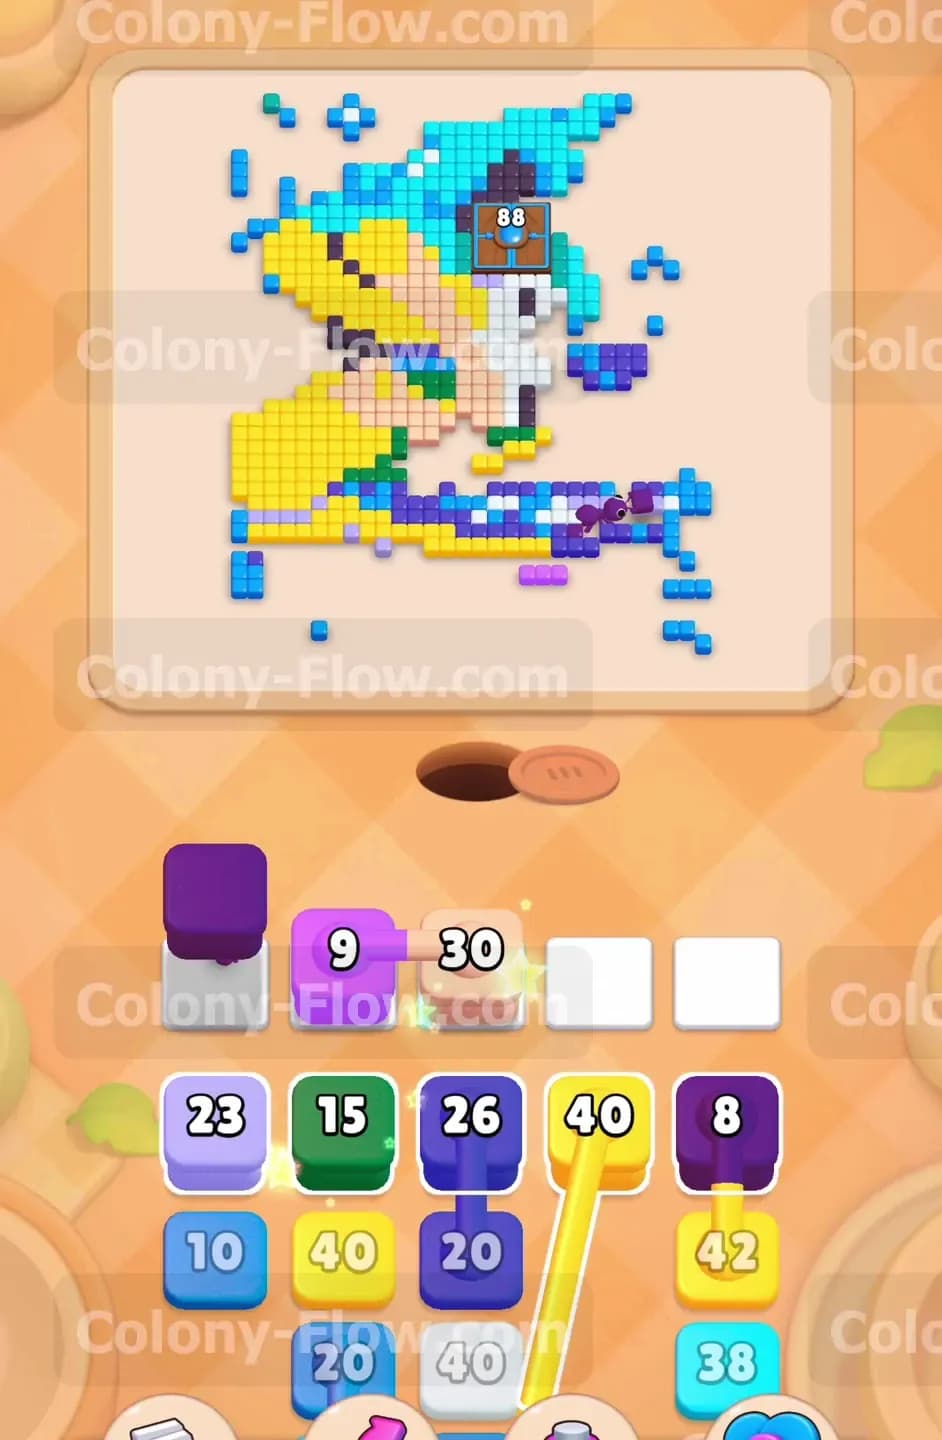
With the top sky opening up and the beak shrinking you expose the darker outline tiles. Tap a light purple block and a dark purple block to move them into the waiting area. The light purple tiles act as delicate shading in the sky and the water. The dark purple tiles form the crisp outlines of the pelican body and the wooden post. Since you removed the bulk of the light blue sky these purple tiles now sit completely exposed to the open air. The ants split up and target the scattered purple pixels across the entire board. You might see a dark purple block sit in the slot for a few seconds longer than usual because the ants have to travel further across the empty board spaces to reach the remaining edges. Be patient and do not tap any more blocks until one of the purple blocks finishes completely. Filling a slot now will ruin your momentum.
Step 5: Execute the light purple and light pink connected move to clear shading
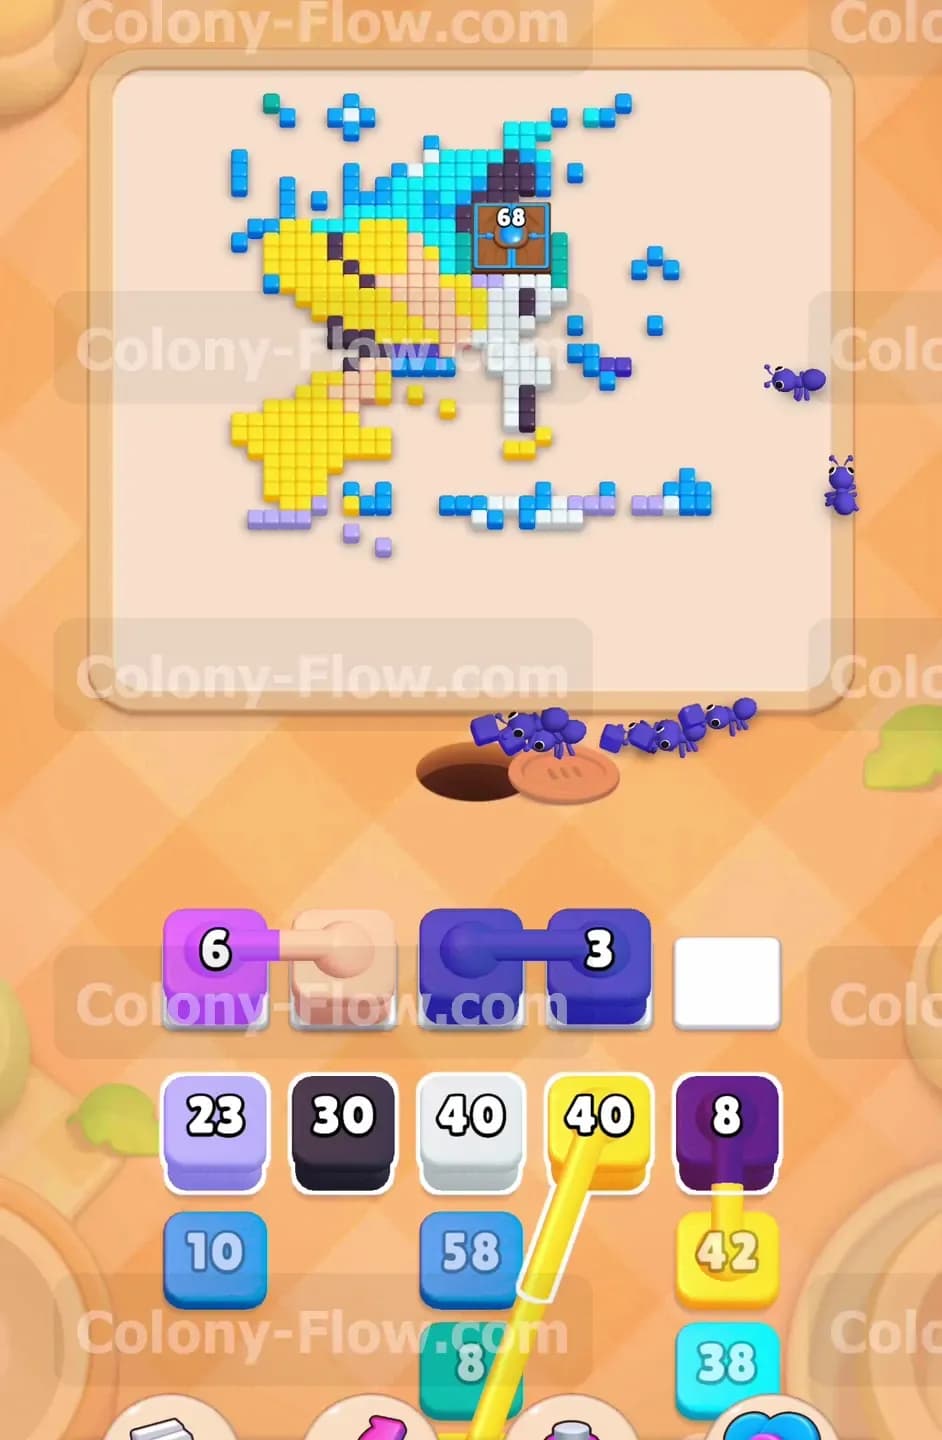
Your tray reveals another pair of connected boxes. This time a light purple block links directly to a light pink block. You need to clear the remaining scattered shading patches across the background. Tap the connected pair and watch them slide into the waiting slots. Because you opened the board up so much in the previous steps the ants have direct and clear routes to all remaining light pink and light purple tiles. The colony swarms the middle section where the shading details sit. You can also tap the dark blue block with a count of 3 to finish off the remaining water patches at the bottom right. The numbers on the linked blocks drain rapidly as the ants feast. This move leaves the board looking very sparse with only the core shape of the pelican remaining on the screen.
Step 6: Flood the final beak tiles with connected yellow blocks to break the shape
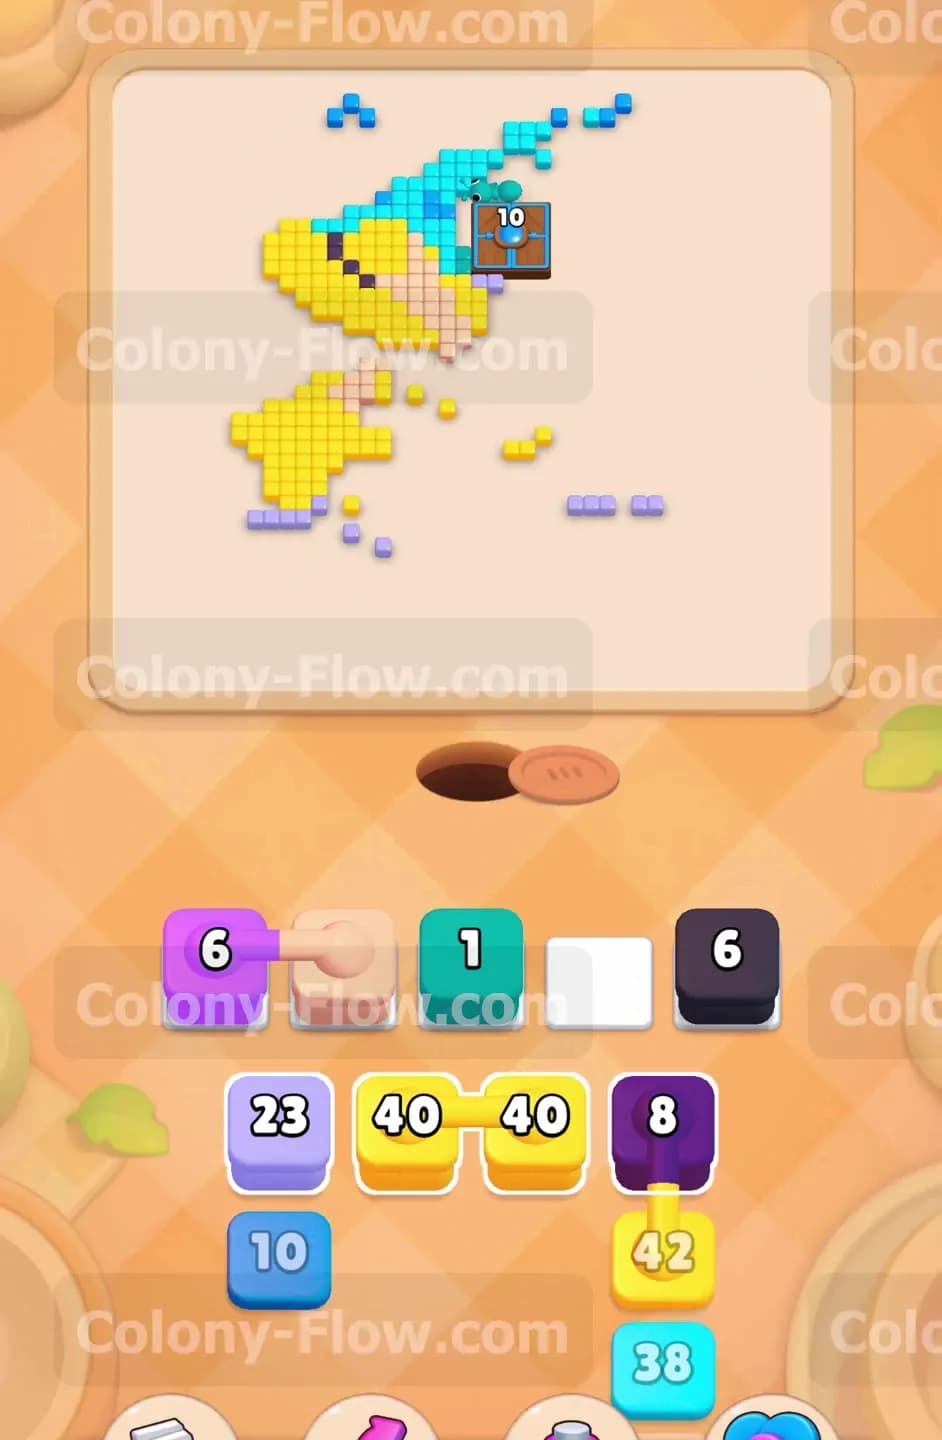
You are now in the home stretch and the massive yellow beak still dominates the left side of the screen. Your tray gives you the perfect tool to finish the job. You will see two yellow blocks with counts of 40 connected together by a line. Before you pull them you want to clear the tiny remaining details around the pelican head. Tap the cyan block with a count of 1 and a dark purple block with a count of 6. Once those clear out tap the double yellow blocks to send both into the waiting slots at once. The entire ant colony rushes out and forms a thick continuous line marching straight into the yellow beak. They consume the yellow tiles at an incredible speed. The two massive yellow blocks in the slots drain down to zero in perfect unison.
Step 7: Clean up the final scattered pixels to clear the board entirely
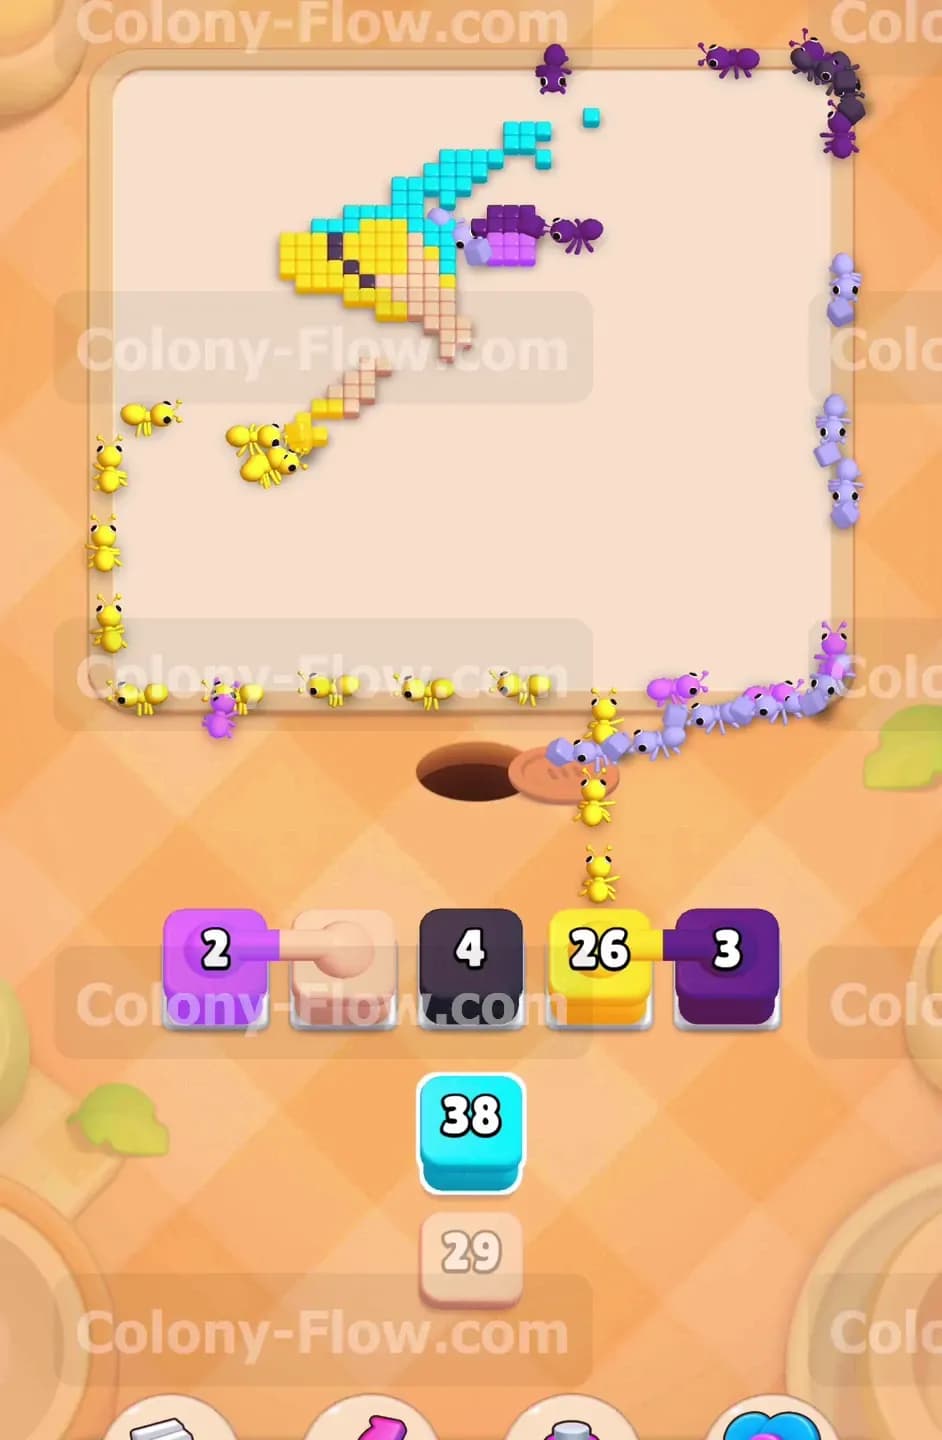
The main picture is entirely gone and only a handful of disconnected pixels remain. You have a light purple block with a count of 2 and a light pink block connected together. You also have dark purple blocks and another yellow block waiting in the tray. Tap them up into the open slots. The ants scramble across the vast empty board to hunt down the final straggling tiles. They grab the last tiny pieces of the outlines and the final yellow tip of the beak. The slots empty out one by one as the counts hit zero. The board goes completely blank and the victorious ants retreat into their nest hole. You successfully cleared the level without ever causing a gridlock in the waiting area.
Final Thought
This level requires careful timing with the connected boxes so you never block your own progress. If you ever find yourself struggling to visualize how the ants route around the pelican just watch the video above this article. Seeing the exact timing of those connected blocks in motion will help you master the flow and keep your slots perfectly clear.