Colony Flow Level 690 Walkthrough Solution & Guides | How to solve Colony Flow 690

Guide By Liam Stone
Updated on August 8, 2026
Check out the video above for the full Level 690 walkthrough if you want to skip the written steps below.
Video doesn't match your screen?
Game updates frequently scramble layouts! Try our AI Screenshot Solver first to find your exact board instantly, or report broken guides to our team.
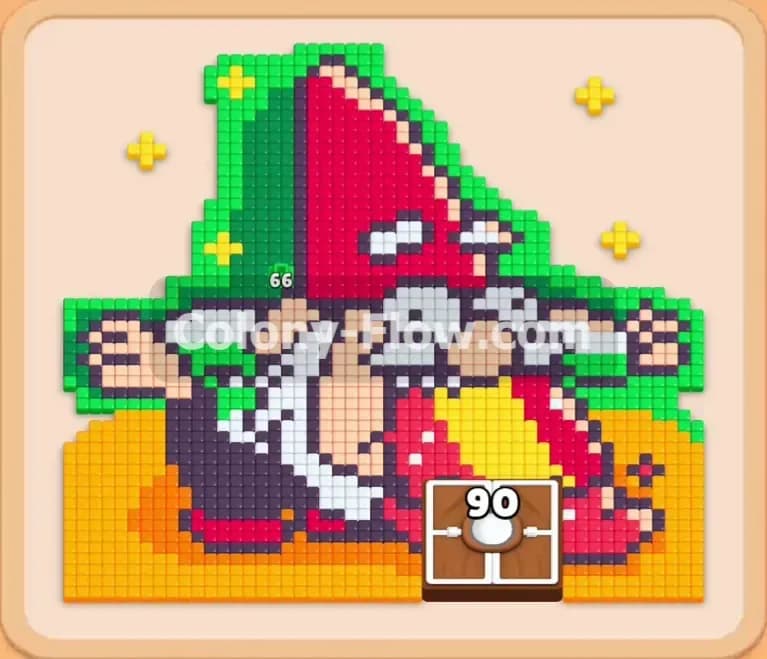
Colony Flow Level 690 presents a highly detailed pixel art puzzle that requires careful block management. The picture features a classic garden gnome design complete with a bright red pointed hat and a thick white beard. You need to carve through an outer green background to reach the core colors of the character. Managing the five waiting slots is your primary task as you peel away these layers.
Colony Flow Level 690 Overview
What You Are Working With
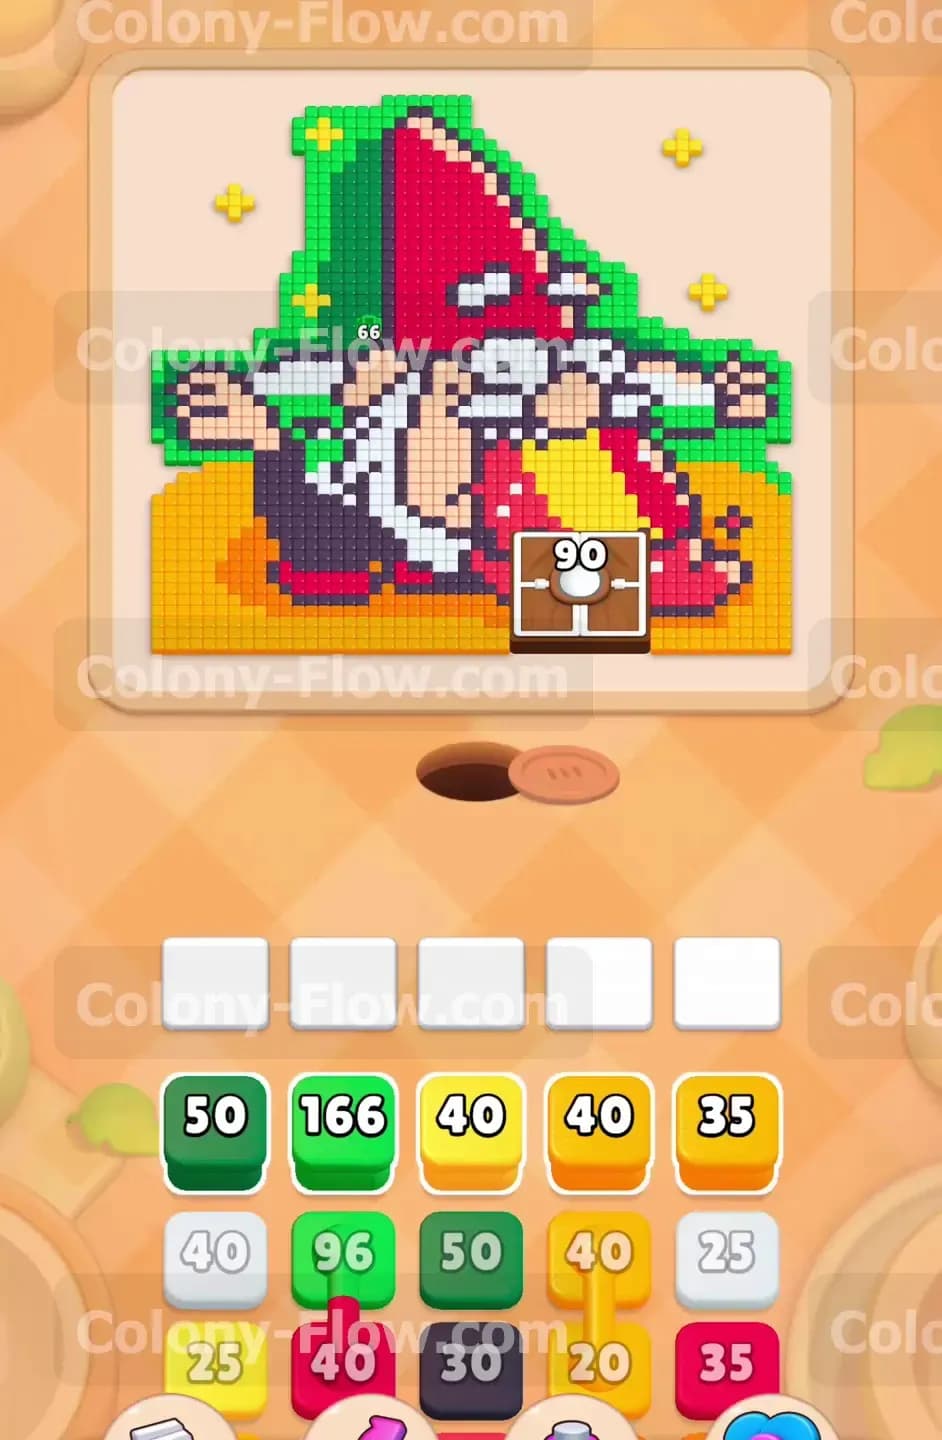
The pixel art presented on this board is an intricate and colorful design. You look at a classic garden gnome character resting on a bright yellow and orange surface. The gnome wears a towering red hat and dark pants. The face features a thick white beard and beige skin tones. A bright green outline acts as a thick background shell surrounding the top half of the character. At the bottom center of the board sits a brown locked box marked with the number ninety. This box blocks access to the lower central area until you feed it enough ants to break the lock entirely. The tray at the bottom holds a deep stack of colored blocks carrying very high numbers. You have access to green blocks ranging from twenty one to one hundred sixty six. You also see large stacks of orange, yellow, white, red, and black blocks. The board provides five empty waiting slots to hold these blocks while the ants complete their work.
What It Takes to Clear Level 690 Board
Clearing this puzzle requires a systematic approach to peeling away the outer layers. The thick green background is your primary target early in the puzzle because it restricts access to the red hat and the white beard. You must clear this green outline to create open travel routes for the red and white ants. The locked box at the bottom center also demands careful attention. You will need to route ants into this box to count the ninety requirement down to zero. You win the level when every pixel is consumed by the colony and your tray is completely empty. The core challenge involves managing your five waiting slots. You must ensure you never pull a block from the tray if the ants cannot reach the matching colored tiles. Filling all five slots without an open path creates a dead end and you will immediately lose the board.
Colony Flow Level 690 Step by Step Solution
Step 1: Clear the outer green outline to open up the top half
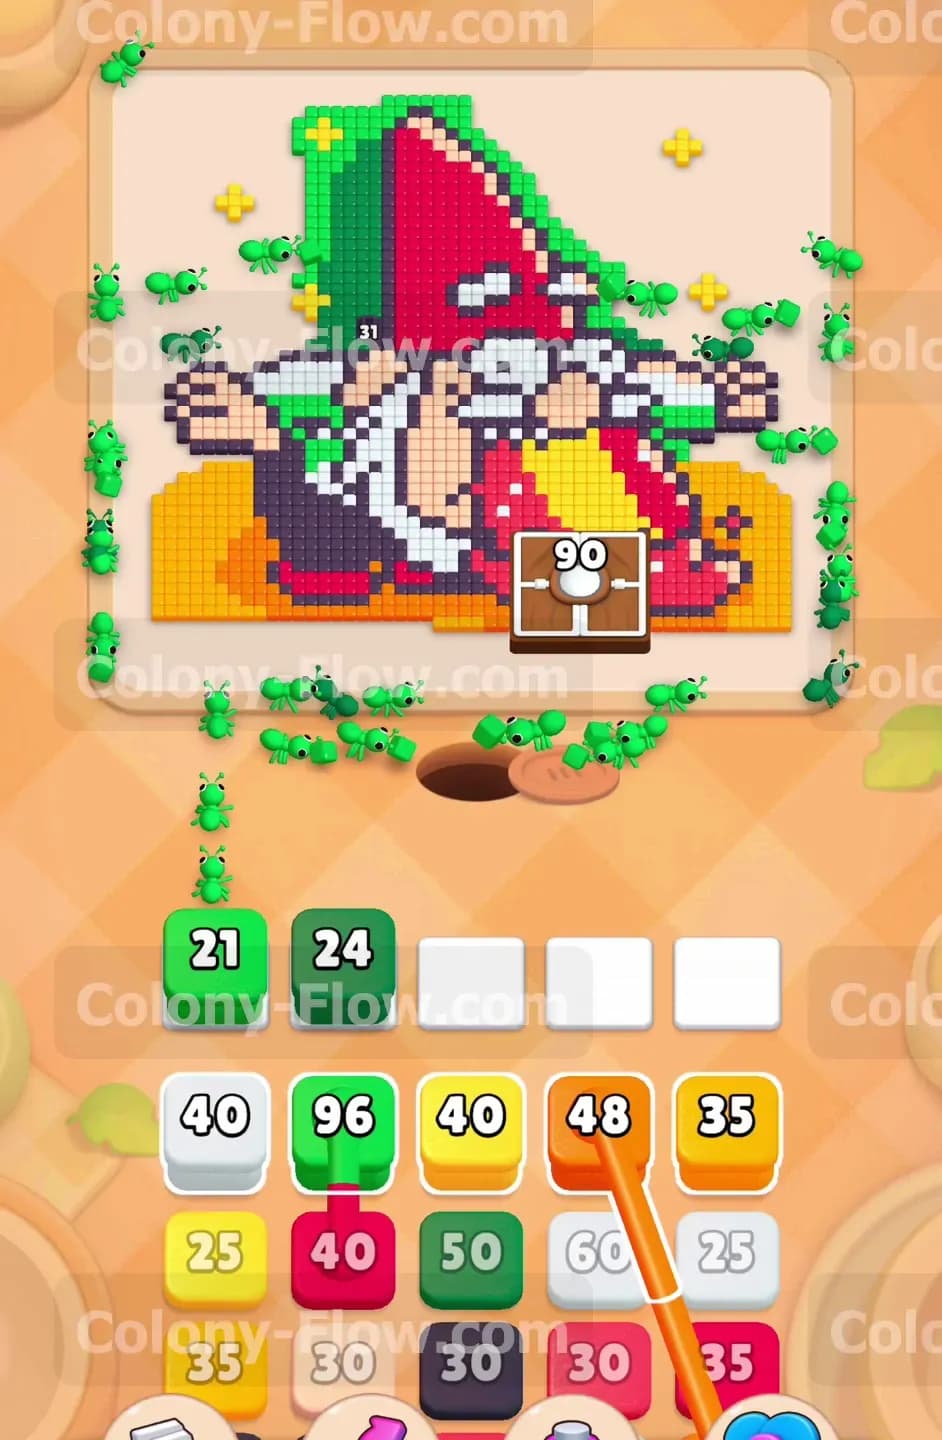
The green outline surrounding the gnome sits on the outermost edge and is completely accessible right away. Pull the massive green block numbered one hundred sixty six into your first waiting slot. You can also grab the fifty dark green block to join it. Your green ants will stream out of the nest hole and begin eating away the thick green border wrapping around the red hat. Pulling these massive blocks clears out huge chunks of the exterior boundary. This initial action starts exposing the bright red tiles of the hat and the white tiles of the beard. Keeping your slots moving early is very important to prevent a traffic jam in your tray. You always want a steady stream of green ants leaving the nest to ensure your waiting slots empty out quickly.
Step 2: Begin chipping away at the orange and yellow ground
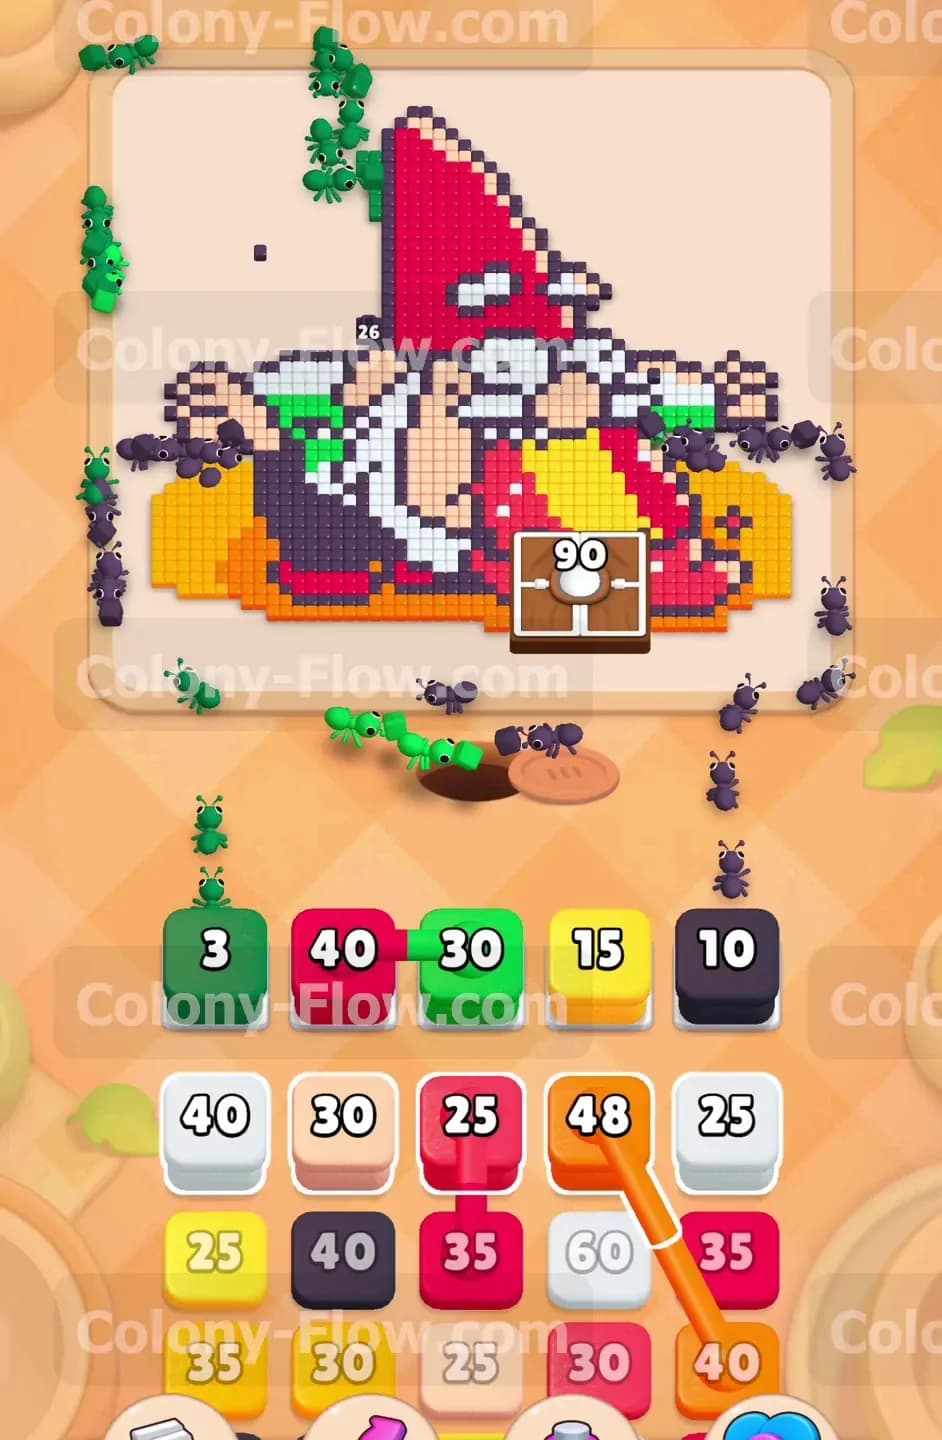
Once the green boundary is partially removed you gain the ability to target the ground beneath the gnome. Select the orange block numbered forty and the yellow block numbered forty from your available tray options. The ants will march directly toward the bottom left and bottom right corners to consume the ground tiles. Taking these ground pieces away creates a much wider path for your colony to navigate around the bottom section of the board. This step also brings your ants physically closer to the brown locked box sitting at the bottom center. Opening up the corners ensures your future ants will not get stuck trying to walk around large blocks of color.
Step 3: Target the dark pants and start feeding the locked box
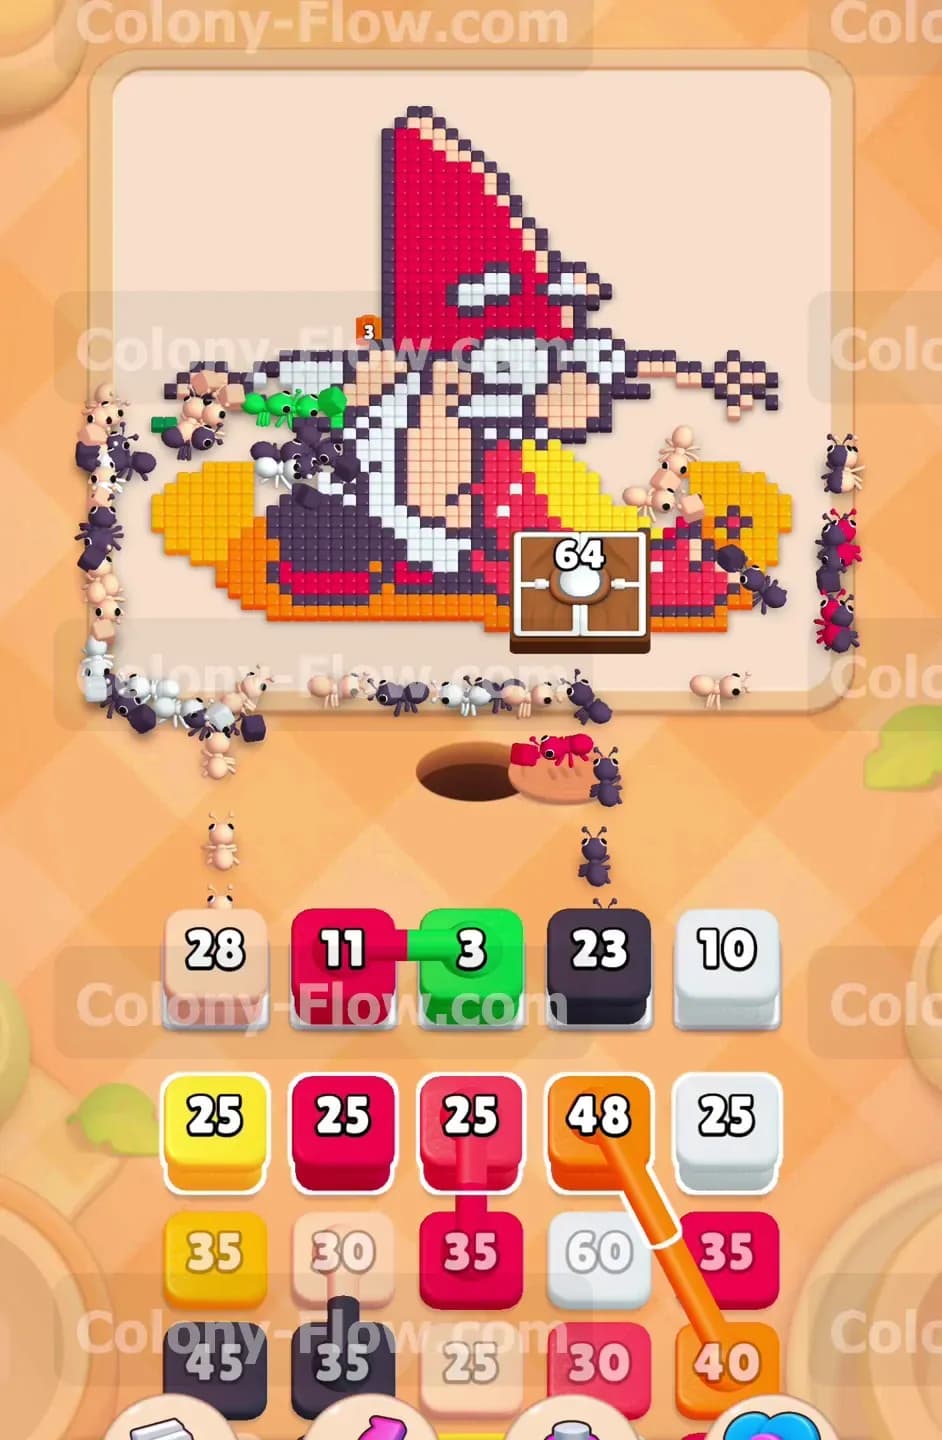
With the outer green shell broken and the ground shrinking you finally have clear access to the dark blue and black tiles making up the pants. Pull the dark colored blocks into the waiting slots as they appear. You can also begin sending ants to interact with the locked box at the bottom. The locked box requires ants to physically reach it and enter the opening. Each ant that goes inside reduces the number by one. Pulling red and dark blocks allows the ants to reach the lower section and start feeding the box requirement. The number on the box will begin to drop steadily from ninety. Do not fill all five slots with colors that cannot reach their targets yet. Always verify visually that a clear path exists before you pull a new block from the tray into your slots.
Step 4: Work on the red hat and the beige skin tones
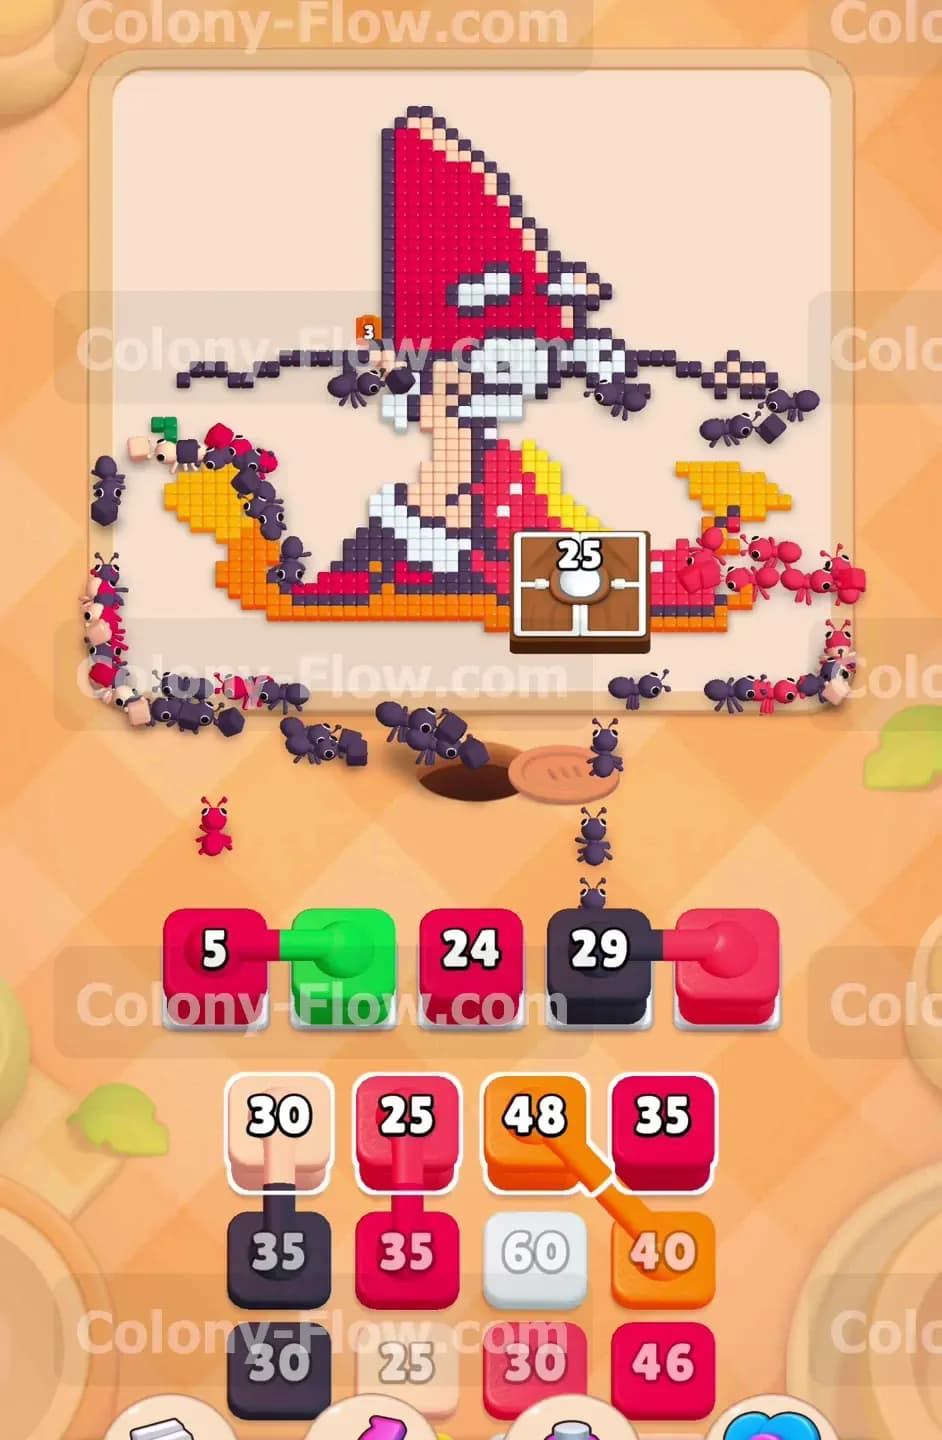
The top half of the gnome is highly exposed after your previous moves. Pull the red blocks numbered forty and twenty five to send ants swarming up toward the large pointed red hat. At the exact same time you can bring up a beige block numbered thirty to start clearing the face and the hands of the character. The ants will climb the open paths you created by removing the green background shell. The red hat requires a large amount of ants to clear completely because of its large size. Continue pulling red blocks as they surface in the tray to keep the red tiles diminishing steadily. Managing the red blocks early prevents them from piling up and clogging your tray later in the puzzle.
Step 5: Continue reducing the locked box requirement
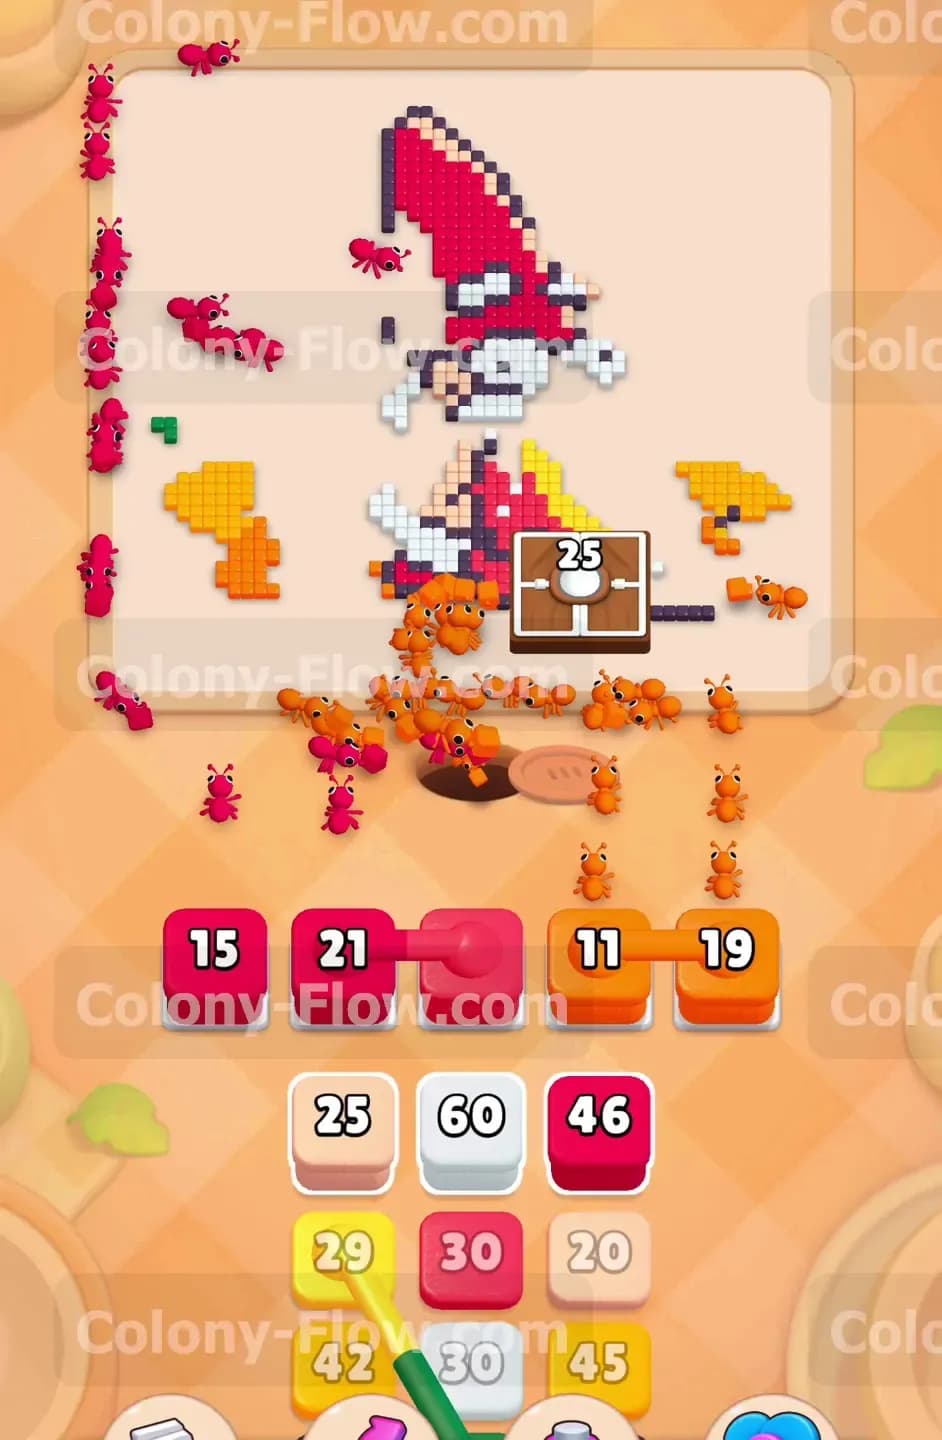
Your ants have been steadily chipping away at the dark pants and the bright red hat. Now you need to focus heavily on dropping that locked box number even further. Bring up the dark green and light green blocks to clear out the remaining background pieces lingering near the edges. The box counter drops through the sixties and into the twenties as you clear the surrounding lower tiles. Keeping a steady flow of ants moving toward the bottom center ensures the box will eventually break and disappear. You must balance the specific colors in your slots so you always have at least one active stream of ants moving across the board.
Step 6: Break the locked box and clear the bottom center
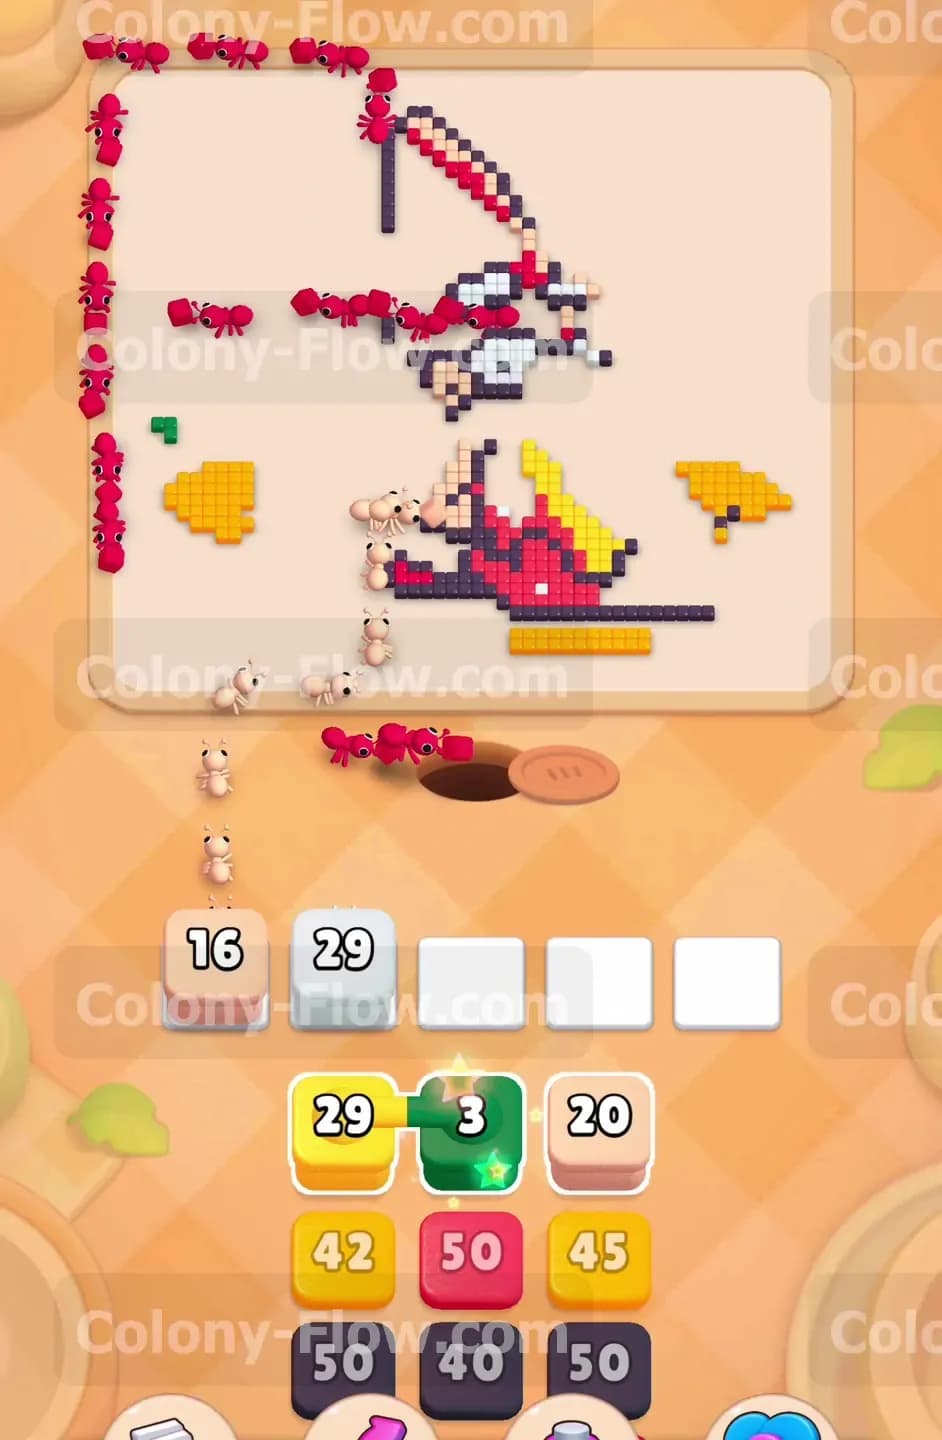
The box counter is finally low enough to clear completely from the board. Pull the required black and red blocks to finish feeding the final numbers into the box. Once the counter hits zero the brown box vanishes from the playing area. This removal completely opens up the entire bottom center section and allows completely free movement across the lower half. The remaining orange and yellow ground tiles are now totally exposed to your colony. You have successfully removed the biggest single obstacle on the board without ever jamming your waiting slots.
Step 7: Consume the remaining red hat and orange ground
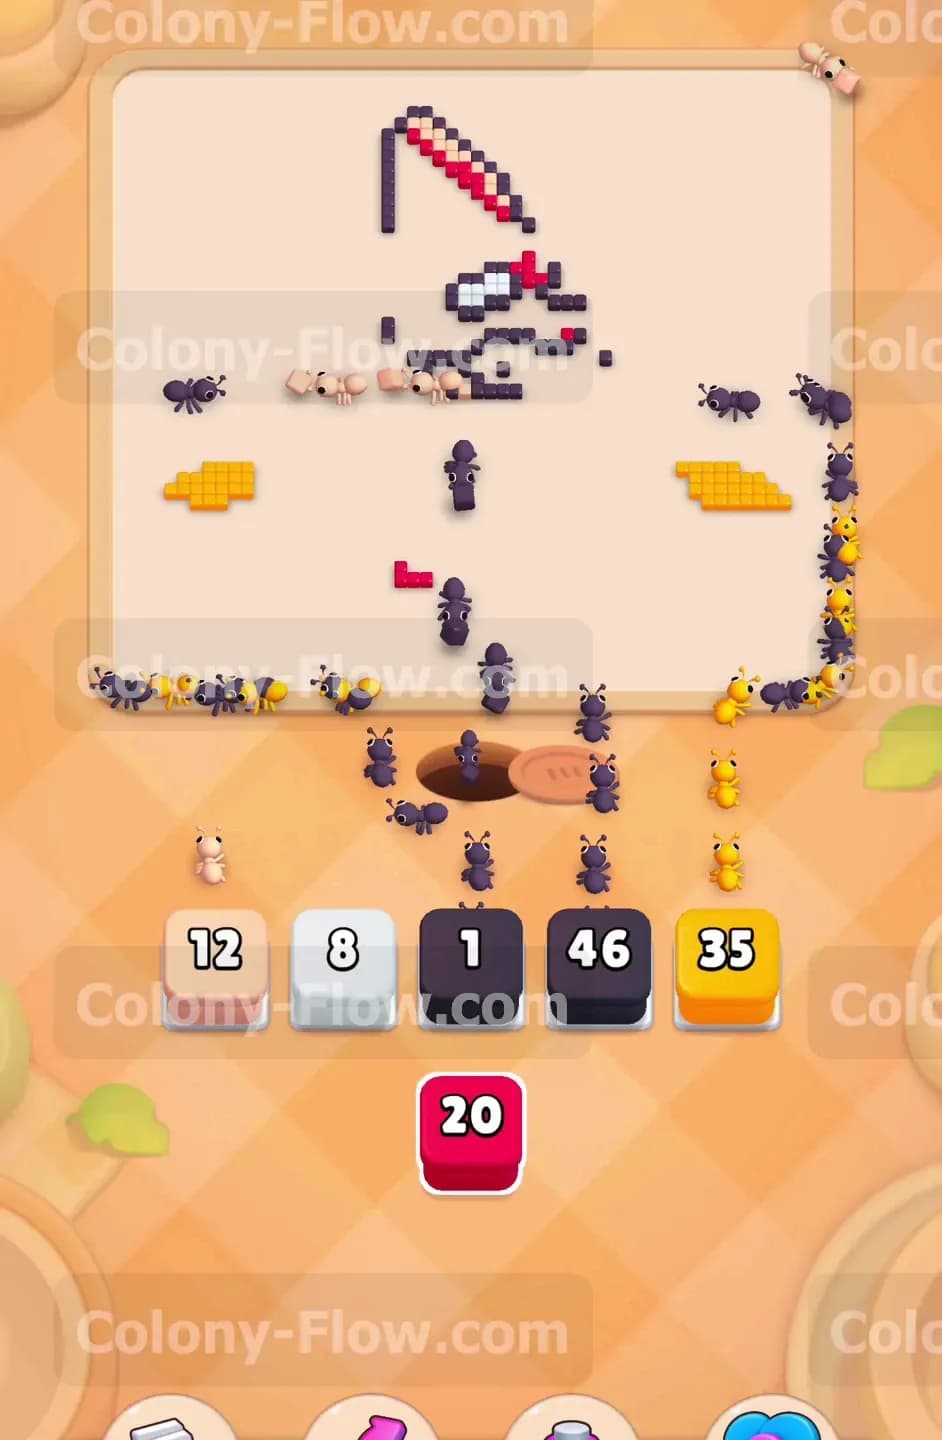
The overall shape of the gnome is breaking down rapidly at this stage. Pull the red blocks numbered twenty one and fifteen to wipe out the last major sections of the hat. Grab the orange blocks numbered nineteen and eleven to clean up the right side of the ground area. The ants will split their attention evenly between the top and bottom sections of the board. This simultaneous action clears out large amounts of remaining pixels very quickly. Your tray is getting significantly smaller and you have plenty of breathing room in your five waiting slots. You can confidently pull multiple blocks at once because the paths are wide and clear.
Step 8: Focus on the thick white beard
The red hat is mostly gone and the dark pants are entirely cleared out. The most prominent remaining feature on the board is the bushy white beard. Pull the large white block numbered sixty followed quickly by the white block numbered twenty nine. The ants will converge directly on the center of the board to eat away the thick beard tiles. You will also pull the remaining beige skin blocks to finish off the nose and the hands of the character. The board is very open right now so the ants travel very fast to their designated targets. You do not have to worry about tight corners or blocked routes anymore.
Step 9: Clean up the final scattered pixels
Only a small handful of isolated colors remain scattered across the empty board. You have a few white tiles left from the edges of the beard along with some black outline pixels and small yellow spots. Pull the black blocks numbered forty six and one into your slots. Grab the yellow block numbered thirty five and the final white block numbered eight. The ants will sweep through the remaining disconnected pixels with ease. Every single travel path is completely open at this stage so you face zero risk of an unexpected slot jam. The final waves of ants finish their meals and the entire board is completely clear.
Final Thought
Patience is your best tool when dismantling a massive pixel art piece like this gnome puzzle. You must clear the outer boundaries first to establish strong travel paths and avoid blocking your own progress. Dealing with the numbered locked box at the bottom requires a steady feed of ants without overflowing your limited waiting slots. Please watch the video above this article if any step is hard to follow in text.