Colony Flow Level 157 Walkthrough Solution & Guides | How to solve Colony Flow 157

Guide By Liam Stone
Updated on August 1, 2026
The Level 157 walkthrough plays out in full in the video above, so skip the article if that works better for you.
Video doesn't match your screen?
Game updates frequently scramble layouts! Try our AI Screenshot Solver first to find your exact board instantly, or report broken guides to our team.
Welcome to Colony Flow Level 157. This puzzle presents a fun pixel art challenge where you clear a large raccoon figure surrounded by a solid yellow background. You need to carefully manage your waiting slots while feeding your colony the correct colors at the exact right moment. I will guide you through the entire process from the first move to the final tile so you can clear the board without jamming your tray.
Colony Flow Level 157 Overview
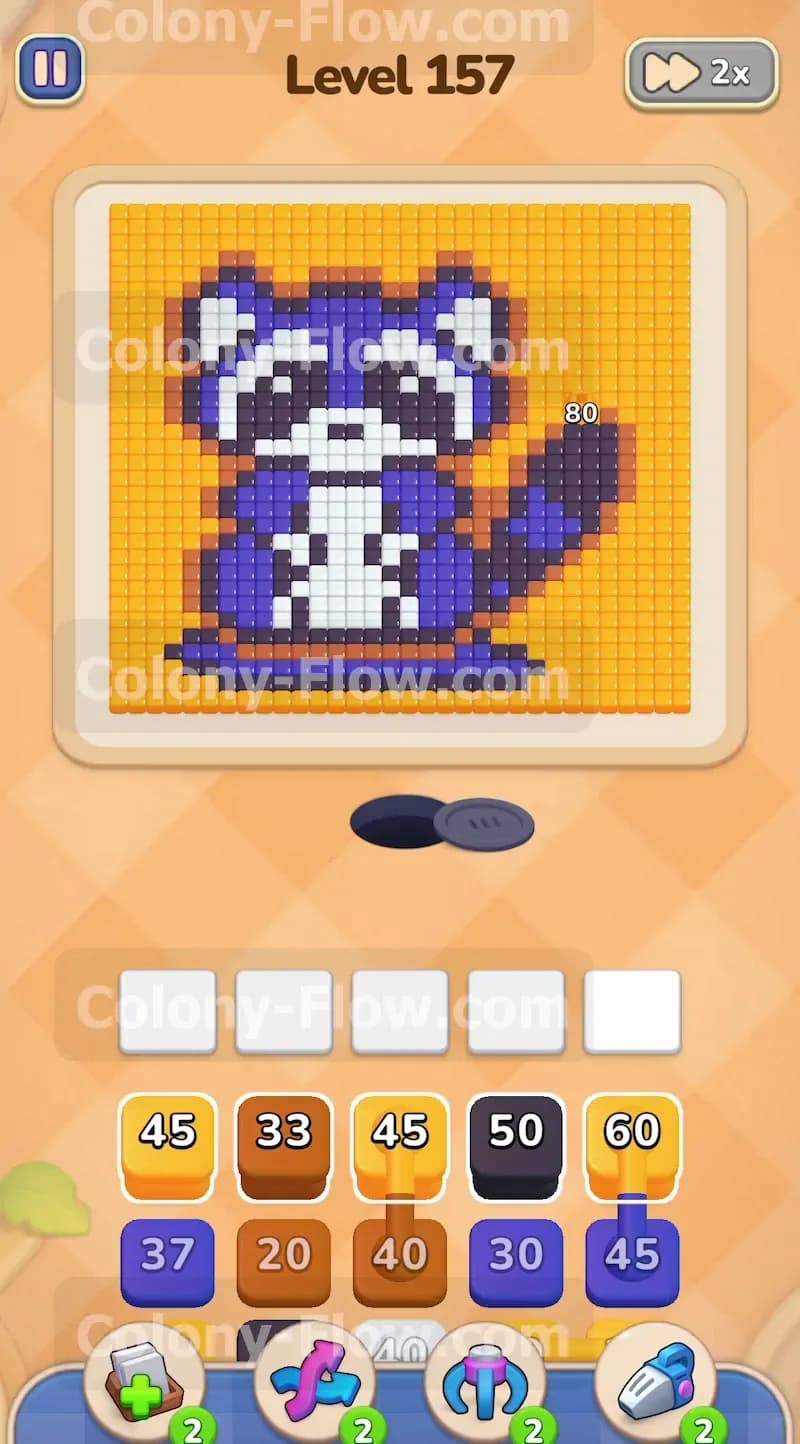
What You Are Working With
The main picture is a pixel art raccoon sitting against a massive yellow background. The raccoon features a blue body, a white belly, a distinct black mask around white eyes, and a thick brown tail curving up the right side. A black outline surrounds most of the animal figure. Your tray at the bottom holds a mix of yellow, black, brown, blue, and white blocks. The numbers on these blocks indicate exactly how many ants will spawn to eat the matching color tiles. There are no hidden boxes, hidden food, or complex special tiles in this specific puzzle. You simply face a straightforward color matching challenge where pathfinding is your only obstacle. You have five waiting slots available at the top of the tray area.
What It Takes to Clear Level 157 Board
Clearing this level requires you to eat the picture from the bottom up. You win when every single tile is gone and your colony returns to the nest. Your primary losing condition is filling all five waiting slots with blocks that have no open path to their matching tiles. If ants cannot reach their assigned color, they stop moving, and the block stays frozen in the waiting slot. You must always ensure the outer edge of the remaining picture has matching colors for the blocks you pull. You will strip away the yellow background border first, break through the black outline, and then systematically dismantle the raccoon from the feet to the ears.
Colony Flow Level 157 Step by Step Solution
Step 1: You clear the solid yellow background border to reveal the bottom of the raccoon.
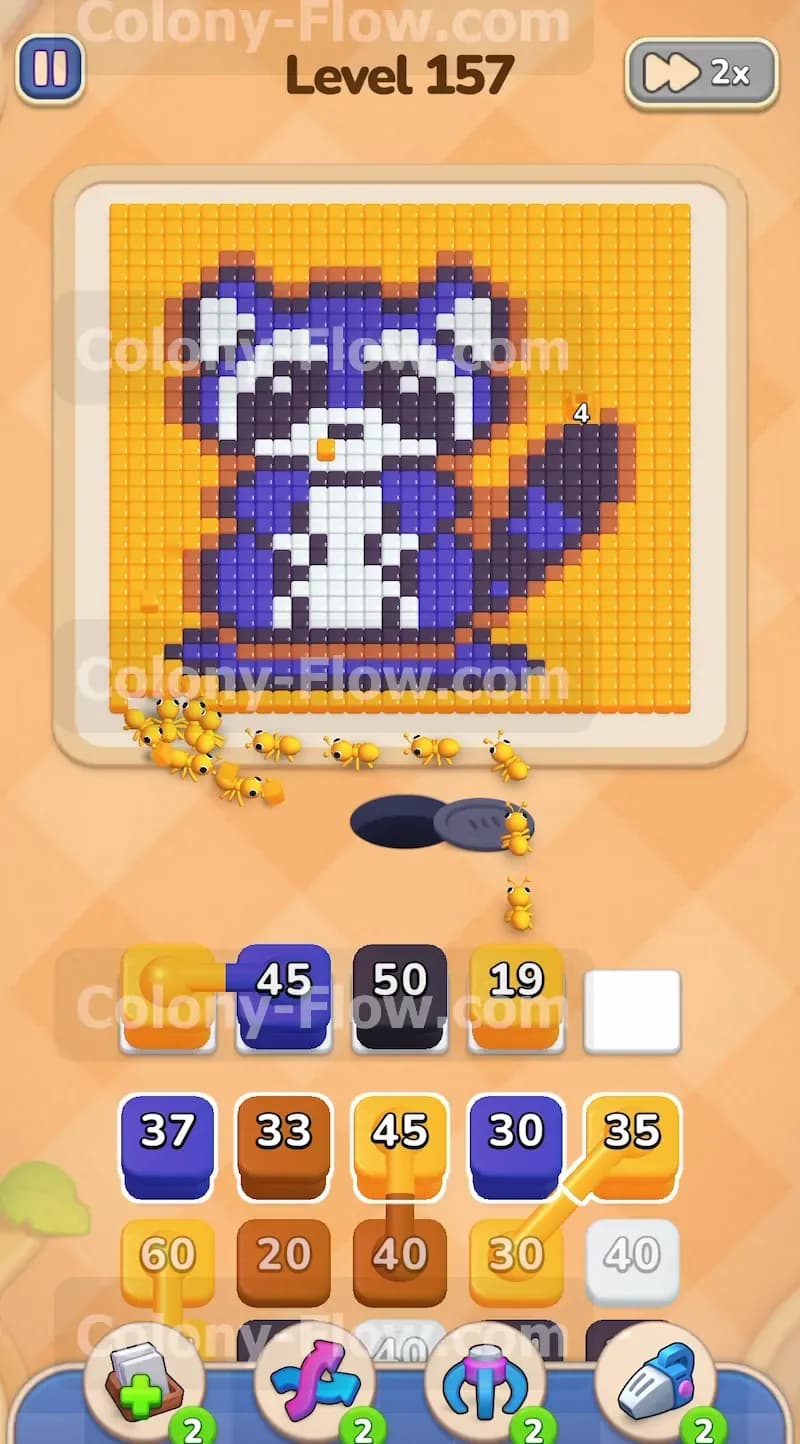
The entire bottom edge of the pixel art picture consists of yellow background tiles. You must clear this barrier before you can reach the raccoon. Pull a high numbered yellow block from the top row of your tray. The block will drop into your first waiting slot and release a massive swarm of yellow ants. These ants will march up from the nest hole and consume the solid yellow line across the bottom. Allow the ants to finish this task completely. Do not pull any other colors yet because they have no open path. Waiting ensures your slots remain clear and gives you a wide entry point into the main figure. The game relies heavily on patience in these opening moves. A rushed pull of a black or blue block right now would instantly lock up a waiting slot and limit your options for the rest of the game. Let the yellow ants do their work and reveal the true bottom of the picture.
Step 2: You break through the black outline to open pathways into the main body.
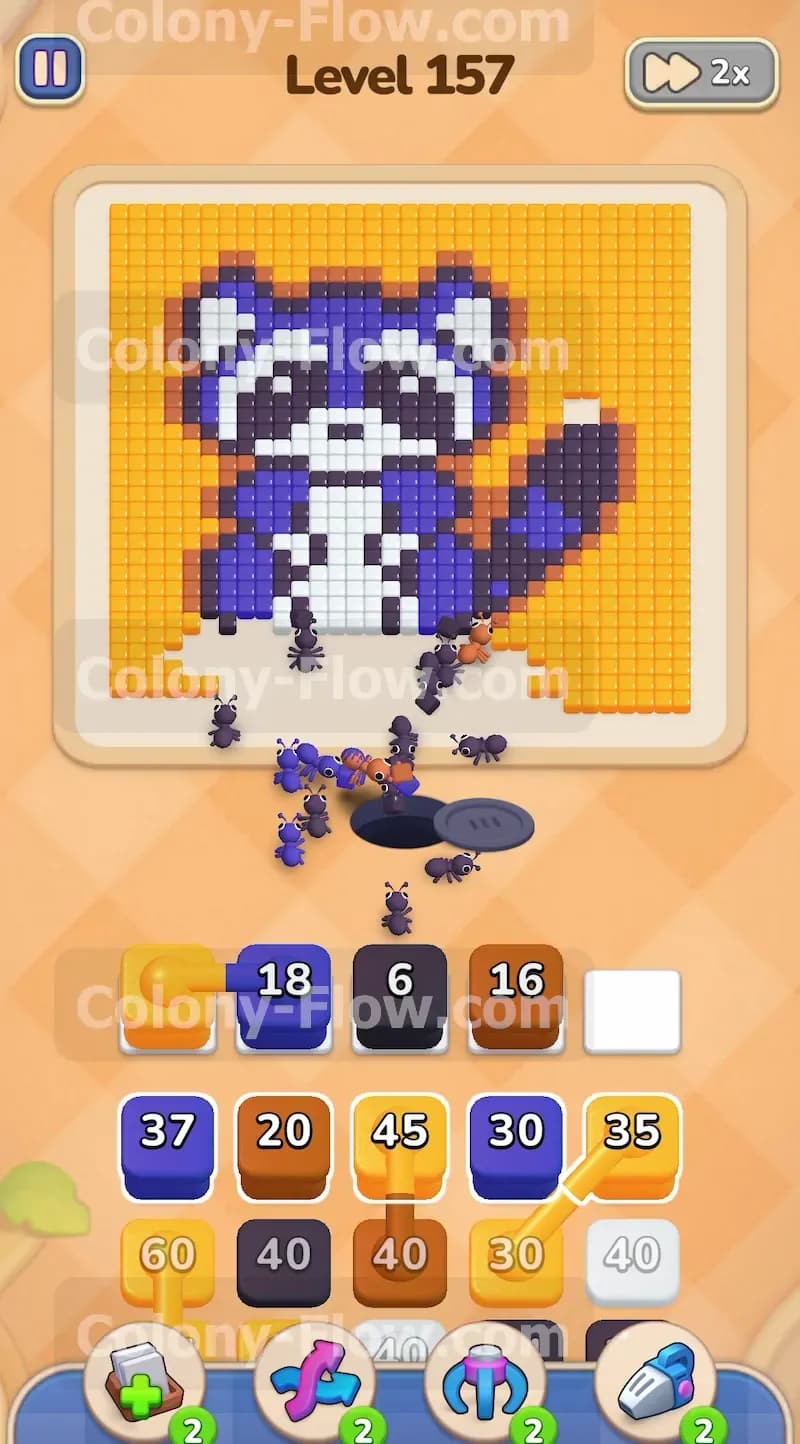
Once the yellow border vanishes, the black outline of the raccoon becomes fully exposed. The ants need a path inside the body. Pull a black block into your waiting tray. The black ants will target the dark outline covering the bottom of the feet and the base of the tail. Clearing this black line acts like opening a door to the rest of the puzzle. You only need a small opening to let the other colors through, but the black ants will naturally eat their way along the available edge until their numbers run out. Pay close attention to how the black tiles wrap around the lower half of the character. Taking out this structural outline early is a core strategy that prevents the inner colors from getting trapped later on.
Step 3: You send brown and blue ants to dismantle the right tail and the left feet.
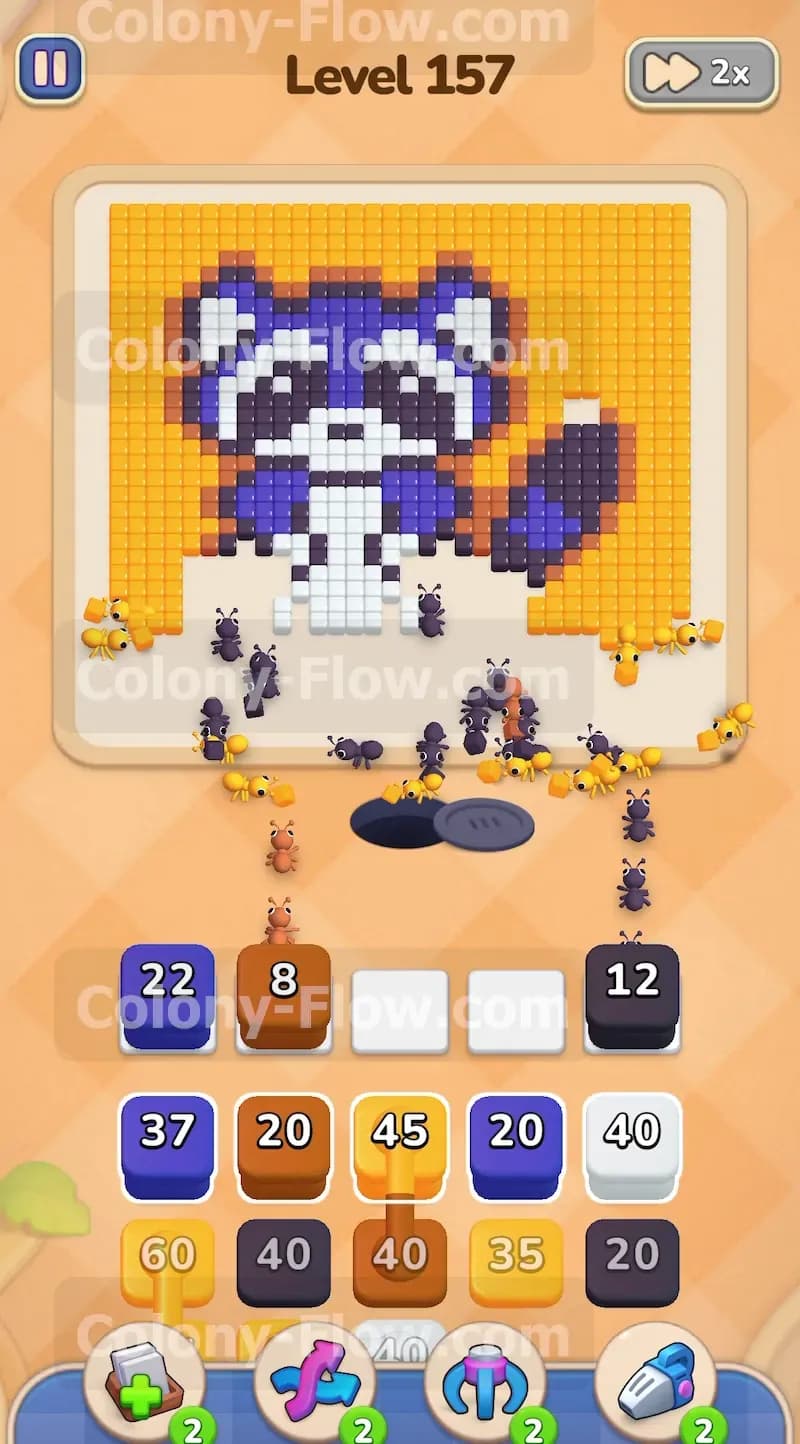
With the black outline breached, you now have direct access to the blue feet on the left and the large brown tail on the right. Pull a blue block and a brown block into your waiting slots. The blue ants will swarm the center left area to consume the feet. At the same time, the brown ants will stream toward the right side and start dismantling the thick tail. Running these two colors simultaneously is highly effective. It creates two separate active paths on opposite sides of the board. This prevents a traffic jam at the nest hole and guarantees that both blocks will count down quickly and leave your waiting slots empty. You will notice the brown tail contains a huge number of tiles, so you will likely need to pull multiple brown blocks in sequence to keep the right side moving at the same pace as the left.
Step 4: You push white ants up the middle to consume the central belly tiles.
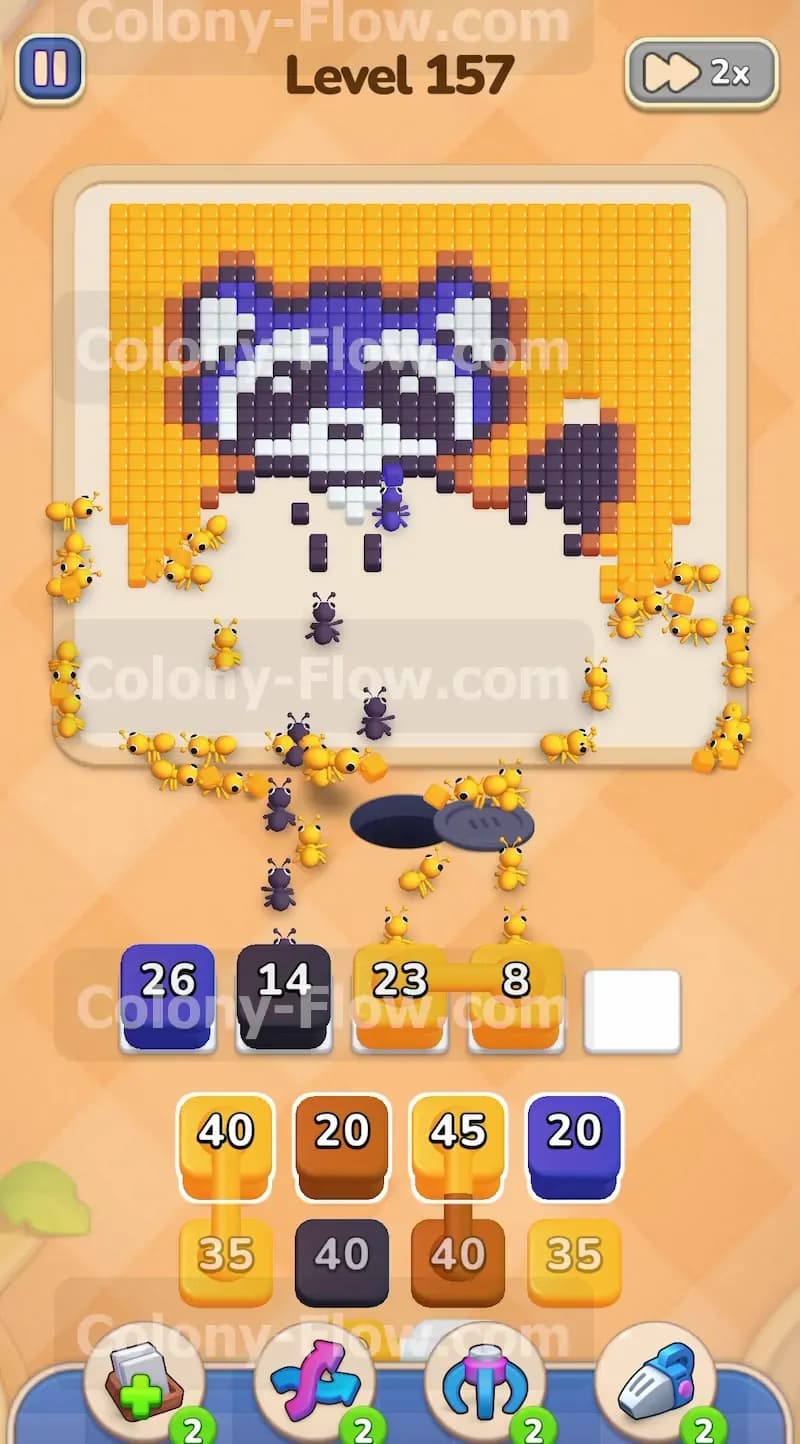
As the blue feet disappear, the bright white tiles making up the raccoon belly become accessible. Pull a white block from the tray to send white ants up the middle of the board. The white belly sits right in the center of the figure. Clearing it creates a massive vertical path that splits the raccoon in half. While the white ants work on the belly, pull another blue block to continue eating the sides of the main body. Keeping the blue and white ants moving together ensures you maintain a wide even front as you work your way upward toward the head. The center path is incredibly valuable because it gives your ants the shortest possible travel time from the nest hole to their food targets.
Step 5: You clear the hanging yellow background edges alongside the main body.
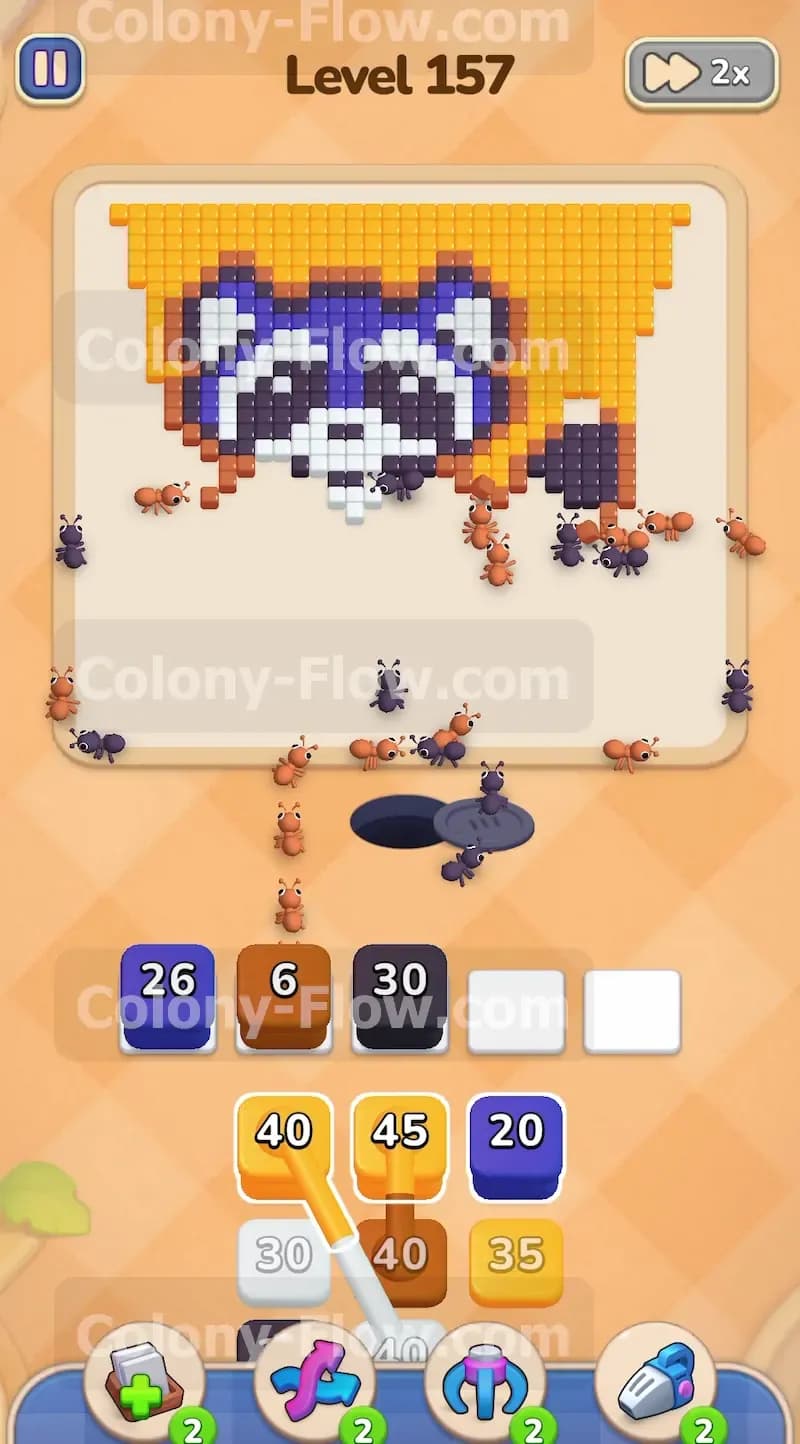
While you focus on the center of the raccoon, the left and right edges of the yellow background begin to hang down below the main action. You never want to leave the background tiles behind. If you ignore them, they can become isolated dead ends later in the puzzle. Pull a yellow block to send ants up the left and right flanks. The yellow ants will eat the background tiles alongside the body. Managing the outer background at the same time as the inner body keeps your color options open and prevents you from getting stuck searching for a single color path. If you let the yellow walls grow too long, the ants will waste precious time walking all the way around the main figure to reach them.
Step 6: You tear down the thick black mask surrounding the eyes and the face.
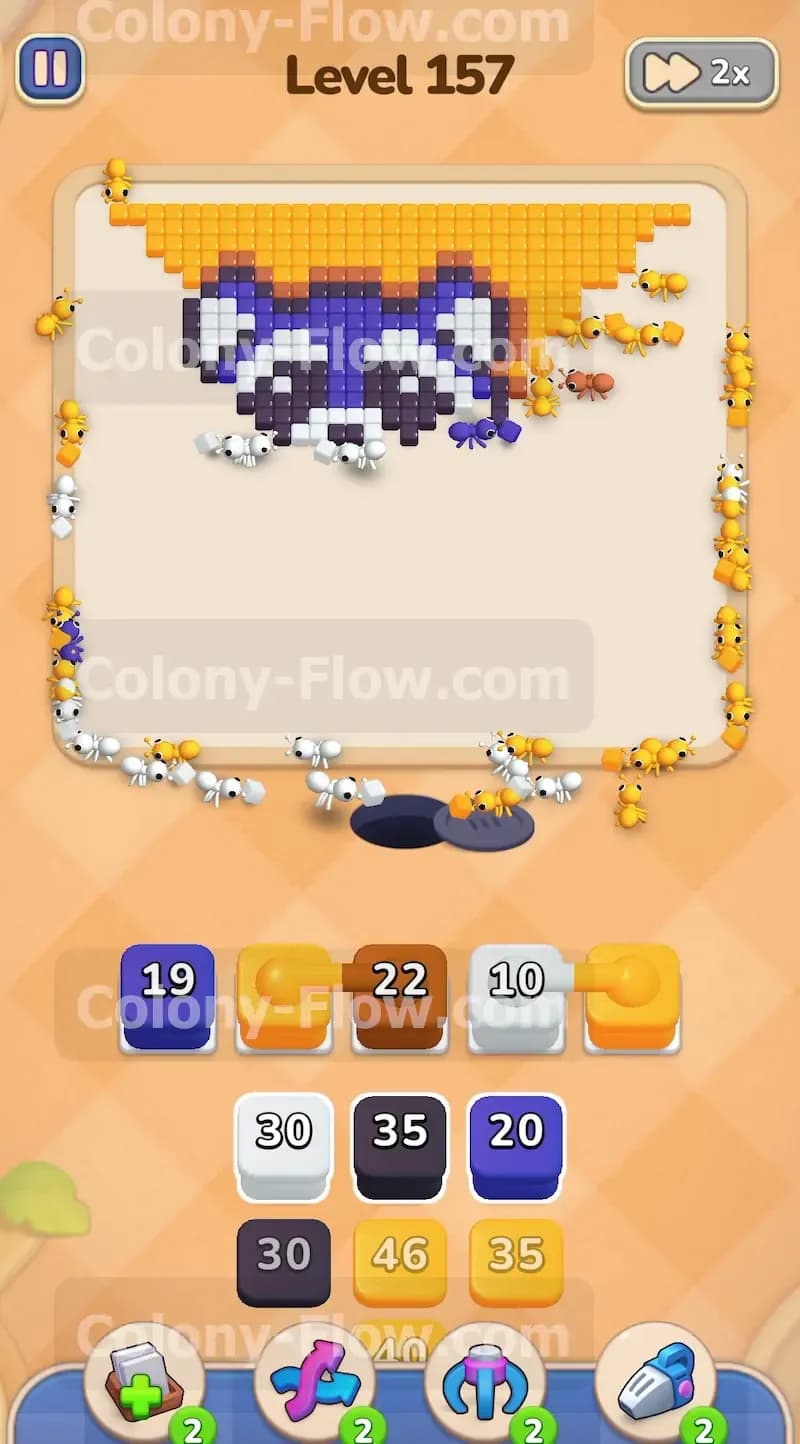
Your colony is now advancing on the head of the raccoon. The most prominent feature here is the thick black mask surrounding the eyes. The white belly path leads directly into the bottom of this face area. Pull a black block to release ants that will tear into the dark mask. The black tiles form a dense barrier across the top half of the figure. You must clear them to expose the remaining white eyes and the blue forehead. Let the black ants finish their job to fully open the upper sections of the face. The mask spans the entire width of the head, so breaking it open provides multiple entry points for the final colors to enter.
Step 7: You consume the white eyes and snout to unlock the upper head region.
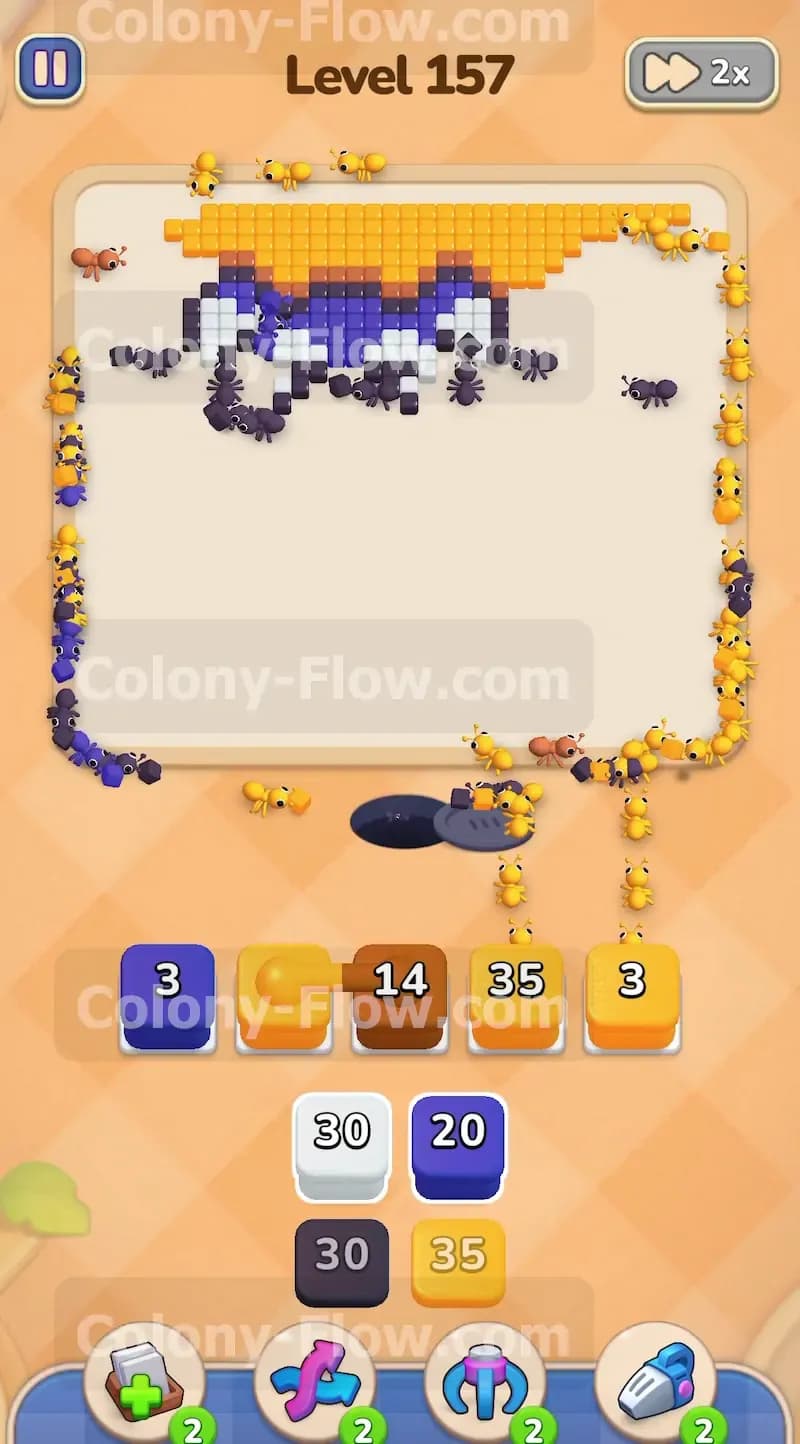
As the black mask recedes, the white tiles of the eyes and snout are laid bare. Pull another white block into your active slots. The white ants will quickly consume these small isolated clusters of tiles. Because there are fewer white tiles here than in the belly, the block will count down very fast. This rapid clearance keeps your tray moving and opens the final pathway to the top of the head. Always make sure the white tiles are actually touching empty space before you pull the block, otherwise the white ants will sit idle and clog your slot. Careful timing here guarantees a smooth transition to the final steps of the puzzle.
Step 8: You erase the blue forehead and the pointy ears at the top of the figure.
Only the top of the blue head and the pointy ears remain of the raccoon figure. Pull your next blue block to send a fresh wave of ants upward. They will march straight past the empty space where the face used to be and attack the top of the head. The ears stick up into the top yellow background. Clearing the blue tiles here is critical because it breaks the final solid structure on the board. You want the blue ants to completely erase the top of the head before you move on to the last background tiles. Removing the ears separates the remaining yellow tiles into easy targets.
Step 9: You sweep the final yellow background tiles across the top edge to win the level.
With the raccoon completely gone, the only thing left on the board is the yellow background across the very top edge. Pull your remaining yellow blocks from the tray. The yellow ants will stream up the sides and fan out across the top border. They will sweep from the outer corners inward until every single yellow pixel is consumed. Keep an eye on your waiting slots and only pull exactly what you need to finish the job. When the last yellow tile vanishes, the board is perfectly clean and you win the level.
Final Thought
This puzzle teaches you the value of maintaining an even front as you move upward through a large figure. If you always clear the outer background alongside the inner body, you will never run out of open paths. Take your time and watch how the colors connect. If any step feels difficult to picture, I highly encourage you to watch the video above this article to see exactly how the ants navigate the board.