Colony Flow Level 1280 Walkthrough Solution & Guides | How to solve Colony Flow 1280

Guide By Liam Stone
Updated on August 12, 2026
Watch the video above first if you want to see Level 1280 solved before reading the written steps.
Video doesn't match your screen?
Game updates frequently scramble layouts! Try our AI Screenshot Solver first to find your exact board instantly, or report broken guides to our team.
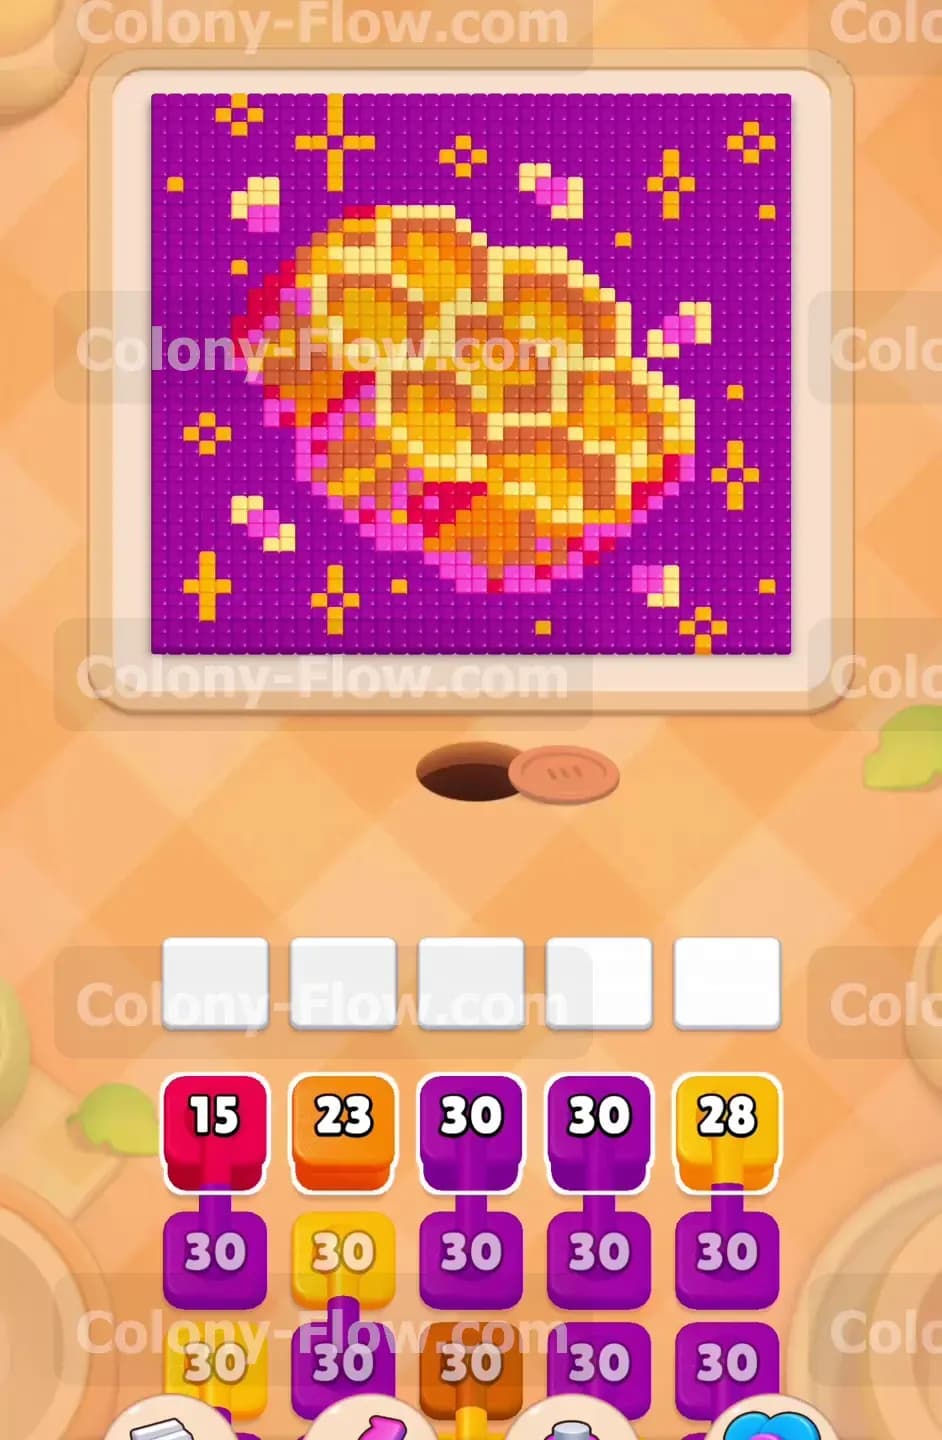
Colony Flow Level 1280 presents a beautiful pixel art honeycomb design that you need to completely devour piece by piece. The vibrant yellow and orange cells sit directly against a deep purple background filled with tiny star details scattered around the edges. You have a massive stack of high number blocks waiting in your tray and need to manage them carefully to keep your waiting slots open at all times. I play this level by focusing on the bottom edge first and slowly working my way up through the center of the comb to open the board.
Colony Flow Level 1280 Overview
What You Are Working With
The top half of your screen displays a large detailed honeycomb structure that dominates the board. The design features bright yellow inner cells surrounded by glowing orange and deep brown borders. Bright magenta accents highlight the lower edges of the honeycomb shape to give it depth. The entire structure rests on a solid deep purple background scattered with little yellow stars that you also have to clear. The tray below contains several layers of numbered colored blocks stacked on top of each other. You will encounter standard single blocks alongside connected boxes that move as a single solid unit when you tap them. The tray also holds hidden boxes buried deep under the top layers. These hidden boxes stay blank and only reveal their true colors once you clear the blocks resting in front of them. The sheer volume of high numbers means you will have huge swarms of ants running at once.
What It Takes to Clear Level 1280 Board
You conquer the level when your colony eats every single pixel in the picture and the board goes completely blank. The ants march out of a dark nest hole located at the very bottom of the screen. They require a direct open physical path to reach their matching colored food tiles. When you tap a block in the tray below, it moves up into one of the five empty waiting slots. The ants then spawn from the nest and run toward the matching tiles on the picture. If you pull blocks into the slots and the ants cannot reach the right colors, those slots remain permanently filled until a path opens. When all five slots jam and no ants can advance, you lose the level immediately and have to restart. Success requires pulling blocks in the exact right sequence to peel the picture away layer by layer. You must always maintain an active feeding path to keep the board moving forward without stalling.
Colony Flow Level 1280 Step by Step Solution
Step 1: Target the bottom edge of the honeycomb first
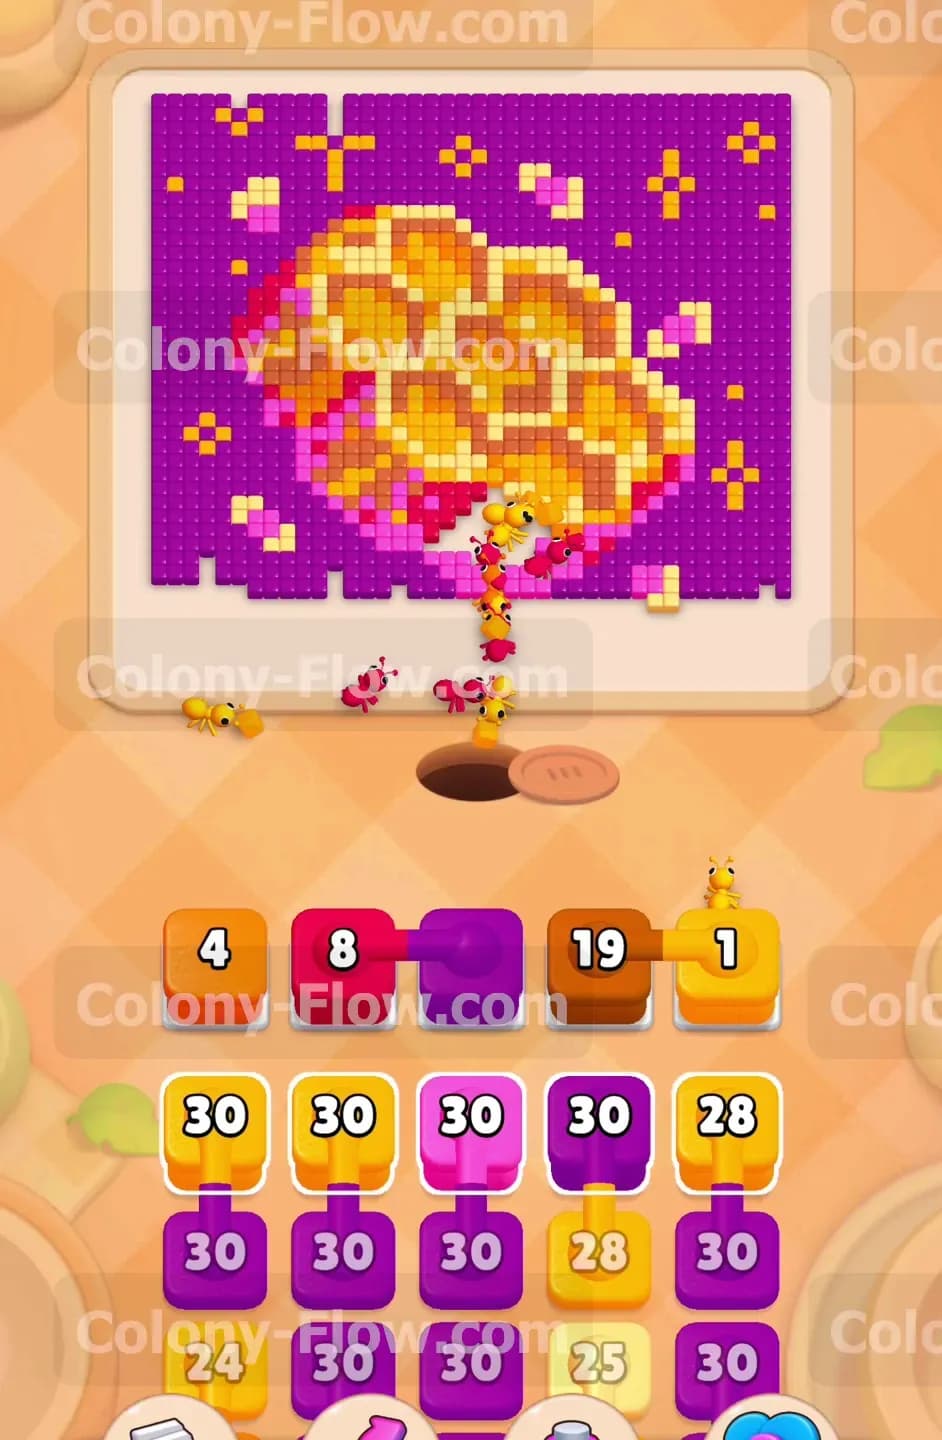
Look at the very bottom center of the pixel art picture right above the nest hole. A dense mix of orange and magenta tiles forms the lower boundary of the honeycomb structure. Tap the first magenta fifteen block and the orange twenty three block from your starting tray. The magenta and orange ants will stream out of the nest hole in a steady line and start eating the bottom edge immediately. This action creates a small but extremely crucial wedge of empty space right in the absolute center of the board. The numbers on your blocks will count down one by one as the ants consume the individual tiles. You need to wait patiently until the ants finish clearing these exact tiles before pulling anything else from the tray. This careful pacing prevents your five waiting slots from clogging up too early in the game when space is tight.
Step 2: Send purple ants into the lower background area
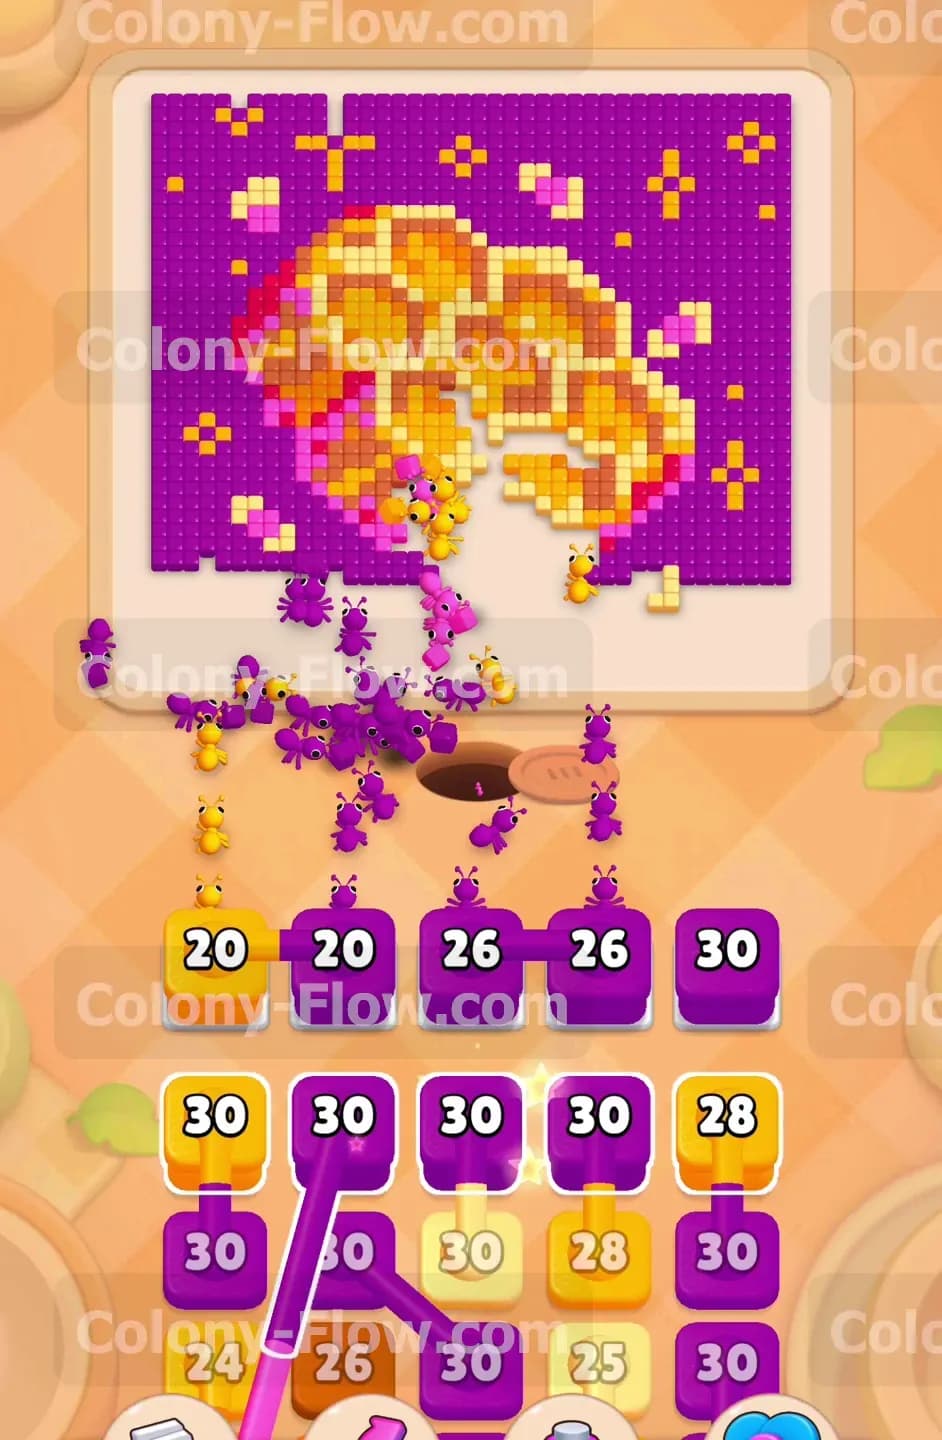
Once the bottom edge of the honeycomb opens up completely, you expose the deep purple background tiles located directly above the nest hole. Tap a purple thirty block from the front of the tray to send a massive swarm of purple ants into this newly opened space. They will fan out rapidly and eat the purple pixels on both the left and right sides of the central opening. Keeping the purple background receding is a highly effective tactic for this specific layout. It gives your other colored ants a much wider physical path to reach the higher sections of the honeycomb later on in the level. Watch the countdown number on the purple block drop down to zero. As soon as that block clears out of your waiting slot, you can confidently move on to the next set of colors without risking a deadly jam.
Step 3: Attack the large yellow central cells
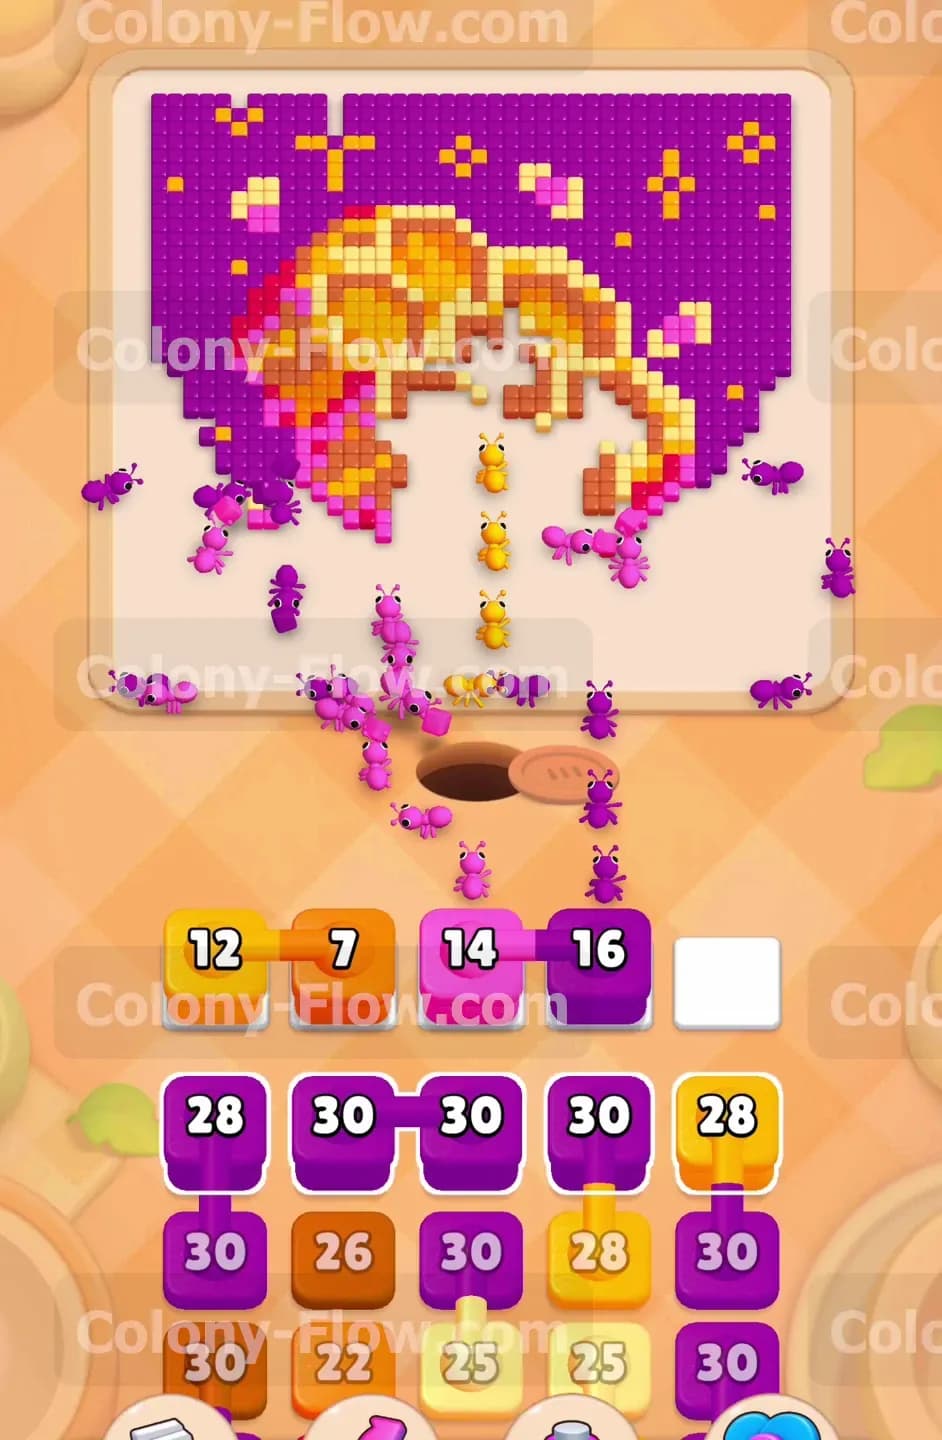
The thick core of the honeycomb consists of large bright yellow cells outlined heavily in orange and brown pixels. Pull a yellow twenty eight block and another yellow thirty block into your available waiting slots at the bottom of the screen. The yellow ants will rush up through the wide gap you just created and start devouring the large yellow patches inside the comb. You will see the center of the honeycomb dissolve rapidly under the sheer weight of the swarm. As the yellow tiles vanish from the screen, the orange borders around them become fully exposed and ready to eat. Tap an orange thirty block to let the orange ants march up and clean away these inner borders right away. Make sure you leave at least one completely empty waiting slot during this heavy feeding phase. The ants need continuous access to the board to keep the flow moving without any interruptions.
Step 4: Handle the connected purple blocks in your tray
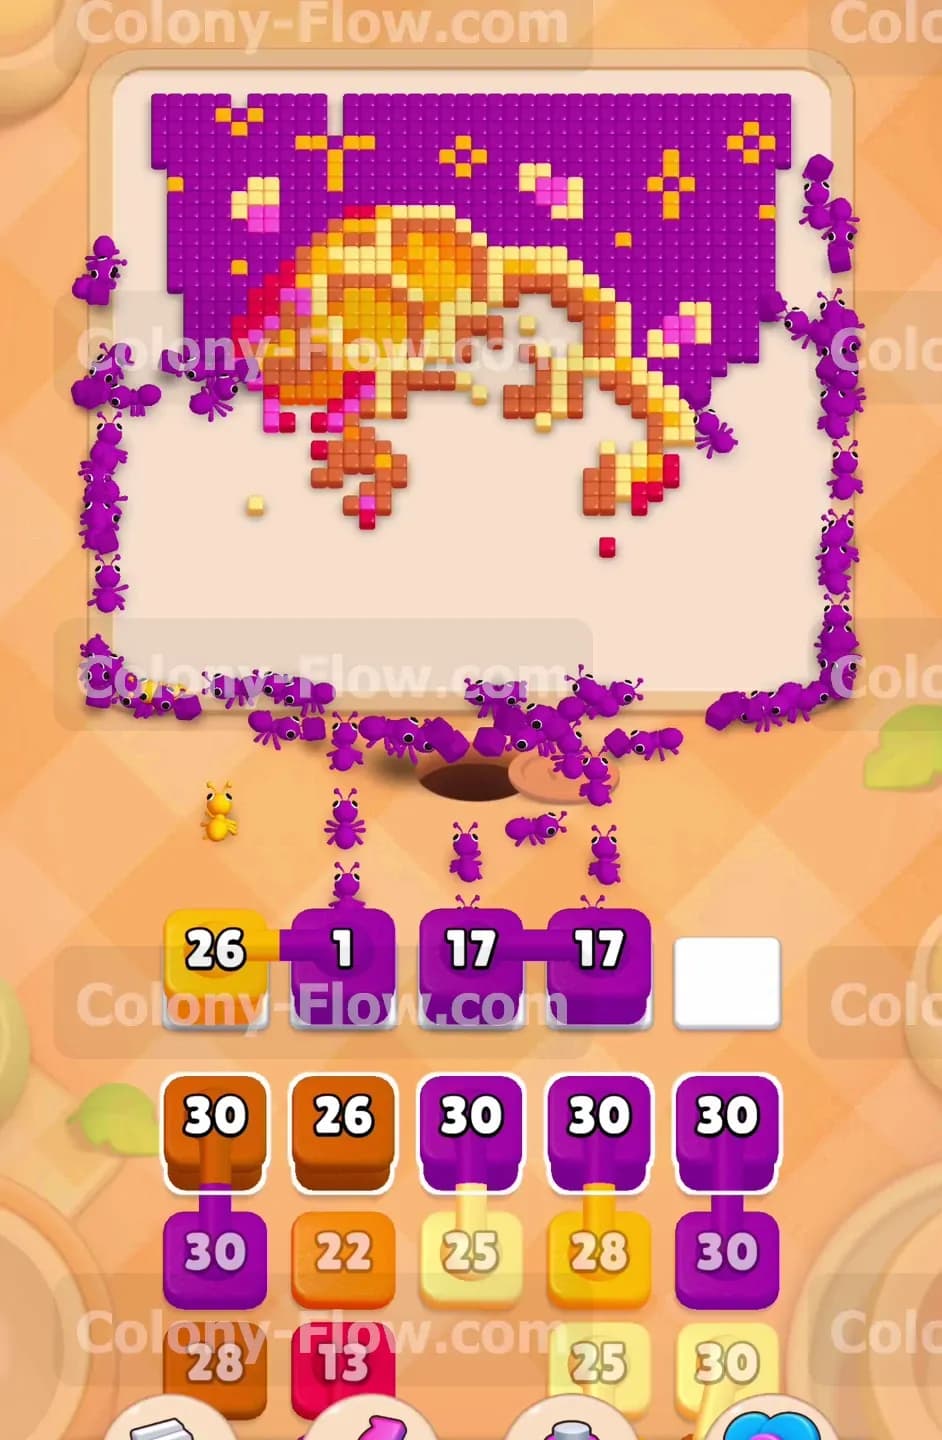
Your tray will soon reveal a frustrating set of connected boxes. You will see two deep purple thirty blocks linked together by a thick visual line. When you tap one of these linked blocks, both of them move up into your waiting slots at the exact same time. This action takes up two of your five precious slots instantly. You must only tap these connected purple blocks when you have a massive amount of exposed purple background on the board ready to eat. Since the yellow central cells are mostly gone now, the ants have a totally clear run at the upper left and upper right purple background areas. The purple ants will flood the board and rapidly eat through the background pixels. This massive swarm drains the linked blocks extremely fast and frees up your slots once again for new colors.
Step 5: Clean up the outer edges of the board
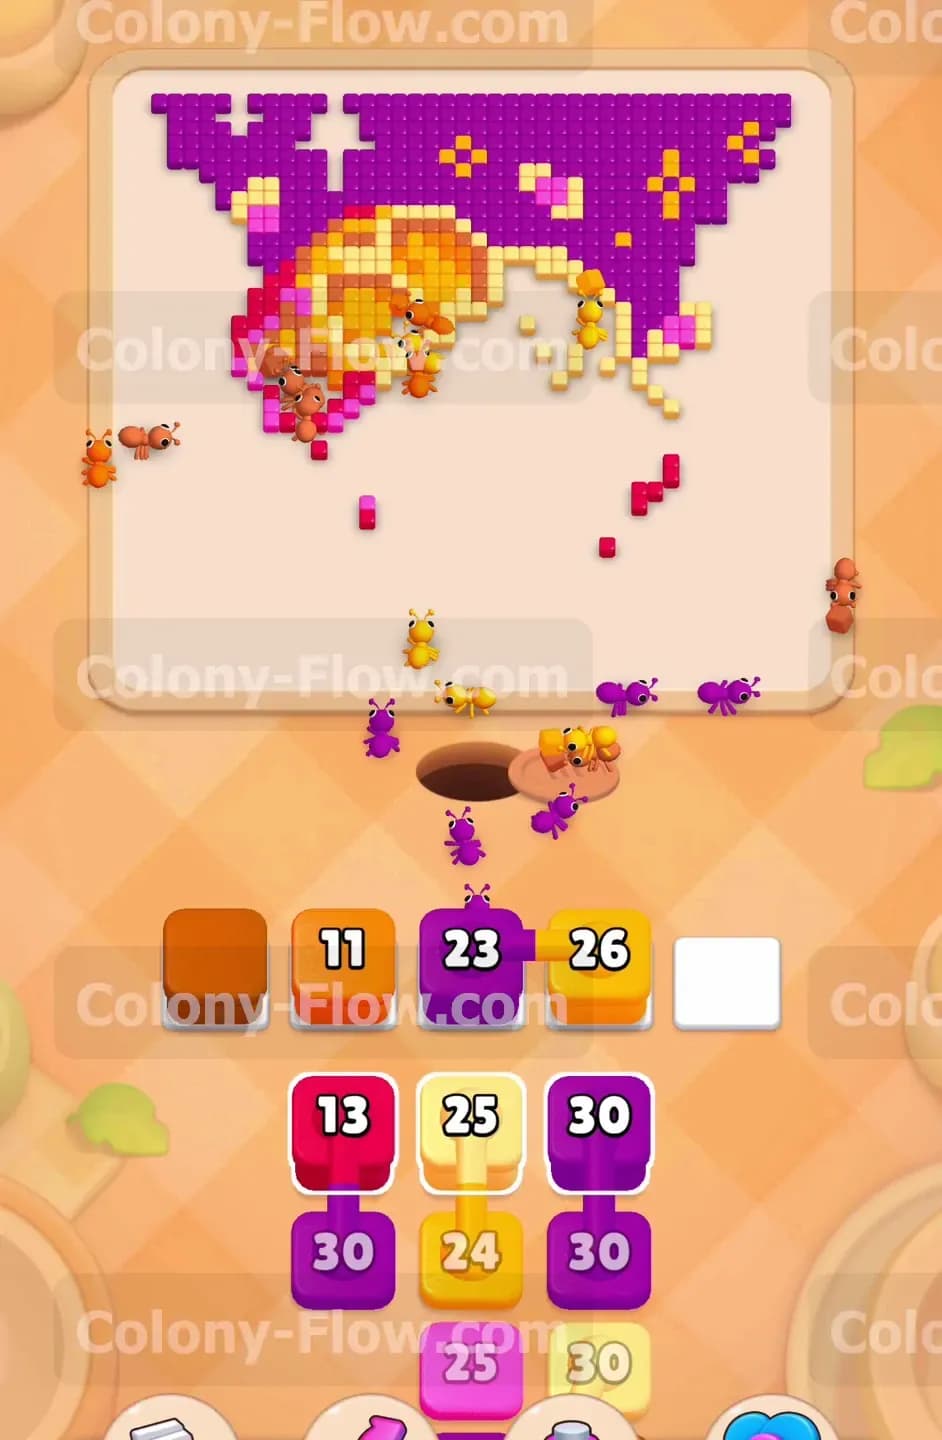
With the center completely hollowed out and gone, the ants will start traveling along the extreme left and right walls of the screen. Tap another purple thirty block to keep feeding the swarm on the edges. The purple ants will form a very long continuous trail wrapping around the sides of the remaining honeycomb picture. They will naturally eat the tiny yellow stars scattered in the background as they pass by them on their long walk. Pull a yellow twelve block and a magenta fourteen block into your slots to clear those specific star details and the leftover magenta edge pieces. You have to carefully monitor the physical travel time of the ants during this phase. The colony now has a very long walk to reach the top corners of the screen. Give them plenty of time to finish their journey so your slots do not back up while they walk along the walls.
Step 6: Expose and use the hidden brown blocks
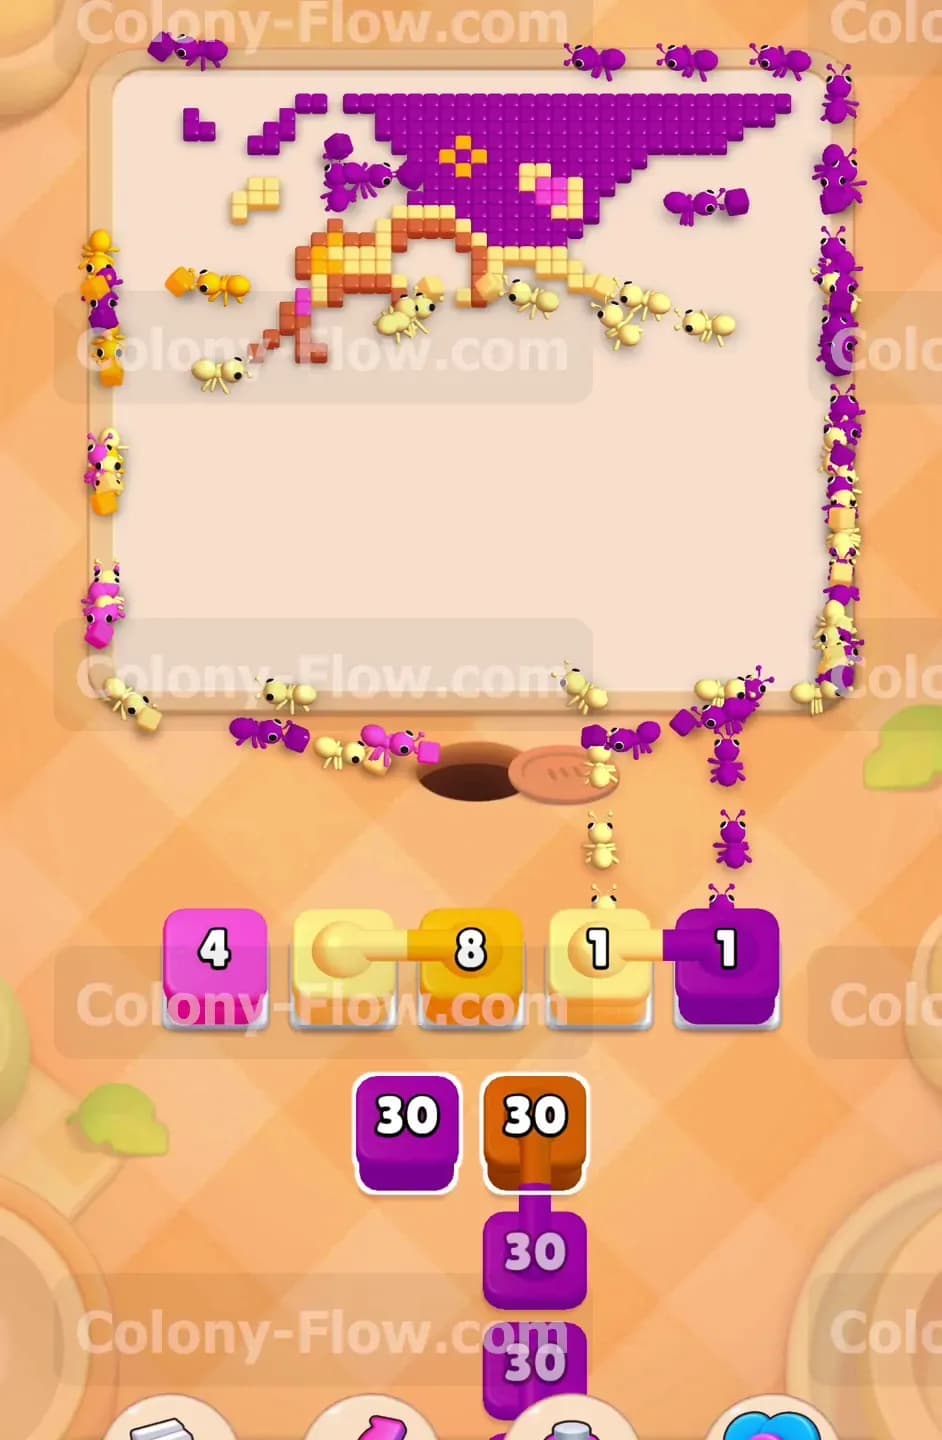
Clearing the top layers of your block tray eventually reveals the hidden boxes that were buried earlier. These boxes appear totally blank until they move up to the absolute front row of the tray. One of these hidden boxes reveals itself as a dark brown eleven block. Tap this brown block along with a yellow twenty six block to keep the momentum going. The brown ants will climb the long vertical paths to eat the final brown borders near the top arch of the honeycomb structure. The yellow ants will follow closely behind to finish off the last remaining whole cell positioned in the upper left corner. You are dealing with small isolated clusters of pixels at this advanced stage. You must match your tray blocks exactly to what is currently exposed on the screen. Never pull a color that remains trapped behind another solid color line or you will freeze the board.
Step 7: Break down the final top borders
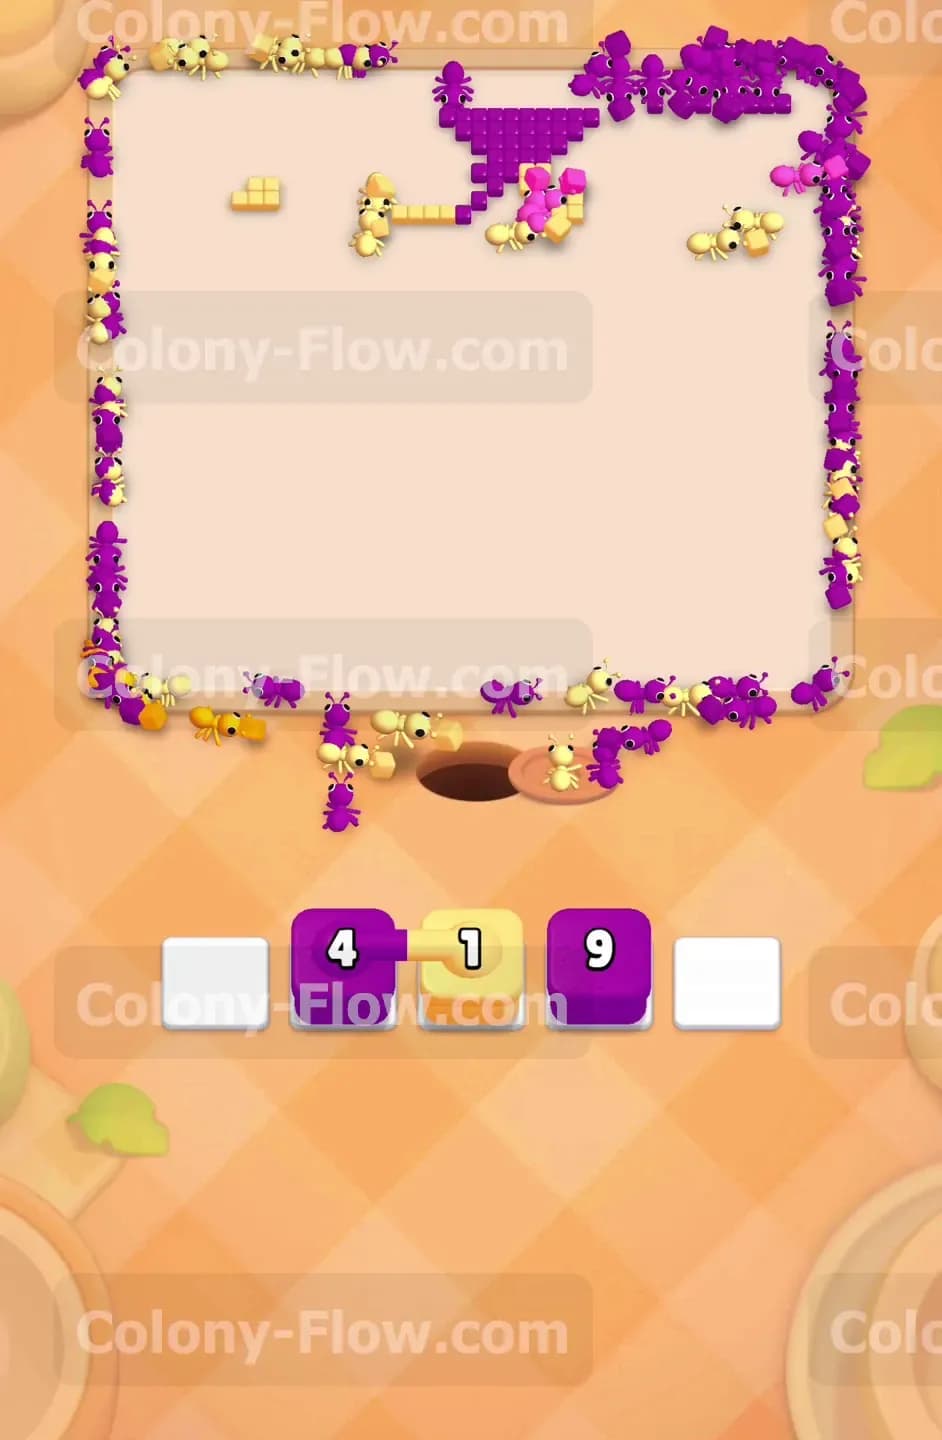
Only a few straggling pieces of the picture remain at the very top of the board right now. You will see a thin string of orange and yellow pixels forming the final broken arch of the honeycomb. Pull a magenta four block and an orange eight block into your waiting slots. The ants will take the long trek up the right side of the screen to munch on these specific isolated tiles. Keep a close eye on the deep purple corner pieces as well because they can hide out of sight. Tap a purple one block to send a single lone ant to grab that absolute last purple pixel sitting on the right edge. Your tray is getting very thin and empty at this point in the level. Every single move needs precise timing to avoid a sudden late failure due to a blocked path.
Step 8: Deploy the final connected blocks to win
The absolute last pieces in your tray include one final connected pair of boxes. You will see a yellow one block permanently linked to a purple nine block. The board only has a tiny sliver of purple background in the top right corner and one lone yellow star tile remaining. Tap the connected pair to pull them into your final open waiting slots at the bottom. The single yellow ant will run all the way up the wall to eat the star. The purple ants will swarm the final patch of purple background in the corner. Once they consume the very last pixel, the board clears completely. You win the level the moment the final ant finishes eating and the screen turns entirely empty.
Final Thought
Colony Flow Level 1280 requires strict discipline when managing your waiting slots and dealing with those connected boxes. Keep your focus on clearing the center first to open up wide paths for the late stage outer edges. If you find any of these written steps hard to follow, watch the video above this article to see the exact timing in motion.