Colony Flow Level 193 Walkthrough Solution & Guides | How to solve Colony Flow 193

Guide By Liam Stone
Updated on July 13, 2026
Rather watch than read? The video above walks through Level 193 step by step.
Video doesn't match your screen?
Game updates frequently scramble layouts! Try our AI Screenshot Solver first to find your exact board instantly, or report broken guides to our team.
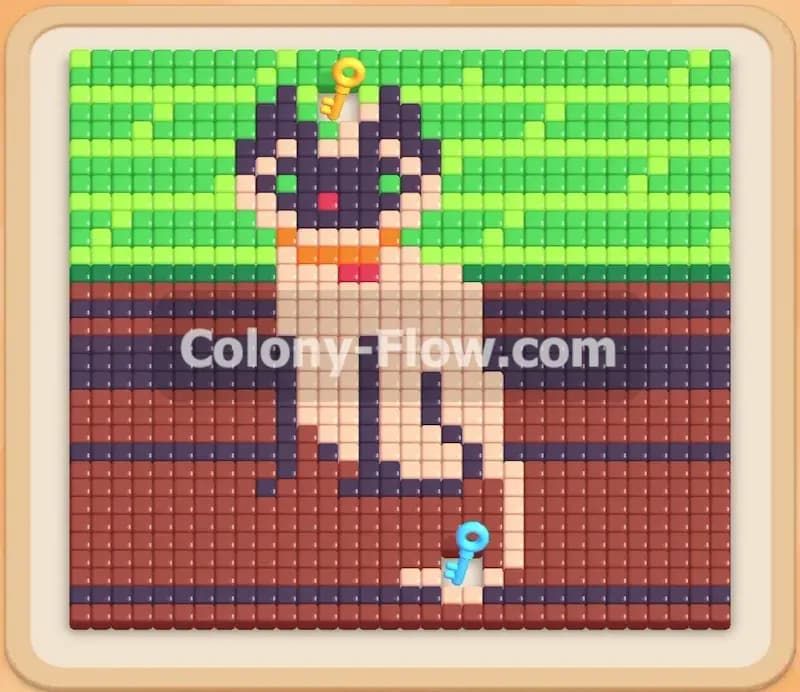
Colony Flow Level 193 presents a fun but challenging pixel art picture of a cute cat resting in a grassy field. You have to carefully manage your tray to clear the sky and the grass before you can tackle the feline in the middle. I played through this one a few times to find the perfect sequence so you avoid jamming your slots.
Colony Flow Level 193 Overview
What You Are Working With
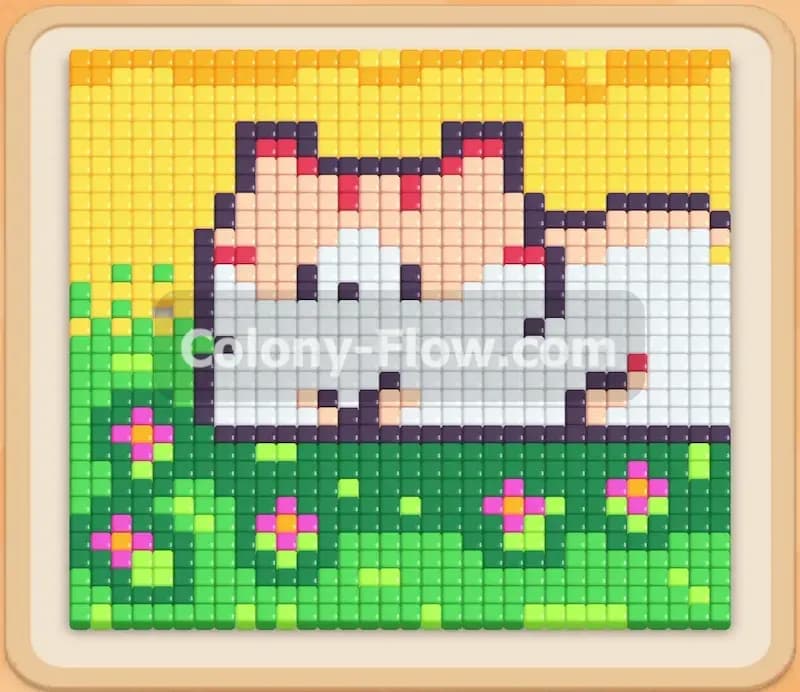
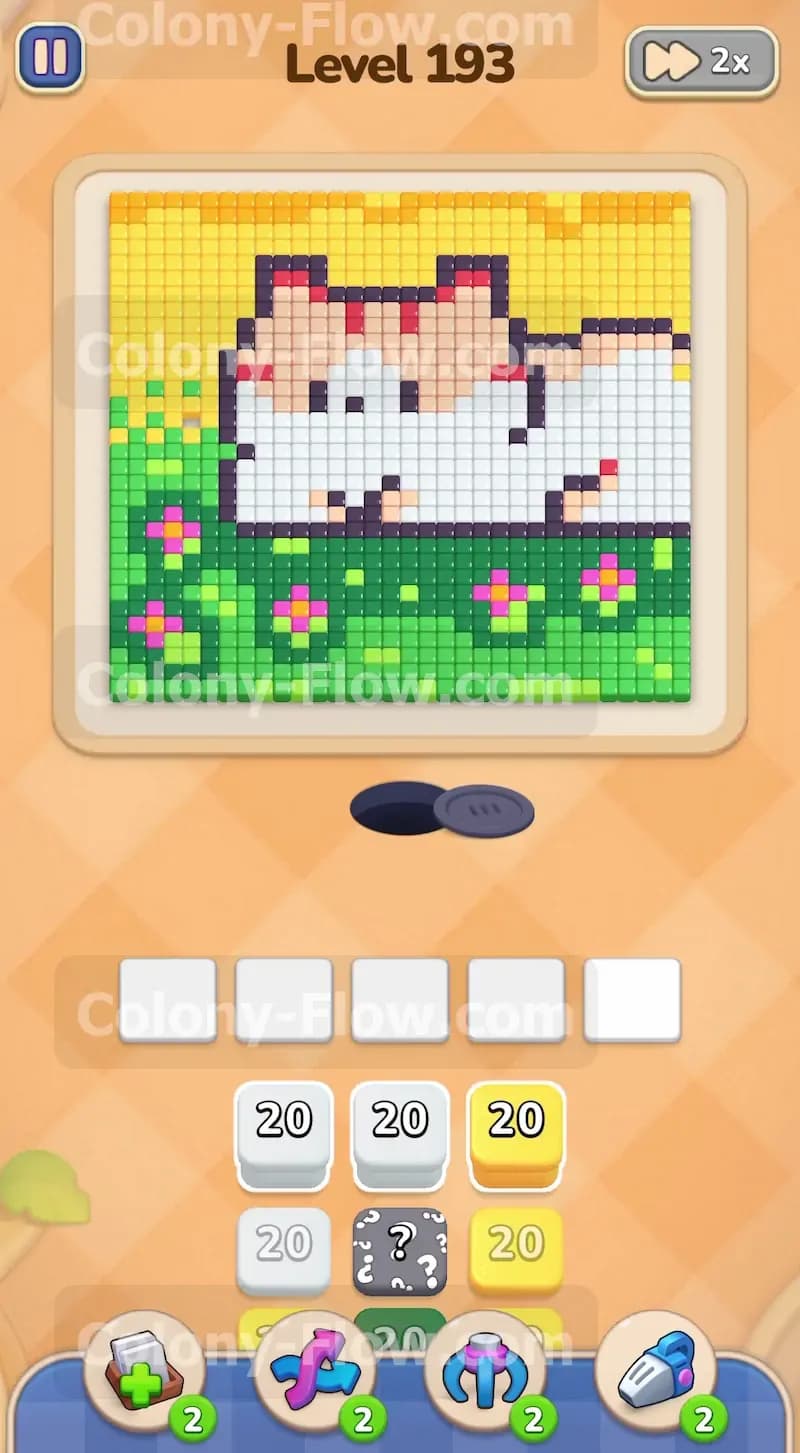
The colored picture at the top of your screen shows a large white cat with tan shading and a solid black outline. The cat is resting on a dark green field that features light green highlights and several pink flowers. Above the resting cat is a bright yellow canopy shape representing the sky. When you look down at your tray you will see a massive stack of blocks waiting to be played. You have multiple white and yellow blocks along with dark green, light green, pink, black, and tan blocks. Most of these blocks hold a high value like twenty. You also have a hidden box sitting in the upper layers of your tray. This grey block displays a question mark and hides its true color until it has a valid path to move into your slots.
What It Takes to Clear Level 193 Board
You need to completely erase every single colored tile from the board to win this level. The main rule of the game dictates that you only have five waiting slots for your numbered blocks. If you pull blocks into all five slots and the ants cannot find an open path to reach their matching tiles you will lose the level instantly. You must work from the outside edges of the picture and slowly dig your way toward the center. This means you will clear the yellow sky and the outer green grass first. You will break through the black outline next and finally consume the inner white body of the cat. Every move you make needs to guarantee an open path for your ants to travel so your waiting slots constantly empty out and refresh.
Colony Flow Level 193 Step by Step Solution
Step 1: Open the outer paths with your starting yellow and white blocks
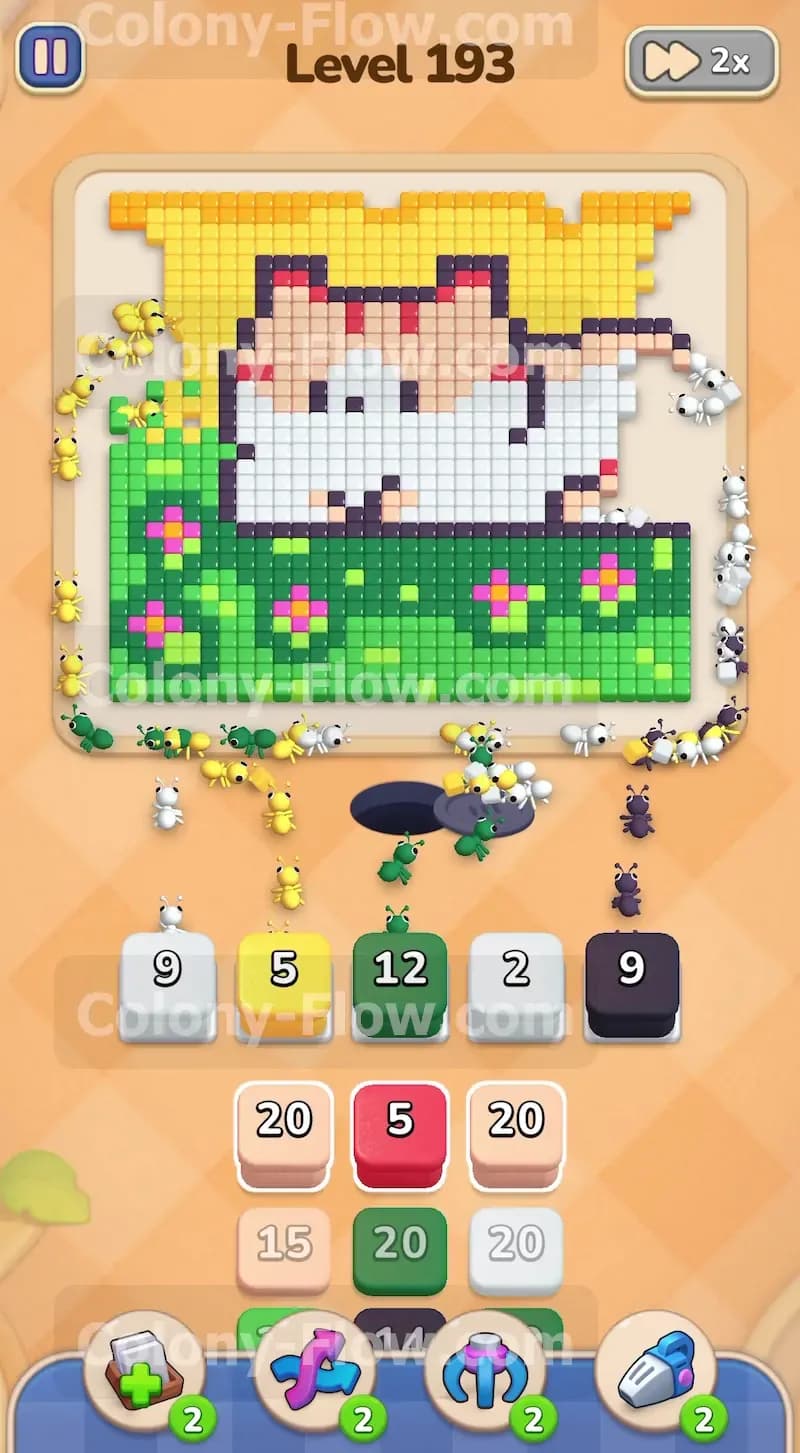
The level begins with a completely solid board showing the cat and the landscape tightly packed together. You need to create an immediate path for your ants to start eating without filling up your limited slots. Pull the first white block and the first yellow block from your tray up into your waiting slots. Both of these starting blocks hold a value of twenty. The ants will stream out of the nest hole at the bottom and travel up the sides to the outer edges of the picture. They will begin eating the yellow sky tiles at the very top of the board and the white background space on the far edges. You will see the numbers on the blocks count down as the ants consume the matching tiles. This keeps your slots moving and prevents a fatal jam right at the start of the puzzle.
Step 2: Uncover the hidden box in your tray to reveal the dark green block
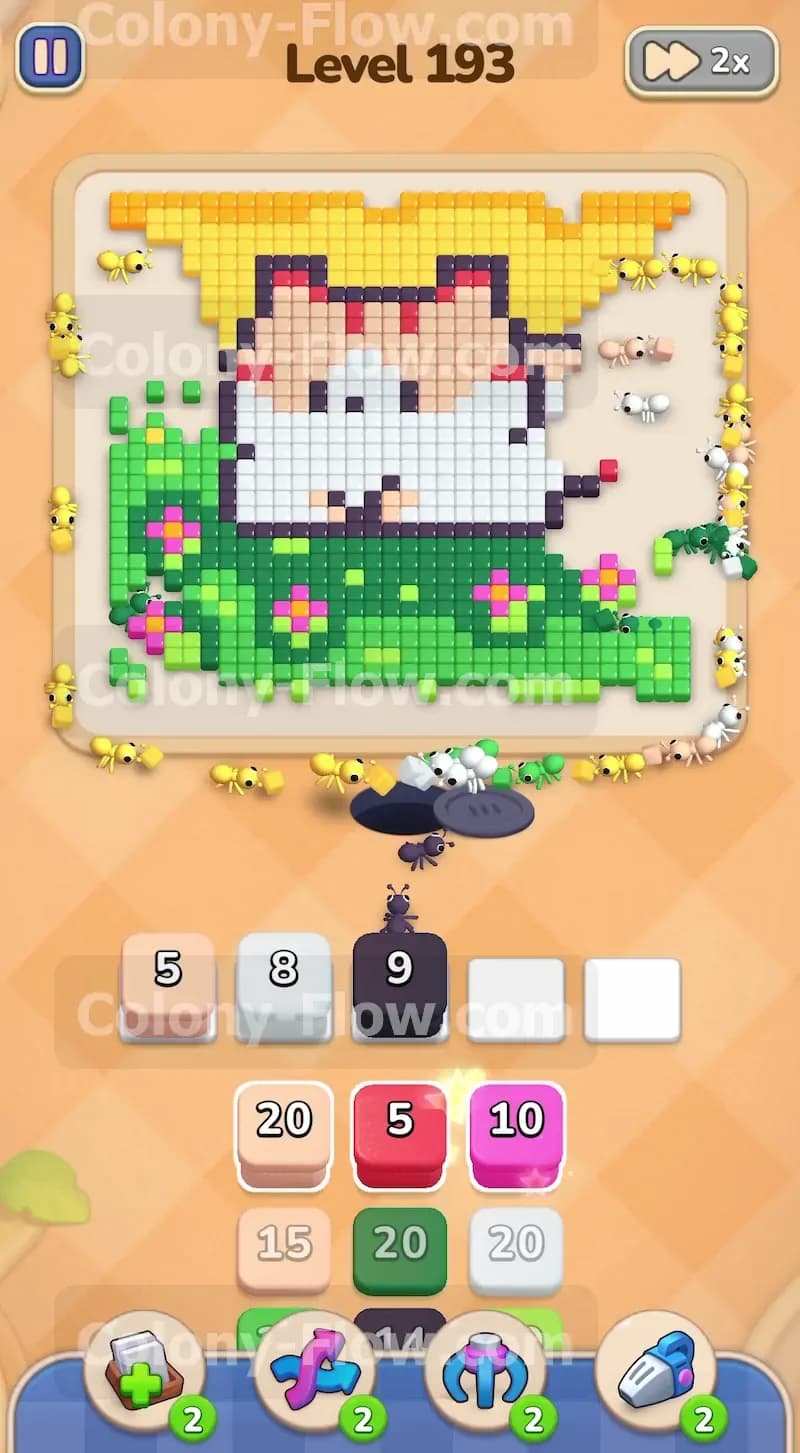
Look closely at your tray and you will notice a grey block with a question mark on it. This is a special hidden box tile. It completely hides its color until it has a valid path to move into your slots. You need to pull the standard white and yellow blocks out of the way first. Once the hidden box has a clear path it will slide up into your waiting slot and reveal its true identity. In this specific level the hidden box turns out to be a dark green block with a value of twenty. You will absolutely need this dark green block to begin clearing the thick grassy field underneath the cat.
Step 3: Deploy the dark green and black blocks to clear the grass and the tail
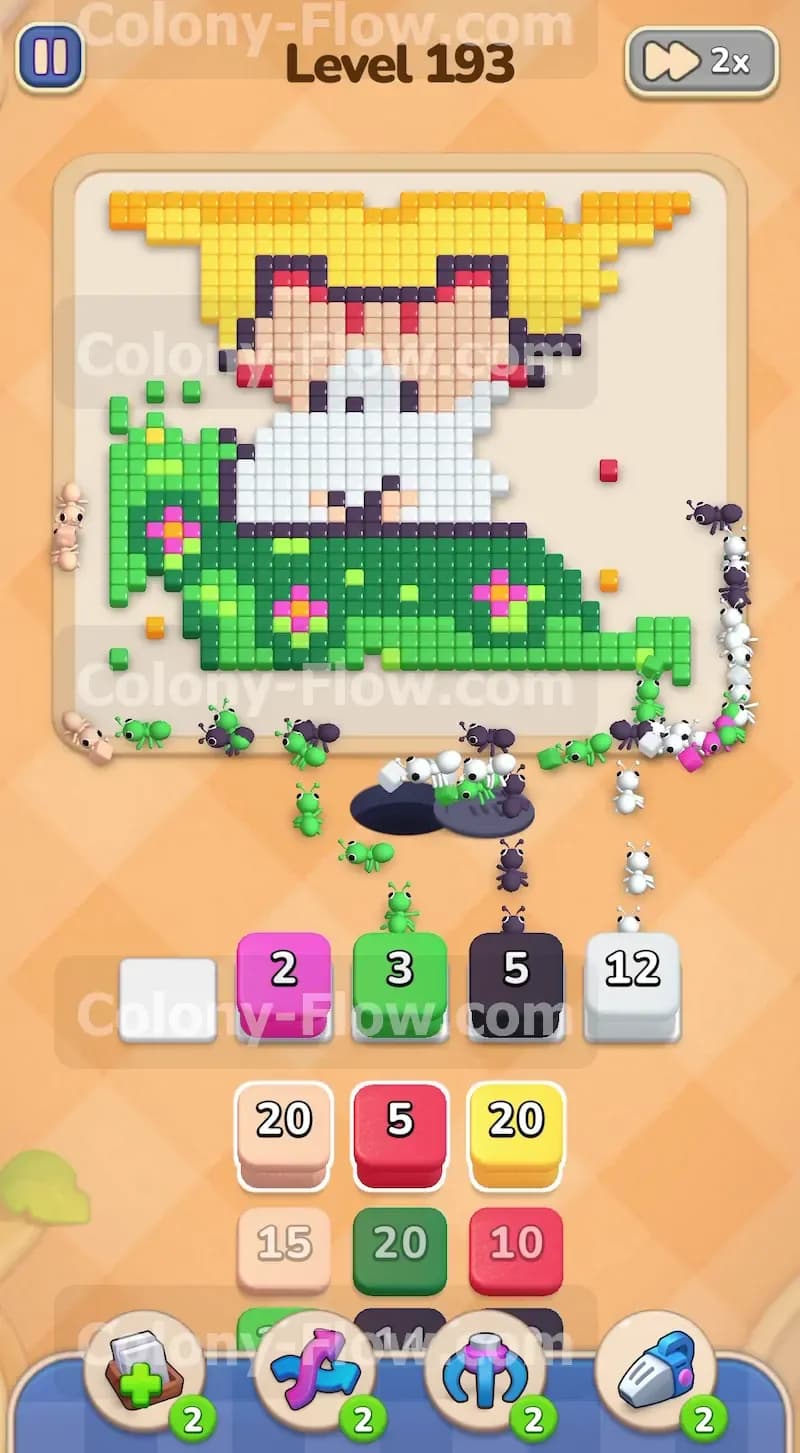
Now that you know the hidden box is dark green you can safely keep it in your waiting slots. Go ahead and add a black block to the slots as well to keep the pressure on the board. The dark green ants will flood out of the nest hole and begin chewing heavily through the massive green field at the bottom of the picture. At the exact same time your black ants will travel all the way up the right side of the board. They will find the black outline tiles near the tail of the cat and begin eating them. Keep a close eye on your remaining empty slots to ensure the ants always have a clear path to these specific colors.
Step 4: Hold off on pulling the pink blocks until the grass opens up
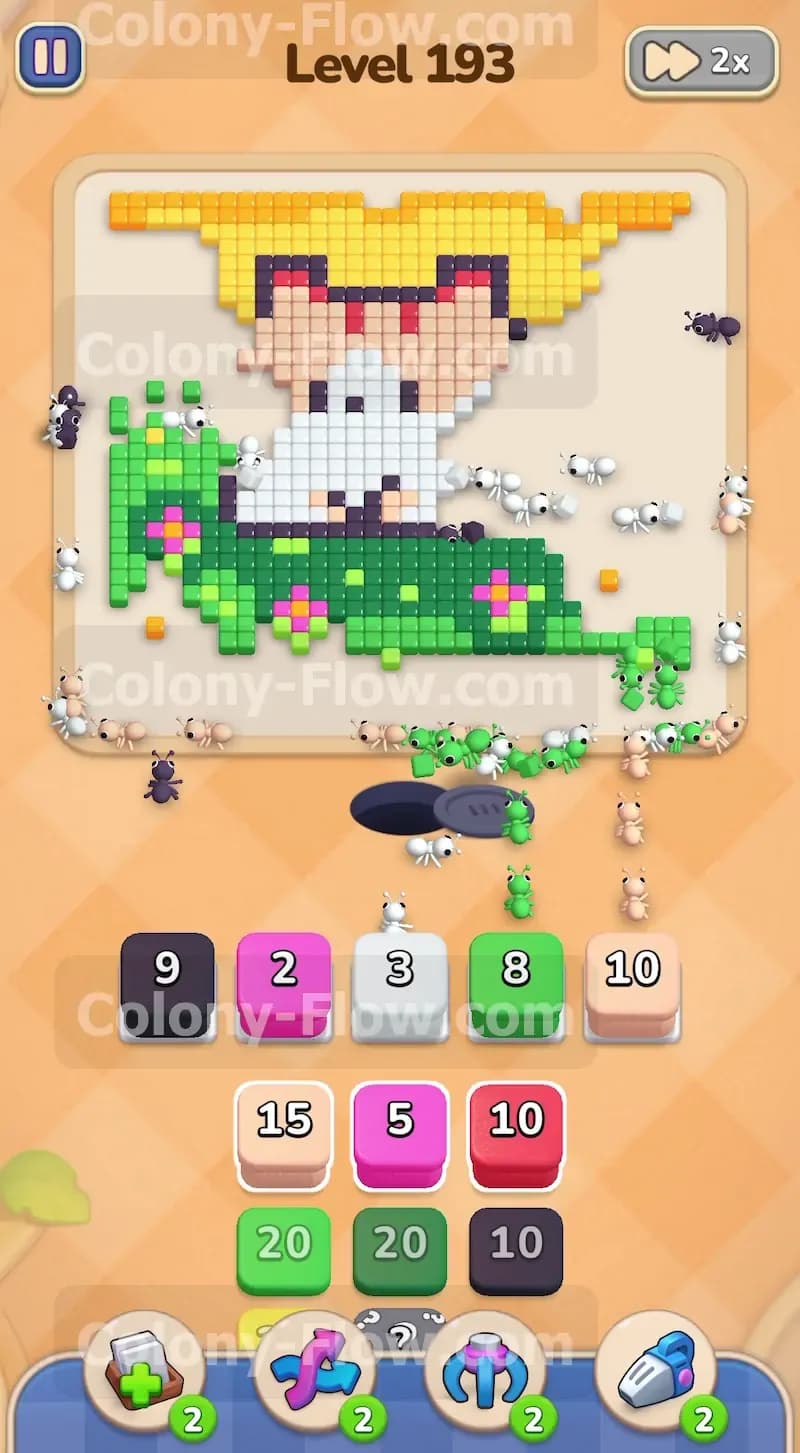
You will see pink blocks in your tray holding a value of ten and twenty as you dig deeper into the stack. You must resist the urge to pull these pink blocks into your slots too early. The pink tiles on the board make up the small flowers embedded deep inside the green grass. If you pull a pink block right now the ants will not be able to reach those flower tiles because the solid green grass blocks the way. The pink block will sit perfectly still in your waiting slot and waste valuable space. If you accidentally fill all five slots with trapped colors you will lose the level instantly. Wait patiently for the dark green ants to eat away enough of the grass to expose the outer edges of the pink flowers.
Step 5: Send out the tan blocks to handle the shading on the cat body
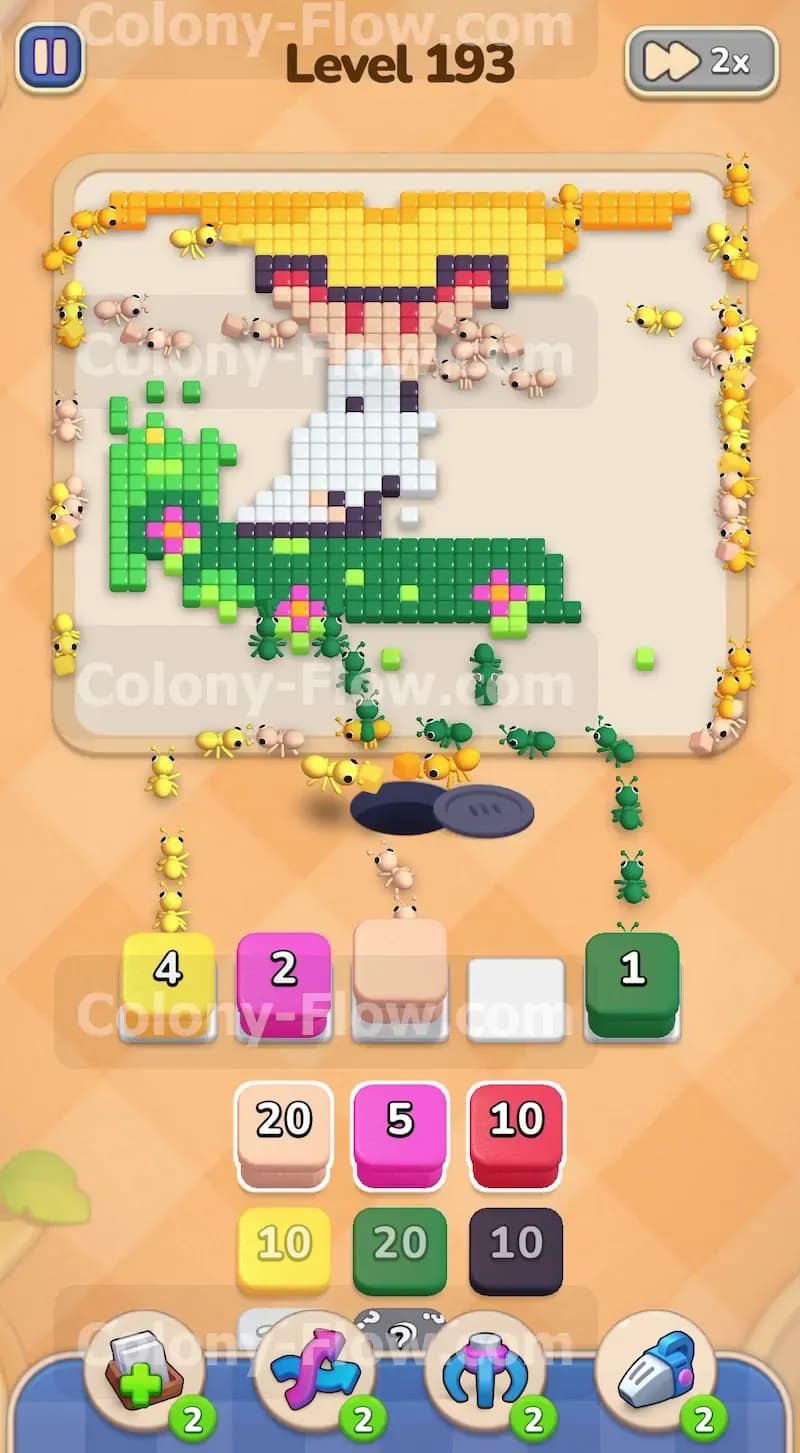
With the outer grass slowly clearing out you can start working on the main body of the cat. Pull a tan block into your open waiting slots. The tan tiles form the shadows and the intricate details on the ears and the bottom edge of the cat body. The tan ants will weave through the new gaps left by the missing yellow sky and begin clearing these shaded areas. You will notice the picture starting to break apart as the solid shapes become heavily fragmented. Keep feeding the tan and white blocks into the slots as long as there is an open path for those specific ants to travel across the board.
Step 6: Release the light green blocks to clear the grass highlights
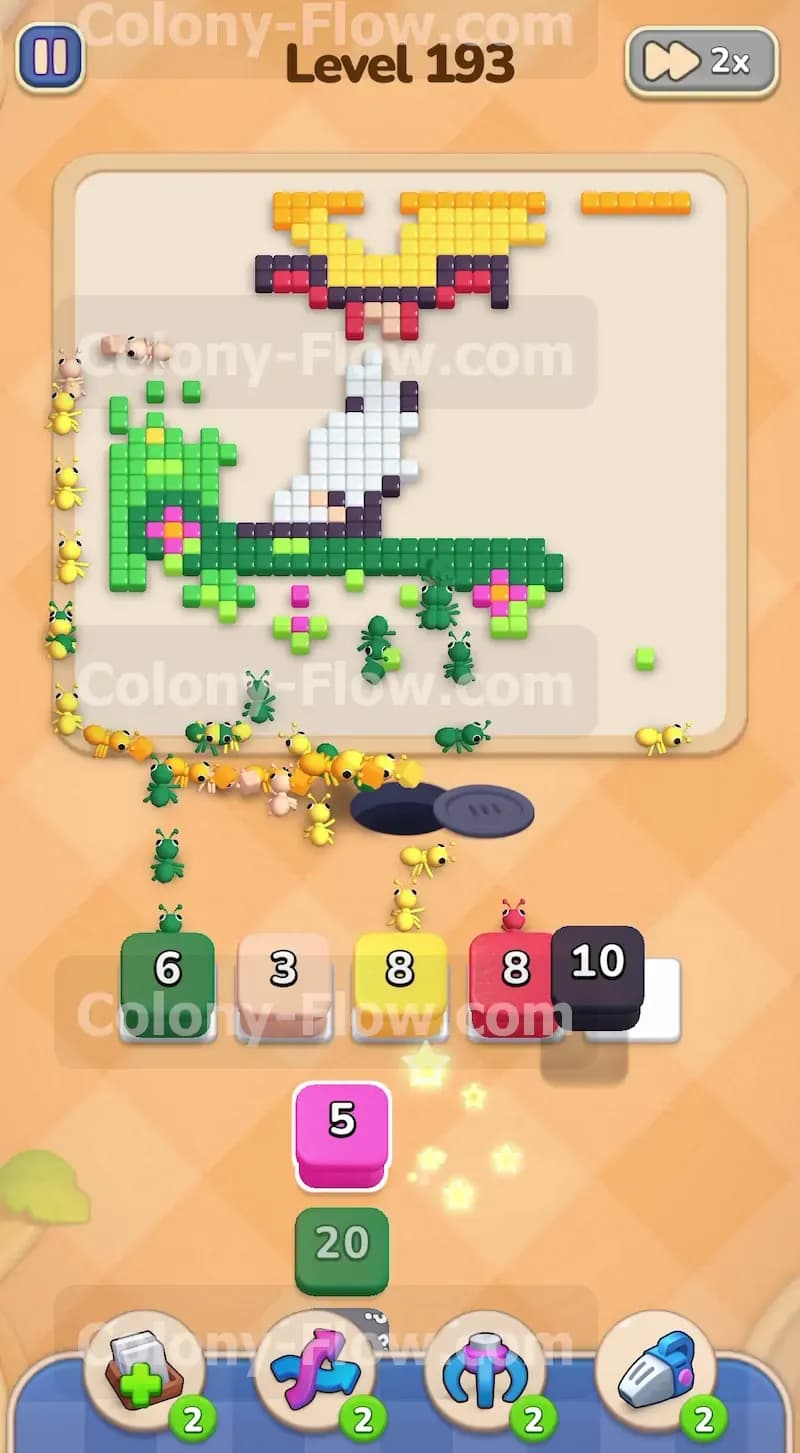
The grass field is not just one solid dark green color. There are light green tiles scattered throughout the field to create bright highlights. Once the dark green ants chew away the bulk of the field you will clearly expose these light green patches to the outside paths. Pull a light green block from your tray into an empty waiting slot. The light green ants will leave the nest and specifically target these isolated grassy patches. Clearing the light green tiles is a mandatory move because they often block the black outline tiles near the bottom paws of the resting cat.
Step 7: Clear the pink flowers now that the paths are fully open
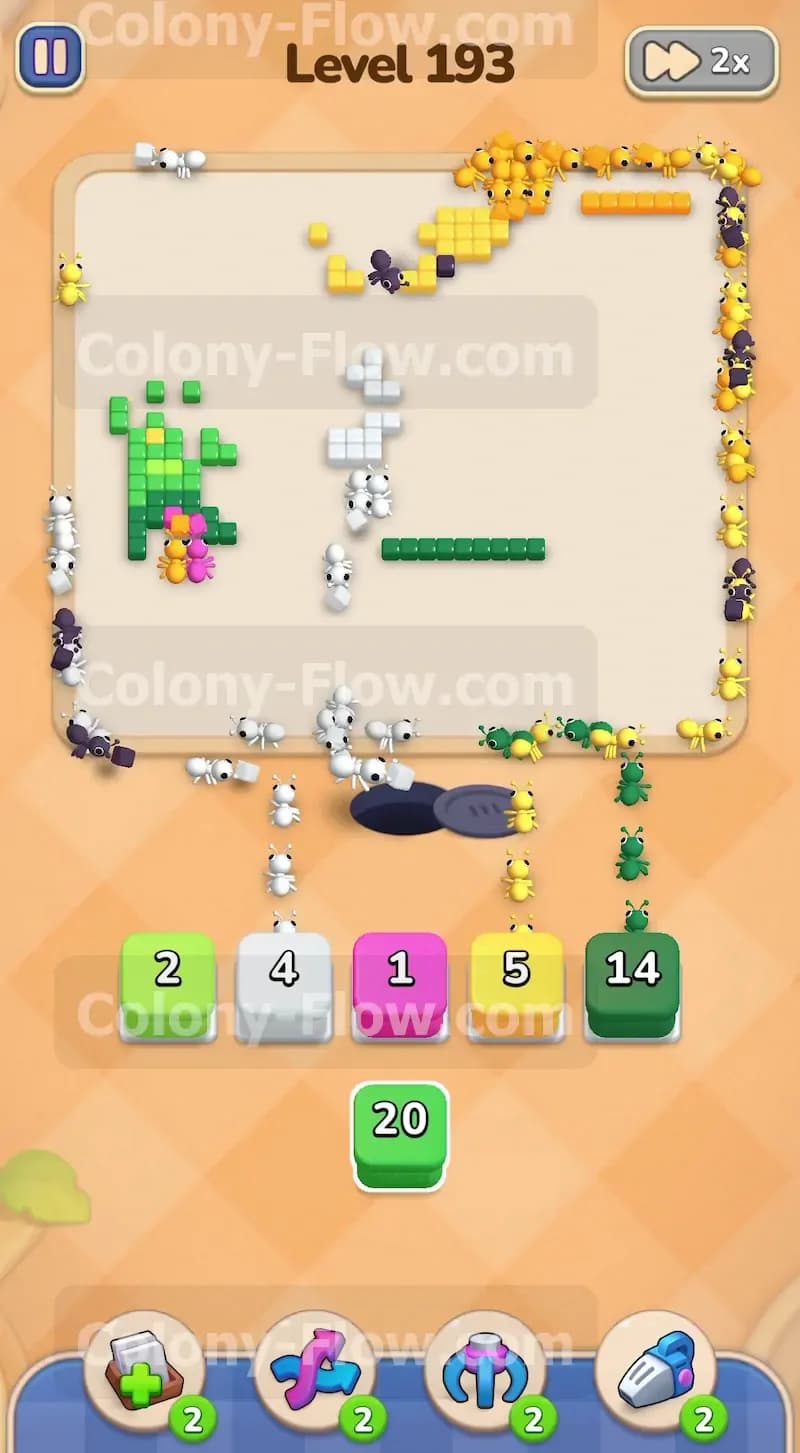
The dark green and light green ants have done their job perfectly and the grassy field is mostly gone. You can finally see clear open paths leading directly to the pink flower tiles. Go ahead and pull a pink block into your waiting slots now. The pink ants will rush out of the nest and rapidly consume the flower shapes. Because you waited for the exact right moment the pink block numbers will count down incredibly fast. The block will empty out and vanish entirely from your slots to give you your space back. This kind of patience keeps your board flowing perfectly without any risk of jamming.
Step 8: Break the remaining black outline to access the inner white body
The cat is protected by a thick black border that tightly surrounds its entirely white belly and face. You cannot reach the inner white tiles until this defensive border is completely broken. Pull another black block into your slots to deal with this barrier. The black ants will aggressively swarm the remaining outline pieces around the ears and the tiny legs. As the black tiles disappear the large white center of the cat becomes fully exposed to the outside paths. You now have a direct route to clear the absolute biggest remaining chunk of the picture.
Step 9: Flood the board with white ants to eat the main cat body
You have several white blocks left in your tray and the black outline is entirely gone. Pull your remaining white blocks into your waiting slots to finish the cat. You can safely load two or three white blocks at the exact same time because the white target area is massive and totally open. The white ants will pour out of the nest and devour the face and the belly of the cat simultaneously. The numbers on your white blocks will drop incredibly fast as the ants feast. The solid shape of the cat will vanish rapidly and leave behind only a few scattered pixels of varying colors on the board.
Step 10: Manage the final random blocks to finish the puzzle completely
The board now looks extremely empty with just a handful of yellow sky pieces and a few green grass fragments scattered loosely around the screen. Look down at your tray and carefully pull the exact matching colors for these remaining isolated tiles. You might need one last dark green block or a final yellow block from the very bottom of your tray stack to clean up these stubborn stragglers. The ants will run all the way across the empty board space to eat these last few pieces. The entire picture finally disappears from your screen and the remaining ants march off the board to secure your victory.
Final Thought
Colony Flow Level 193 demands incredible patience and careful slot management from start to finish. You really have to resist the massive temptation to pull those pink and tan blocks too early while the grass and the black outline still block the way. Take your time and let the outer layers clear completely before you aggressively move inward. I highly encourage you to watch the video above this article if any step feels hard to follow in text. Seeing the exact timing of the blocks in motion makes it much easier to understand how the paths open up and flow naturally.