Colony Flow Level 737 Walkthrough Solution & Guides | How to solve Colony Flow 737

Guide By Liam Stone
Updated on August 8, 2026
You don't need to read the article to solve Level 737. The video above shows you everything.
Video doesn't match your screen?
Game updates frequently scramble layouts! Try our AI Screenshot Solver first to find your exact board instantly, or report broken guides to our team.
Welcome to Colony Flow Level 737. This puzzle presents a massive star design sitting on top of an enormous white grid background. You have to manage your waiting slots carefully from the very beginning because the sheer volume of tiles can easily lead to a jam if you pull the wrong colors too early. I play every level to figure out the safest path through the board, and I will walk you through exactly how I clear this picture without hitting a dead end. We need to systematically dismantle the star while constantly feeding the background.
Colony Flow Level 737 Overview
What You Are Working With
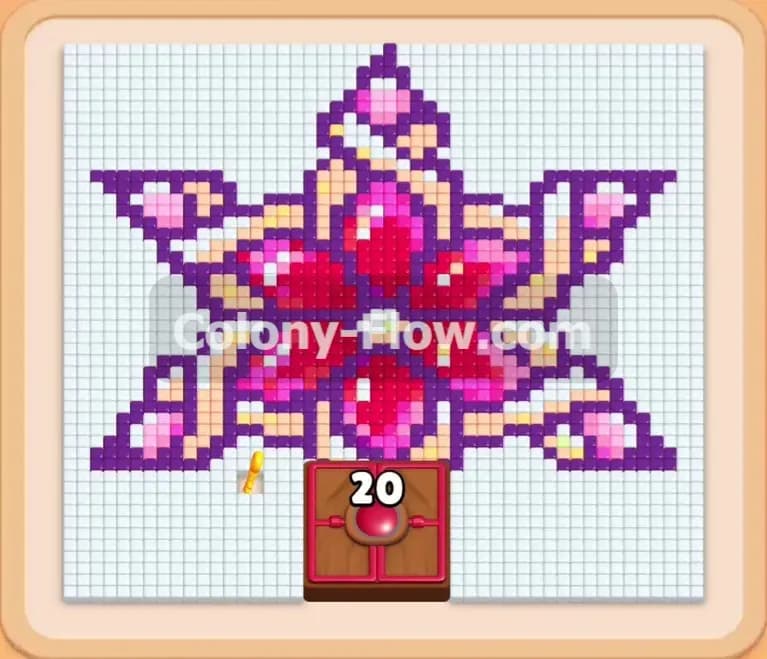
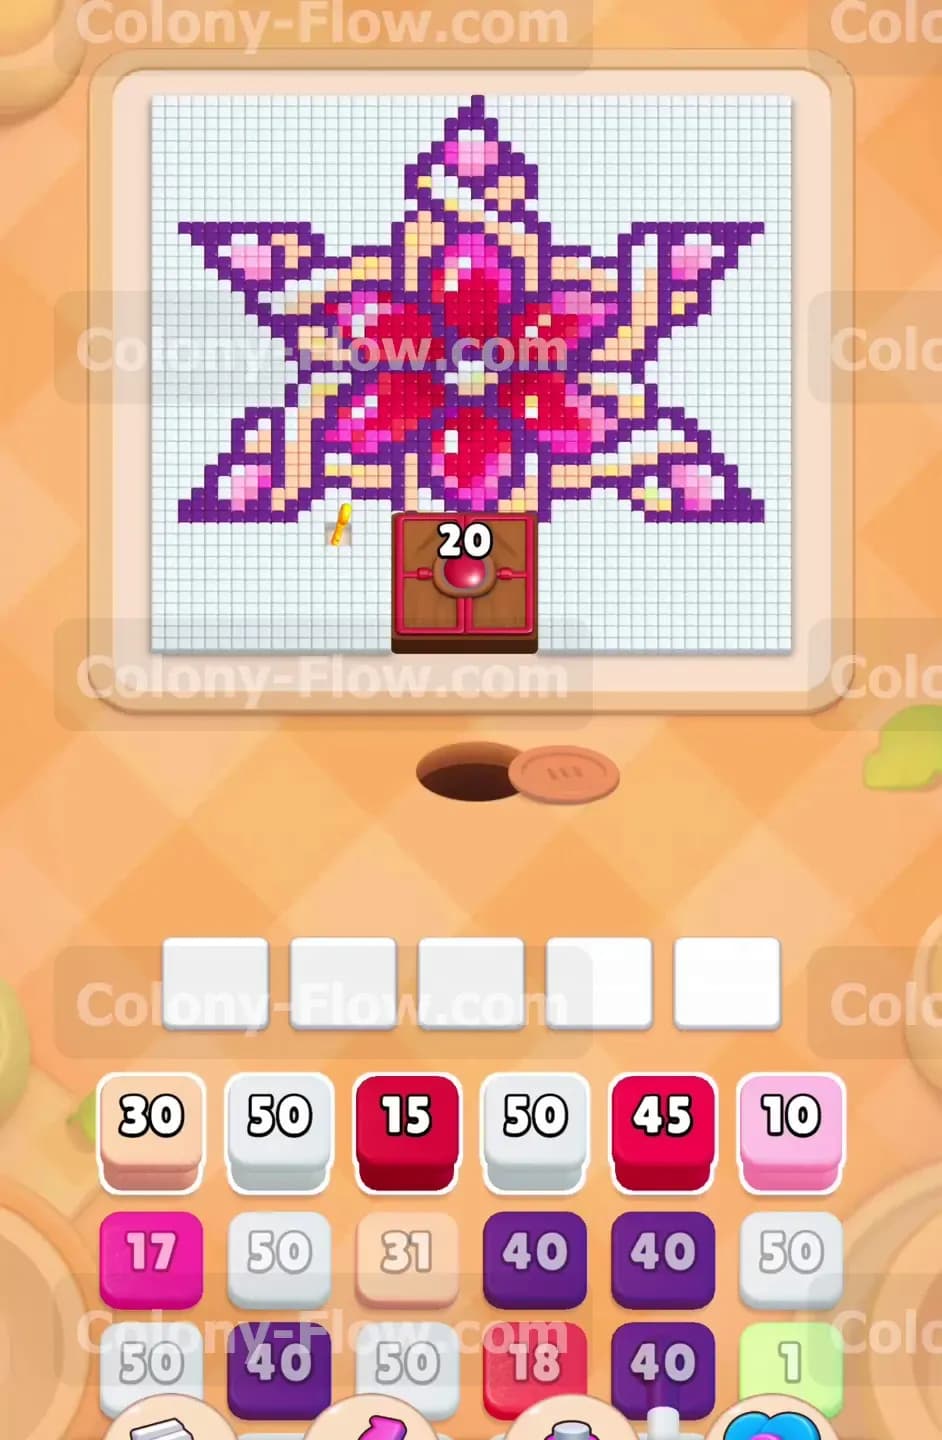
The board features a large intricate star shape occupying the center of the screen. The outer edge of this star is made of dark purple tiles. Inside that border is a beige structural outline holding several pink petals. The core of the star consists of dark red and bright red tiles. The entire star sits on a vast white background grid that takes up most of the screen space. At the bottom center of the board, a brown Hungry Door blocks the lower section of the star. This door displays the number twenty and a red jewel, indicating it requires twenty red ants to open. In your tray at the bottom, you will find a mix of single color blocks and connected blocks. The connected blocks hold two colors linked together. You will see high capacity blocks here, including many white blocks holding fifty ants each, which reflects the huge background grid you need to clear.
What It Takes to Clear Level 737 Board
Clearing this level requires a two part strategy. You must constantly feed white ants to the background to keep your waiting slots moving while systematically taking apart the star from the outside in. You cannot reach the red core immediately because the outer dark purple, beige, and pink layers block the path. Your primary goal is to strip away these outer layers to expose the red center. Once the red tiles are open, you can send red ants to feed the Hungry Door. Opening that door is mandatory because it hides the bottom portion of the star. If you pull red blocks before the core is exposed, they will sit in your waiting slots and block you from pulling the colors you actually need. You win when the door is gone, the star is fully dismantled, and the massive white grid is entirely consumed.
Colony Flow Level 737 Step by Step Solution
Step 1: Begin by attacking the exposed outer border of the star shape.
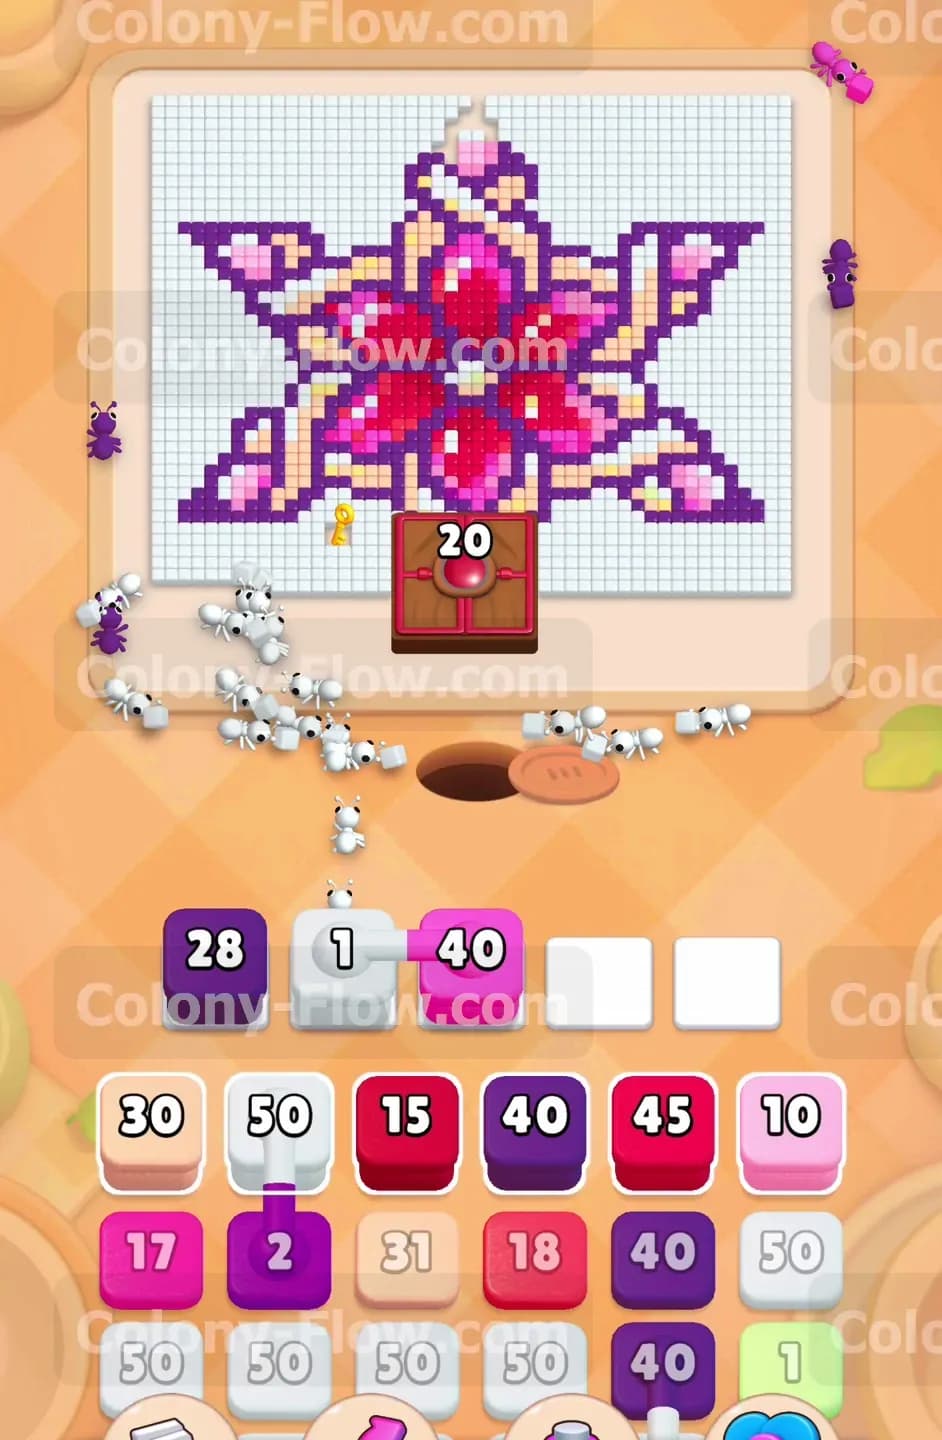
Your first move should target the most accessible tiles on the board to create working room. The dark purple border of the star is fully exposed to the open space around it. Look at your tray and pull a dark purple block into your waiting slots. The dark purple ants will immediately stream out of the nest hole and follow the open path to the left side of the star. They will begin eating away the outer edge points. This is a very safe opening move because the path is perfectly clear and the ants will drain quickly from the slot. You always want to start with the outermost layers of the central picture to carve out more open paths for the next steps. Keep an eye on the number on the block to ensure it is steadily counting down.
Step 2: Introduce a connected block to work on the background and the star simultaneously.
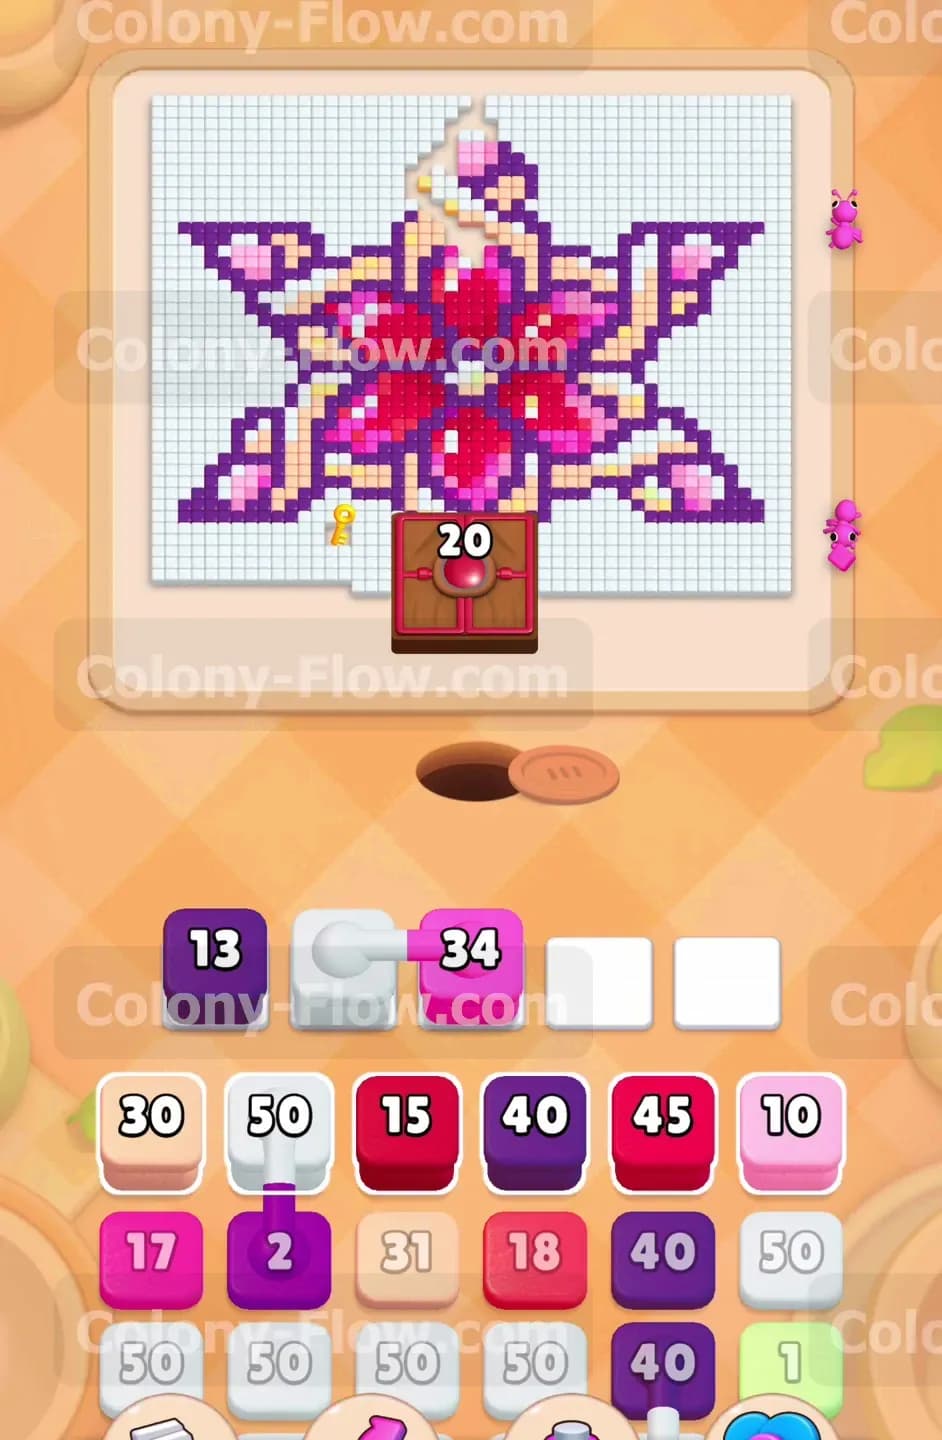
With the left border taking damage, it is time to start on the massive white background grid. Locate a connected block in your tray that links white and pink. Pull this connected block into your waiting area. This single pull activates two different colors of ants at the same time. The white ants will head straight for the bottom left corner of the white grid and start clearing the background layer. Meanwhile, the pink ants will travel up to the top point of the star to eat the exposed pink petal tiles. Using connected blocks early is highly efficient provided both colors have an open path to their matching tiles. Since the white background is always accessible from the edges, the white half of this block is guaranteed to keep moving and prevent the slot from jamming.
Step 3: Increase the pressure on the right side of the star border.
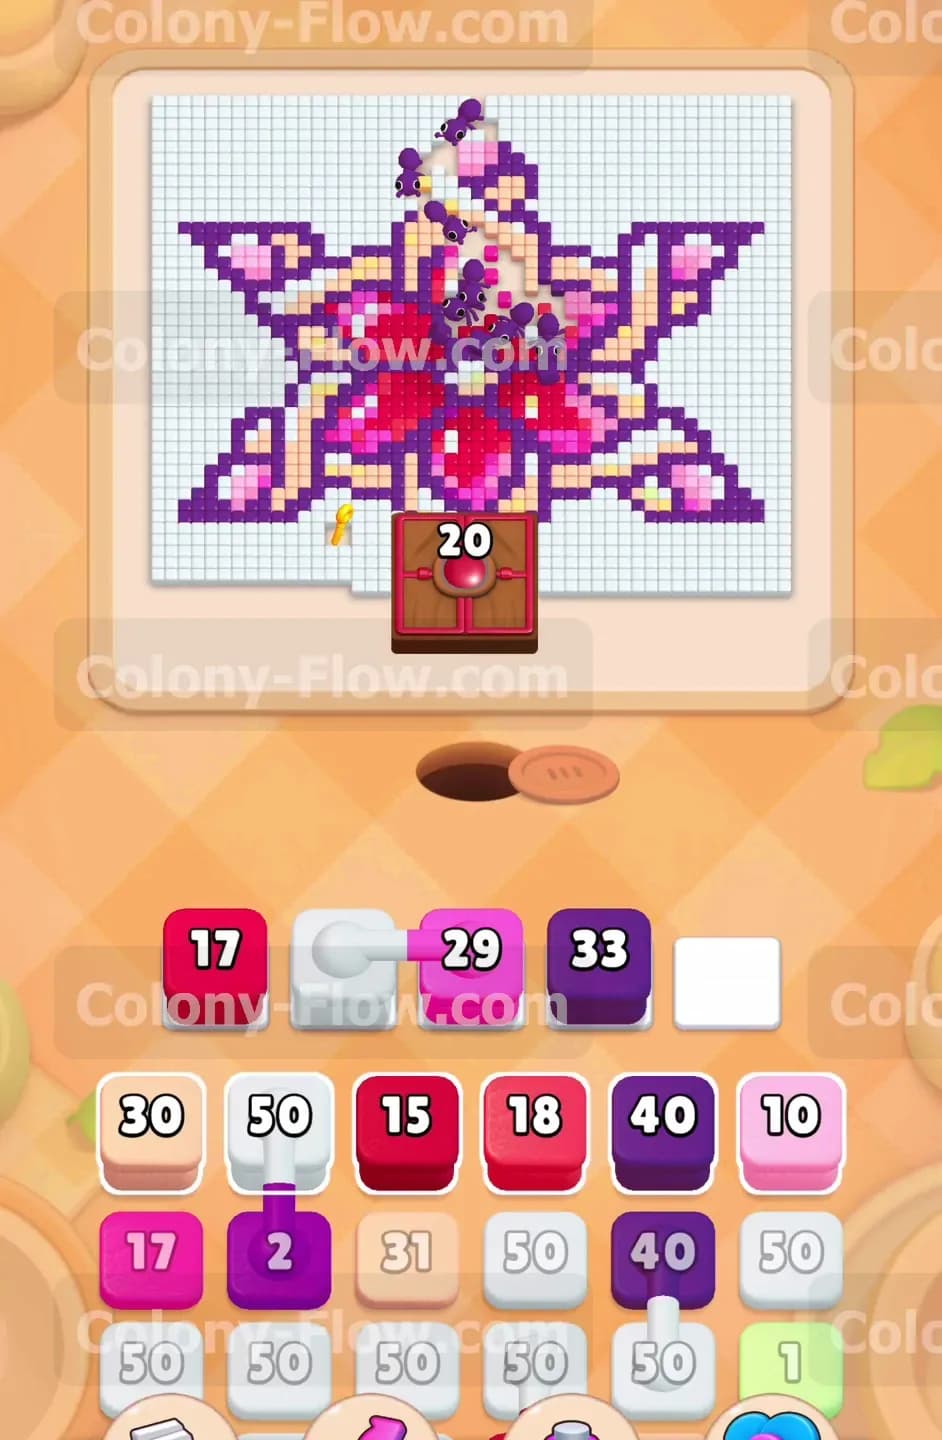
You need to balance the clearing across the whole picture to keep multiple paths open. Go back to your tray and pull a solid pink block followed by another dark purple block. These blocks will fill more of your waiting slots, but the board has plenty of open targets to handle them. The new swarm of pink ants will surge toward the right side of the star to dismantle the pink petals located there. The fresh dark purple ants will travel to the top right section to continue breaking down the outer border. By attacking multiple sides at once, you shrink the overall footprint of the star much faster. Watch the numbers on your blocks count down. As long as the numbers are decreasing, your slots are active and you are safe from losing.
Step 4: Maintain the flow by pulling high capacity white blocks.
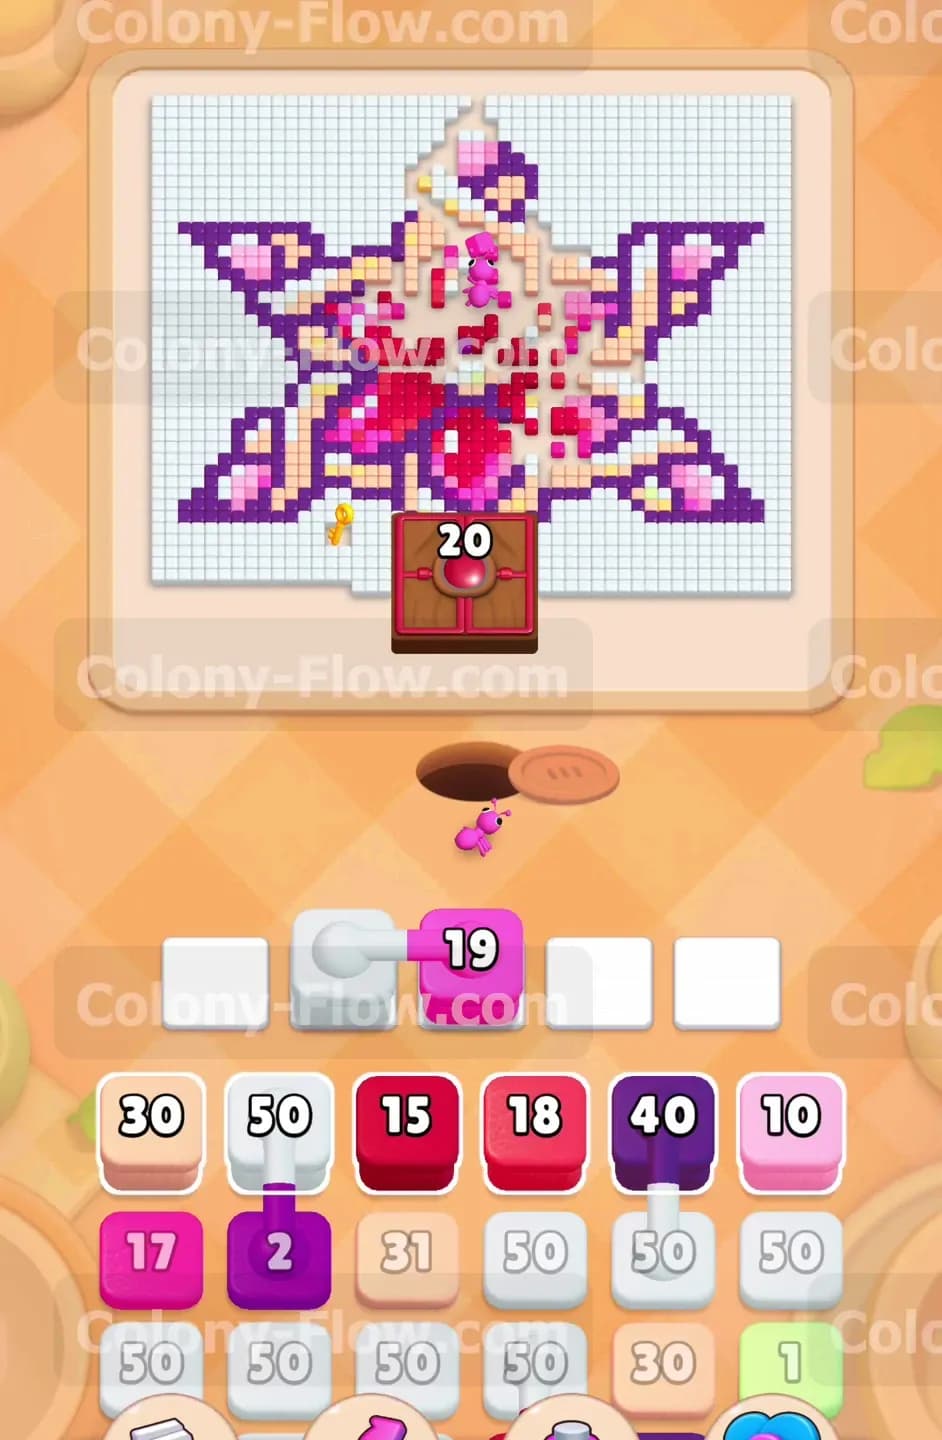
As the star detail blocks finish their work, your waiting slots will open up again. The white background requires thousands of ants to fully clear over the course of the level. You must keep a steady stream of white ants on the board at all times. Pull a large white block holding fifty ants from your tray. These ants will join the effort on the outer edges of the background grid. Pulling white blocks acts as your safety valve. Because the background is so large and surrounds the entire picture, white ants will almost never get stuck looking for a path. Keeping a white block active ensures that at least one of your five slots is constantly draining, which protects you from a sudden dead end jam if you accidentally pull a blocked color.
Step 5: Clear the remaining structural layers to fully reveal the red core.
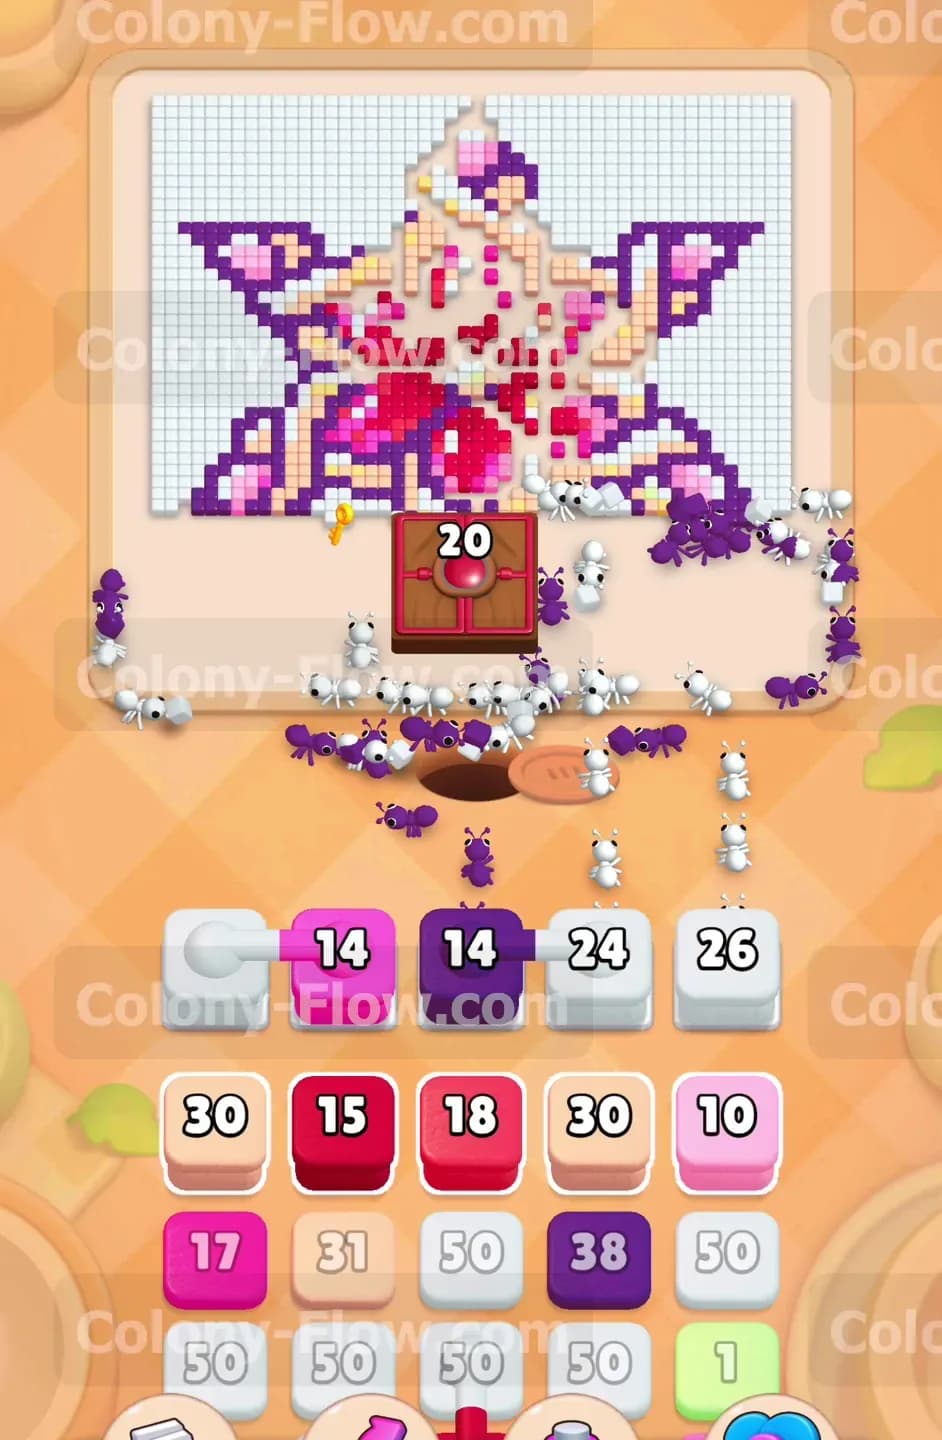
The continuous flow of pink and dark purple ants will eventually strip away the top and side petals completely. You will start to see the beige structural lines and the dark red and bright red center tiles become fully exposed to the open board. This is the critical transition point of the level. You must ensure the path to these red center tiles is completely clear of any blocking pink or beige tiles. Wait for your current active blocks to finish clearing the surrounding area. Do not rush to pull a red block until you physically see an open unobstructed path from the nest hole leading directly to the red tiles in the middle of the star. Pulling too early will clog your tray and cost you the game.
Step 6: Feed the Hungry Door to unlock the hidden bottom section of the board.
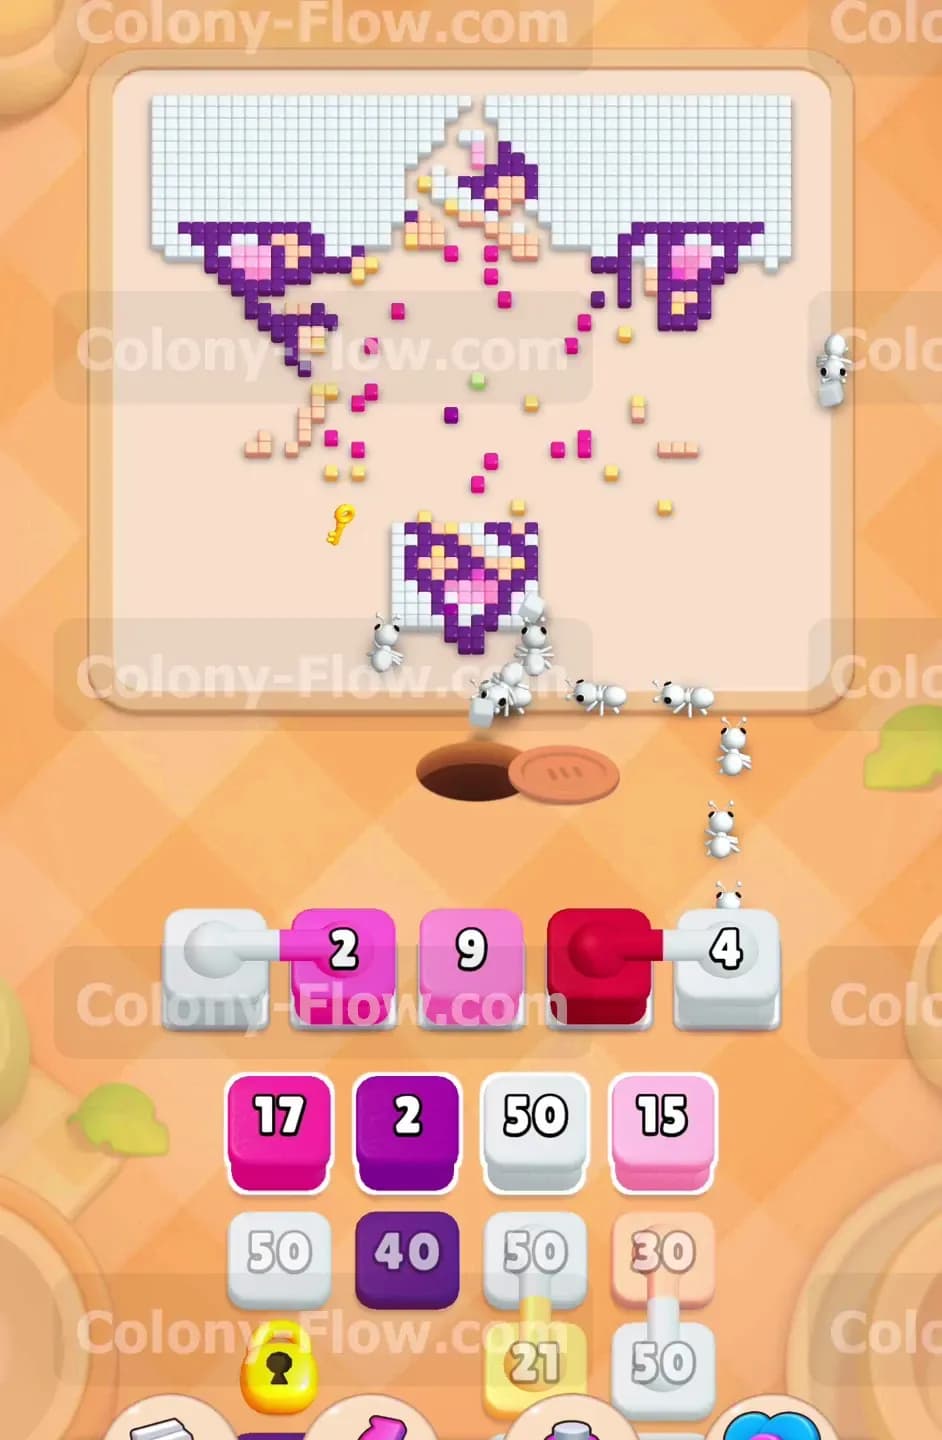
Now that the red core is accessible, you can focus on the main obstacle. Locate the connected block in your tray that contains red and white. Pull it into your active slots. The white ants will continue their massive job on the background grid. The red ants will flood into the star and head straight for the red center tiles. Because the Hungry Door shares the required color, the red ants will also feed directly into the door at the bottom of the screen. Watch the counter on the Hungry Door drop from twenty down to zero as the ants enter it. Once the counter hits zero, the door will completely vanish from the board. This specific action reveals the bottom point of the star that was previously hidden underneath the door.
Step 7: Clear the newly revealed bottom star section.
With the Hungry Door out of the way, you have full access to the rest of the picture. The bottom point of the star consists of more dark purple border tiles, pink petals, and some inner detail lines. Look at your tray and pull the matching pink and dark purple blocks to target this brand new area. The ants will flow down to the bottom center of the board and quickly consume these remaining star pieces. Because you saved these blocks until the door was gone, the ants have a direct path and will drain from your slots immediately. Keep your focus on pulling the correct colors to match the remaining bottom tiles and ensure you do not leave any stray star pieces behind.
Step 8: Clean up the final details and finish the massive background grid.
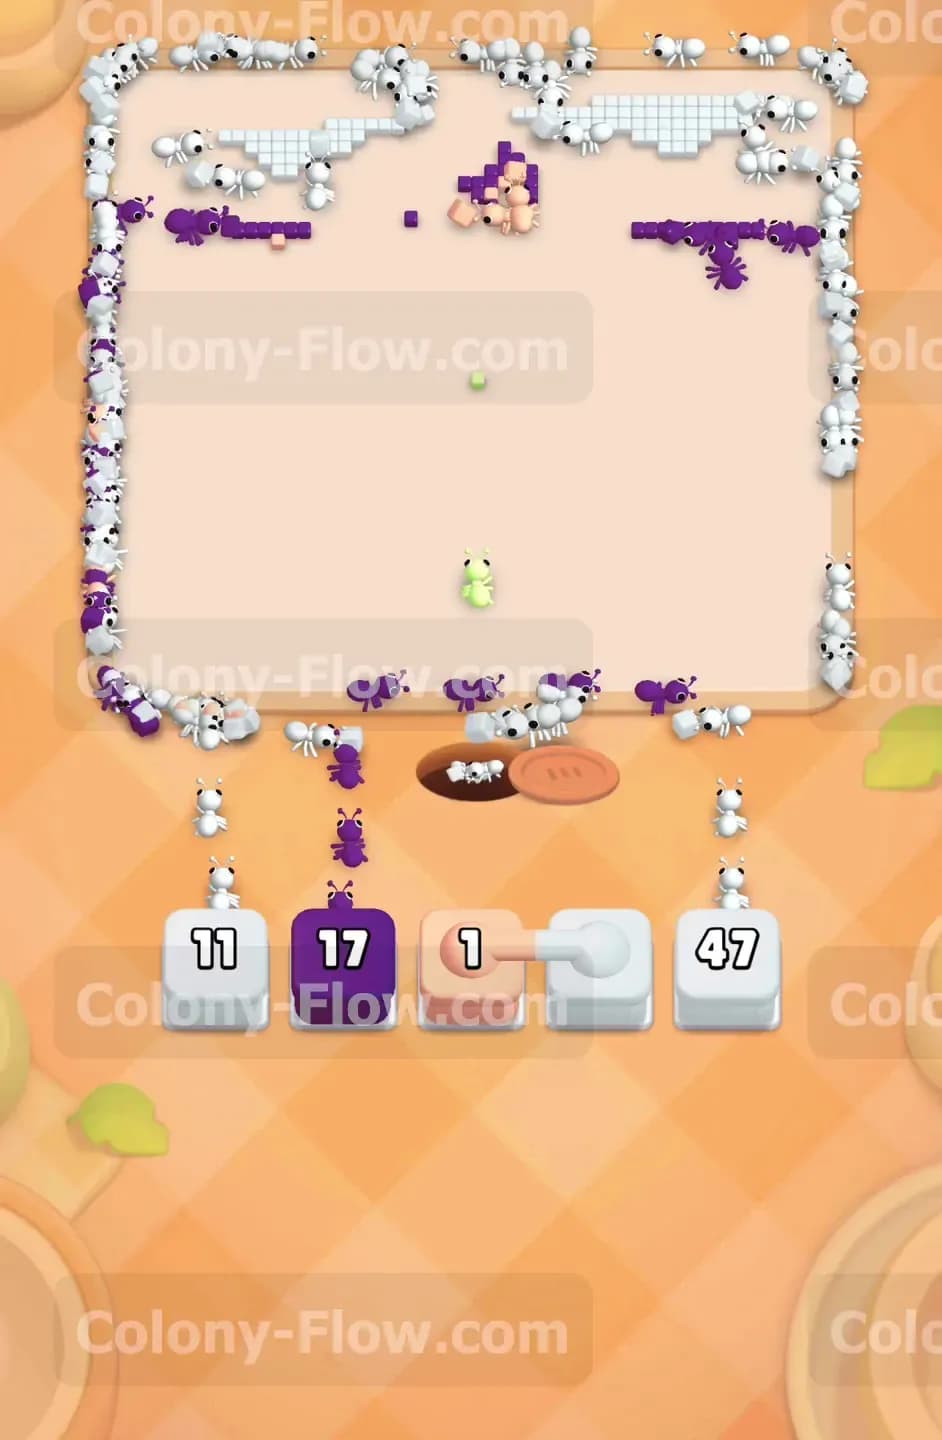
Only a few scattered pixels of the star remain near the center and the very bottom. Pull the specific small blocks from your tray, such as the light blue or light orange, to clear these final tiny details. Once the star shape is completely gone, your only remaining task is the white background. You will have several large connected white blocks left in your tray. Pull them all into your waiting slots. A huge swarm of white ants will pour out and trace the entire outer perimeter of the screen. They will march around the edges of the board eating the very last of the white grid. Since the whole board is open now, they will finish the job quickly and clear the level for you.
Final Thought
This level tests your patience and your ability to manage high capacity blocks alongside smaller detail pieces. The key to winning is simply using the massive white background as a buffer to keep your slots draining while you surgically dismantle the star to reach the Hungry Door. Never pull a red block until you are absolutely sure the core is exposed. If you find yourself getting stuck or want to see exactly how the ants path around the star shape, watch the video above this article for a complete visual guide.