Colony Flow Level 817 Walkthrough Solution & Guides | How to solve Colony Flow 817

Guide By Liam Stone
Updated on August 8, 2026
The video above breaks down Level 817 visually, so skip the text below if you'd rather watch.
Video doesn't match your screen?
Game updates frequently scramble layouts! Try our AI Screenshot Solver first to find your exact board instantly, or report broken guides to our team.
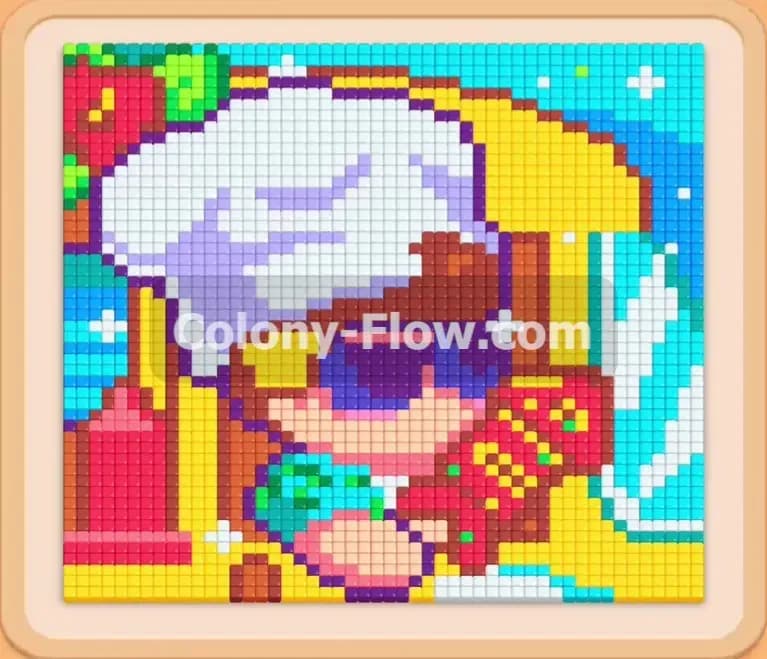
Colony Flow Level 817 presents a vibrant pixel art picture of a boy in sunglasses enjoying a hot dog meal. I found this board tricky because you have connected boxes and a hidden box sitting at the bottom of the tray. You need to manage your five waiting slots perfectly so you never block the ants from reaching their food tiles.
Colony Flow Level 817 Overview
What You Are Working With
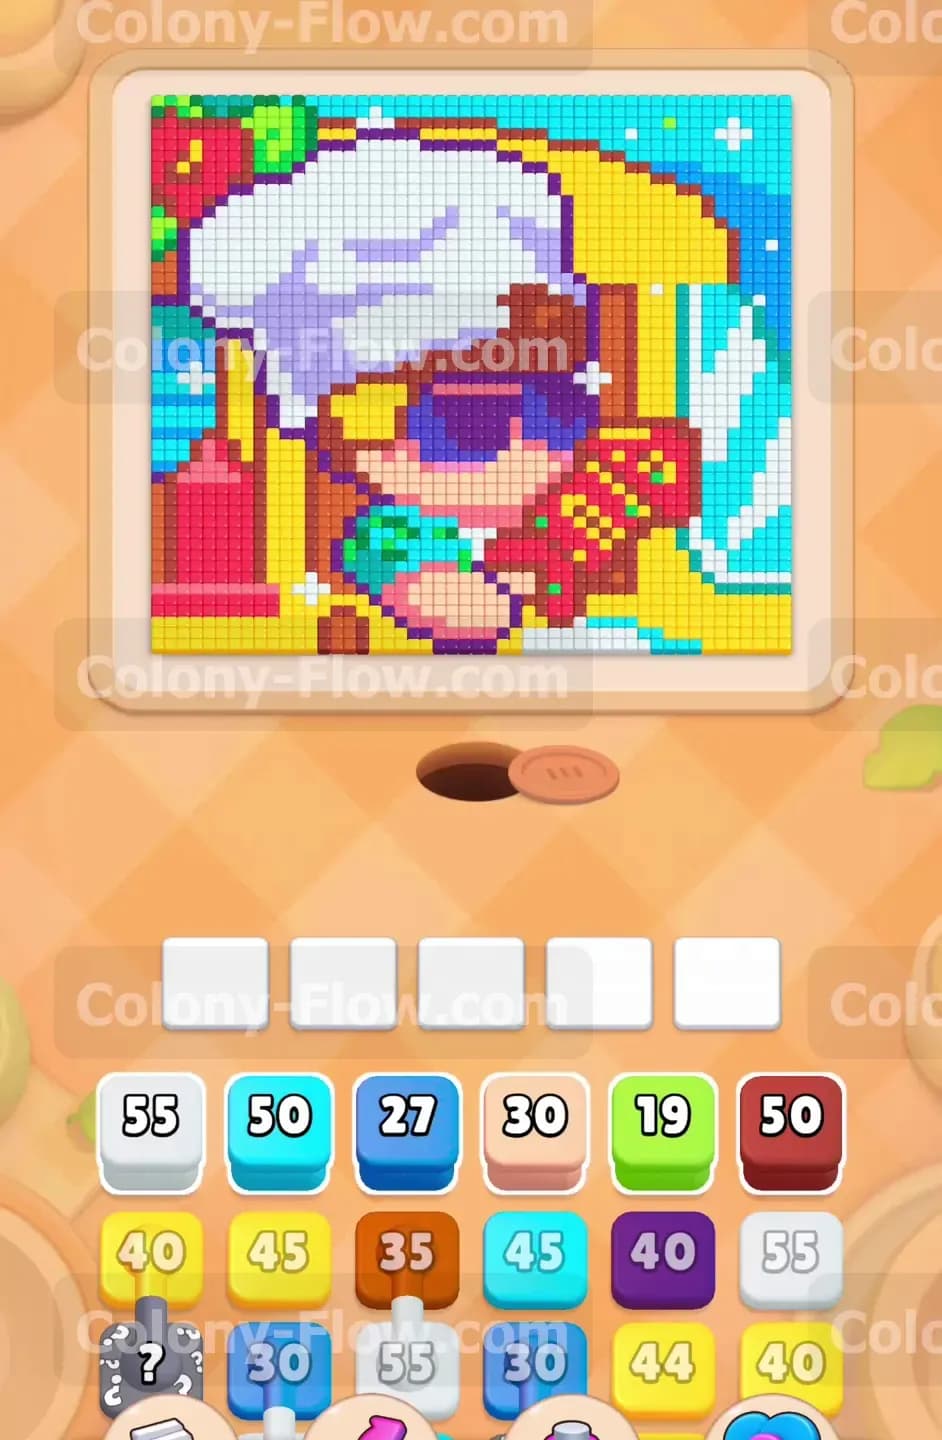
Colony Flow Level 817 features a highly detailed pixel art picture at the very top of the board. The image shows a boy wearing a large white hat and dark purple sunglasses. He is sitting at a table with a red ketchup bottle on the left and a hot dog in his hand. The background consists of large light blue and bright yellow sections. At the bottom of your screen sits the tray filled with numbered colored blocks. Each number represents how many ants will spawn from that specific block. This level includes standard individual blocks and connected boxes that pull into your slots as a pair. You will also notice a hidden box marked with a question mark at the very bottom left corner of the tray structure.
What It Takes to Clear Level 817 Board
Winning this level requires you to completely clear every single food tile from the picture. You achieve this by tapping the colored blocks in the tray to move them into the five waiting slots just below the board. Once a block is in a waiting slot the nest hole spawns ants of that matching color. These ants march along open paths to eat the matching food tiles. As the ants eat the tiles the number on your waiting block counts down to zero. When it hits zero the block vanishes and frees up that waiting slot for a new block. Your main obstacle is the strict limit of five waiting slots. If you pull five blocks into the slots and none of those colors have an open path to their food tiles the ants cannot move. The board dead ends and you immediately lose the level. Your strategy must focus on peeling away the outer layers of the picture first to guarantee an open path is always available for your active blocks.
Colony Flow Level 817 Step by Step Solution
Step 1: Clear the white hat and light blue areas first to open board space
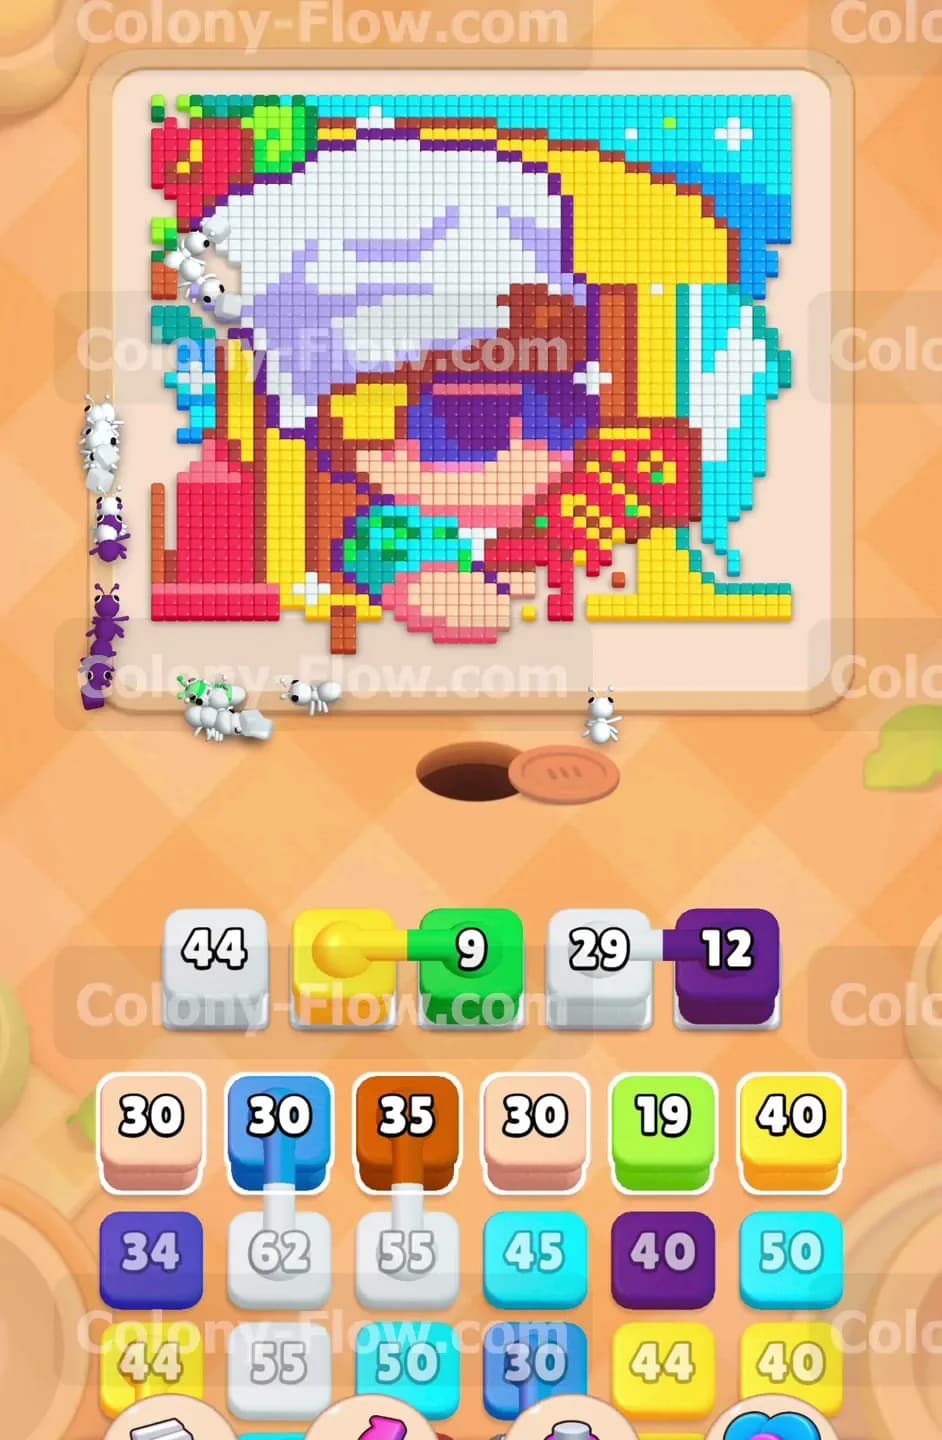
Your first goal on this board is to remove the large outer sections of the picture to create walking room for the entire colony. Look at the top row of your tray at the start of the level. You will see a large white block with the number 55 and a light blue block with 50. Tap the white block to send it to the waiting slots. The white ants will stream out of the nest hole and march straight up the left side of the screen. They will begin eating the massive chunk of white tiles that make up the hat. Next tap the light blue block. A new stream of light blue ants will head to the right side of the board to clear the background pixels. These two massive sections consume a huge number of ants. Processing them early keeps your waiting slots completely safe from dead ends because the paths to the outer edges are completely unobstructed. You want to keep the flow moving smoothly without forcing any blocks to sit idle. You will notice the white hat takes up almost a quarter of the entire top screen. Clearing it removes a massive roadblock for all future colors. The light blue section serves the same purpose on the right edge.
Step 2: Manage the connected yellow and green boxes carefully
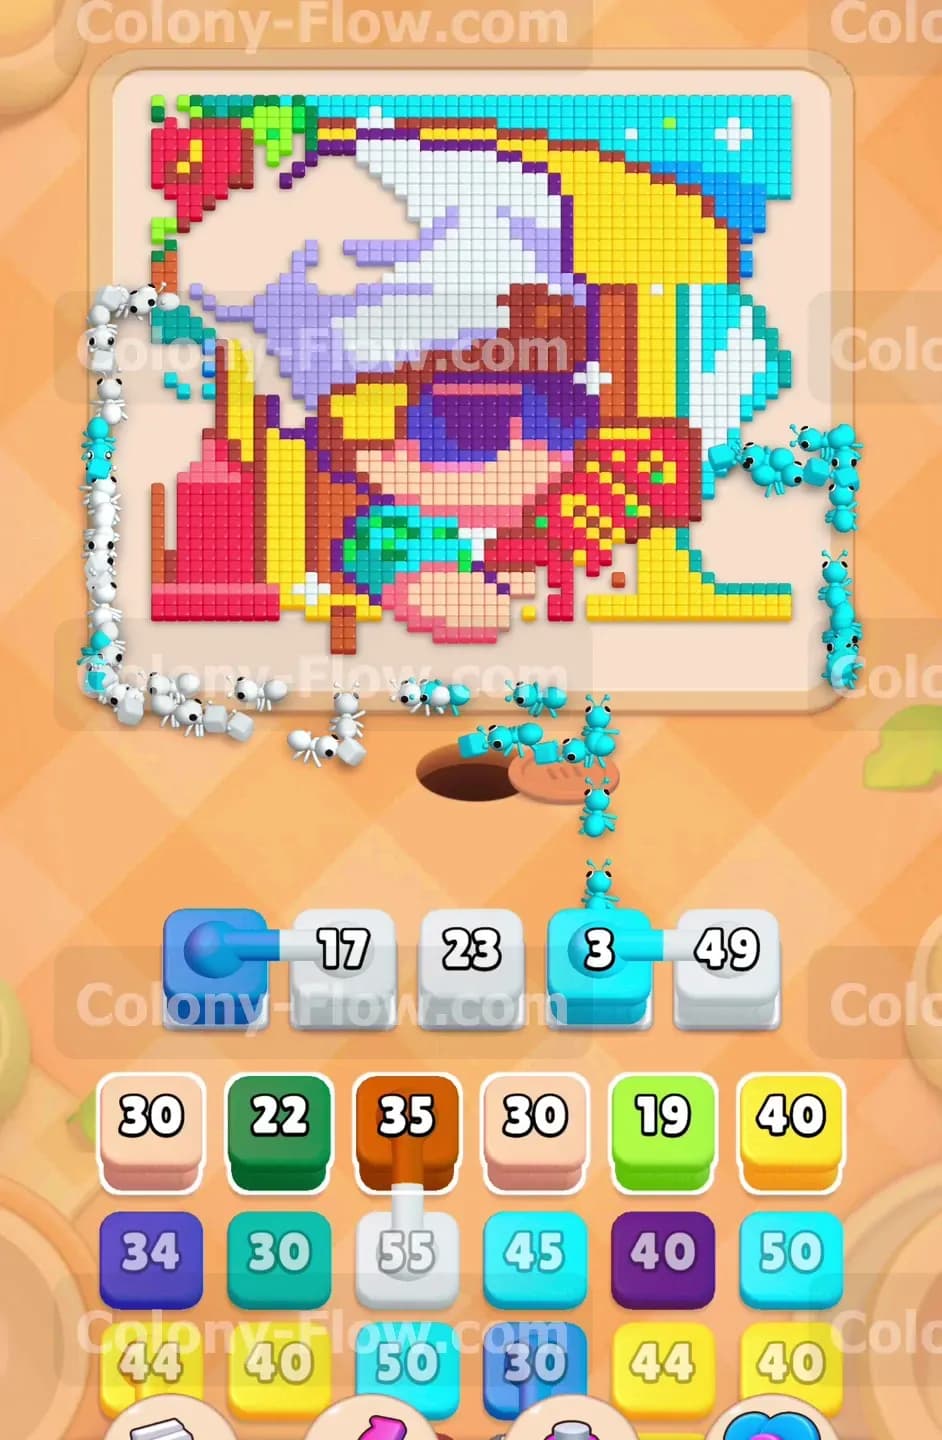
With the white hat and light blue background partially cleared you now have direct access to the yellow background tiles and the green shirt tiles. This is the perfect time to pull the connected yellow and green blocks from the tray. Because these two boxes are physically linked by a line they will move into your waiting slots together and occupy two spaces at once. You must have valid open paths for both colors before you pull them into play. If only one path is open the other block will sit in your tray and choke your available space. Tap the linked pair to bring them up. The yellow ants will flow toward the top right to eat the yellow background pixels while the green ants move down toward the shirt area. Keeping both streams active simultaneously ensures neither block gets stuck in your slots. You always want to verify that both colors in a connected pair can reach their targets before you commit to moving them. Connected boxes are tricky because you cannot separate them. You must treat them as a single unit when evaluating your board space. The yellow and green tiles are spaced far apart which actually helps the ants fan out instead of bunching up in one spot.
Step 3: Release the blue and dark red blocks to clear the shirt and ketchup bottle
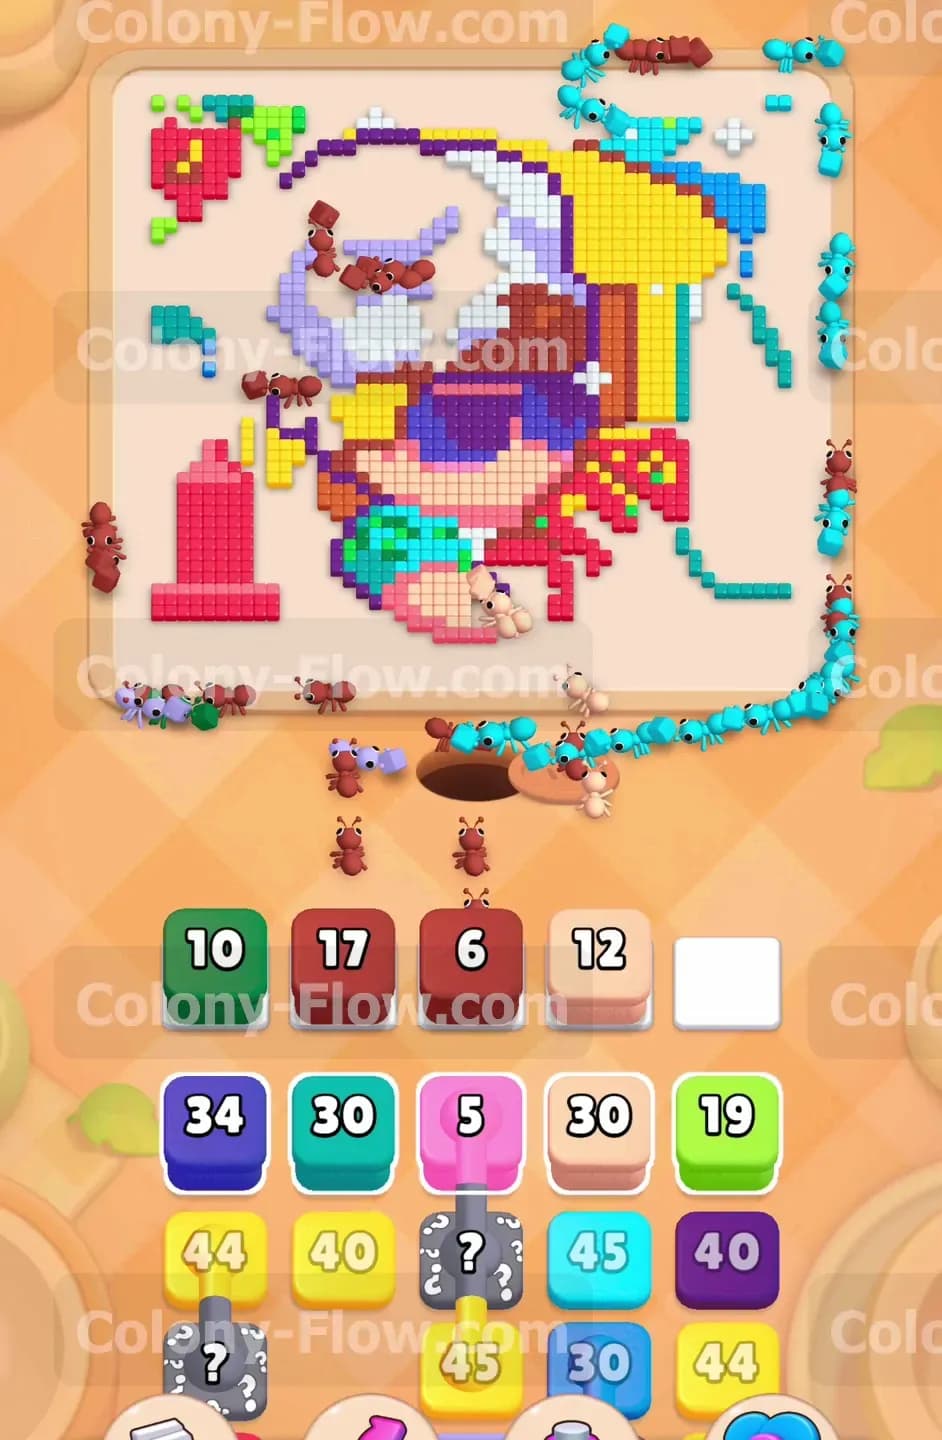
Your next logical target is the dark red ketchup bottle sitting on the left side of the table and the bright blue sections of the shirt. Bring up the dark red block from the tray followed by the blue block. The path to the ketchup bottle is wide open now that the heavy white hat tiles are out of the way. The dark red ants will march straight over to the left edge and clear that entire bottle shape without any interference. Meanwhile the blue ants will navigate into the center of the image to eat the blue shirt pixels. Pulling these specific blocks clears out the middle layers of the tray and gets you much closer to the hidden box at the bottom. Careful sequence planning here prevents the red and blue ants from crossing paths and slowing down the overall clear rate. The ketchup bottle shape is very vertical so the ants will naturally form a straight line up the left border. The blue shirt pieces sit much lower near the center so those ants will fan out directly above the nest hole.
Step 4: Target the peach skin tones and remaining light blue tiles
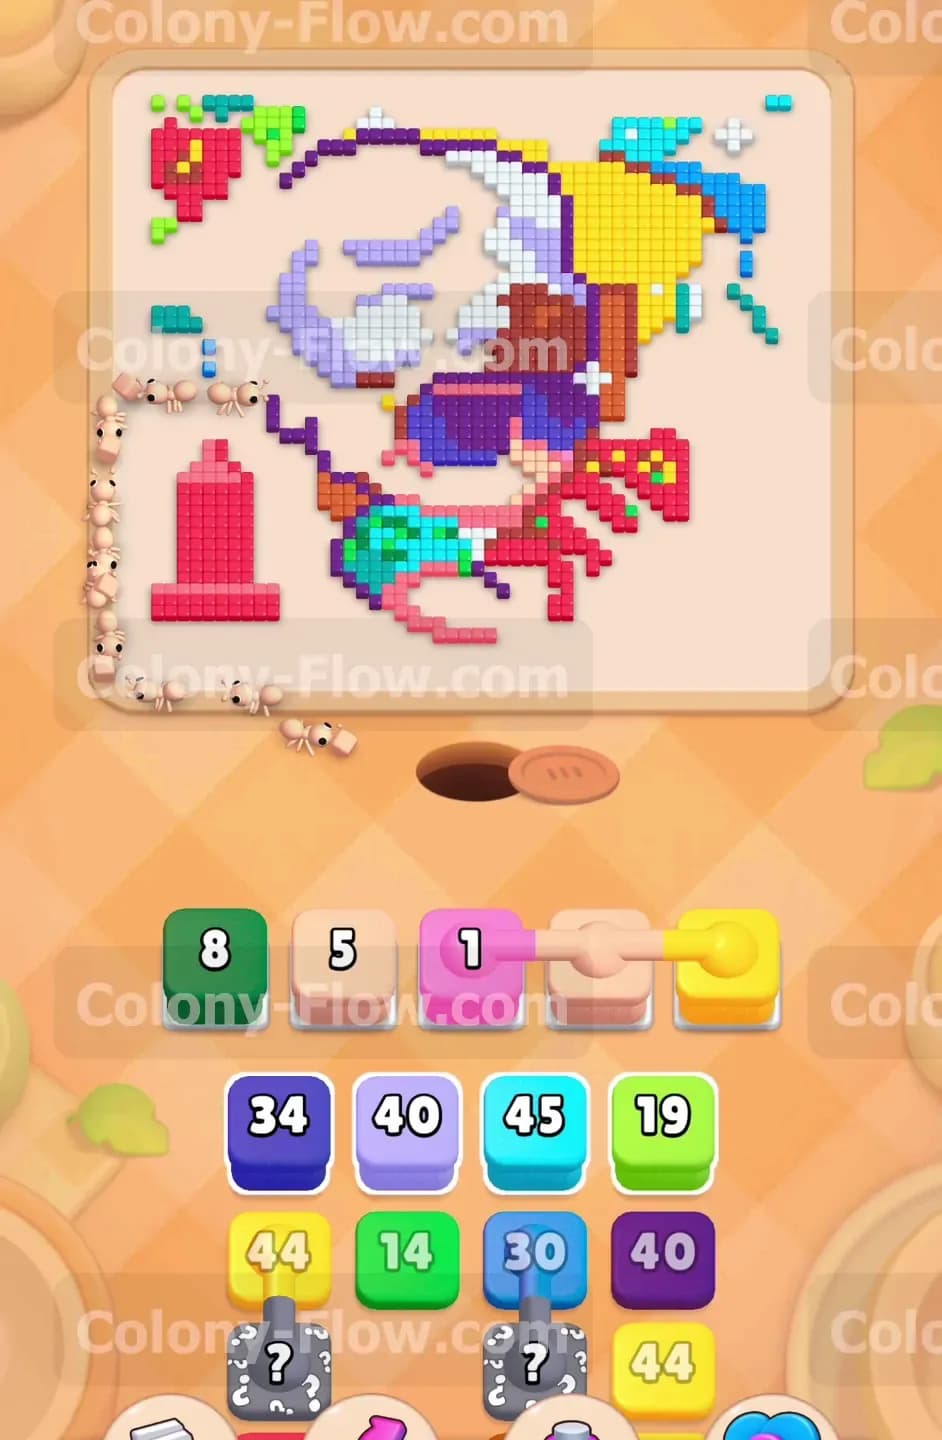
The boy needs his face and arm tiles cleared next. Tap the peach colored block and bring it up to the active slot area. The peach ants will climb up the board and start eating the skin tone tiles around his face and lower arm. At the exact same time you should pull the next available light blue block to finish off the right side background. You always want to balance clearing the inner details of the character with clearing the outer background pieces. This strategy prevents any single color from getting trapped behind a thick wall of uncleared food tiles. Your waiting slots remain totally safe as long as the ants have a clear line of sight to their matching colors. Watching the skin tones vanish reveals the true shape of the sunglasses and prepares you for the next major phase of the level. Skin tones often connect different sections of the picture together. Removing the peach tiles severs the visual link between the hat and the shirt. This creates massive open lanes for the ants to travel through.
Step 5: Deploy the purple blocks to remove the large sunglasses
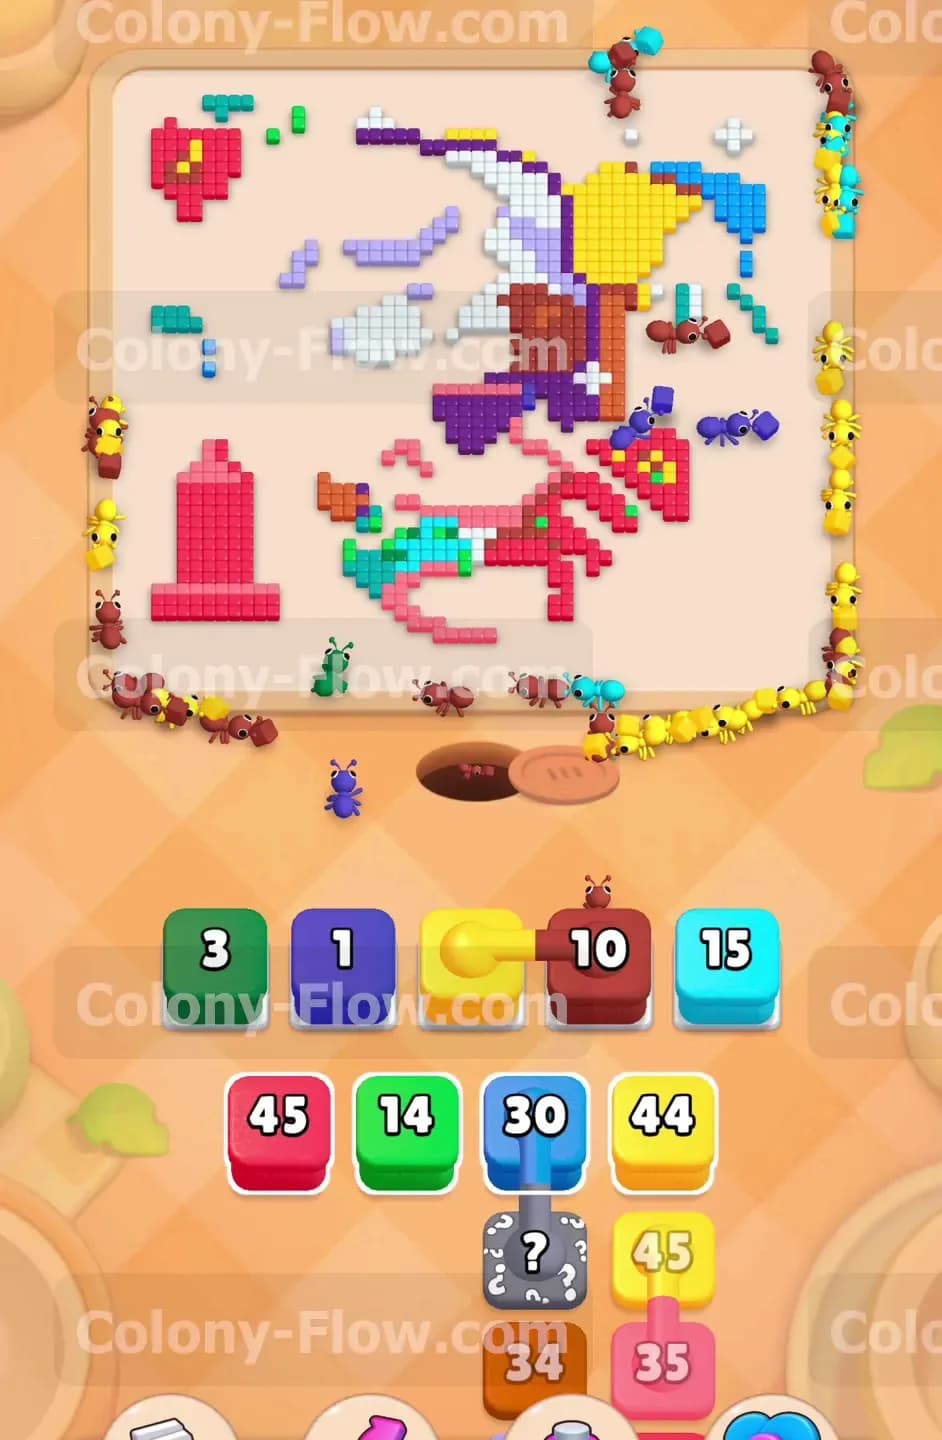
The purple tiles forming the dark sunglasses block access to several small hidden details in the center of the face. You need to clear them out to keep your momentum going. Pull the purple block from the tray into an empty slot. The purple ants will march right into the center of the board and begin eating the heavy glasses. This shape takes a large number of ants to completely remove due to its dense pixel count. Let the ants work their way through the center at their own pace. You will see the board really start to open up as these central pixels vanish. The pathing for your future moves becomes much simpler once this massive visual obstacle is out of the way. Keeping the center clear allows ants to take shorter diagonal routes to their targets later on. Sunglasses in pixel art levels always sit dead center and block the most critical paths. You want to make absolutely sure you have two or three empty slots before you start pulling heavy purple blocks. This gives the ants room to maneuver around each other.
Step 6: Unlock the hidden box and clear the pink details
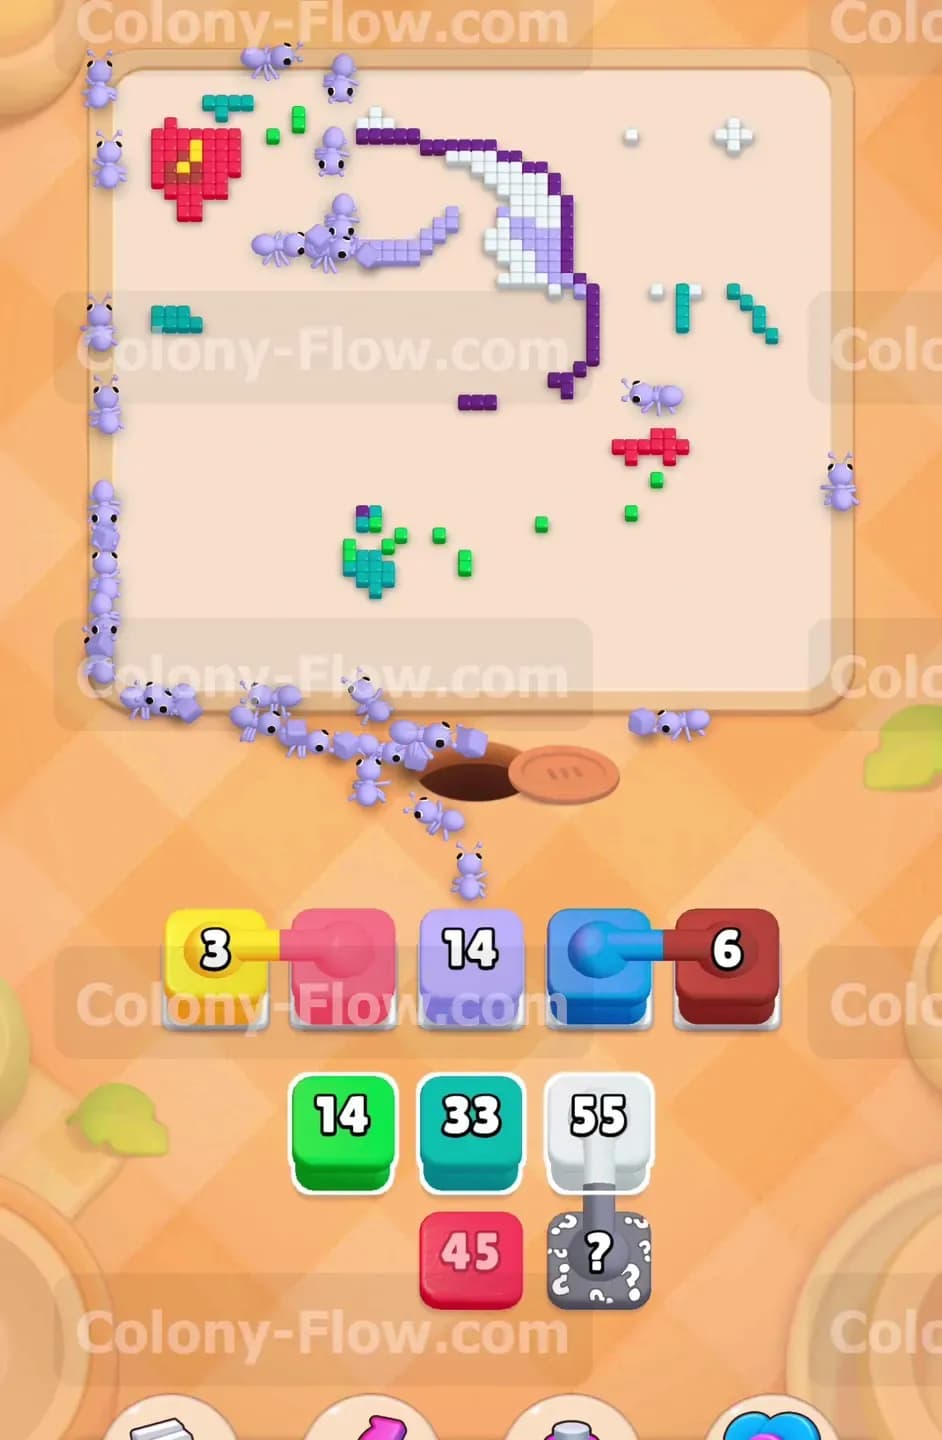
You have now removed enough blocks from the tray to uncover the hidden box sitting in the very bottom left corner. The question mark disappears and reveals the true color and number of the block. Before you pull it you also need to clear the small pink details around the hands and face. Tap the pink blocks and send those ants out to clean up the tiny scattered pink tiles. Then pull the newly revealed hidden block into your waiting slots. The game requires you to clear all the blocks stacked above a hidden box before you can use it. Managing your early moves correctly guarantees that this hidden block never causes a sudden traffic jam in your tray. You simply adapt to whatever color it reveals and send the ants on their way. Hidden boxes often act as a trap if you forget about them. I always keep my eye on that bottom corner so I know exactly when it unlocks. The pink tiles are scattered randomly so the ants will dart in multiple directions to hunt them down.
Step 7: Clean up the final green leaves and leftover purple tiles
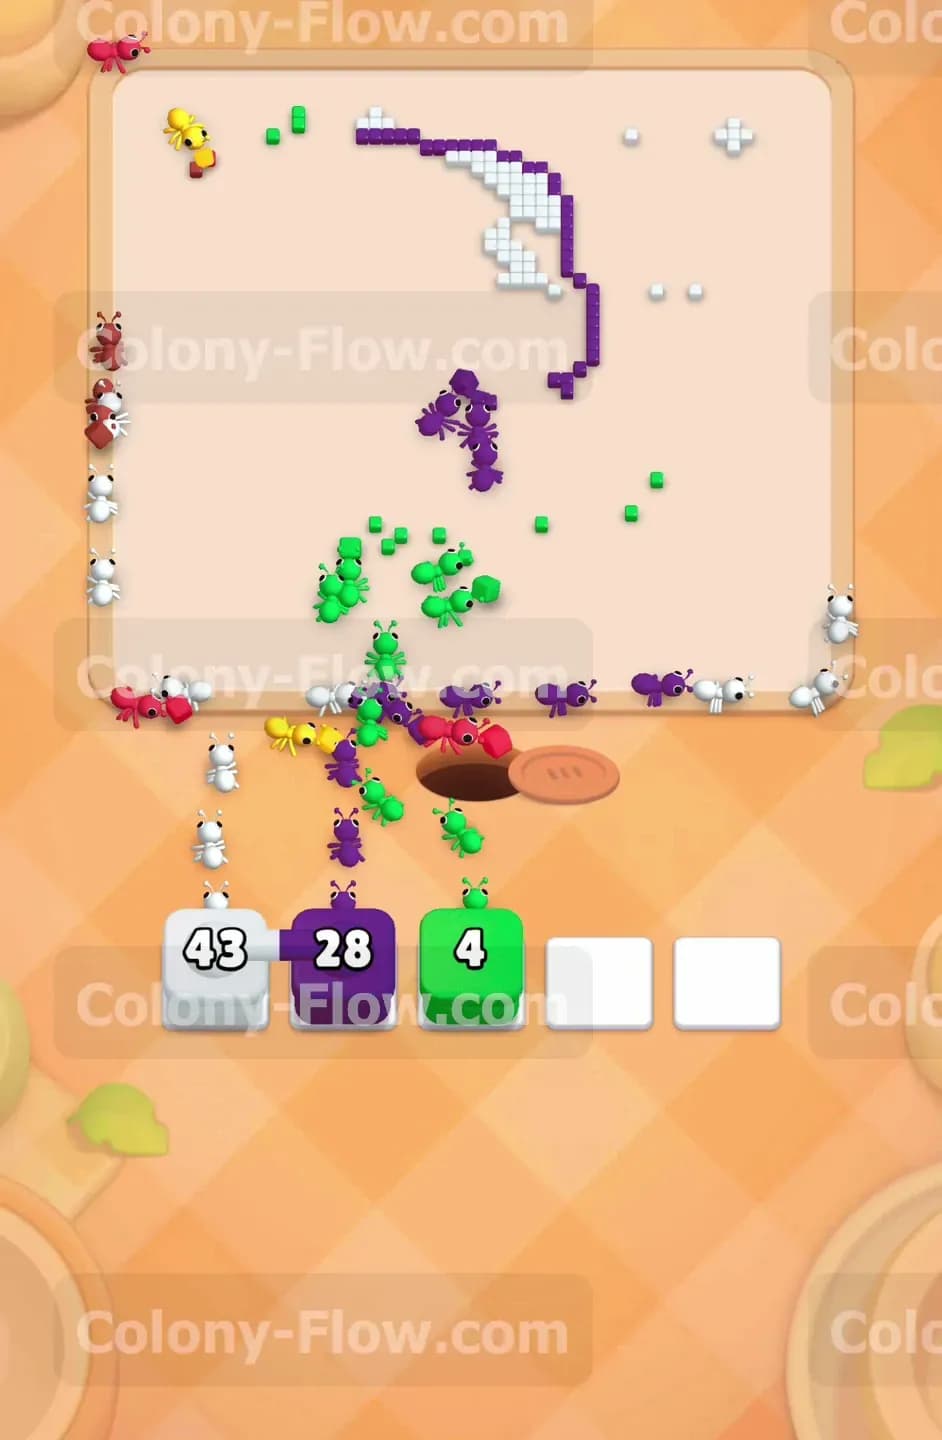
Only a few scattered pixels remain on the board at this late stage. You will see some small green leaves near the top left corner and a few remaining purple outline tiles near the center. Pull the final green block and the final purple block into your empty waiting slots. The ants will take the shortest open paths to reach these last few food tiles. Because the board is almost totally empty the ants move incredibly fast and clear the tiny shapes without any trouble. You do not have to worry about blocked paths anymore. Once the absolute last food tile is eaten and the final group of ants retreats back down into the nest hole you will successfully win the level. The final moments of any flow puzzle are the most satisfying. You get to watch the last few ants race across a completely blank background. Just make sure you do not accidentally tap a block that has no remaining tiles to eat.
Final Thought
This board tests your ability to juggle multiple colors without letting your tray fill up. I always recommend clearing the massive outer borders first so the smaller inside details open up naturally. If any step is hard to follow in text I encourage you to watch the video above this article. You will see exactly how I pace my block selections to keep the colony moving smoothly.