Colony Flow Level 730 Walkthrough Solution & Guides | How to solve Colony Flow 730

Guide By Liam Stone
Updated on August 8, 2026
Want the shortcut? Watch the video above for the full Level 730 solution.
Video doesn't match your screen?
Game updates frequently scramble layouts! Try our AI Screenshot Solver first to find your exact board instantly, or report broken guides to our team.
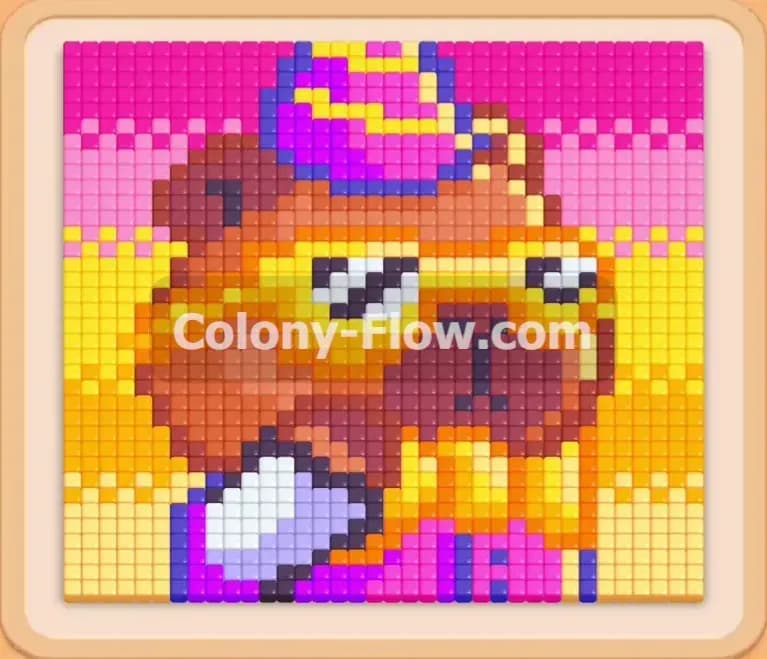
Welcome to Colony Flow Level 730. This puzzle gives us a fantastic and colorful piece of pixel art right at the top of the screen. You get to dismantle a giant capybara wearing a purple party hat and bright yellow sunglasses. The character is set against a vibrant sunset sky made of solid pink tiles and flanked by tall yellow structures. You will face a very full tray of colored blocks and a big reliance on connected boxes to feed your ants. I will walk you through exactly how to handle these links so your waiting slots stay entirely clear and your colony can finish their meal without ever hitting a dead end.
Colony Flow Level 730 Overview
What You Are Working With
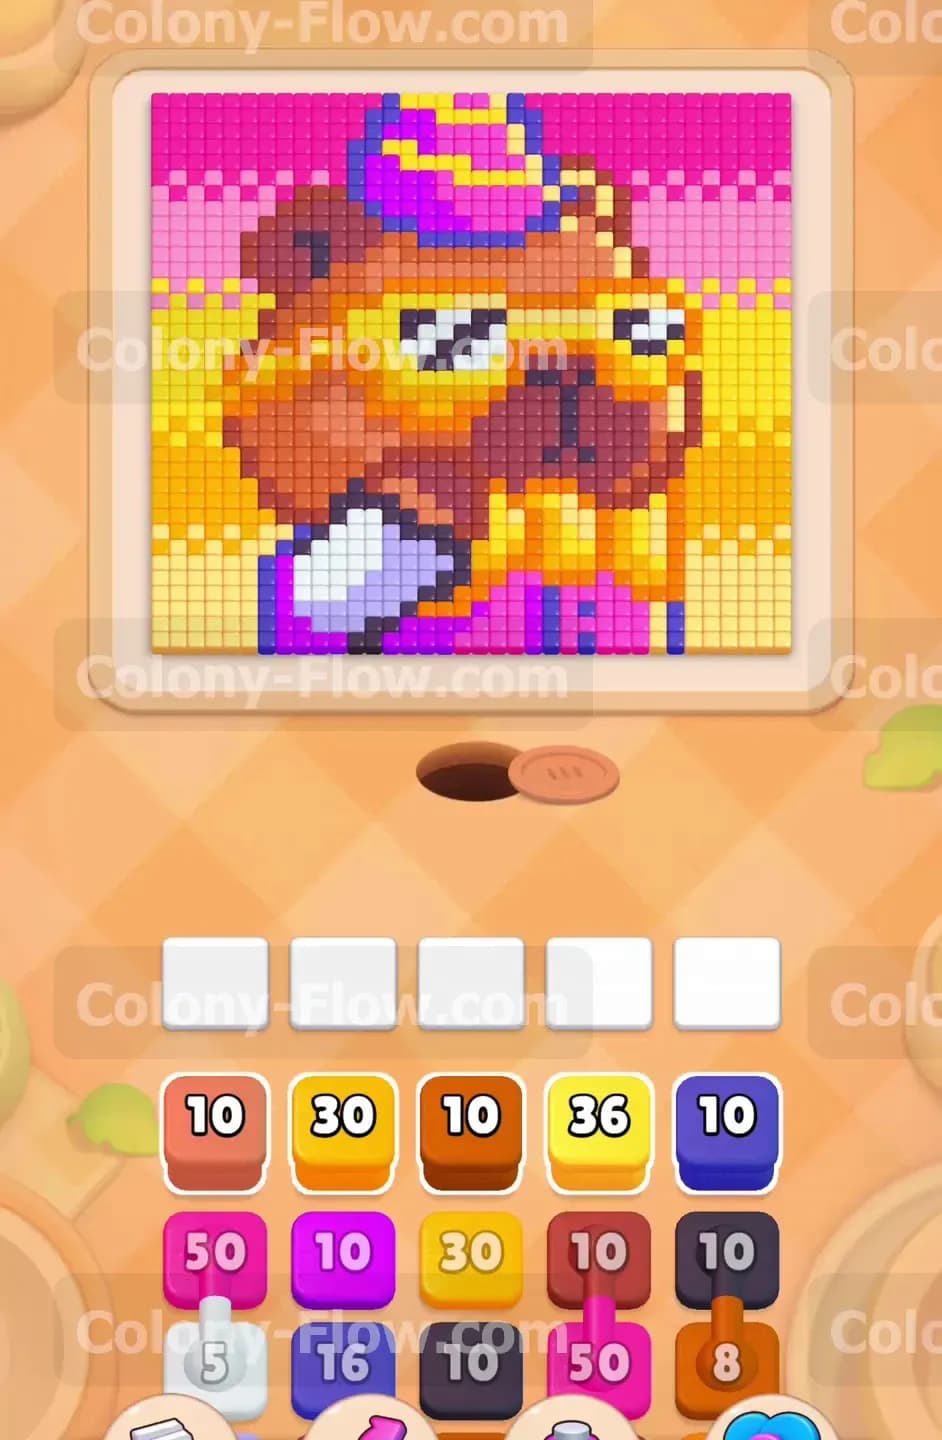
The picture here is massive and uses a wide variety of colors. You have a central brown capybara character surrounded by a thick pink sunset background and bright yellow building shapes. The capybara features dark brown fur shading, black and orange sunglasses, a purple bow tie, and a white item near its front paw. The tray at the bottom of the screen is packed with high numbers right from the start. You have a huge pink fifty block and a large yellow thirty block waiting for you early on. The standout feature in this level is the connected boxes mechanic. You will see several sets of blocks tied together with a visible linking line in the tray. When you pull one of these chained boxes into the waiting slots, the other linked blocks automatically come up with it. You do not get to pick and choose them individually.
What It Takes to Clear Level 730 Board
To win this stage you absolutely must manage those connected boxes carefully. Because the board only gives you five waiting slots total, pulling a chain of three or four connected blocks will fill your available space instantly. If the ants cannot reach the specific food colors for all those chained blocks at the exact same time, the board will dead end and you lose the game. The key to clearing the level is precise timing. You want to open up pathways to multiple colors across the capybara face and the background before you pull any chained blocks. This ensures your ants always have an open route to work on at least one active color. That keeps the slot numbers counting down and prevents the dreaded slot jam.
Colony Flow Level 730 Step by Step Solution
Step 1: Start by clearing the blue accent tiles to open initial paths
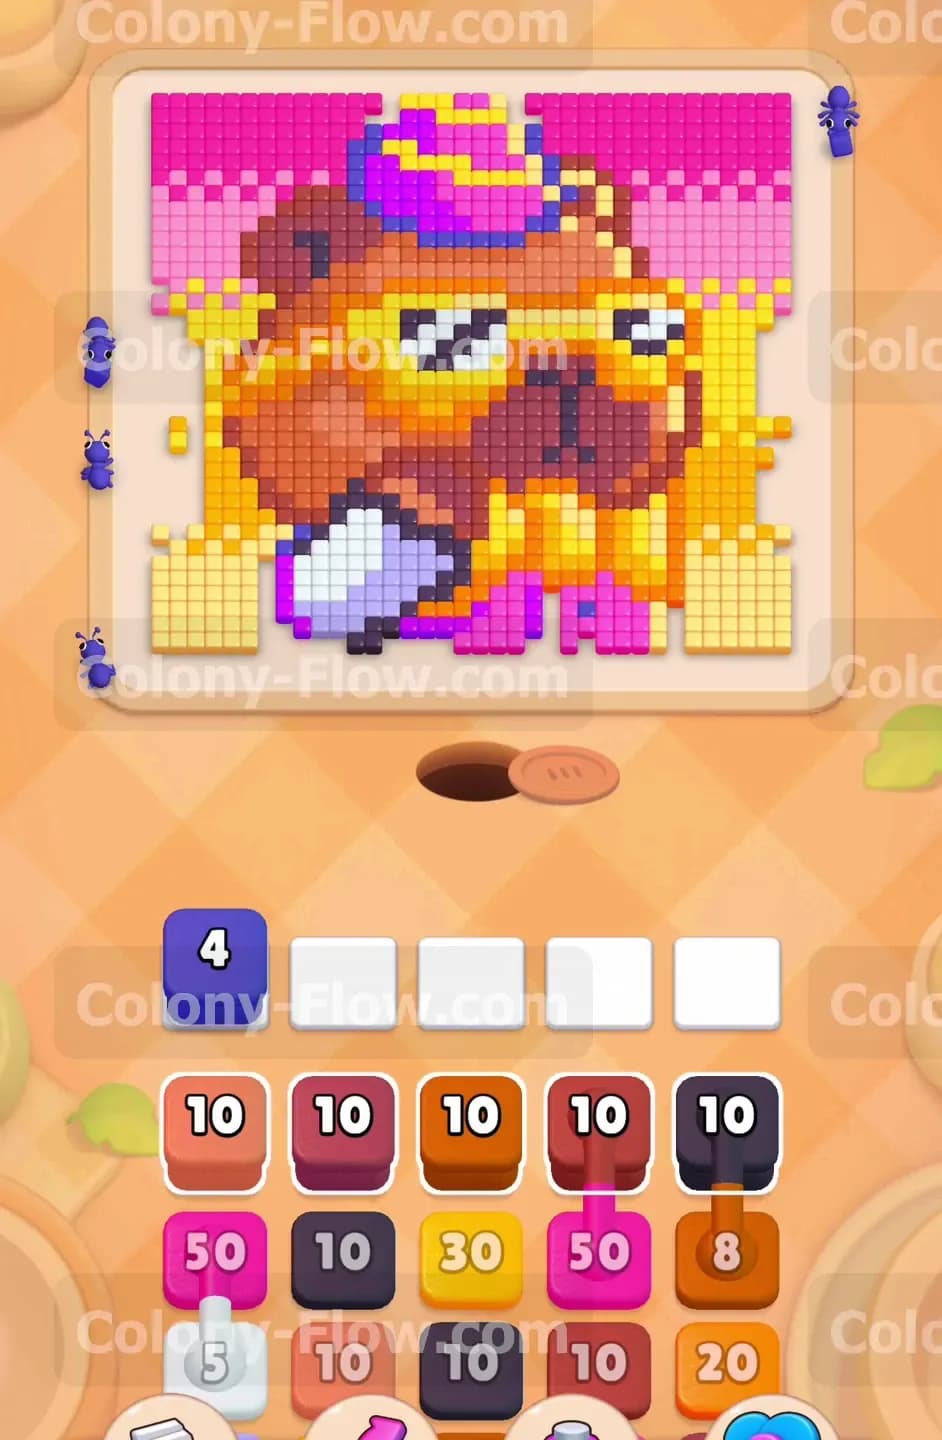
The puzzle begins with a fully solid block of picture tiles and a fresh tray of numbered blocks. Your ants need a place to start digging into the picture so they can create tunnels to the deeper colors. Look at the right side of the tray and pull the blue ten block up into your very first slot. The ants stream out of the nest hole and head straight for the small blue tiles scattered around the purple bow tie and the top of the party hat. As the ants carry the blue food away from the board, the number on your blue block counts down steadily. This creates the very first gaps in the solid picture so your ants can eventually reach the pink and brown tiles trapped behind them. Let this blue block run down completely until the slot frees up.
Step 2: Bring in the large pink block to work on the bright background
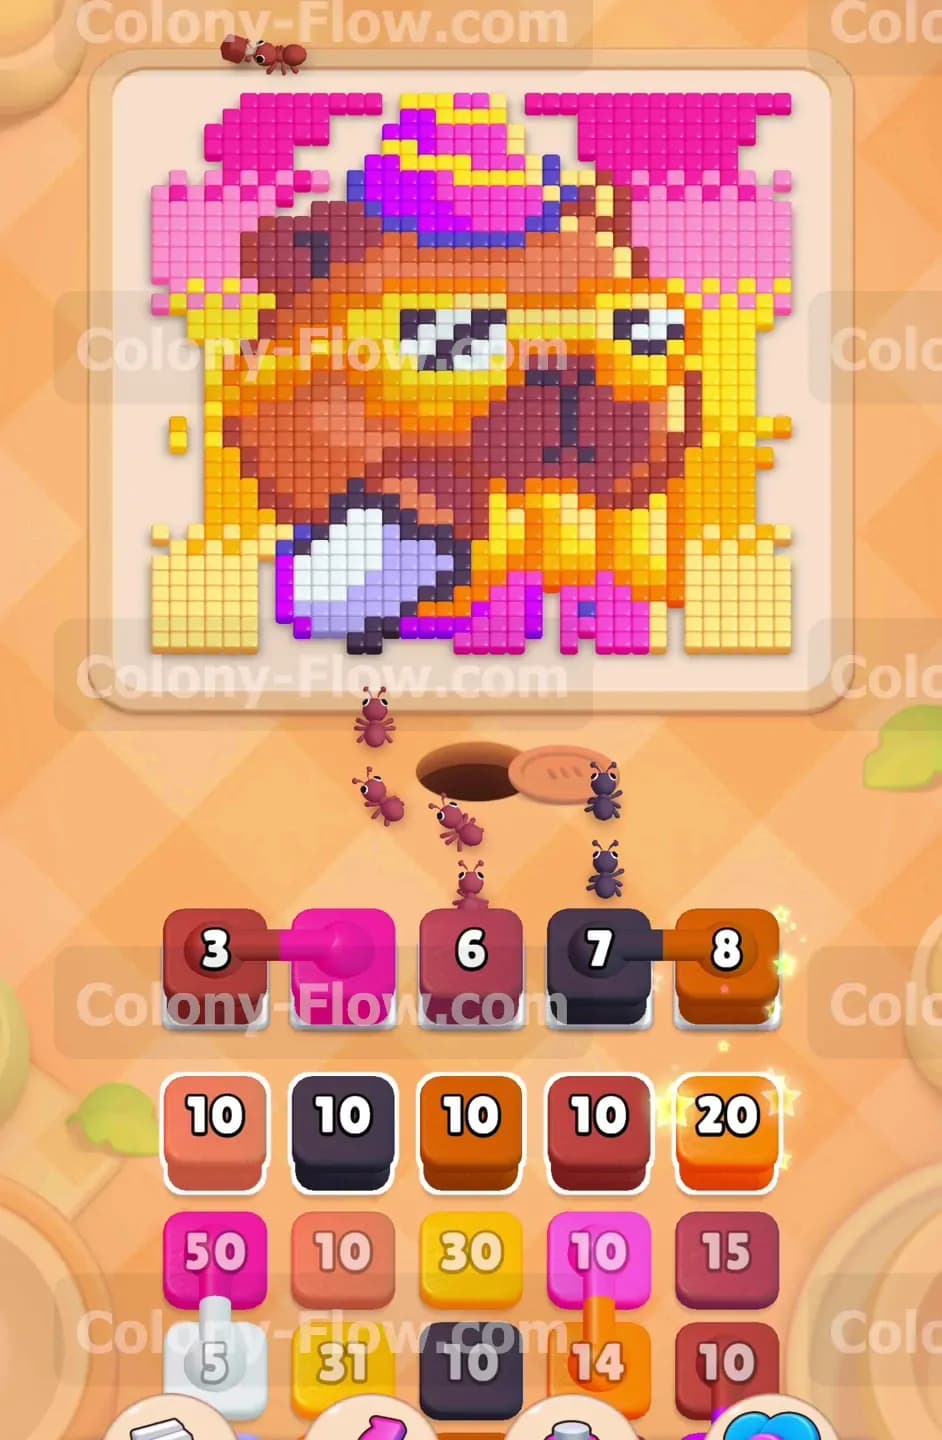
Once the blue block finishes, you have a solid opening to reach the outer edges of the image. Tap the large pink fifty block from the left side of the tray. This block handles the massive pink sunset sky stretching all the way across the top and sides of the picture. Because the required number is so high, this block will sit in your waiting slot for a long time. The ants will constantly march up the left and right sides of the board to chip away at the thick pink border. Having this block active is a great strategic move because it keeps a steady stream of ants moving and clears a massive amount of physical space around the capybara head.
Step 3: Deploy the first massive chain of connected boxes
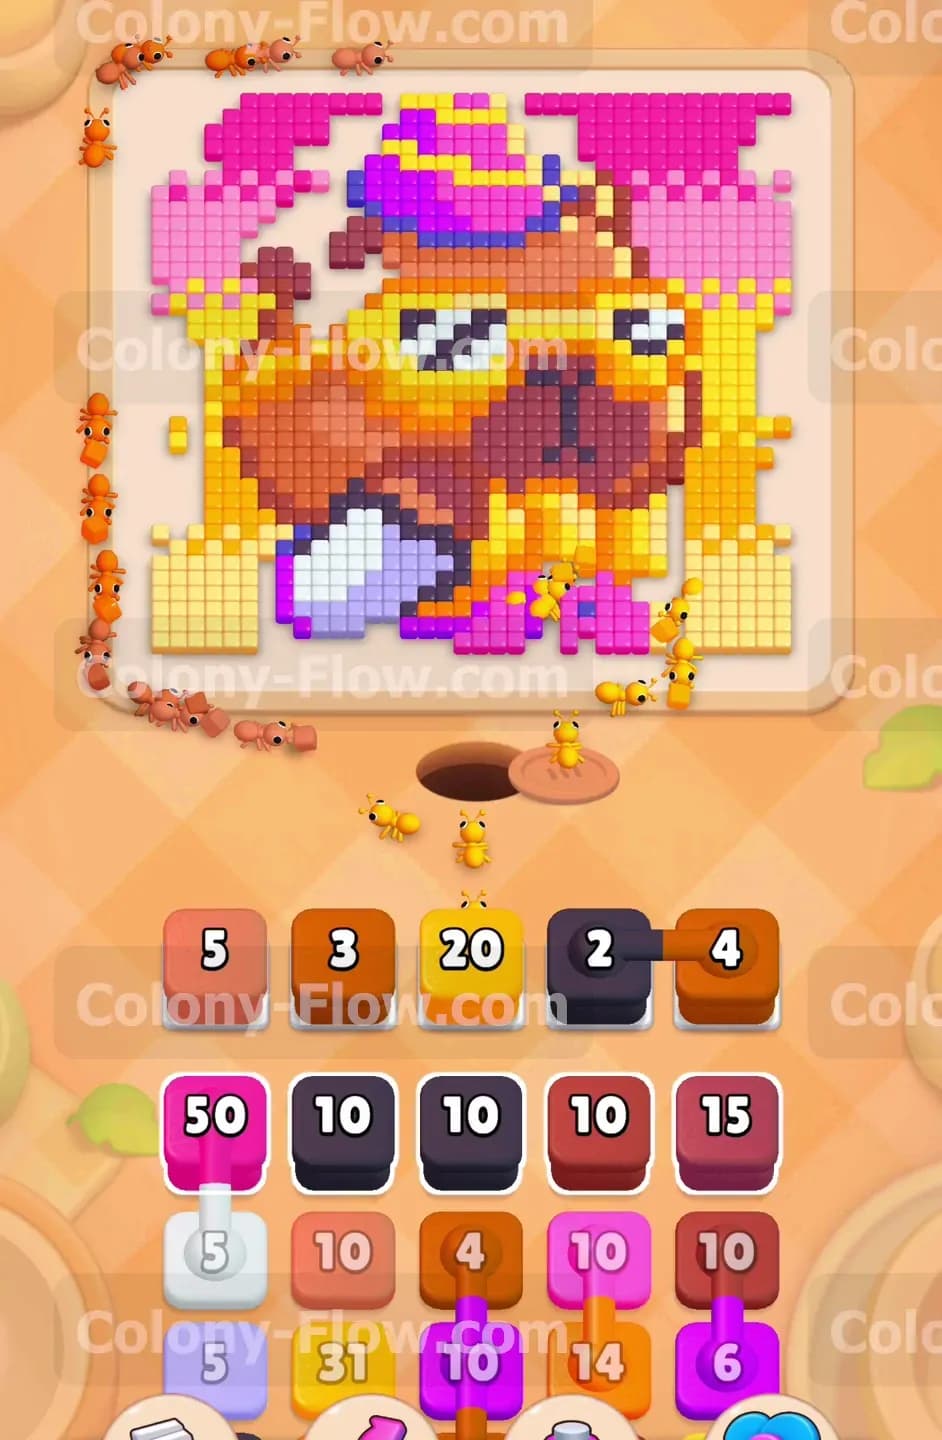
You now face a tray containing a large set of blocks tied together. You will see a brown block linked to a pink block, a black block, and a light brown block. Before you pull this heavy chain, make sure your ants can physically reach the brown fur, the pink background, and the black sunglasses frames. Once you confirm the paths are open through the gaps you made earlier, pull the chain into your available slots. All four blocks snap into the waiting area at once. Your ants will immediately split up into separate groups and attack the different colors simultaneously. Since you verified the paths beforehand, none of the blocks will stall out. They will all count down together and eventually leave your slots wide open for the next moves.
Step 4: Use the light orange block to clear the capybara face
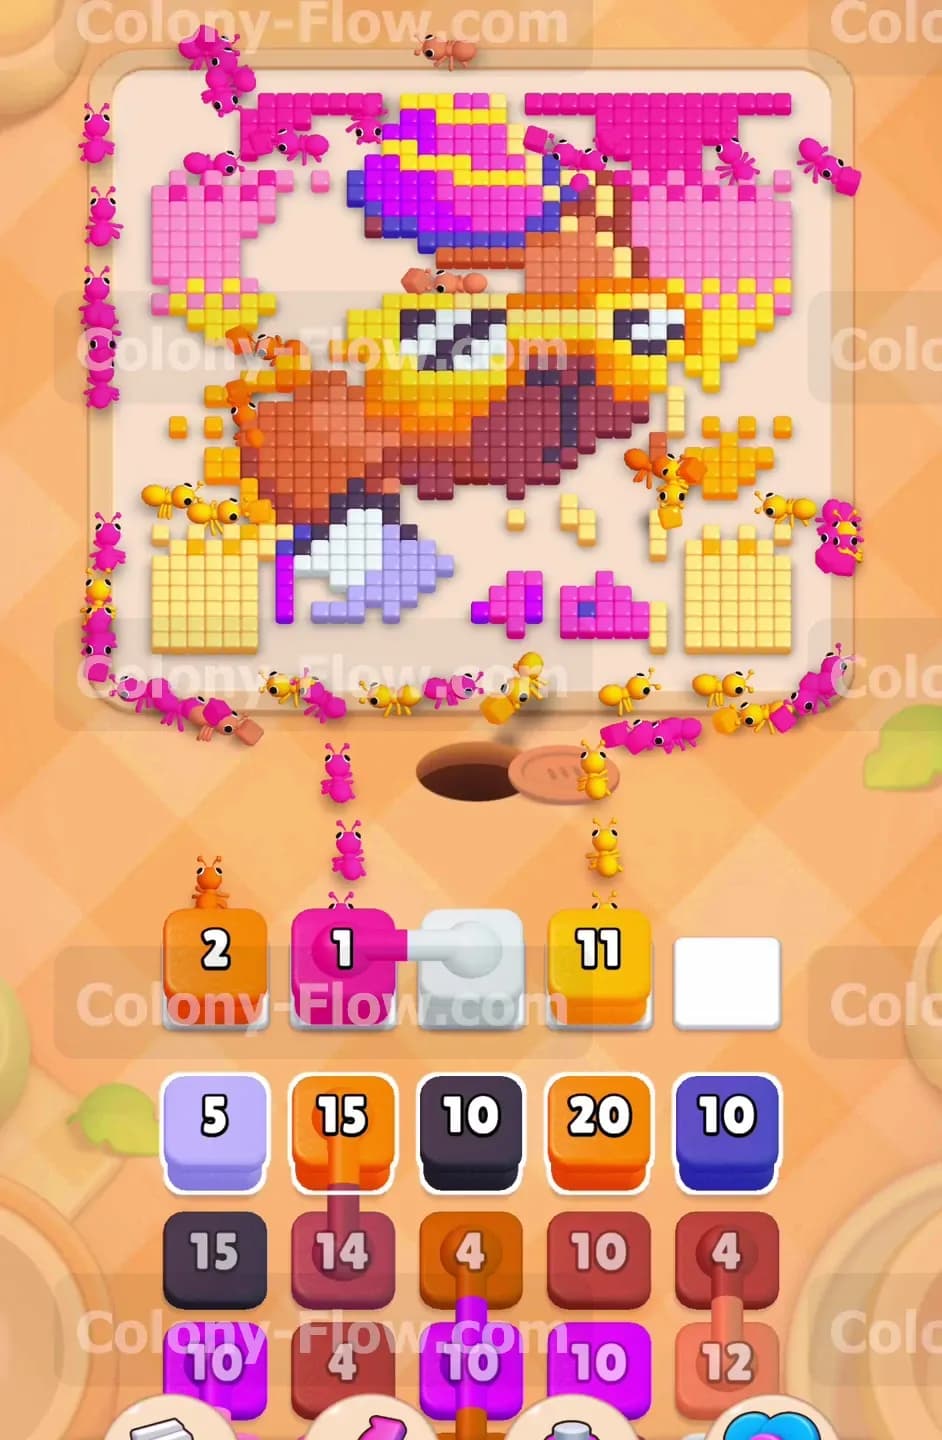
With the black sunglasses frames finally gone, the bright orange reflection tiles inside the glasses are fully exposed. Look in your tray for the light orange twenty block and tap it to bring it up. The ants will rush the center of the board and consume the glasses along with parts of the yellow background structures. You will see the character face start to break apart nicely as the bright colors vanish. Let the ants clear these twenty tiles until the block vanishes from the slot. This hollows out the entire middle section of the picture and creates multiple new attack angles for the ants to reach the back of the capybara head.
Step 5: Pull the white block to tackle the small object near the paw
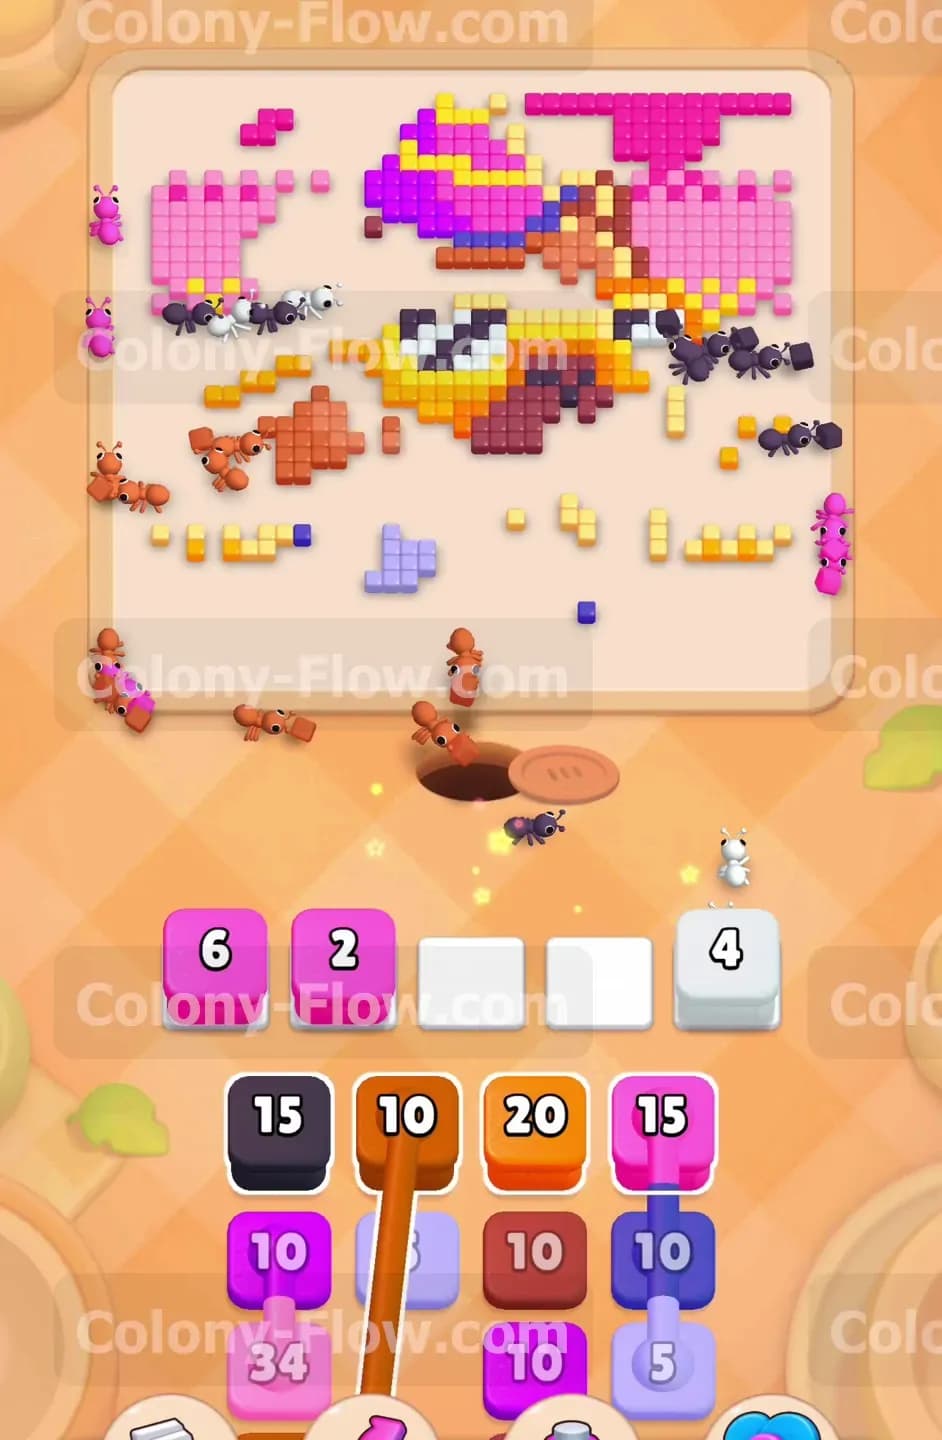
The capybara is holding something white near the bottom left corner of the image. Tap the white five block from the tray to activate it. Because the number is so incredibly small, the ants will devour this entire section in a matter of seconds. Pulling small blocks like this is a great way to quickly cycle a slot and uncover new edges without clogging your queue for too long. The white tiles disappear rapidly and expose more of the solid brown body and the thick pink lower border.
Step 6: Handle the second set of connected boxes
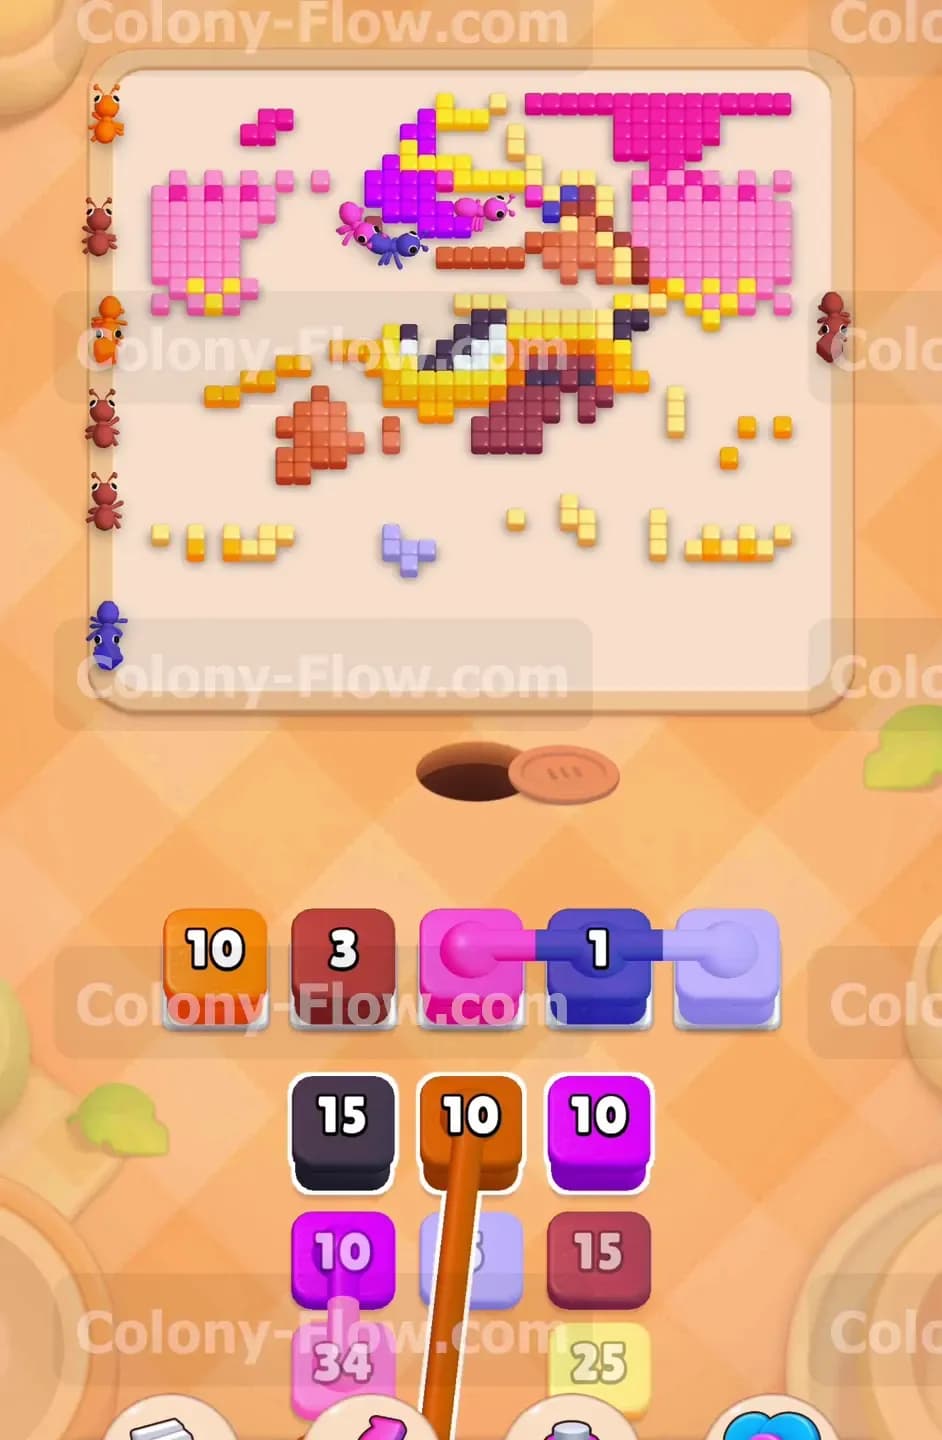
The tray will reveal another set of linked blocks ready for use. This time you have a pink block securely connected to a white block. Check the board to make sure there are still white tiles and pink tiles freely available to eat. Tap the connected pair to bring them both into your slots. The ants will finish off the last remaining pieces of the white object and continue carving out the pink sky and ground tiles. By grouping these linked pulls during moments when the board is completely wide open, you entirely avoid the dangerous slot jam. Both blocks will zero out smoothly and leave you with plenty of room.
Step 7: Clear the remaining brown blocks to dismantle the body
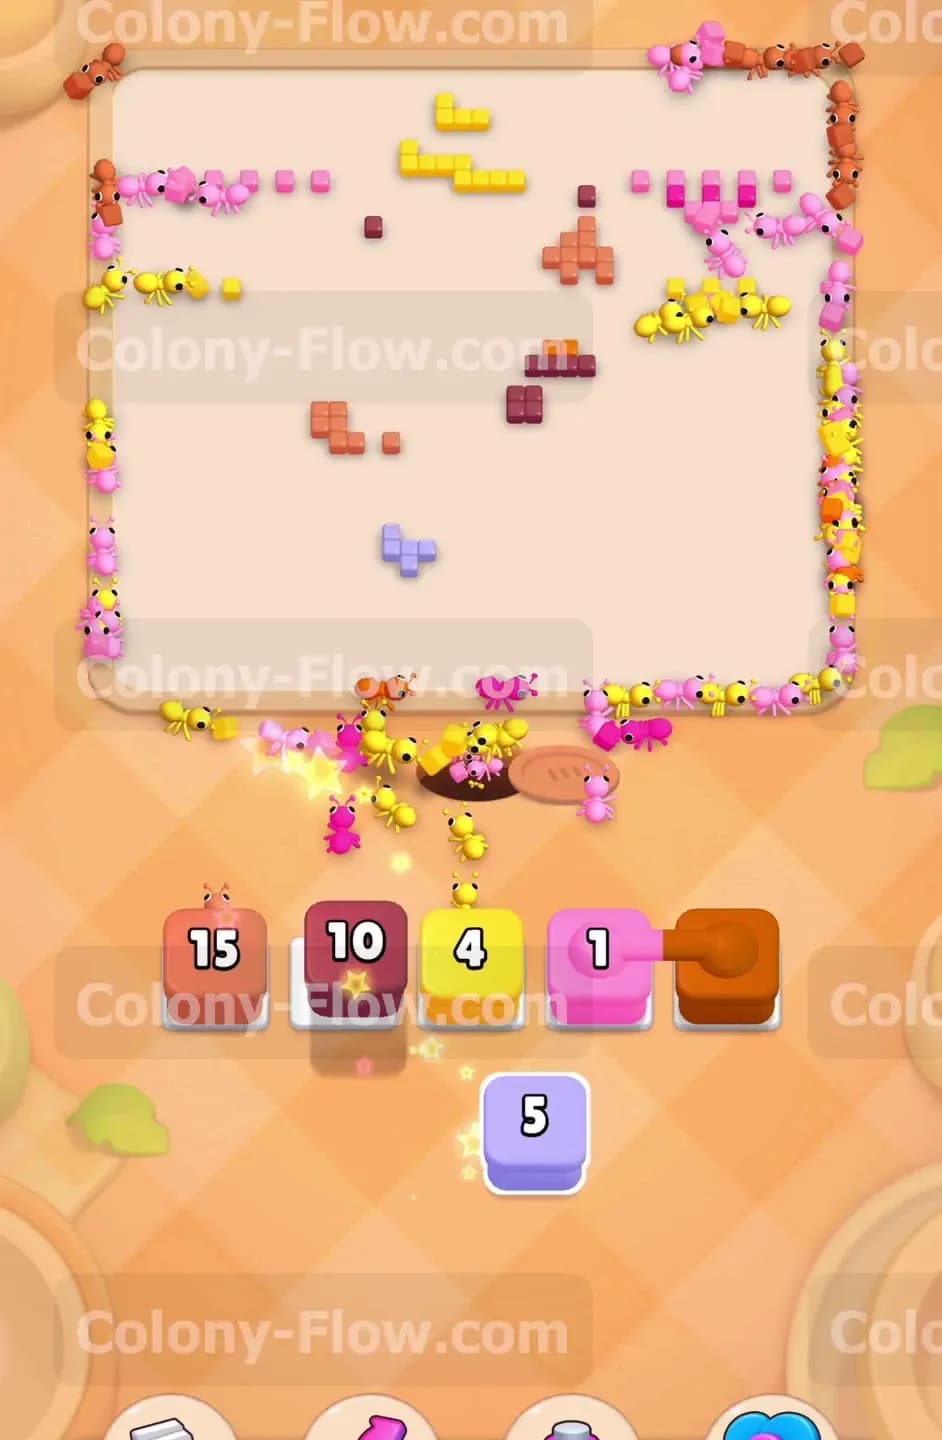
The capybara body is made of several different shades of brown tiles packed tightly together. You will see a dark brown ten block and a regular brown ten block waiting in the tray. Pull both of these into your open available slots. The ants will swarm the main body of the character and the lower jaw. The entire center of the pixel art will collapse into pure open space. At this point the picture looks mostly unrecognizable. You just have scattered isolated islands of tiles and a thin broken border holding the original shape together. Keep the ants flowing by letting these brown blocks run out completely.
Step 8: Manage the final connected pink and blue blocks
Near the end of the tray you will uncover one last linked set of blocks. A pink one block is connected tightly to a blue one block. This provides a very fast clear for the board. Pull them up and watch the ants grab the two tiny isolated tiles left on the board. They finish the job instantly and free up the two slots right away. It is always incredibly satisfying to clear these tiny connected blocks because they give you immediate visible progress and keep your momentum high for the final stretch.
Step 9: Finish the scattered border tiles to complete the level
The board is mostly empty now with only a loose frame of tiles remaining. You only have a few pink, yellow, and light orange tiles scattered heavily around the absolute outer edges. Your tray has a light orange fifteen block, a dark pink ten block, a yellow four block, and a brown one block ready to go. Pull them all up to fill your remaining slots. Because the picture is completely broken open everywhere, the ants have zero pathing issues to worry about. They will run straight to the corners and clean up the final loose pieces of the puzzle. The slots will empty one by one as the last colorful tiles vanish and the victory screen appears.
Final Thought
Level 730 absolutely tests your ability to plan ahead for those linked block groups. As long as you never pull a connected chain without checking your available physical paths first, you will breeze right through this challenge. Always remember that keeping a slot moving is the only way to survive. If you find yourself struggling to visualize exactly when to pull the heavier chains, I highly recommend watching the video above this article. It shows the exact careful timing I used to keep the ants moving and the slots perfectly managed from start to finish.