Colony Flow Level 490 Walkthrough Solution & Guides | How to solve Colony Flow 490

Guide By Liam Stone
Updated on August 1, 2026
The Level 490 walkthrough plays out in full in the video above, so skip the article if that works better for you.
Video doesn't match your screen?
Game updates frequently scramble layouts! Try our AI Screenshot Solver first to find your exact board instantly, or report broken guides to our team.
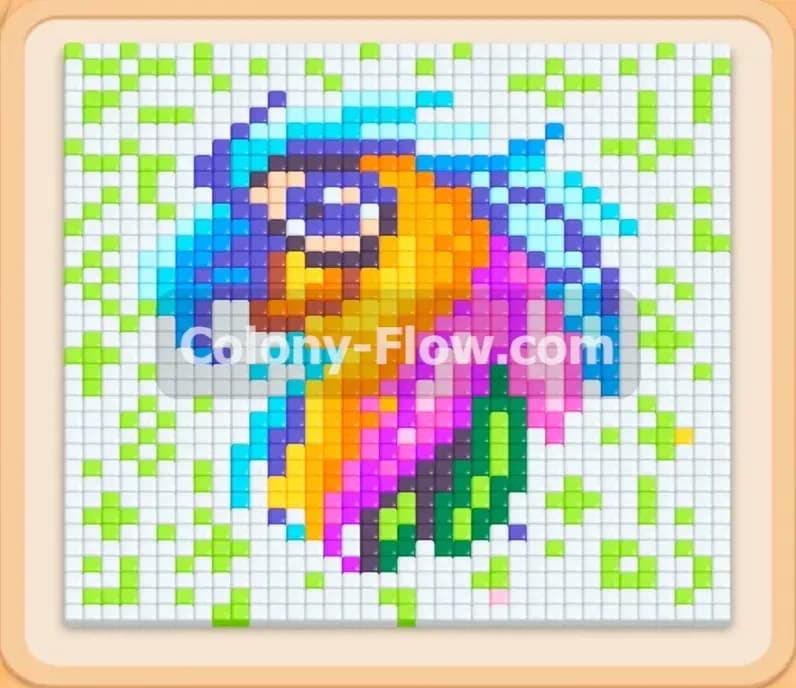
Playing Colony Flow Level 490 puts you in charge of clearing a massive colorful parrot puzzle. You have to feed your hungry ant colony by matching numbered color blocks from your tray to the bright pixel art tiles on the screen. The pixel art here is incredibly vibrant and satisfying to dismantle piece by piece. I recently played through this exact board and learned the very best order to pull the colors. I will walk you through my exact moves step by step so you can beat the board without ever jamming your tray.
Colony Flow Level 490 Overview
What You Are Working With
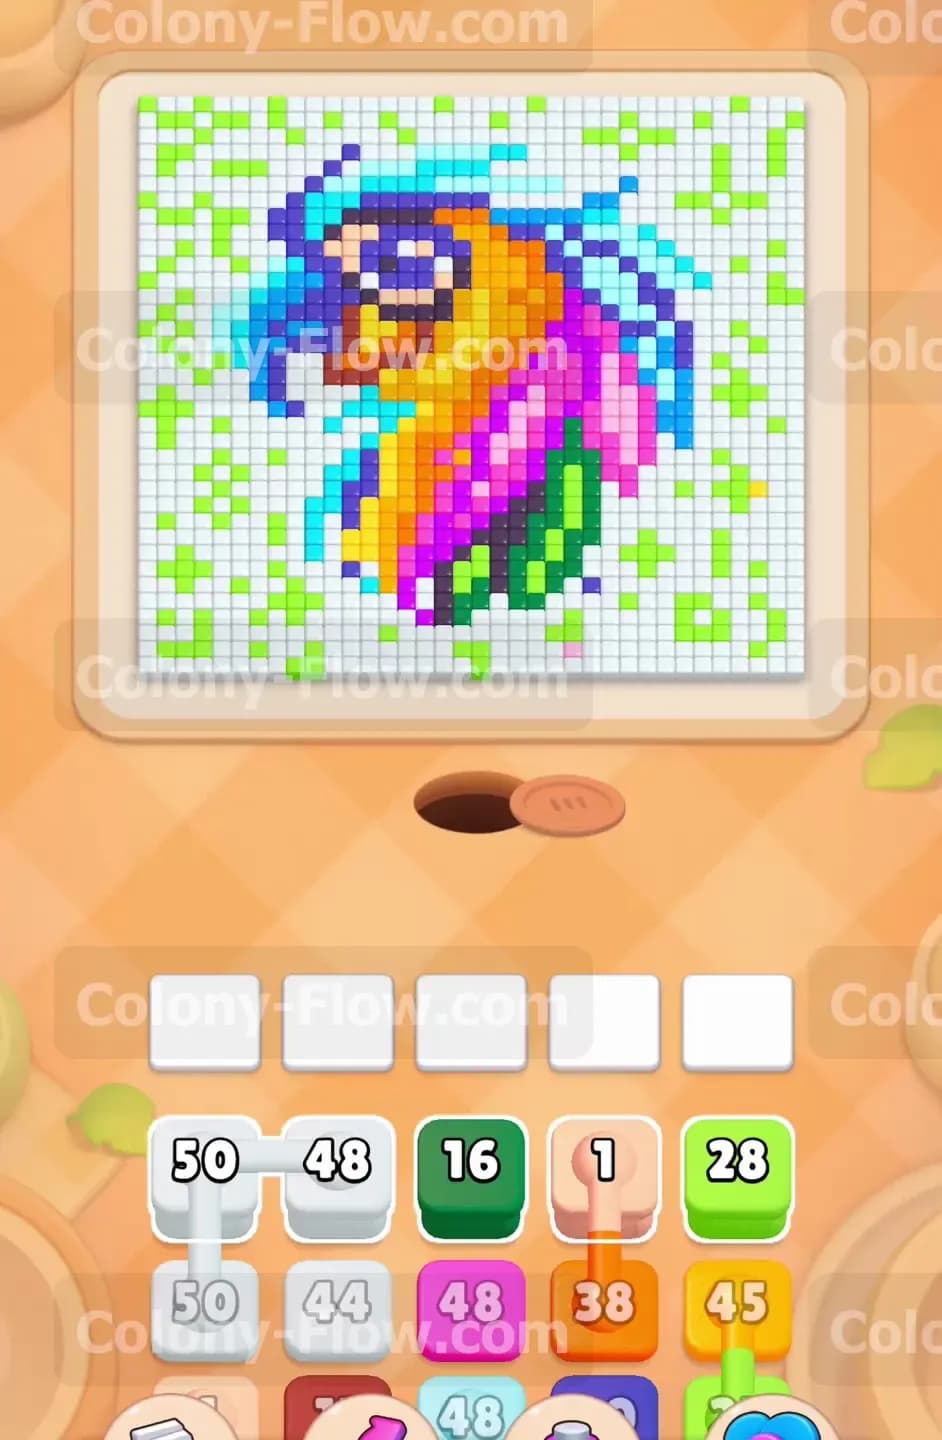
The main picture features a beautiful bright tropical bird made of magenta yellow orange dark blue and cyan tiles. The parrot sits inside a large border of white background tiles that are speckled with a pattern of light green squares. Down in your tray you have a mix of single color blocks and a few special connected blocks. Connected blocks link two colors together and force you to pull both at the exact same time. You will see huge number counts on the white and magenta blocks because those two colors cover so much space on the board. There are no special hidden food tiles or hungry doors on this board. You just have the pure puzzle of the connected blocks and a massive amount of colorful tiles to clear.
What It Takes to Clear Level 490 Board
To beat this puzzle you must clear the whole parrot and every single piece of the white background frame. The real challenge of the game is managing your five waiting slots at the bottom of the screen. You lose the game instantly if all five slots fill up and your ants have nowhere to go. You must always maintain an open path for the colors you select from the tray. The winning strategy involves eating through the bottom white border first and then chewing upward through the bird to leave the upper background for the very end. If you pull colors out of order your ants will sit in the waiting slots and block the entire colony from moving.
Colony Flow Level 490 Step by Step Solution
Step 1: Open the bottom edge with the connected white blocks
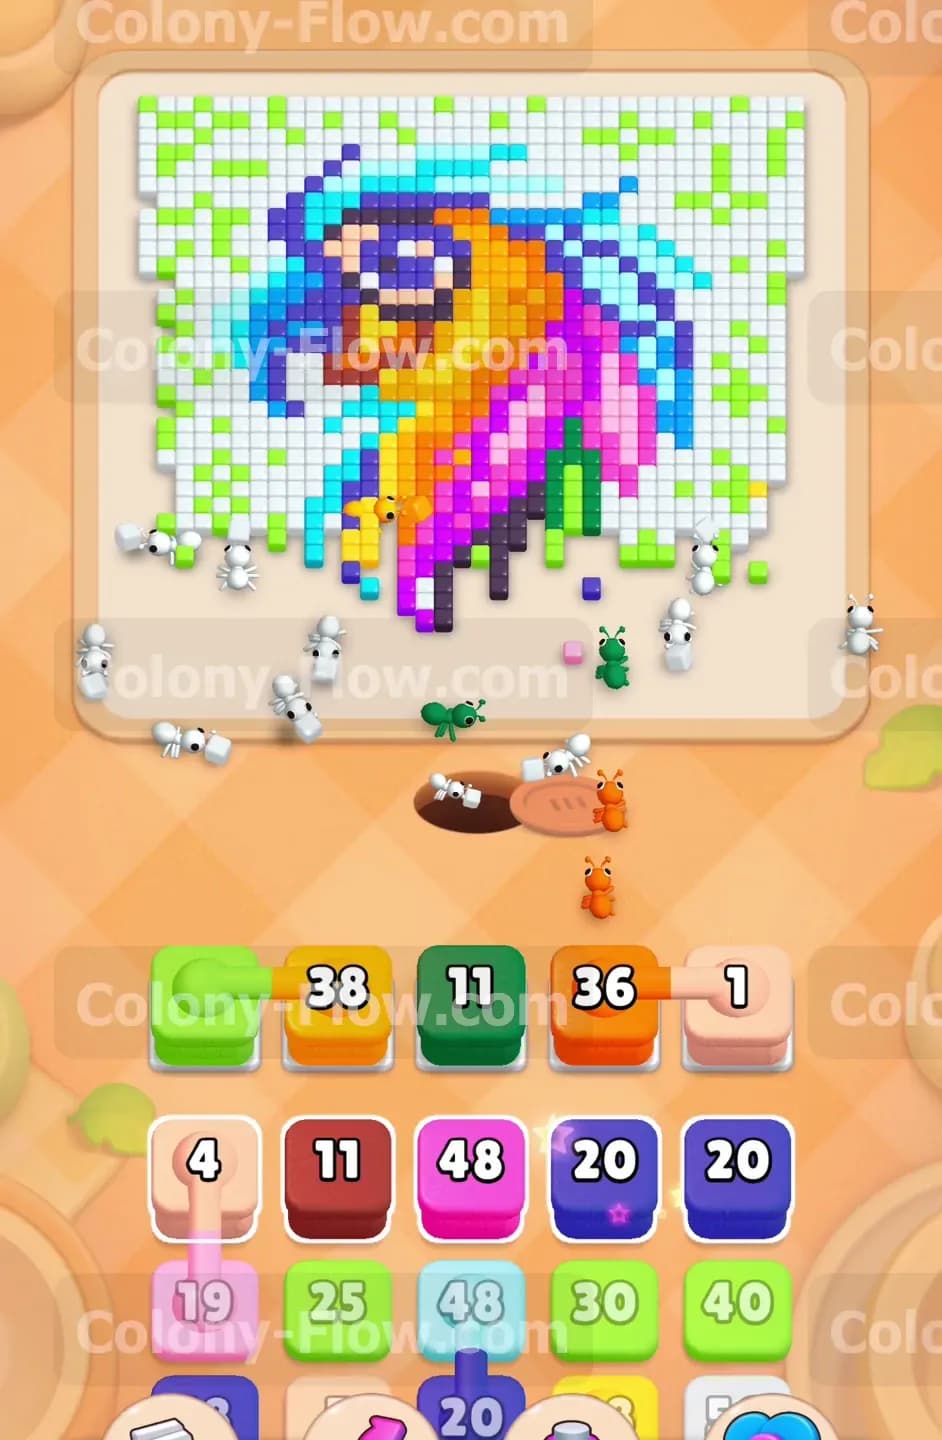
Start the puzzle by tapping the connected white blocks in the top row of your tray. These blocks hold massive numbers like 50 and 48. Pulling a connected block fills two of your five waiting slots right away. A huge wave of white ants will stream straight out from the nest hole and flood the bottom section of the picture. The ants will eat away the thick white border directly underneath the parrot. Clearing this bottom area is the absolute most important first move you can make on this board. It removes the wall blocking the bird and guarantees your next colors will have a direct path to the feathers. Your waiting slots will stay completely safe because the white ants have hundreds of bottom tiles to eat.
Step 2: Clear the lower tail feathers with dark green and orange
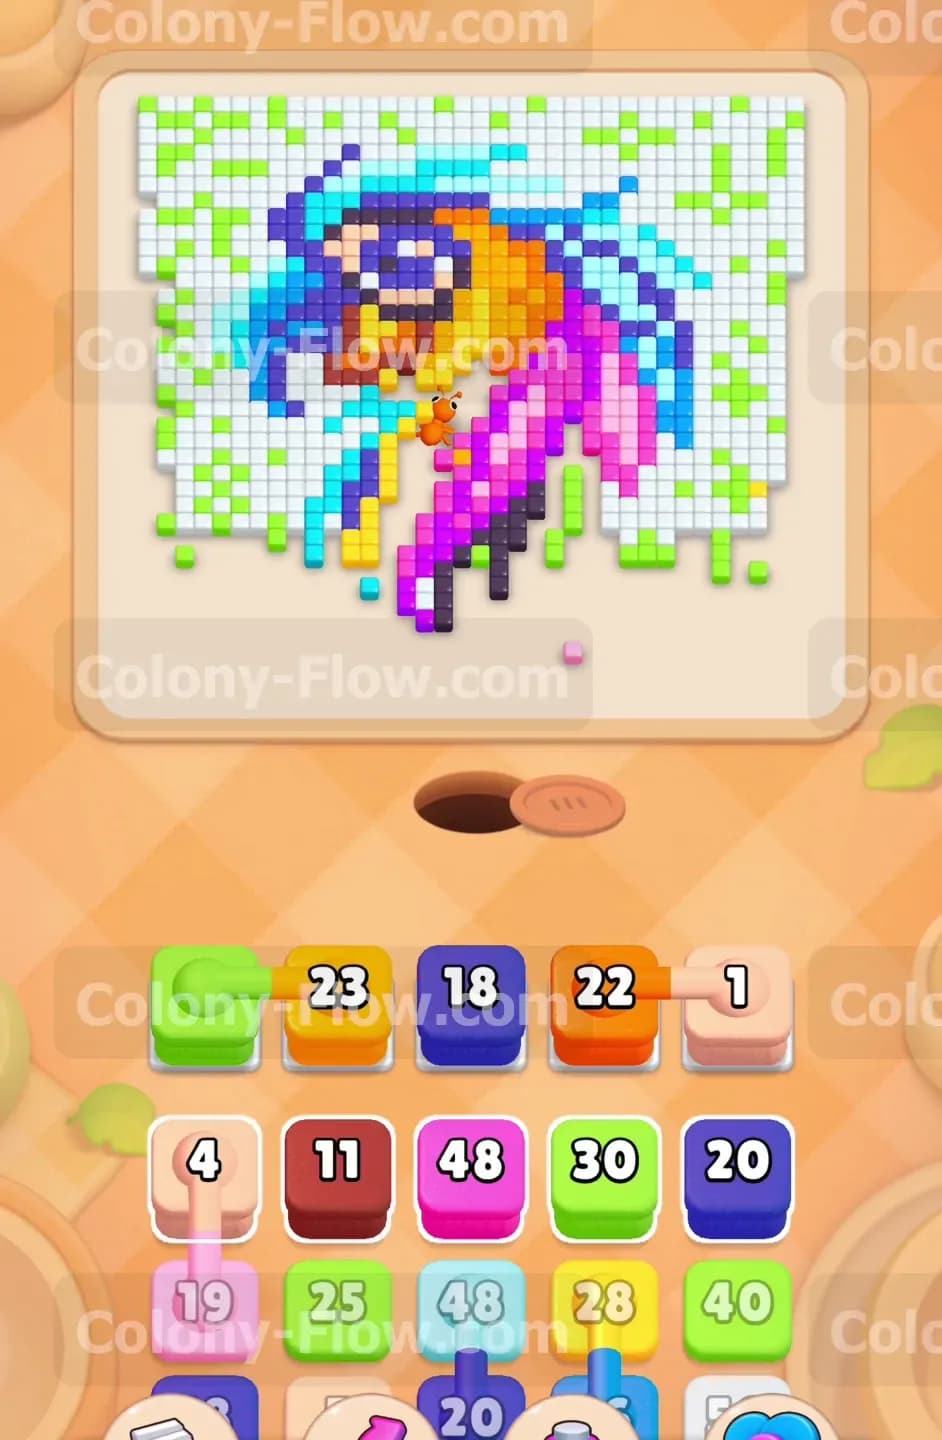
With the bottom white border completely gone the lowest feathers of the parrot are now fully exposed to the nest hole. You will see a small mix of dark green and orange tiles forming the tail section near the bottom right of the bird. Tap the dark green block and the orange block to pull them into your waiting slots. The dark green ants will sweep in and eat the cluster of green accents. The orange ants will stream up the middle and start devouring the lower orange feathers. This move keeps your tray moving smoothly because the path is totally open from the bottom up. Do not pull these colors before the white blocks or they will get trapped in the nest hole and cause you to lose the game.
Step 3: Attack the chest and lower beak with the yellow block
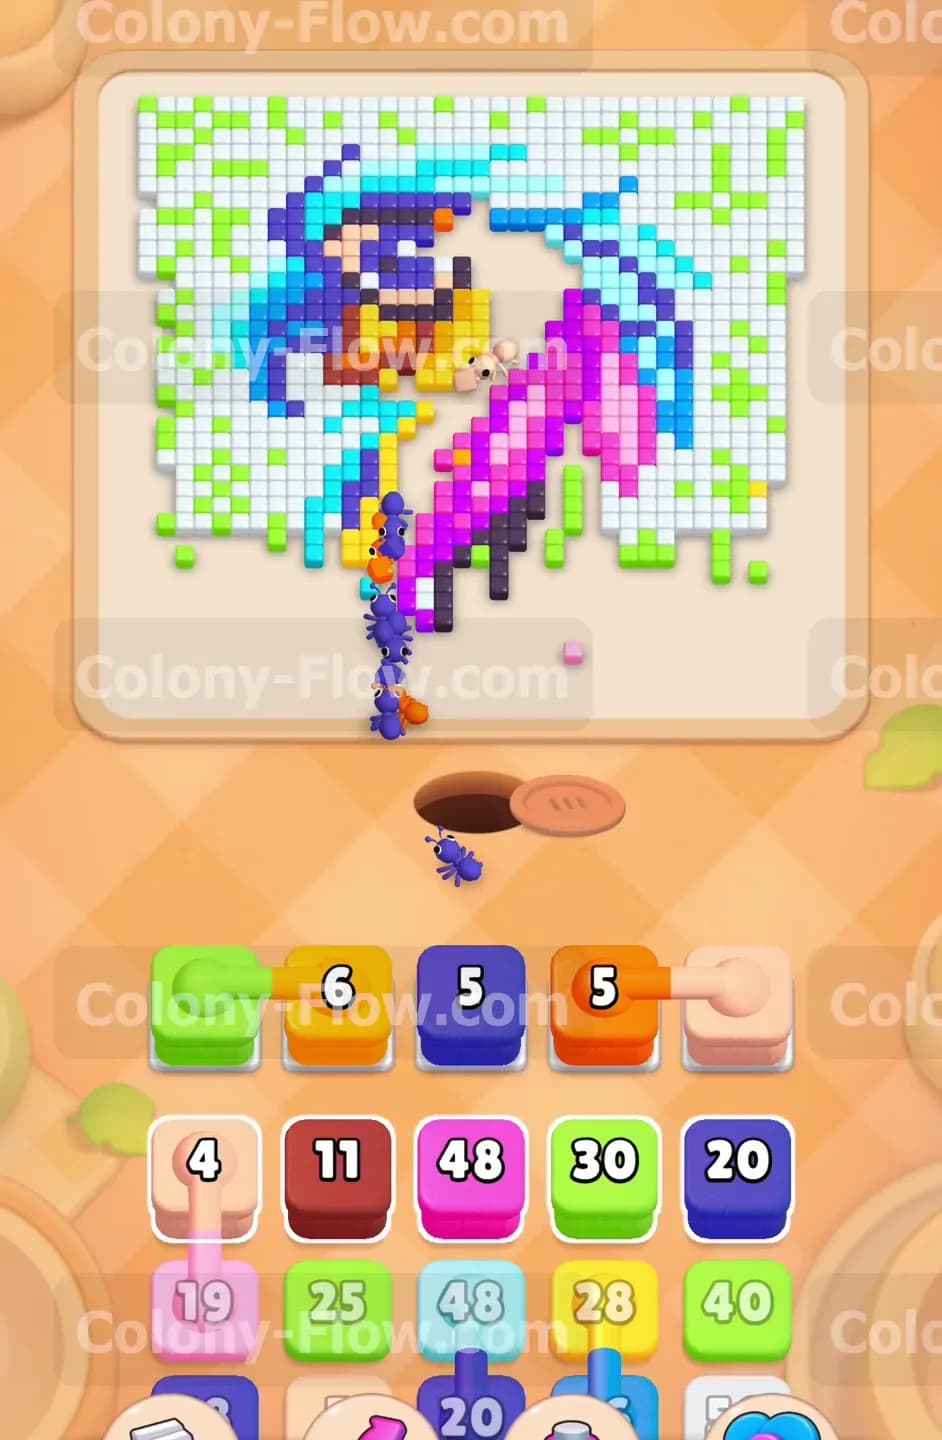
The orange ants will open a wide path to the bright yellow belly of the bird. Pull the large 45 count yellow block from your tray next. The yellow ants will march straight past the empty tail section and flood the entire chest area of the parrot. They will also spread up toward the lower part of the beak where the yellow pattern continues. You will watch the yellow block count down rapidly in your slot as the ants clear out the middle of the parrot. Wait for the yellow ants to finish a good chunk of the belly before you pull your next major color. This careful pacing prevents your slots from backing up and ensures a steady flow of ants into the board.
Step 4: Release the magenta ants to clear the large wing
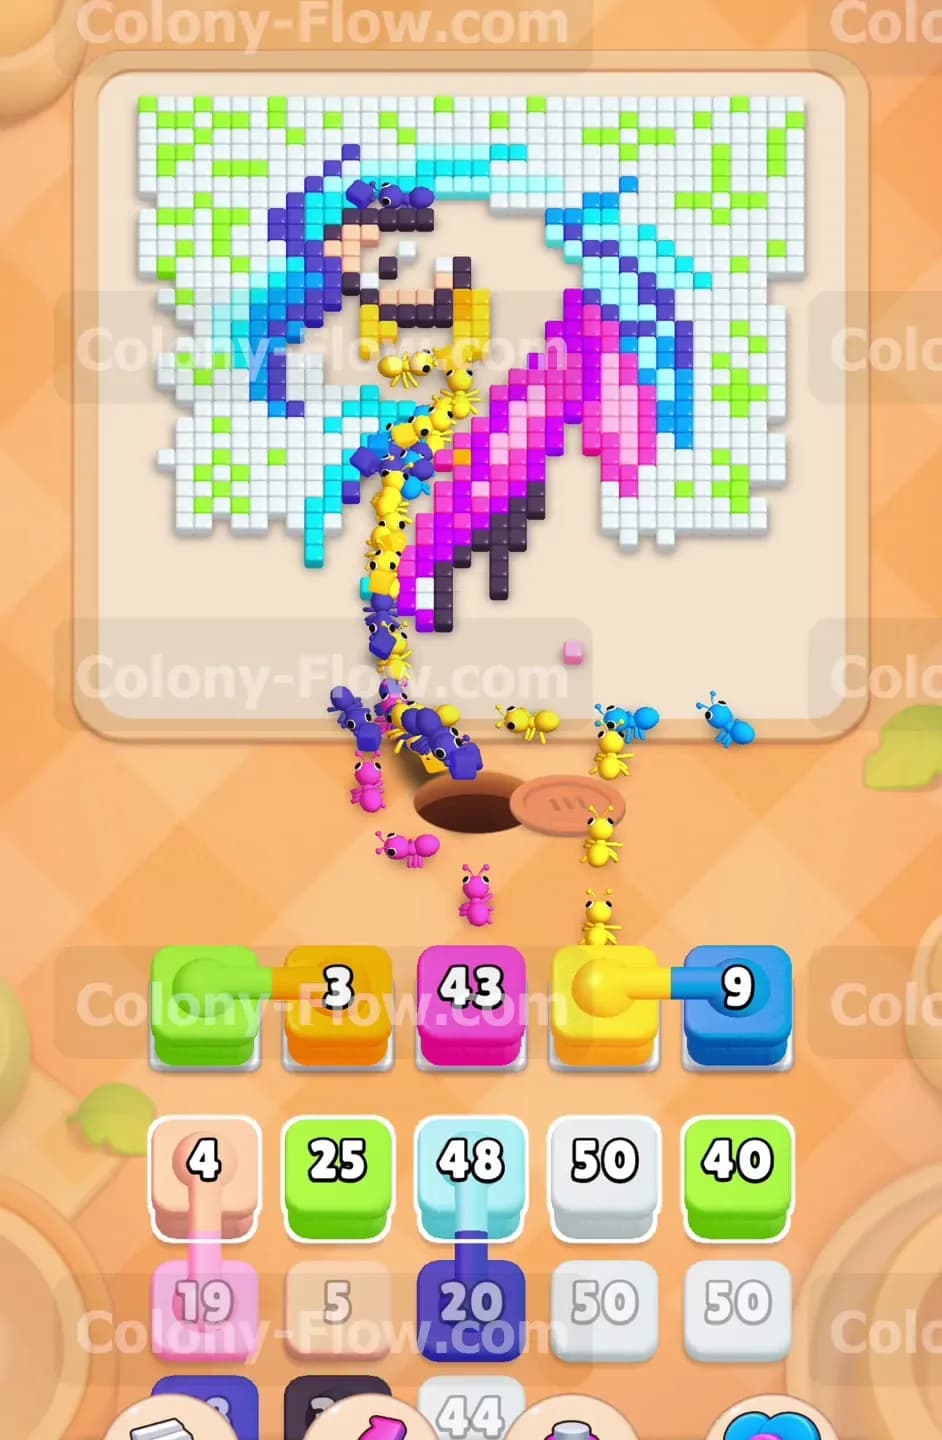
The right side of the parrot features a huge wing made almost entirely of magenta tiles. Pull the heavy 48 count magenta block into your tray. A massive swarm of magenta ants will pour out of the nest hole and hook to the right side of the board. They will eat their way up the entire wing and start chewing into the back of the neck. You will also see a pink peach colored block in your tray with a very low number of just one single tile. Pull that single pink peach block now to clear the tiny accent piece near the beak. The large magenta block will take quite some time to count down to zero so just sit back and let the ants work through the dense wing.
Step 5: Send dark blue to erase the face outlines and eye
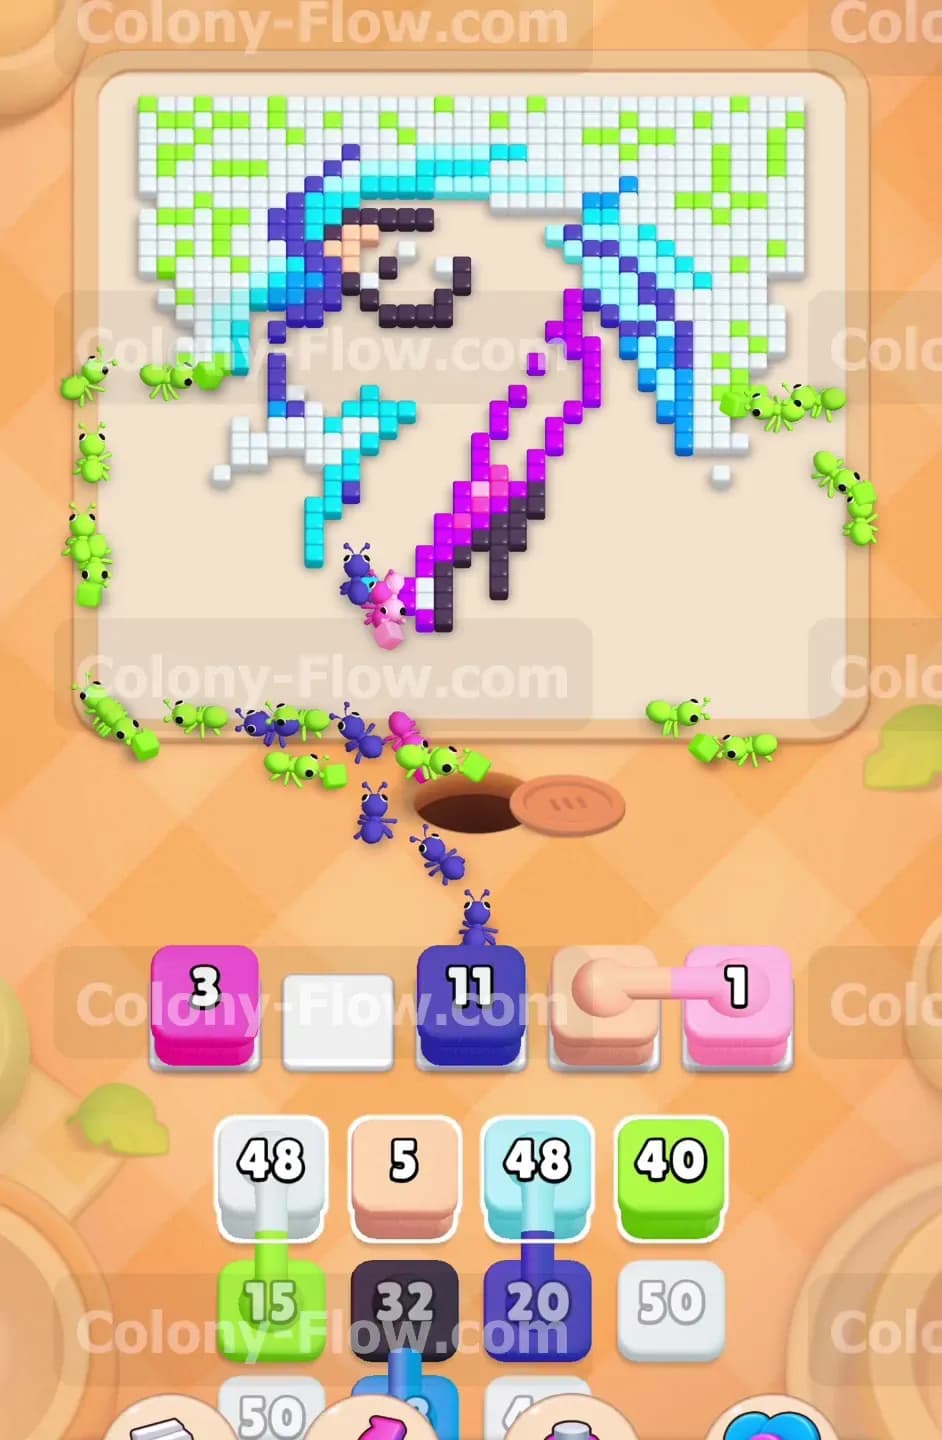
As the yellow and magenta ants hollow out the middle of the bird they expose the dark blue outlines around the face. Tap the dark blue blocks in your tray to pull them into the active waiting slots. The dark blue ants will travel up the empty chest cavity and reach the head. They will eat the thick outlines around the beak and the large dark blue patch forming the eye of the parrot. These dark blue blocks have numbers in the twenties so they will clear out of your waiting slots very quickly once they reach the top of the head. Keeping the dark blue moving is exactly how you avoid a dead end and keep the board flowing nicely.
Step 6: Use cyan and light blue to dismantle the head crest
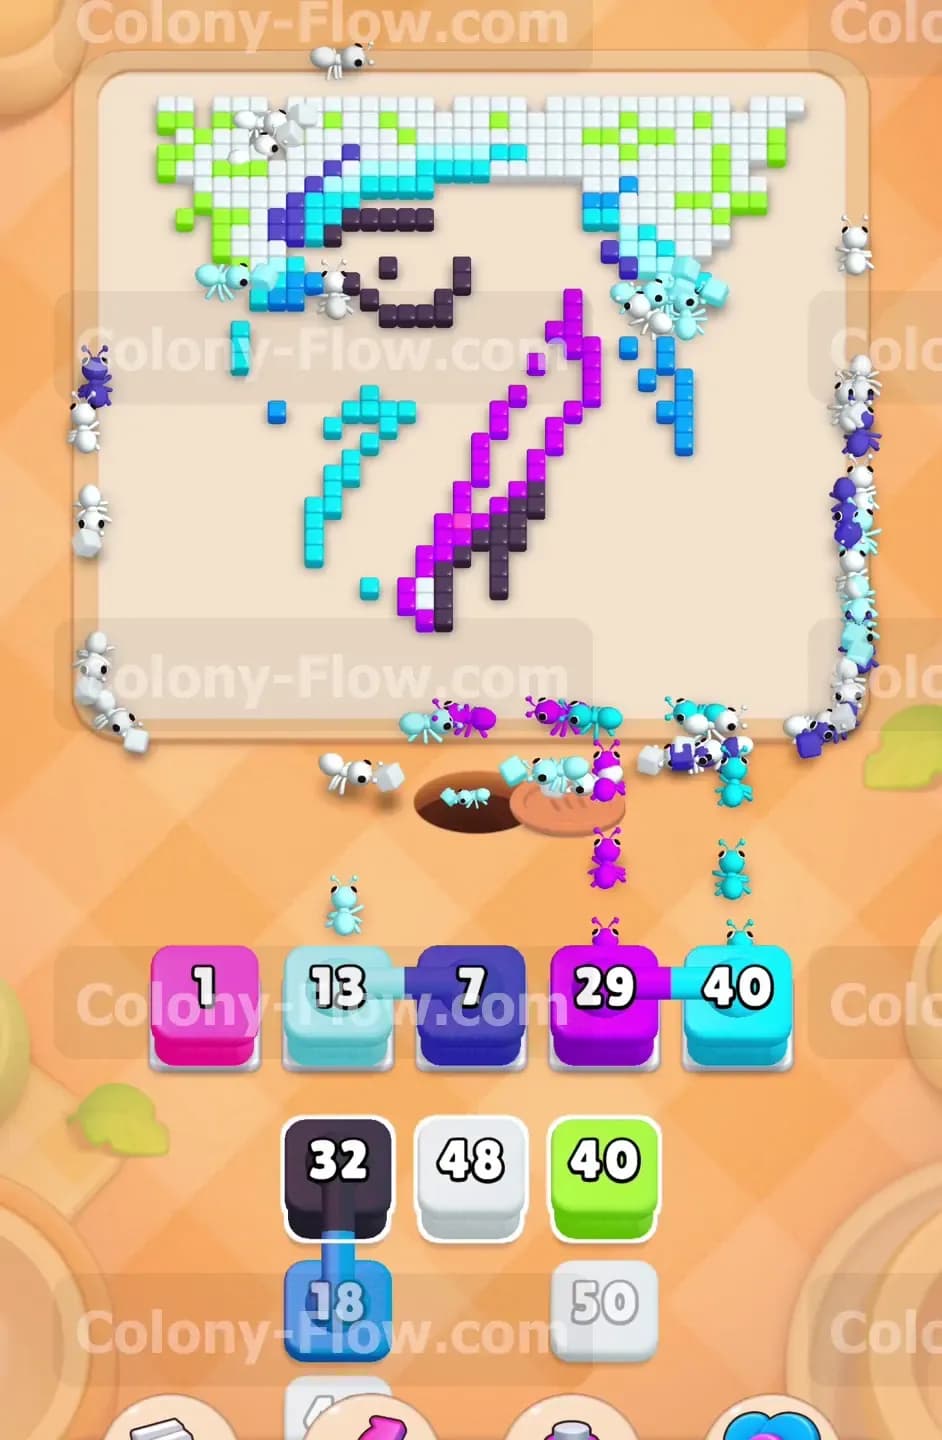
The very top of the parrot head has a bright spiky crest made of cyan and light blue tiles. Once the dark blue face outlines are completely gone the path to this top crest is wide open. Tap the cyan block and the light blue block in your tray. These ants will march all the way up the middle of the board and consume the bright crest feathers. At this point the entire main body of the bird is almost completely gone from the screen. Your waiting slots remain perfectly safe because the ants have a clear empty highway straight up from the nest to the top of the board.
Step 7: Clean up the final magenta feathers on the neck
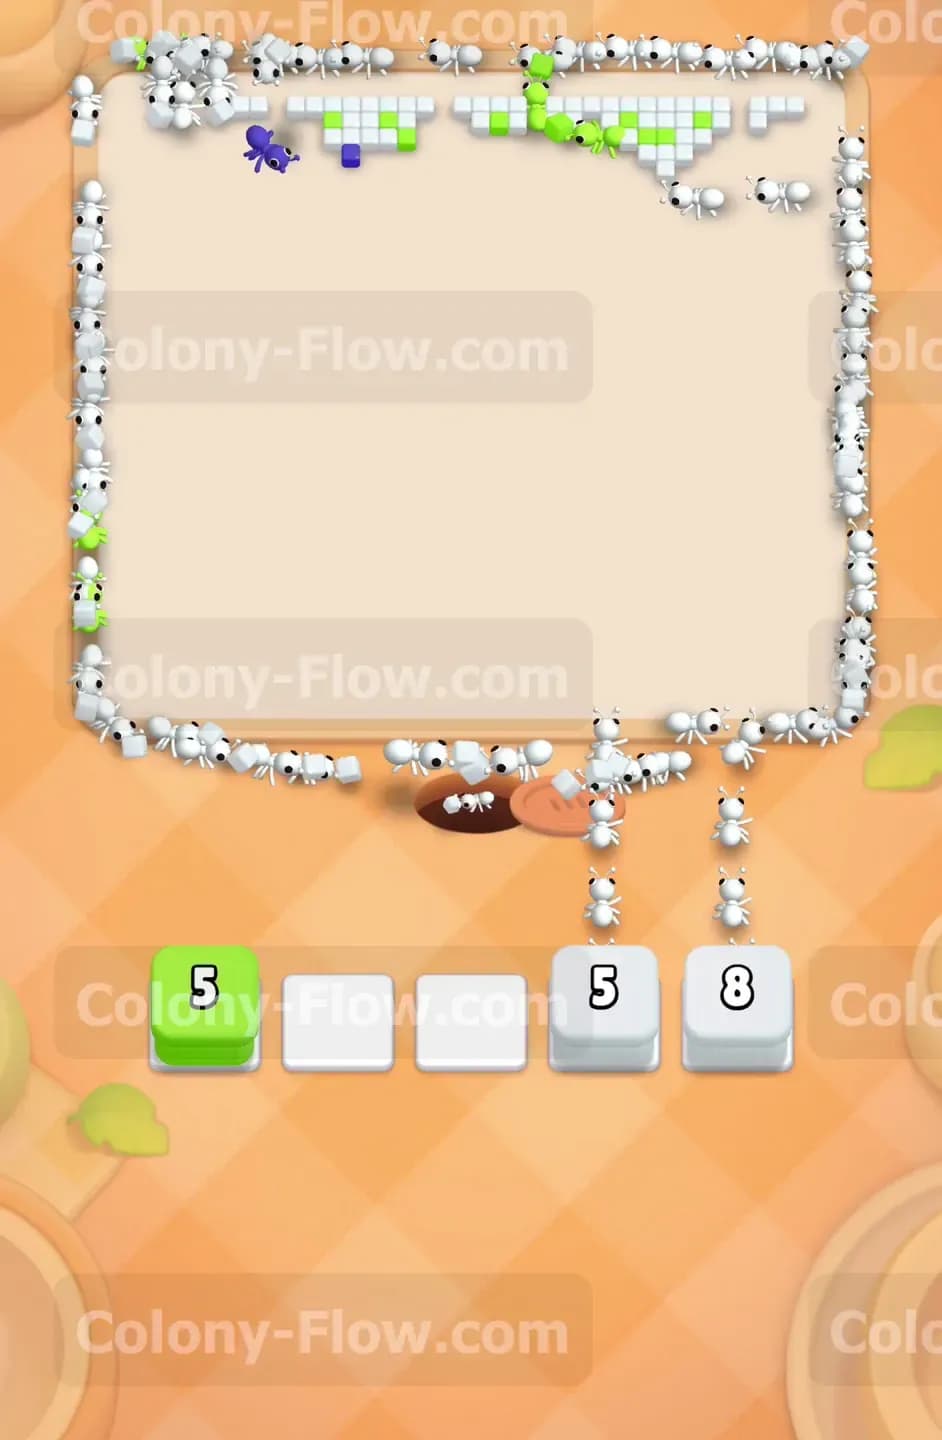
You will notice a few stubborn magenta tiles left on the back of the bird neck and the upper wing area. Look down at your tray and pull the remaining magenta blocks into the waiting slots. The ants will rush up the right side and wipe out the very last colorful pieces of the parrot. The only tiles left on the screen will be the top and side background sections. The entire center of the board where the bird used to be is now completely empty and your ants can travel anywhere they need to go without getting stuck behind anything.
Step 8: Sweep the final border with white and light green
The final challenge is the massive outer border of white tiles and scattered light green specks. Pull every remaining white block and light green block from your tray. The ants will fan out in all directions to finish the job. They will travel up the left side up the right side and across the top edge. The light green ants will snipe the scattered green specks while the white ants devour the rest of the thick border. You can pull these blocks as fast as you want because every single path is open. The numbers will count down to zero and the last tile will vanish to complete the puzzle.
Final Thought
Playing this level requires patience and a strict approach to working from the bottom all the way up to the top. I hope my detailed breakdown helps you clear the beautiful parrot and keep your tray slots totally empty. Feel free to watch the video above this article if you want to see exactly how the ants move through the board or if any particular move is hard to visualize from the text.