Colony Flow Level 485 Walkthrough Solution & Guides | How to solve Colony Flow 485

Guide By Liam Stone
Updated on July 30, 2026
Watching beats reading for some players. The video above has the entire Level 485 walkthrough ready to go.
Video doesn't match your screen?
Game updates frequently scramble layouts! Try our AI Screenshot Solver first to find your exact board instantly, or report broken guides to our team.
Welcome back to another puzzle solution. Colony Flow Level 485 gives us a cute pixel art woodland creature to clear. You will notice an enormous wooden crate covering the upper half of the picture right from the start. I played through this board to figure out the exact sequence for you. Let us get those ants moving and solve this together.
Colony Flow Level 485 Overview
What You Are Working With
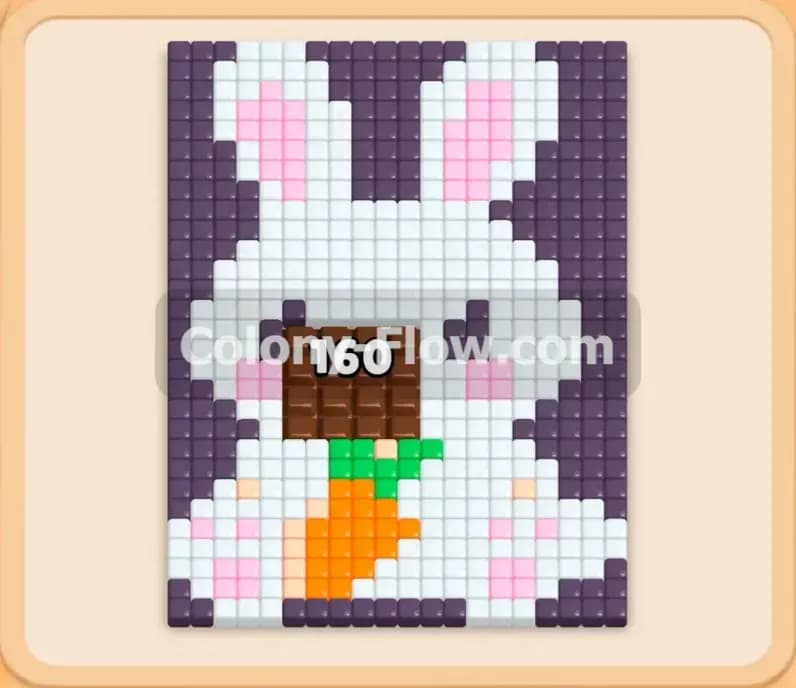
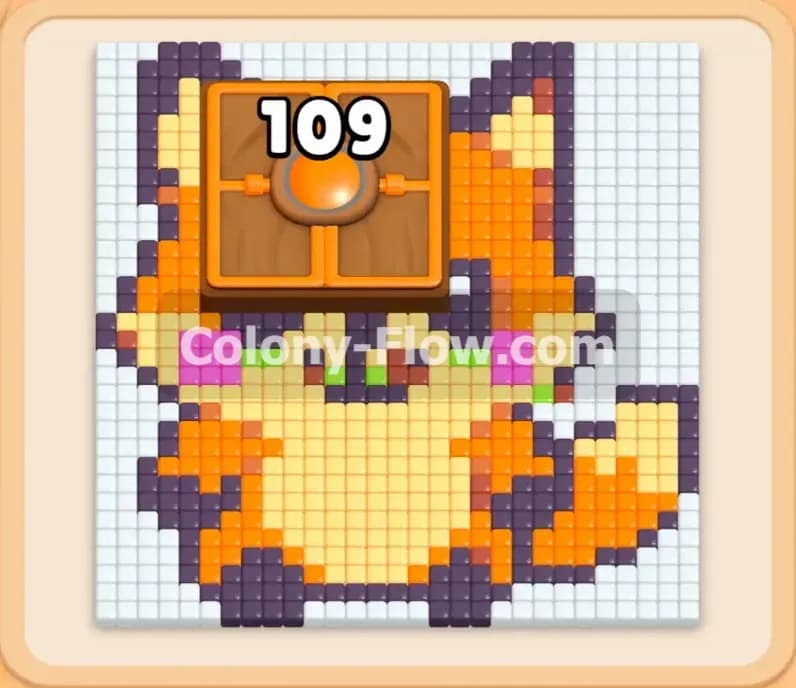
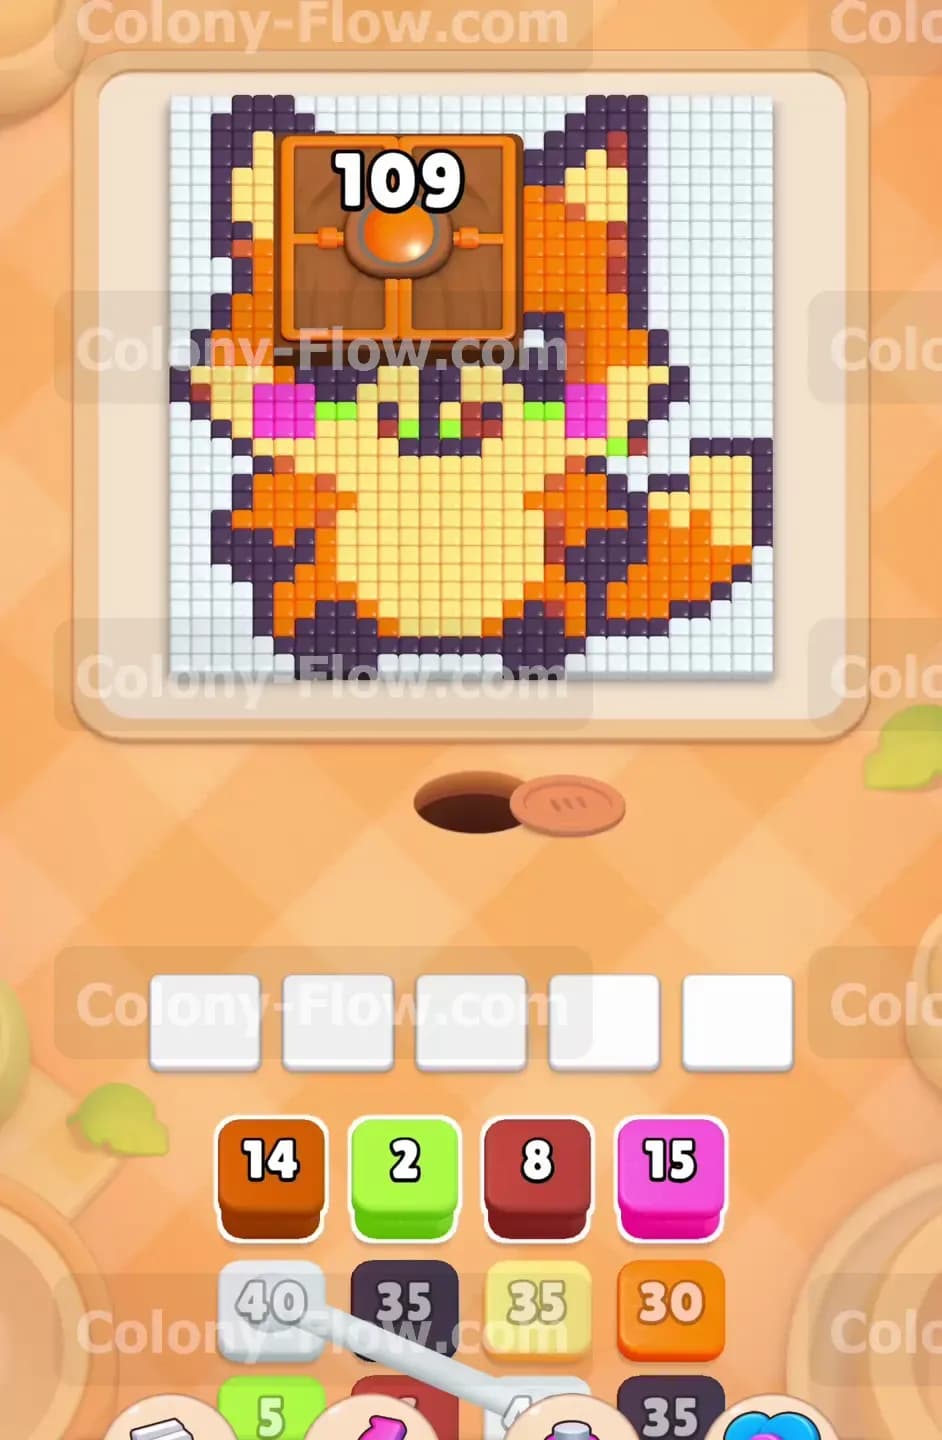
The picture in this level looks like a raccoon or a fox. The creature features a bright orange body and a light yellow belly. The feet and outer edges use dark purple tiles. Pink cheeks and a tiny green bowtie sit right in the middle of the chest. A thick white border surrounds the entire shape on all sides. The most obvious obstacle is the massive wooden box taking up the entire top section of the board. This heavy wooden crate holds a white counter number starting at 109. Your tray at the bottom gives you access to an orange block with 14 ants, a green block with 2 ants, a dark purple block with 8 ants, and a pink block with 15 ants. More colors wait in the lower rows including a large white block with 40 ants. The board gives you five waiting slots to hold your active blocks.
What It Takes to Clear Level 485 Board
You win the level when the picture is entirely empty and the ants return to their nest. You lose the level if your five waiting slots fill up completely and no active block has an open path to matching food tiles. To clear this board you must focus all your early attention on the bottom half of the creature. The large wooden box will not budge until you clear enough tiles to drop its counter to zero. Every single tile you remove from the exposed lower area subtracts one from the box counter. Once the box disappears you gain access to the hidden upper head and ears. You must carefully manage your tray to clear the newly exposed top half without jamming your waiting slots.
Colony Flow Level 485 Step by Step Solution
Step 1: Target the lowest exposed colors on the board to establish a strong foundation
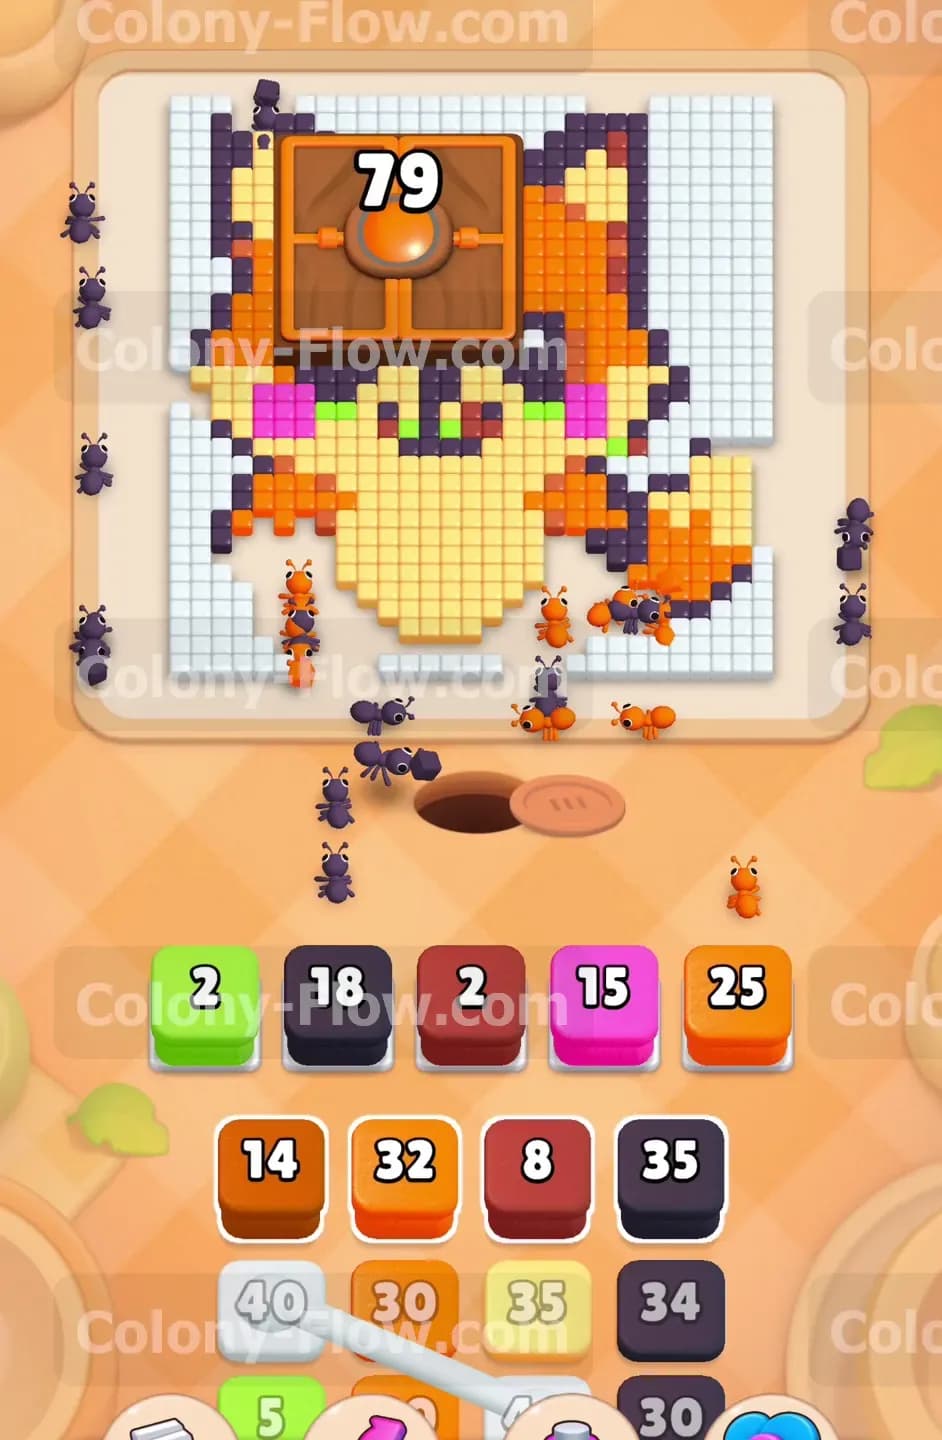
Start your moves by pulling the orange block with 14 ants into your waiting slots to send them toward the bottom right tail section and lower body. Bring up the dark purple block with 8 ants right after it to keep the momentum going. You need to pull these initial blocks quickly to get the colony moving out of the hole. The ants will march out of the nest and begin eating the dark purple feet at the very bottom of the picture. This action opens up more surface area on the light yellow belly and the inner orange body. Your large wooden box counter will drop from 109 down into the seventies as these initial sections vanish. Always ensure the bottom border stays wide open for the ants to travel freely without blocking the paths.
Step 2: Clear the pink cheeks and the green bowtie from the center
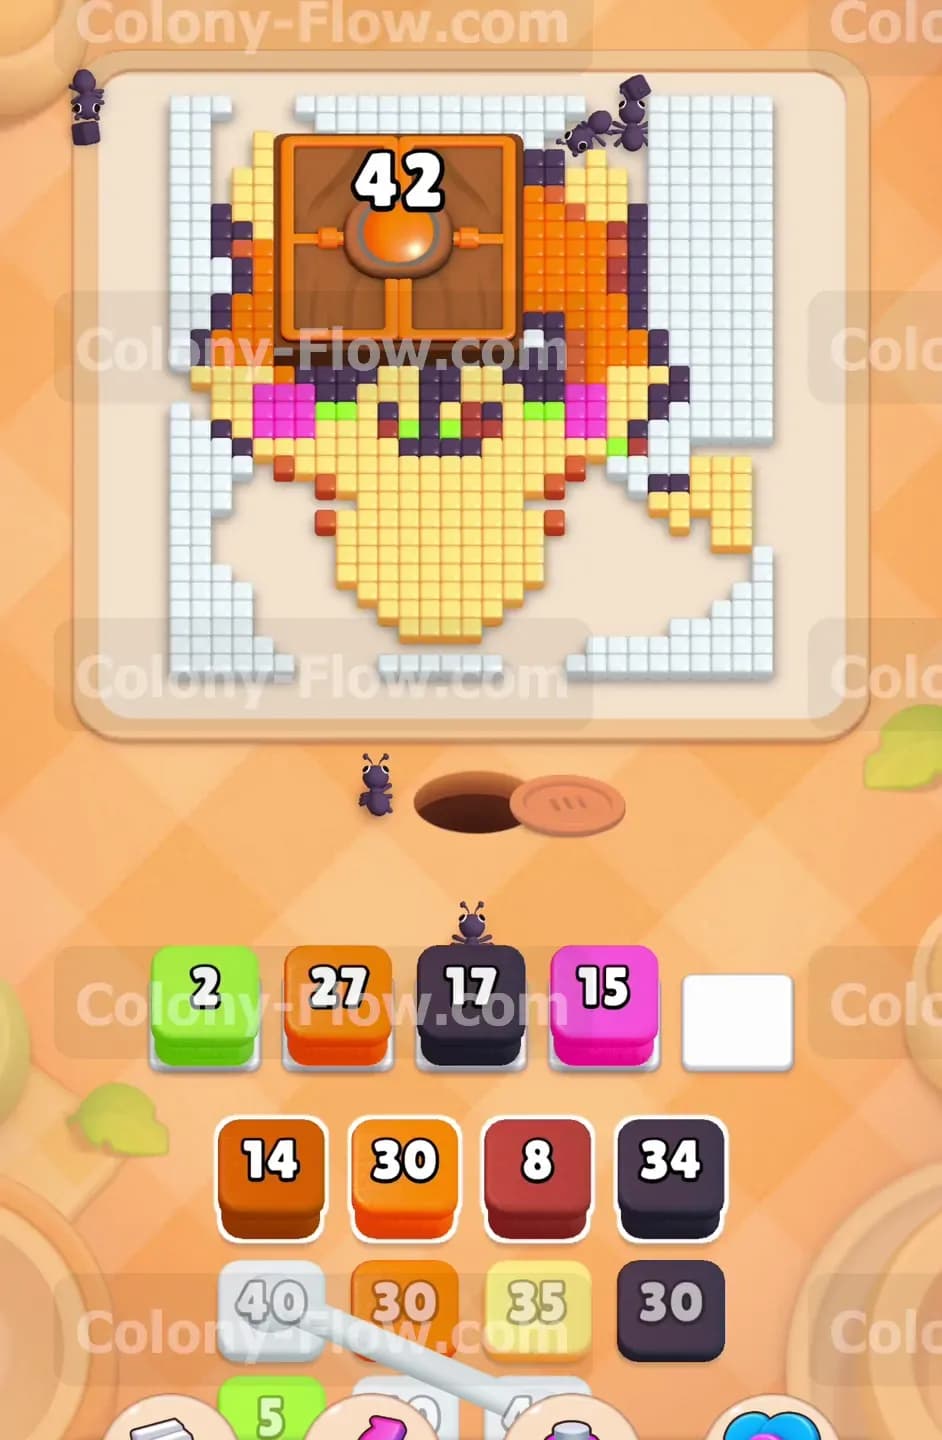
With the lowest sections gone you have a clear path to the center of the chest and face. Pull the green block with 2 ants to clear the small bowtie area. Pull the pink block with 15 ants to send your colony after the round pink cheeks located on either side of the face. These moves are critical because the green and pink tiles sit dead center in the layout. Removing them opens up multiple new angles for the ants to reach the surrounding light yellow and orange tiles. Keep a close eye on your waiting slots and only pull the pink and green blocks when you see an absolutely clear path to the center. The heavy wooden box counter will continue to drop rapidly during this phase as the center empties out.
Step 3: Remove the massive white background borders on the lower sides
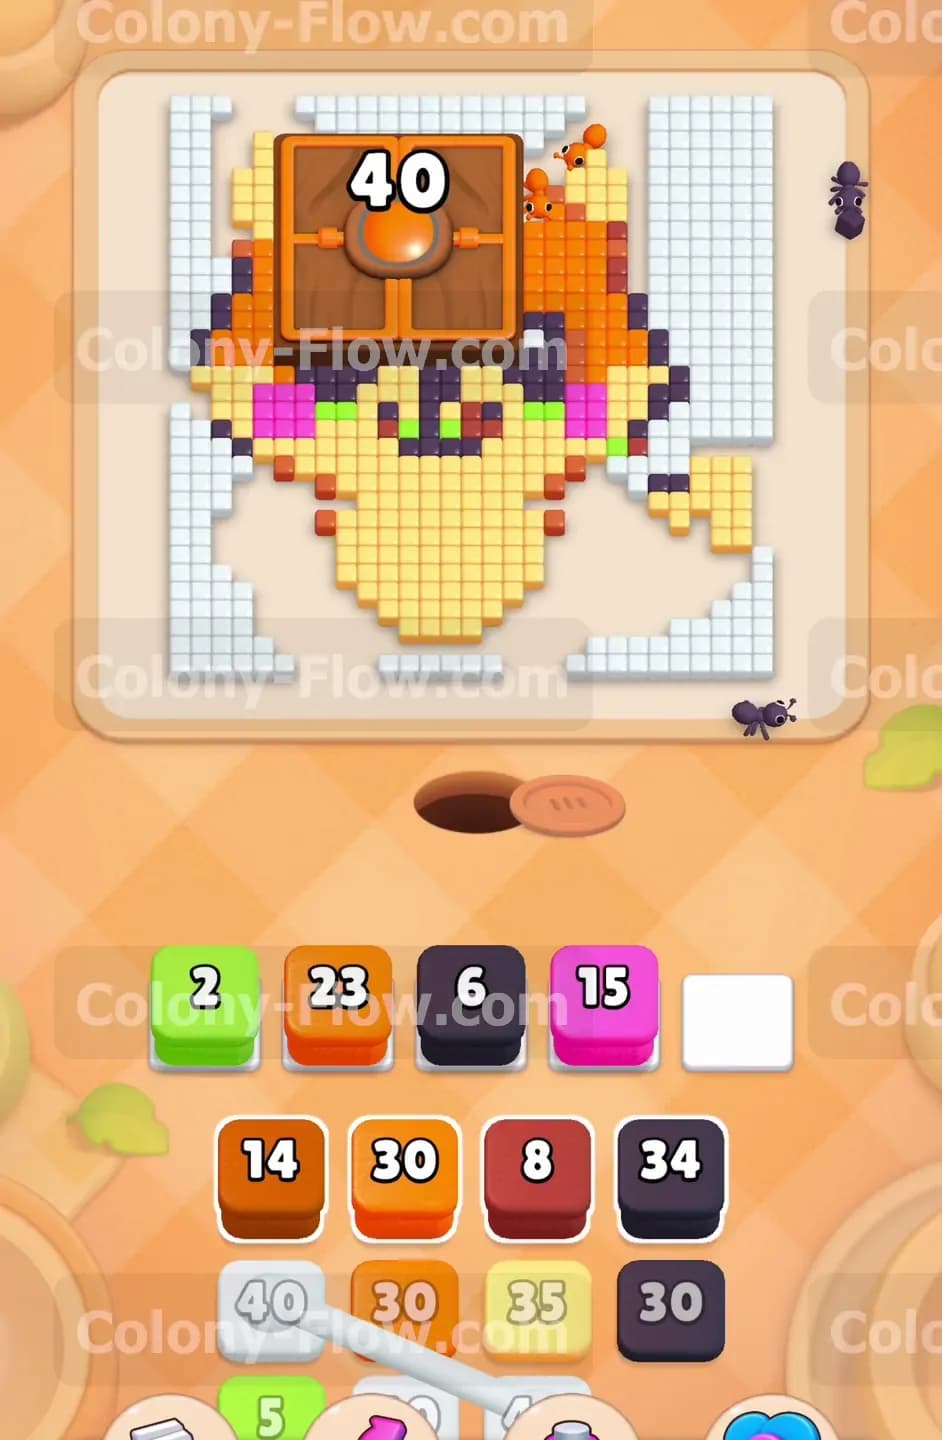
You need to start making a serious dent in the massive white background area before it traps your progress. Pull the large white block with 40 ants from the tray to activate your white ants. They will travel up the left and right sides to eat the white tiles flanking the lower half of the creature. Clearing these side areas is essential because it exposes the outer edges of the orange fur and dark purple borders. The white tiles form a thick wall that limits your access to the higher colored sections. Pulling the white block early prevents these side walls from becoming a problem later. By this point the giant wooden box counter will dip into the forties. Do not pull multiple large blocks at once or you risk filling your five slots with ants that have a long walking distance.
Step 4: Erase the light yellow belly and chest tiles completely
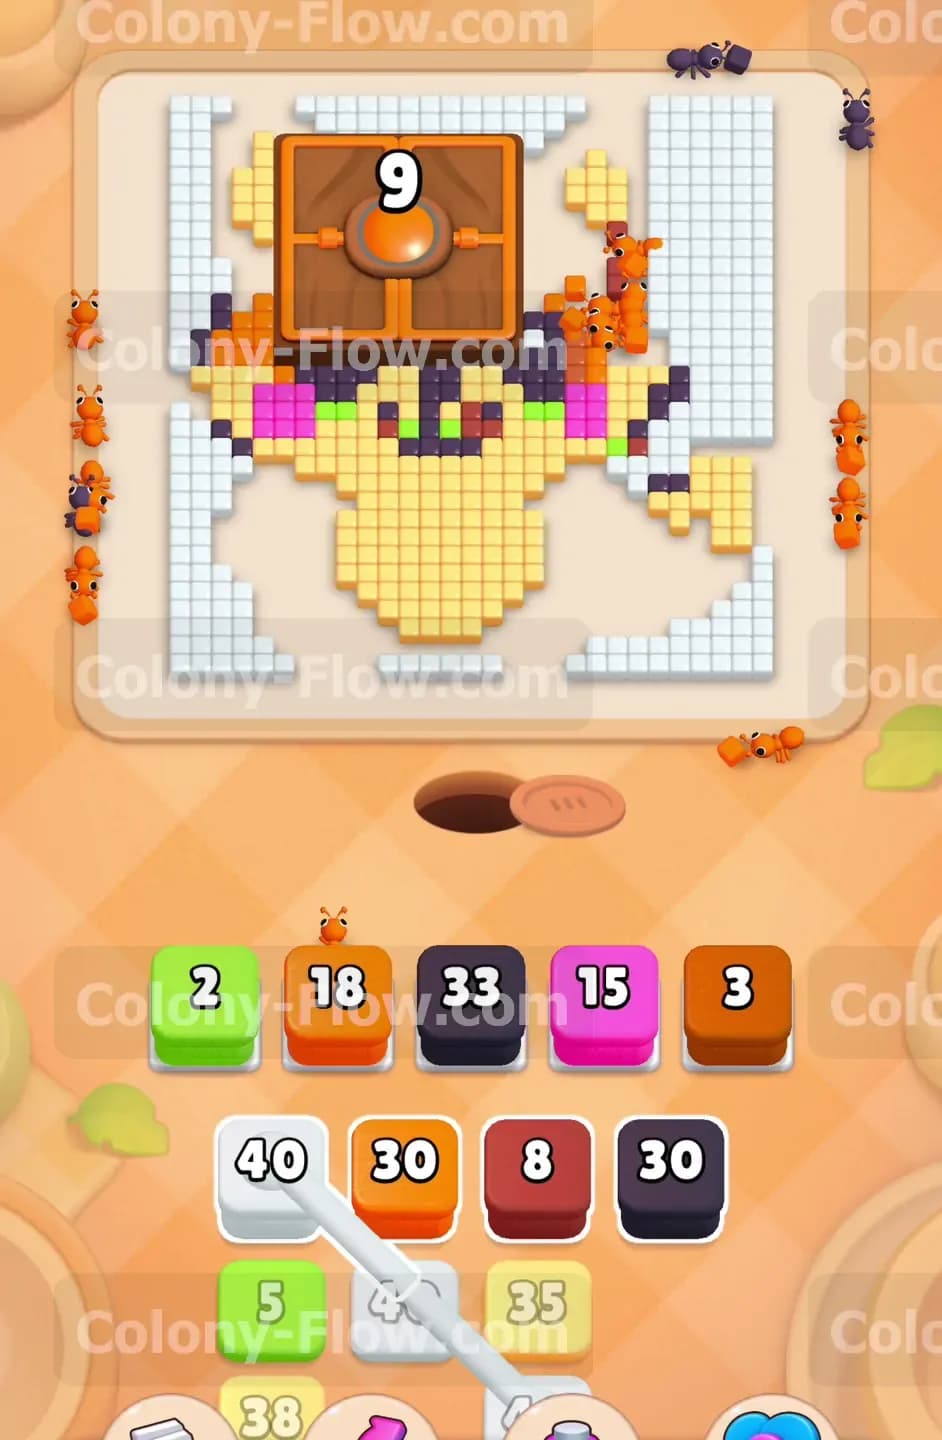
Your next major target is the large patch of light yellow tiles making up the chest and belly. Pull a light yellow block and watch the ants swarm the center of the open board. Since you already removed the pink cheeks and green bowtie earlier the ants will have a huge open highway to work with. They will devour the light yellow section very quickly. This continuous action significantly reduces the remaining tiles on the lower half of the picture. The wooden box counter will drop down to single digits as the chest completely disappears from the screen. Managing your tray here is easy because the center path guarantees the waiting slots will not jam.
Step 5: Finish the lower dark purple outlines to force the wooden box away
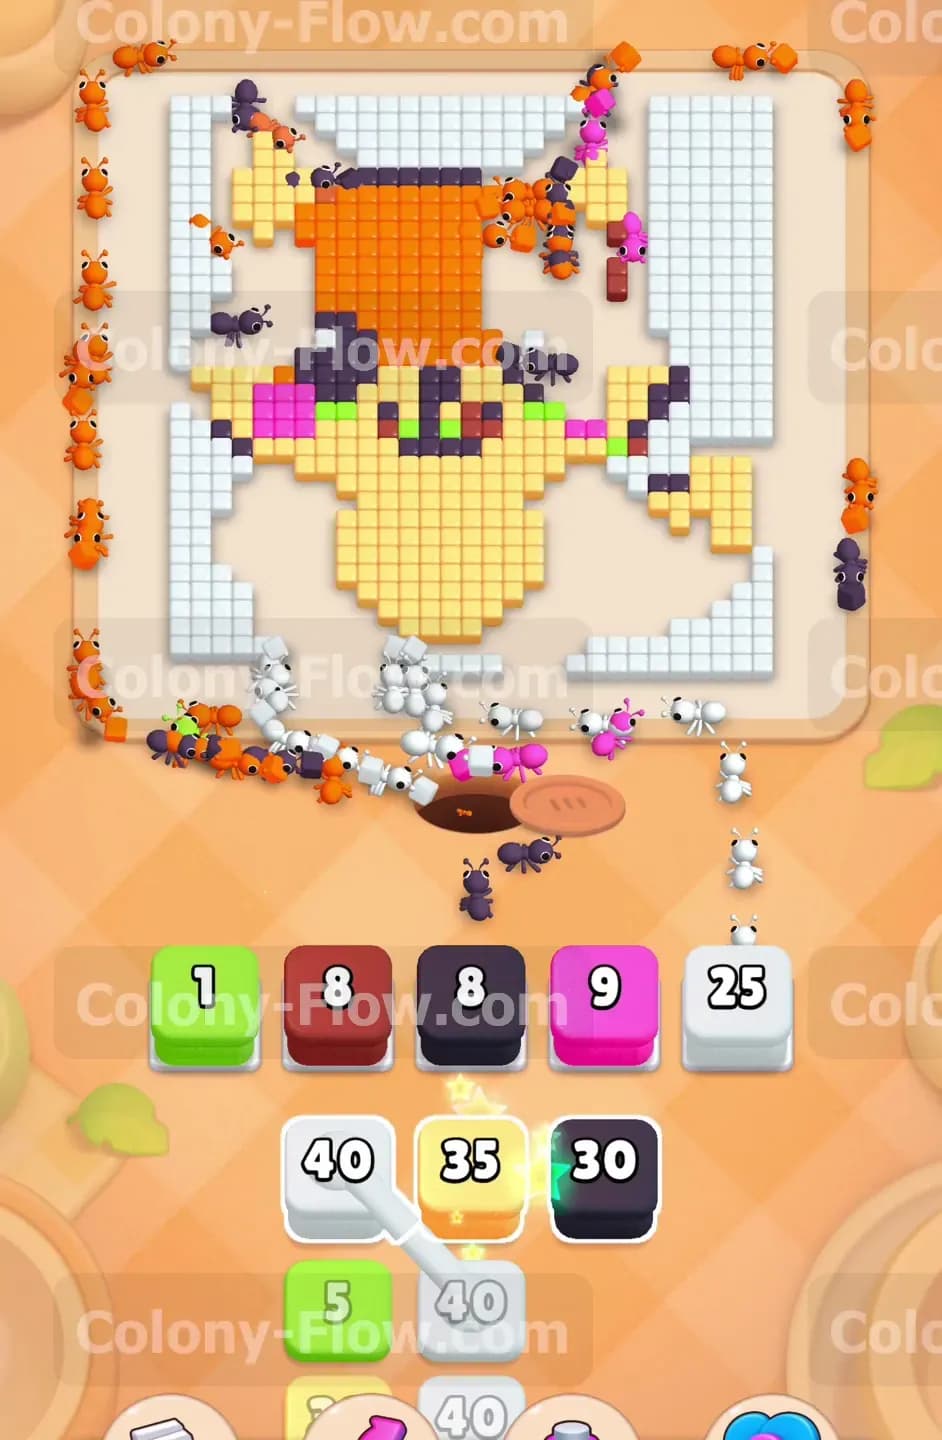
You must remove the last few dark purple outline tiles on the lower half to finally get rid of the wooden box. Pull a dark purple block into your tray to clear the remaining borders around the lower face and shoulders. The ants will easily find their way to these exposed edges because the center is completely hollow. Once they eat these final few colored tiles the counter on the large wooden crate will hit zero. The heavy wooden box will immediately vanish from the board in a flash. This removal completely changes the layout of the level and opens up the final phase of the puzzle.
Step 6: Evaluate the newly revealed top section of the head
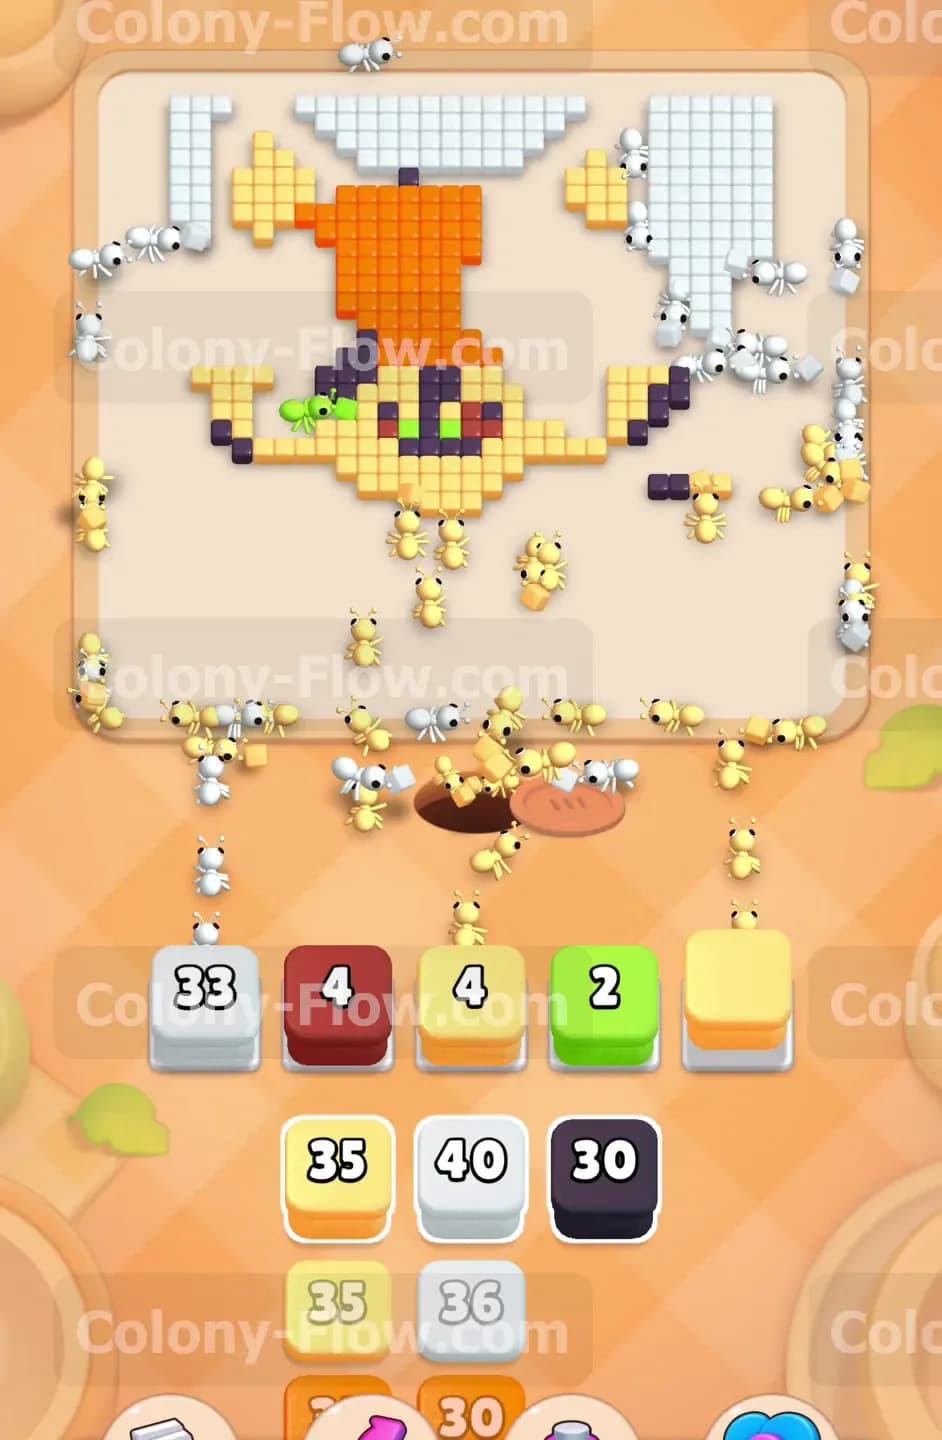
The removal of the wooden box exposes a completely fresh section of colored tiles. You now have full access to the top of the head which features large orange ears and a light yellow forehead. Dark purple tiles outline these new ears just like they did on the bottom half. A massive upper white background border surrounds everything at the very top of the screen. The game hides this entire upper layout from you until the box vanishes. You have to adjust your strategy on the fly. Take a brief moment to look at your tray options. You need to verify which colors are ready in your next row of blocks before you make a move. Always leave at least one slot open just in case you need to cycle through a small block to reach the color you actually need.
Step 7: Clear the bright orange ears and light yellow forehead
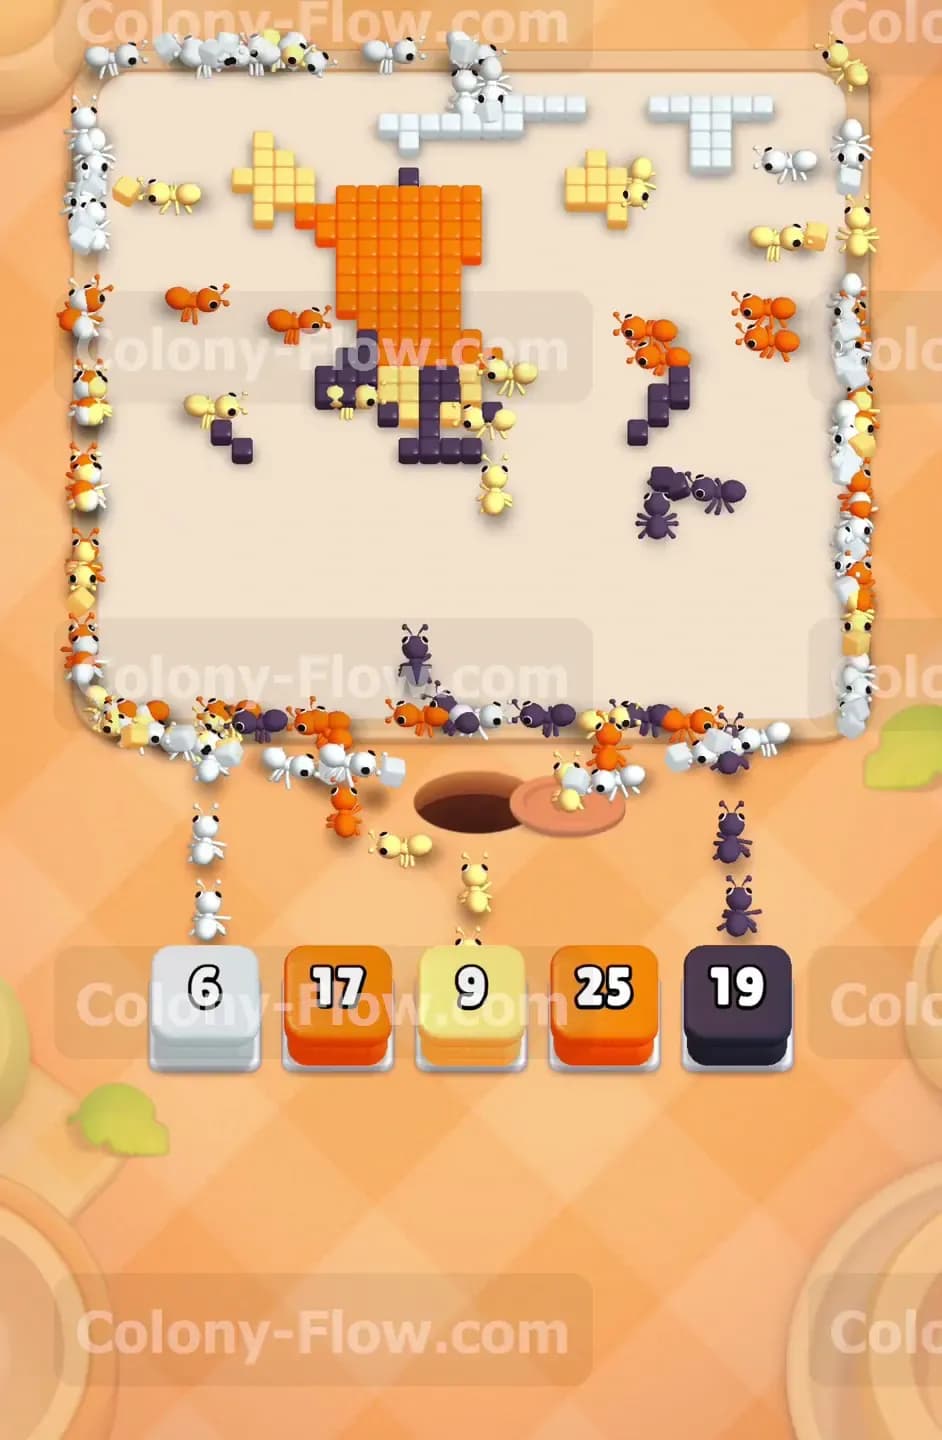
Your immediate priority is the top center of the head section. Pull a light yellow block to send ants straight up to clear the forehead section right between the two ears. Next you should bring up a large orange block from the tray. The ants will stream up the middle path and attack the two large orange ear sections simultaneously. This aggressive move greatly reduces the bulk of the remaining colored tiles. The ants have a totally straight shot up the center of the board now so these blocks will empty out very fast. Your waiting slots will stay clear and safe as the orange blocks drain rapidly.
Step 8: Eliminate the highest dark purple edges from the board
With the bright orange ears completely gone you will see the dark purple outline tiles left standing by themselves. Pull a dark purple block into an open slot at the bottom. The ants will run straight up the middle and dismantle the dark outline around the ears and the top of the head. The dark purple tiles are scattered in a thin line which takes a little extra time for the ants to walk across. Patience is key here. Let the purple blocks drain entirely before you flood the board with another color. This step removes the very last of the actual colored picture from the board. You are now left with nothing but the scattered remnants of the upper white background border. Keep pulling your dark purple blocks until every single piece of the character shape is completely erased from the screen.
Step 9: Sweep the remaining upper white border to finish the level entirely
The final hurdle is the huge white border enclosing the top corners of the board. You will likely see several large white blocks waiting in your bottom tray. Pull one white block to send a massive wave of ants around the entire upper perimeter. The white ants have the longest distance to travel out of any move in this puzzle. They must walk from the bottom hole all the way to the highest corners of the grid. Wait for the ants to finish eating the current white section before pulling the very last block. Watching the huge swarm of white ants clear out the final border is incredibly satisfying. Once your ants consume the final white tile the board will be completely clean and you will win the level.
Final Thought
This level requires careful timing to bring down the massive crate without jamming your tray slots. Keeping the bottom paths clear ensures a steady flow of ants to the top half once the obstacle vanishes. I highly encourage you to watch the video above this article if any step is hard to follow in text. Seeing the exact timing of the tray pulls can make a huge difference in your gameplay.