Colony Flow Level 764 Walkthrough Solution & Guides | How to solve Colony Flow 764

Guide By Liam Stone
Updated on August 8, 2026
Some players prefer video. The one above covers the entire Level 764 walkthrough.
Video doesn't match your screen?
Game updates frequently scramble layouts! Try our AI Screenshot Solver first to find your exact board instantly, or report broken guides to our team.
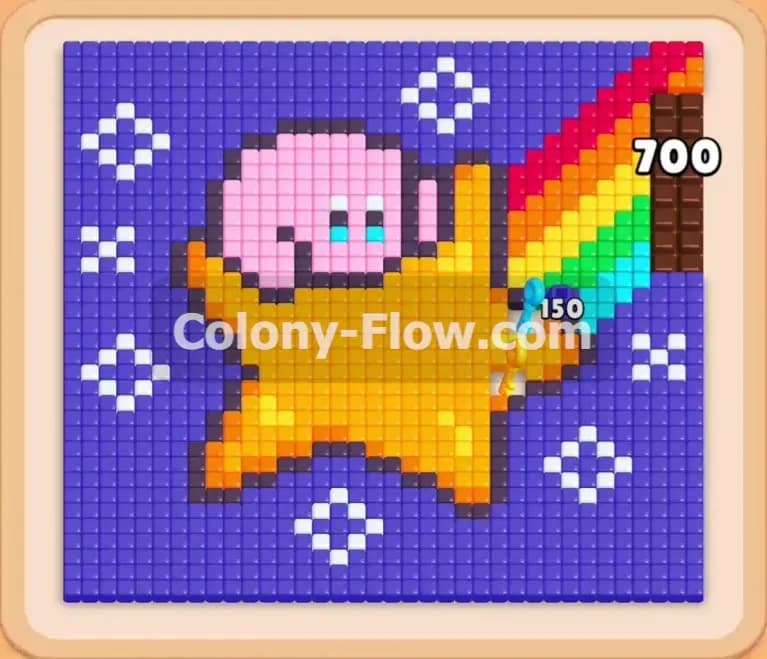
Colony Flow Level 764 brings a fun and colorful pixel art picture of a pink character riding a yellow star with a bright rainbow tail. This board is packed with challenges like a giant chocolate barrier and locked blocks in the tray that require you to carefully manage your five wait slots. Every move you make must be calculated to keep a path open for the colony so you never jam the board. Here is exactly how to navigate the puzzle, handle the special elements, and secure the win without ever dead ending your progress.
Colony Flow Level 764 Overview
What You Are Working With
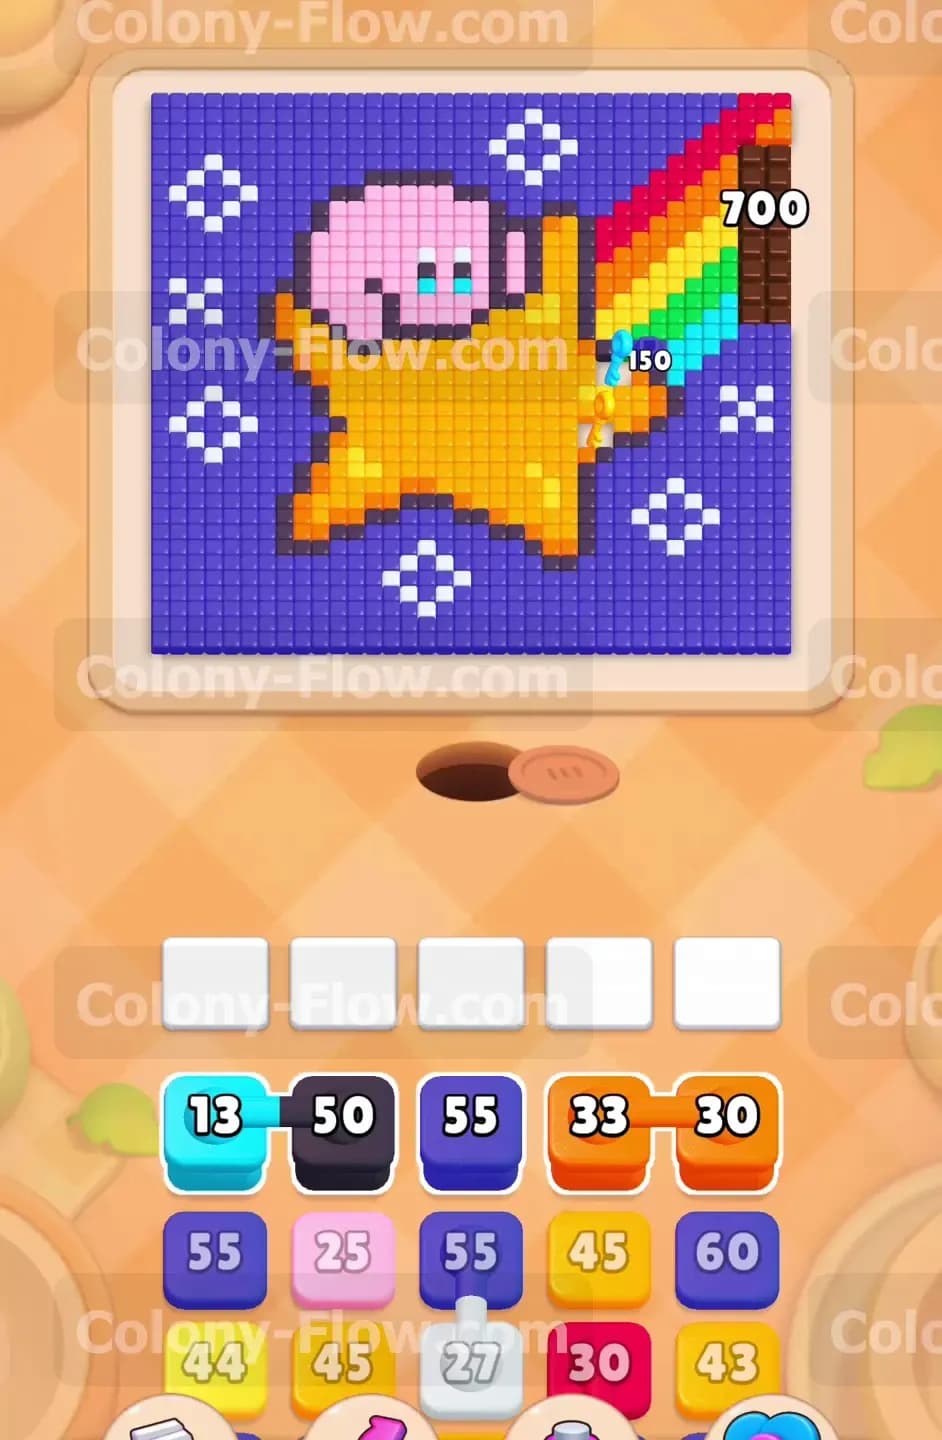
The picture at the top of the screen features a large yellow star carrying a pink character. A bright rainbow tail streams out behind them. The rainbow includes beautiful stripes of red, orange, yellow, green, light blue, and dark blue. The background surrounding the main image is filled with bright purple tiles and decorated with four white diamond shaped stars. At the top right corner of the picture, a massive block of chocolate sits directly over the end of the rainbow.
Your tray at the bottom holds a massive stack of numbered colored blocks. You will encounter several special elements in this level. First, you have connected boxes linked together by a thick line. You also face hidden boxes marked with question marks that hide their true color until you clear a path for them. There are locked blocks in the tray that require you to collect keys from the board before you can pull them. Finally, the chocolate acts as a tough barrier that you must break down to access the food tiles trapped underneath.
What It Takes to Clear Level 764 Board
To clear this level, you must match colored blocks from your tray to the corresponding food tiles in the picture. Ants stream out of the nest hole and follow open paths to consume the tiles. You win when every single tile is eaten and the picture is completely clear. The main danger is filling all five wait slots with blocks that have no open paths. If the ants cannot reach the colors you pulled, the board jams and you lose. You must constantly alternate between the rainbow stripes, the central star, and the outer background to keep the flow moving smoothly.
Colony Flow Level 764 Step by Step Solution
Step 1: Deploy the connected orange blocks to start breaking the chocolate
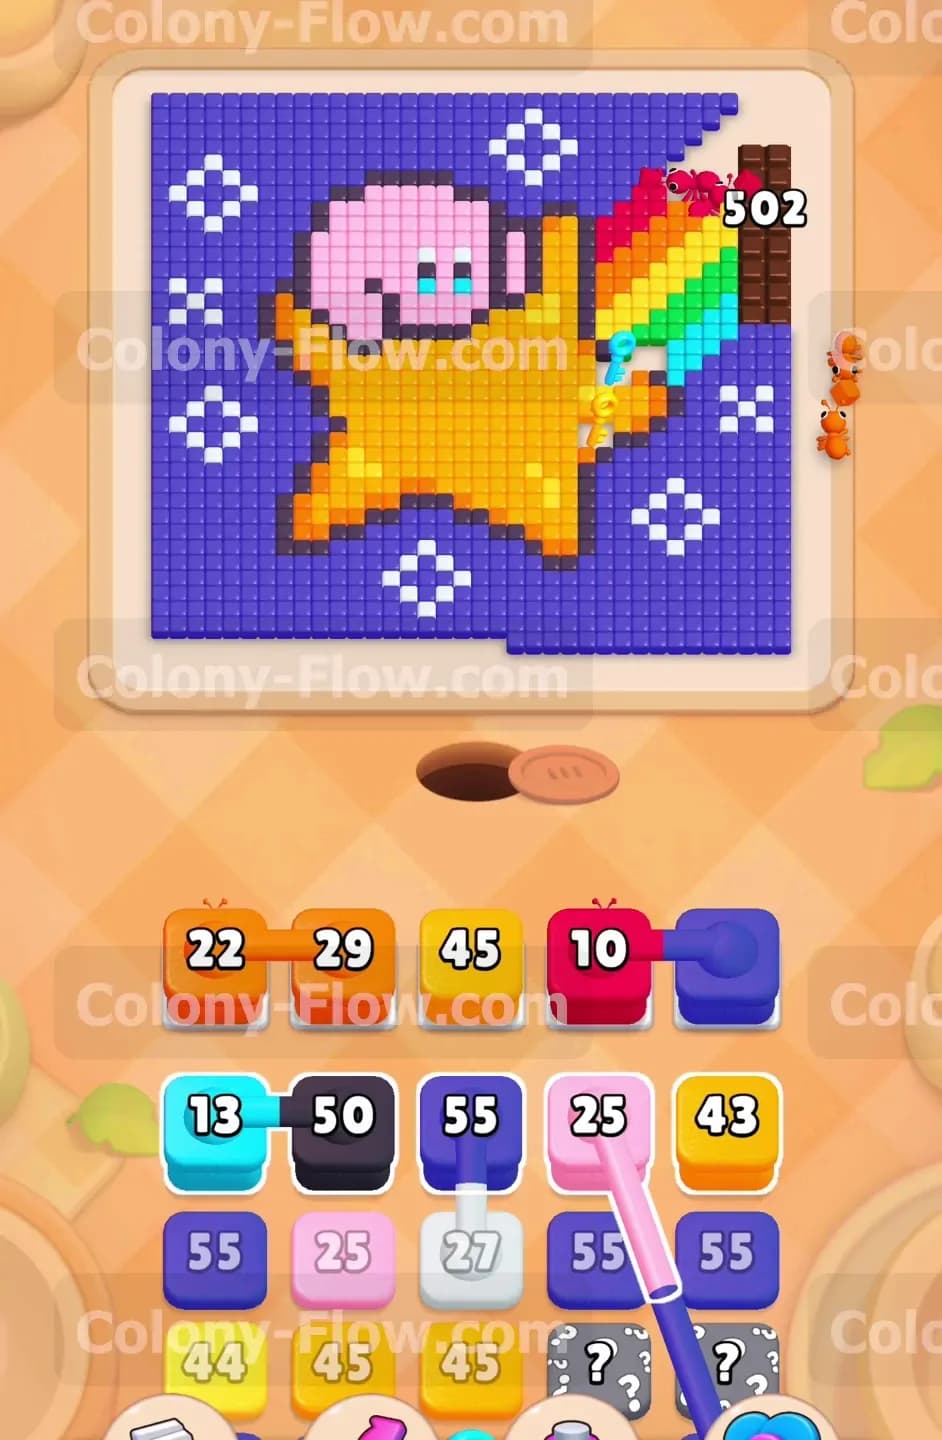
Your first priority is to open a path toward the top right corner where the chocolate blocks the rainbow. Look at the top right of your tray to find two connected orange blocks. Pull them both up into your wait slots. Because they are connected, pulling one brings the other along. The orange ants will immediately stream up the board and begin eating the orange stripe of the rainbow. As they reach the top right, they will also start dealing damage to the massive chocolate barrier. The chocolate starts with a huge hit point number, so you need to keep ants flowing nearby to chip away at it early on. This move establishes a strong path through the right side of the board and prevents your wait slots from jamming right at the start. It also peels back the initial layers of the puzzle so you can see your next targets clearly.
Step 2: Feed the yellow star to keep wait slots clear
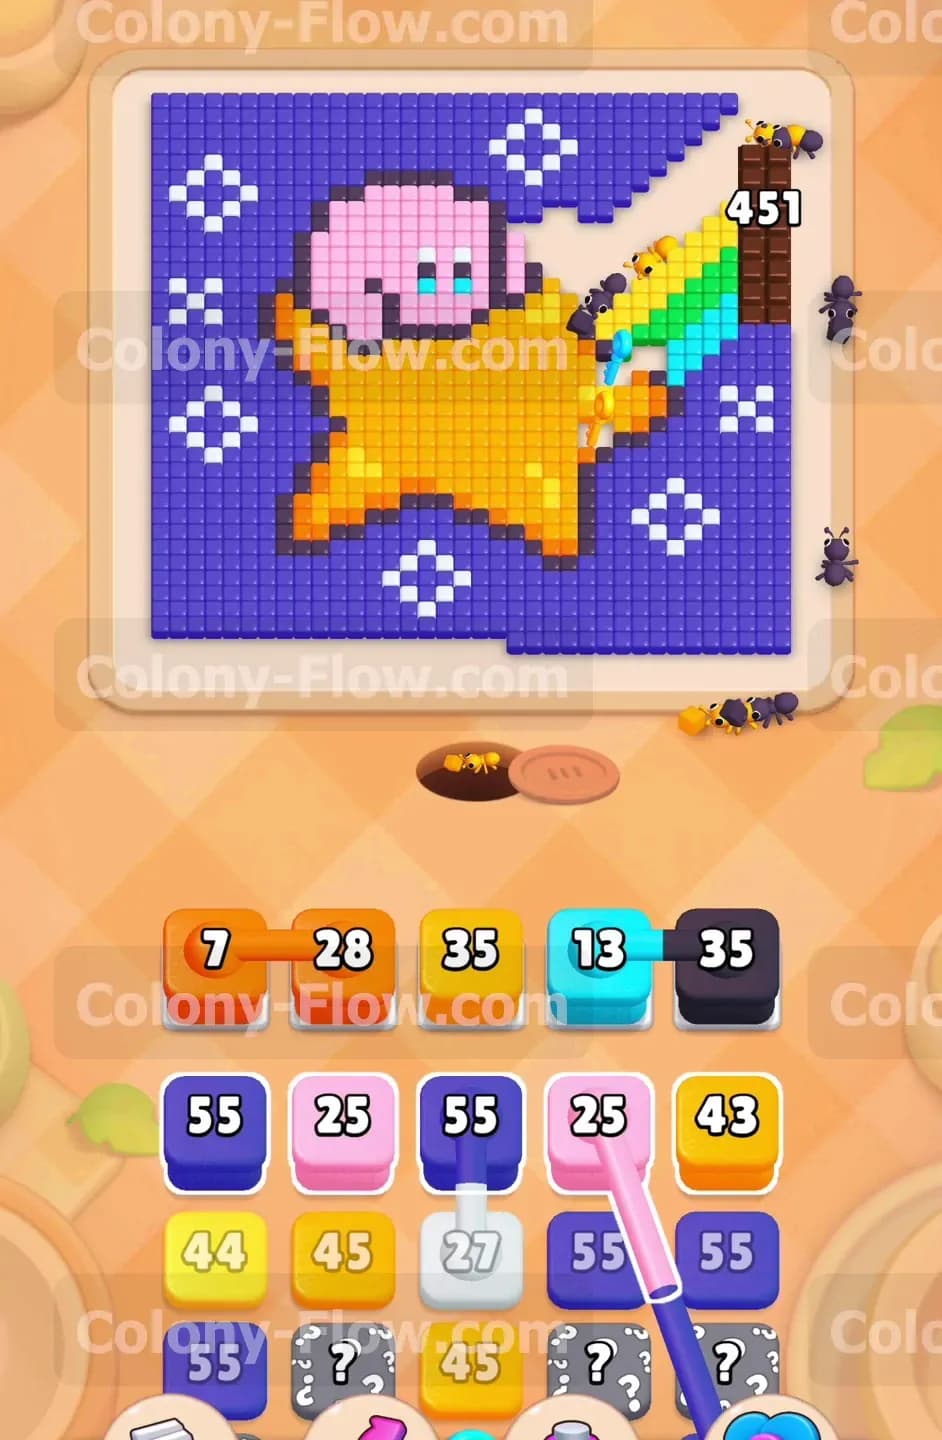
While the orange ants are busy with the rainbow, you need to keep your wait slots active and moving. Pull a large yellow block from the tray. The yellow star takes up a huge portion of the middle board, which means yellow ants have a massive open surface area to work with. Sending yellow ants ensures that the yellow block in your wait slot will count down rapidly and disappear. This is a great habit for survival in this game. You always want to pull a block that corresponds to a wide open area. The yellow star provides the perfect release valve for your tray, giving you plenty of breathing room to plan your next pulls without the fear of filling all five wait slots.
Step 3: Bring out the pink blocks for the character body
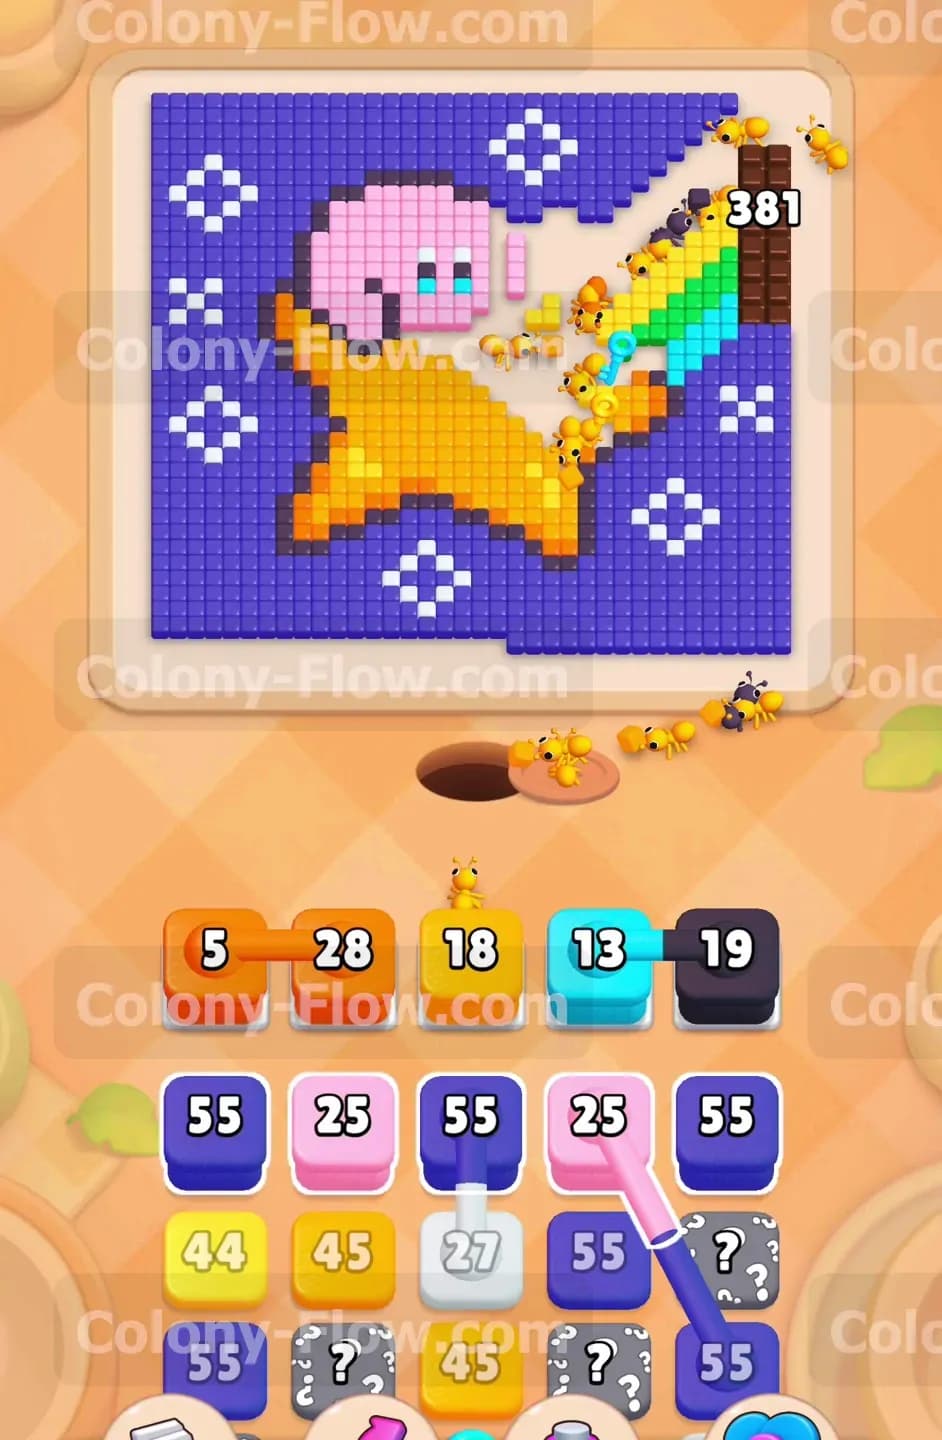
Once the yellow star begins to shrink, it exposes more paths toward the top left of the board. Now is the perfect time to pull a pink block from the tray. The pink character body is large enough to absorb a full block quickly. Sending pink ants creates a steady stream toward the top left corner. By alternating between the right side rainbow and the left side character, you distribute the ants across the entire board. This wide distribution prevents traffic jams near the nest hole and keeps your ants flowing smoothly. Keeping multiple lanes of traffic open is the best way to ensure that your wait slots never back up and cause an accidental loss.
Step 4: Utilize the connected light blue and dark blocks
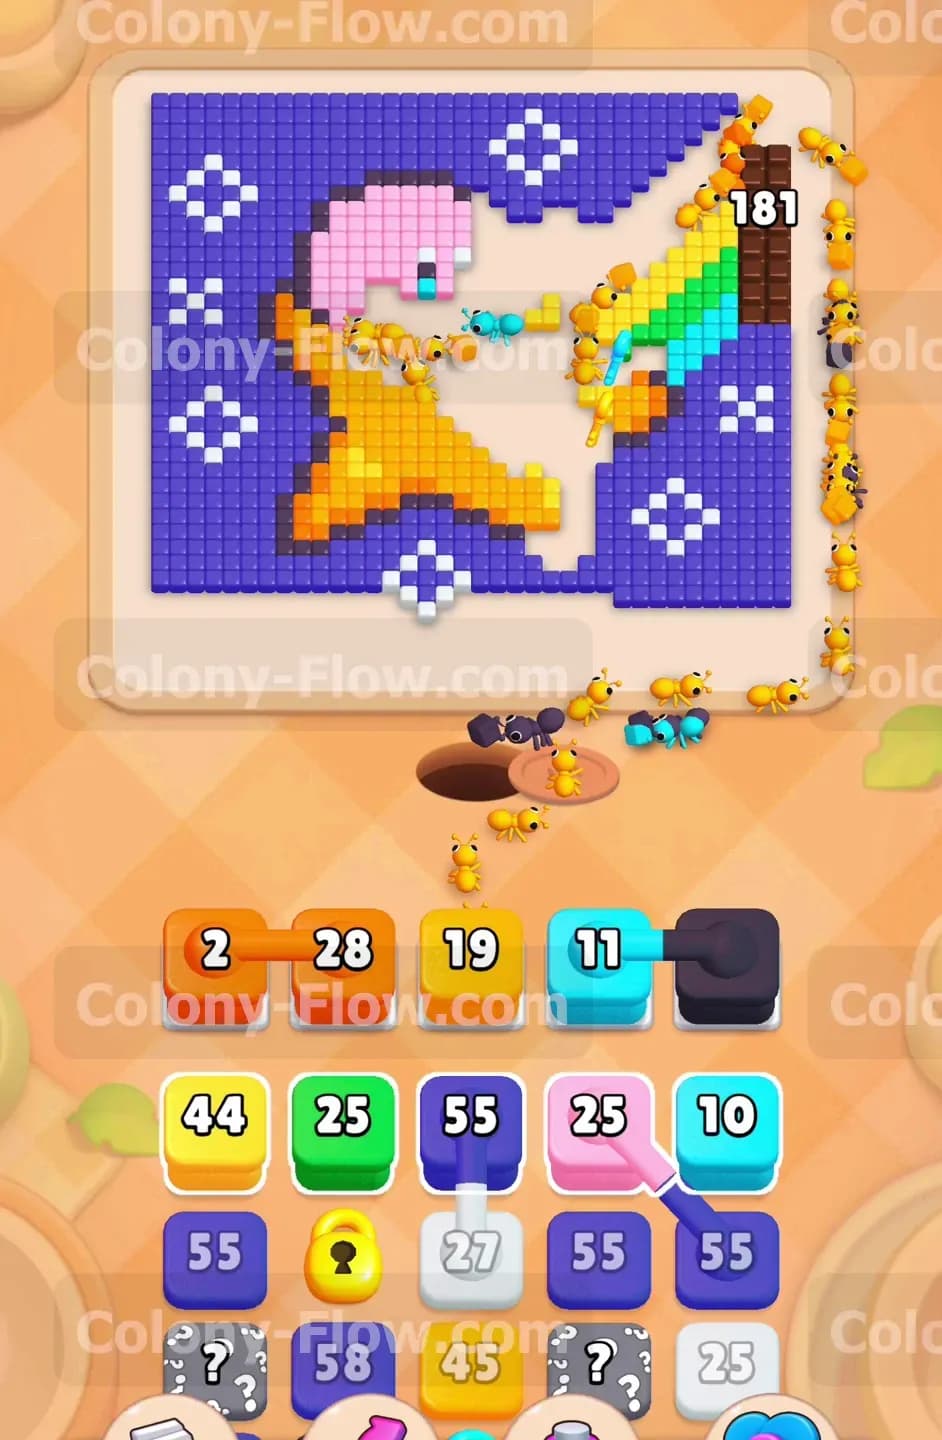
As you dig deeper into the tray, you will uncover another pair of connected blocks. These are the light blue and dark navy blocks. Pulling this connected pair sends ants to two different areas simultaneously. The light blue ants will tackle the cyan stripe of the rainbow on the right side. The dark ants will start eating into the dark outer edges of the background. Because you already cleared parts of the orange and yellow areas, the light blue ants have a clear highway to reach the upper sections of the rainbow. Always verify that a color has an open path before you pull a connected pair. If one of the colors is completely blocked, the pair will sit in your wait slots and put you at risk of a terrible jam.
Step 5: Collect keys to unlock the restricted tray blocks
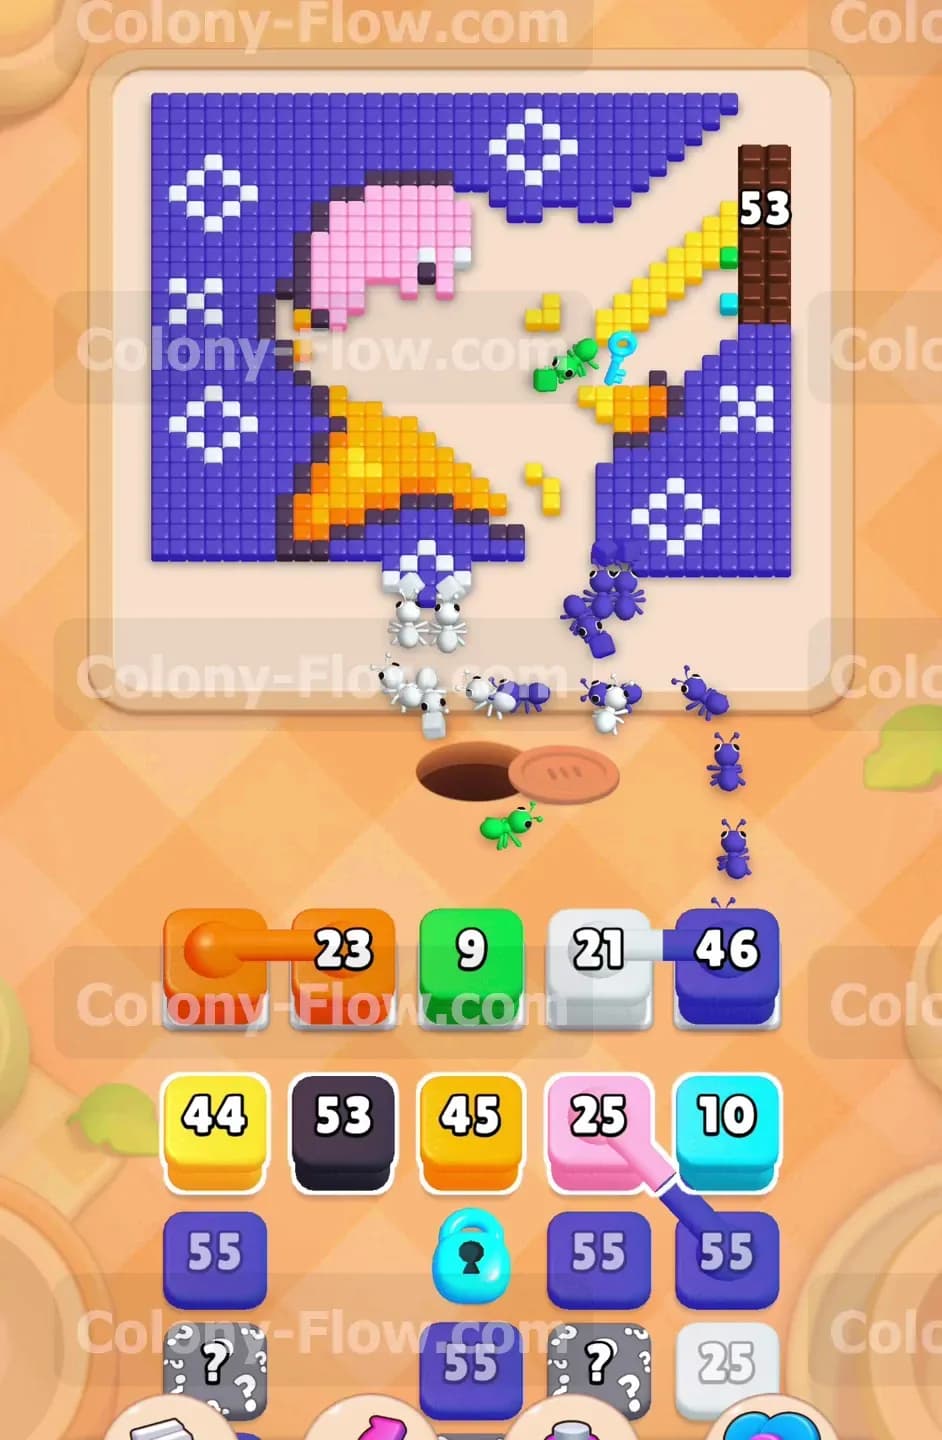
As the ants consume the rainbow and the character tiles, they will automatically pick up key items scattered on the board. You need these keys to unlock the restricted blocks sitting in your tray. You will see a yellow block and a light blue block wrapped in heavy locks. You cannot pull these locked blocks until you gather enough keys from the main picture. Keep feeding the accessible colors like purple, yellow, and pink to ensure the ants reach the key tiles hidden among the pixels. Once the final key is collected, the locks shatter entirely. This opens up fresh options in your tray and allows you to continue feeding the massive yellow star and the bright rainbow sections.
Step 6: Break through the final layers of the chocolate barrier
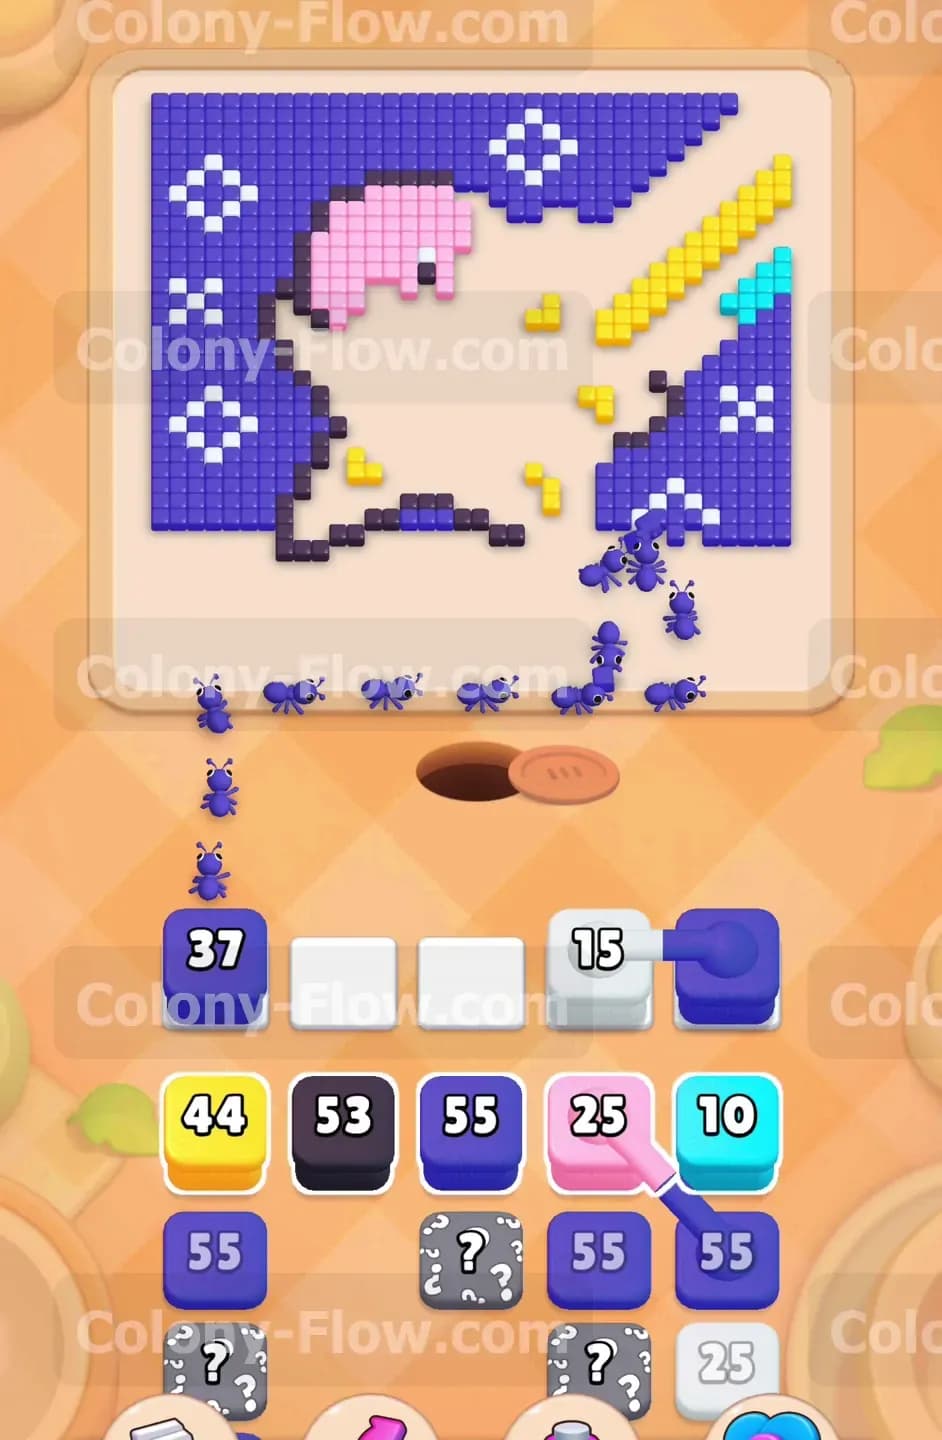
By this time, the constant flow of orange, yellow, and light blue ants has reduced the chocolate number significantly. Pull any remaining red or green blocks to clear the rest of the rainbow stripes leading up to the top right corner. When ants consume the food tiles directly adjacent to the chocolate, they deal massive damage to it. Eventually, the chocolate barrier will shatter completely. This is a huge relief because it exposes the final sections of the rainbow and the background underneath. Clearing the chocolate entirely removes the risk of those right side tiles causing a late game dead end. You can now access every single tile on the board without any solid barriers getting in your way.
Step 7: Reveal the hidden boxes at the bottom of the tray
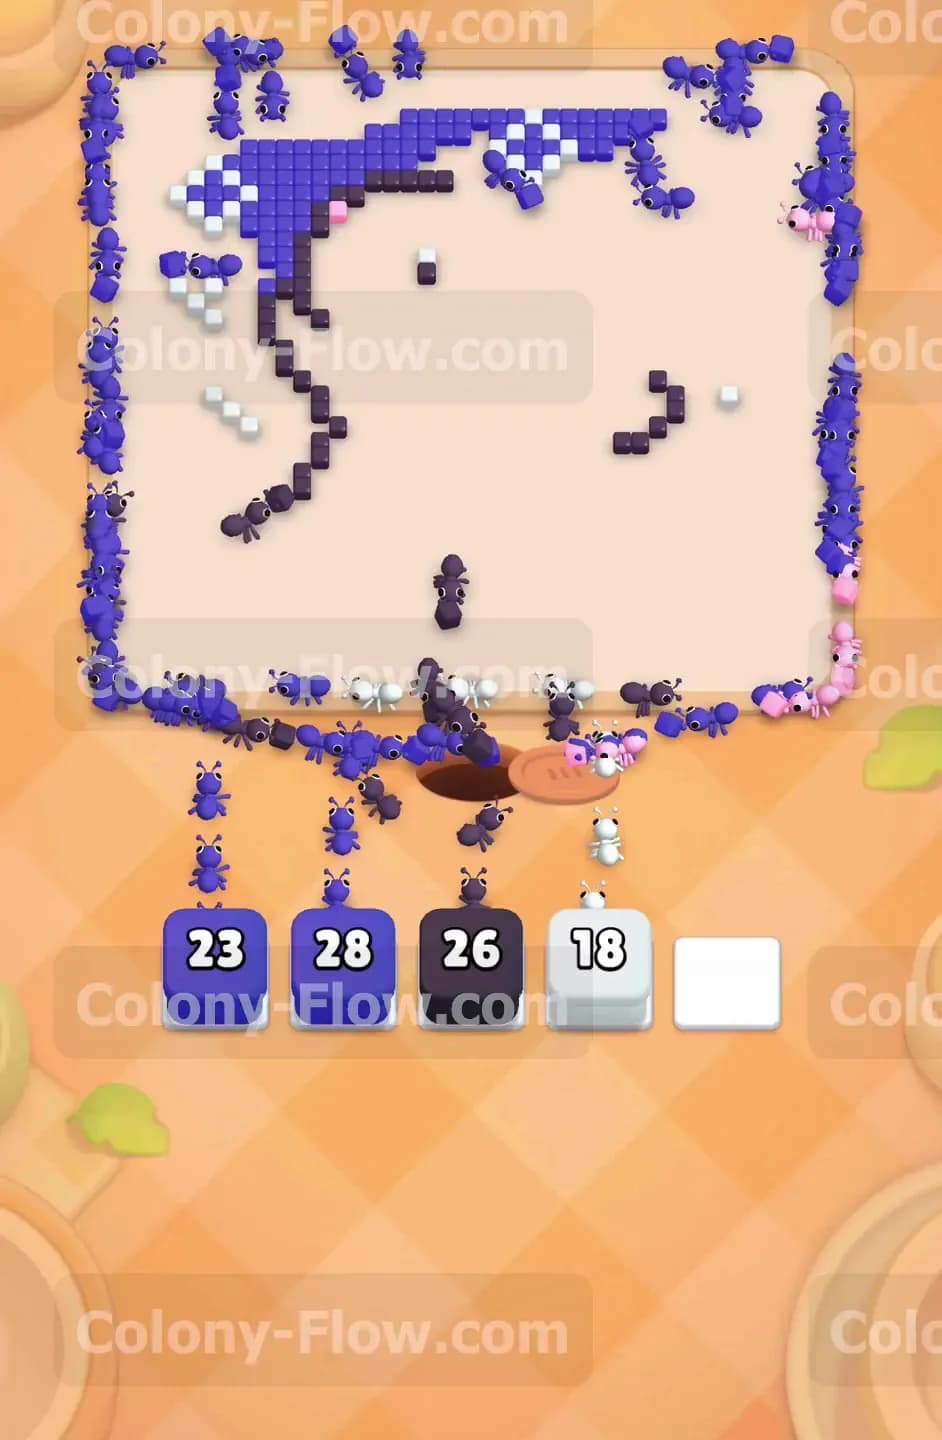
As your tray empties out, you will expose gray boxes marked with a large question mark. These are the hidden boxes. They will not reveal their true color until they have a valid path to move into the wait slots. Pull the adjacent white blocks to clear the white diamond stars dotted around the background. Clearing the white blocks shifts the tray and gives the hidden boxes room to breathe. They will flip over to reveal purple and pink colors. Because you already opened massive paths on the board, you can immediately pull these newly revealed blocks into your wait slots without fear of jamming. It is always satisfying to turn a mysterious hidden block into a useful tool for clearing the board.
Step 8: Flood the board with purple blocks to finish the background
The final phase of the level is all about the deep purple background. The purple area is absolutely enormous and requires multiple large purple blocks to fully clear. Look at your tray and you will see several purple blocks with a high value of fifty five. Pull them into your wait slots one by one. The purple ants will swarm the outer edges of the picture in huge numbers. Since all the inner picture elements like the star, the character, and the rainbow are already gone, the purple ants have zero obstructions in their path. They will rapidly devour the remaining background tiles from all sides. Watch as the last purple block counts down to zero, leaving the board completely clear and securing your hard earned victory.
Final Thought
Colony Flow Level 764 requires a careful balance of clearing the central picture elements while constantly chipping away at that massive chocolate barrier. By managing your connected blocks wisely and unlocking the restricted tray items early, you can keep your wait slots free and your ants moving forward. If you find yourself struggling with the exact order of the tray pulls or how to handle the hidden boxes, please watch the video above this article. Seeing the sequence in motion will help you master the timing and conquer the board with total confidence.