Colony Flow Level 1220 Walkthrough Solution & Guides | How to solve Colony Flow 1220

Guide By Liam Stone
Updated on August 12, 2026
Rather watch than read? The video above walks through Level 1220 step by step.
Video doesn't match your screen?
Game updates frequently scramble layouts! Try our AI Screenshot Solver first to find your exact board instantly, or report broken guides to our team.
Welcome to Colony Flow Level 1220. This space puzzle gives you a large striped planet surrounded by bright rings against a massive dark starry background. You have to feed your ants carefully to avoid a tray jam while managing some tricky mechanics. This board forces you to think ahead because of the massive amount of background tiles and the complicated linked pieces resting in your tray. I will guide you through the safest path to clear the whole board. Let us dive into the best strategy to complete this challenge.
Colony Flow Level 1220 Overview
What You Are Working With
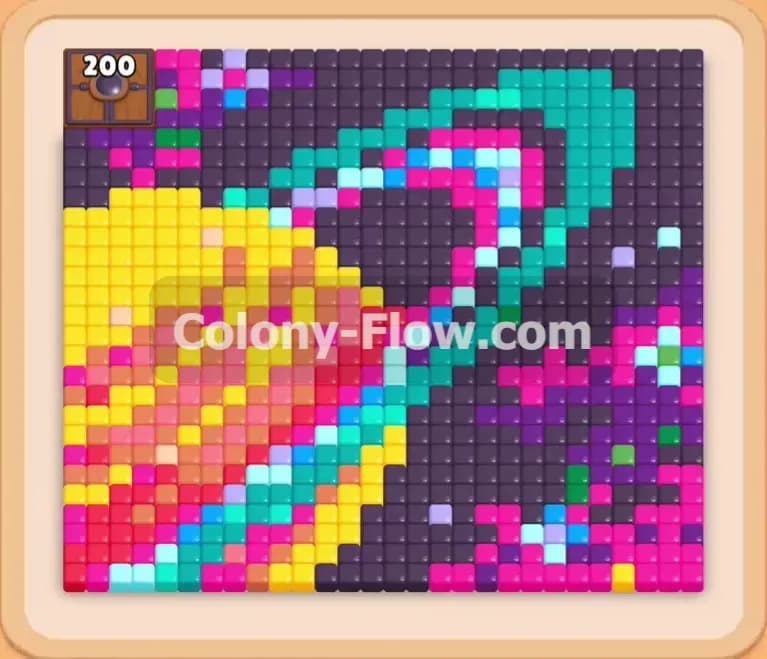
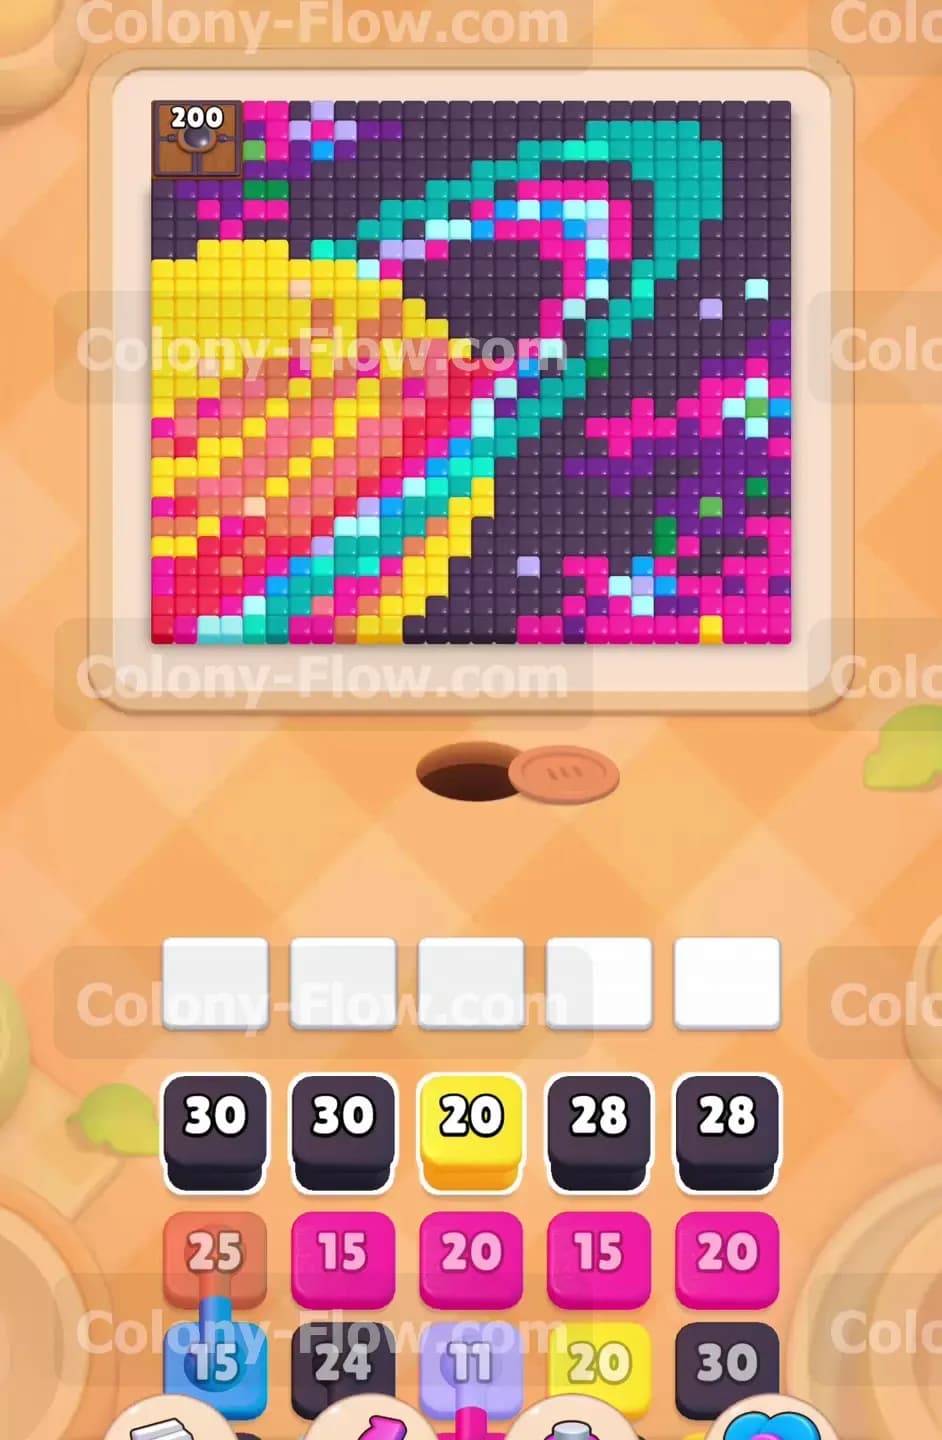
Take a moment to look at the beautiful pixel art on your screen. A massive dark black background completely surrounds the central shape and dominates the right side of the board. The central shape is a planet with thick yellow, orange, and red diagonal stripes. A gorgeous set of rings wraps around the planet in vibrant light blue, white, and magenta colors. In the extreme top left corner sits a Hungry Door tile clearly marked with the massive number 200. This door completely blocks the tiles underneath it and prevents any ants from entering that corner. Down in your tray, you see standard single numbered blocks and several complex groups of connected boxes. Pulling one connected box automatically drags its linked partner up into the waiting slots along with it.
What It Takes to Clear Level 1220 Board
You need to strip away the giant black background first. Clearing any background tiles automatically reduces the counter on the Hungry Door. You have exactly five waiting slots to hold your colored blocks. If you fill all five slots with colors the ants cannot currently reach, you lose the level instantly. The connected boxes pose a major threat and require careful planning. When you pull a linked pair into the waiting slots, they take up two of your five spaces at the exact same time. You must ensure the ants have a clear unobstructed walking path to at least one of those colors immediately. You win this level when the entire planet and background disappear into the ant nest without dead ending your colony.
Colony Flow Level 1220 Step by Step Solution
Step 1: Send black blocks to clear the outer space background
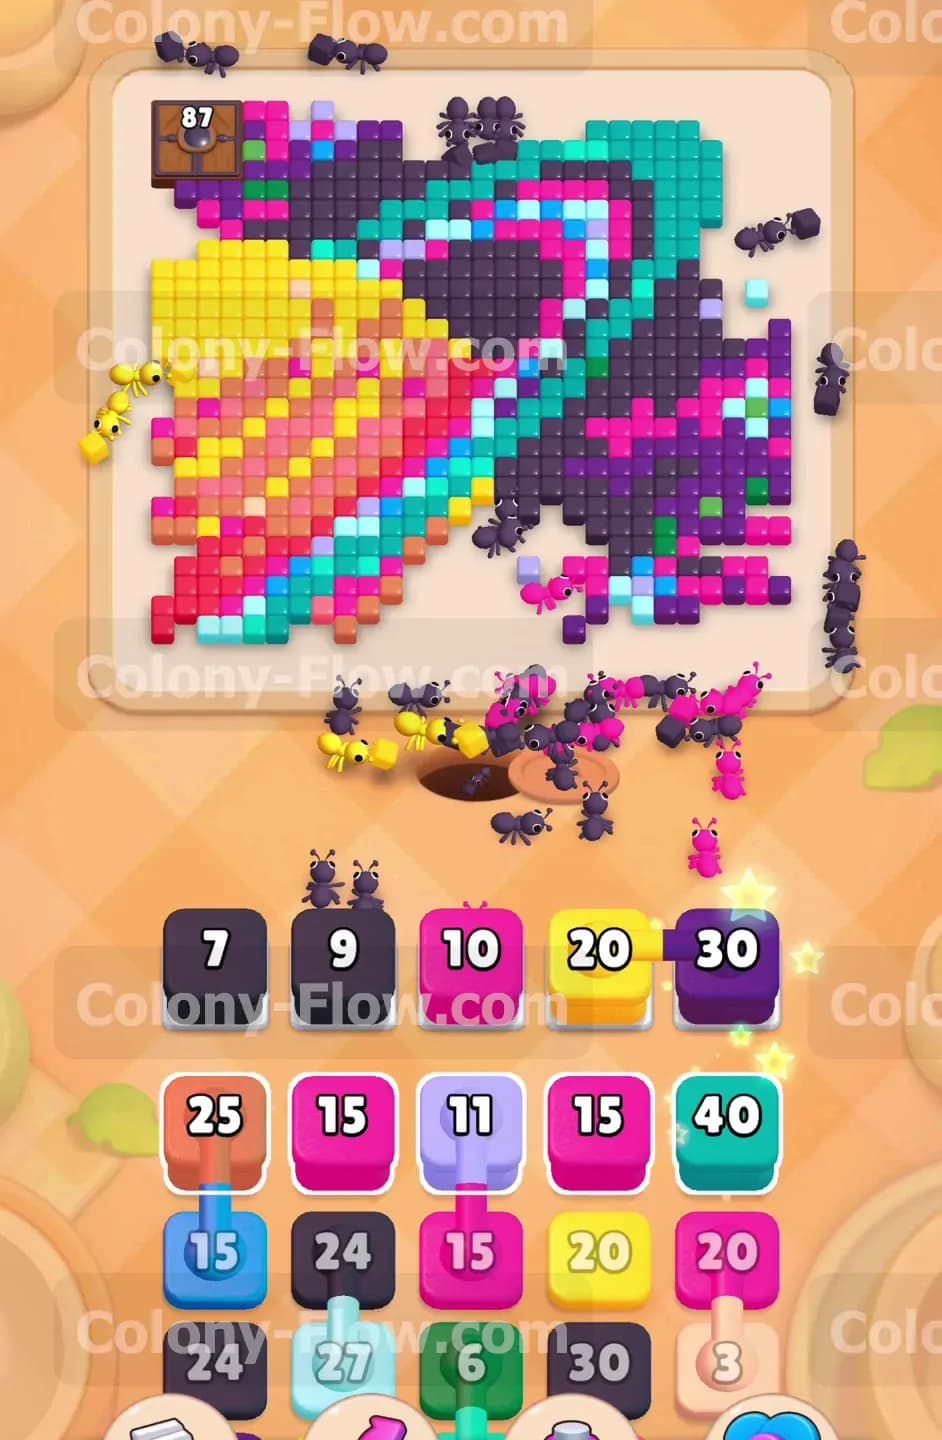
Start by pulling the large black blocks from the very top row of your tray. The black tiles cover the entire right side and the entire bottom edge of the screen. Feeding these specific blocks to your ants gives them massive surface area to work with right from the very first second. The ants pour out of the nest hole at the bottom and quickly eat the dark space tiles. Every single black tile they eat subtracts one point from the Hungry Door counter in the top left corner. Keeping the ants focused on the outer background edges prevents your five waiting slots from jamming early in the round. You want to watch the large numbers on those black blocks count down to zero before you introduce too many new colors to the board.
Step 2: Feed the yellow planet stripe and magenta rings
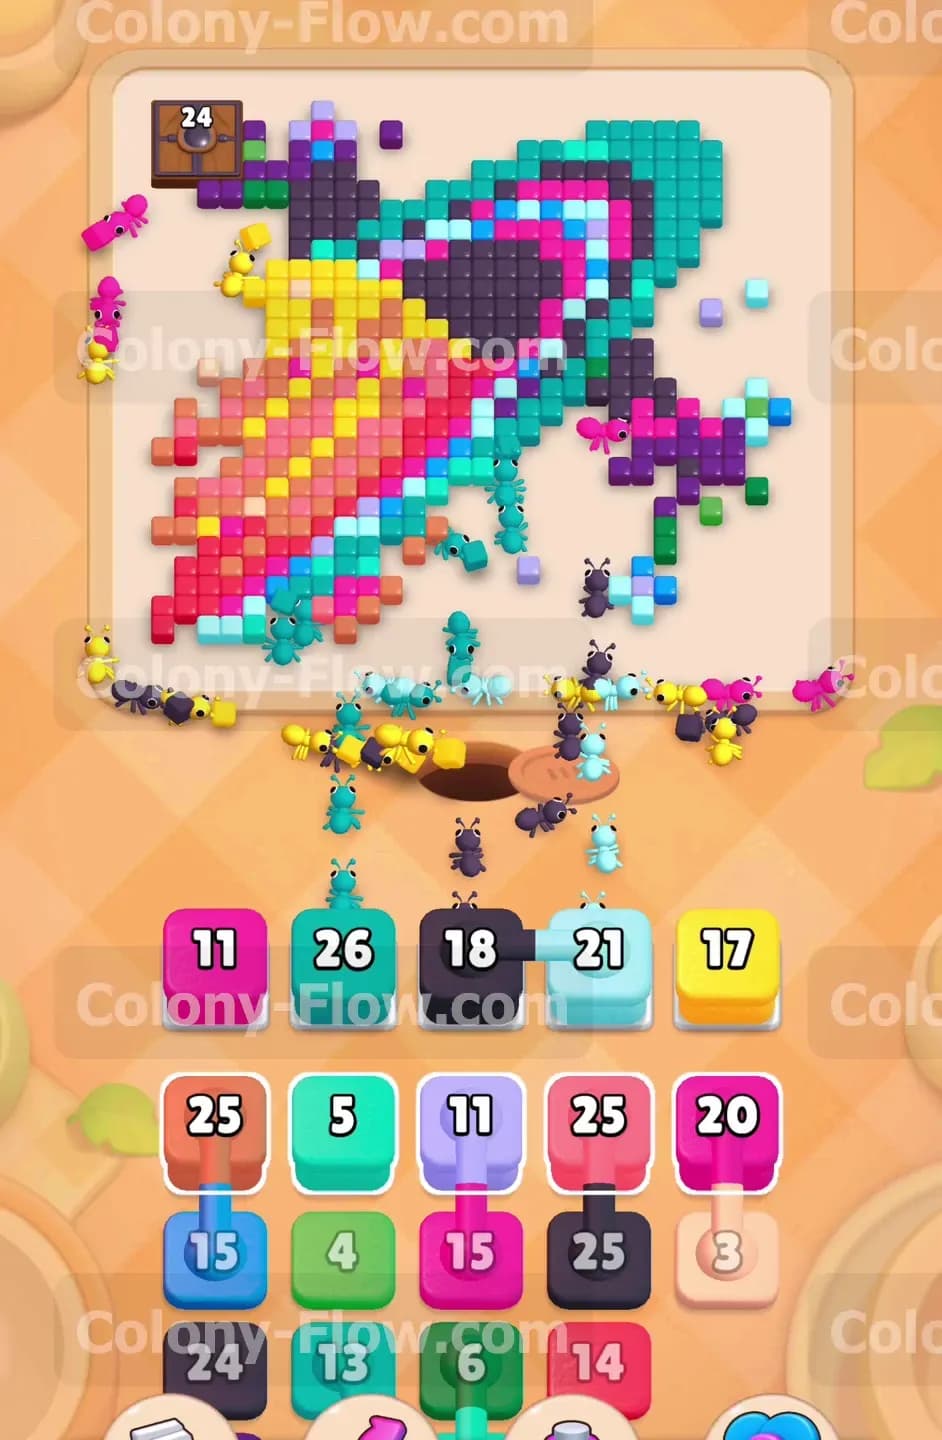
Once the ants clear a large portion of the black background, the outer edges of the planet and rings become completely exposed. Pull up a large yellow block to start eating away at the thick yellow stripe on the left side of the planet. Following that move, bring up a magenta block to target the bright outer layer of the rings. The magenta tiles run all the way around the main body and provide a huge pathway for your colony. Giving your ants immediate access to both the yellow section and the magenta section at the same time keeps two massive streams of ants moving constantly. The ants will march up the left side and swing around the right side simultaneously.
Step 3: Crack open the Hungry Door at the top left
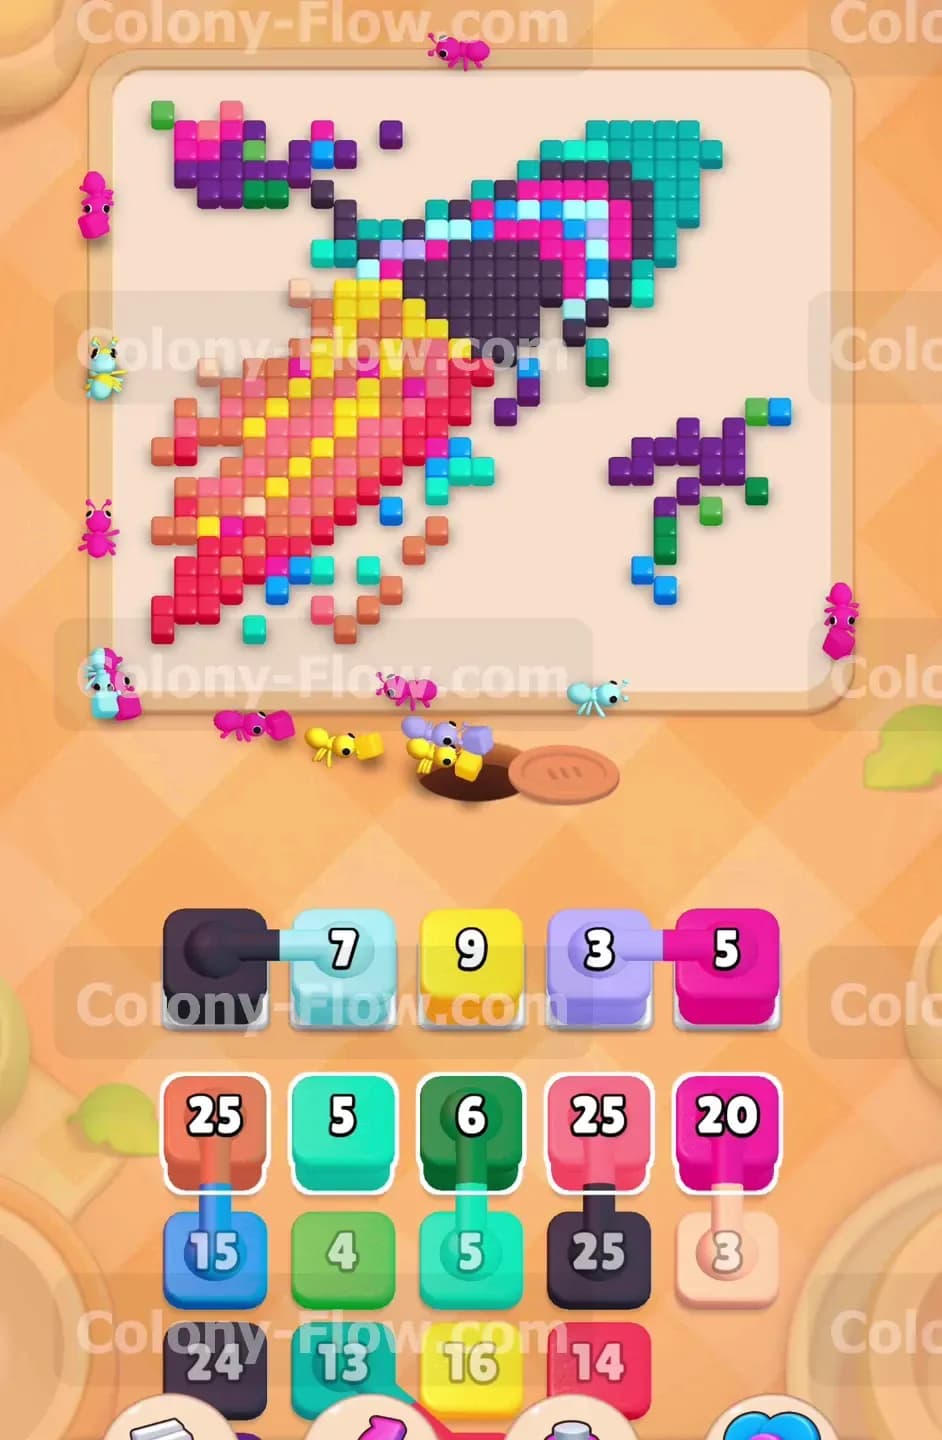
Your continued hard work on the black background and the outer magenta rings brings the Hungry Door counter rapidly down to zero. The brown door completely vanishes from the board and reveals the hidden sections of the rings underneath. This action opens up a brand new path for your ants to reach the extreme top left side of the board. You now have full uninterrupted access to the upper curve of the light blue ring and some extra background blocks. Wait for the ants to finish their current black and magenta numbers before you flood the tray with new colors. Keeping a steady pace here ensures your waiting slots stay wide open and ready for the next phase.
Step 4: Handle the first set of connected tray boxes
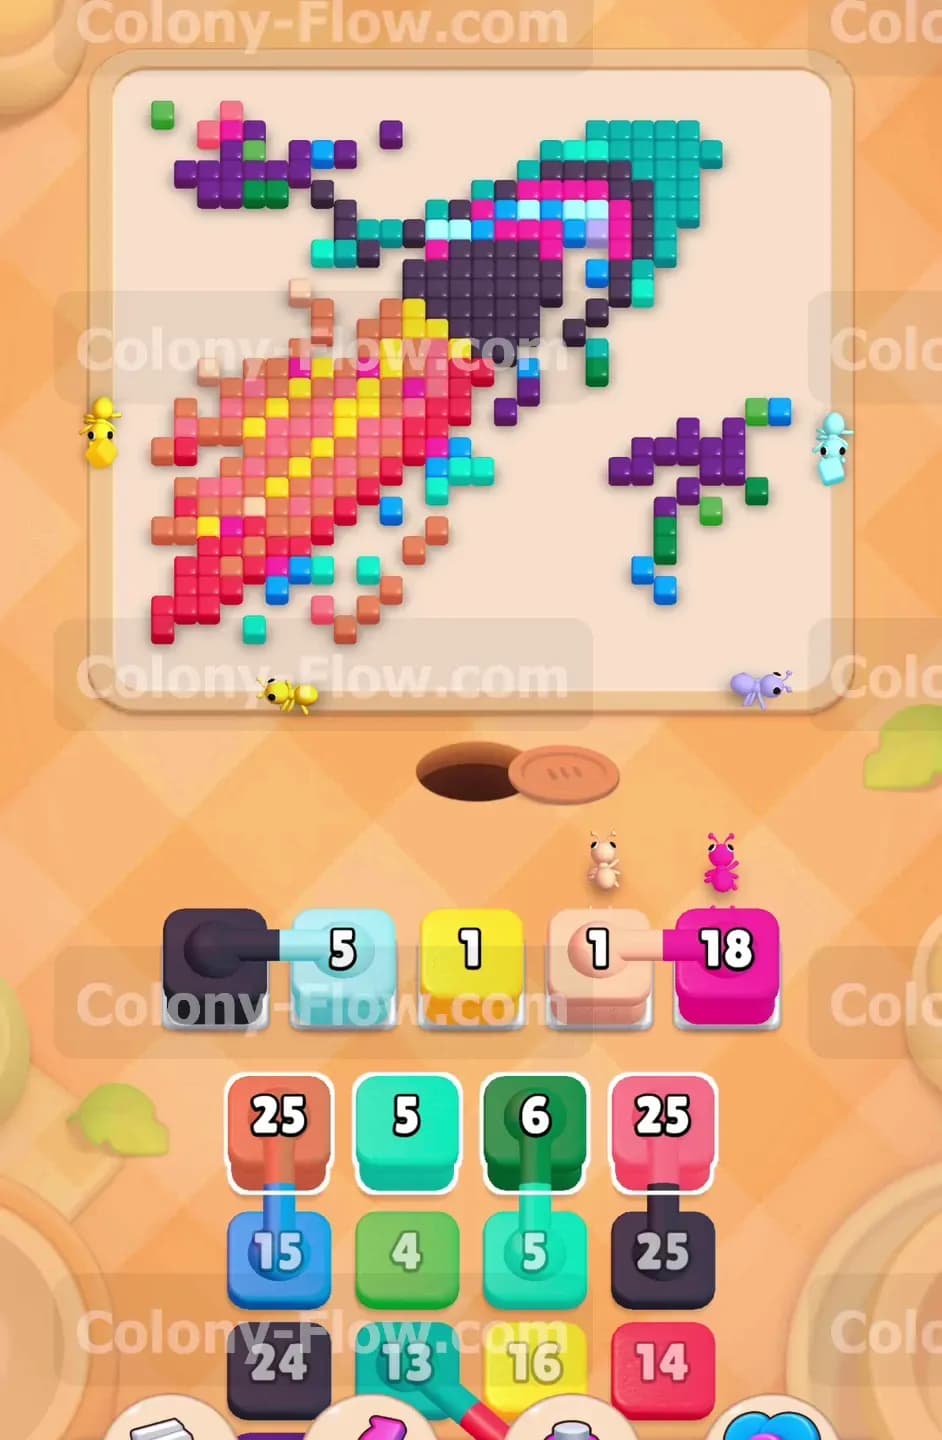
You will now face a row of connected boxes sitting near the middle of your tray. You see a large peach block permanently linked to a magenta block. Before you pull them into your precious waiting area, you must check the board visually. The ants can easily reach the magenta ring tiles, but the peach planet tiles remain completely buried under the orange stripe. Pull the linked pair up anyway because you have a guaranteed open path for the magenta color. The ants will immediately rush out to drain the magenta block completely. The peach block sits safely in the waiting area without jamming your remaining four slots. Managing this pair correctly allows you to prepare for the inner planet layers.
Step 5: Peel back the light blue ring layer
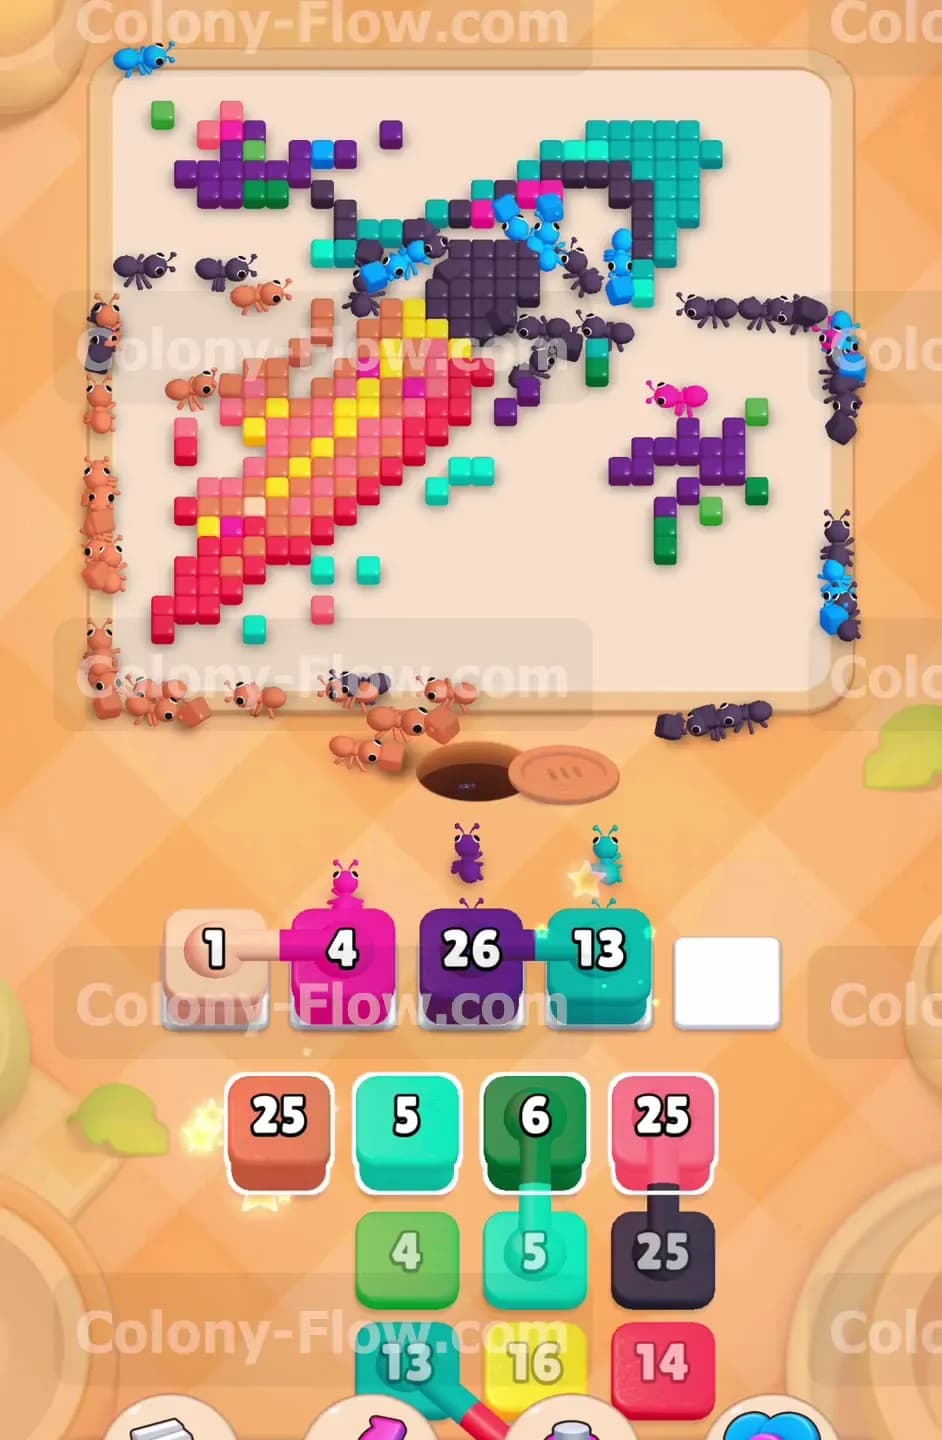
With the magenta ring entirely gone, the inner light blue ring stands completely exposed to your colony. Pull up a large light blue block to send your colony swarming all over the bright rings. The ants start at the bottom corner and confidently work their way up the entire right side curve. This sweeping action uncovers the final black background tiles trapped deep between the ring and the planet body. Bring up a smaller black block to clear out that hidden pocket of dark space. Your waiting slots remain safe and clear because you provided open walking paths for every single color you selected from the tray.
Step 6: Chew through the orange and red planet stripes
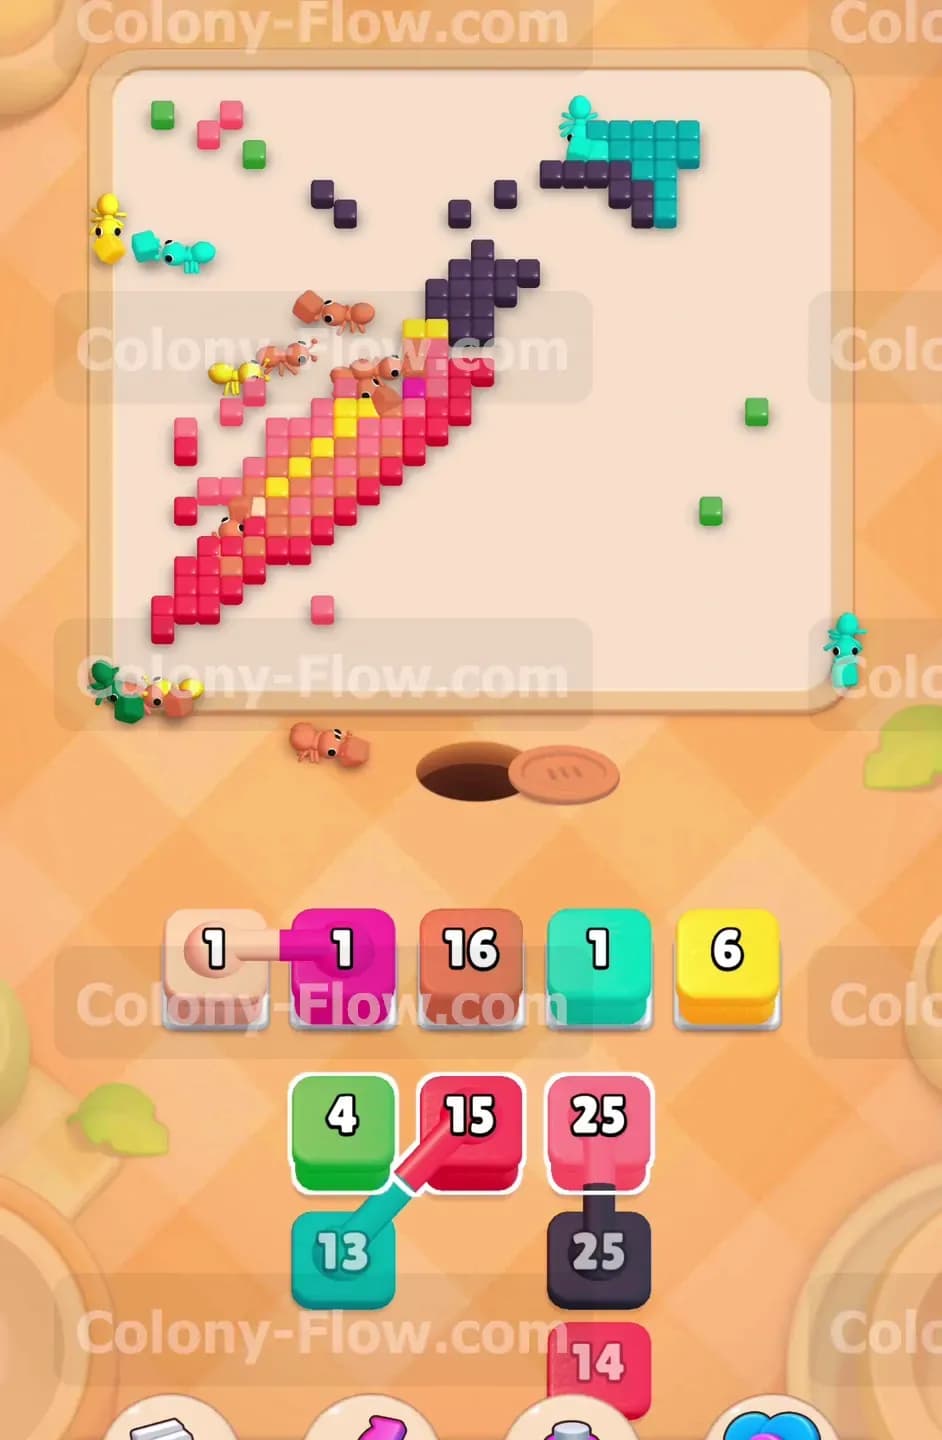
The large yellow stripe is totally gone and the orange stripe is now fully accessible to your hungry colony. Bring up a high numbered orange block to unleash the ants directly onto the middle section of the planet. As the ants aggressively consume the orange tiles, they expose the bright red core underneath. You also need to deploy the waiting peach blocks you stored earlier in the round. The ants easily clean up the peach tiles located near the bottom left edge of the planet. Always let one specific color finish its numerical countdown before you bring up another massive number into your limited tray slots.
Step 7: Navigate the green and light blue connected boxes
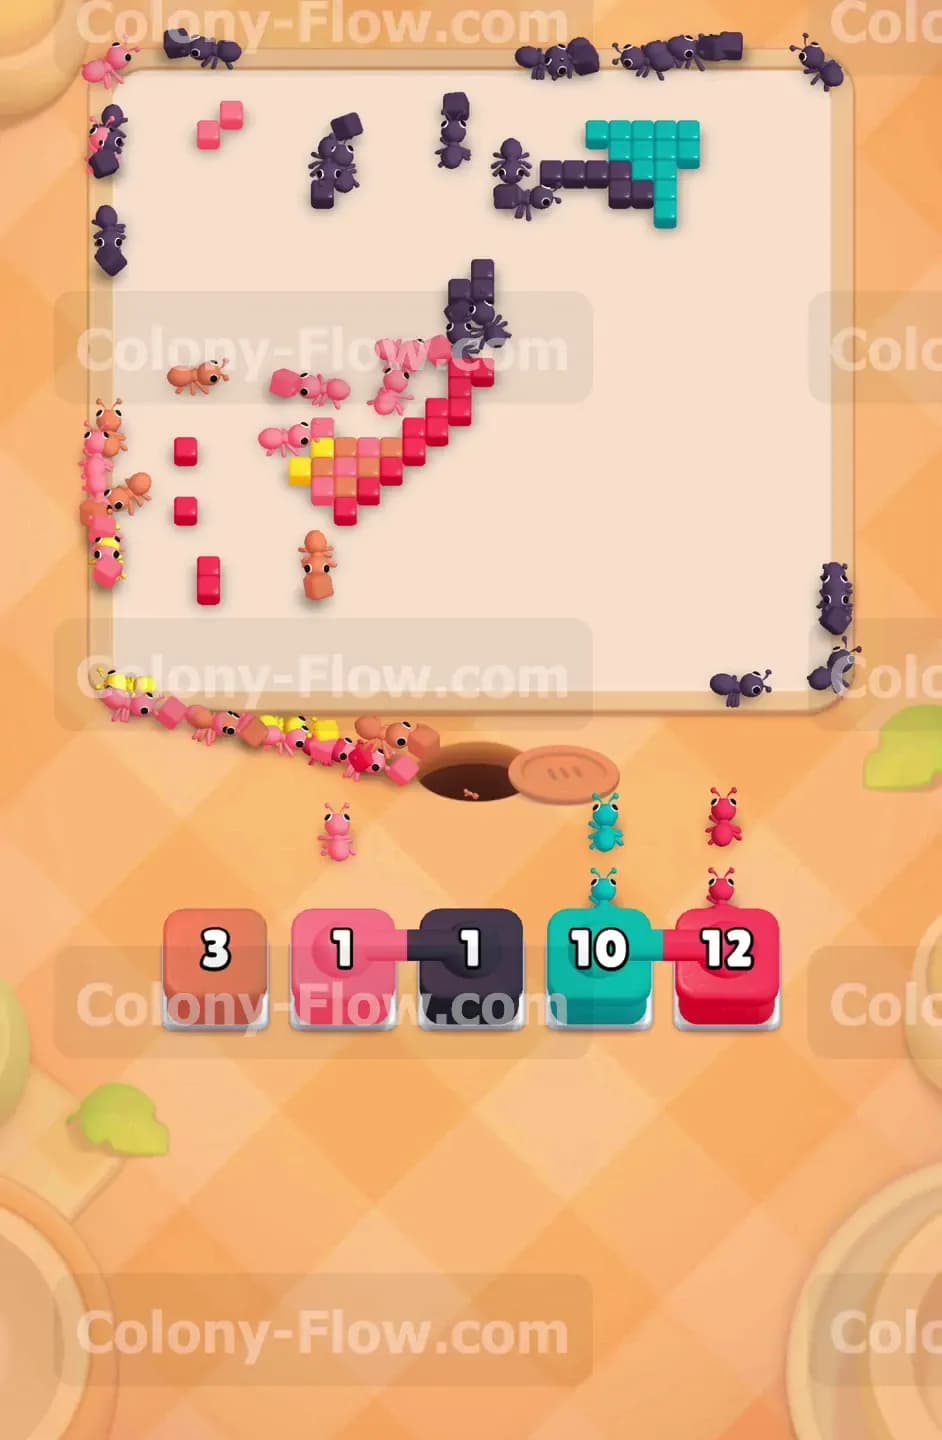
The bottom section of your tray holds a nasty chain of connected boxes featuring green and light blue colors bound tightly together. You absolutely must clear the remaining orange tiles before you dare to pull this dangerous chain. Once the orange stripe is completely clear, the small green tiles become freely available. Pull the connected chain into your waiting slots confidently. The ants instantly swarm the light blue tiles left on the top right ring section and simultaneously eat the green tiles resting on the planet surface. Handling this chain correctly guarantees you easily avoid a fatal board jam right near the end of the puzzle.
Step 8: Clear the final red core and finish the board
Only the bright red central core of the planet remains standing on the board. You also have a few stray light blue tiles floating up in the top right corner. Pull your final red block straight into the waiting slot. The entire colony marches straight up the middle of the screen and totally devours the red shape. Follow this simple move up with the last light blue block to clean the top right corner perfectly. The ants eat the final few pieces and return to their nest. The board empties completely and you win the level with zero tray jams.
Final Thought
Patience truly makes all the difference when dealing with connected boxes in your tray. You always want to visually verify your ants have an open walking route before you pull a linked chain into your waiting slots. Rushing your moves will cause those linked boxes to clog your entire tray and end your run prematurely. If you ever get stuck on any specific section of this puzzle, I highly encourage you to watch the video above this article. Seeing the ants move in real time across the board helps you time your own block pulls perfectly.