Colony Flow Level 82 Walkthrough Solution & Guides | How to solve Colony Flow 82

Guide By Liam Stone
Updated on July 11, 2026
You can watch the video above to see Level 82 solved from the very first move.
Video doesn't match your screen?
Game updates frequently scramble layouts! Try our AI Screenshot Solver first to find your exact board instantly, or report broken guides to our team.
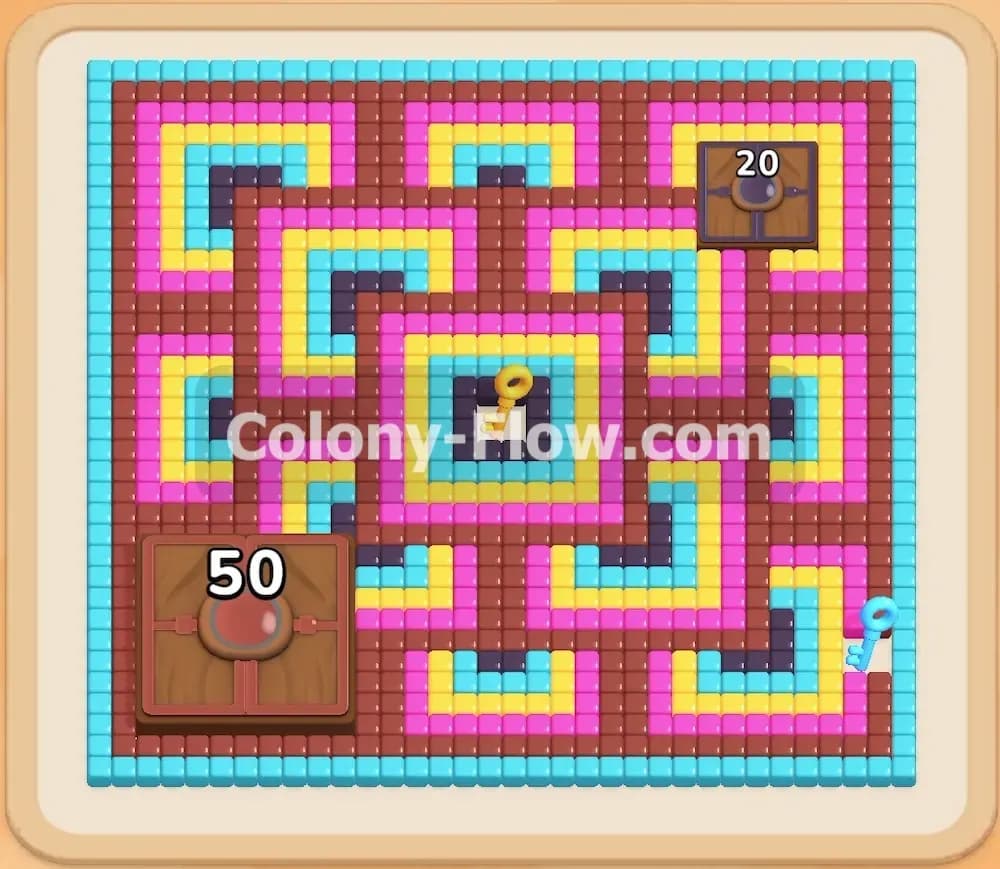
Welcome to Colony Flow Level 82. This board presents a very structured puzzle that feels like a brightly colored fortress. You are looking at a square maze built with thick concentric rings of food that protect a valuable prize in the very center. I will walk you through my exact strategy to dismantle this layout piece by piece. You have to balance massive food chunks against the limited space in your waiting slots to win this round.
Colony Flow Level 82 Overview
What You Are Working With
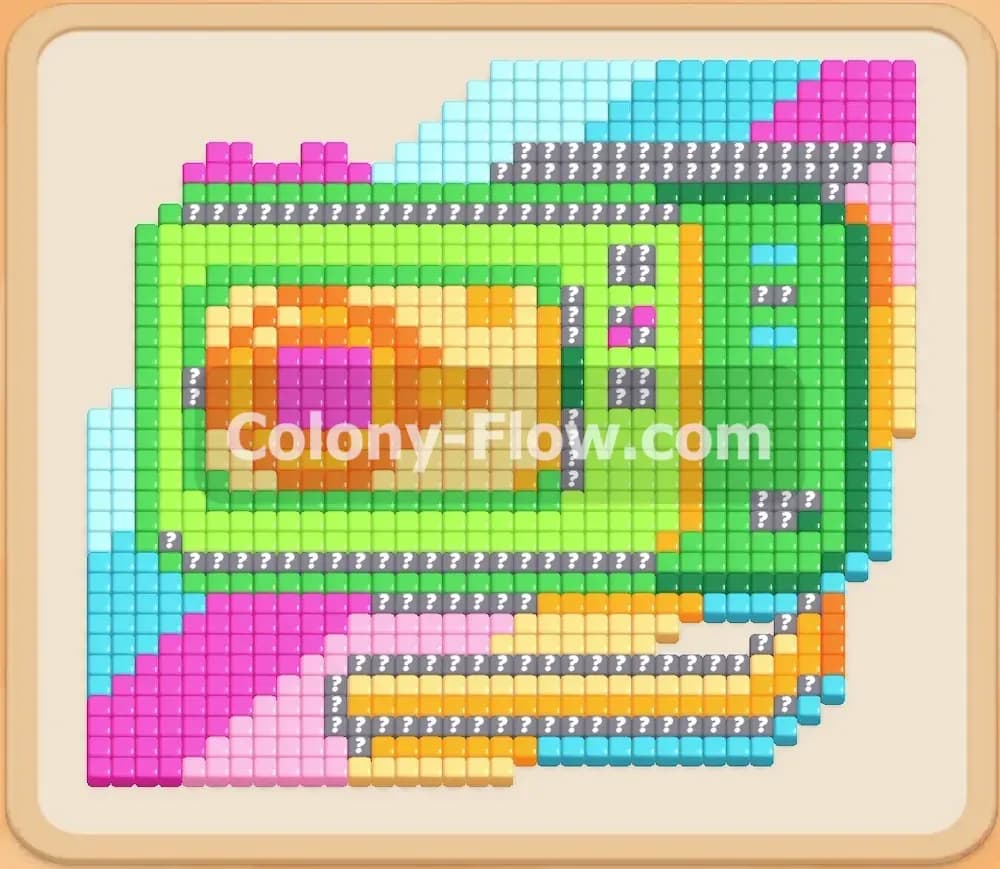
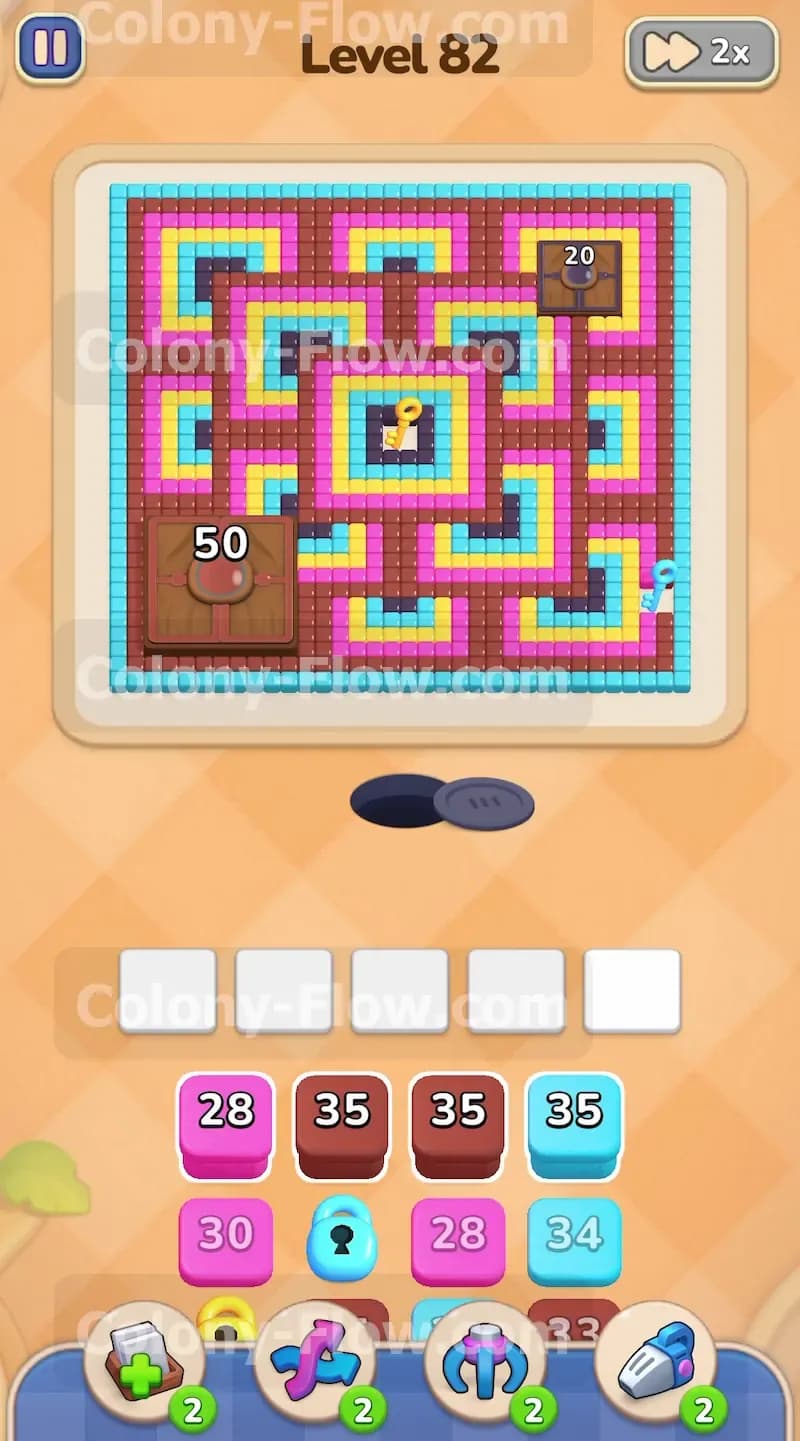
Level 82 puts a beautiful but stubborn pixel art maze right in front of you. The entire structure is wrapped in a thick cyan outer border. Just inside that cyan border you will find a bright pink layer followed closely by a deep brown layer. Finally a yellow layer surrounds the very center of the board. Right in the middle of that yellow square sits a single key. You absolutely need to secure that key to win the game. The board also features two exceptionally large chunks of brown food. A massive block sitting in the bottom left corner requires a staggering 50 ants to consume completely. A second large brown block in the top right corner demands 20 ants. Your tray at the bottom starts packed with heavy numbers including a Pink 28 block and multiple Brown 35 blocks. You will also see blocks in your tray marked with lock icons. Those locked blocks represent a trap. You cannot play them at all until your ants navigate the maze and physically touch the key.
What It Takes to Clear Level 82 Board
Clearing this board requires a very disciplined approach to peeling away the exterior defenses. You cannot rush the center. You must strip off the cyan and pink outer layers first to carve out walking paths for your ants. The biggest threat to your success is that 50 count brown block. You have to feed it early and consistently so it does not turn into a roadblock later in the puzzle. The waiting slots at the bottom of your screen dictate your survival. Because you are dealing with blocks holding 35 ants at a time pulling too many colors will instantly fill your five slots. When all five slots are full and no ants can reach their matching colors you lose the game immediately. You avoid this dead end by playing only one or two colors at a time. Once you break through the yellow layer and collect the key your locked tray blocks open up. From there you execute a rapid cleanup sequence to claim victory.
Colony Flow Level 82 Step by Step Solution
Step 1: Attack the outer cyan and pink perimeter to open the map
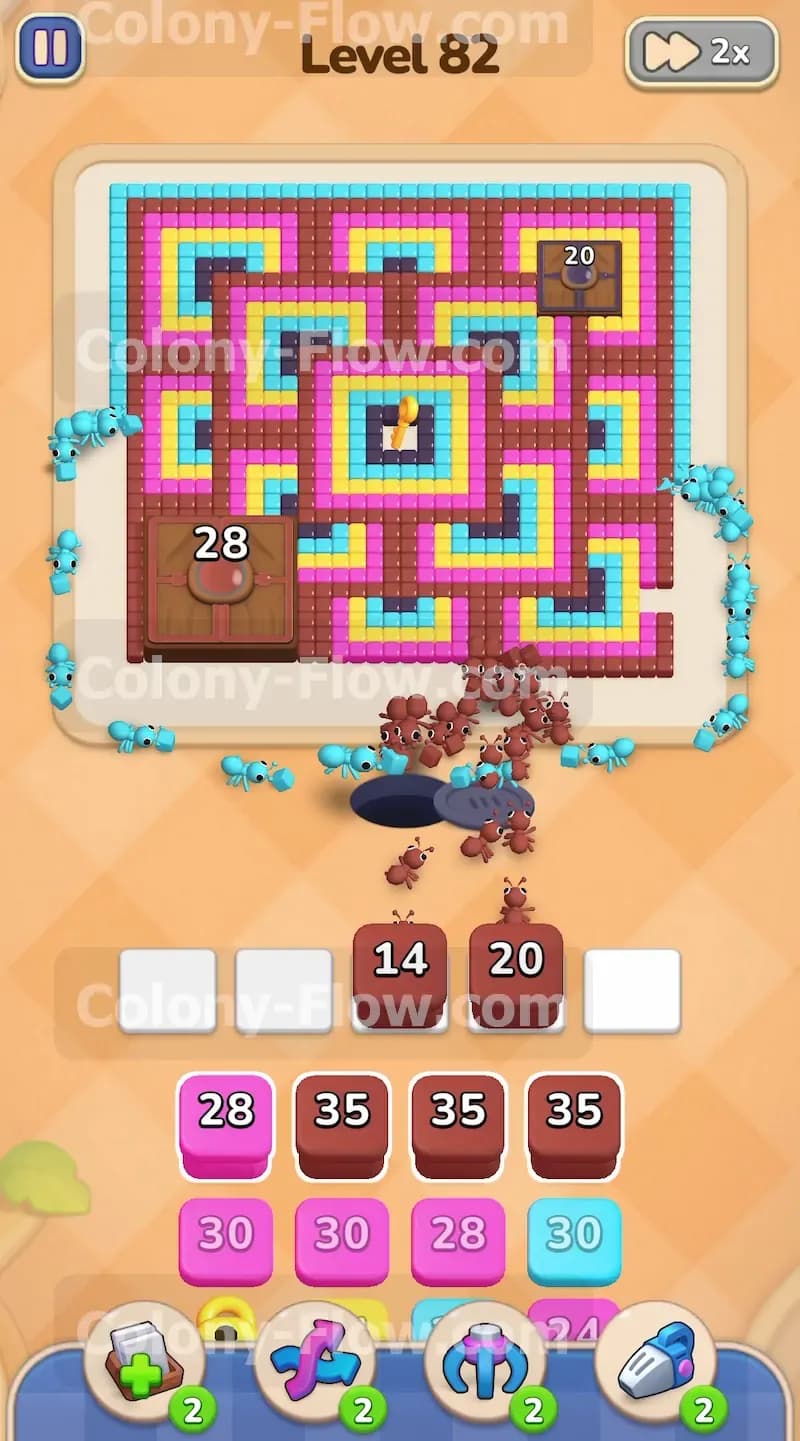
You want to begin by targeting the most exposed food on the very bottom edge of the board. The ants spawn from their nest hole right at the bottom center so giving them immediate targets keeps their travel time incredibly short. Tap a Cyan 35 block and a Pink 28 block from your tray into the waiting slots. The cyan and pink ants will stream out and start eating the bottom rows. Immediately tap a Brown 35 block to join them. The brown ants will bypass the outer rings and march straight toward that massive 50 count brown block in the bottom left corner. This is a critical move. That gigantic food chunk takes a massive amount of time to chew down. Sending your brown ants in early ensures the 50 count begins dropping while your other ants handle the perimeter. Do not tap any more blocks yet. You must wait for these three blocks to drain down so you keep your waiting slots free from jams.
Step 2: Demolish the bottom left quadrant to create walking space
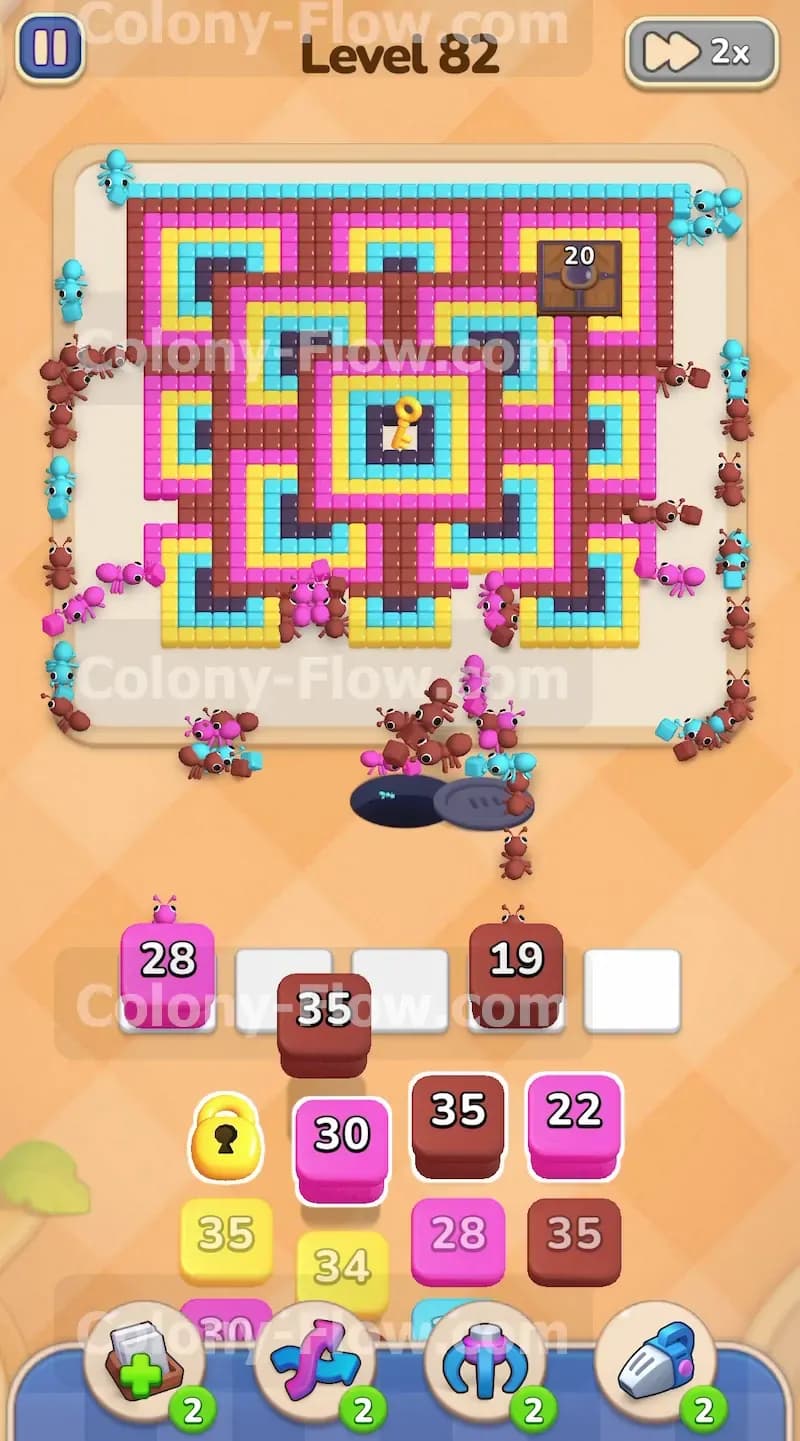
As your first wave of brown ants finishes their work you will notice the massive 50 count block shrinking down to a much smaller number. Tap another Brown 35 block and a Pink 30 block into your active slots. The new wave of brown ants will swarm the remaining pieces of that large chunk. You will watch the number drop from 28 down to 14 and then vanish completely. Meanwhile your pink ants will carve out the thick pink lines forming the bottom left corner of the maze. This specific action opens up vital physical space on the board. The ants need empty ground to walk across so they can reach the higher sections of the maze. By clearing out the entire bottom left quadrant you prevent your ants from taking long complicated detours. Keeping their walking paths direct ensures the numbers in your tray count down rapidly. Rapid countdowns mean empty waiting slots and zero risk of losing.
Step 3: Sweep away the remaining cyan border to expose the top half
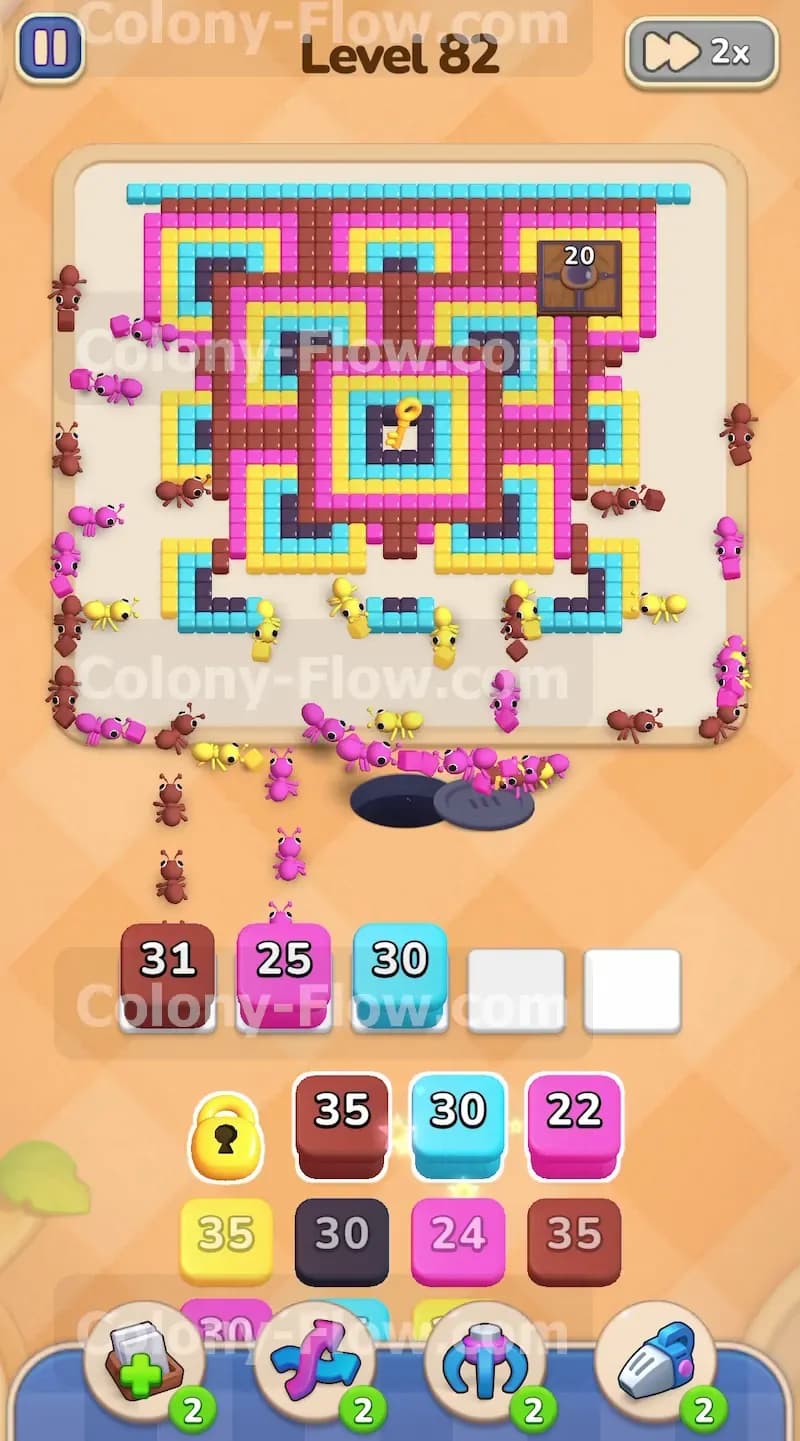
With the bottom left corner entirely out of the way your ants now have clear access to the vertical sides of the board. Look at your tray and select your remaining Cyan 35 and Cyan 34 blocks. Send them into the active slots. The cyan ants will surge up the left side and wrap completely around the right edge to consume the outer boundary. As the cyan layer disappears the upper half of the maze becomes totally exposed. You will clearly see the secondary large brown food block sitting in the top right corner waiting for 20 ants. You must allow the cyan layer to vanish completely before sending any more brown ants. If you mix them too early the brown ants will get stuck behind the cyan ants and clog up the board. Let your cyan blocks finish their work and empty out of your slots completely before you plan your next move.
Step 4: Dismantle the pink and brown inner walls to breach the top right
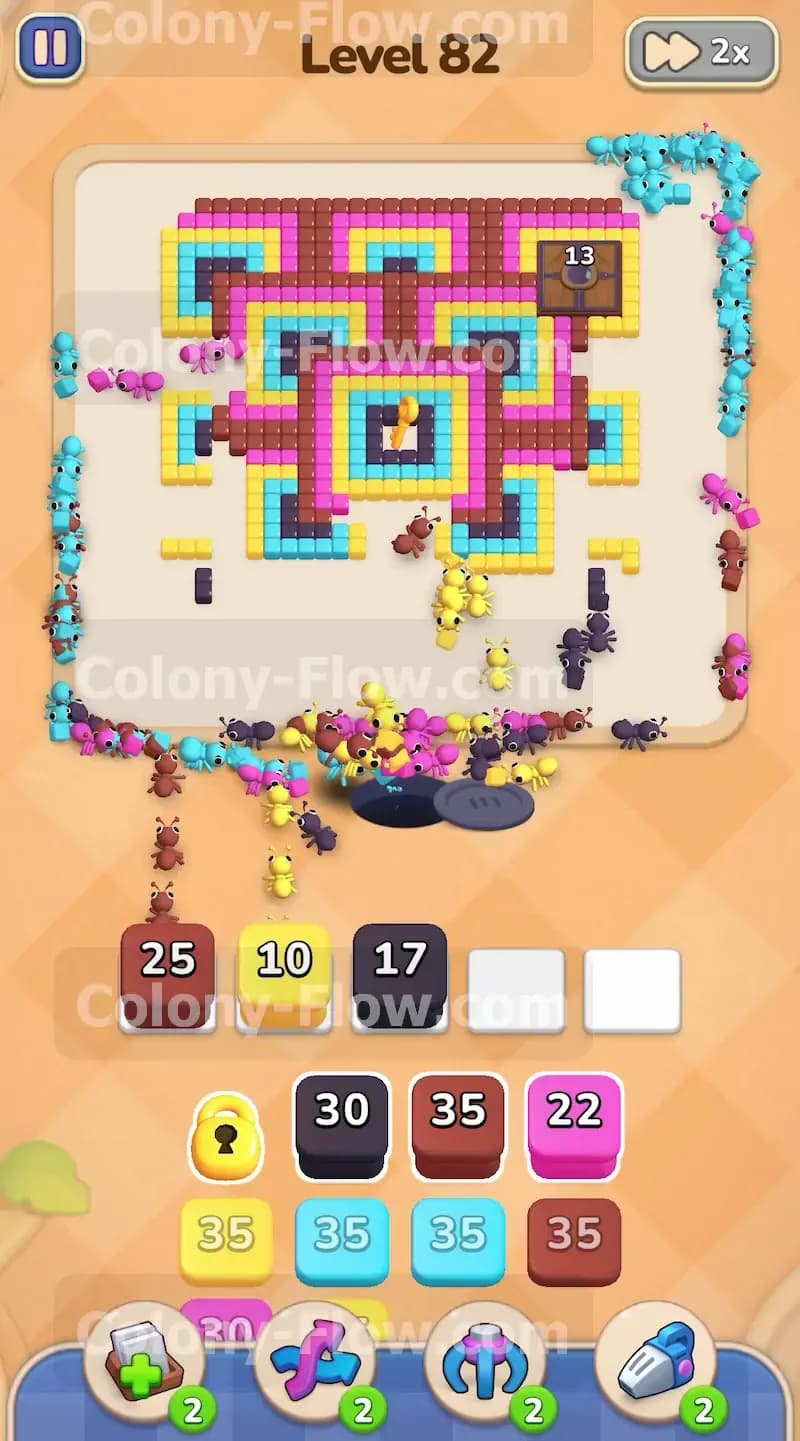
Now that the protective outer shell is gone you need to push deeper into the heart of the puzzle. Tap your Pink 28 block and another Brown 35 block into the active slots. The pink ants will march straight up the sides to consume the thick pink boundary along the top edge. The brown ants will use the empty space you created earlier to make a direct line for the top right corner. They will surround and destroy the 20 count food chunk sitting there. You will see a massive swarm of brown ants dominating the upper right quadrant until the large chunk shatters into nothing. This clearing action completely exposes the inner yellow ring that protects the key. Pay close attention to your five waiting slots right now. You likely have a Pink 19 or Pink 25 partially used in the tray. Give those blocks a few seconds to finish their respective paths. You must maintain at least one completely open slot to safely bring up your yellow ants.
Step 5: Pierce the yellow defensive ring blocking the center square
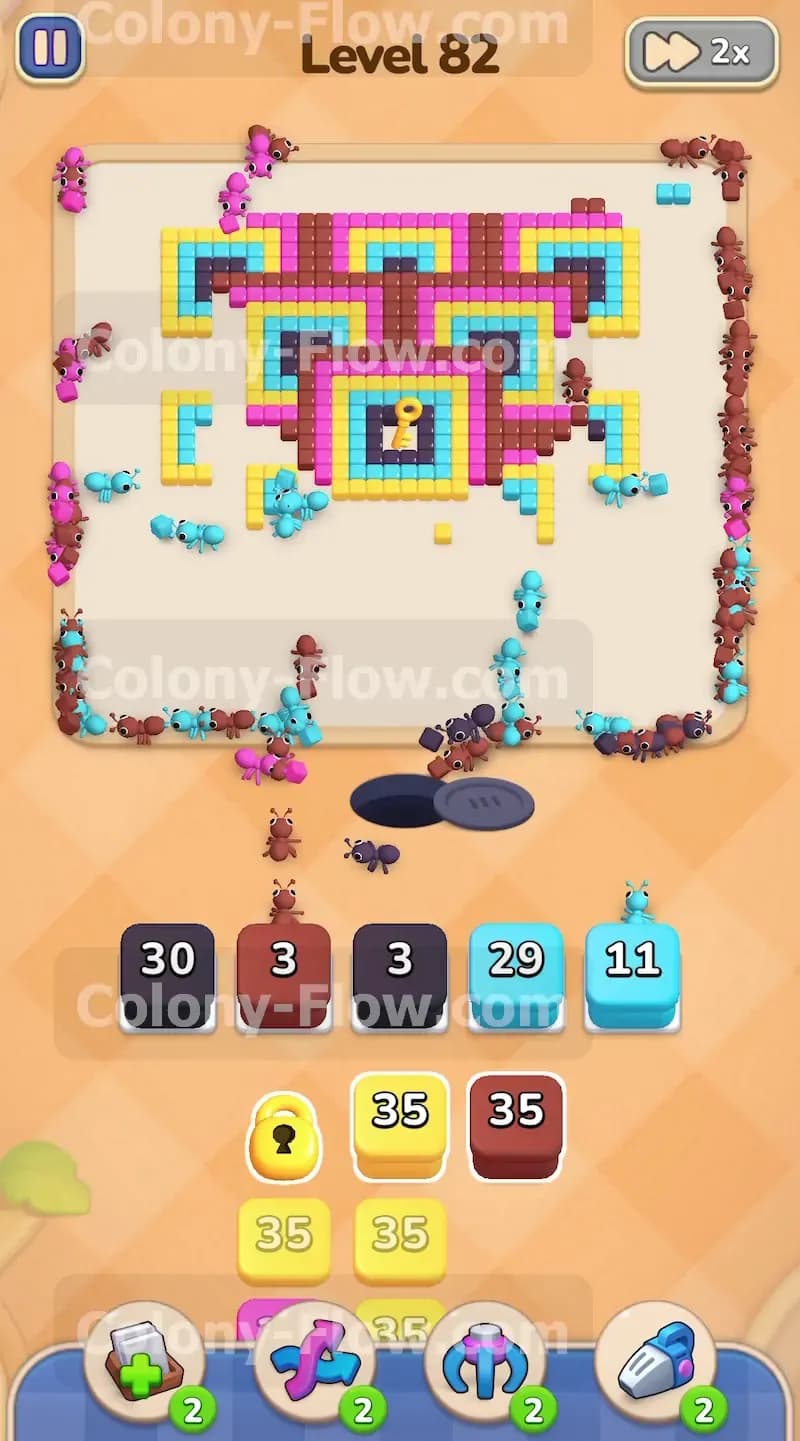
The only barrier remaining between your colony and the key is the thick yellow square layer. Bring your first Yellow 35 block up into the waiting area. The yellow ants will pour out of the nest and funnel into the top and bottom openings of the yellow ring. Watch closely as they chew through the tight corners and side walls of the yellow structure. The path into the center is quite narrow at this stage. Your yellow ants have to filter through very small gaps left behind by the cleared brown tiles. This proves exactly why you cleared the outer layers first. Without that empty space on the perimeter the yellow ants would have no physical room to maneuver. Let the yellow block drain down steadily until about 10 or 15 ants remain. The ants are now standing mere steps away from the center tile and the prize.
Step 6: Collect the center key to free the locked tray blocks
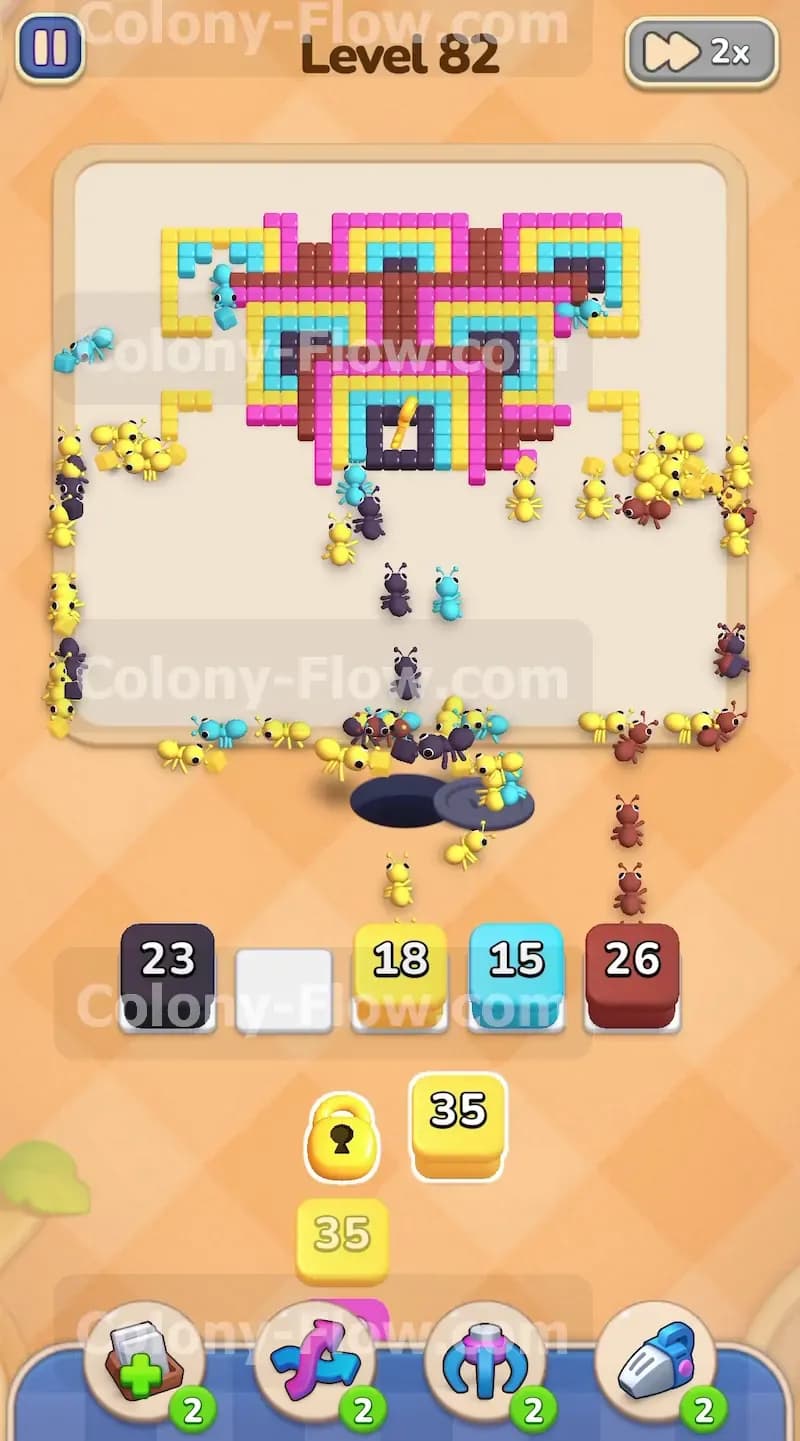
This moment marks the major turning point of the entire level. As your yellow ants consume the final few tiles forming the center square they will physically walk over the key. Collecting this key triggers an immediate chain reaction at the bottom of your screen. The lock icons instantly vanish from the blocks sitting in your tray. You now have full access to the dark blue blocks and the extra cyan blocks that were frozen since the start of the game. The center of the board is now a wide open empty space. Do not make the mistake of tapping all your newly unlocked blocks at once. Your slots are currently holding a partially used Yellow block and most likely a leftover Brown block. You must exercise patience and wait for at least two slots to become totally empty. Pulling locked blocks too early is the fastest way to jam your slots and lose the level.
Step 7: Deploy the dark blue ants to sweep the upper maze sections
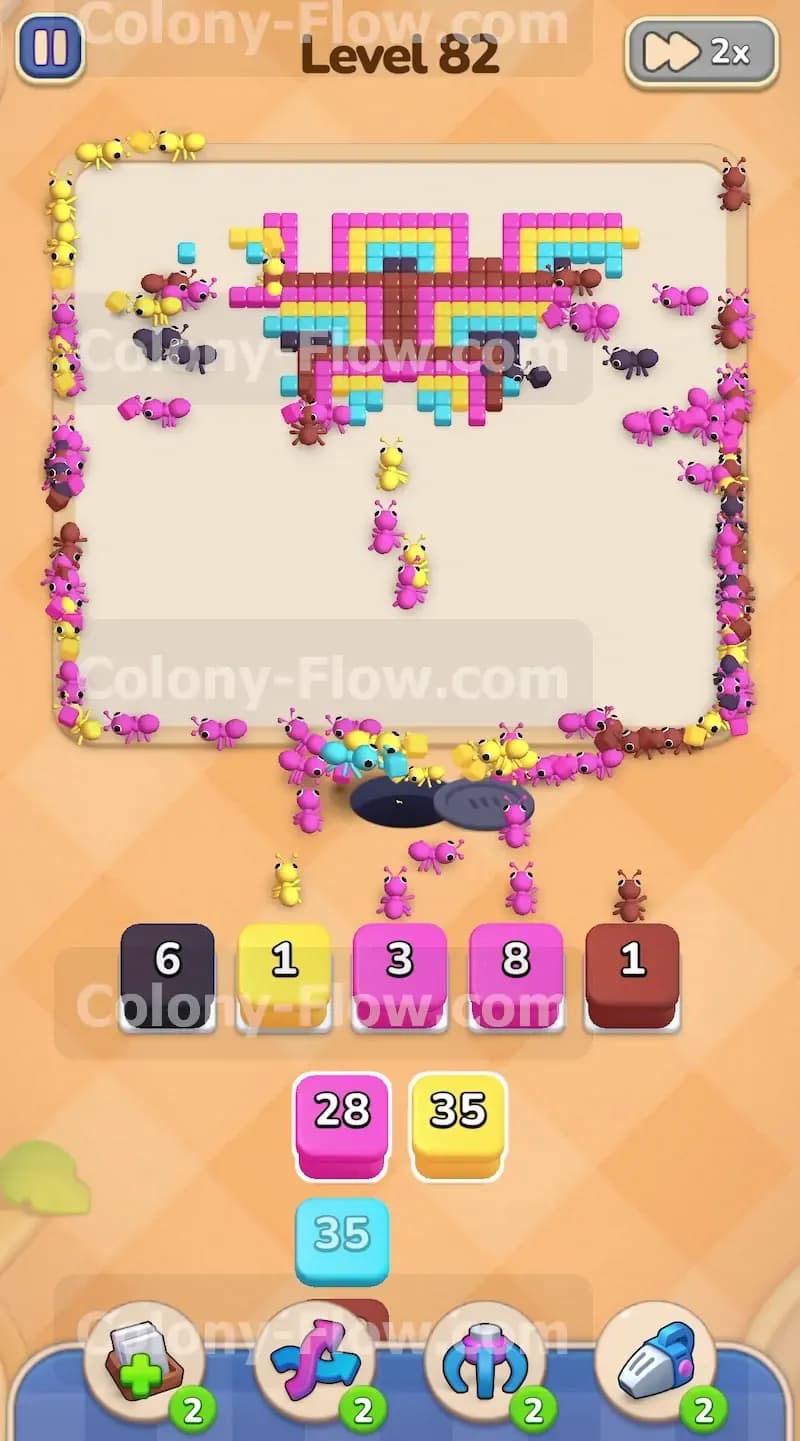
With your tray unlocked and your slots managed perfectly tap the Dark Blue 30 block into an empty space. A massive wave of dark blue ants will stream out of the nest hole and rush directly into the upper left and upper right sections of the board. They will aggressively eat the scattered dark blue tiles that were previously hidden behind the thick brown and pink walls. Add a Cyan 29 block to the waiting slots to support their advance. The board will look chaotic for a few seconds as dark blue cyan and yellow ants all cross paths through the empty center square. Because you kept that middle area completely clear the ants have plenty of room to navigate without blocking one another. The dark blue block will quickly count down from 30 to zero as it sweeps up the remaining upper tiles.
Step 8: Clean up the final scattered pieces to complete the puzzle
You are now entering the final stretch of the level. Only a few scattered colored tiles remain on the far left and right flanks of the board. Look down at your tray and locate the final small number blocks. Tap the Pink 8 block the Yellow 3 block and the Brown 1 block into the slots to match the remaining food pieces. Since the walking distances are incredibly short now these blocks will clear out of your waiting slots in a matter of seconds. The final ants will run up and sweep the last remaining pixels of food off the map. Once the last tile disappears the board is completely clear and you win the level. You successfully managed the massive food chunks and handled the lock mechanic perfectly without ever dead ending your paths.
Final Thought
Level 82 demands extreme patience and a strict layer by layer approach to clear the board safely. The ultimate trick is always feeding that massive brown block early so it never bottlenecks your progress when space gets tight. Managing your five waiting slots is the only way to survive the heavy numbers sitting in your tray. If you ever feel stuck on how to route the ants into the center square without jamming your slots I highly recommend you watch the video above this article. Seeing the exact timing of the blocks in motion makes the entire strategy incredibly easy to follow.