Colony Flow Level 474 Walkthrough Solution & Guides | How to solve Colony Flow 474

Guide By Liam Stone
Updated on August 1, 2026
If you want to skip straight to the solution, watch the video above covering Level 474.
Video doesn't match your screen?
Game updates frequently scramble layouts! Try our AI Screenshot Solver first to find your exact board instantly, or report broken guides to our team.
Welcome to Colony Flow Level 474. This level presents a beautiful pixel art planet surrounded by the vastness of space. You need to manage multiple block colors while dealing with obstacles like chocolate blocks and a hungry door. The sheer volume of dark purple background tiles requires careful planning to prevent your waiting slots from jamming. I play every level myself and this one took some specific slot management to get right. Let me walk you through exactly how to beat it.
Colony Flow Level 474 Overview
What You Are Working With
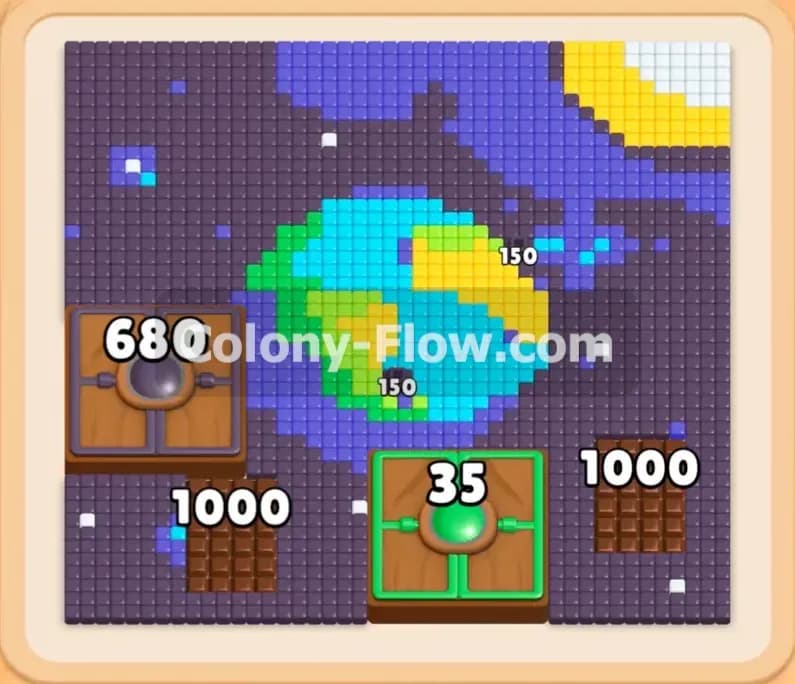
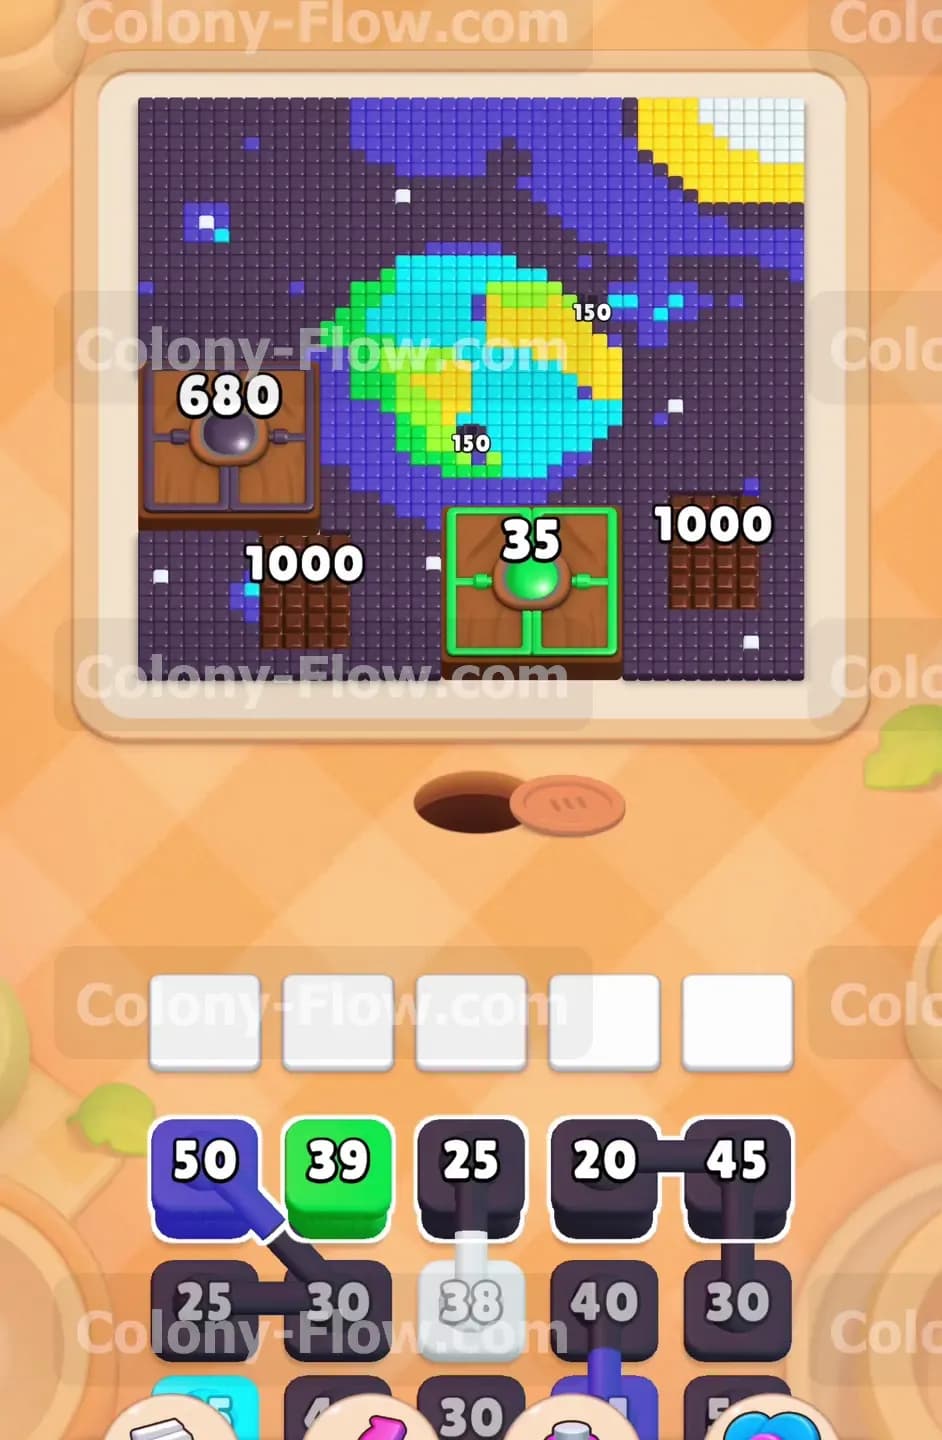
The central focus of this board is the beautiful Earth like planet made of vibrant green, yellow, and cyan tiles. Surrounding this colorful globe is a massive dark purple and dark blue space background that takes up the majority of the screen. At the bottom left corner sits a large brown connected box holding a massive number. Chocolate blocks cover significant portions of the bottom area and hide the exact tiles underneath them. A green hungry door rests squarely in the bottom center and blocks access to the tiles directly behind it. The tray at the bottom of your screen provides black blocks for the dark purple space, blue blocks for the dark blue space, and green, yellow, cyan, and white blocks for the planet and the distant stars. Every element on this board connects and clearing one section often relies on opening a path through another.
What It Takes to Clear Level 474 Board
You must carefully chip away the dark purple space to open paths to the planet and the chocolate covered areas. The green hungry door requires a dedicated green block to open so you must route green ants specifically to that spot. The chocolate needs to be cleared by routing ants to adjacent tiles causing the chocolate to melt away layer by layer. Managing your five waiting slots is very important because pulling too many planet colors before the space background is clear will cause a massive jam. You lose the level if all five slots fill up and the ants have nowhere to go. You win when you dismantle the entire picture, open the door, melt the chocolate, and the final ant returns to the nest hole.
Colony Flow Level 474 Step by Step Solution
Step 1: Start by clearing the outer space background to create initial paths
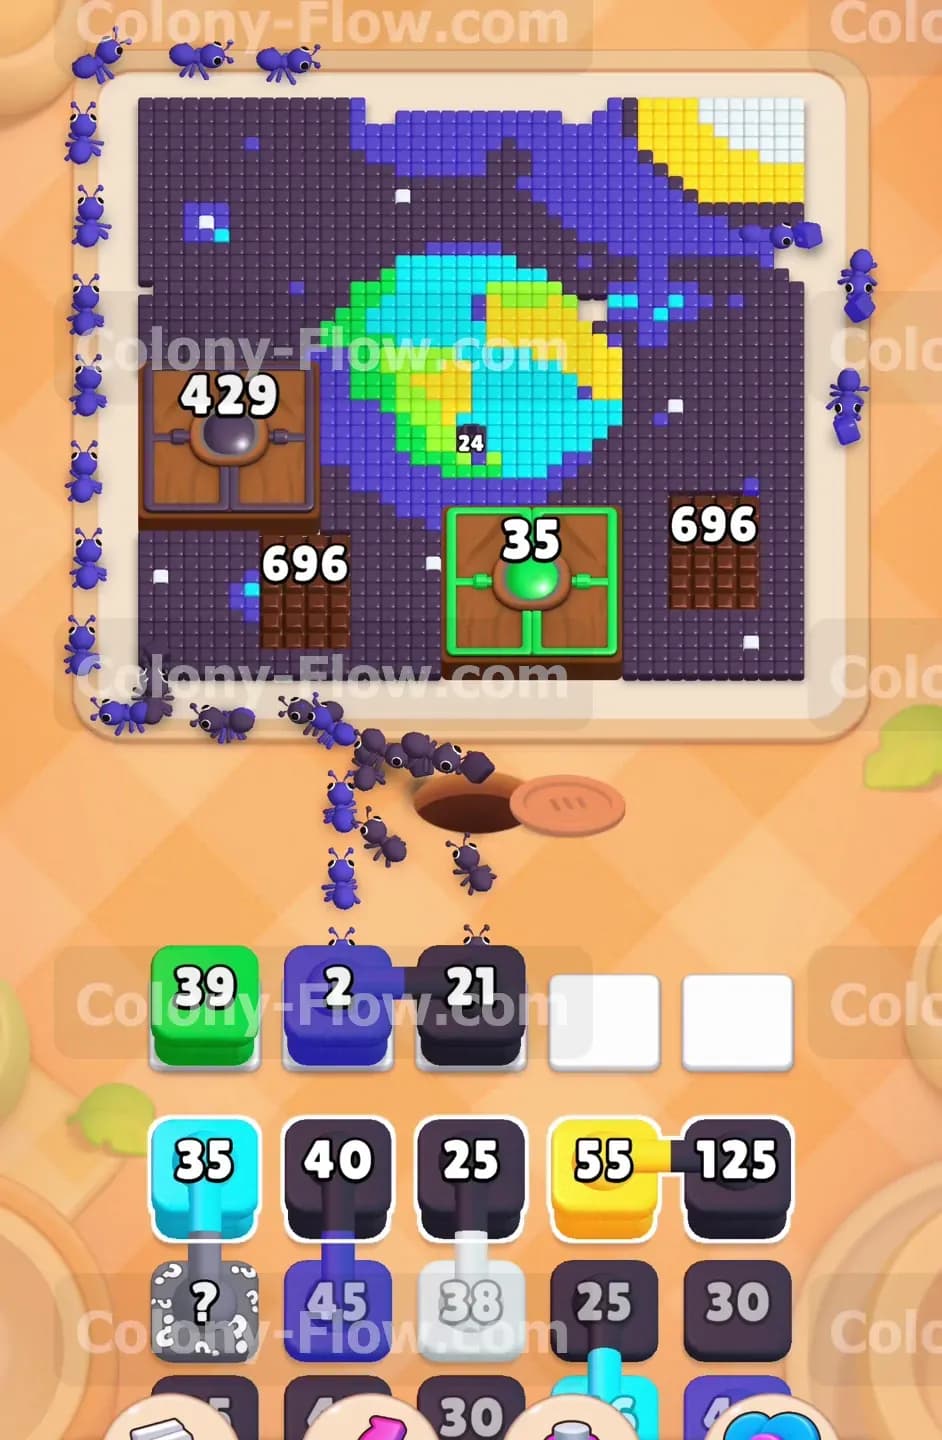
Your very first move should focus entirely on the dark purple space tiles that dominate the board. Pull the large black blocks from the tray to send your ants to the outer edges. You will see a black 45 block, a black 20 block, and a black 25 block available early in the tray. Pulling these immediately starts clearing the space around the bottom area and opens a vital path toward the connected box and the chocolate. You can also pull the blue 50 block to start working on the dark blue sections of space. Pull the green 39 block into your waiting slots to prepare for the green hungry door. The black blocks help the ants reach the chocolate and start reducing its numbers right away. Keep a close watch on your slot capacity and never pull a block if you do not have an active path for those ants to travel.
Step 2: Focus on the dark purple area and begin attacking the planet
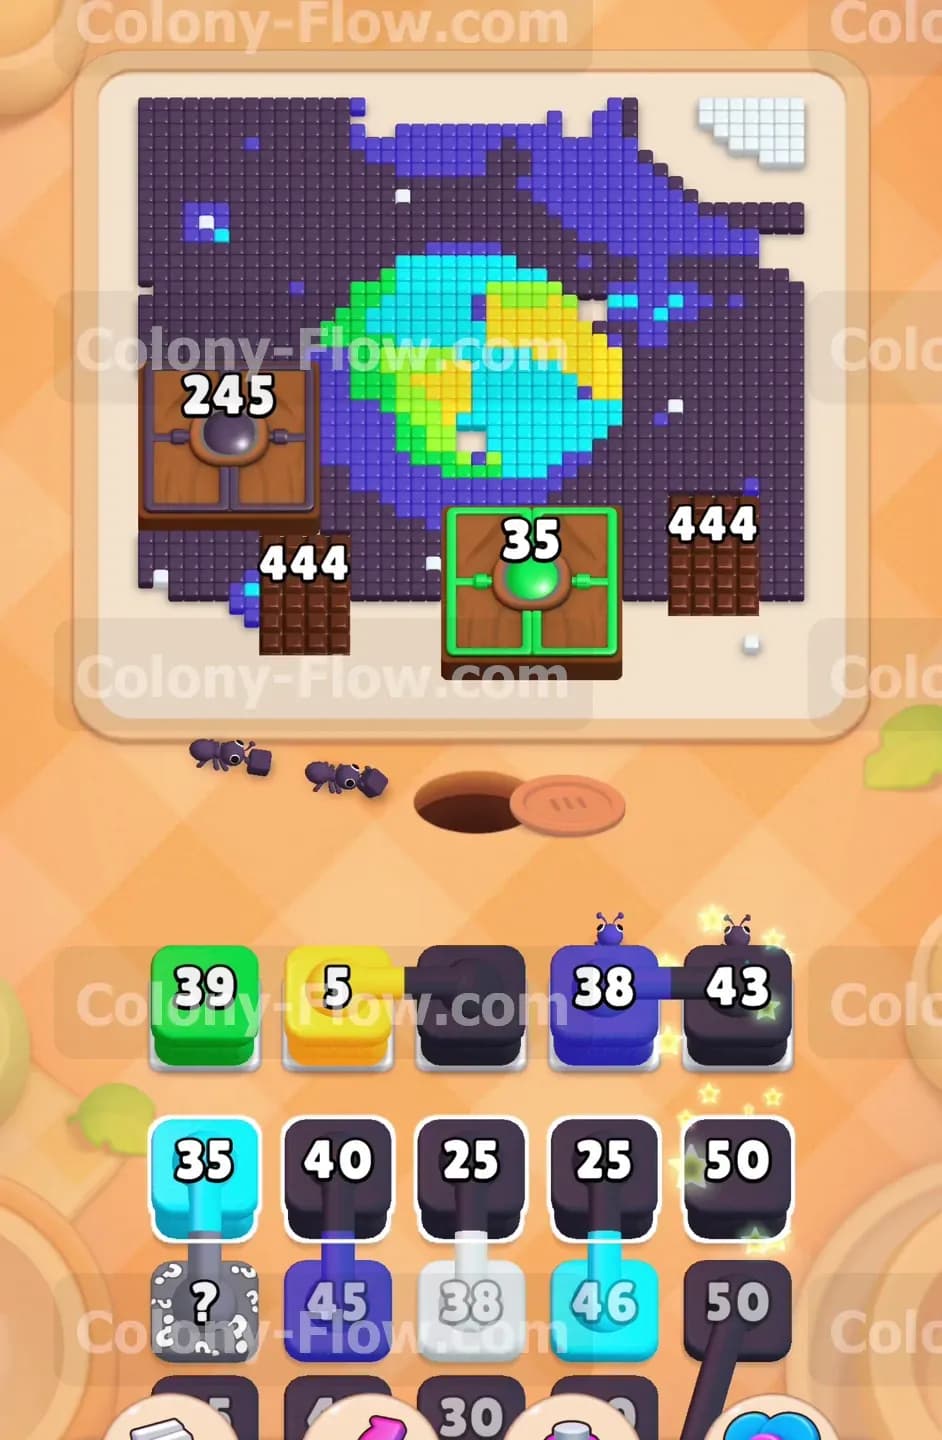
As the ants consume the initial dark purple tiles, new paths open up across the lower half of the board. Pull more black blocks to clear the area around the brown connected box and the chocolate layers. You will notice the large numbers on the chocolate and the connected box start to drop as the ants process the surrounding area. The connected box number will fall from 680 down to the 400s as the ants continuously work the edges. Now you can pull the cyan 35 block and the yellow 55 block from the tray into your slots. These specific colors will target the water and land masses on the planet in the center. Ensure you do not overfill your slots while waiting for the ants to traverse the board. You must always leave at least one slot open to pull a black block and keep the background clearing process moving forward without any delays.
Step 3: Feed the hungry door and clear the chocolate barriers
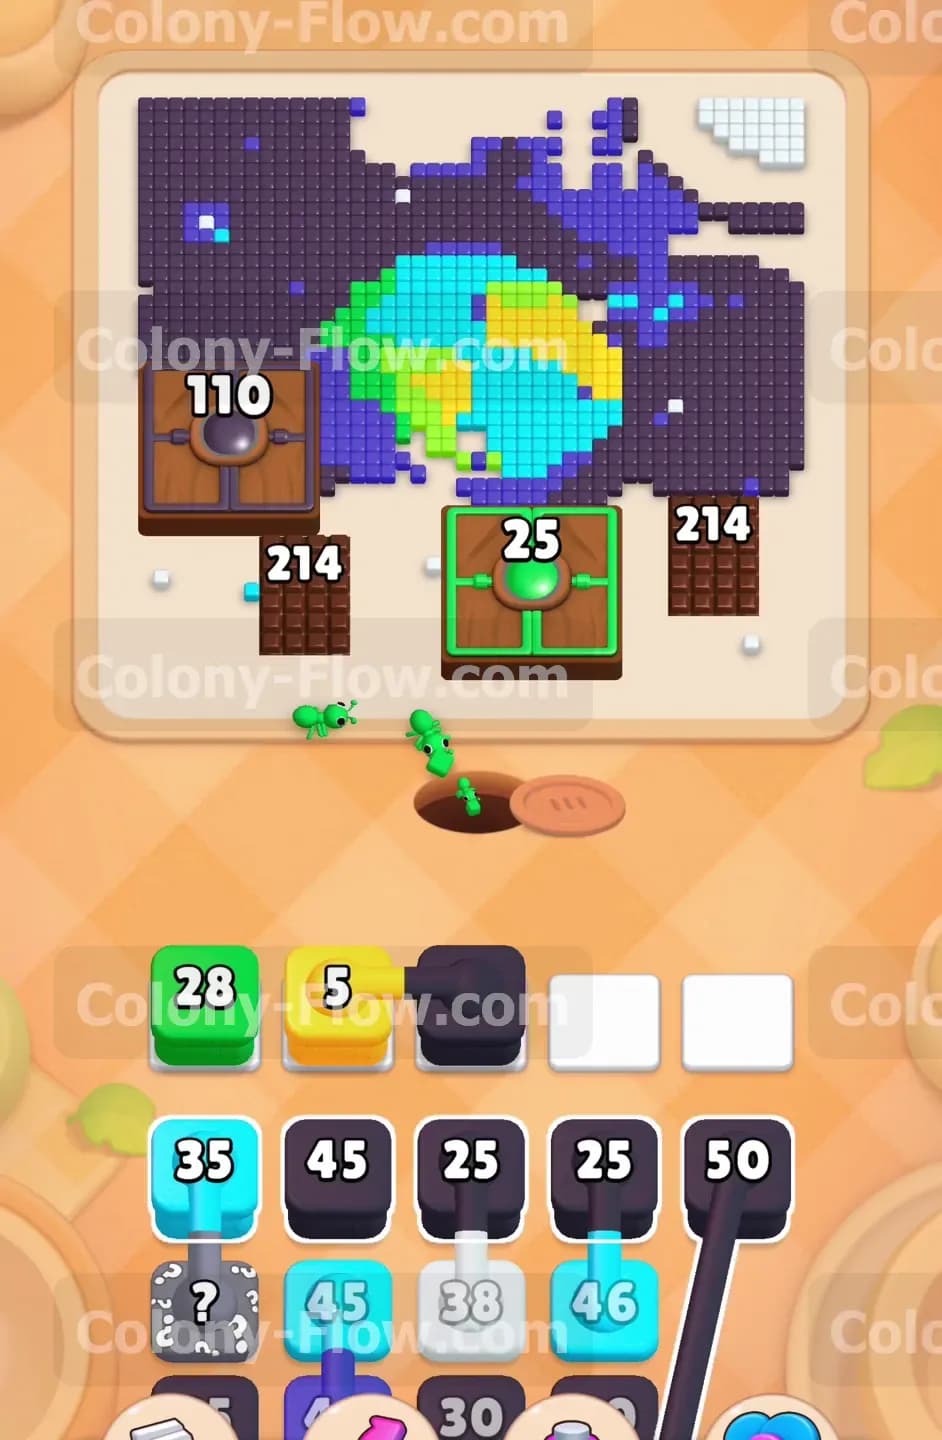
The path to the green hungry door finally opens once enough background tiles disappear from the bottom center. The green block you pulled earlier now activates and sends a stream of green ants to feed the door. The door requires exactly 35 green ants to open fully. While the green ants march toward the door, the chocolate blocks continue to melt away as ants eat the adjacent space tiles. The numbers on the chocolate will drop down into the low 200s and eventually clear entirely. Pull another black block to maintain momentum on the right side of the board where a large chunk of dark purple remains. The blue block in your slot will continue to chip away at the dark blue space tiles above the planet. This simultaneous action across different zones helps prevent a stall and keeps your slots flowing smoothly.
Step 4: Process the planet colors and open the lower board entirely
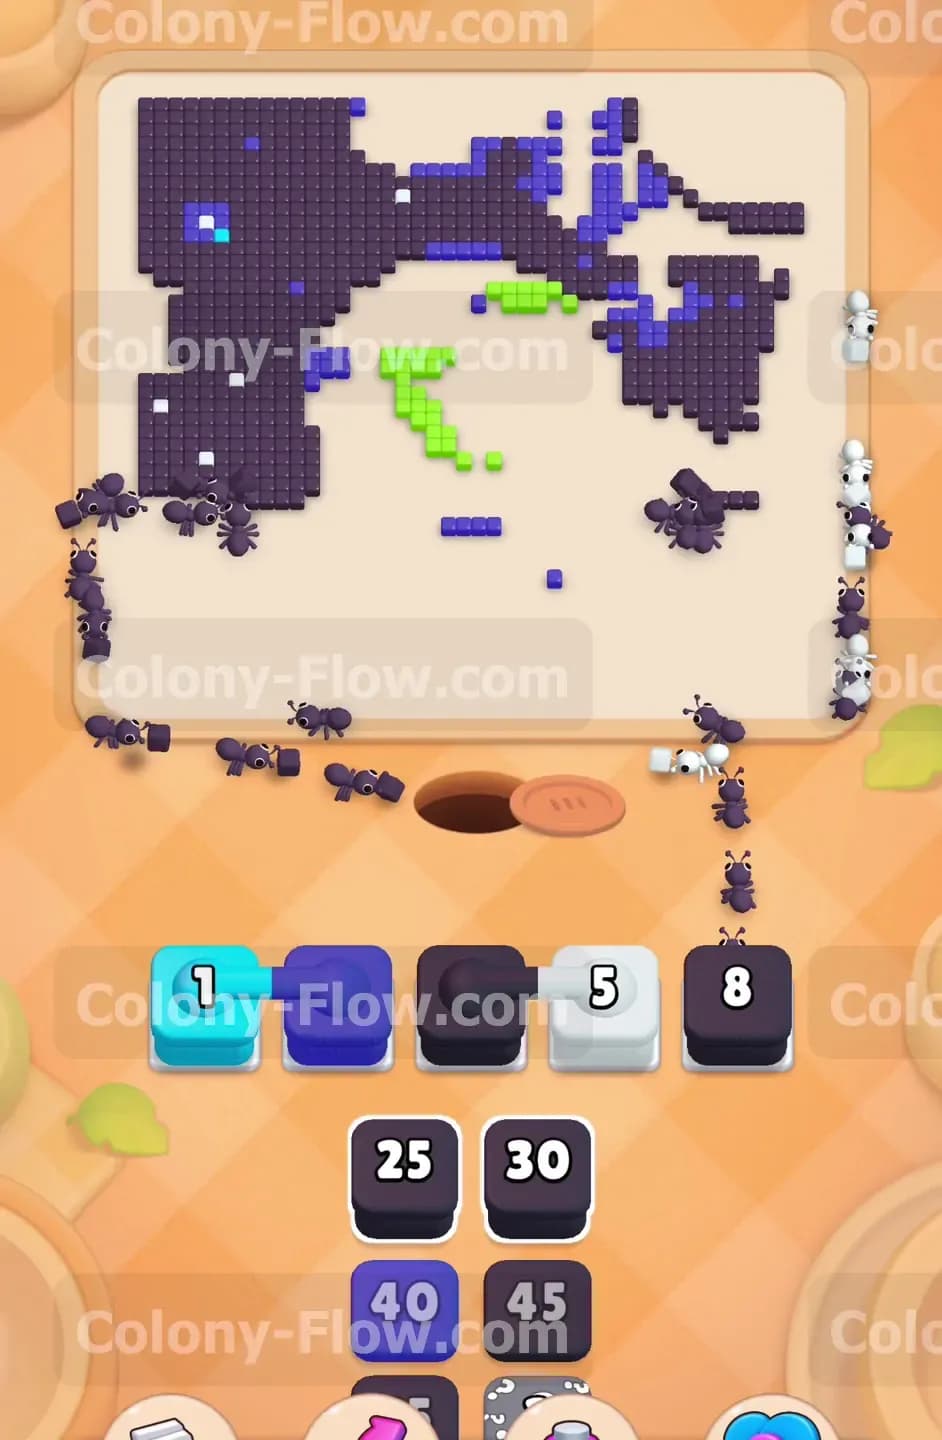
The green door opens completely and reveals the space and tiles hidden behind it. The brown connected box on the left and all the chocolate blocks are fully cleared by this point. You now have cyan, yellow, and green blocks actively clearing the remaining sections of the planet. The green ants move past the newly opened door to finish the remaining green landmasses on the globe. Pull additional cyan blocks such as a cyan 8 and a cyan 40 from the tray to handle the remaining water sections of the planet. Keep pulling black blocks as space frees up in your tray. You will see black 25 and black 35 blocks become available for use. Feed these into the slots to clear the remaining dark purple areas on the left and right flanks of the board. The board opens up drastically here and the ants have much shorter travel distances.
Step 5: Finish the planet and tackle the top right corner stars
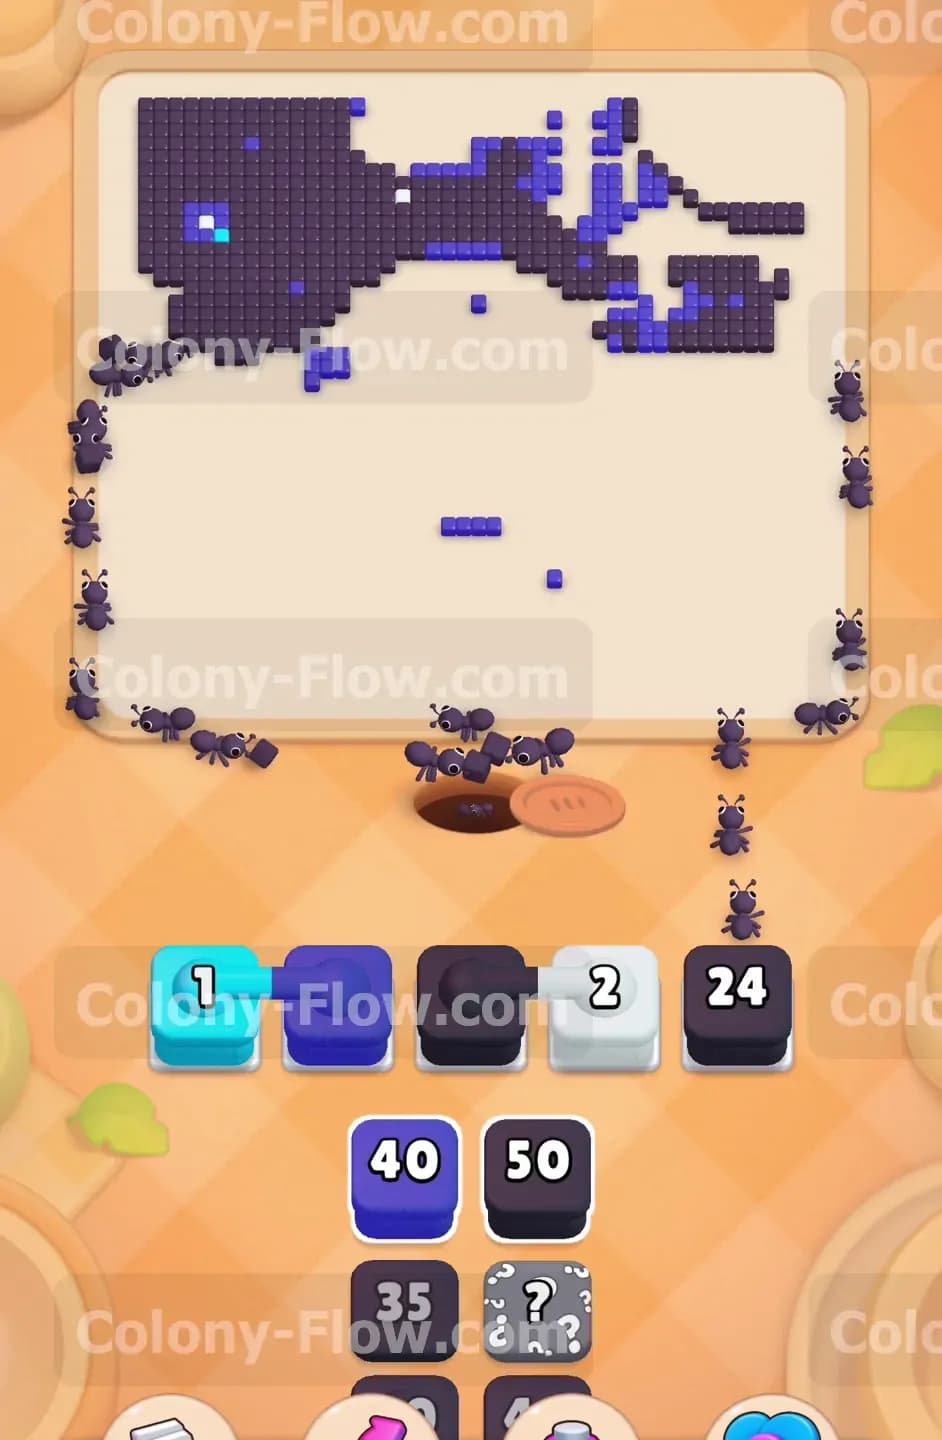
The central planet is almost entirely dismantled now with only a few cyan and green tiles remaining. Pull the white block to send ants to the white star tiles located in the top right corner of the board. Pull the remaining black blocks to clear out the left side and top sections of the space background. The black 25 and black 30 blocks will handle the large chunks of dark purple still lingering on the right side. Keep an eye on your waiting slots to ensure the cyan and blue blocks finish their work without blocking new pulls from the tray. The board will look very empty at this stage with only scattered clusters of tiles left to clear. You want to make sure every color in your slot has a direct route to its matching tiles.
Step 6: Clear the remaining space and border tiles to complete the level
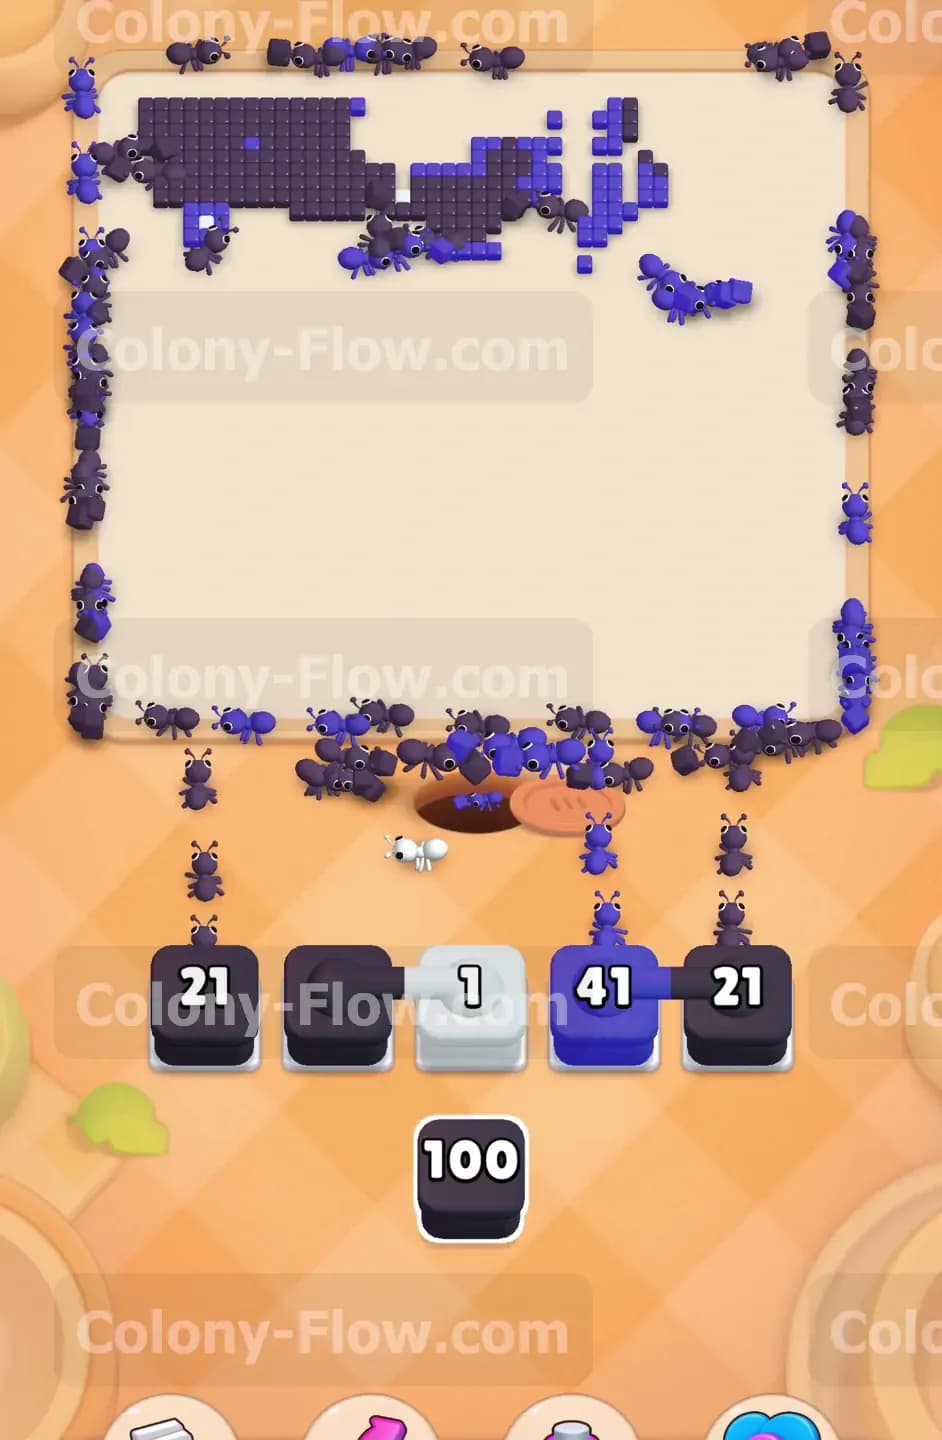
Only scattered dark blue tiles and the final dark purple border remain at the very end of the level. Pull the final blue 40 block and the black 50 block from the tray to target these last pieces. The ants will sweep around the edges of the board in a long line to clean up the border pixels. Once those finish, a final black 100 block appears in the tray to clear the very last stragglers forming the frame. The ants will march around the perimeter until every single pixel is gone. Once the final black blocks count down to zero and the last ant enters the nest hole, the board is perfectly clean and you win the level.
Final Thought
Level 474 requires a steady rhythm of clearing background tiles while slowly dismantling the central planet. Managing the chocolate and the hungry door without jamming your slots is the main challenge you will face. Take your time and always prioritize keeping an active path open for your ants to flow. If any step is hard to follow in text, I encourage you to watch the video above this article for a complete visual guide.