Colony Flow Level 820 Walkthrough Solution & Guides | How to solve Colony Flow 820

Guide By Liam Stone
Updated on August 8, 2026
The Level 820 walkthrough video above shows every step, so feel free to skip the article and watch instead.
Video doesn't match your screen?
Game updates frequently scramble layouts! Try our AI Screenshot Solver first to find your exact board instantly, or report broken guides to our team.
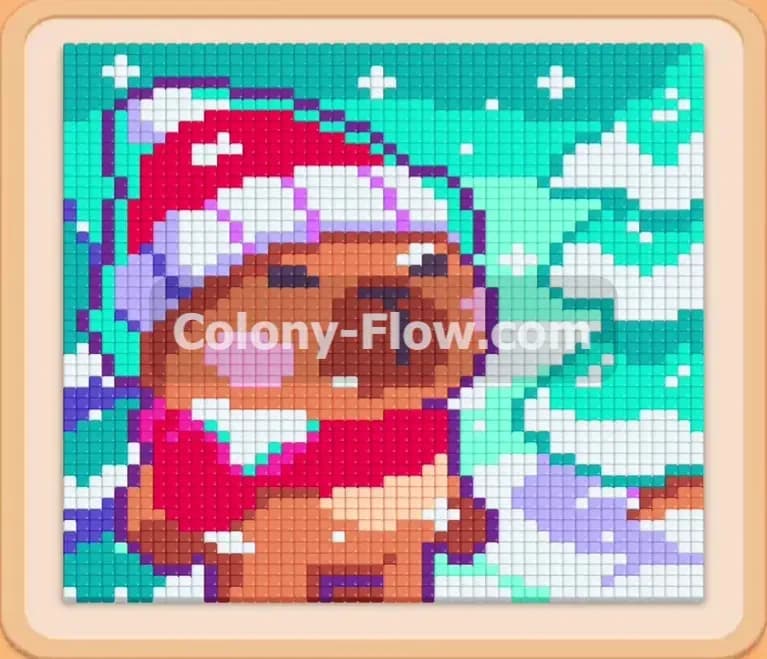
Colony Flow Level 820 presents a beautifully detailed winter scene for you to dismantle piece by piece. Your target is a round brown character bundled up in a bright red winter hat and a thick red scarf. The background sets a freezing cold tone with tall white snowbanks and a bright clear teal sky. You have a massive grid of colored food tiles to clear and a busy ant colony waiting inside their nest hole. You will completely guide your colony through this snowy portrait by pulling the exact right colors from your lower tray.
Colony Flow Level 820 Overview
What You Are Working With
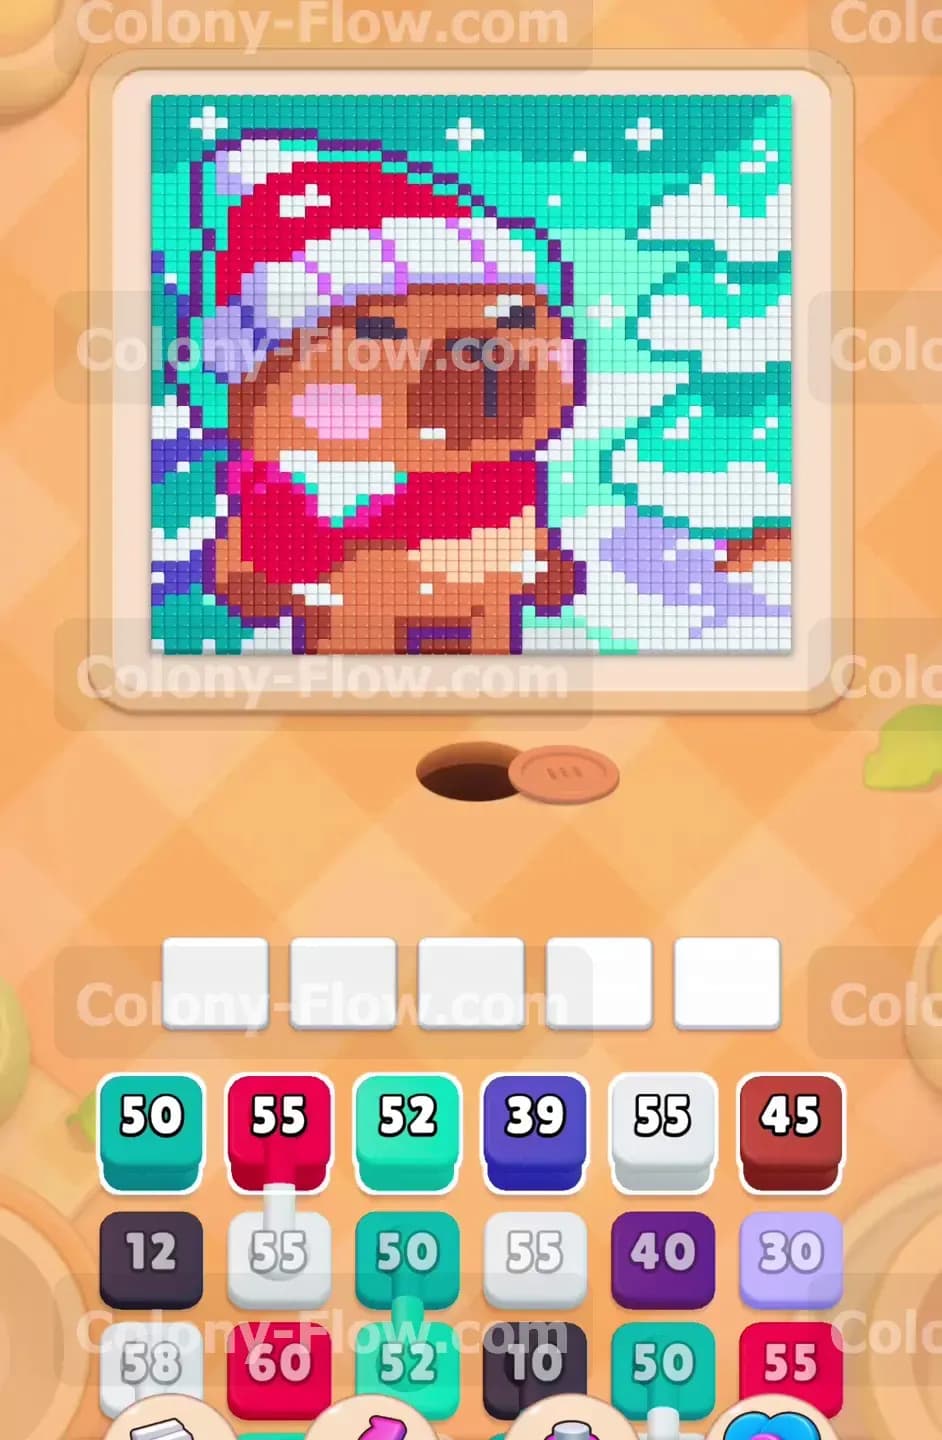
The colored pixel picture takes up the entire upper half of your screen. The round brown character sits squarely in the absolute middle of the board. The red and white scarf wraps tightly around the lower neck area. The red hat features a very thick white trim and a white pom resting at the top. The background consists of teal sky tiles filling the upper corners and white snow tiles forming heavy ground banks on the right side.
Your tray at the bottom holds dozens of numbered colored blocks. Each block exactly corresponds to a specific color on the board above. You will see large numbers like fifty five and fifty on the red and white blocks. You also have Connected Boxes sitting in your tray. These specific blocks feature a thick colored line linking them firmly together. When you tap one connected box you drag all linked boxes into your waiting slots at the very same time. You must manage these connected pairs carefully to avoid entirely filling your slots with unusable colors.
What It Takes to Clear Level 820 Board
You win the level when the ants consume every single food tile in the entire picture. You instantly lose the level if you fill all five waiting slots and no ants can reach a matching food tile. Every move you make must directly focus on opening new open paths. You always want active ants draining the numbers from your waiting blocks. If you pull a color that is buried deep inside the picture your slots will immediately jam and the level ends.
Colony Flow Level 820 Step by Step Solution
Step 1: Open the bottom edge by feeding the ants the red scarf and bottom snow tiles
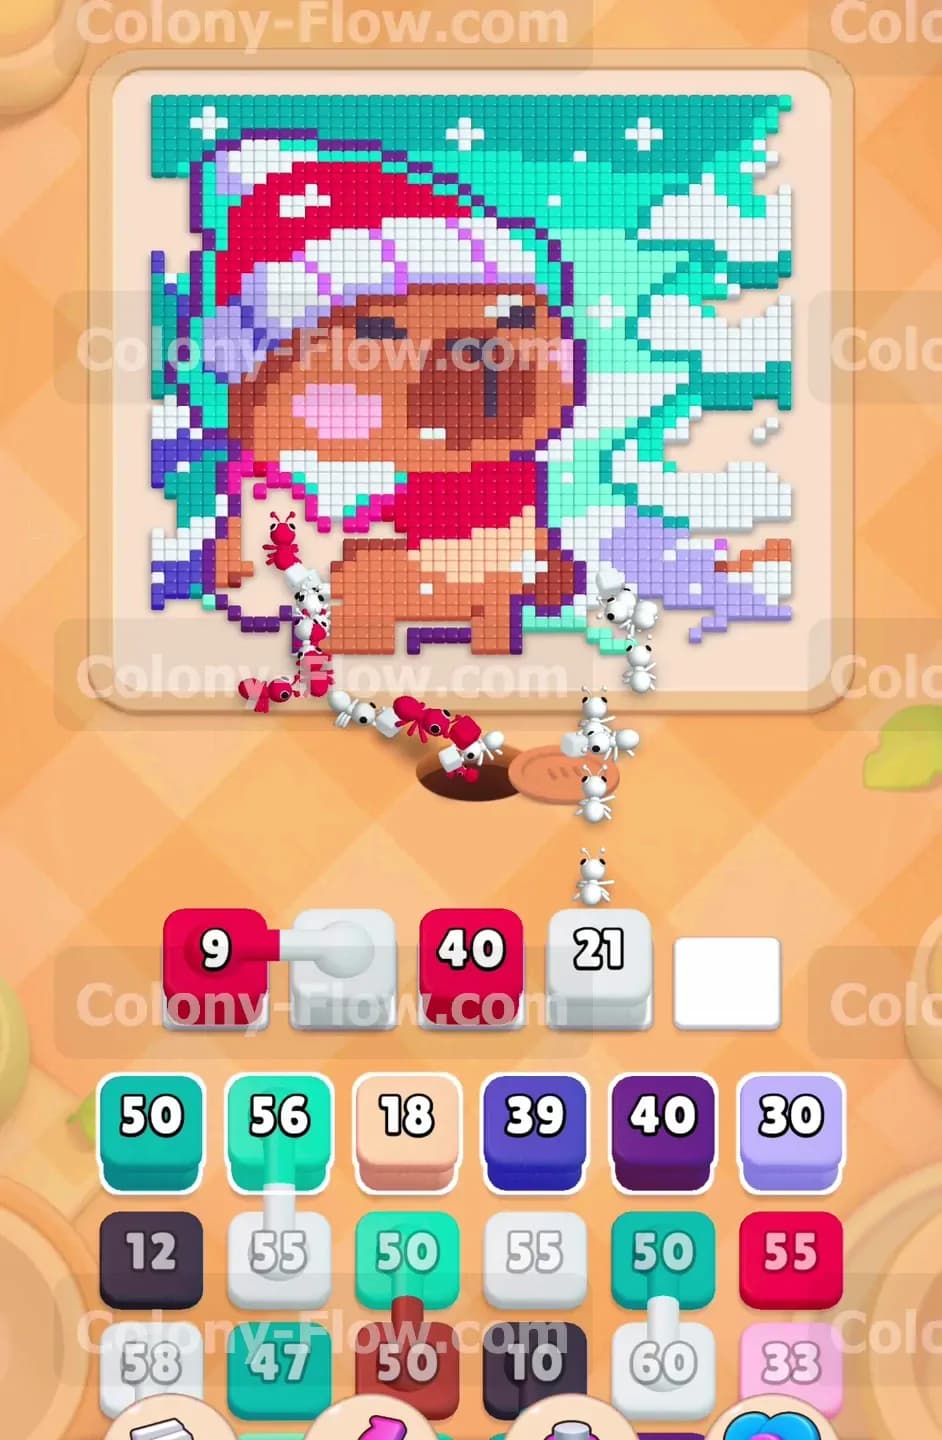
You begin by clearing the most exposed colored tiles on the board. The bottom edge of the red scarf and the lowest white snow tiles are fully open directly above the ant nest hole. Tap the red block valued at fifty five and the white block valued at fifty five located in the top row of your tray. These two blocks drop instantly into your first two waiting slots. The ants stream out of the dark hole and immediately split into two distinct working groups. One group attacks the right side of the red scarf while the other group marches further right to eat the base of the white snow. The large numbers on your tray blocks drop rapidly as the ants chew away the bottom layers of the picture. This aggressive early move opens up the darker colors hidden directly behind the scarf and creates a wide landing zone for future ants.
Step 2: Target the dark purple shadows and dark blue hat details
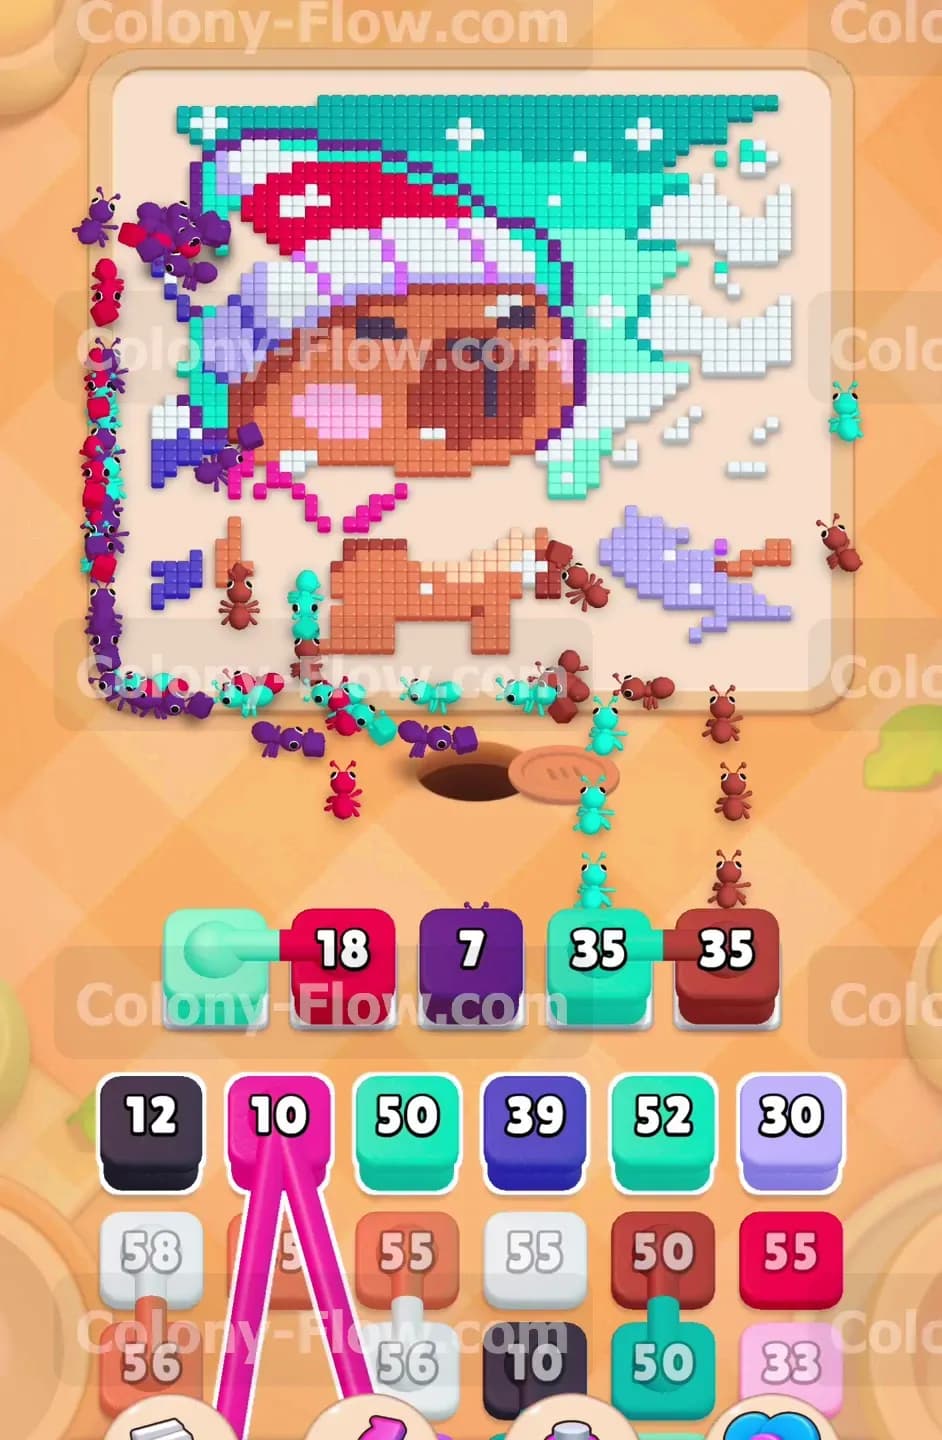
With the bottom edge successfully pushed back you now have wide access to the dark purple outlines of the character and the dark blue sections of the winter hat. Locate the dark blue block valued at thirty nine and the dark purple block in your tray. Tap them directly into your open waiting slots. You must keep a close eye on your available slots at this exact moment. You currently have four slots filled with active blocks but the ants are actively draining them. The ants climb up the freshly cleared paths and begin stripping the dark purple border surrounding the round brown face of the character. Another busy stream of ants carves into the dark blue stripes located on the lower half of the hat. This targeted feeding exposes the lighter colors underneath and prevents the entire board from dead ending.
Step 3: Activate the connected white blocks to clear the middle snow layers
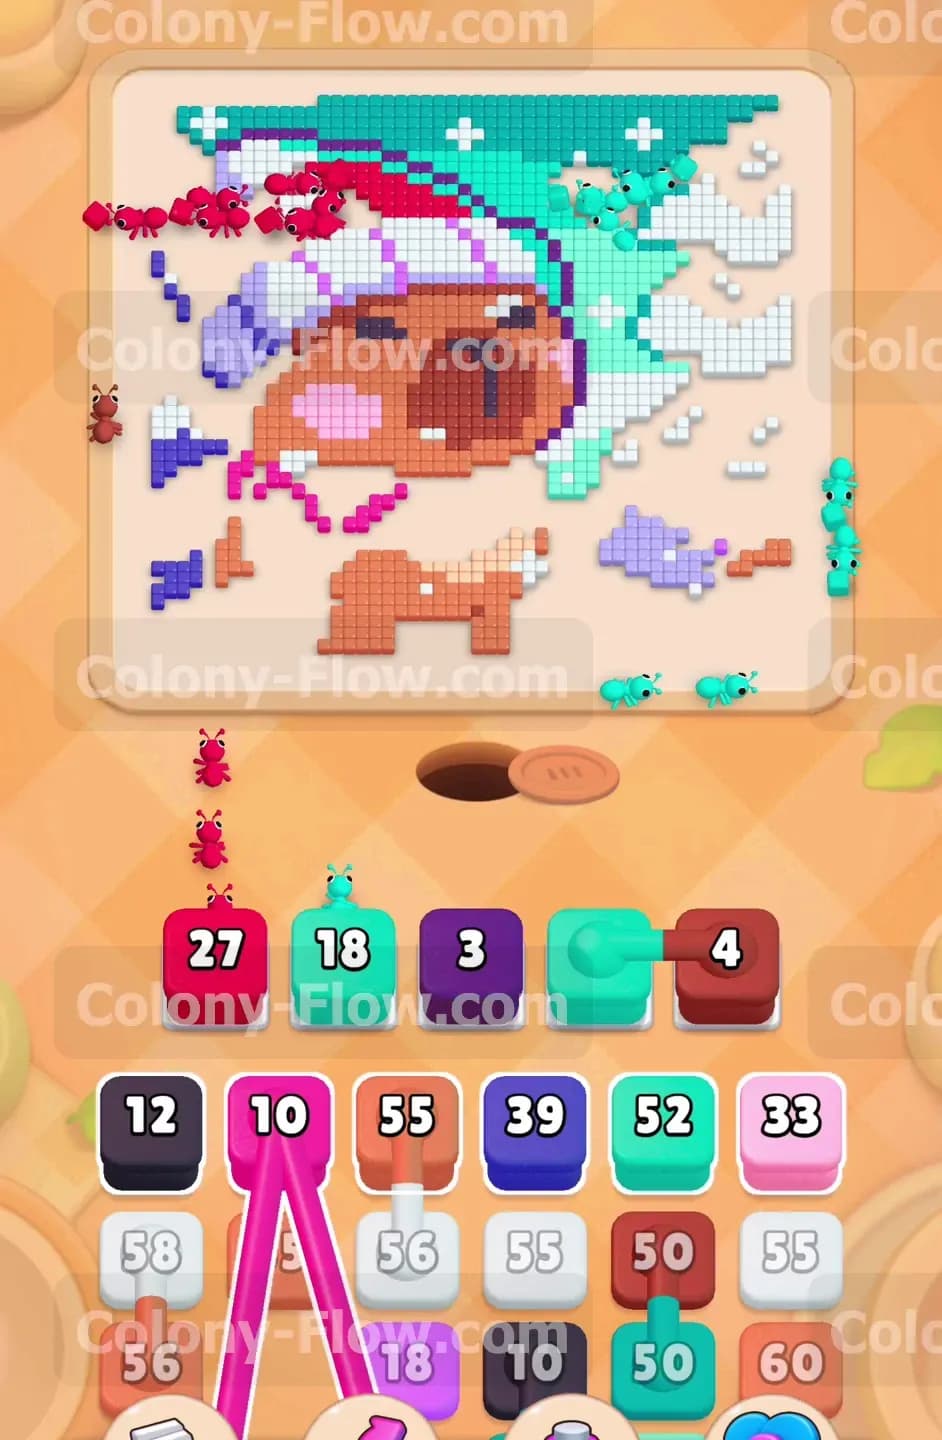
The right side of the board contains a massive cluster of white snow tiles that reach all the way up to the sky. You need a massive amount of white block value to clear this dense section of the picture. Find the white Connected Boxes resting inside your tray. Tapping one of these white blocks pulls the entire connected group into your waiting slots simultaneously. This action fills multiple slots at once and temporarily removes your safety net. You only make this bold move because you know the white snow path is wide open and ready for rapid consumption. The ants rush the right side of the board and devour the middle layers of the snowbanks in a matter of seconds. Your waiting slots empty out just in time to prevent a fatal slot jam. The entire right side of the background begins to thin out completely.
Step 4: Unleash the teal blocks to consume the upper sky
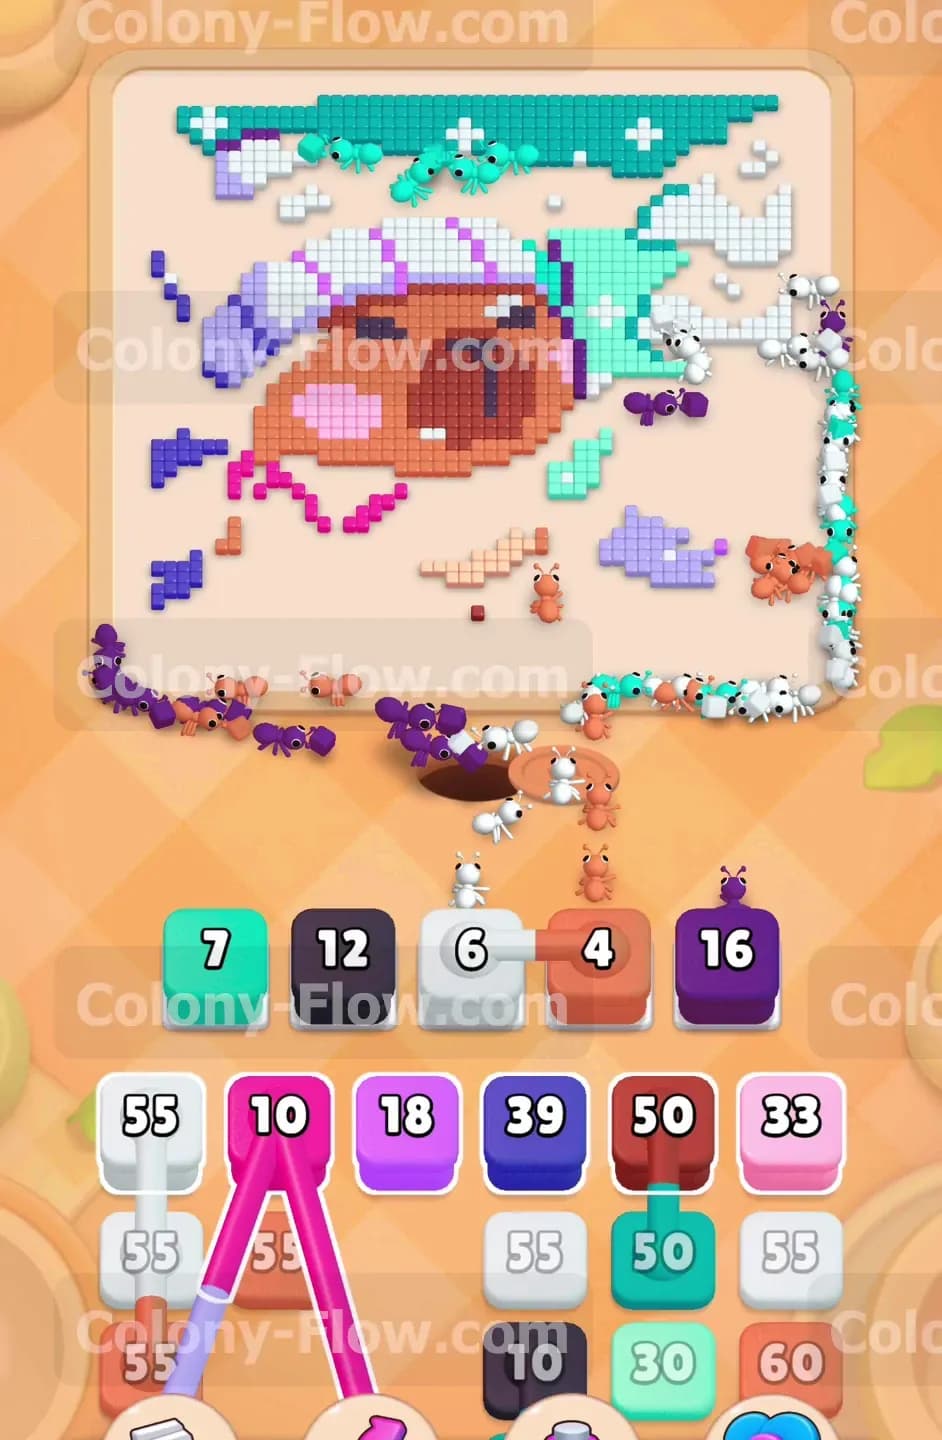
The bright teal sky completely dominates the top left and top right corners of the winter portrait. Now that the snow is actively receding the ants can finally reach the lower edges of the sky tiles. Tap the teal block valued at fifty and the second teal block valued at fifty two. These heavy blocks slide smoothly into your waiting slots. A massive swarm of ants forms a very long line up the far left and right edges of the board. They hit the teal tiles and spread out horizontally across the top border of the picture. The numbers on your teal blocks drop from the fifties down into the single digits very quickly. Clearing the sky perfectly isolates the winter hat from the background and gives you a clear visual of what remains.
Step 5: Strip the dark red fabric from the center of the winter hat
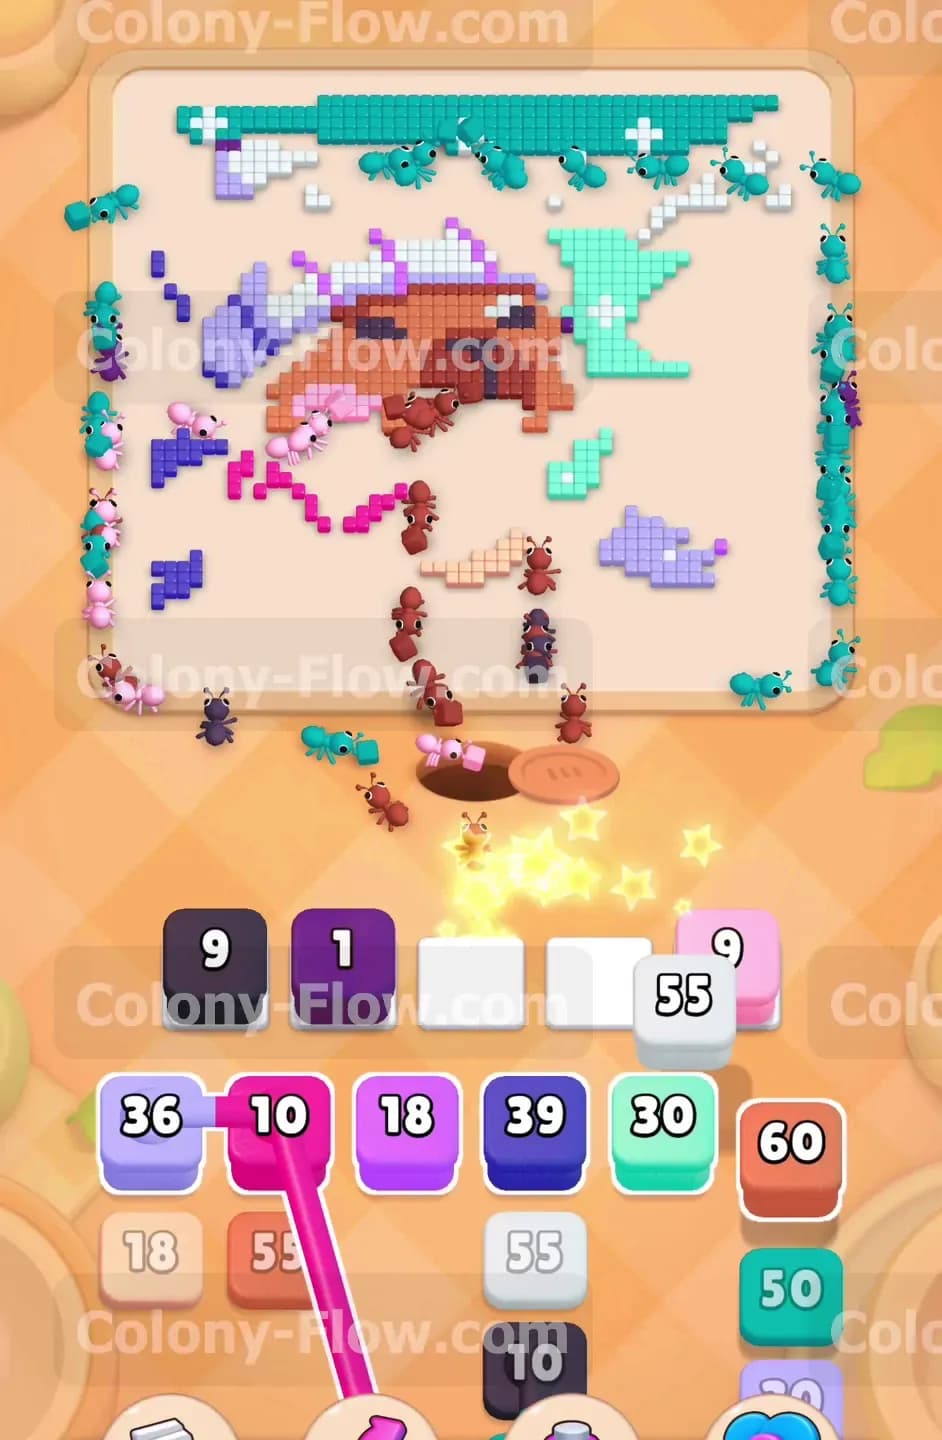
The winter hat still contains a large heavy section of dark red tiles near the center of the picture. You have a completely clear path straight up the middle of the board directly to the main fabric of the hat. Pull the dark red block valued at forty five into your next empty waiting slot. The ants march straight up the middle and begin dismantling the dark red fabric piece by piece. You also need to actively manage the remaining white trim on the hat to keep the board flow moving. Pull another white block from the tray to keep a second stream of ants totally busy on the opposite side. Keeping two different colors active at the exact same time ensures your waiting slots drain highly efficiently. You never want to rely on a single tiny path to clear a large numbered block.
Step 6: Peel away the dark purple outline surrounding the face
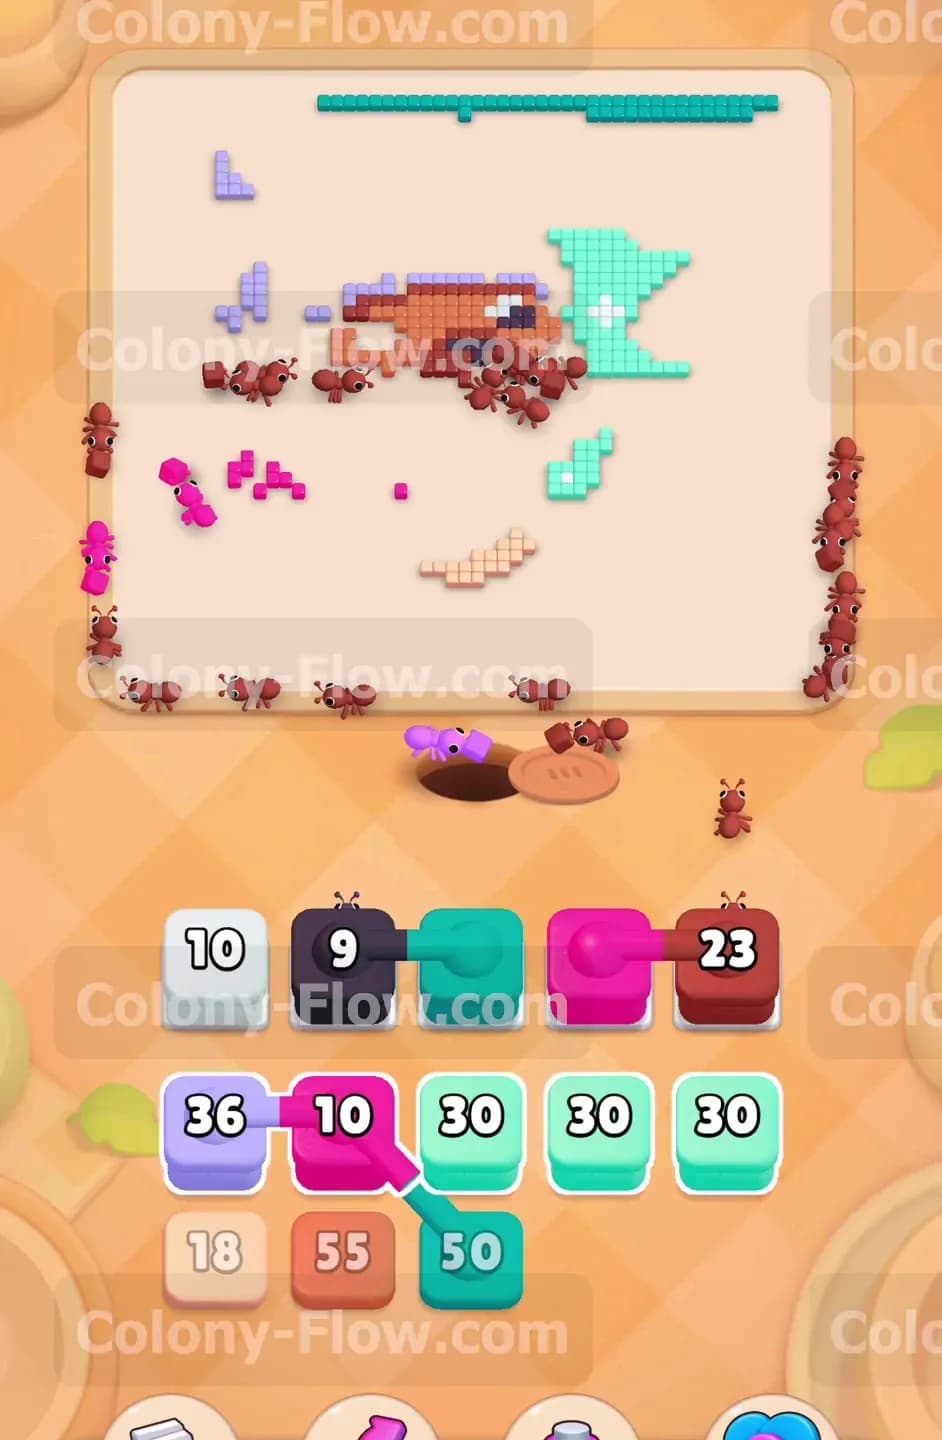
The round brown face is heavily framed by a thick dark purple outline. You opened the bottom of this outline earlier but the top sections remain entirely intact. Tap the next dark purple block in your tray to target this specific border. The ants follow the outer curve of the face and eat away the remaining border tiles. This precise move completely exposes the light brown skin tiles of the main character. You must make sure the dark purple block finishes counting down to zero before you pull the light brown blocks into the tray. If you pull the light brown blocks too early they will sit frozen in your waiting slots and block other useful colors from entering the active queue.
Step 7: Clear the pink and light purple shading on the cheeks
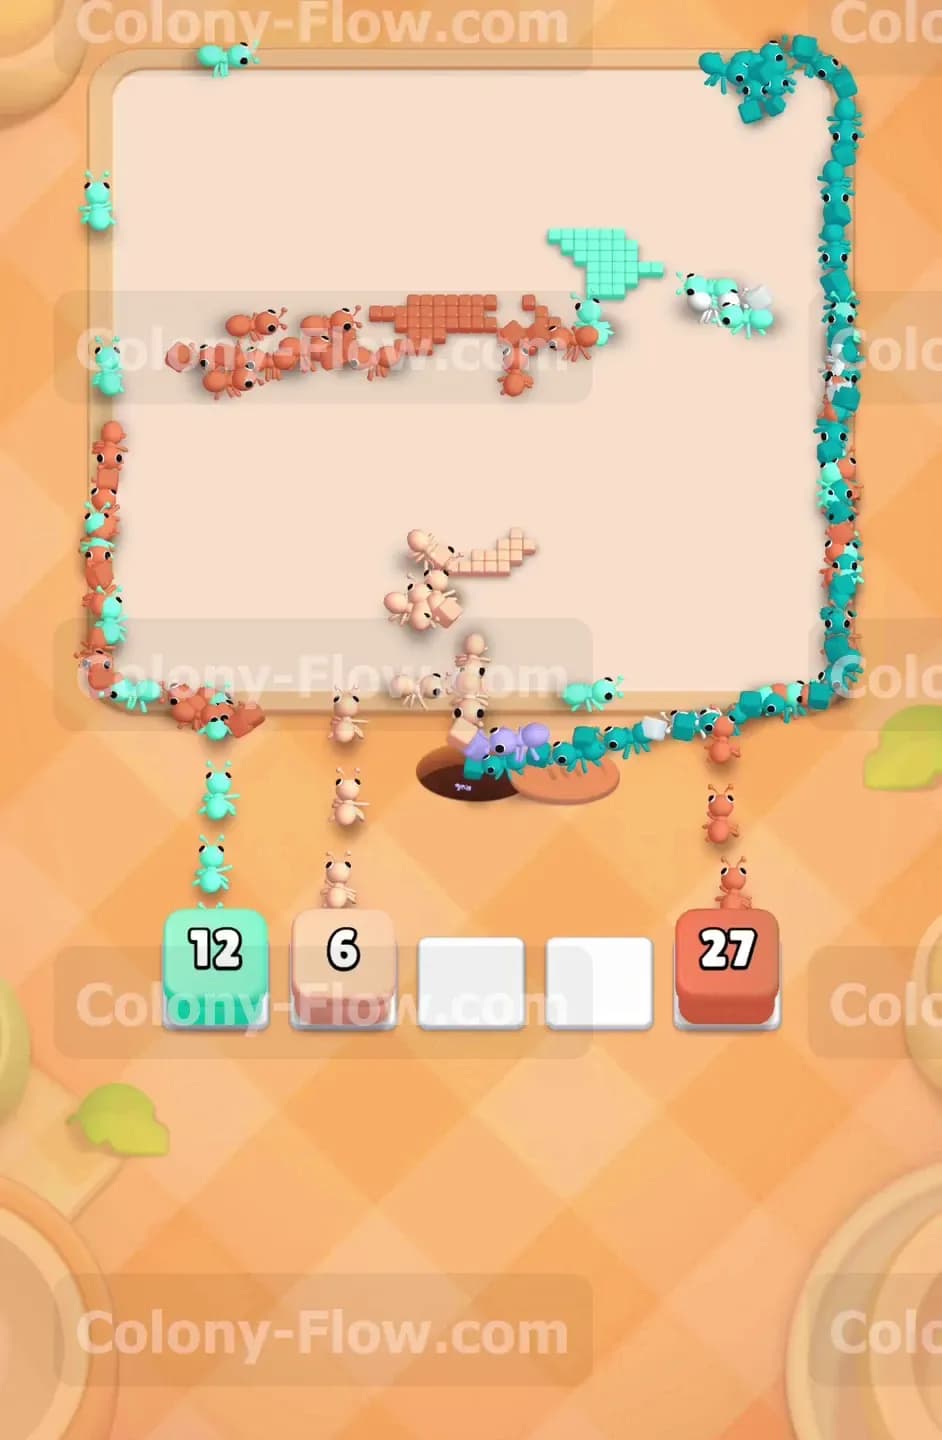
The character features bright pink and light purple shading on its cheeks and forehead to simulate cold winter weather. These small clusters of bright color are now fully exposed to your ant colony. Tap the pink block valued at ten and the corresponding light purple block from your tray. The ants move quickly into the center of the face and clean up these small facial details. These blocks have much smaller numbers so they drain out of your waiting slots extremely fast. This rapid turnover is exactly what you want as you closely approach the very end of the level. Your tray is shrinking rapidly and your choices are becoming much more narrow and highly focused.
Step 8: Erase the final teal sky pieces and remaining white snow
A few scattered pieces of teal sky and white snow still cling stubbornly to the top edge of the board. Pull the connected teal blocks from your lower tray. Because these are Connected Boxes they will instantly take up multiple slots. The ants make a very long continuous trek all the way to the top border of the empty board. Watch the numbers count down steadily until the slots totally clear. The final white block in your tray is the exact next logical pull. Send it up the board to clear the final white pom resting on the very top of the winter hat. The board is now entirely empty aside from the main body of the winter character.
Step 9: Finish the light brown face and completely clear the board
The only significant chunk of tiles left on the board is the light brown face of the character. The path to these specific tiles is completely unobstructed from all possible sides. Pull the remaining light brown blocks from your lower tray directly into your empty waiting slots. The ants swarm the dead center of the board and consume the entire face in one final massive wave. You might have one or two tiny dark purple or red blocks left in your tray to clean up the very last scattered individual pixels. Pull them into your final open slots without hesitation. The ants sweep the board completely clean and your waiting slots empty out for the final time to secure your win.
Final Thought
You just completed a highly detailed and complex puzzle by perfectly managing your tray space and keeping the ant paths continuously flowing. Planning your pulls around the Connected Boxes prevents your waiting slots from ever jamming at the worst possible moments. Check out the gameplay video above this article if you want to closely watch the exact timing of how these specific paths open up during the final stages of the puzzle.