Colony Flow Level 1194 Walkthrough Solution & Guides | How to solve Colony Flow 1194

Guide By Liam Stone
Updated on August 12, 2026
The video above has you covered on Level 1194, so skip the text if you'd rather watch it play out.
Video doesn't match your screen?
Game updates frequently scramble layouts! Try our AI Screenshot Solver first to find your exact board instantly, or report broken guides to our team.
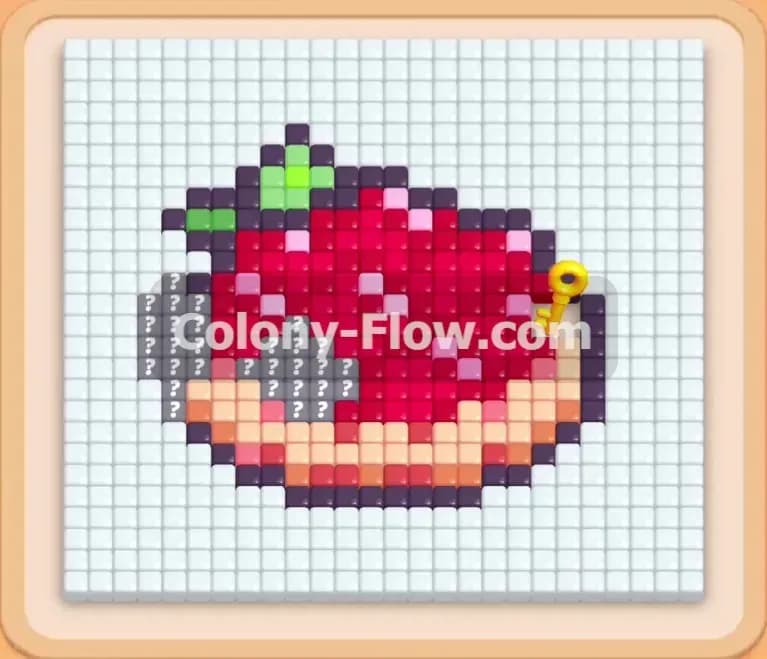
Welcome to Colony Flow Level 1194 where you face a massive red pixel art picture surrounded by a dense white background grid. You play every move carefully here because the game gives you extremely high number blocks right from the start. I played this level myself and I will show you the exact order to pull your blocks so your ants never run out of open paths. Keeping your waiting slots clear is the only secret to winning this board. You must control the flow of ants to prevent a massive traffic jam.
Colony Flow Level 1194 Overview
What You Are Working With
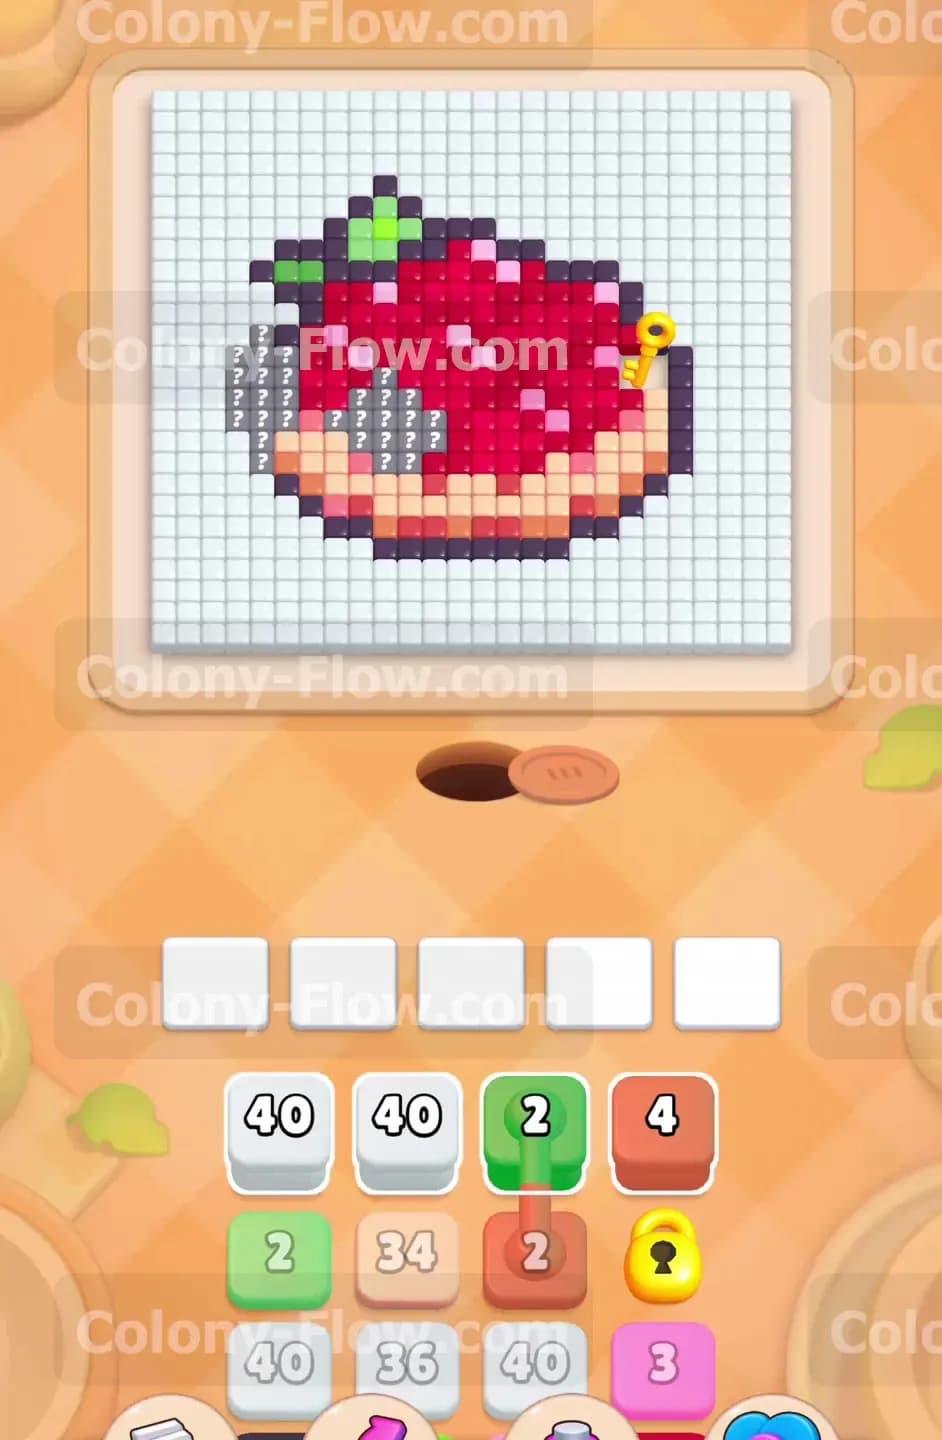
The board presents a large central object that looks like a slice of pie or a strawberry made of red and dark purple tiles. Green leaves sit at the very top of the shape. A thick orange crust lines the entire bottom edge. A dense white grid surrounds the entire central picture and blocks your access to the higher areas. You will spot a cluster of gray hidden food tiles on the left side of the main shape. These gray tiles hide their true colors until you clear the spaces directly touching them. A single yellow key rests on the right edge of the picture waiting for you to grab it.
Look down at your block tray to see the resources you have. You have massive numbers to deal with on this level. Two white blocks hold forty ants each. An orange block holds thirty four ants. You will also see connected green blocks linked together which pull as a pair. A yellow locked block sits in the tray and it requires the yellow key from the board to open.
What It Takes to Clear Level 1194 Board
Winning this level requires you to clear every single colored tile and every white background square from the screen. You must pull colored blocks from your tray into the five waiting slots at the bottom. The ants will then march out of the nest hole and eat the matching tiles on the board. You lose the level if you fill all five waiting slots with blocks that have nowhere to go. Every move you make must guarantee an open path for your ants so they can reach their target colors. If a block cannot reach its matching color on the board, it will sit in the waiting slot forever and slowly cause a deadly jam. Your main strategy is to alternate between clearing the outer white grid and chipping away at the central colored shape. This back and forth rhythm ensures you never dead end your board.
Colony Flow Level 1194 Step by Step Solution
Step 1: Clear the bottom grid background to open paths
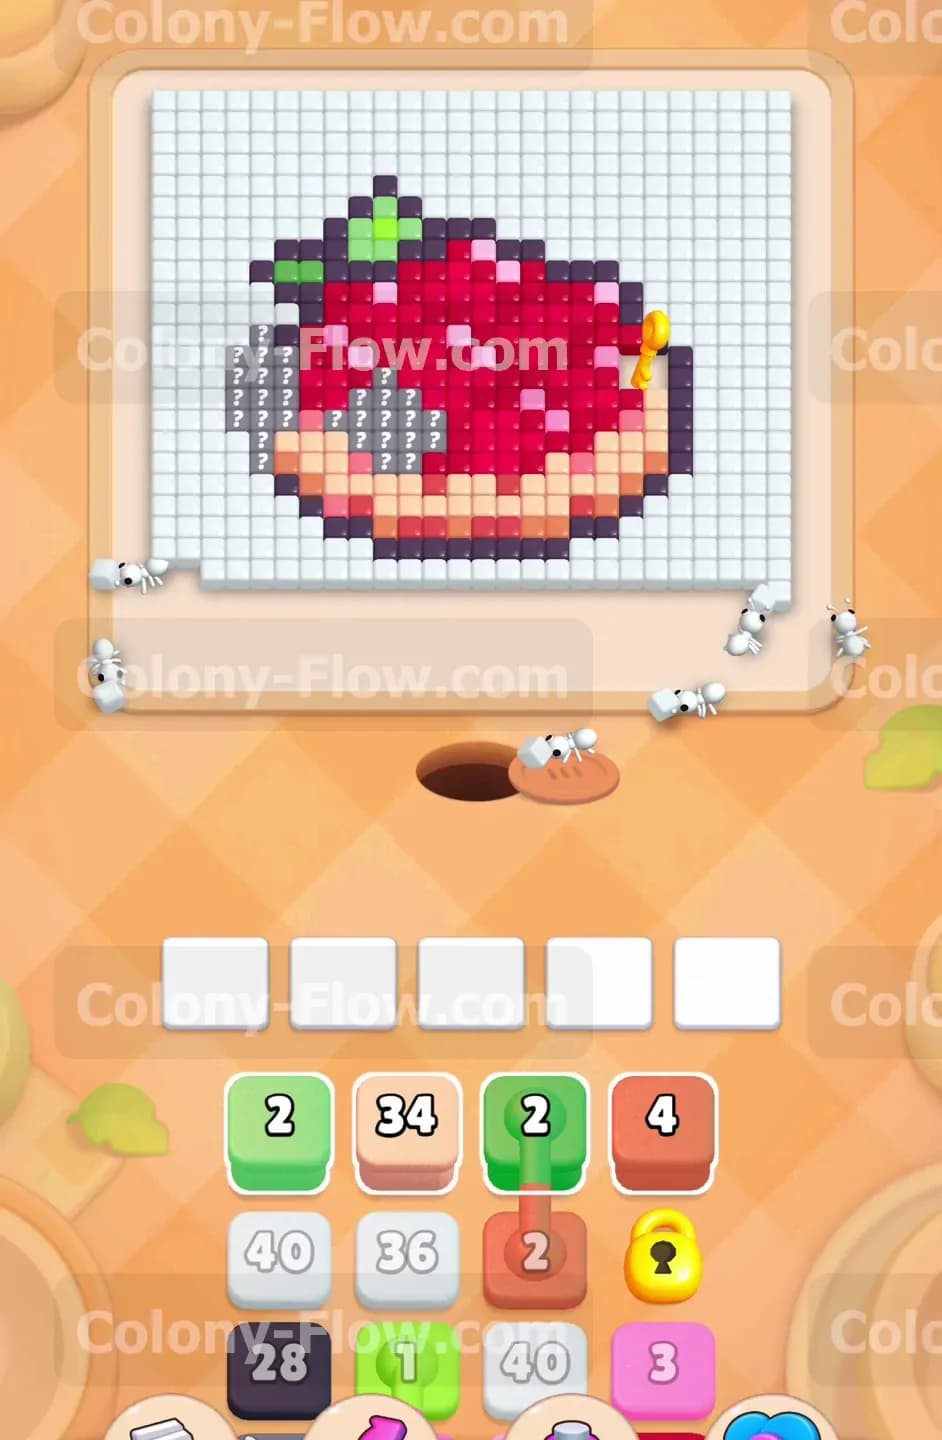
Start your attack by pulling the first white block from your tray. This block holds forty ants and they need plenty of space to work. The ants will stream out of the nest hole at the bottom of the screen and begin eating the white background grid surrounding the lower half of the picture. You must let these white ants clear this lower area completely before you do anything else. Do not pull any other colors yet. If you pull the orange or red blocks right now, they will get stuck behind the white ants and fail to find a clear path. The white ants slowly eat away the outer border and expose the orange crust at the bottom of the central shape. Watch the number forty count down to zero as the ants find their targets. Keep your waiting slots completely empty during this opening move to guarantee safety.
Step 2: Break the bottom orange crust barrier
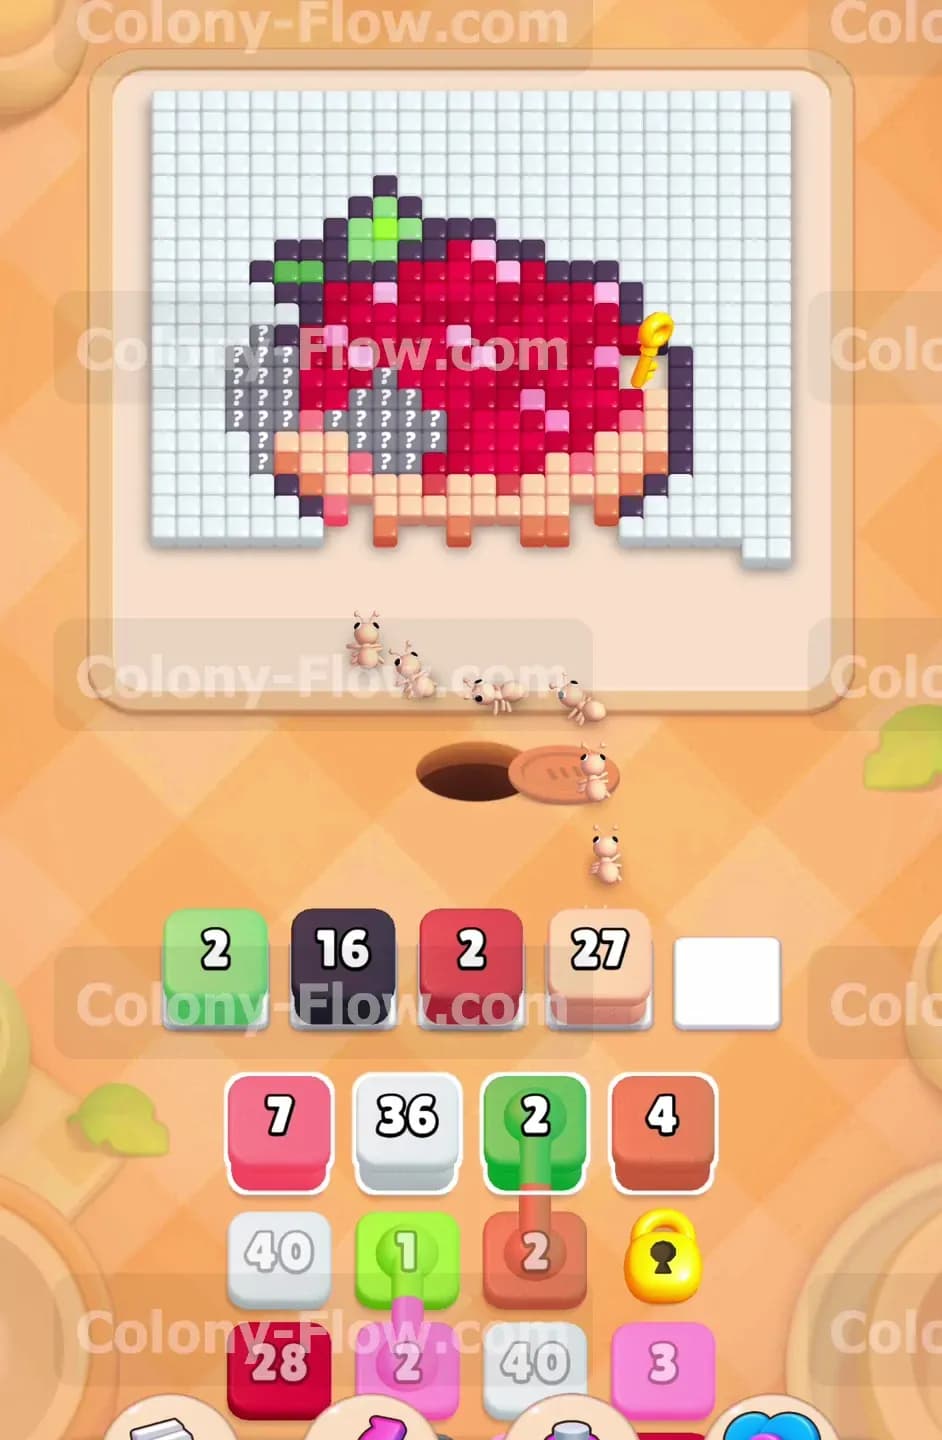
Now that the lower background is clear you have direct access to the central shape. Look at your tray and find the large orange block holding thirty four ants. Pull this orange block into your waiting slots. The orange ants will march up from the nest and begin consuming the orange crust at the bottom of the picture. This is a critical move because it breaks the outer shell of the shape. As the orange ants eat the crust, they expose the dark red interior tiles. They also clear the tiles directly touching the gray hidden food blocks on the left side. You want to keep the flow moving so pull the smaller orange blocks to finish off any remaining crust pieces. Your waiting slots remain perfectly clear because the orange ants have a wide open path to the food.
Step 3: Expose and clear the hidden gray food tiles
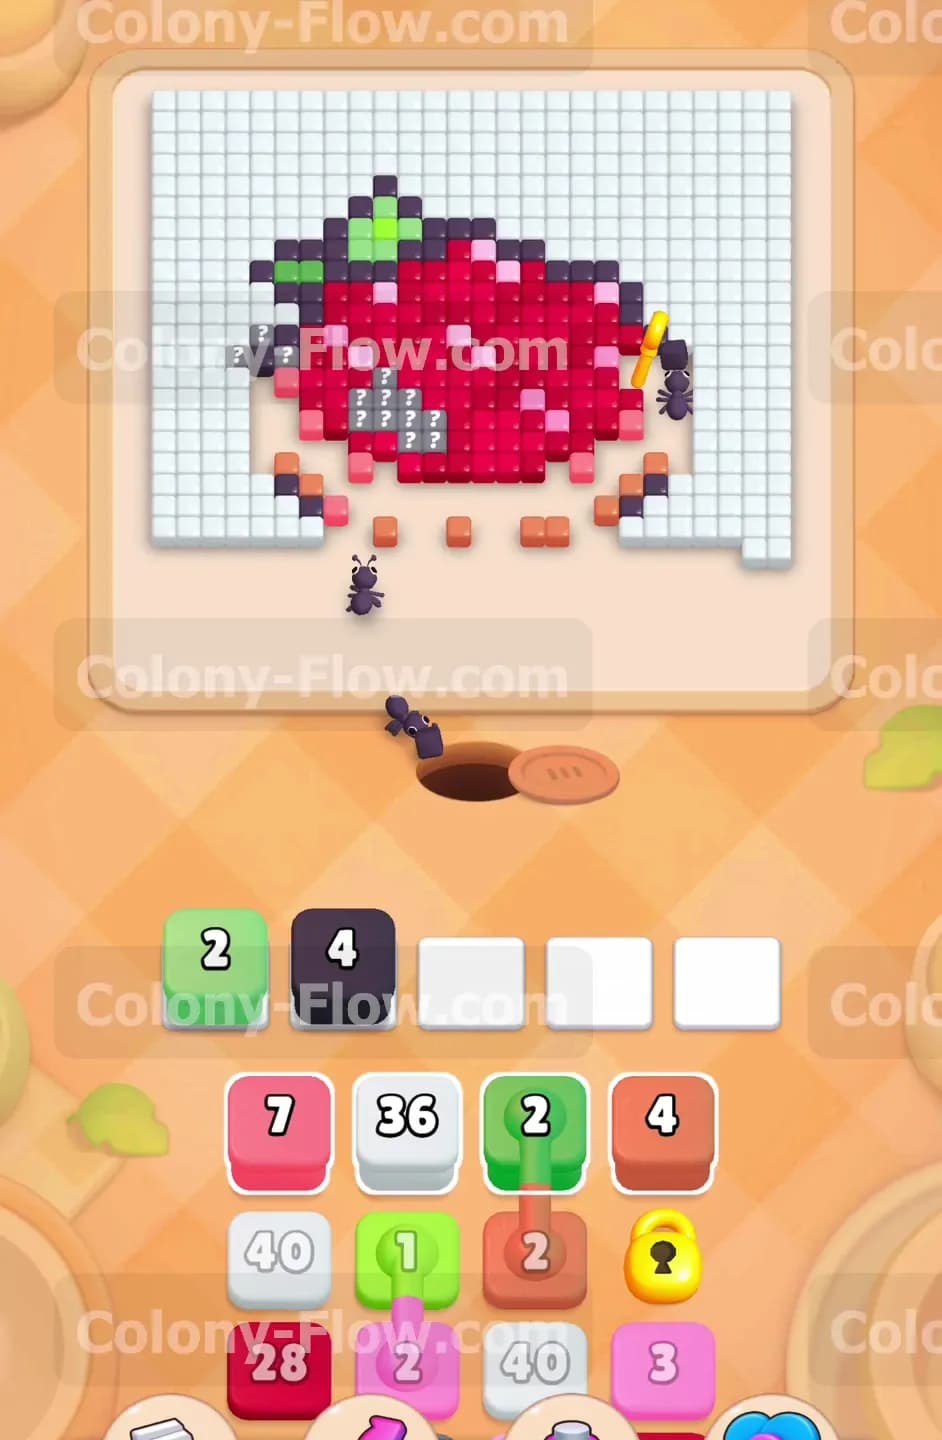
The orange ants just removed the tiles touching the gray hidden food blocks on the left side of the picture. These gray blocks now flip over and reveal their true colors. You will see new colors required to clear this left section. Look at the newly revealed colors and pull the exact matching blocks from your tray into your active slots. Do this slowly and methodically. Pull one color and let those ants march up the left side to eat their targets. If you pull all the matching blocks at once, the ants will bump into each other and jam your five waiting slots. Clear the left side piece by piece as the colors reveal themselves. This careful pacing guarantees that at least one path remains open for the ants currently moving on the board.
Step 4: Route your ants to collect the yellow key
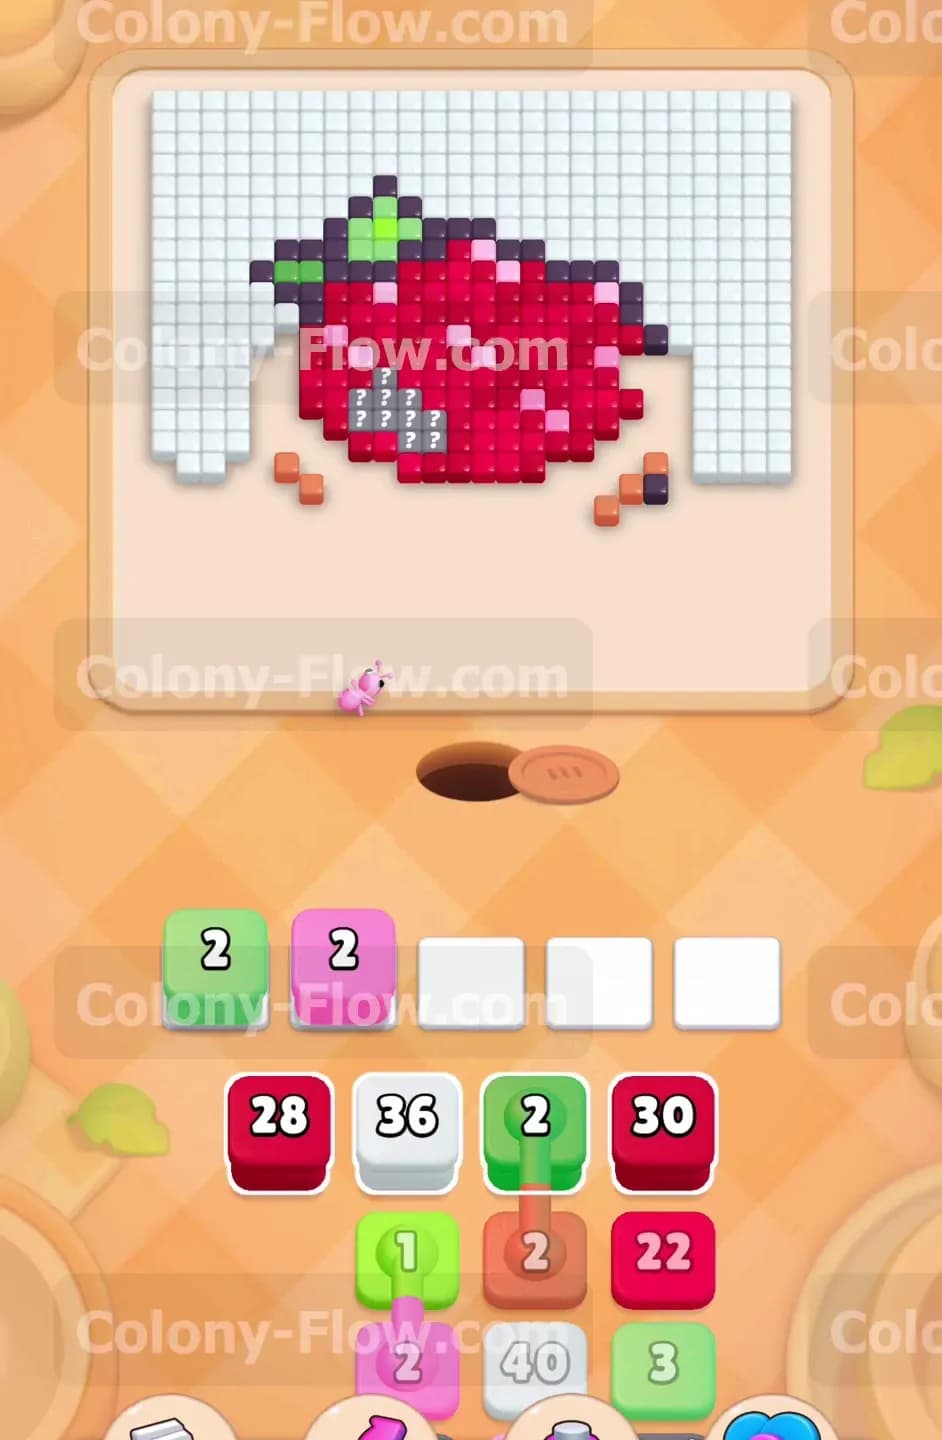
Turn your attention to the right side of the picture where the yellow key is located. You must collect this key to unlock the special block sitting in your bottom tray. Pull the blocks that match the colors surrounding the key on the right side. You will need to send out white ants to clear the background grid near the key and then send the matching colored ants to eat the actual picture tiles holding the key. Once the ants consume the tile underneath the key, you automatically collect it. The yellow lock symbol on your tray block instantly vanishes. This opens up new options for your next moves and prevents a late game tray jam. Always secure the key as soon as you have a clear path to it.
Step 5: Deploy the connected green blocks carefully
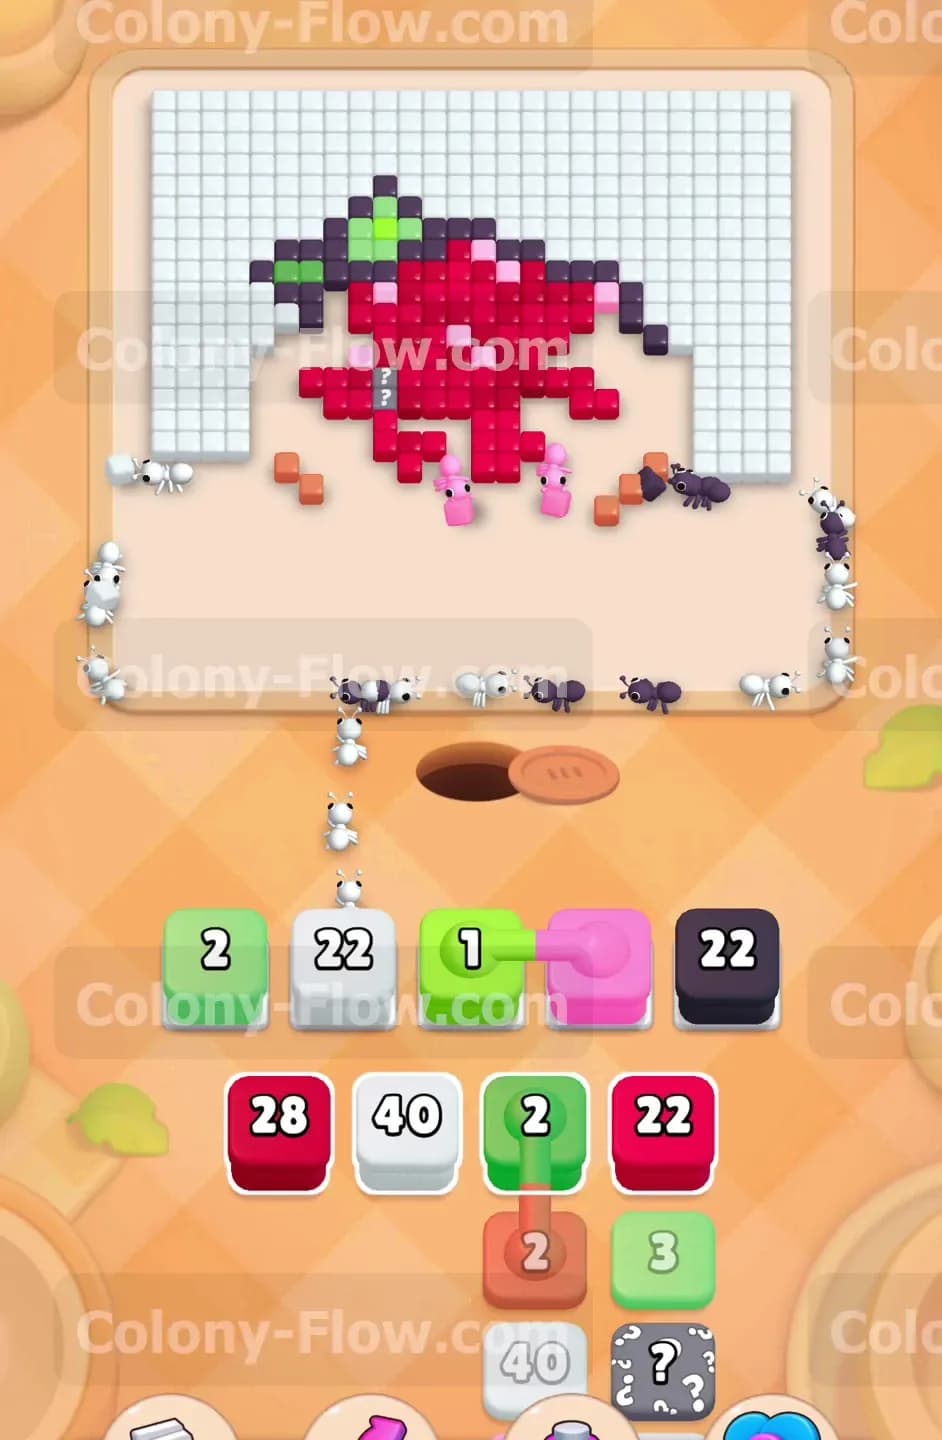
Your tray contains green blocks that are permanently linked together. When you pull one of these green blocks, the connected block automatically comes with it and takes up an extra space in your waiting slots. You must ensure you have a completely clear path to the green leaves at the very top of the picture before you make this move. Check that the white ants have cleared enough of the side background to create a road to the top. Once the path is open, pull the connected green blocks into your tray. The green ants will march up the outer edges of the board and consume the leaves. Because you waited for a clear path, the green blocks quickly empty out of your waiting slots and keep your board safe.
Step 6: Flood the center with dark red and dark purple ants
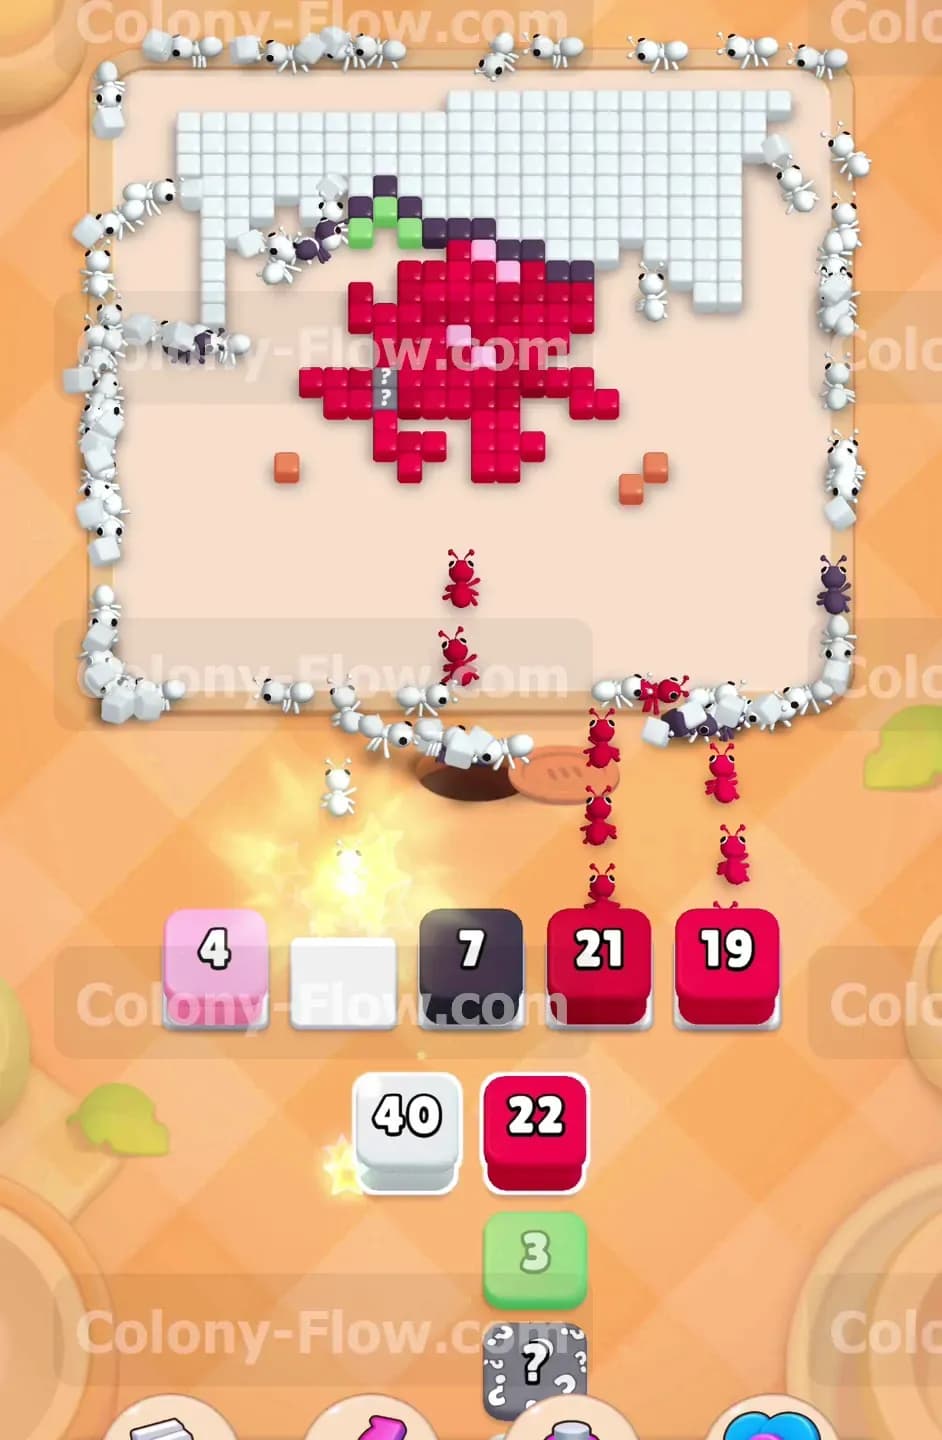
The massive core of the picture consists of dark red and dark purple tiles. Your tray is now full of large numbered blocks for these colors including a dark red block with twenty eight ants and another with thirty ants. Pull these large blocks into your waiting slots one by one. The red and purple ants will flood the center of the board and rapidly shrink the main shape. You will see the numbers on your tray blocks drop quickly as the ants find their targets. Do not pull all the large blocks at the exact same time. Let the dark red block finish half its ants before pulling the dark purple block. This staggers the flow of ants and guarantees your waiting slots never fill up completely.
Step 7: Consume the top white grid background and finish
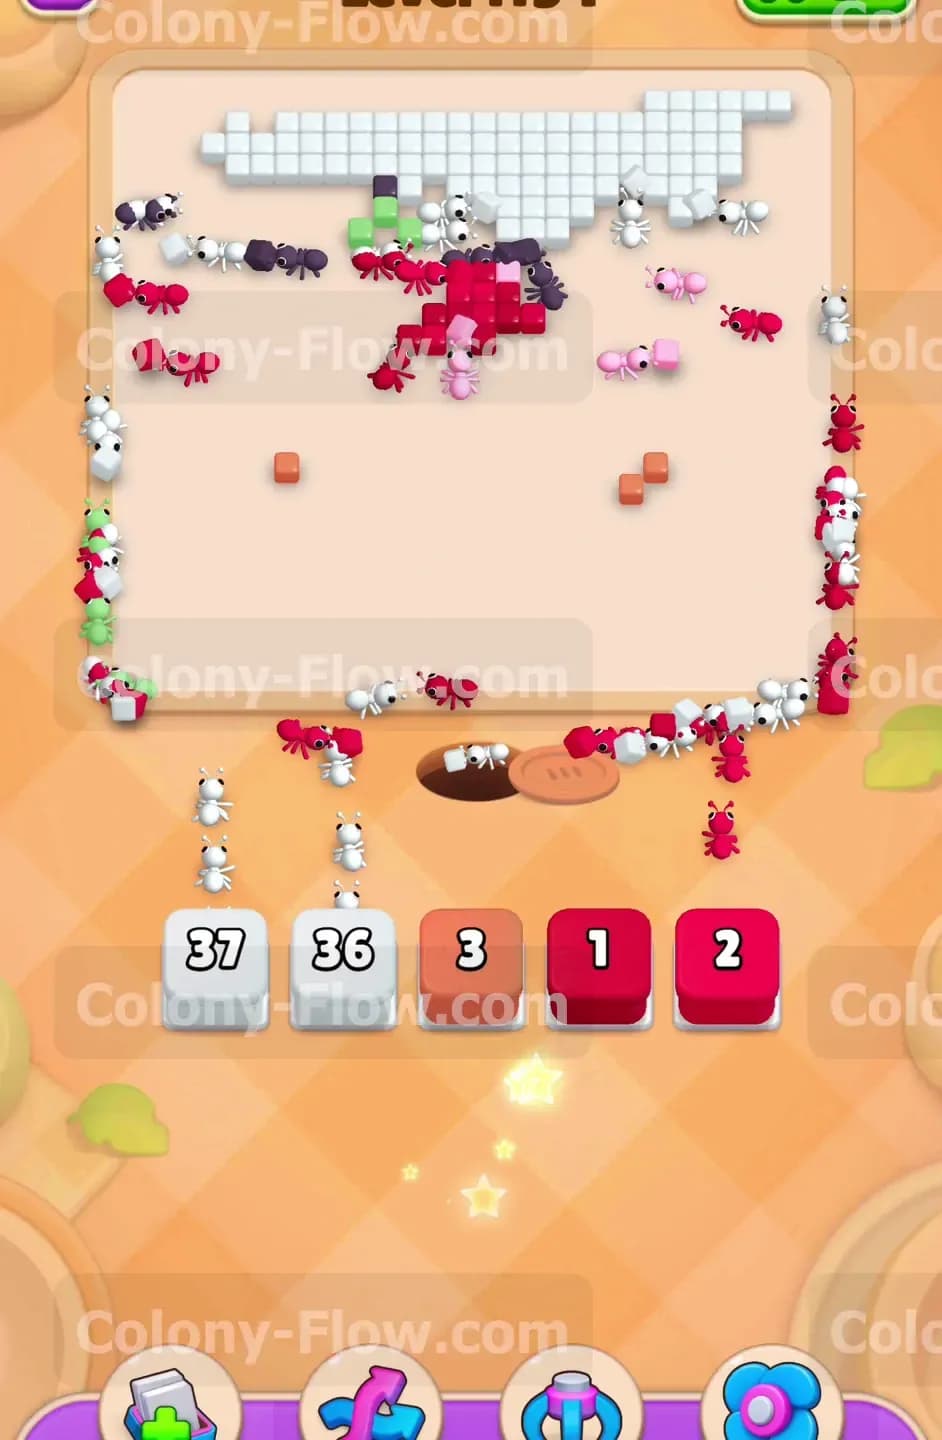
You are now in the final stretch of the level. The central shape is mostly gone and only the top section of the white background grid remains. Your tray holds the last massive white blocks including one with thirty six ants and another with thirty seven ants. Pull these white blocks and watch the white ants swarm the very top of the board. They will spread out and eat every remaining white square in the grid. Pull your final small red and orange blocks to clean up the last few stray tiles of the picture. Every ant has a direct path to its food now. The board becomes completely empty and you win the level.
Final Thought
Managing the giant numbers in this puzzle feels intimidating at first glance. The secret is simply taking your time and trusting the process of clearing the outer layers before rushing the center. Keep a close eye on your five waiting slots and never pull a block unless you know exactly where those ants will go. You control the pace of the board by watching the paths. Watch the video above this article if any step is hard to follow in text. Seeing the ants move in real time makes the exact timing of the connected blocks and hidden food much easier to understand.