Colony Flow Level 937 Walkthrough Solution & Guides | How to solve Colony Flow 937

Guide By Liam Stone
Updated on August 8, 2026
Not in the mood to read? The video above solves Level 937 for you from beginning to end.
Video doesn't match your screen?
Game updates frequently scramble layouts! Try our AI Screenshot Solver first to find your exact board instantly, or report broken guides to our team.
Getting past Colony Flow Level 937 requires careful timing and solid slot management. I am Liam Stone and I play every level of this game to find the safest routes for you. This stage gives you a massive pixel art picture of a frog wearing sunglasses against a striped background. You will face a huge block of chocolate and a stubborn hungry door blocking your paths. Let me show you exactly how to feed your colony and clear the board without filling your waiting slots.
Colony Flow Level 937 Overview
What You Are Working With
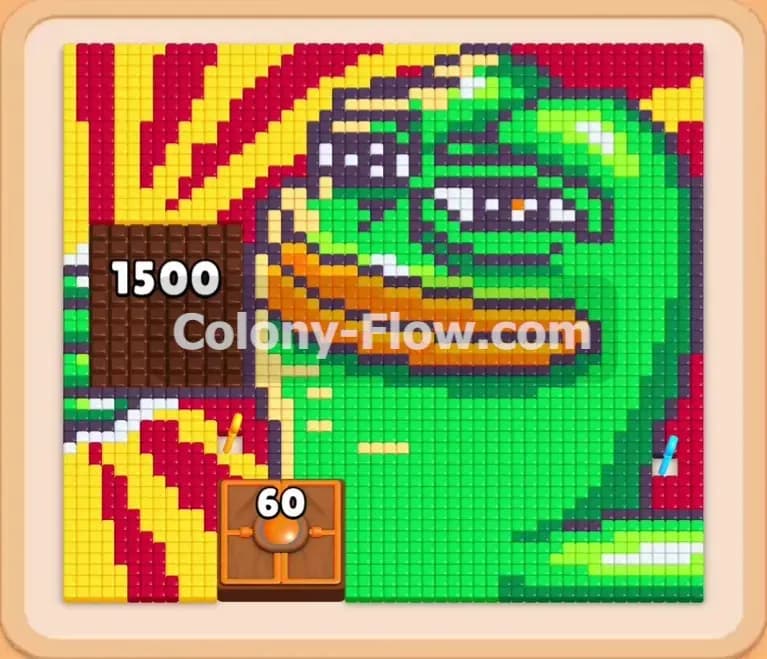
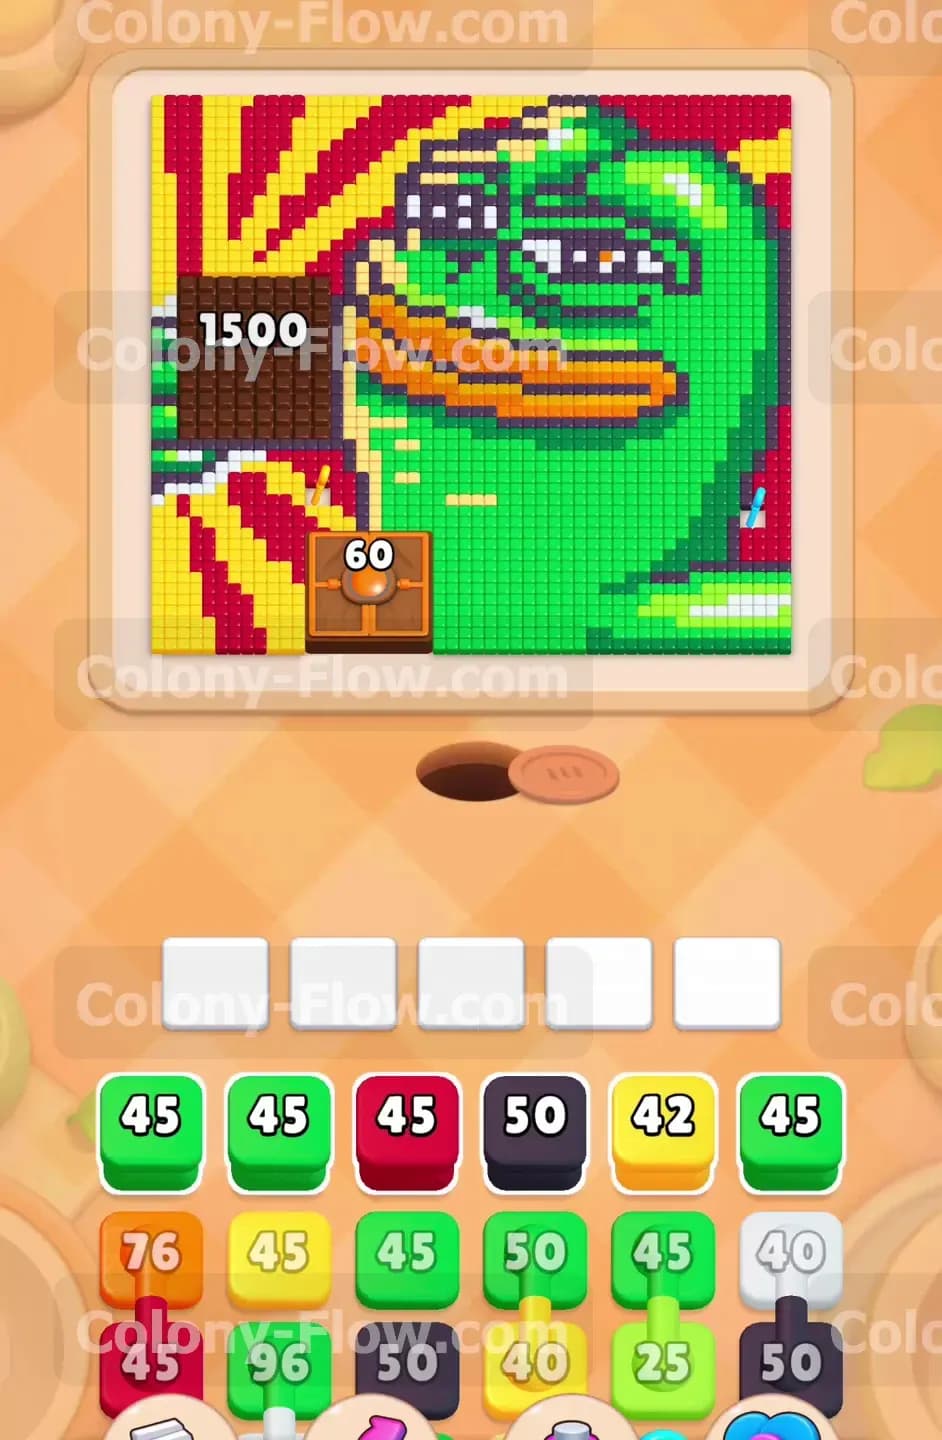
The board presents a large pixel art frog head with a bright green face. You will see dark green shading on the skin, an orange mouth, and black sunglasses. The background behind the frog is a bright red and yellow sunburst pattern. A massive chocolate square sits on the left side of the board with a starting count of 1500. A brown hungry door rests near the bottom center with a count of 60. The tray at the bottom holds multiple rows of numbered blocks in green, red, black, yellow, and orange. You will also deal with connected boxes in the tray. These linked blocks require you to have an open path for all connected colors before you pull them into your waiting slots.
What It Takes to Clear Level 937 Board
Clearing the board means completely dismantling the frog picture while melting away the chocolate and unlocking the hungry door. You win when every colored tile is gone and your ants return to the nest hole. You lose if your five waiting slots fill up with blocks that have nowhere to go. You must constantly balance the colors you pull from the tray with the open paths on the board. The chocolate block will slowly shrink as the colony interacts with it, but you have to keep the rest of the board moving so your slots never jam up. Every move you make must keep at least one path open for the ants.
Colony Flow Level 937 Step by Step Solution
Step 1: Clear the right side of the green face and the black sunglasses.
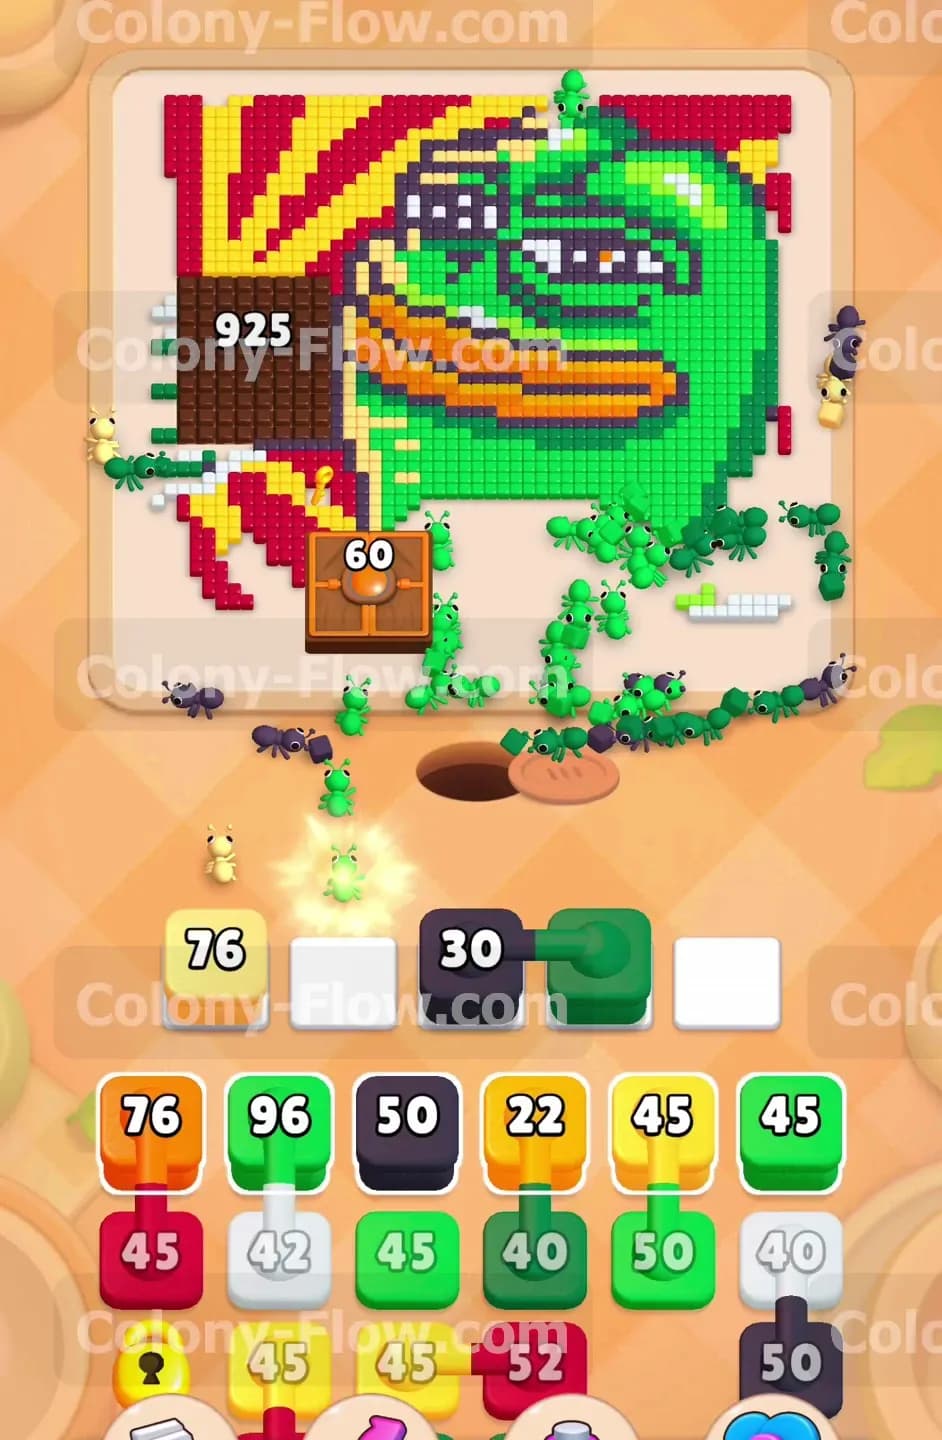
You need to get the ants flowing out of the nest hole immediately so you do not waste any time. Look at the front row of your tray. You have several green blocks and a black block available to pull. Pull the green block with a count of 45 and the black block with a count of 50 into your waiting slots at the bottom of the screen. The ants will stream out of the nest, march up the right side of the board, and start eating the light green skin and the black outline of the sunglasses. This initial move clears a large section on the right side and creates room for your ants to move deeper into the pixel art picture. Keep an eye on the massive chocolate block on the left side of the screen. The number will start to drop from 1500 as the colony gets to work on the board. Do not pull any red or yellow blocks yet because the sunburst background is largely blocked by the frog face. Pulling them now would trap them in your waiting slots and risk a total dead end.
Step 2: Pull the first set of connected boxes to clear the dark green shadows.
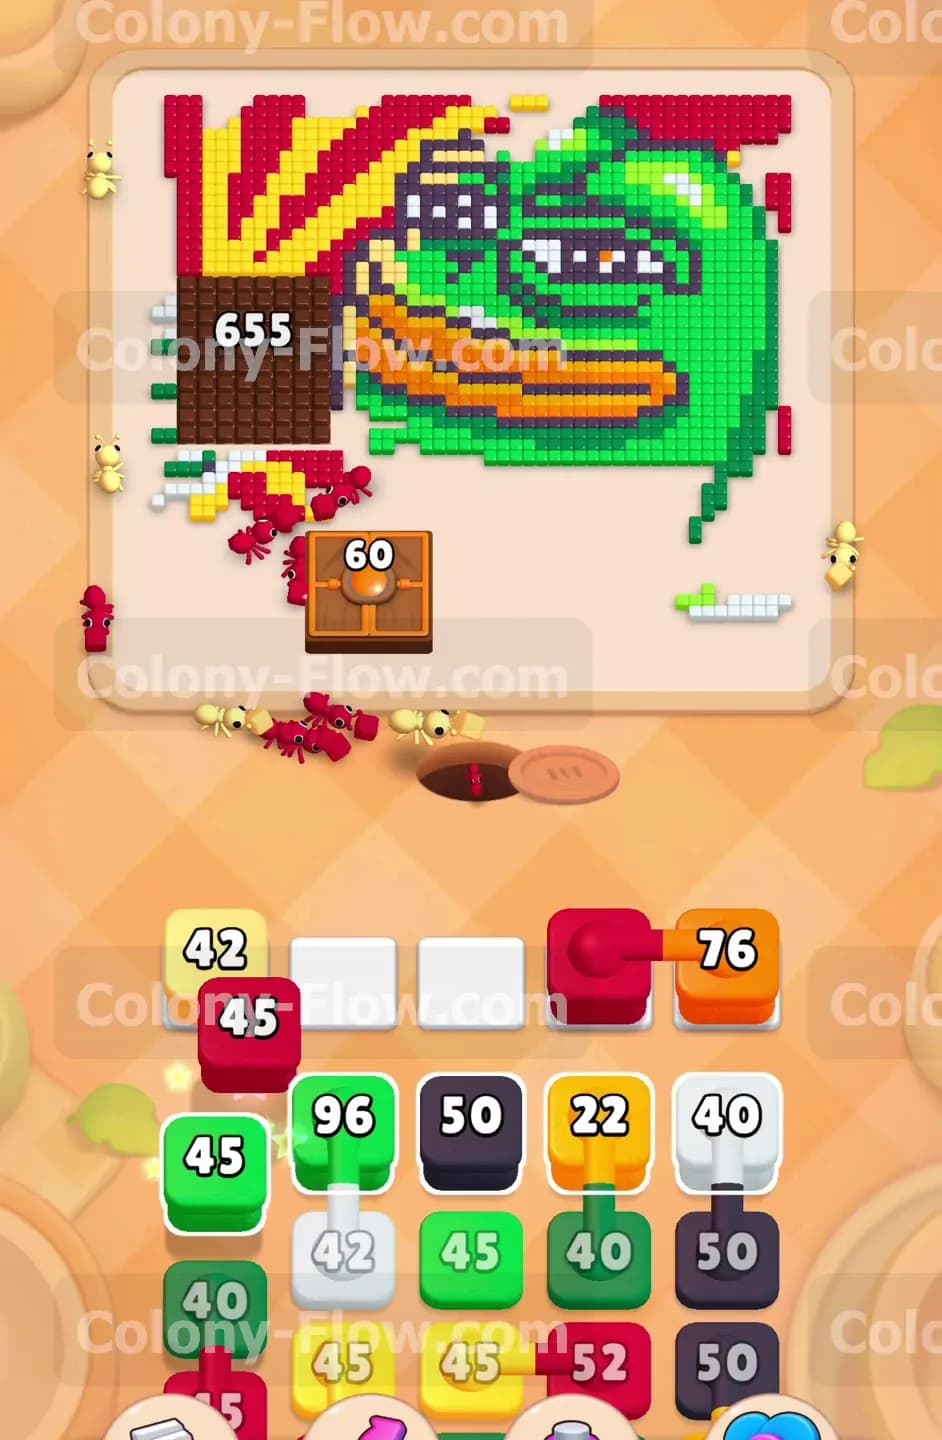
Once the outer light green skin clears out completely, the darker green shadows and the yellow background stripes open up for your ants. Your tray now shows a yellow block with a count of 76 and a dark green block with a count of 30. Bring the black block and the yellow block into your slots to keep the ants moving forward. The tray also holds connected boxes featuring an orange block linked directly to a green block. You must wait until the orange lips of the frog become fully accessible before pulling this linked pair. If you pull the connected boxes too early, the orange block will sit idle in your waiting slot and risk a severe slot jam. Send the dark green block up to clear the shading on the frog face instead. This action keeps your ants busy and allows the chocolate block to count down well below 1000.
Step 3: Feed the hungry door and work on the orange lips.
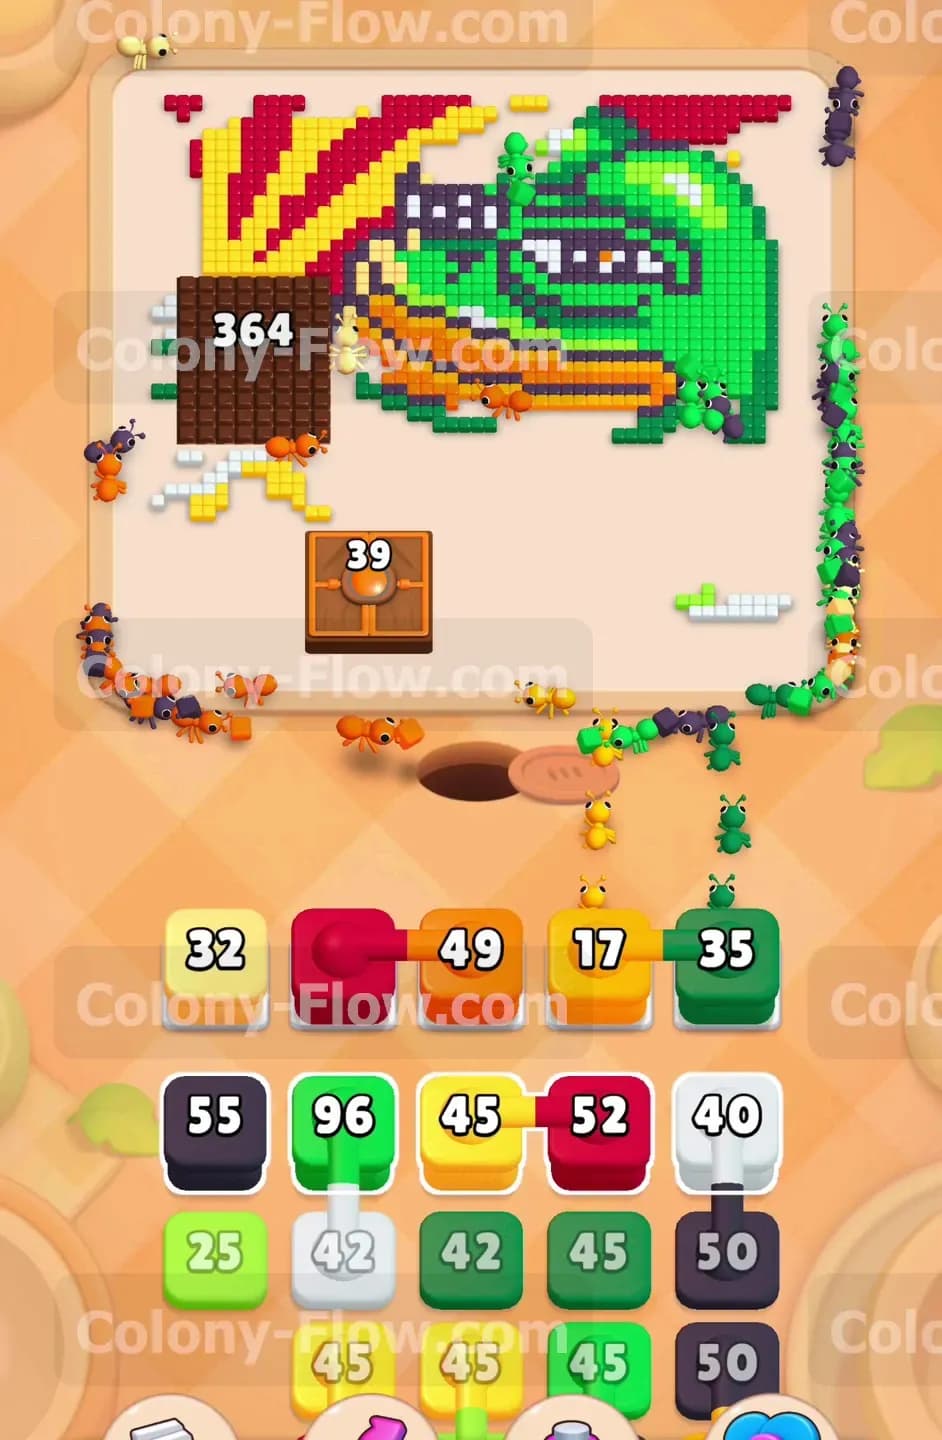
The brown hungry door near the bottom center starts at 60 and blocks a chunk of the lower board. Route your ants toward it by clearing the green tiles directly around it. As the green tiles vanish, your ants will feed the hungry door and drop its count rapidly. Pull the yellow block with 42 and the red block with 45 to start eating into the sunburst pattern on the top left and top right. Now that the frog mouth is exposed, you can safely pull the connected orange and green boxes from the tray. The orange block will send ants to the frog lips while the green block finishes off the remaining right side skin. Your waiting slots will stay entirely clear because every block has an active target on the board. The chocolate block will now be in the 600 range.
Step 4: Clear the red sunburst stripes and chip the chocolate down further.
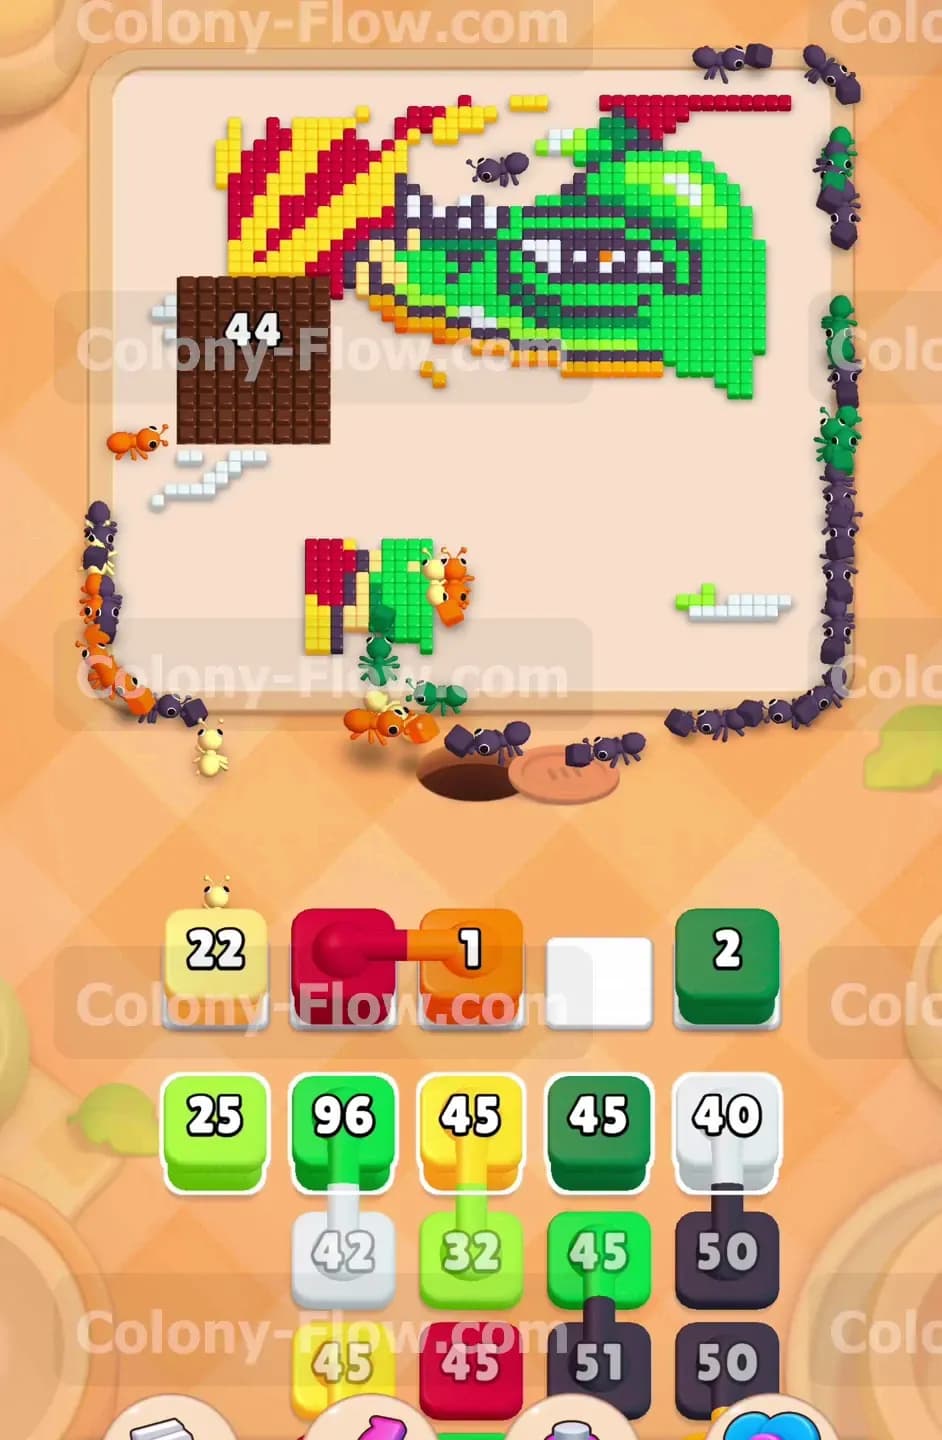
The right side of the board is getting very empty now. The frog face is mostly gone except for the part trapped under the chocolate on the left. The hungry door count drops to 39 and soon disappears completely. You must focus on the red and yellow sunburst background to keep your ants moving across the board. Pull the red block with 49 and the dark green block with 35 into your tray. The dark green block targets the final pieces of the frog eye and sunglasses on the upper right. The red block tackles the thick red stripes at the top. The chocolate block is now down into the 300 range. You must maintain this steady flow of ants to guarantee a win. Do not pull any light green blocks from the back of the tray yet because the left side frog skin is still totally hidden under the chocolate.
Step 5: Melt the final piece of chocolate to reveal the hidden tiles.
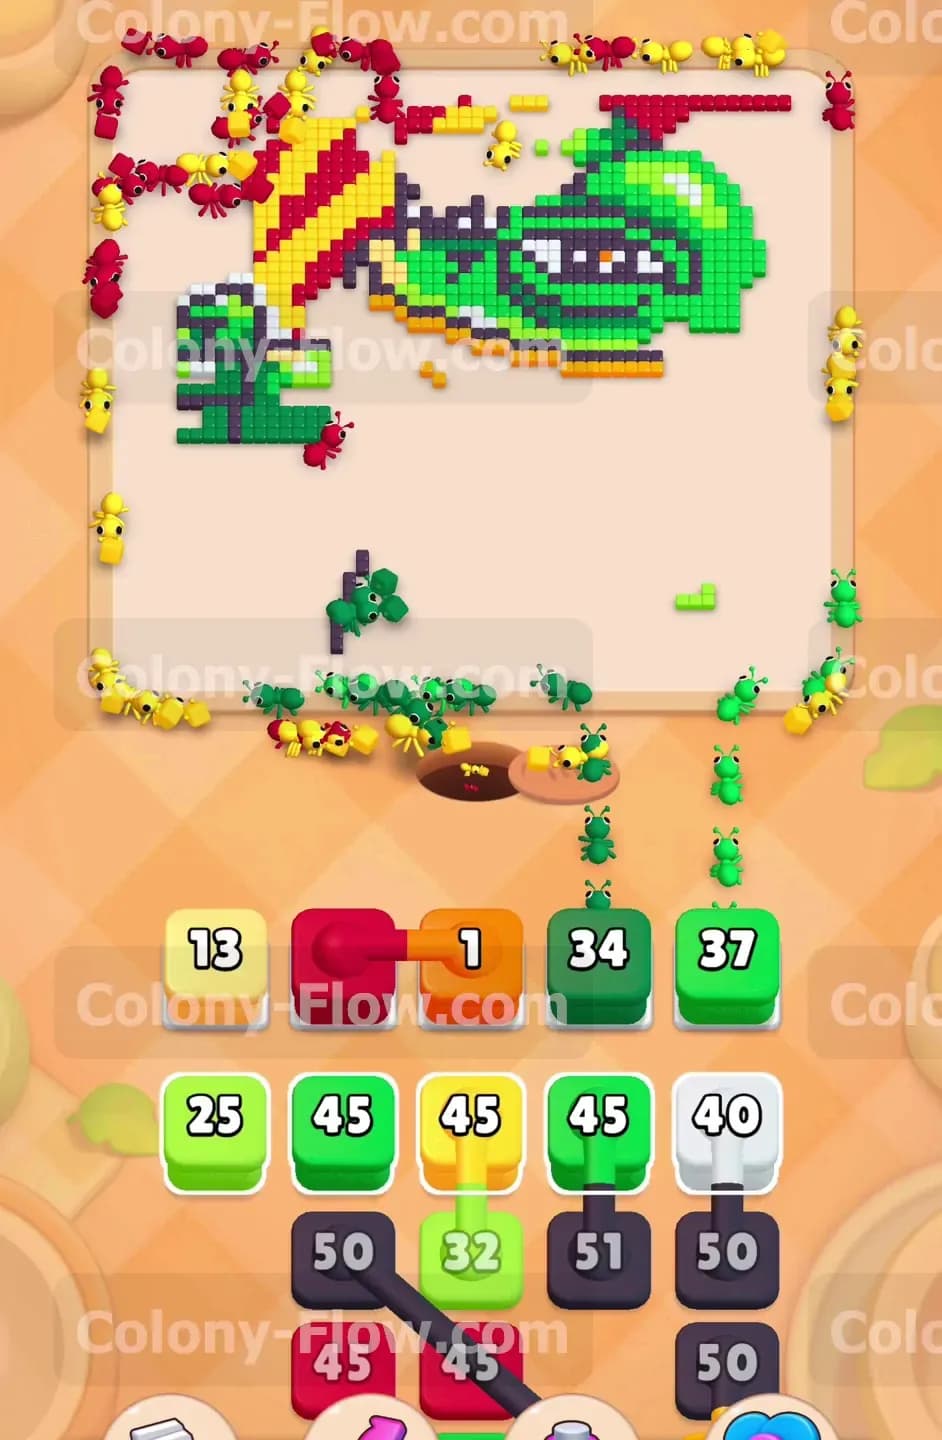
Keep feeding the red and yellow stripes with matching blocks. You will pull a yellow block with 22 and another red block into your slots. The chocolate block reaches 44 and then finally breaks apart completely. This reveals the hidden left side of the board. You will uncover the frog hand, some extra green skin, and the rest of the left sunburst pattern. This is a critical moment for your success. If you had pulled green blocks earlier, your slots would be hopelessly jammed right now. Now that the green tiles are exposed, you can safely pull the light green blocks from the tray. Your ants will immediately rush to the newly opened paths.
Step 6: Clear the newly exposed left side green tiles.
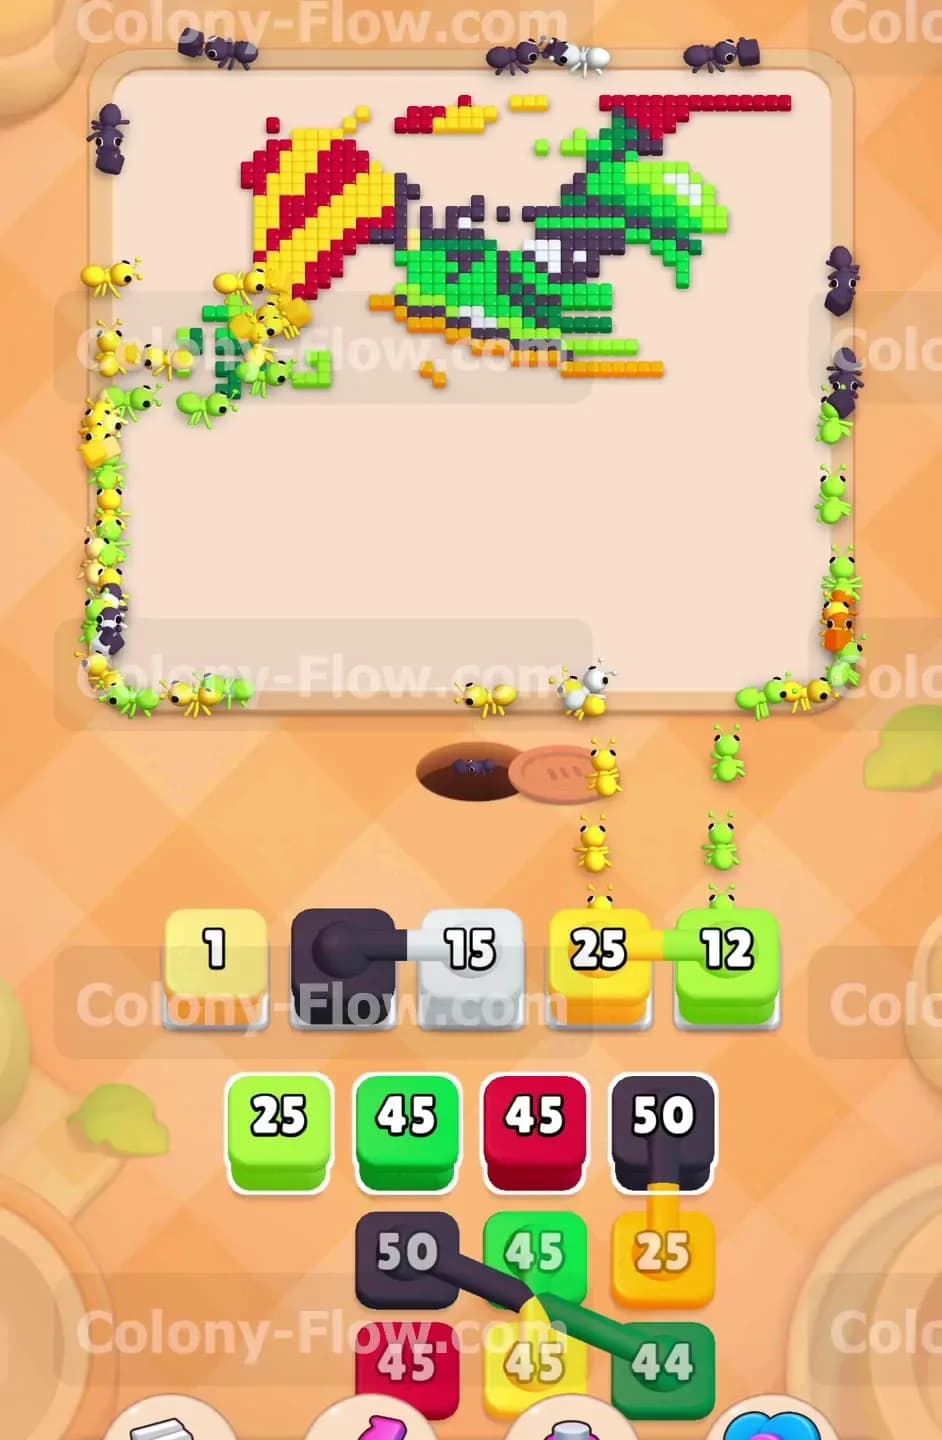
Now that the chocolate is out of the way, you have full access to the left edge of the board. Pull the light green block with 37 and the dark green block with 34 into your waiting slots. The colony will rush to the left side and quickly dismantle the frog hand and arm. You will also see a small orange spot near the hand. Pull the connected orange and red blocks from the tray to clear this small detail. The board is now extremely open and you have plenty of room to maneuver. Your waiting slots are completely safe from jamming at this point because every color on the board is fully exposed and ready for your ants.
Step 7: Sweep up the remaining sunburst background.
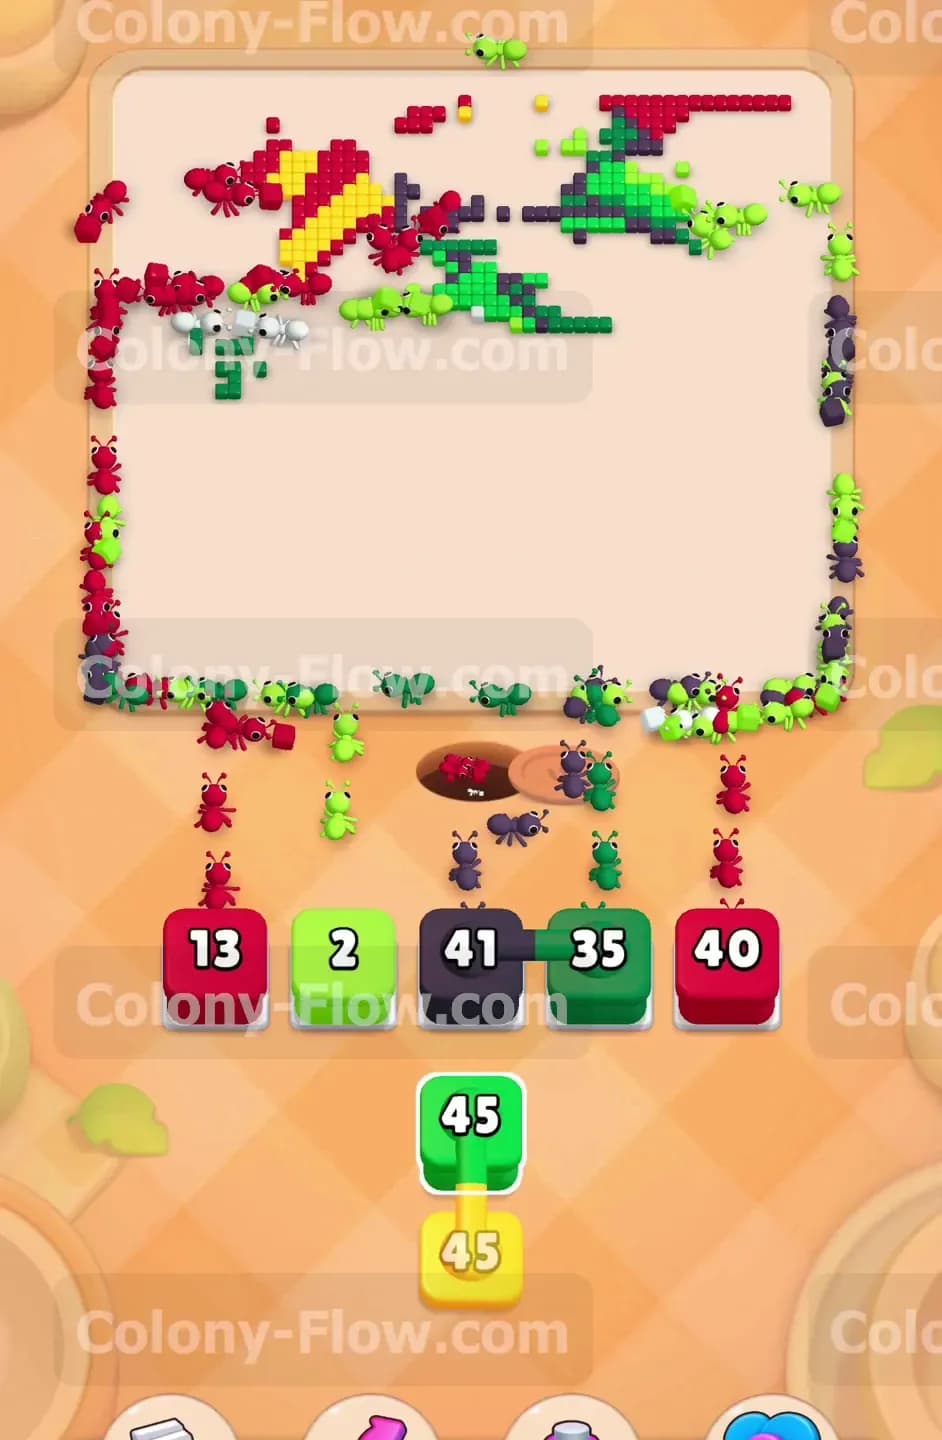
Only the outer edges of the red and yellow sunburst remain on the top left. Look at your tray and pull the black block with 15 and the white block with 25. The white block clears a small hidden highlight, while the black block cleans up the last bits of the sunglasses outline floating on the left. Pull the light green block with 12 to finish the very last pieces of the frog skin. Keep your flow going by pulling the remaining red block with 45 and the yellow block with 45. The ants will march up the left wall and eat away the final stripes. You are keeping the flow fast and preventing any dead ends from ruining your run.
Step 8: Empty the tray and finish the level.
You are down to the very last blocks in your tray. Pull the red block with 13, the black block with 41, and the dark green block with 35. These blocks perfectly match the final scattered pixels on the outer edge of the board. The ants will clear the last red stripe, the final black outline, and the last green shadow. Once the final tile disappears, the remaining ants will scurry back into the nest hole. The board is fully cleared and you win the level. You kept your slots open the entire time and maintained a perfect flow.
Final Thought
This level tests your patience with that massive chocolate block and the connected tray boxes. You just need to keep chipping away at the open colors while waiting for the chocolate to melt. If you find any of these moves hard to picture in text, I highly encourage you to watch the video above this article to see exactly how I route the colony.