Colony Flow Level 1080 Walkthrough Solution & Guides | How to solve Colony Flow 1080

Guide By Liam Stone
Updated on August 12, 2026
Watch first, read later. The video above shows the complete Level 1080 walkthrough.
Video doesn't match your screen?
Game updates frequently scramble layouts! Try our AI Screenshot Solver first to find your exact board instantly, or report broken guides to our team.
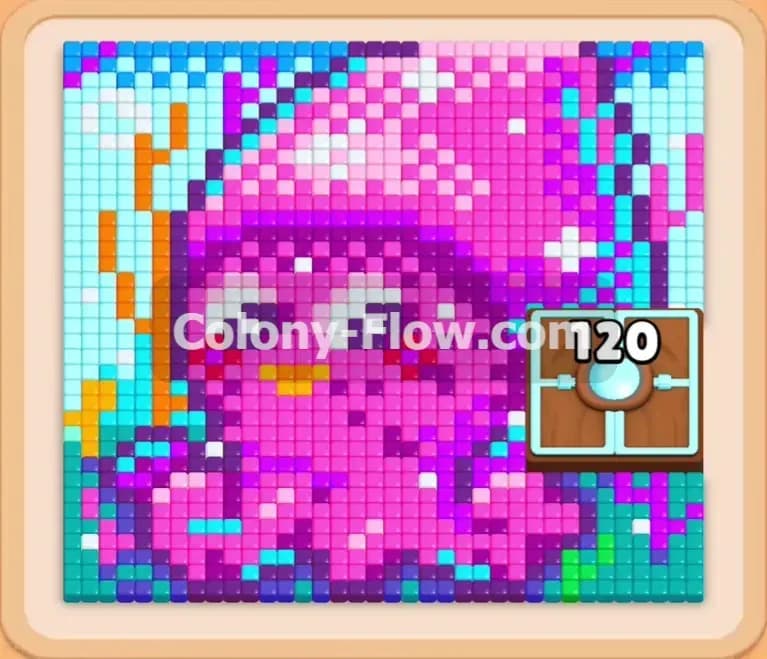
Colony Flow Level 1080 throws you right into a massive pixel art puzzle that requires careful planning. You face a giant pink and purple octopus surrounded by intricate ocean details. The sheer volume of tiles means you must sequence your moves perfectly so you do not jam your board. I played this level multiple times to find the exact order of blocks that keeps the ants moving freely from start to finish.
Colony Flow Level 1080 Overview
What You Are Working With
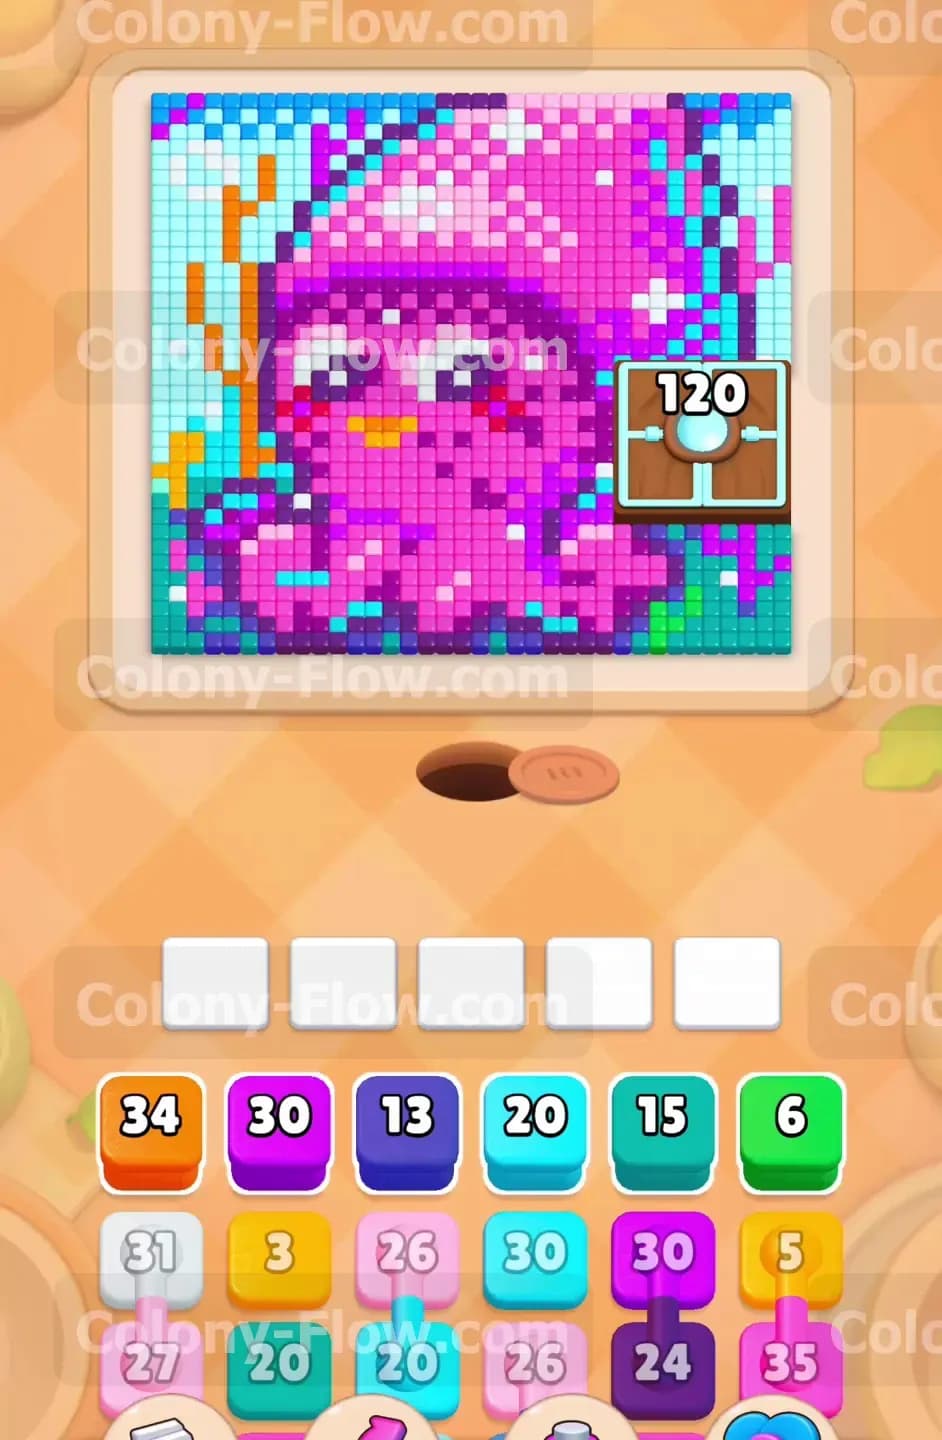
The board is dominated by a large octopus character made of bright pink, purple, and dark purple tiles. The left side features orange and cyan background elements representing seaweed and ocean water. The right side features a massive crate obstacle starting with the number 120 printed on it. This giant box takes up a huge portion of the screen and requires a massive amount of ant traffic to break down. Down in your tray you have high capacity blocks like an orange 34 and a purple 30. You also face connected boxes in this level. These are two blocks joined together by a solid line. When you pull one connected box into your queue, the attached block comes with it and takes up an adjacent waiting slot immediately.
What It Takes to Clear Level 1080 Board
Clearing the board means matching every single color block from your tray to its corresponding tile until the entire picture completely disappears. You win the level when the ants carry away the final pixel and the giant 120 crate drops to zero. You must manage your five available waiting slots perfectly to achieve this. If you fill all five slots with blocks that the ants cannot currently reach, the board will dead end and you lose the level instantly. You keep the flow alive by always matching colors that sit on the outer exposed edges of the pixel art.
Colony Flow Level 1080 Step by Step Solution
Step 1: Open the bottom tentacles with purple and blue blocks to create immediate paths
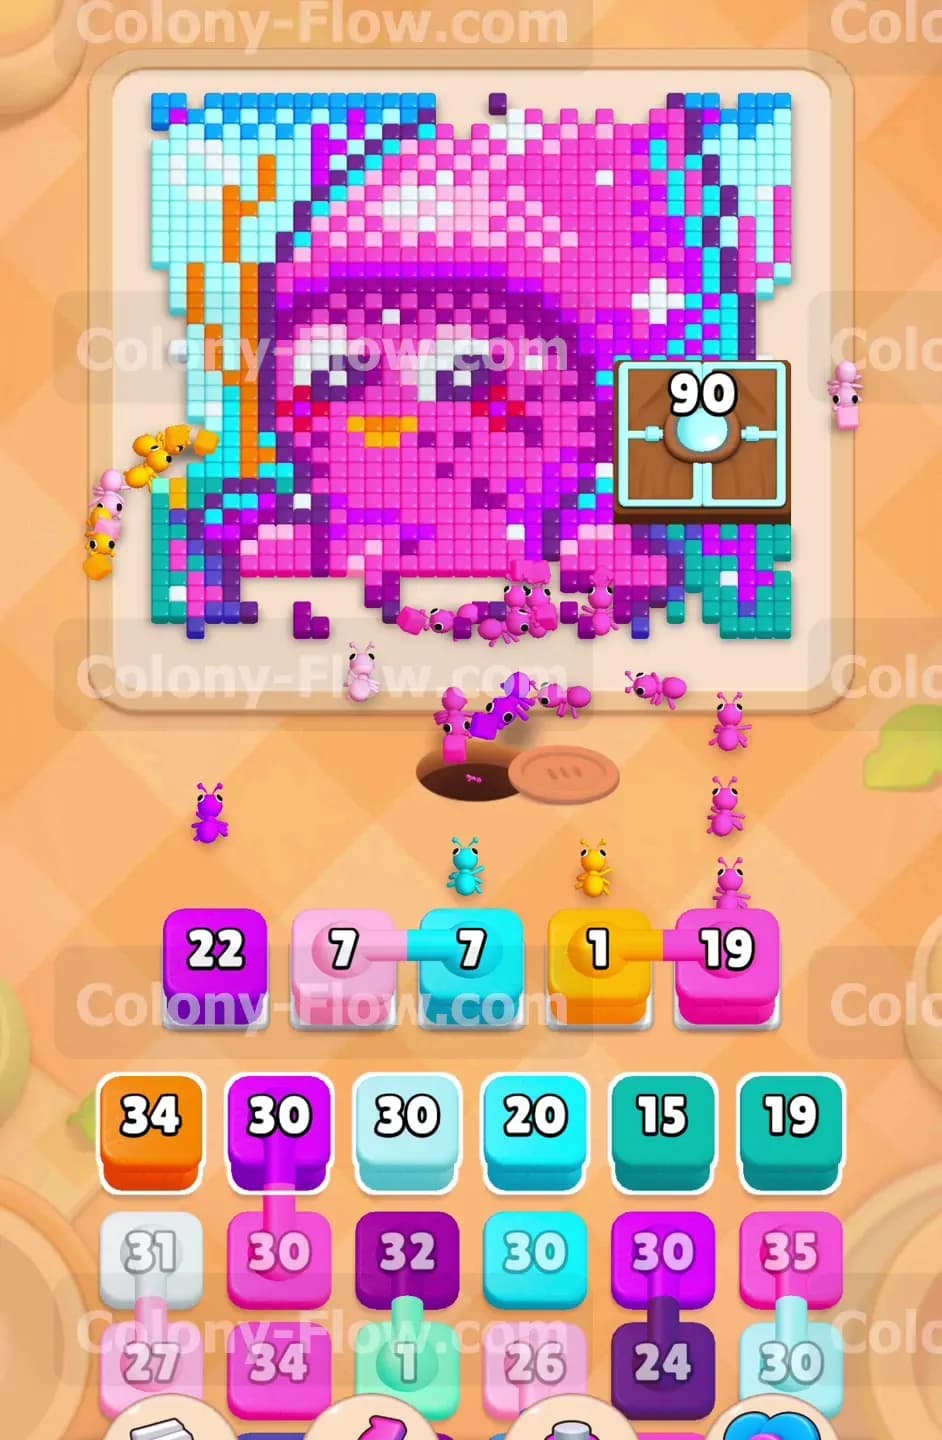
Start the level by focusing on the lowest hanging parts of the octopus to create a wide opening. You need to pull the dark blue 13 block and the purple 30 block from your tray into the waiting slots. The ants stream out of the nest hole at the bottom and immediately latch onto the lower edge of the picture. This clears away the bottom tentacles and gives you a much wider surface area to work with. You keep your waiting slots open because these purple and blue tiles sit right on the outer boundary. Your ants never have to wait for a path to open. They chew through the exposed tiles and free up your tray slots so you can line up your next moves.
Step 2: Pull the first set of connected boxes to clear the lower pink sections
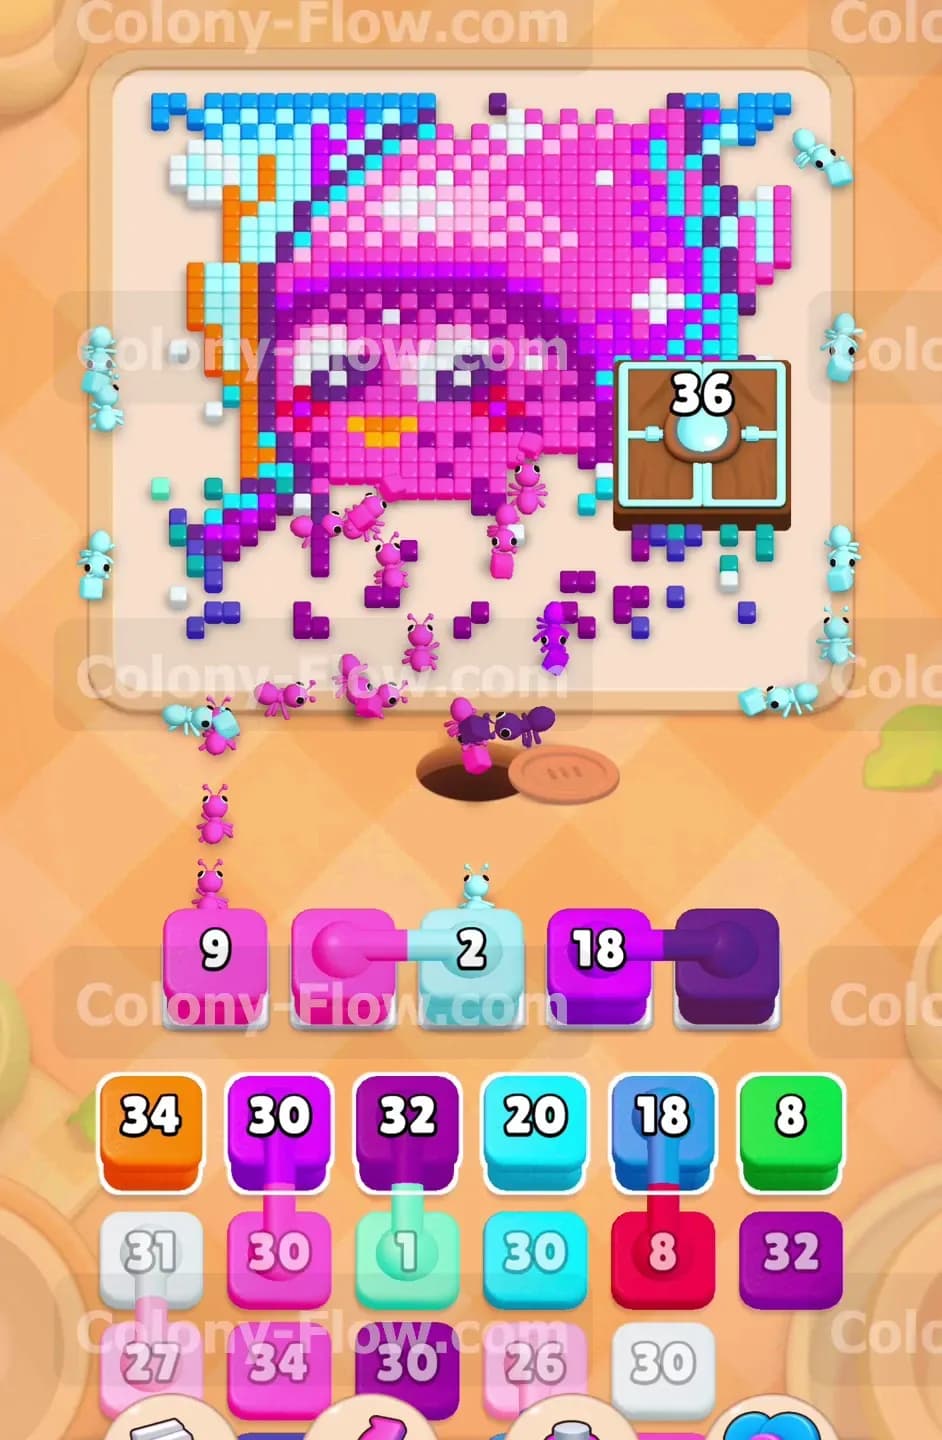
Once the bottom edge opens up you will see your first pair of connected boxes in the tray. These are a pink 7 block and a cyan 7 block joined together by a solid link. Pulling either one brings both blocks into your waiting slots at the exact same time. You must ensure that both pink and cyan tiles are fully exposed on the board before you make this move. The ants divide their attention and clear both colors simultaneously. This dual action sends a massive swarm to the right side where they start attacking the massive 120 crate. You watch the crate number drop down to 90 as the ants swarm its surface and eat the surrounding blocks.
Step 3: Attack the left side background elements with high capacity orange blocks
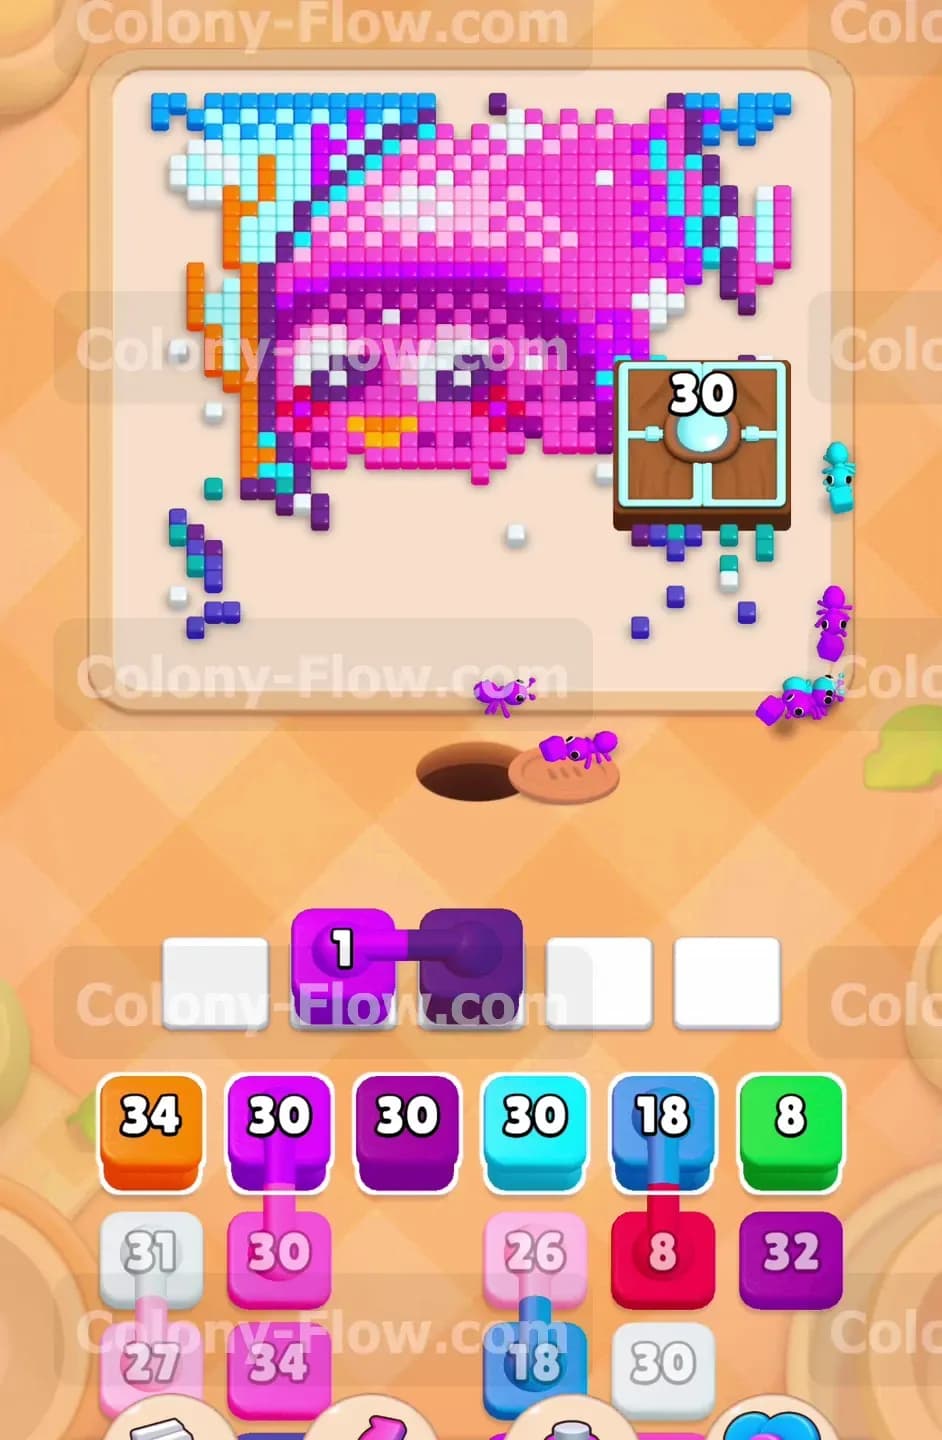
The left side of the board holds a tall structure of orange and cyan tiles that represent ocean seaweed and water. Pull the large orange 34 block from your tray to send a wave of ants to the far left. They rush up the side and begin eating away the long vertical orange shapes. You follow this move by pulling a cyan 20 block to clear the surrounding water pixels. Working on the left side is a brilliant way to keep your waiting slots completely empty. The left edge is totally exposed and allows the ants to work continuously without getting blocked by the main octopus body. You easily avoid a dead end by alternating your focus between the left background and the main center figure.
Step 4: Feed the giant right side crate to drop its number down to 36
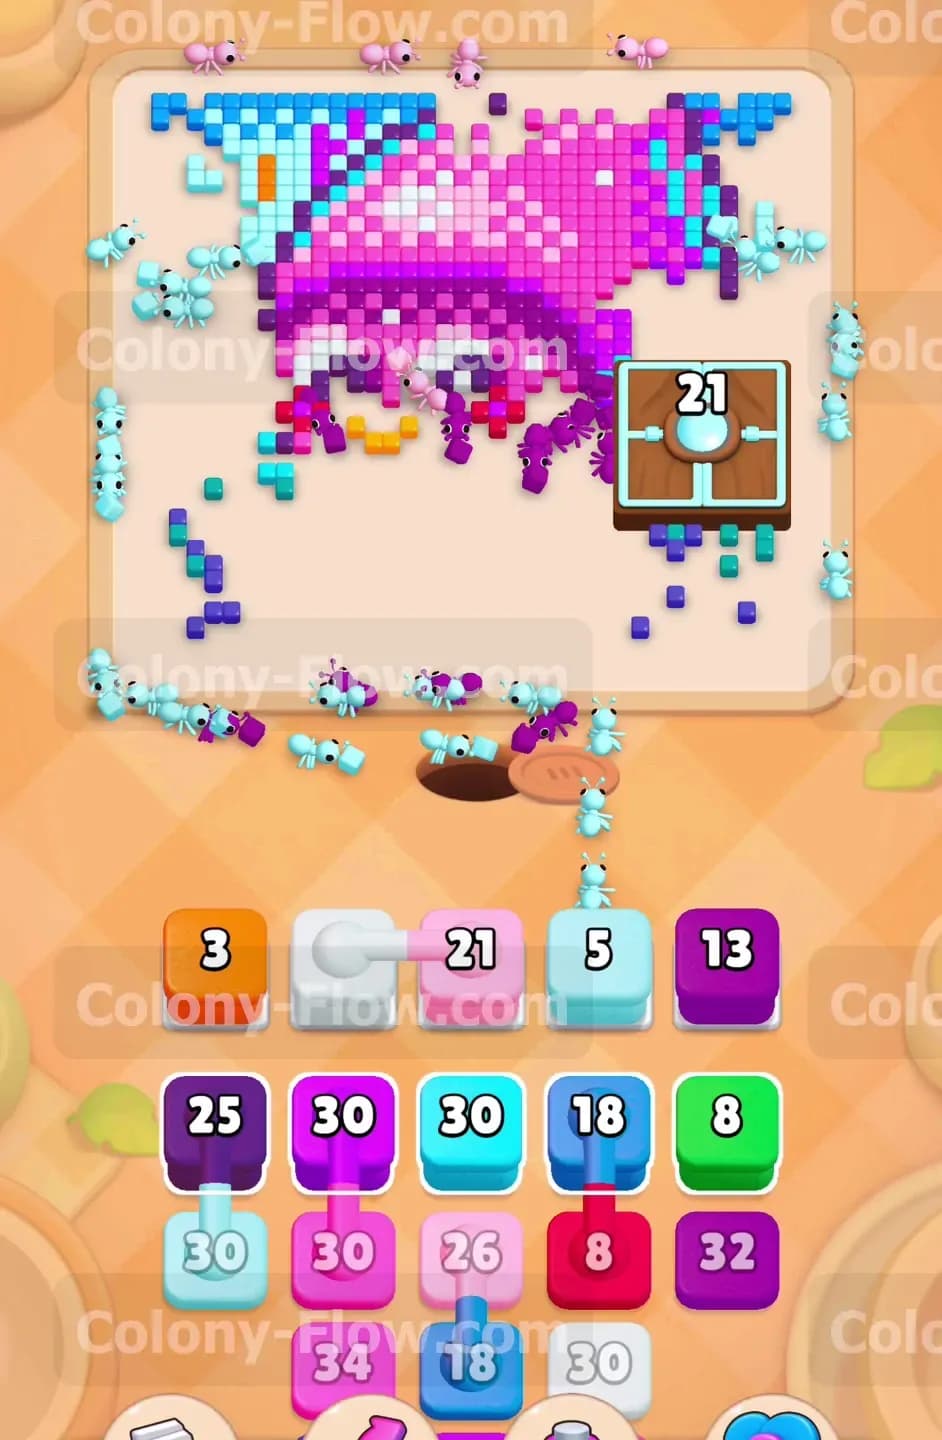
The massive crate on the right side demands your constant attention to prevent a late game bottleneck. You need to pull purple and pink blocks to clear the dense cluster of tiles that block the path to the crate. As the ants clear the way they attack the crate directly and its number shrinks rapidly. You watch the counter drop from 90 down to 36 as the ants swarm the area. You manage your five slots perfectly by holding back on colors that are trapped deep inside the head. You only pull the specific pink and purple blocks that have a clear line of sight to the crate. This guarantees your ants always have a valid target and your waiting slots never jam with unusable colors.
Step 5: Deploy the connected white and dark purple boxes for the facial details
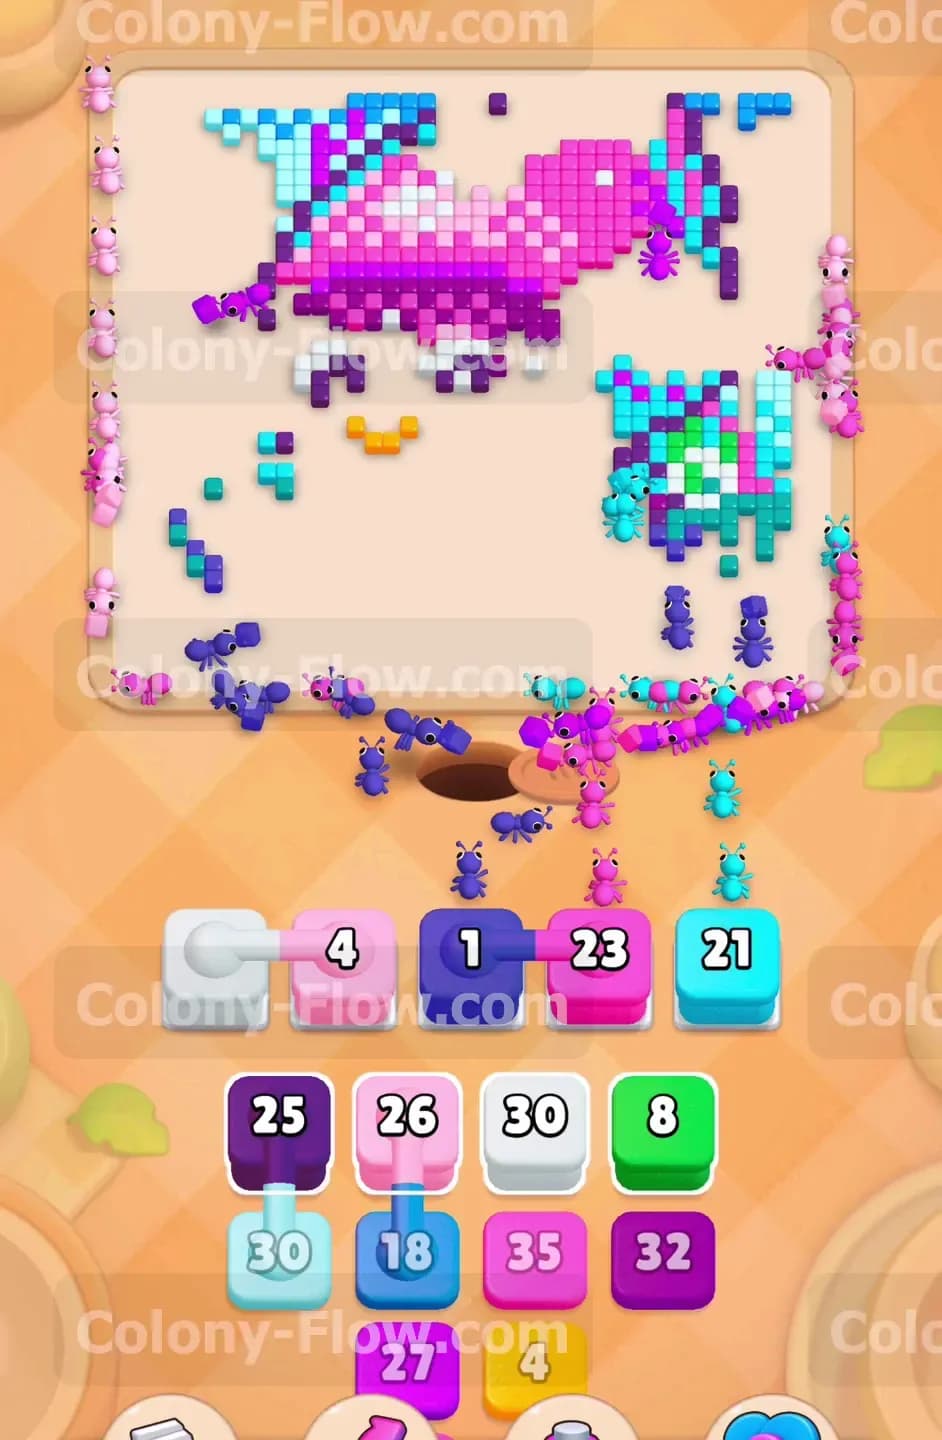
As you dig deeper into the octopus head the facial features become fully exposed to your ants. You will find a connected white 1 block and a dark purple box waiting in your tray. Pull these linked blocks to target the white reflections in the eyes and the dark outlines of the face. Connected boxes always take up two slots so you must be absolutely certain the ants can reach both colors before you pull them. The white tiles in the eyes clear out quickly. The dark purple blocks clear the heavy outlines surrounding the head. This opens up the entire upper half of the pixel art and gives your ants access to the top sections.
Step 6: Destroy the giant crate and open the entire right side of the board
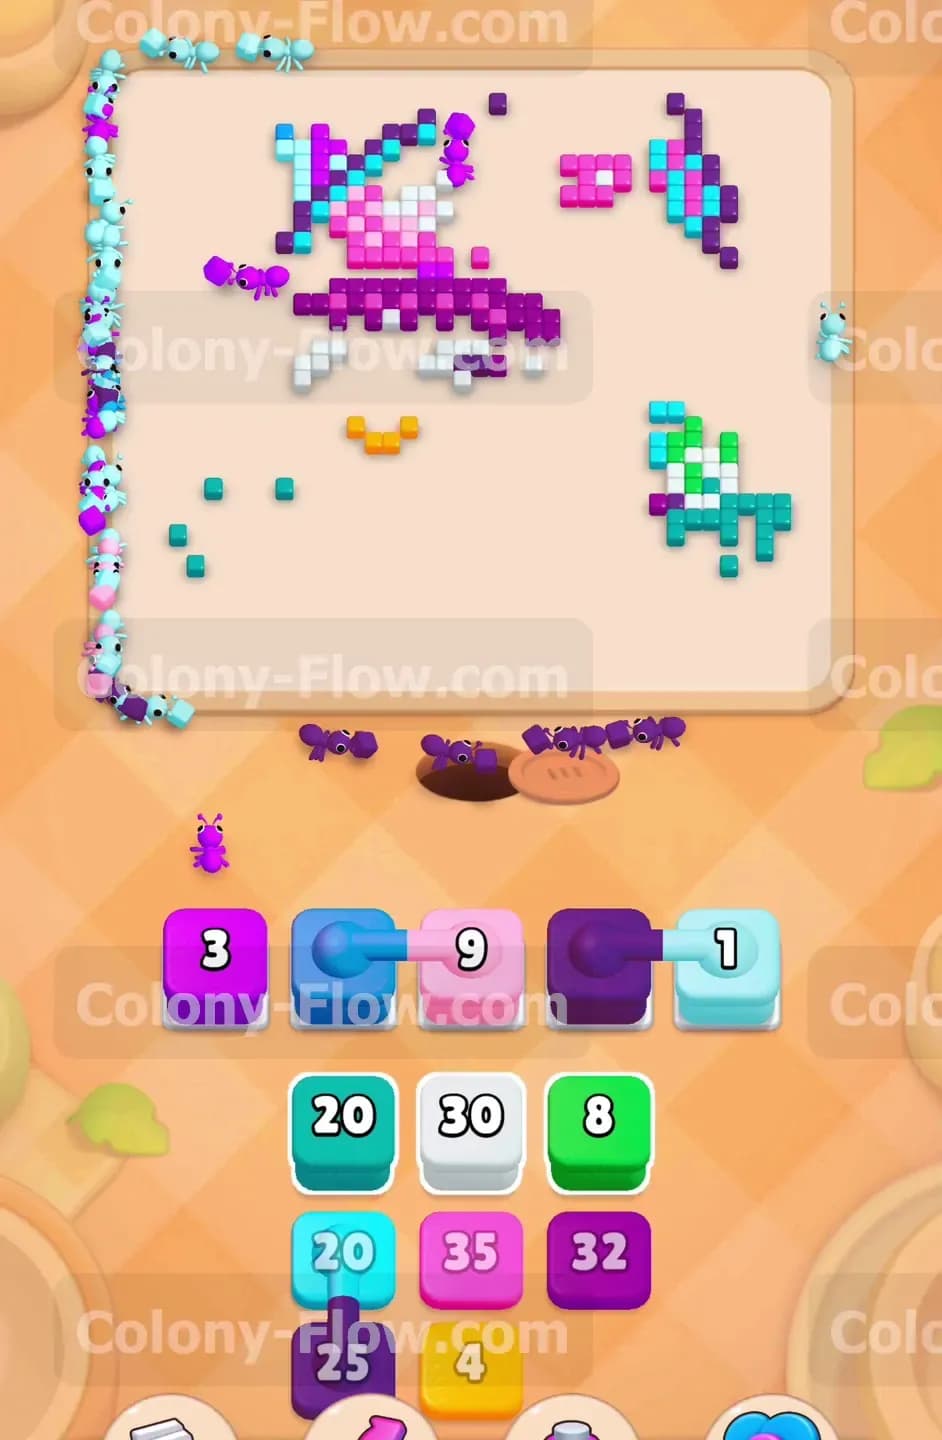
The large crate on the right now reads 30 and then drops to 21 after a few more ant attacks. Pull a cyan 18 block and a pink 21 block to finally finish off this giant obstacle. The ants swarm the last few hit points and the entire massive box vanishes from the board. This provides a massive relief for your waiting slots. The disappearance of the crate exposes the entire right side of the octopus head. Your ants now have a massive new open space to attack freely. You can pull blocks from your tray without worrying about dead ends on the right side of the screen.
Step 7: Manage the connected white and pink boxes to clear the top hat
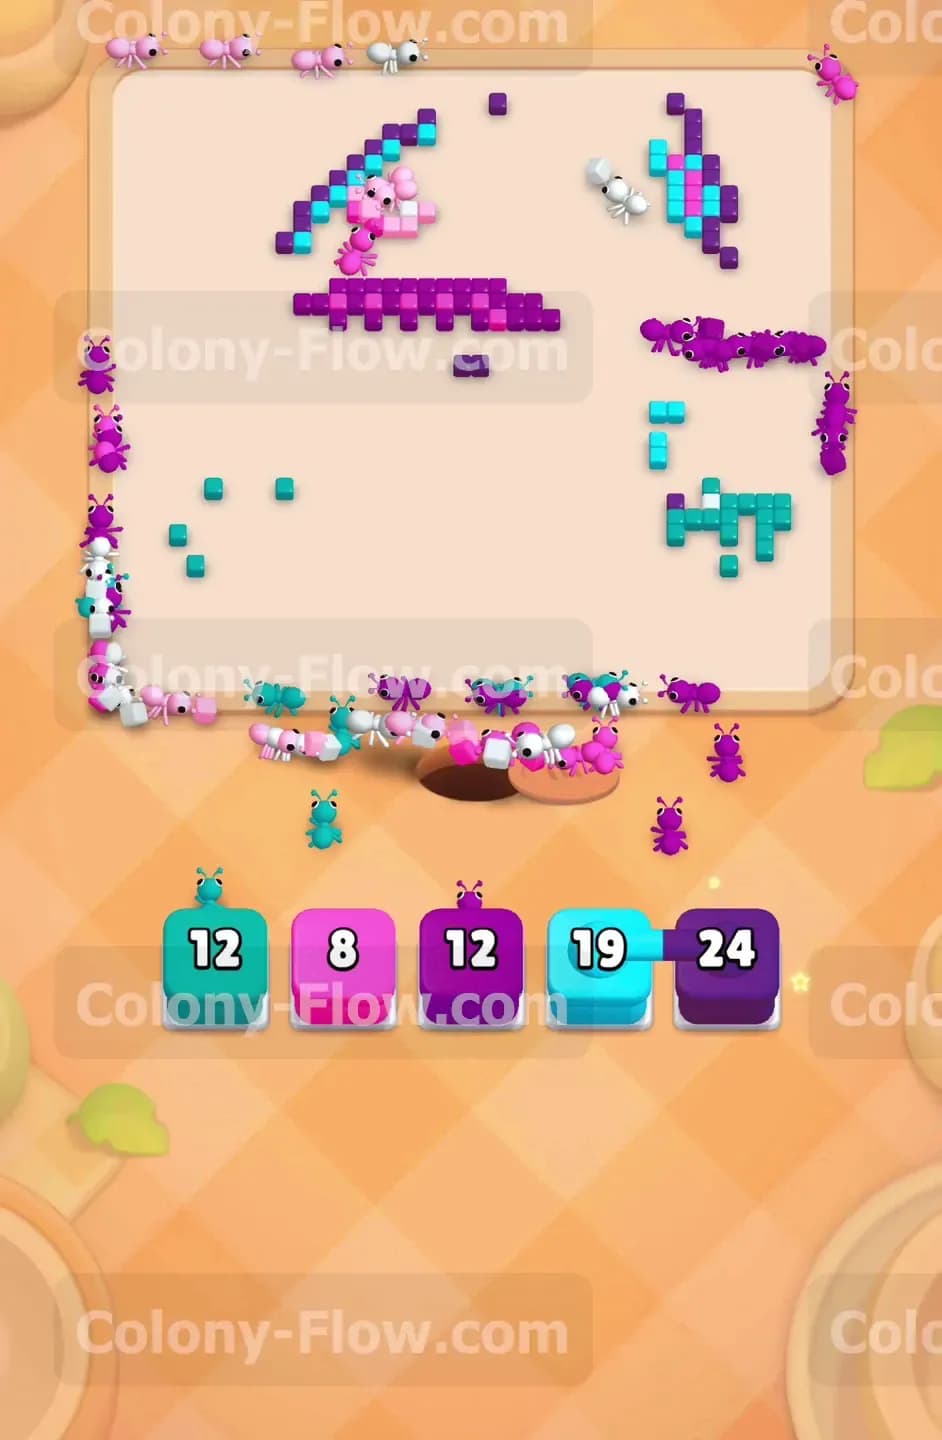
The top of the octopus features a slanted hat structure made of cyan, pink, and white tiles. You encounter another set of connected boxes in your tray featuring a white 4 block and a pink 4 block. Pull these into your slots along with a cyan 21 block. The ants march all the way to the top of the board to eat away the hat details. You keep your slots flowing by pacing your moves carefully. You wait for the lower pink tiles to clear before pulling the connected boxes that target the very top edge. This patience ensures the ants never get stuck behind uncleared tiles on their way to the top.
Step 8: Clear the final scattered background tiles with green and blue blocks
The main body of the octopus is now entirely gone. Only a few scattered clusters of cyan, green, and dark purple tiles remain on the extreme outer edges. Pull the green 8 block and the cyan 19 block to target these isolated islands. The ants split up and travel to the top left and bottom right corners to finish the job. Your waiting slots are mostly empty now so you have plenty of room to operate. You pull the final purple 12 and pink 8 blocks to clean up the last few remaining pixels. The board goes completely blank and you complete the level successfully.
Final Thought
Level 1080 requires a steady rhythm of clearing background elements while constantly chipping away at that massive numbered crate. Managing the connected boxes properly is the only way to keep your five slots open and avoid an unexpected dead end. I encourage you to watch the video above this article if you find any step hard to visualize in text.