Colony Flow Level 990 Walkthrough Solution & Guides | How to solve Colony Flow 990

Guide By Liam Stone
Updated on August 8, 2026
The Level 990 solution is right there in the video above, so read on only if you want the extra detail.
Video doesn't match your screen?
Game updates frequently scramble layouts! Try our AI Screenshot Solver first to find your exact board instantly, or report broken guides to our team.
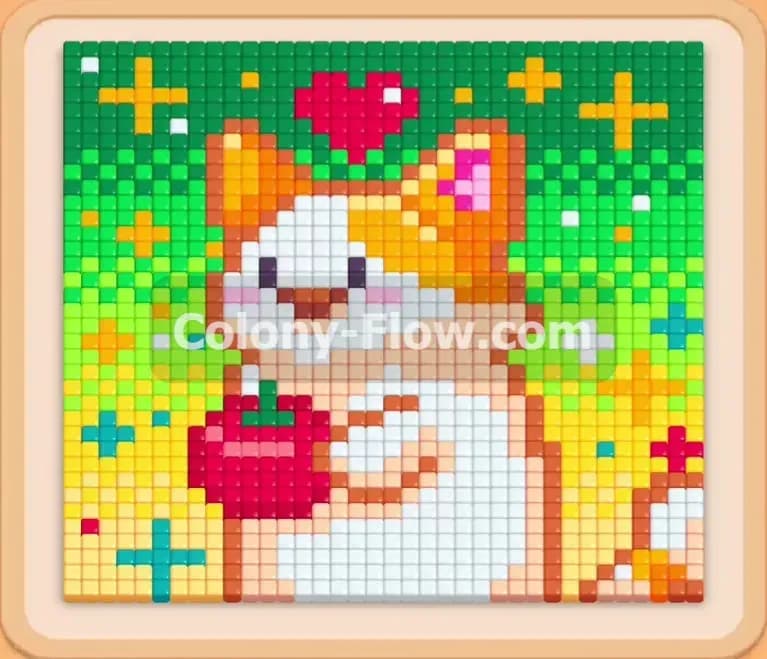
Colony Flow Level 990 presents a delightful pixel art design of a cat holding a bright red piece of fruit. You will guide your hardworking colony of ants to dismantle this beautiful image piece by piece while navigating a crowded tray of numbered blocks. The mechanics require careful timing because the board shapes shift drastically as you clear the central figures. I played this level countless times to figure out the exact sequence of moves needed to keep the ants moving and the waiting slots completely clear. This walkthrough provides everything you need to conquer the board.
Colony Flow Level 990 Overview
What You Are Working With
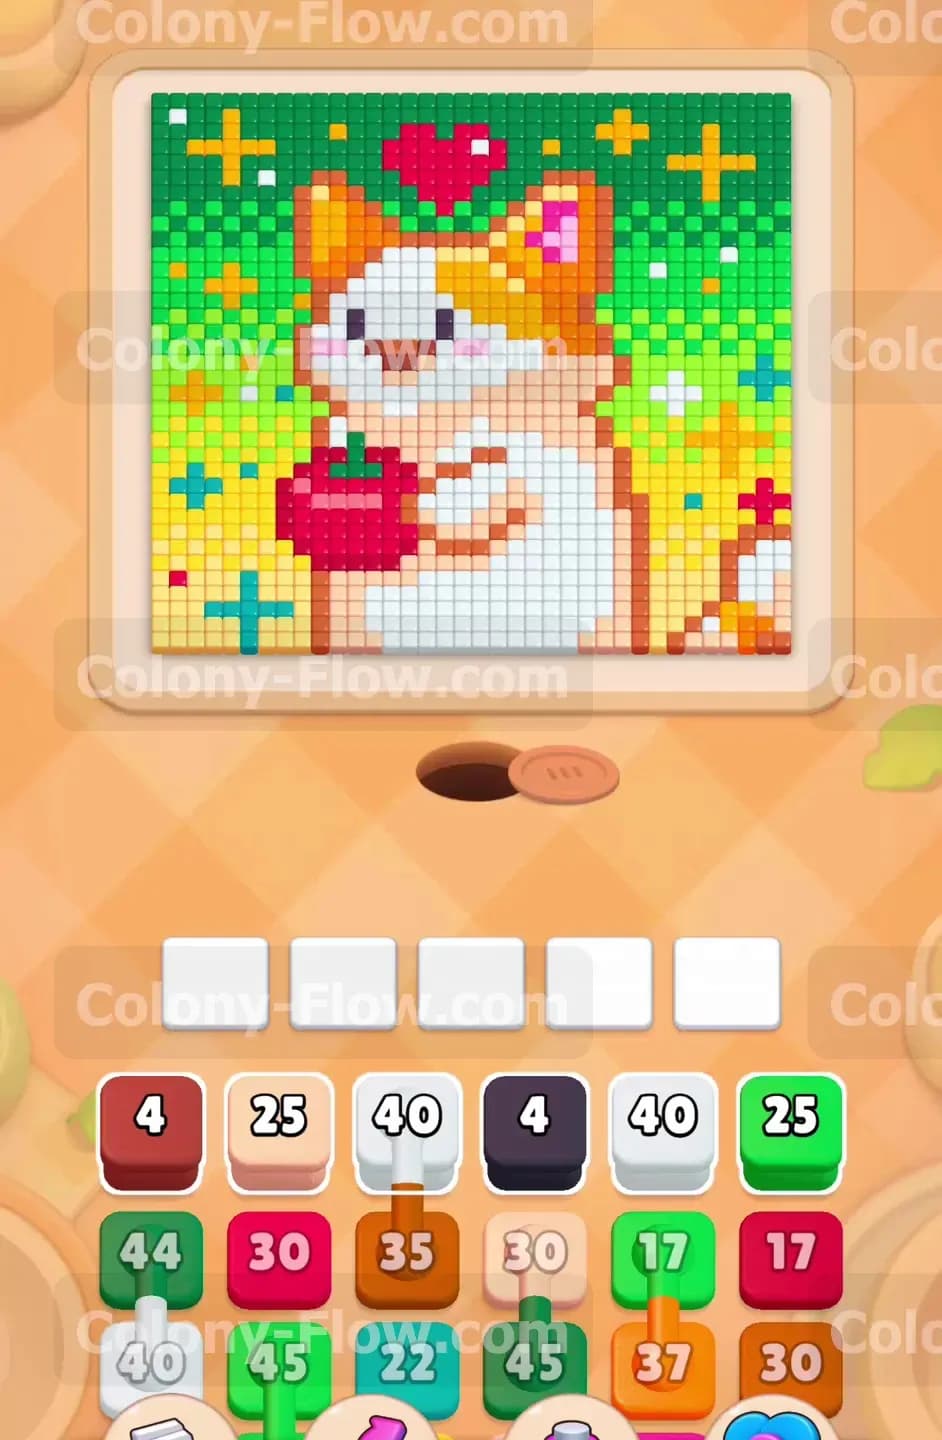
The board features a large central pixel art design of a fluffy white and orange cat clutching a red apple in its paws. A bright red heart floats directly above the head of the cat to complete the charming artwork. The background consists of a vibrant mix of green and yellow tiles that completely frame the central figure. Down at the very bottom of your screen, you have your main tray filled with stacks of colored blocks. Each block displays a number indicating exactly how many ants it will send out to eat the matching tiles. This specific level introduces a few special tiles that will significantly complicate your block management strategy. You will encounter a large hidden box that conceals its true color until it is completely ready to move. You will also have to manage pairs of connected boxes that pull multiple colors into the waiting slots at the exact same time. The pixel art naturally provides clear entry points at the bottom left corner and the center red fruit to start your harvest.
What It Takes to Clear Level 990 Board
Winning this level means clearing every single pixel art tile from the game board without letting your waiting slots jam up. You have exactly five empty waiting slots at the bottom of the screen. When you select any block from the main tray, it instantly moves into one of these five slots. If all five slots fill up and the active blocks have no open paths to matching colored tiles, you lose the level immediately and must start over. Your primary strategy throughout the entire game must revolve around always keeping at least one valid path open for the active blocks in your waiting area. You achieve this by constantly studying the exposed edges of the pixel art and only pulling blocks that perfectly match the colors of those exposed edges. As the ants carry away the outer tiles, they naturally open up new paths to the deeper interior sections. You must constantly balance the act of clearing the outer green background and eating into the solid white body of the cat.
Colony Flow Level 990 Step by Step Solution
Step 1: Target the bottom background and the red fruit to open the center
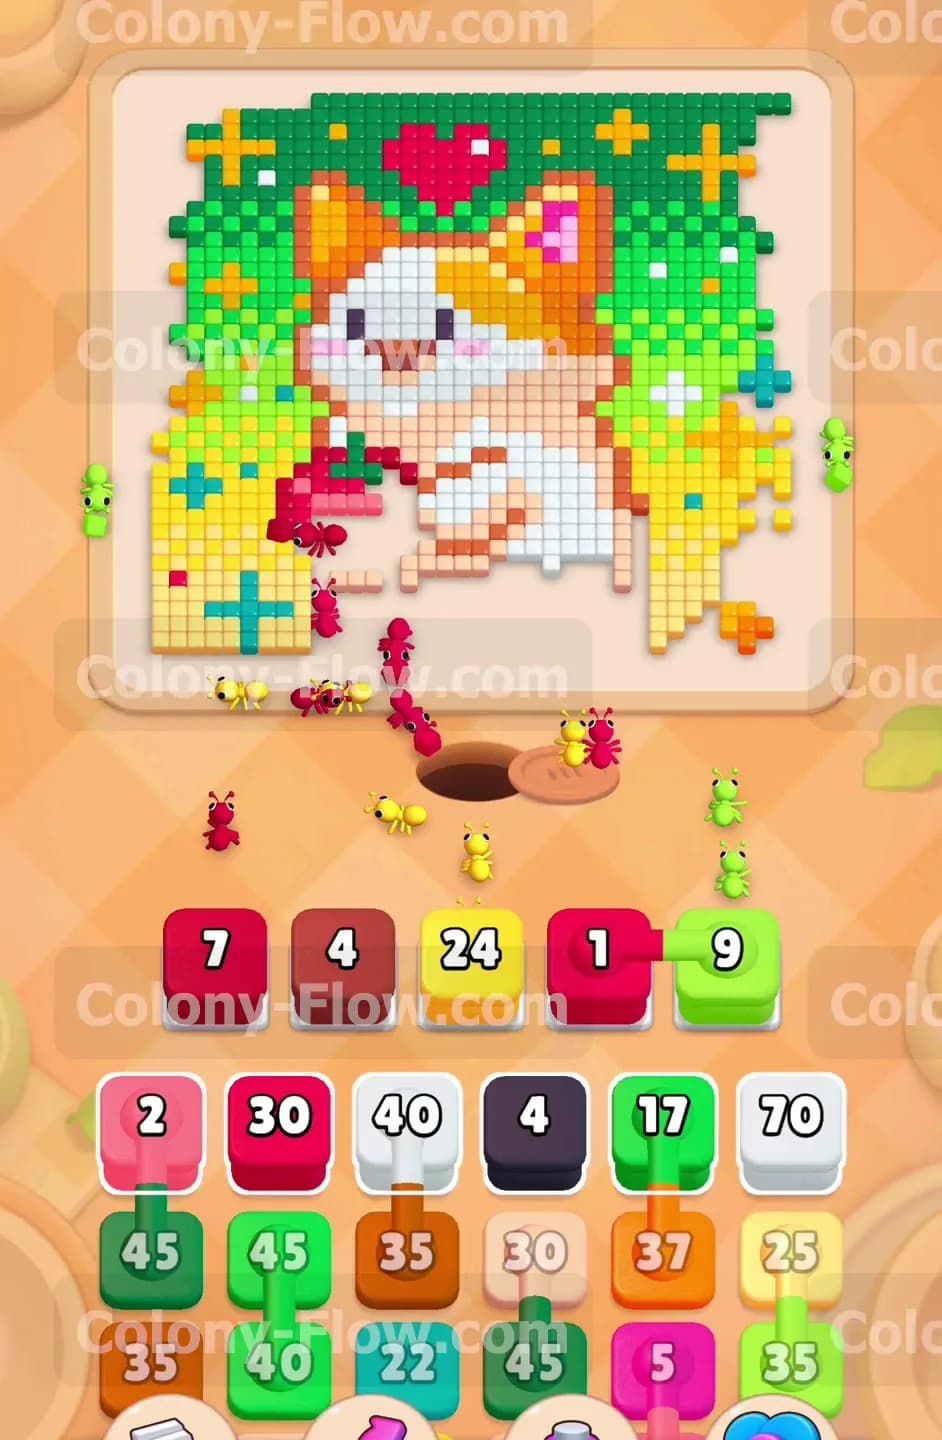
You begin the level by focusing your attention on the most accessible parts of the pixel art. The bottom left corner has highly exposed yellow and light green background tiles, while the red fruit in the center presents a massive open target for your colony. Pull the red and dark red blocks into your waiting slots to send your hungry ants straight toward the fruit. At the exact same time, pull a yellow block and a light green block to tackle the bottom corners of the background. You want to clear these outer sections immediately because they physically block the lower half of the cat from being reached. The swarm of red ants will quickly reduce the fruit to nothing, which naturally exposes the white tiles of the cat body located directly behind it. Keep a very close eye on your waiting slots and only pull a new block when you are absolutely sure the corresponding color is fully exposed on the active board.
Step 2: Clear the white body of the cat to create maneuvering room
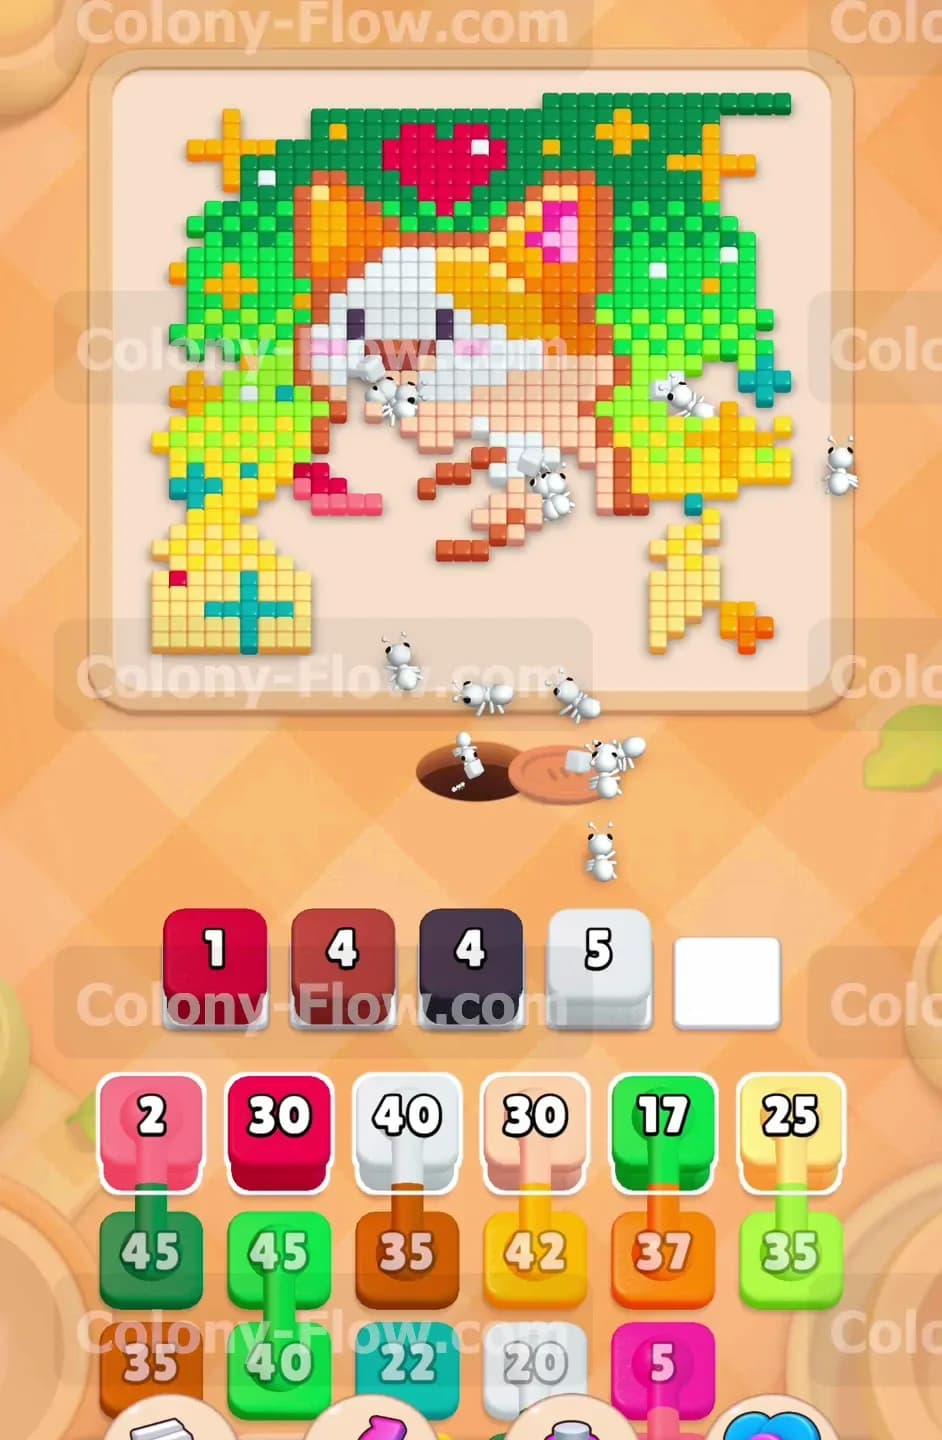
Once the red fruit is completely gone and the bottom edges recede, the solid white body of the cat becomes your primary focus. The white area is incredibly large and blocks all access to the face and the inner background tiles. Pull the large white blocks from your tray to send a massive swarm of white ants straight into the center of the board. You will also have a dark grey block and some additional dark red blocks to pull for the smaller details around the paws and the shading of the fur. The white ants will eat away the torso of the cat very efficiently and rapidly. As the solid white body disappears from the screen, you create a massive empty space directly in the middle of the board. This huge open space gives your subsequent waves of ants plenty of room to reach the face and the upper background sections without ever getting stuck behind narrow pathways.
Step 3: Reveal the hidden box and attack the thick green background
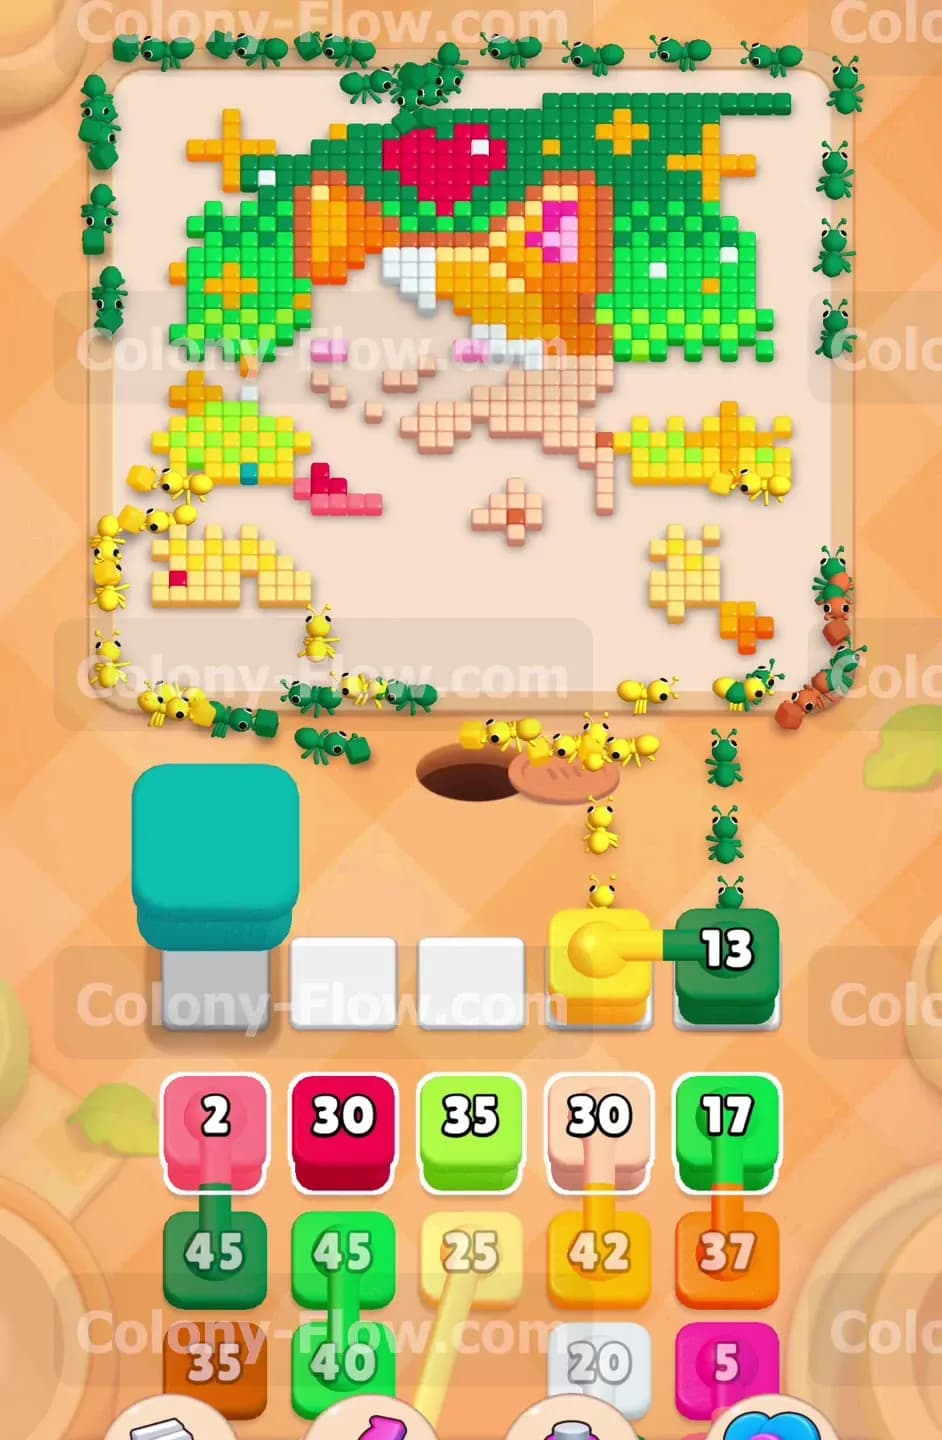
With the center completely cleared out, you will easily notice a large teal hidden box occupying a significant amount of space right above your tray. This hidden box visibly displays a yellow button and will eventually drop into active play. You need to immediately shift your focus to the green and yellow background tiles that closely surround the top half of the cat. Pull the available green and yellow blocks from the tray to send your colony swarming all around the outer edges of the board. The ants will march right up the sides and begin eating deeply into the thick green background. Clearing this large background section is absolutely essential to create open paths for the top details of the pattern. As you process these green and yellow blocks, the hidden box will eventually process and free up crucial maneuvering space in your tray area. Keep cycling the green and yellow blocks very smoothly to prevent any dangerous backlog in your limited waiting slots.
Step 4: Manage the connected boxes carefully to clear the cat ears
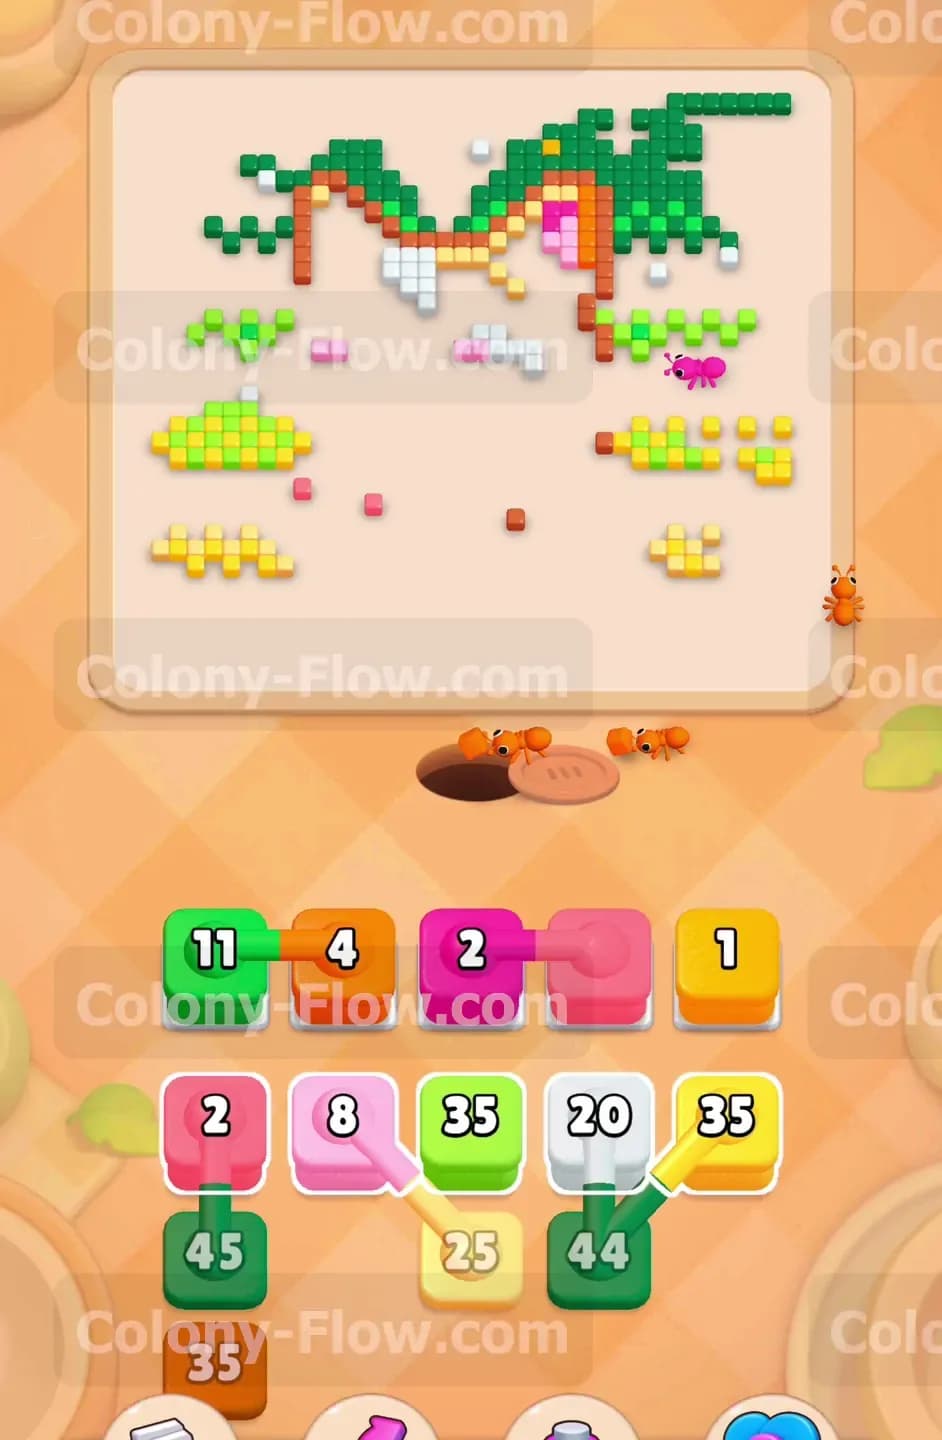
As you push much higher into the design, the main tray will serve up challenging connected boxes. You will see two green blocks permanently linked together by a thick line. When you pull just one of them, both blocks move into your waiting slots simultaneously, taking up two precious spaces at once. You must absolutely verify that the green background tiles at the top of the board are perfectly open before pulling these connected blocks. Send the green ants to devour the very top edge of the background. While the green ants diligently work on the perimeter, pull the orange blocks to start clearing the large orange sections of the cat ears. The ears are quite thick and require multiple orange blocks to fully clear them from the board. Balancing the connected green blocks with the thick orange blocks requires strict attention to the available paths so your waiting slots stay entirely fluid.
Step 5: Process the inner details of the ears without jamming the tray
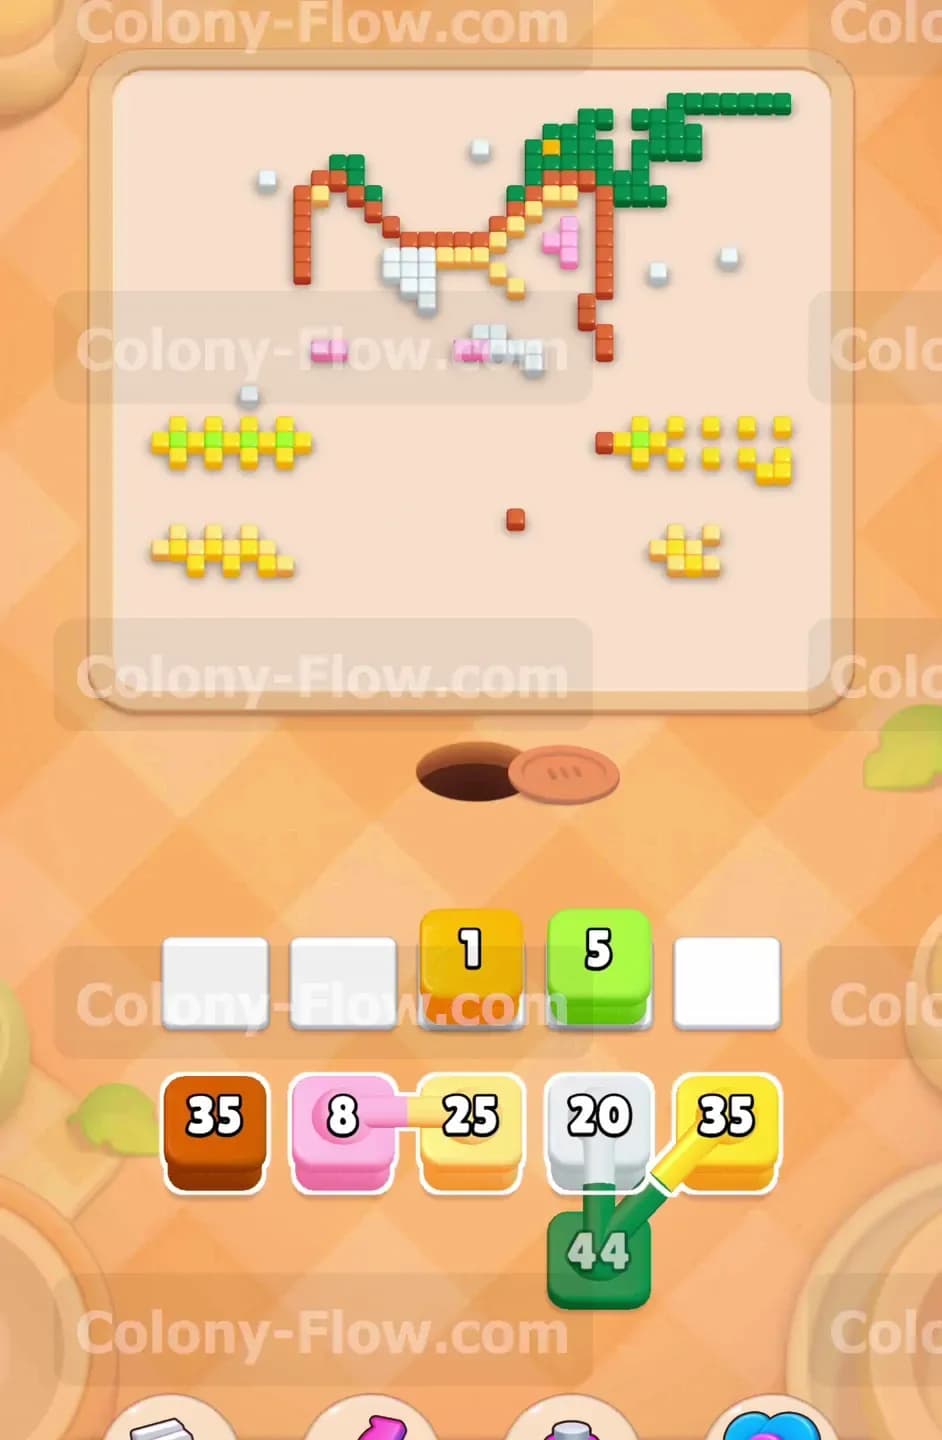
The puzzle is now drastically reduced to just the thin top edge of the background and the detailed outline of the cat ears. You will soon encounter another set of connected boxes featuring an orange block and a pink block joined together. Pull these connected blocks only when both the orange and pink tiles on the active board are completely accessible to your ants. The pink ants will march right up to clear the tiny pink inner details inside the ears, while the orange ants continue to narrow down the main ear shapes. You will also have another green block available to keep the top background shrinking away. Because the board is getting very thin at this stage, the available paths are extremely narrow. You must be exceptionally deliberate with your block pulls. If you pull any block too early, it will simply sit uselessly in the waiting slot and block your other colors from deploying properly.
Step 6: Finish the final outlines and stray pieces to win the level
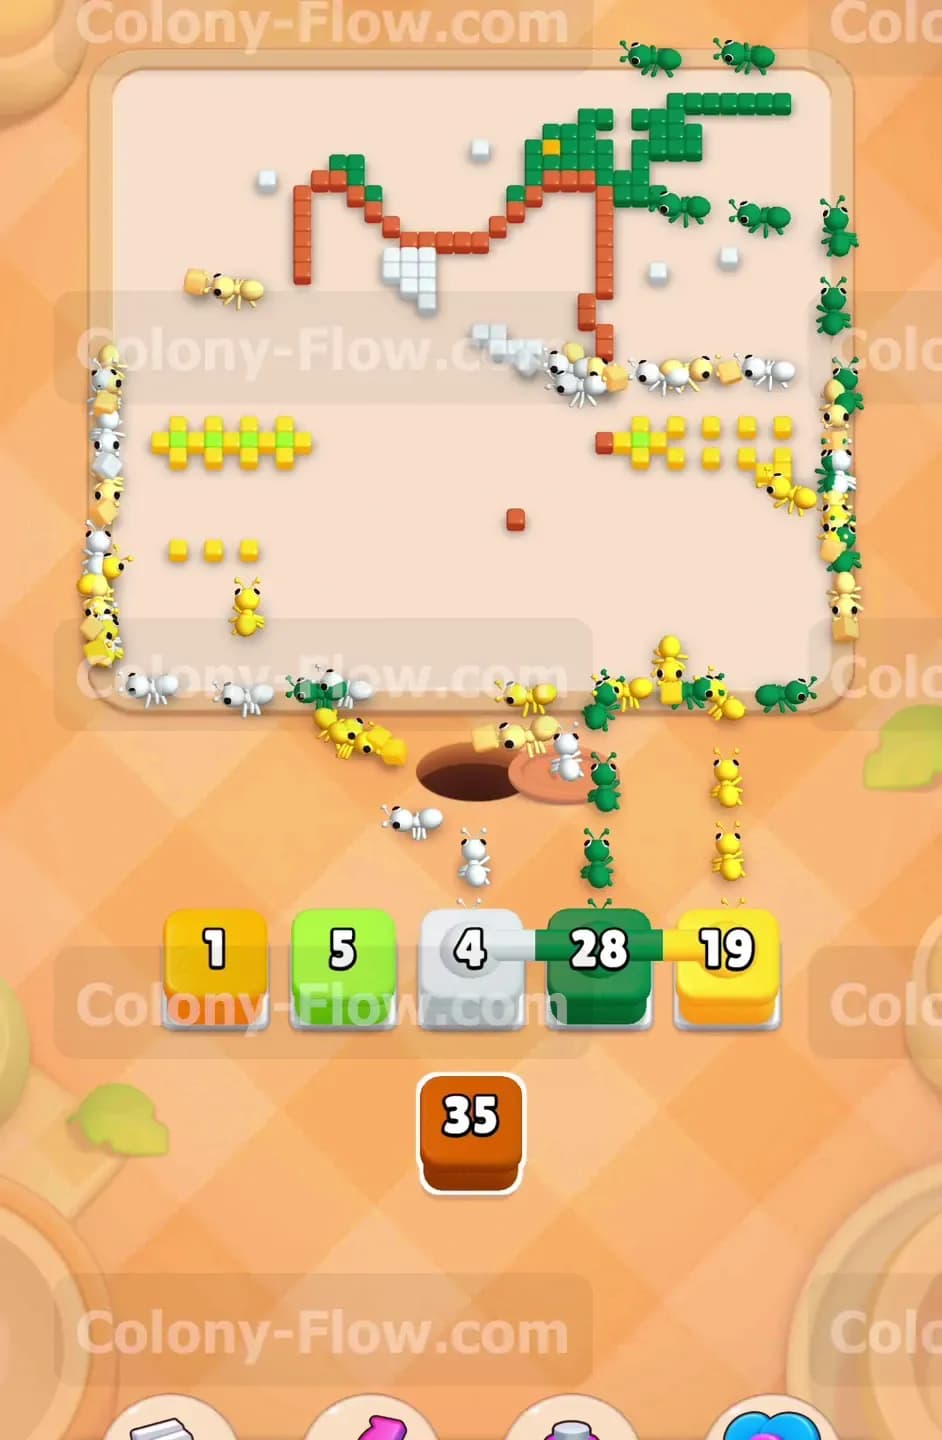
In the final critical moments of the level, the board consists of absolutely nothing but a very thin green outline of the ears and a few scattered white and yellow pieces near the top center. Your block tray is almost entirely empty by this point. Pull the very last remaining yellow, green, and white blocks straight into your waiting slots. The ants will eagerly wrap around the very top edges to consume the final remaining green tiles. Meanwhile, the yellow and white ants will quickly mop up the small stray pieces left behind from the inner ear details. Since there are very few tiles left on the screen, the matching blocks in your tray will have exactly enough numbers to clear them completely. Just pull the exact colors that match the remaining visible tiles on the game board. The final wave of ants will clear the last pieces of the outline, leaving the board completely empty and securing your ultimate victory.
Final Thought
Level 990 demands precise timing and incredibly careful management of your waiting slots as you transition from the bulky center blocks to the very thin outer details. The connected boxes and the large hidden box definitely add significant pressure, but strictly sticking to the open paths guarantees your success every single time. If any specific move feels tricky to visualize from the text alone, I strongly encourage you to watch the detailed gameplay video located right above this article. The video shows the exact sequence and flawless timing I used to keep the colony moving without suffering any game ending jams.