Colony Flow Level 417 Walkthrough Solution & Guides | How to solve Colony Flow 417

Guide By Liam Stone
Updated on July 29, 2026
You can follow along with the video above for the complete Level 417 solution instead of reading below.

Video doesn't match your screen?
Game updates frequently scramble layouts! Try our AI Screenshot Solver first to find your exact board instantly, or report broken guides to our team.
Playing Colony Flow Level 417 feels like taking a fun trip back to school with its bright pixel art school bus design. You have a lot of solid color blocks to clear out including the bright yellow bus body and the bright cyan blue sky. The main challenge comes from managing the five waiting slots so your ants always have an open physical path to reach their matching colored tiles. If you make a wrong move and fill the slots with colors that cannot reach their tiles you will lose the level instantly. I will walk you through exactly how I clear this board without getting stuck.
Colony Flow Level 417 Overview
What You Are Working With
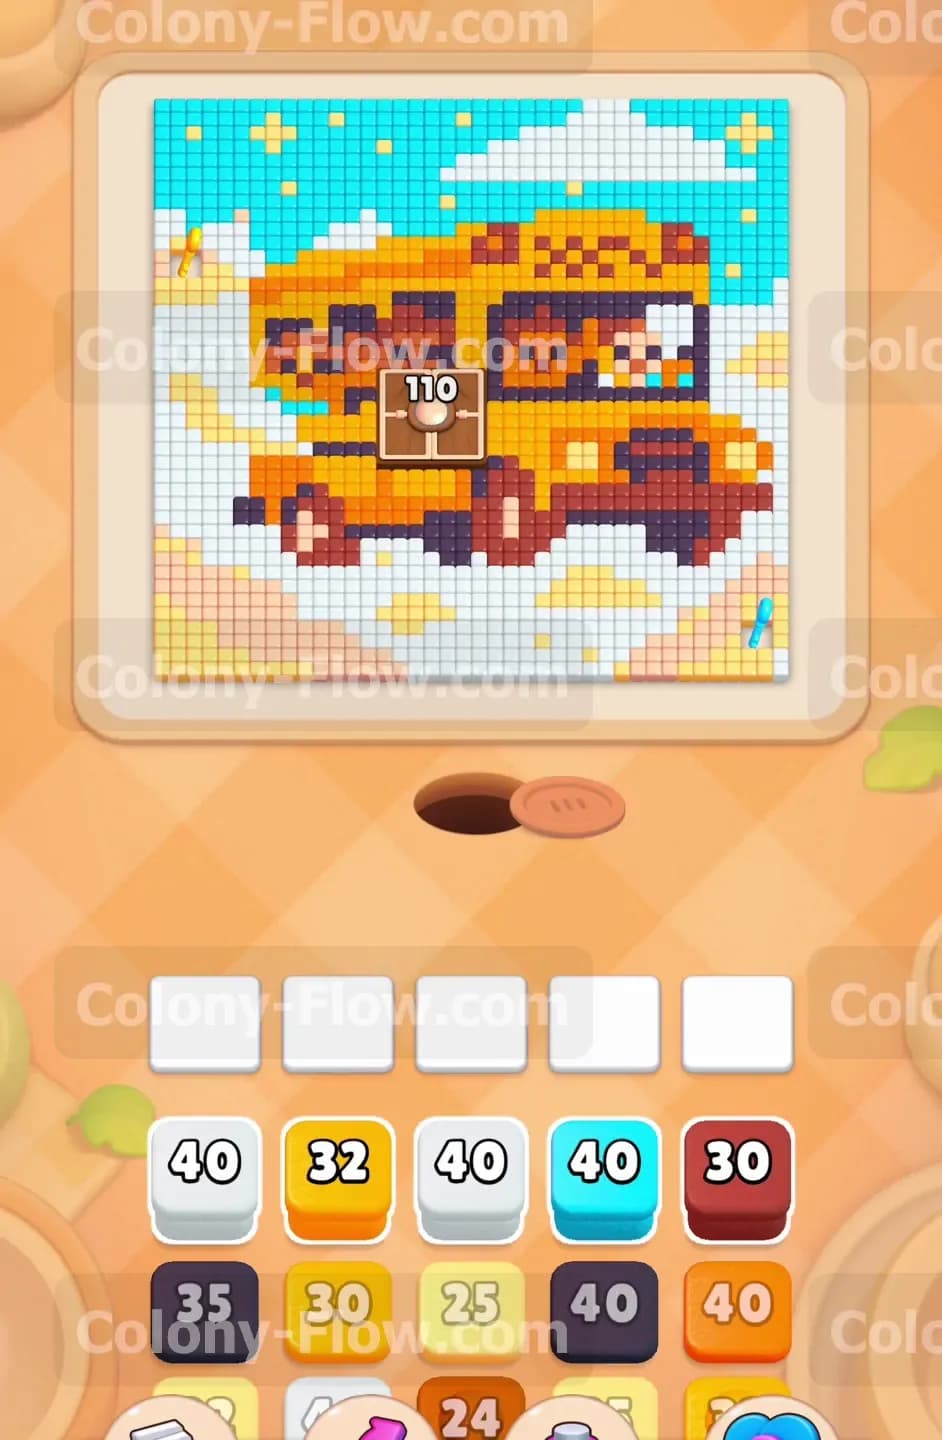
The main picture is a classic yellow school bus surrounded by a clear cyan sky and white fluffy clouds. The bus itself features bright yellow and deep orange sections along with solid black windows and dark red details for the wheels and undercarriage shadows. Right in the middle of the bus sits a large block holding the number 110. This central block acts as a major obstacle because it requires a massive amount of food to clear out before you can reach the tiles behind it. Below the bus you see a ground area made of light tan and white tiles representing a dirt path or snowy ground. Your tray at the bottom starts filled with high value blocks. You see White, Yellow, Cyan, Dark Red, Black, and Orange blocks waiting to be deployed. The sheer number of tiles on the board means you must plan your pulls carefully so the five waiting slots never fill up completely with blocked ants. Every color has a specific section of the board it needs to reach and understanding these paths is your key to winning.
What It Takes to Clear Level 417 Board
Winning this level requires you to systematically dismantle the picture from the outside in. You start by opening up the ground and the lower clouds to give your ants some basic breathing room. Once the outer paths are clear you can send in the orange and yellow ants to tackle the massive bus structure itself. The central 110 block will slowly count down as your ants chip away at the surrounding structure and feed it the required colors. You must constantly monitor the waiting slots during this process. If you pull a color that has no open path it will sit in the slot and block your other moves permanently. You clear the level when the final cyan ants sweep through the huge expanse of sky and leave the board completely empty. You have to treat the sky as your final goal and resist the urge to pull cyan blocks too early in the match.
Colony Flow Level 417 Step by Step Solution
Step 1: Open the ground paths with white and dark red blocks to create initial movement.
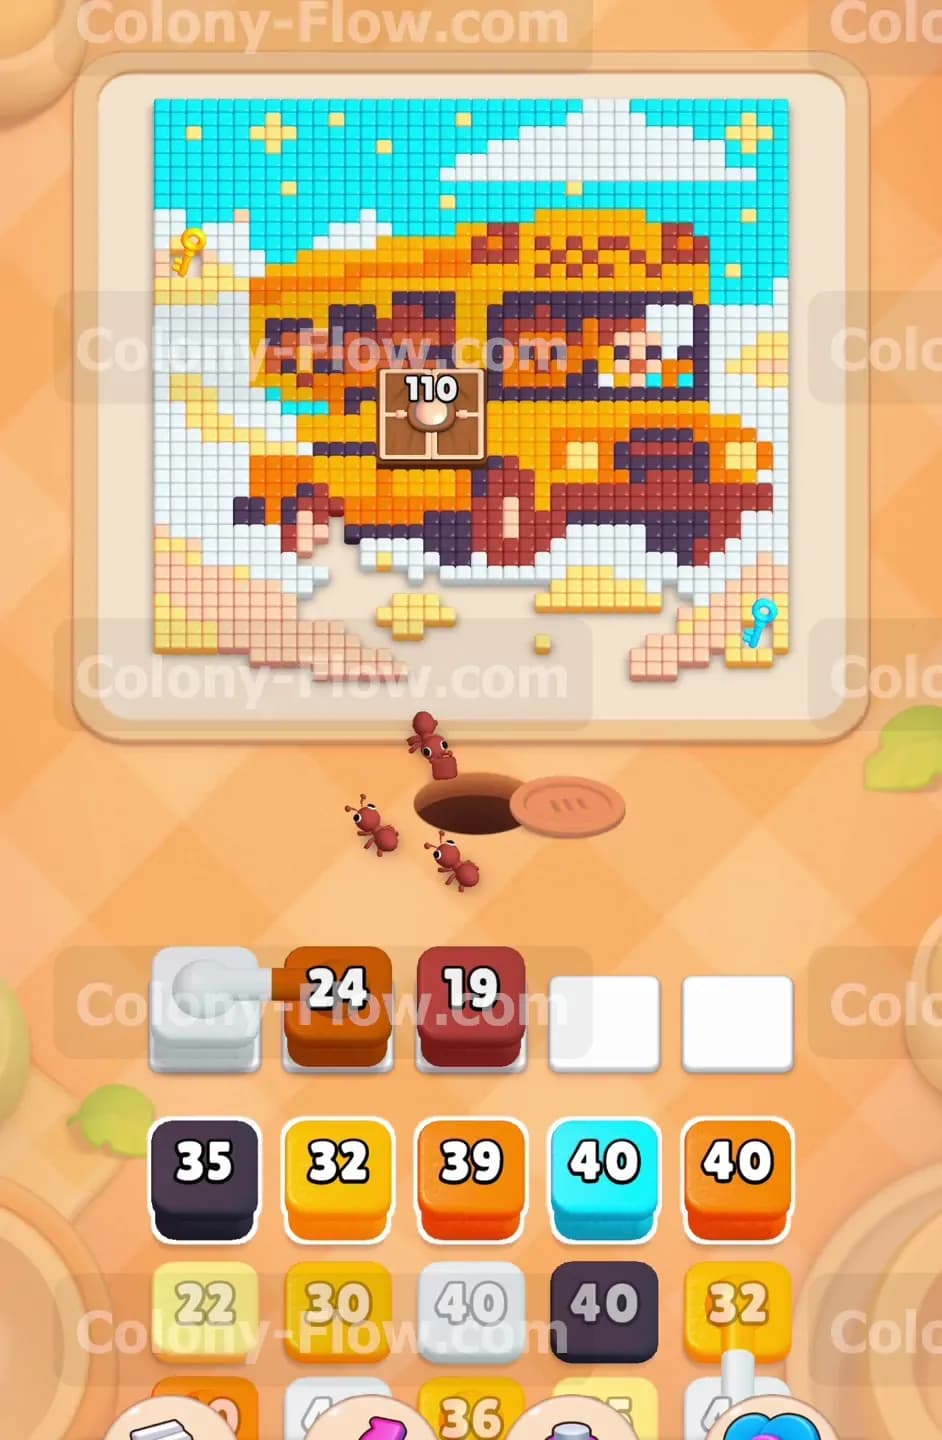
You begin by looking at the lowest part of the picture where the wheels touch the ground. The ground consists of white clouds or snow patches and dark red shadows under the bus. Pull the first White block and the Dark Red block from the top row of your tray. The white ants will stream out of the nest hole and head straight for the white tiles on the ground and the lower edges of the clouds. The dark red ants will follow suit and target the shadow tiles and the bottom sections of the lower wheels of the bus. By choosing these two specific colors first you guarantee that both groups of ants have immediate physical access to their target tiles. This keeps your waiting slots moving and prevents any early jams that would ruin your run. The ants will carve a clear path along the bottom edge of the board which sets you up for the next phase of the clear.
Step 2: Add a second wave of dark red to completely clear the wheel sections.
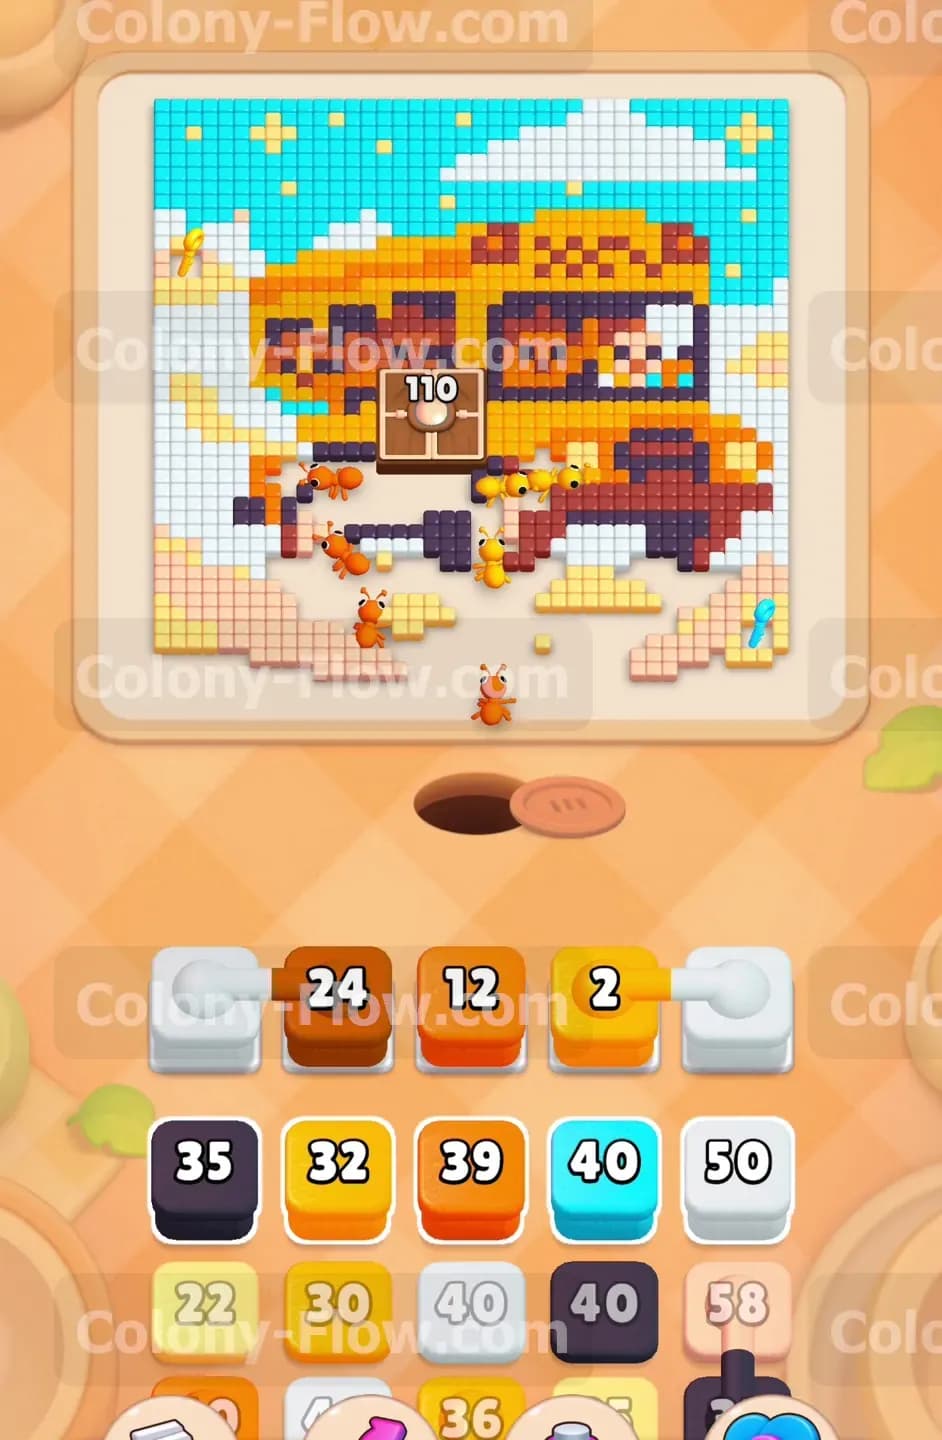
As the first Dark Red block counts down you will notice that the bus wheels and shadows need significantly more dark red ants to fully disappear. Go ahead and pull another Dark Red block into the waiting slots from your tray. You will see the dark red numbers decrease rapidly as the ants steadily consume the lower details of the bus chassis. At this point you have a White block and two Dark Red blocks occupying space in the waiting slots. Because the bottom paths are completely open and free of obstacles these ants flow freely without clogging up your slots. This action matters because it strips away the defensive bottom layer of the bus and finally exposes the main yellow and orange body panels above. You want the bottom completely flat before you move higher.
Step 3: Deploy orange and yellow blocks to begin dismantling the main bus body.
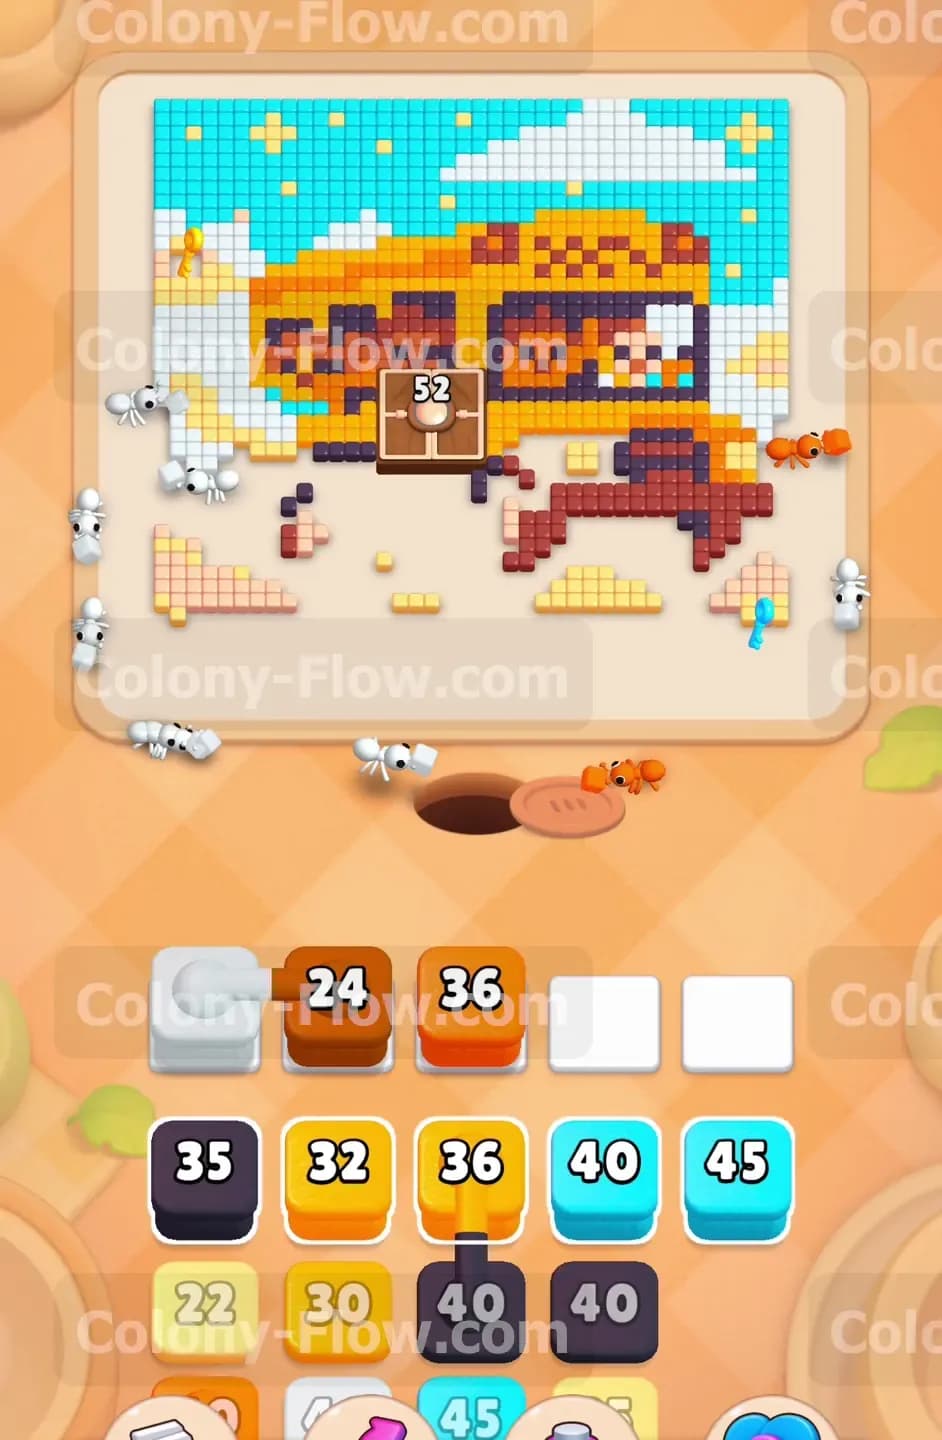
With the lower wheels completely out of the way the orange and yellow tiles on the lower half of the bus are now fully accessible to your colony. Bring an Orange block and a Yellow block up from the tray into your empty waiting slots. The orange ants will immediately climb up the cleared paths and start eating away at the orange stripes and lower details on the bus. The yellow ants will flank them and target the bright yellow structural panels. During this phase the large central block with the number 110 starts to become fully exposed to the swarm. You will see the numbers on your Orange and Yellow blocks tick down rapidly as the ants chew through the massive solid blocks of color. You still have plenty of room in your waiting slots because the ants have multiple wide open paths to reach their food.
Step 4: Continue feeding the main structure to heavily reduce the central block number.
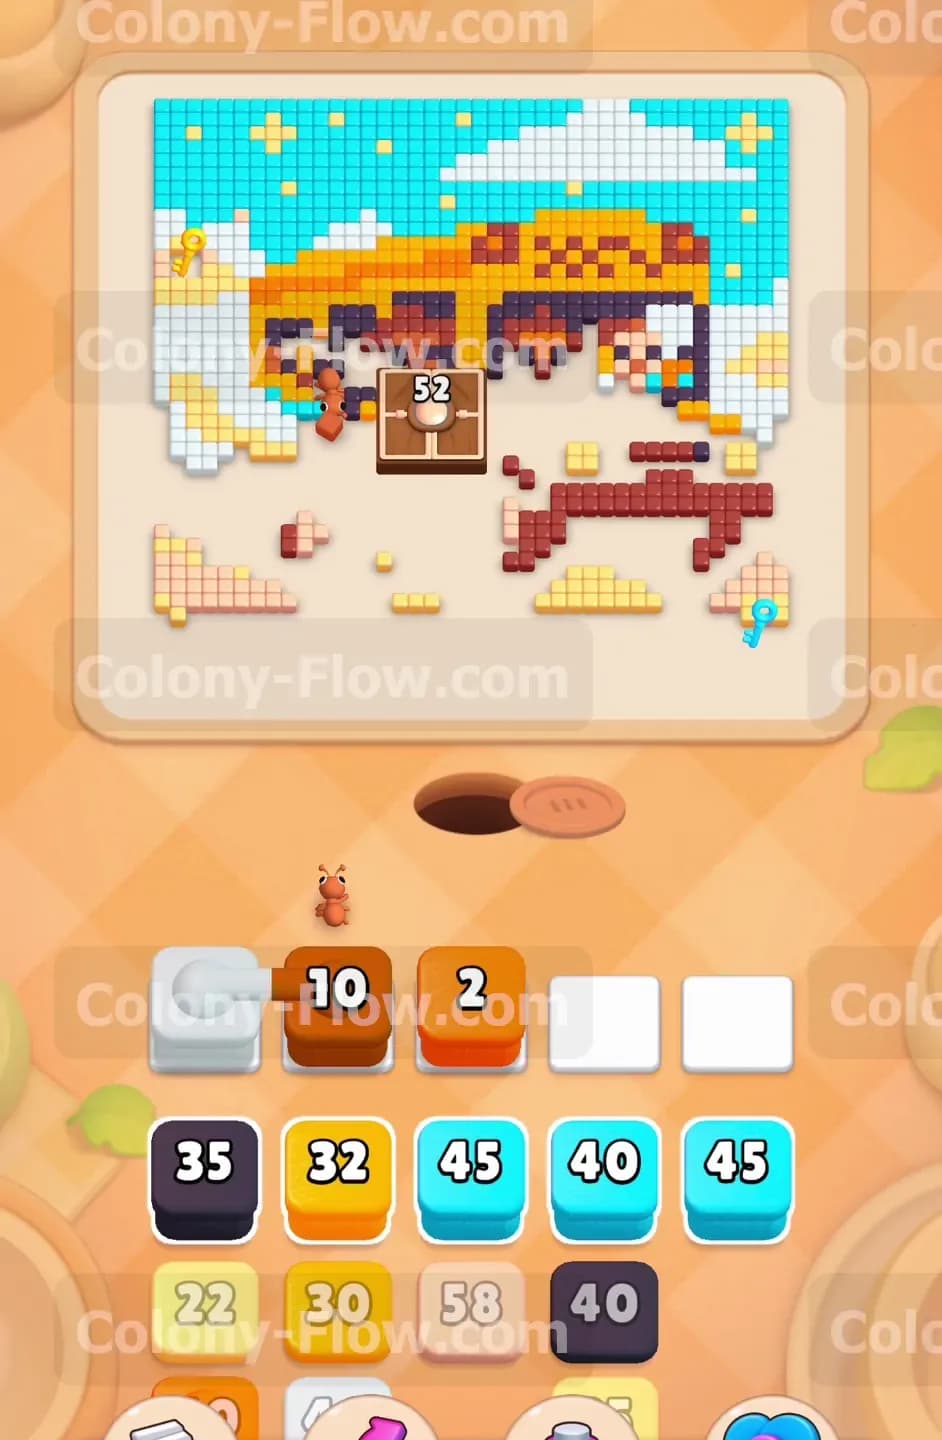
Keep pulling Orange and White blocks as they become available in the lower rows of the tray. The white ants will continue to clear the fluffy clouds around the left and right edges of the bus while the orange ants dig deeper into the core of the bus body. As the surrounding colored tiles disappear the ants begin to interact directly with the central block. You will see the massive number on that central block drop from 110 all the way down to 52. This moment defines your success on this board. You must maintain a steady flowing stream of ants to keep reducing that number without letting the slots jam. Make absolutely sure you do not pull any of the high value Cyan blocks yet because the sky tiles are still totally blocked by the remaining bus roof and upper cloud tiles.
Step 5: Introduce the black block to clear the bus windows and open the upper half.
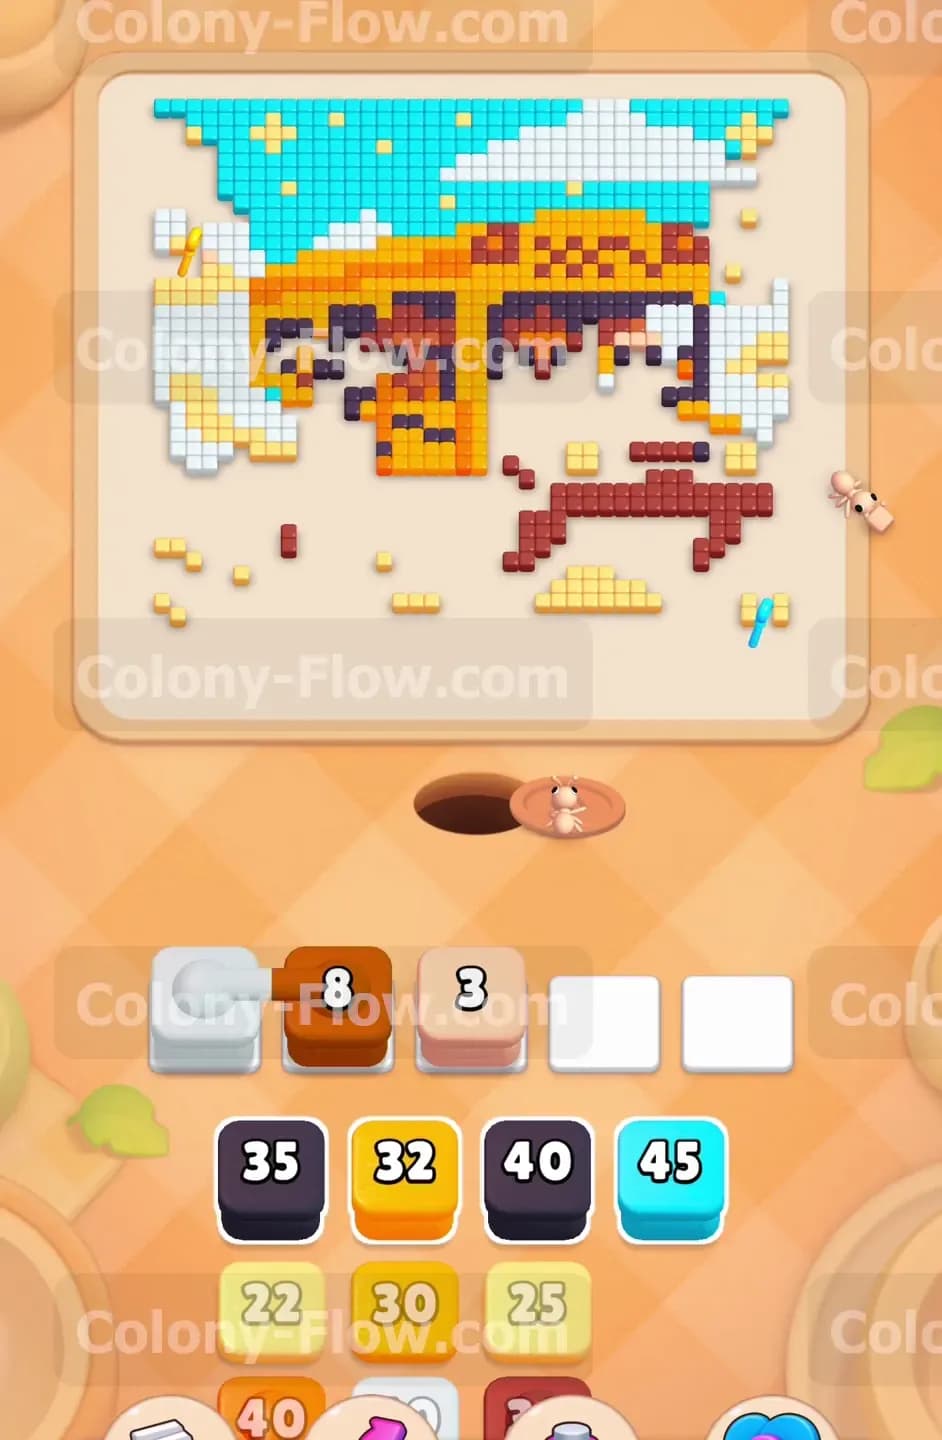
Now that the yellow and orange panels are partially cleared away the solid black windows of the school bus are fully exposed and ready to be eaten. Pull a Black block from the tray into an open waiting slot. The black ants will rush in through the newly opened gaps and completely consume the window tiles. This action further breaks apart the solid mass of the bus and opens up entirely new vertical angles for your other ants to use. Your waiting slots will look crowded at this stage with White Dark Red Orange and Black blocks all active at the same time. However as long as each individual color has a valid path to its matching tiles the blocks will continue to clear out smoothly and free up space in the tray for your next moves.
Step 6: Clear the remaining bus pieces and small ground details to finish the middle.
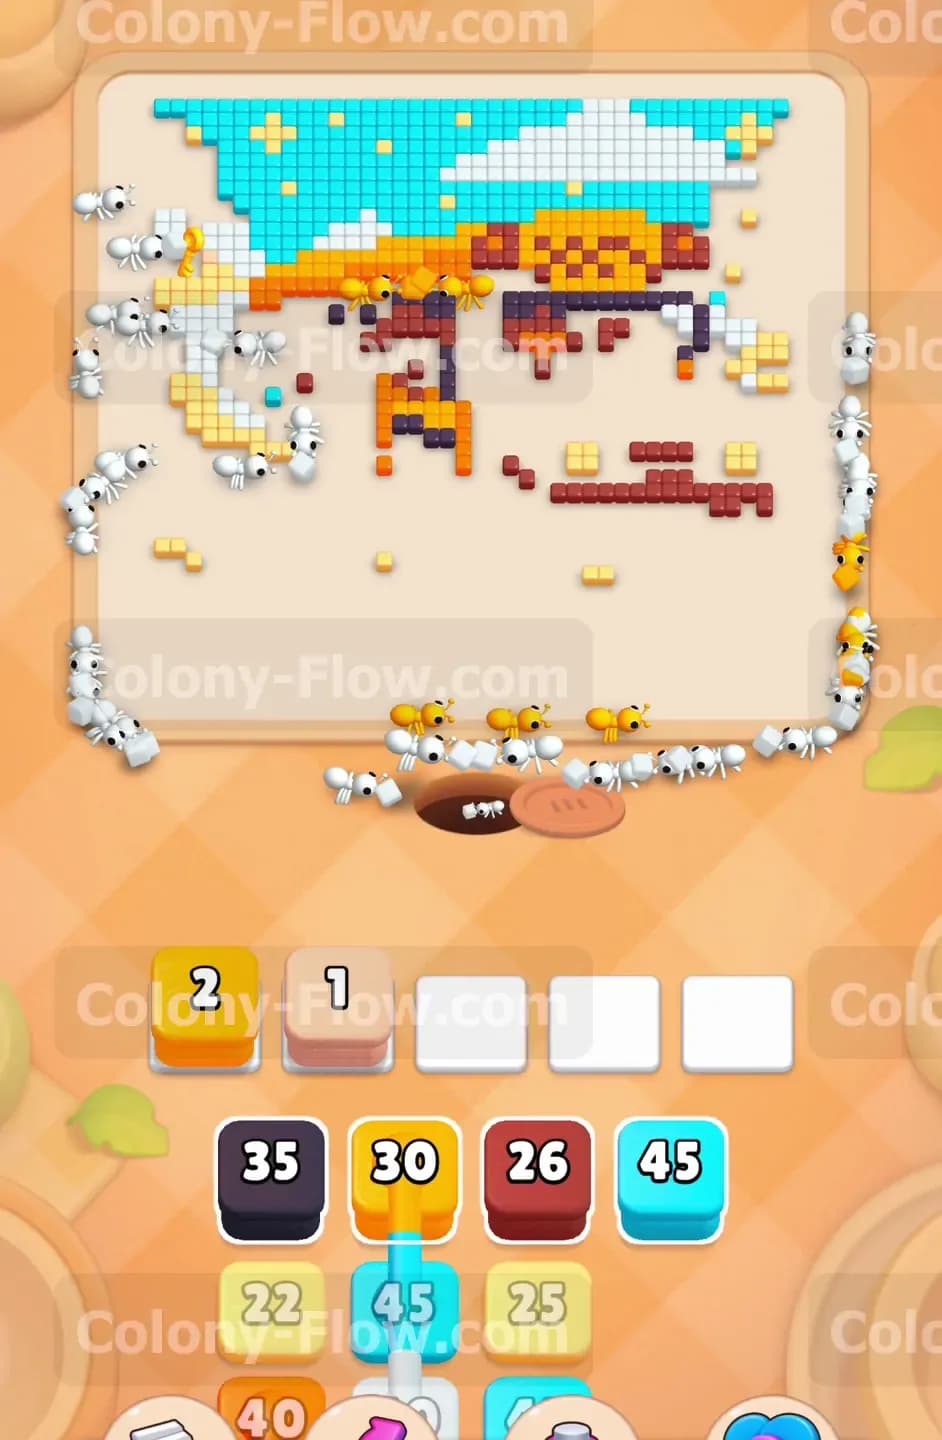
At this late stage the bus is mostly a hollowed out skeleton of its former self. Pull the remaining Light Tan blocks to clear out the rest of the dirt ground tiles sitting directly below the bus frame. You should also pull any remaining small Dark Red and Orange blocks to finish off the very last bits of the bus body and internal shadows. The central block will finally disappear completely once its number hits zero after being fed by the constant stream of ants. This clears a massive hole right in the center of the board and gives your remaining ants total freedom to move around in any direction. The waiting slots will start to empty out completely as these middle colors finish their assigned jobs and leave the board clear.
Step 7: Launch the massive cyan blocks to systematically clear the sky.
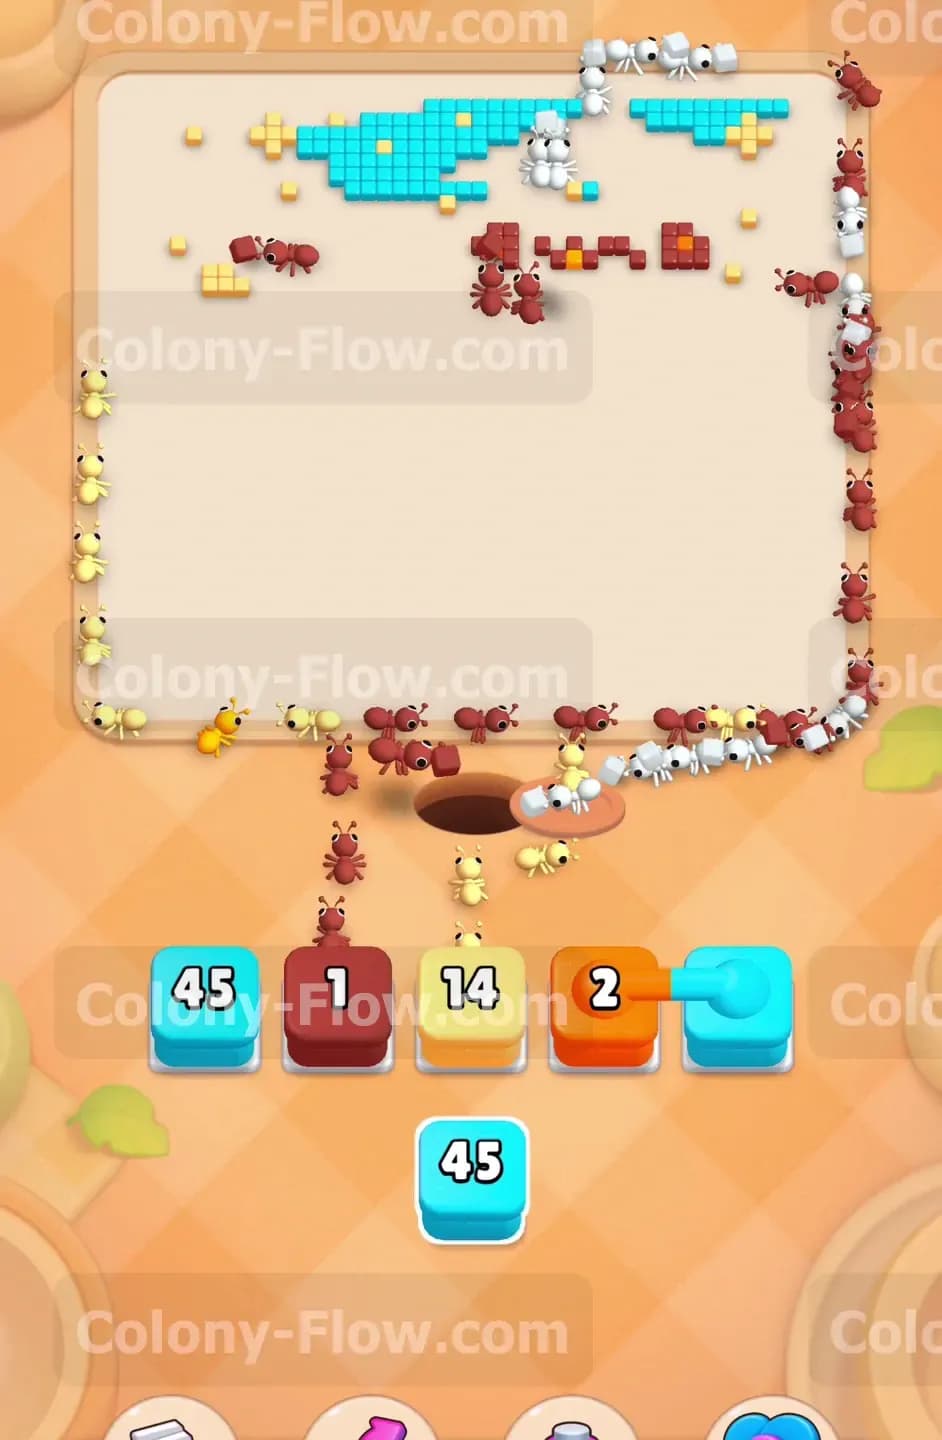
With the bus and the ground completely erased from the board the only thing left standing is the massive solid cyan sky covering the entire upper half. Your tray should now be completely full of Cyan blocks holding massive values like 40 and 45. Start pulling these Cyan blocks into the waiting slots one after another. The cyan ants will swarm the board in huge numbers and begin eating away at the sky tiles from the bottom edges upwards. Because the rest of the board is entirely empty the cyan ants have zero obstacles in their way. They will quickly flow through the remaining sky tiles like a wave and bring those high block numbers down to zero in record time. Keep pulling cyan blocks as the slots open up.
Step 8: Watch the final cyan ants finish the top corners of the board.
Pull the very last Cyan block from your tray to clear the extreme top corners of the sky. The final few ants will scurry across the empty white space of the board to consume the last handful of remaining blue tiles hiding at the top edge. Your waiting slots will be completely clear and the colorful picture will vanish entirely from the screen. You have successfully navigated the tricky central block and managed your waiting slots perfectly to secure the win on a very dense board.
Final Thought
Colony Flow Level 417 demands patience and a strict adherence to working from the bottom up. By clearing the ground and wheels first you ensure your ants never hit a dead end while chewing through the massive central bus structure. Managing the waiting slots is your top priority throughout the entire run. If you ever find your waiting slots jamming up or if you struggle to see the correct opening moves I highly encourage you to watch the video above this article. Seeing the ants flow in real time will help you master the timing needed to keep those slots perfectly clear.