Colony Flow Level 674 Walkthrough Solution & Guides | How to solve Colony Flow 674

Guide By Liam Stone
Updated on August 8, 2026
You can watch the full Level 674 walkthrough in the video above if you'd rather not read through every step.
Video doesn't match your screen?
Game updates frequently scramble layouts! Try our AI Screenshot Solver first to find your exact board instantly, or report broken guides to our team.
Welcome to Colony Flow Level 674. My name is Liam Stone and I am a puzzle game content creator who loves breaking down tough mechanics. I play every level of this game myself so I can teach you the most reliable winning strategies. This puzzle features a large pixel art face and introduces some dangerous connected boxes that will easily jam your waiting slots if you lack patience. I will walk you through the exact moves to dismantle the thick outlines and keep your ant colony moving.
Colony Flow Level 674 Overview
What You Are Working With
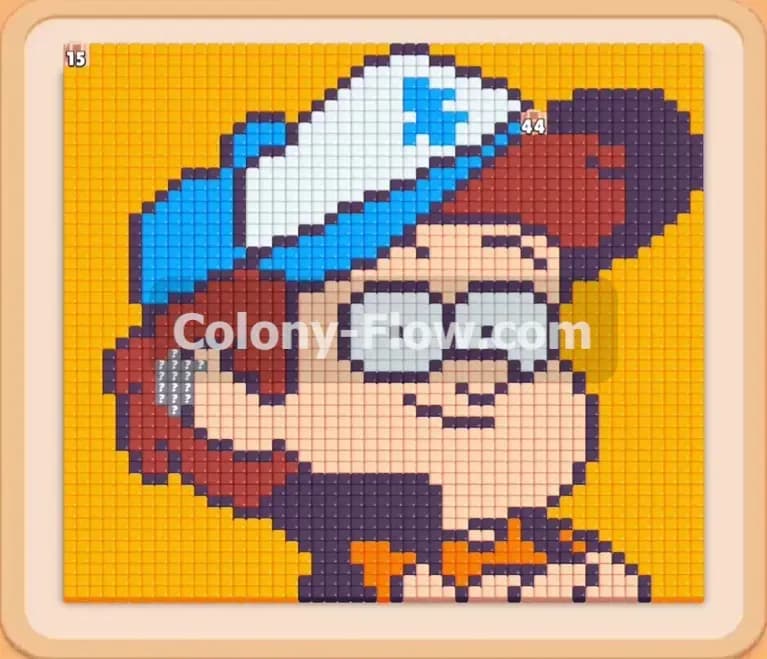
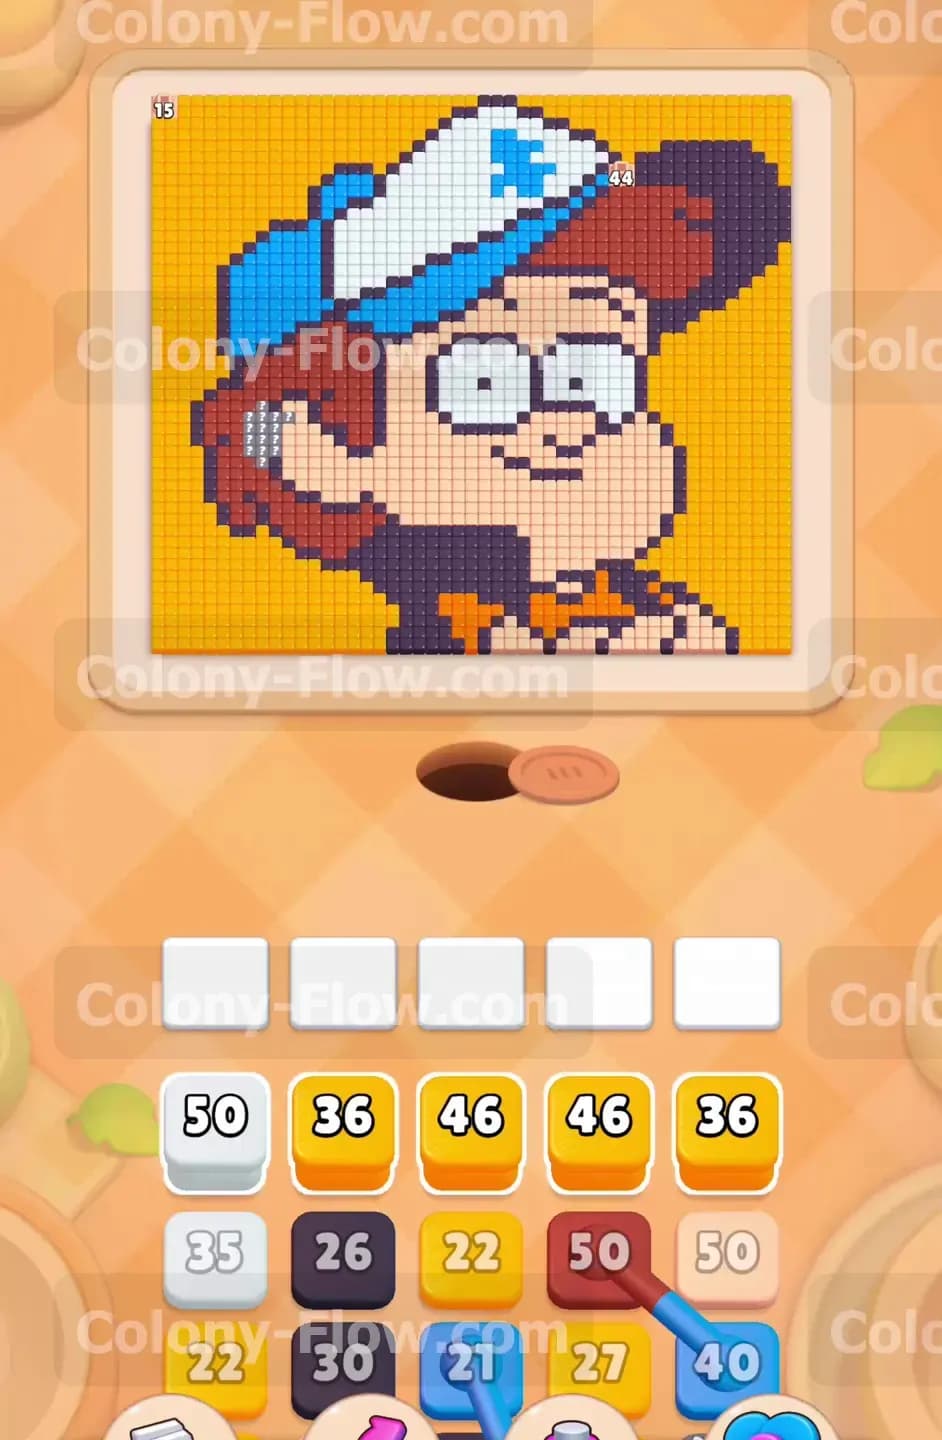
The board presents a massive pixel art portrait of a boy wearing a pine tree hat. The picture consists of a yellow background, a white and blue hat, dark red hair, a skin colored face, and thick black outlines separating every single feature. The food tiles are densely packed from corner to corner. The bottom of your screen holds the tray where your colored numbered blocks wait. You have exactly five empty waiting slots above the tray to manage your moves. This specific level includes connected boxes. Connected boxes are two or more blocks linked together by a visible line in the tray. When you tap one connected box, the entire linked group moves up into your waiting slots as a single unit.
What It Takes to Clear Level 674 Board
You have to clear every single colored food tile from the board to win this level. You achieve this by tapping numbered blocks in the tray to place them into the five waiting slots. The ants emerge from the nest hole, travel along the open paths, and eat the matching colored tiles. Every time an ant takes a tile, the number on the block counts down. When a block reaches zero, it disappears from the waiting slot and frees up that space. You lose the game if you fill all five waiting slots with blocks that have no open paths to their matching tiles. If the slots jam and the ants stop moving, the level ends in defeat immediately. Your core strategy revolves around never dead ending the board.
Colony Flow Level 674 Step by Step Solution
Step 1: Start by opening the board with dark red and white blocks.
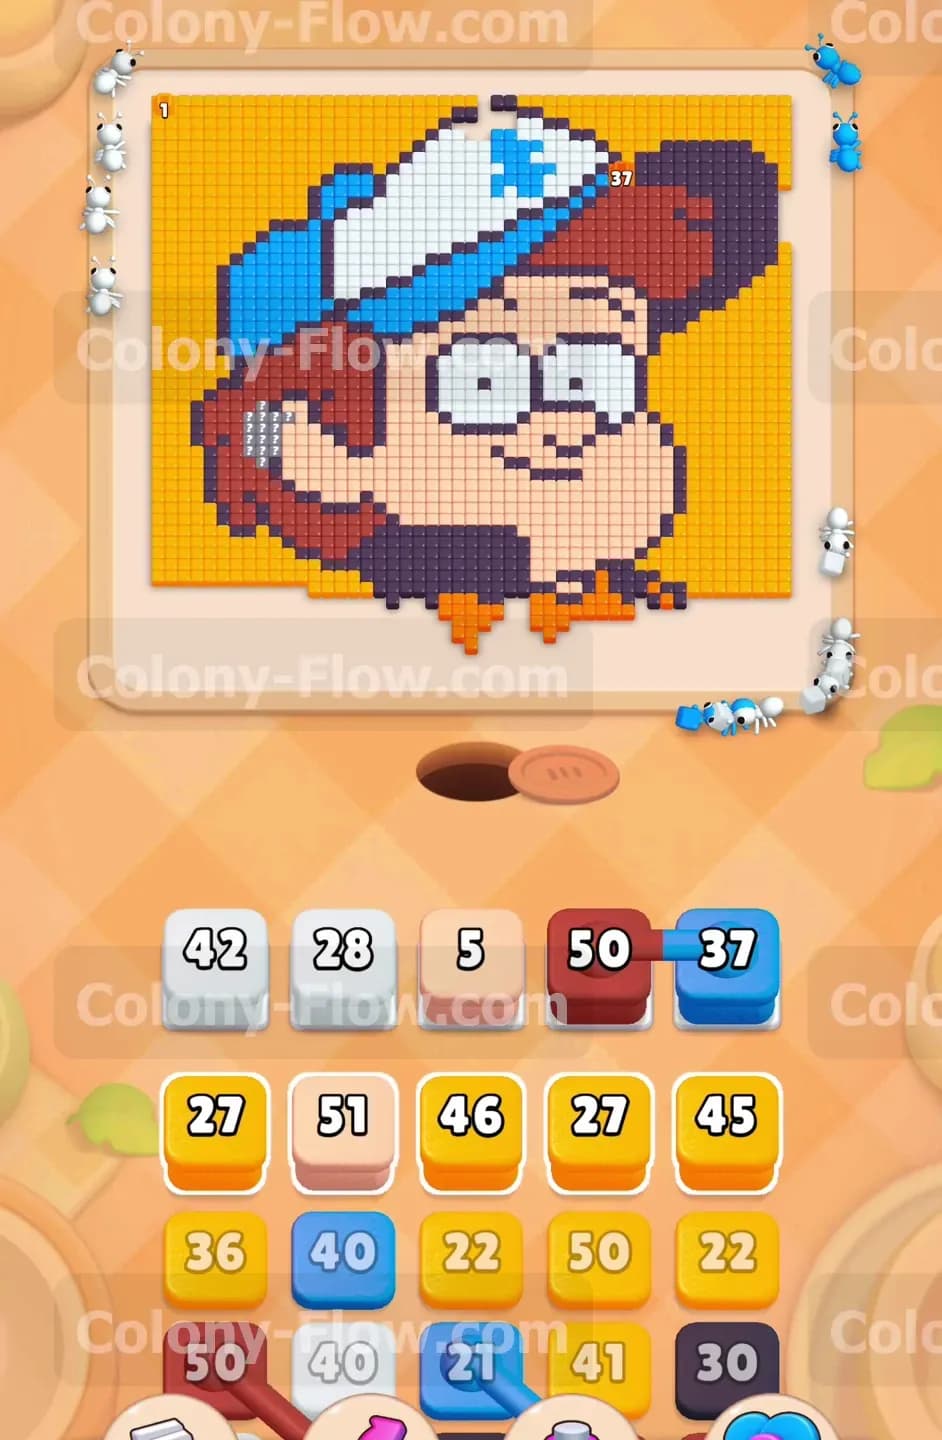
You begin the level facing a dense board filled with a huge character portrait. The picture is completely surrounded by yellow background tiles. Your tray at the bottom is packed with high number blocks. You want to open up the edges of the board immediately to give your ants room to maneuver. Find the dark red fifty block in the second row of your tray and tap it into a waiting slot. The ants instantly stream out of the nest hole and march toward the bottom right corner to eat the dark red hair tiles. Next, tap the white fifty block from the top row. A second stream of ants will head straight up the left side of the board to dismantle the solid white top of the hat. Getting these two massive blocks out of the tray early is a very smart move. It frees up tray space and opens two distinct paths on opposite sides of the board. You never want to leave high number blocks trapped in your tray because they will block your access to the colors you need later.
Step 2: Clear the huge yellow background to create more travel space.
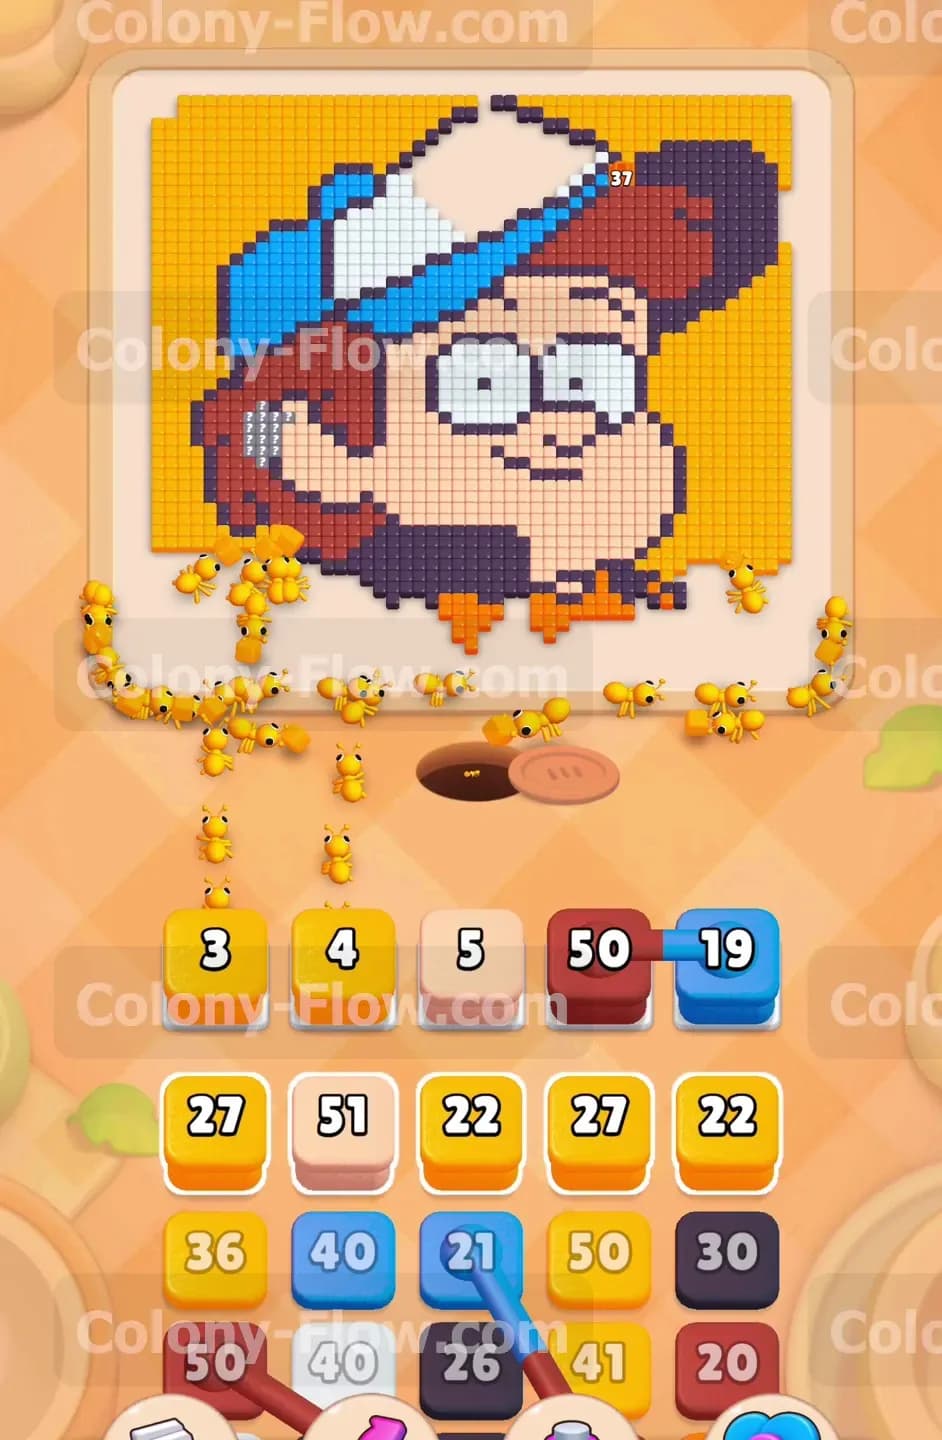
The yellow background tiles cover a huge percentage of the total board area. You must clear these tiles out systematically so the ants have a shorter walk to the center picture. Look at the top row of your tray to find several large yellow blocks. Tap a yellow thirty six block and a yellow forty six block into your open slots. A massive swarm of ants will pour out and begin eating the yellow tiles along the left and bottom edges. As these numbers count down, you need to feed more yellow blocks into the empty slots to keep the swarm moving. However, you must be very careful not to get greedy. Always leave at least two of your five waiting slots completely empty. If you fill all five slots with yellow blocks, you run a huge risk. The ants will finish the easy yellow tiles and then stop moving because the remaining yellow tiles are trapped behind other colors. Keep the flow steady and rotate your yellow blocks one by one.
Step 3: Attack the blue hat brim and manage the remaining white tiles.
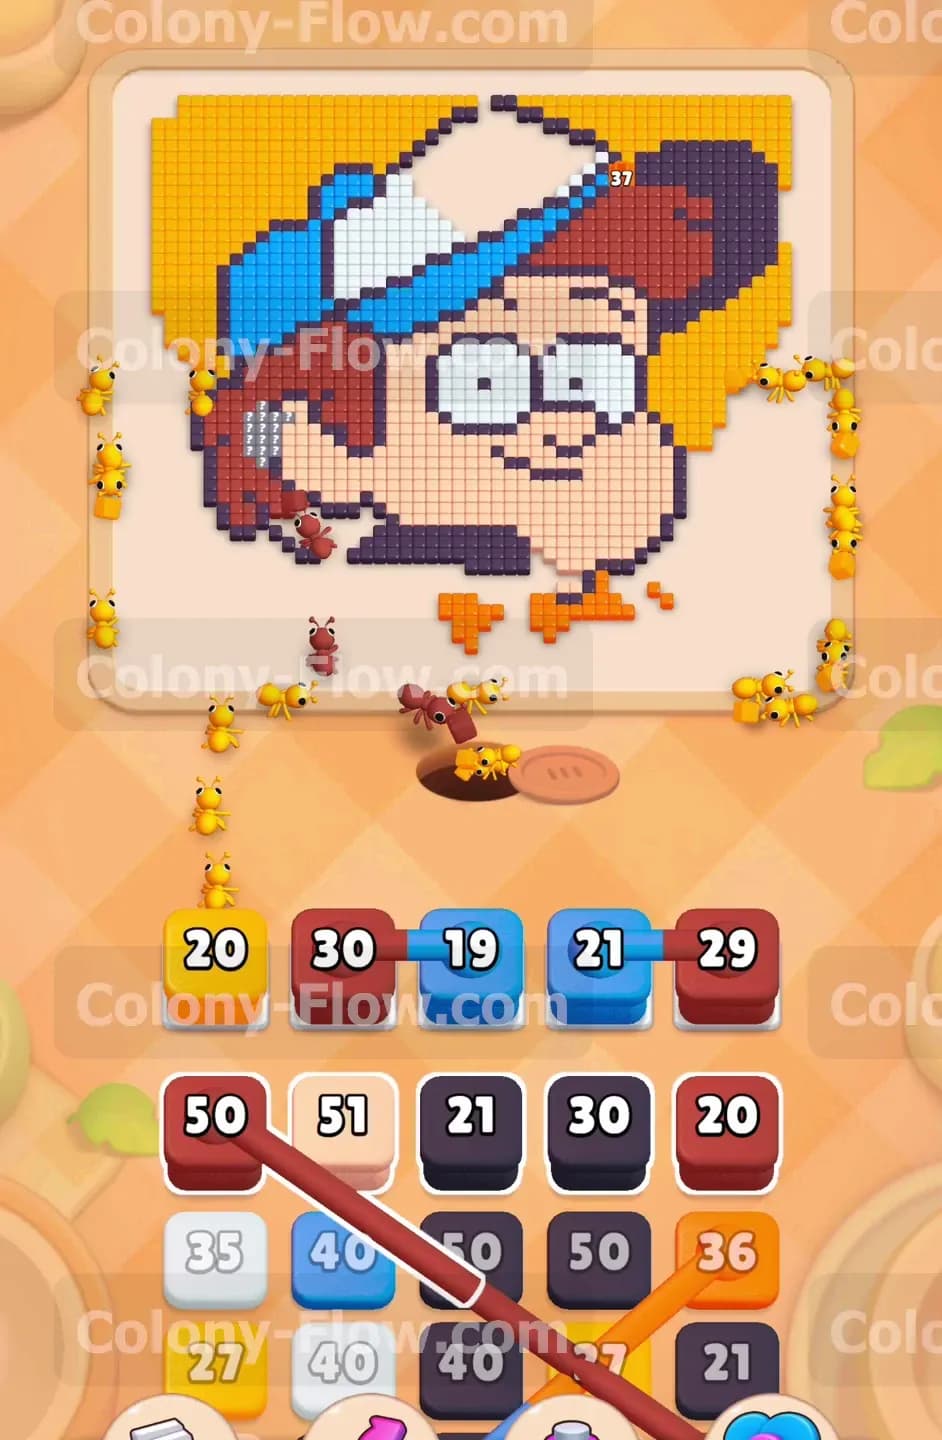
Once you clear a good chunk of the yellow background on the left side, the blue brim of the hat becomes completely exposed. You now have a direct path to the blue tiles. Tap a blue thirty seven block to bring it up to the waiting slots. The ants will travel up the left edge and start breaking down the blue brim and the blue pine tree logo in the center of the hat. While the ants work on the blue sections, tap a white forty two block and a white twenty eight block to continue chewing through the top of the hat. The solid white sections will vanish very quickly because multiple ants can attack the open edges at the same time. You want to completely erase the white top of the hat during this phase. Clearing the hat exposes the thick black outlines bordering the upper face. Every time you clear an outer section, you bring your ants one step closer to the center of the puzzle.
Step 4: Handle the connected boxes with extreme caution to avoid jams.
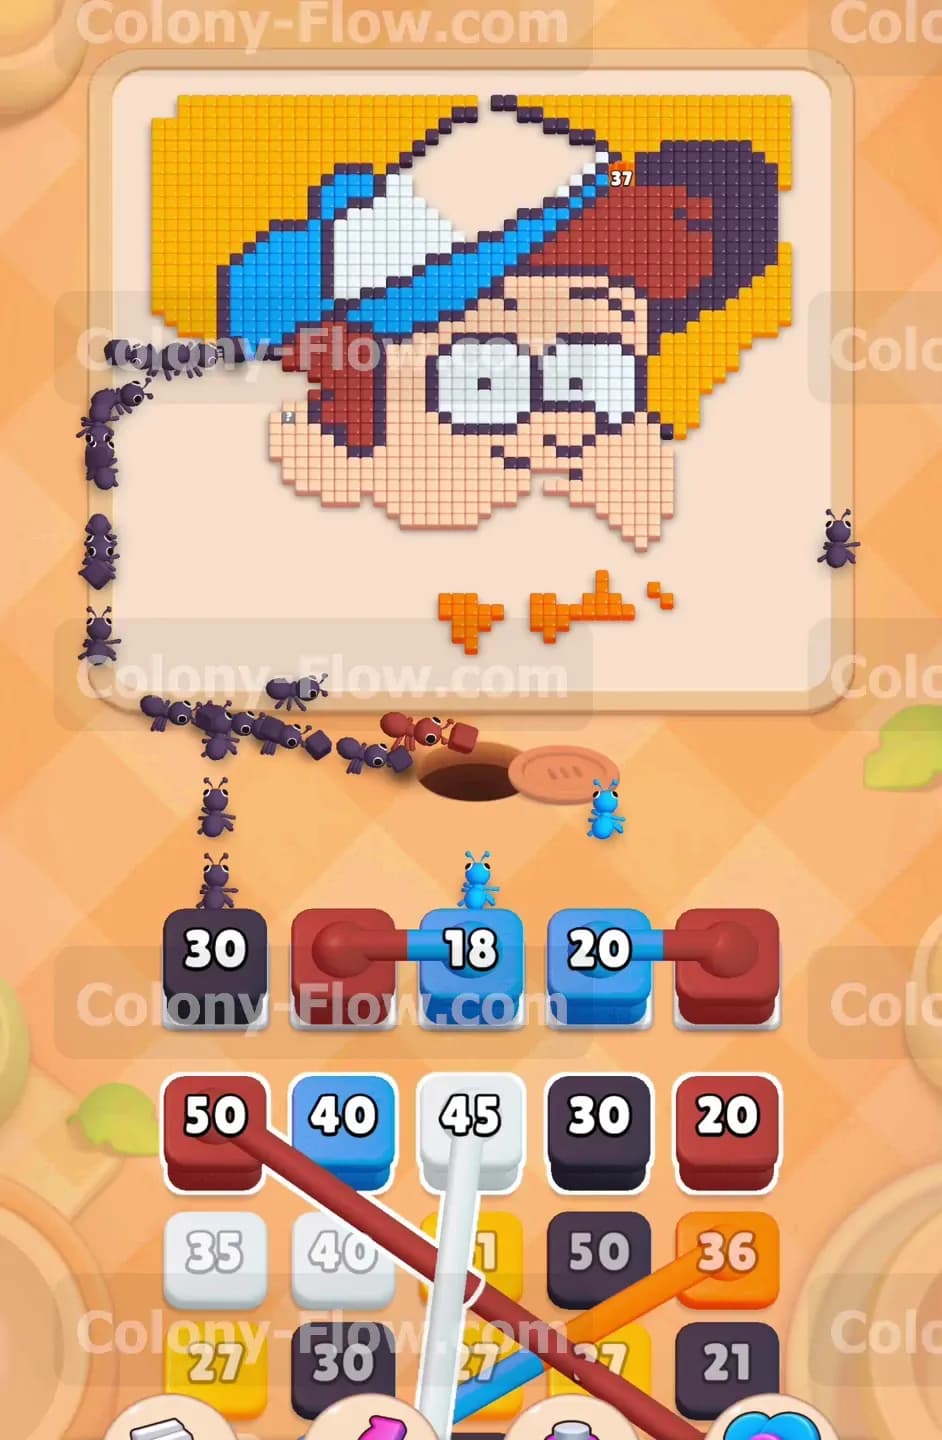
This level introduces connected boxes into your tray and they require extreme caution. You will spot a group of four blocks linked together by a horizontal line. This group contains a dark red block, a blue eighteen block, a blue twenty block, and another dark red block. When you tap any block in this linked group, all four blocks instantly move into your waiting slots together. They will occupy four slots at the exact same time. If you already have two blocks sitting in your waiting slots, pulling this connected group is impossible. If you only have one block in a slot, pulling the connected group fills your board completely. You must verify that the ants have wide open paths to the blue hat tiles and the dark red hair tiles before you touch this group. Wait until the top of the hat is clear and the dark red hair on the right is fully exposed. Tap the connected group when you have exactly four open slots. The ants will divide their forces and clear both colors simultaneously without causing a jam.
Step 5: Break through the thick black outlines to reveal the character face.
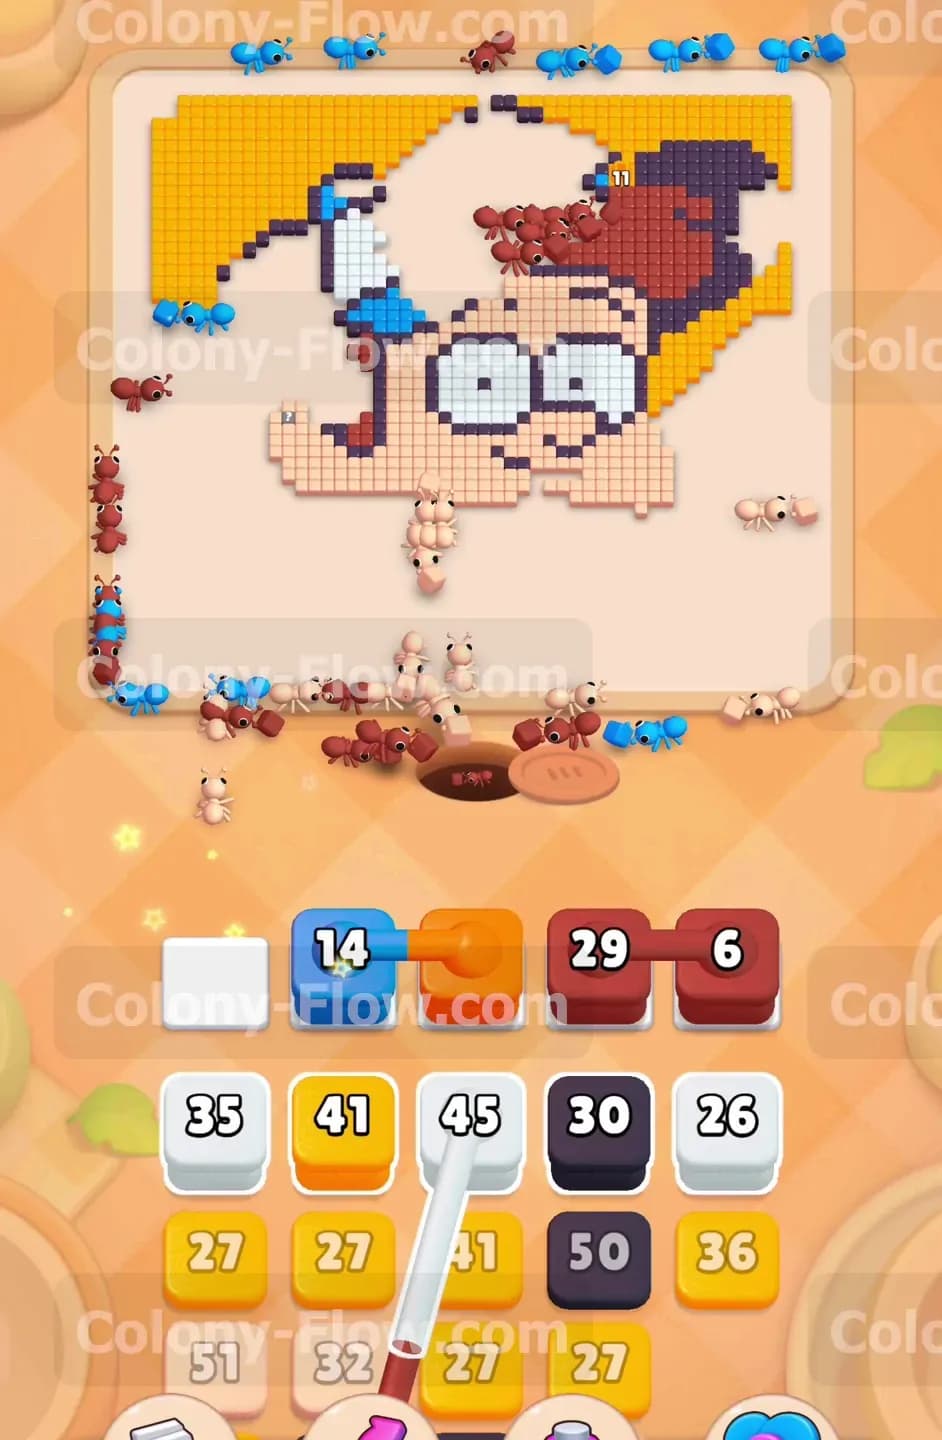
The character face is made of skin colored tiles. These tiles are heavily guarded by a thick black outline that acts like a solid wall. You absolutely cannot clear the face until you break through this black barrier. Scan your tray for the black thirty blocks and the black twenty one blocks. Tap a black thirty block into your waiting slot. The ants will immediately target the black outlines around the chin, the ears, and the sides of the face. This step is a major chokepoint for the whole puzzle. You must focus entirely on these black blocks. As the black tiles vanish, gaps open up and expose the inner face tiles. Never tap a skin colored block while the black outline is fully intact. The ants cannot walk through the black wall. A premature skin colored block will sit dead in your waiting slot and threaten your run. Break the wall first and the rest of the board opens up beautifully.
Step 6: Clear the skin colored tiles across the open center face.
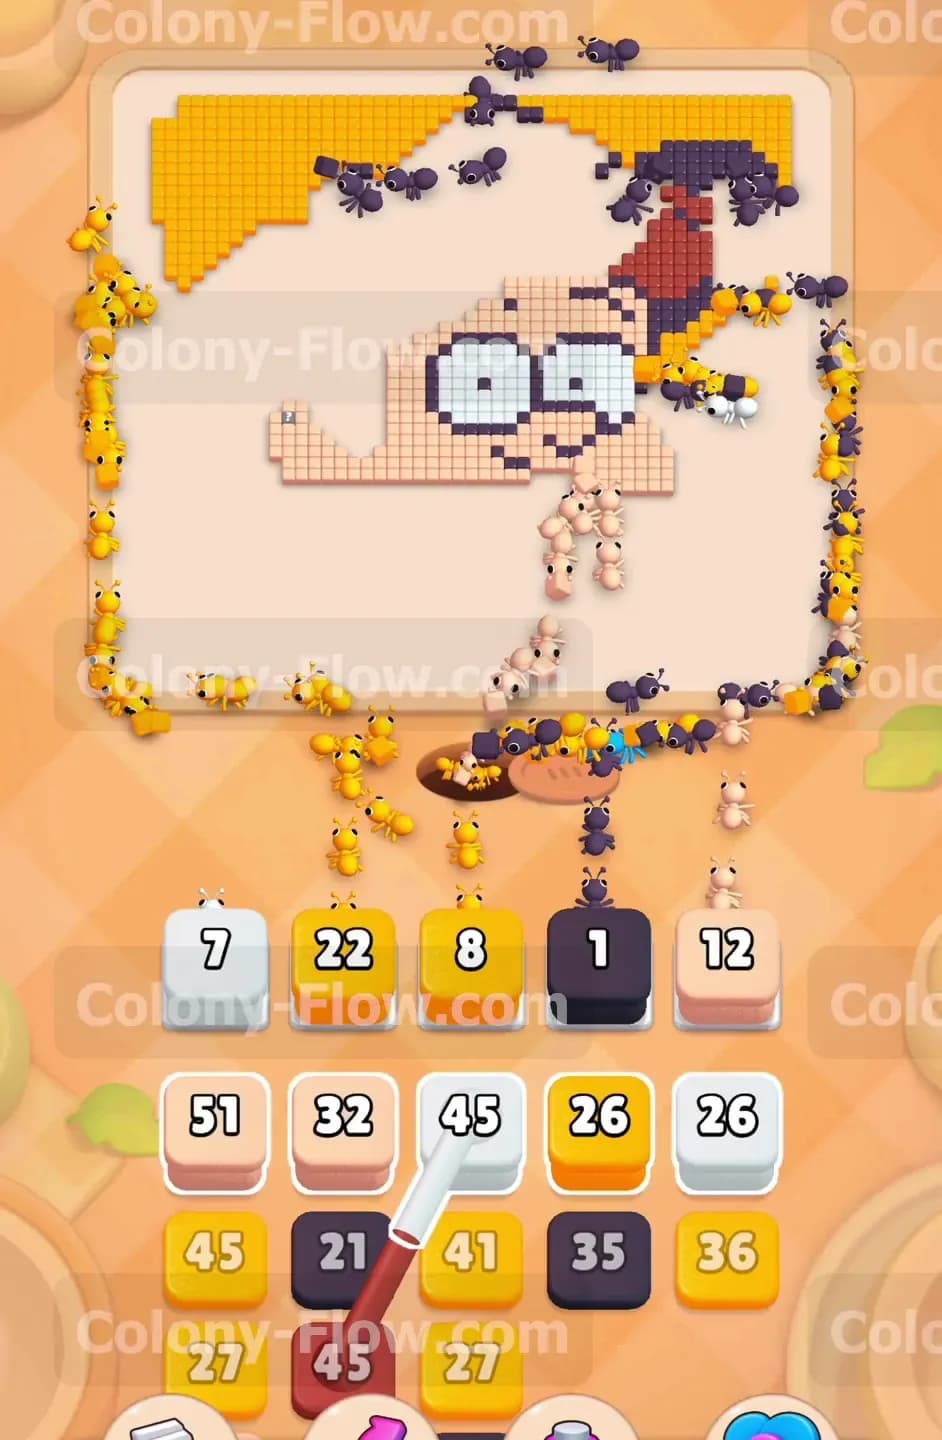
With the black outline shattered in multiple places, the skin colored face is finally vulnerable. You have direct paths leading right into the center of the board. Tap a skin colored five block to handle the small clusters, and then bring up the larger skin colored thirty two block. The ants will flood through the broken black outlines and consume the cheeks, nose, and chin. The board feels very empty at this stage. Your ants have an incredibly short walk from the nest hole directly to the face tiles. Because the travel time is so fast, the numbers on your skin colored blocks will drop to zero in a flash. Keep a close eye on your tray and tap the next skin colored block the moment a slot opens up. You want to maintain a heavy uninterrupted flow of ants marching into the center. This rapid deployment will wipe out the face very quickly and leave only a few stray pieces behind.
Step 7: Clean up the final scattered blocks and finish the level board.
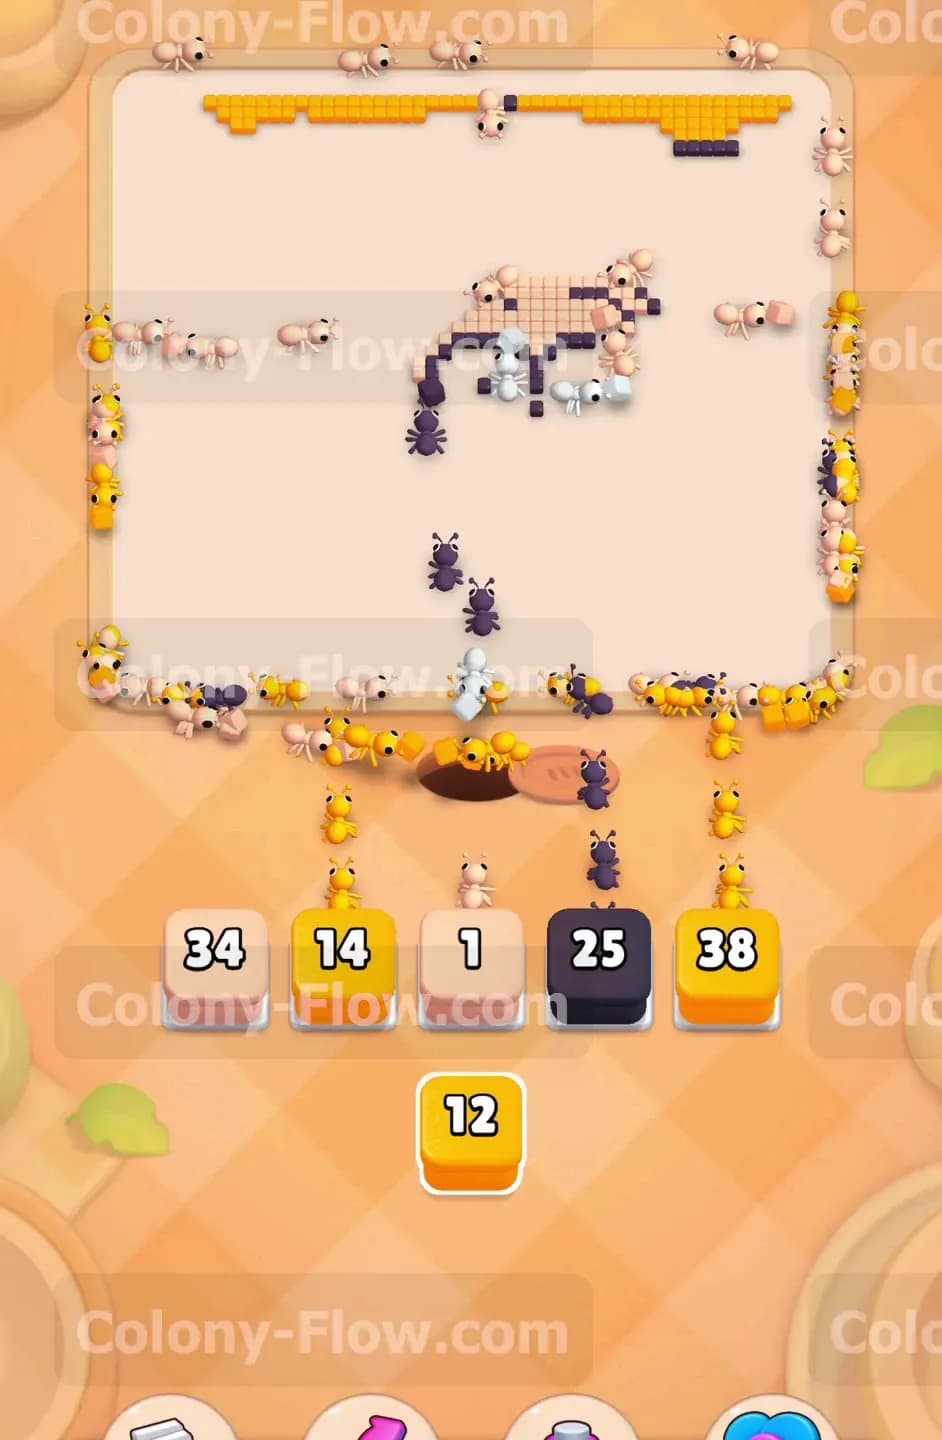
Only a handful of scattered tiles remain on the board at this point. You will spot a few dark red hair tiles lingering on the far right side and some straggling yellow background tiles near the top corners. Tap a dark red twenty nine block and a dark red six block into your slots to command the ants to finish the hair. Then tap the last remaining yellow blocks to clear out the top edge of the board. Since your waiting slots are mostly empty now, you do not have to worry about causing a jam. You have total freedom to pull whatever colors match the remaining tiles. The last few ants will march out, grab the final pieces of the puzzle, and carry them back into the nest hole. The picture is completely erased and you win the level.
Final Thought
Managing the massive yellow background and the tricky connected boxes makes this level a fantastic challenge. You really have to plan your waiting slots carefully to avoid hitting a dead end. Once you break the black outlines, the entire board falls apart very smoothly. If any part of this written guide is hard to visualize, I highly encourage you to watch the video above this article. The video shows the entire run in real time and makes the connected box mechanics very easy to understand. Keep your paths open and I will see you in the next level.