Colony Flow Level 884 Walkthrough Solution & Guides | How to solve Colony Flow 884

Guide By Liam Stone
Updated on August 8, 2026
Prefer to watch rather than read? The Level 884 walkthrough video sits right above this guide.
Video doesn't match your screen?
Game updates frequently scramble layouts! Try our AI Screenshot Solver first to find your exact board instantly, or report broken guides to our team.
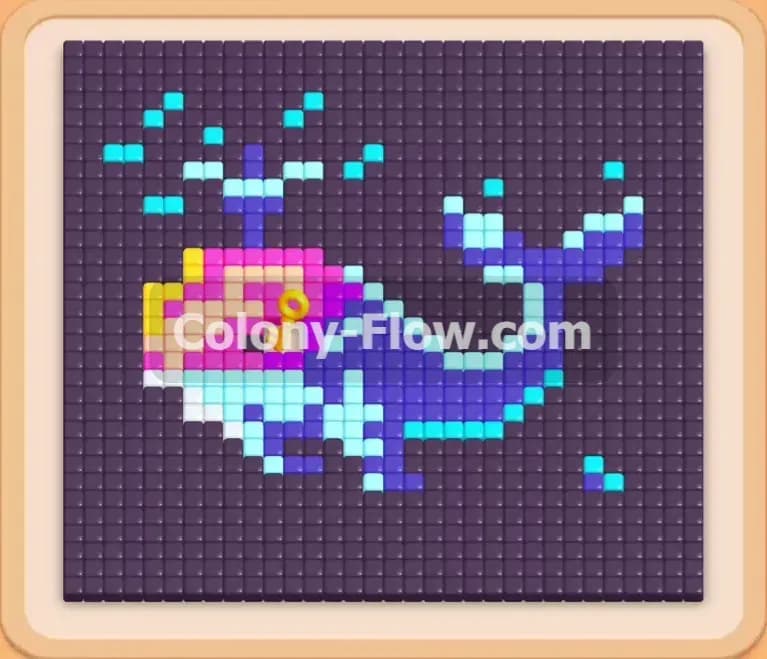
Welcome to Colony Flow Level 884. This level presents a delightful pixel art picture of a flying whale complete with a spinning propeller hat. The board is dense with a massive dark purple background and a colorful mix of tiles forming the whale character. You will need to carefully manage your waiting slots as you dig through layers of blocks in the tray. I played this level to figure out the best sequence so you can clear the board without jamming your slots. This guide will walk you through exactly which blocks to pull and when to pull them.
Colony Flow Level 884 Overview
What You Are Working With
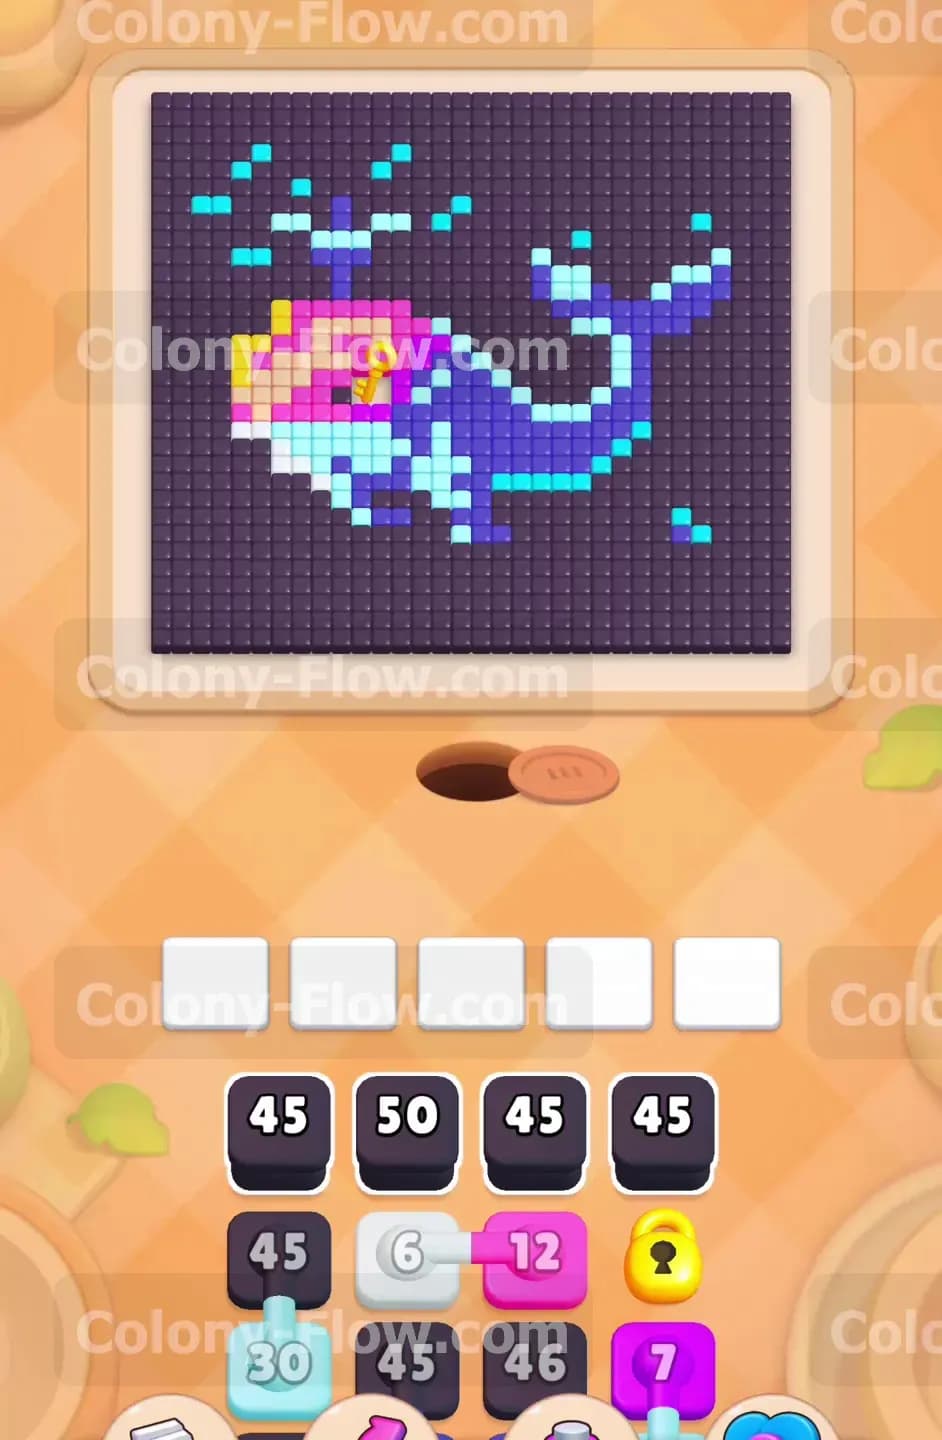
The picture at the top of the screen is a whimsical whale hovering in the air. The vast majority of the board is filled with a solid dark purple background that wraps entirely around the figure. The whale itself is built from dark blue for the main body and tail. Light blue tiles create the underbelly, the water spouts, and parts of the propeller. White tiles are used sparingly for the teeth and the single eye. Pink and peach tiles form a pattern that looks like a brain on the head of the whale, while bright yellow accents highlight the face. A cute purple and light blue propeller sits right on top of the whale head.
Down in your block tray, you face a thick stack of numbered blocks. You will see several massive dark purple blocks carrying heavy numbers like 45 and 50. These blocks are meant exclusively for that huge solid background. You will also encounter connected blocks that pull together and take up multiple waiting slots in one single move. There are locked blocks in the tray that require keys to open. The yellow tiles on the board hold these hidden keys. You must clear those yellow tiles to free the locked blocks below. Your waiting slots can only hold five blocks at a time, making space management your absolute top priority.
What It Takes to Clear Level 884 Board
Winning this level requires a systematic approach to peeling away the dark purple background while simultaneously taking apart the central whale figure. You must balance the long processing times of the big dark purple blocks with the quicker moving smaller colored blocks. The connected blocks demand extra space in your waiting slots, so you have to ensure you never pull them when your slots are almost full. Clearing the board means directing your ants to strip away the background, dismantle the whale piece by piece, grab all the keys to unlock the hidden tray layers, and finally consume the very last dark purple tiles stranded at the top edge. Every move you make must keep at least one active path open so your waiting slots do not jam and cause you to lose.
Colony Flow Level 884 Step by Step Solution
Step 1: Start chipping away at the massive background.
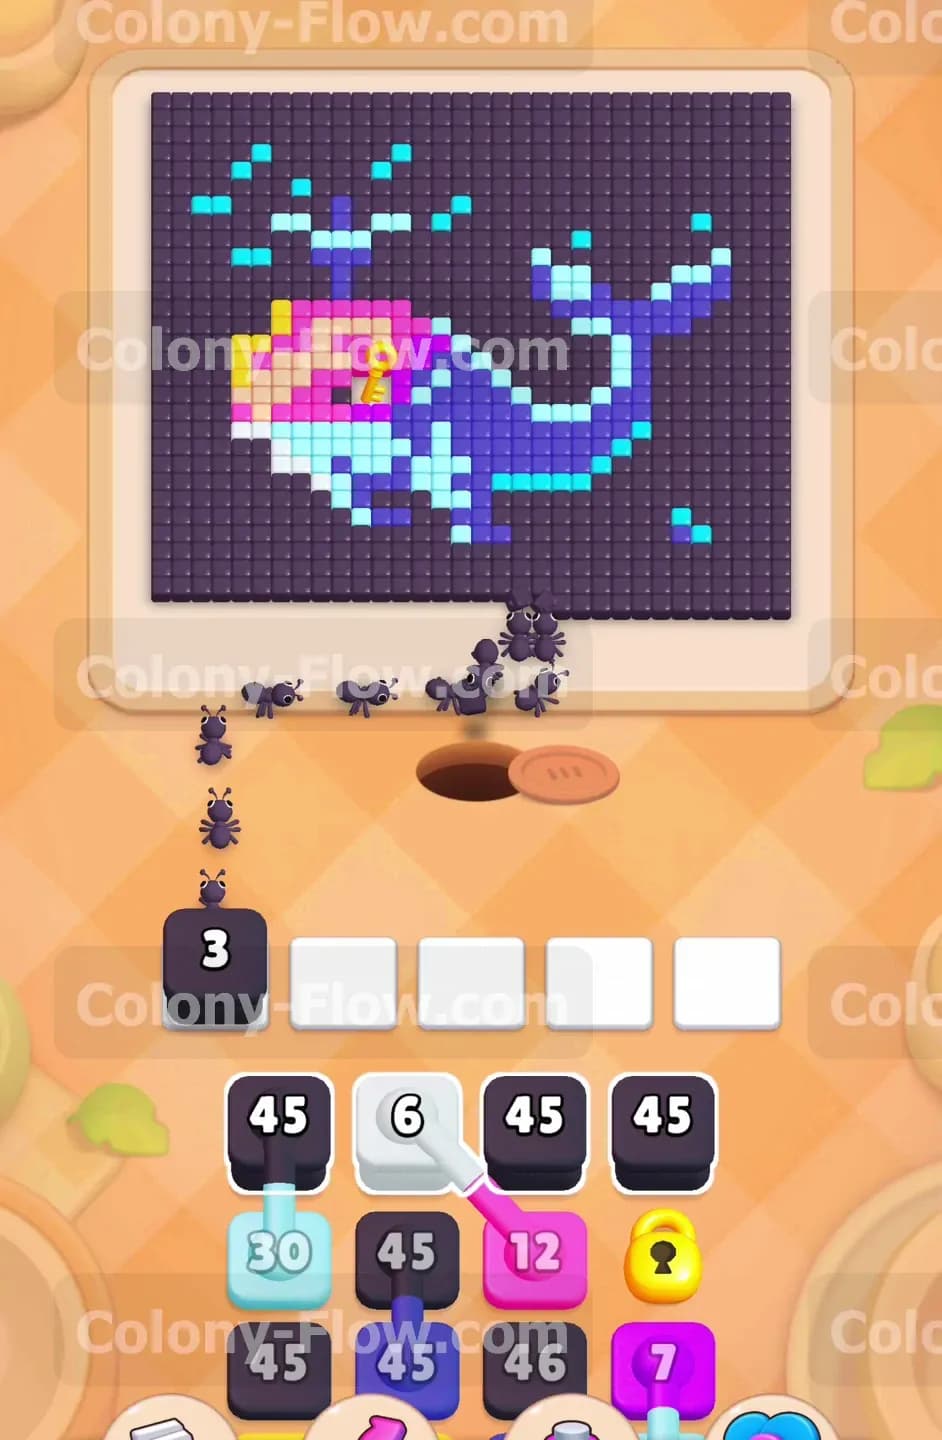
You begin with a completely full picture and a tray loaded with dark purple blocks blocking your access. Tap the 50 dark purple block from the front row of the tray. This block immediately jumps into your first waiting slot. A massive swarm of dark purple ants streams out of the nest hole at the bottom of the screen and marches up the open central paths. They split left and right to attack the outer lower edges of the background. Because this block contains 50 ants, it will sit in your waiting slot for a long time as the number slowly counts down. This is exactly what you want to happen. It keeps a steady flow of ants working on the biggest obstacle on the board while leaving your other four slots wide open. Do not pull any other blocks just yet. Let the dark purple ants do their heavy lifting and carve out some necessary empty space around the bottom of the whale.
Step 2: Pull a second background block to expose the tray.
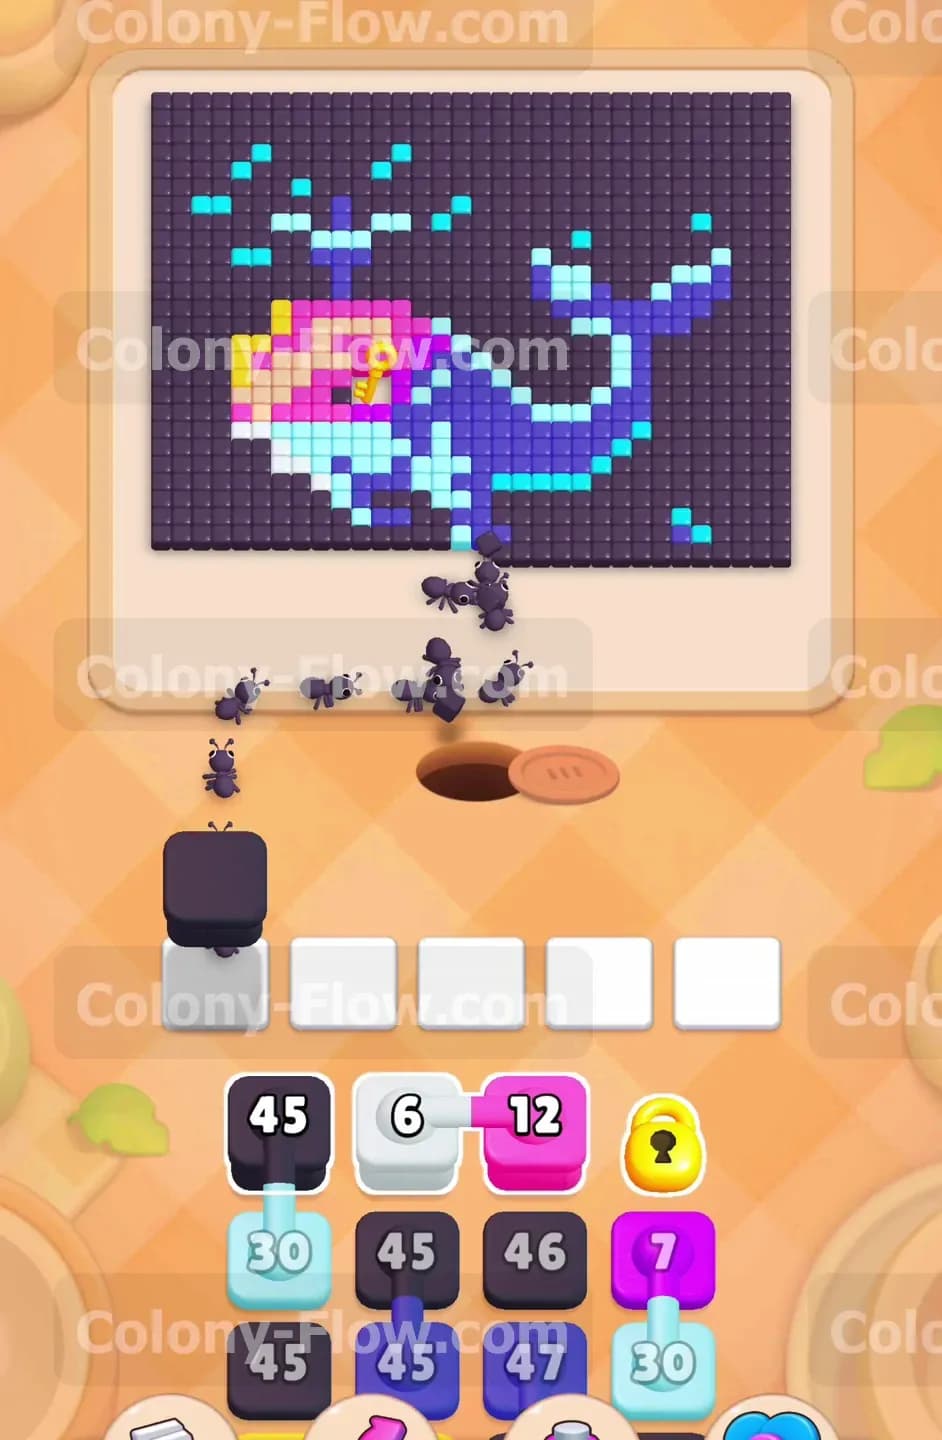
As the first dark purple block counts down and shrinks to a single digit, you need to keep the momentum going. Tap the third 45 dark purple block located in the front row of your tray. Pulling this specific block clears the column covering the connected blocks underneath. This move sends a second wave of dark purple ants rushing to the board. They will join the first group in chewing through the heavy background and extend the cleared space higher up the sides. Moving this block out of the tray is a crucial strategic choice because it reveals the hidden layers below. You will now clearly see a 30 light blue block and a pair of connected blocks featuring a 6 white and a 12 pink. Keeping two dark purple blocks active ensures the background vanishes fast enough to open safe paths for the colored ants you will need next.
Step 3: Activate the light blue and connected white and pink blocks.
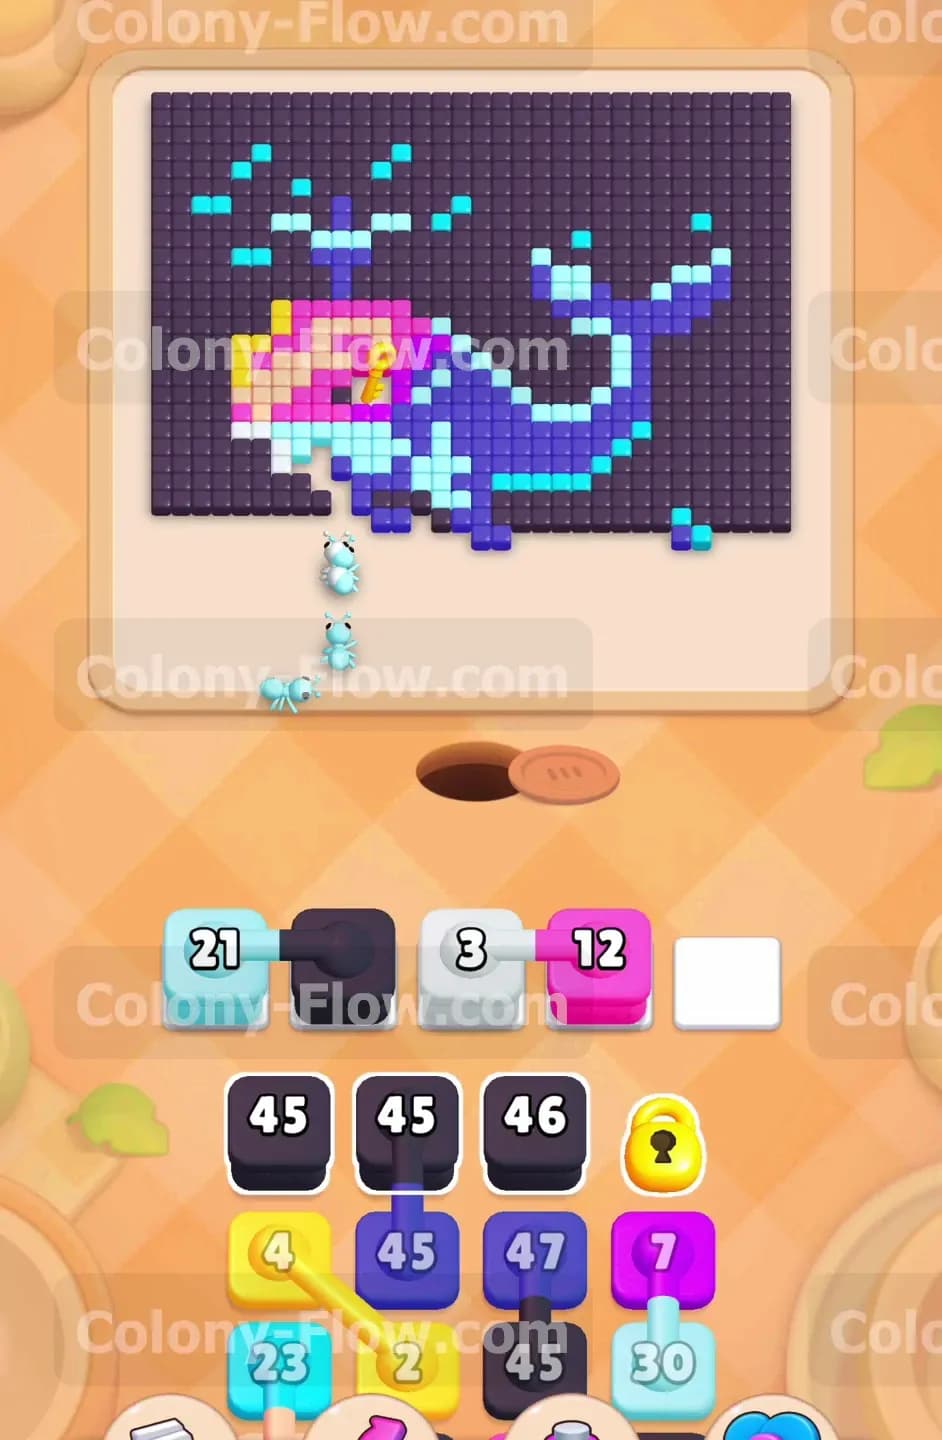
Now that you have cleared enough background to open direct paths to the whale, it is time to start eating the character figure itself. Tap the 30 light blue block to send light blue ants after the isolated lower water drops and the striped belly of the whale. Immediately after that, pull the connected 6 white and 12 pink blocks into your slots. Remember that connected blocks always move together and will instantly fill two of your waiting slots next to each other. The white ants are fast and will quickly rush up to eat the teeth and the single eye of the whale. The pink ants take slightly longer as they march toward the dense bright pink section of the head. Your waiting slots are now extremely busy and hold a mix of light blue, white, pink, and dark purple blocks. Watch the numbers count down and ensure the ants always have a clear unbroken path to their matching tiles.
Step 4: Bring in the dark blue ants for the main body.
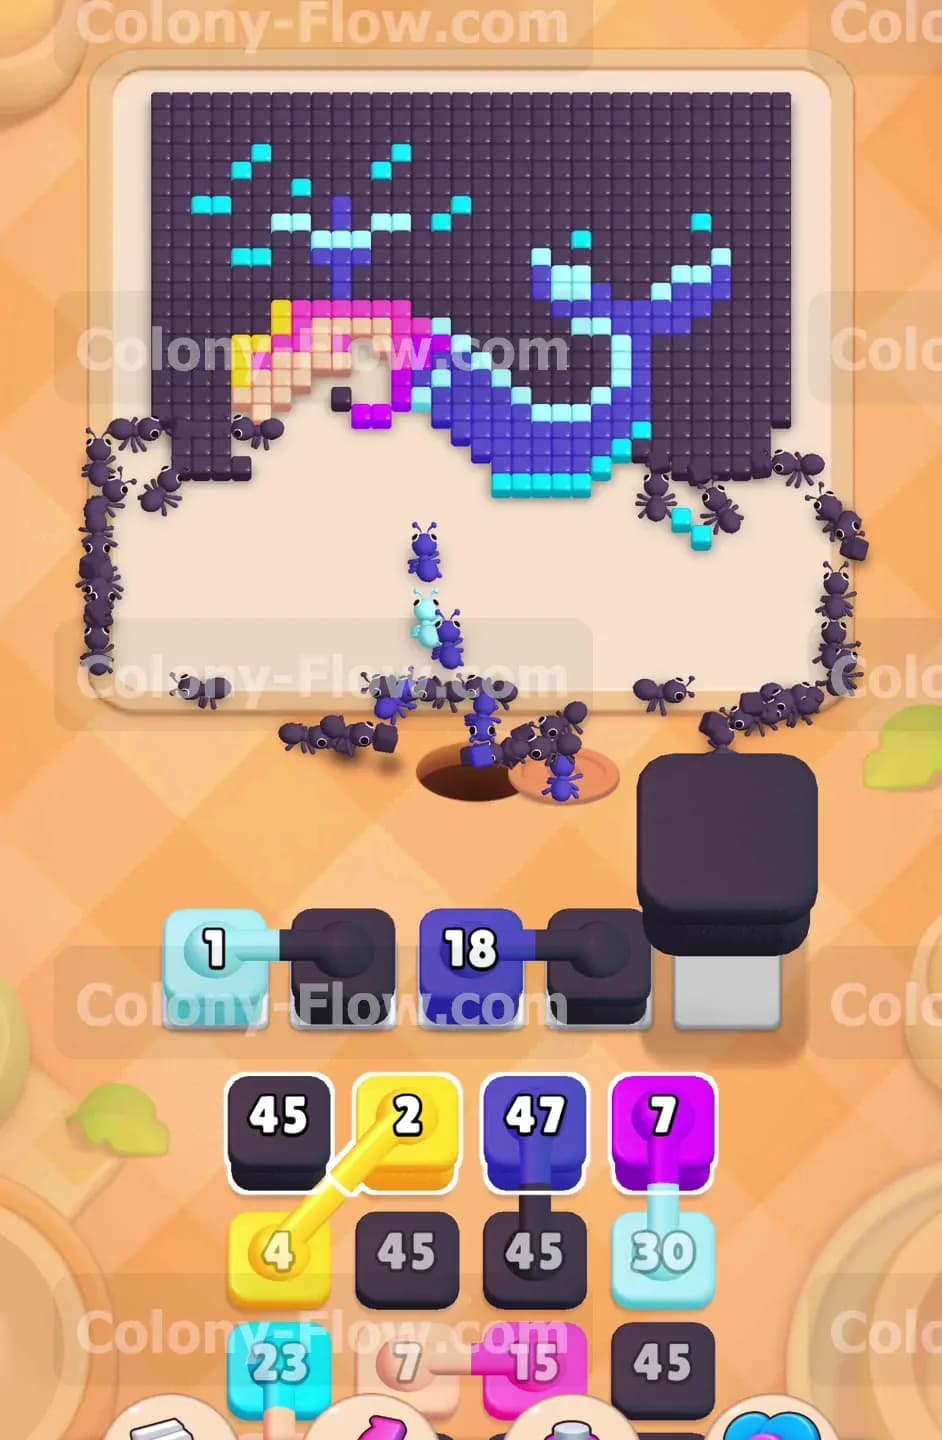
As the top layers of the tray empty out, new blocks shift into view from the bottom. You will spot a 46 dark blue block and a 47 dark blue block. You will also see a 7 purple block appear. Once your waiting slots have some breathing room and the white block finishes, pull the 46 dark blue block. The dark blue ants will flood the board and begin consuming the large tail and the bulky body of the whale. Then tap the 7 purple block. These purple ants will bypass the body entirely and head straight for the propeller blades on top of the whale head. By overlapping the dark blue and purple ants, you efficiently break down the largest remaining colored sections without blocking any travel routes. Keep a close eye on the locked blocks in the tray. You cannot touch them yet because the lock icons sit right over the blocks you will need later.
Step 5: Deploy the yellow ants to hunt for keys.
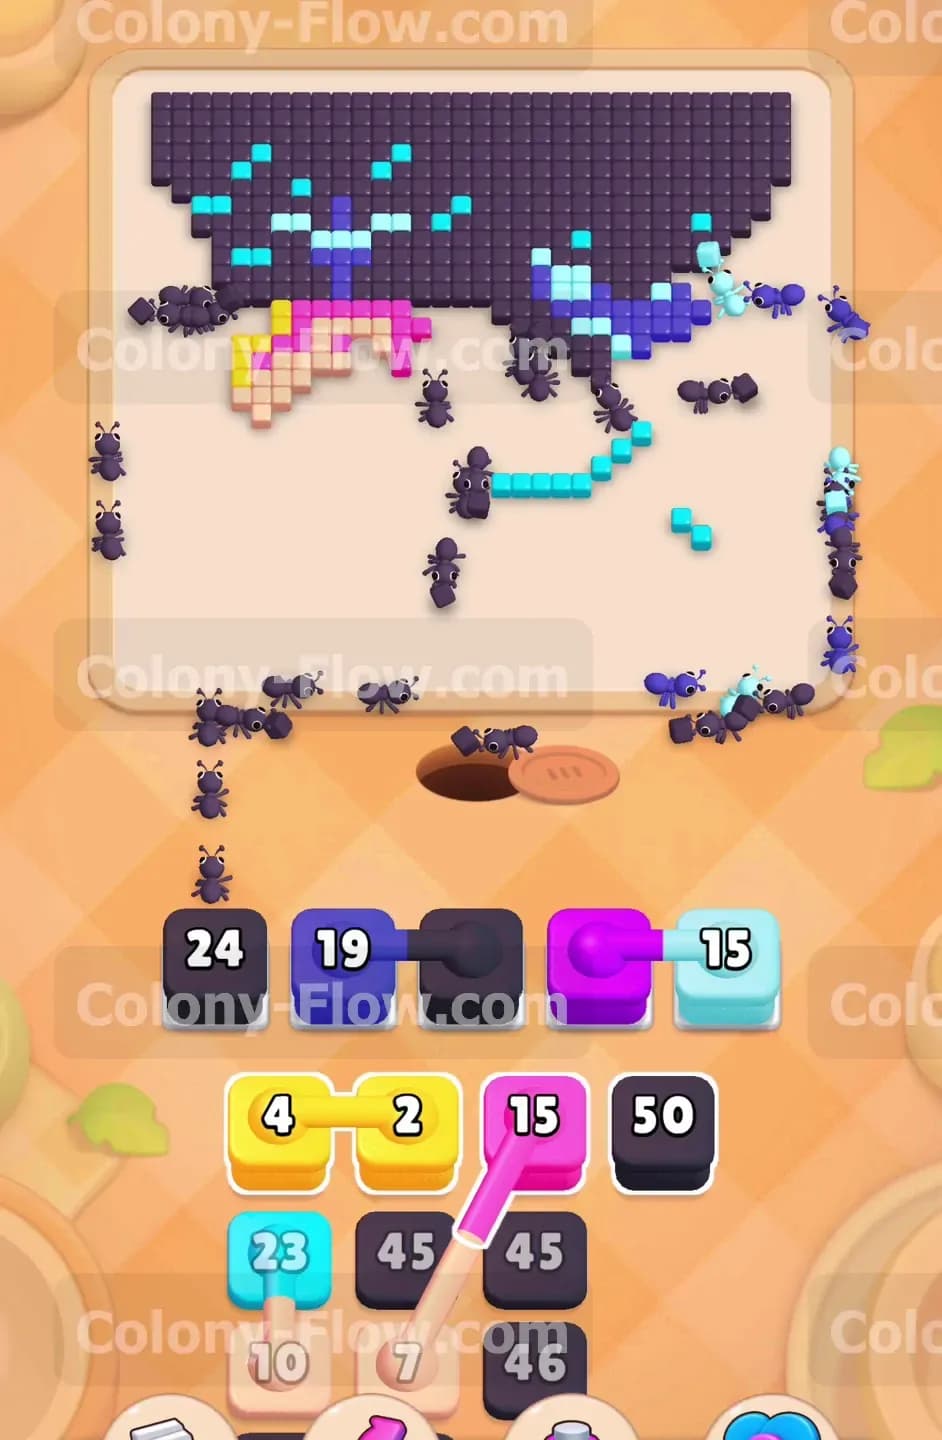
With the dark blue body shrinking rapidly, you can now focus your attention on the keys. The keys are trapped securely inside the yellow tiles located on the front face of the whale. Down in your tray you will find connected yellow blocks including a 4 yellow and a 2 yellow. Pull these yellow blocks into your waiting slots as soon as you have two empty spaces available. The yellow ants will scurry up to the head and aggressively eat the yellow tiles. Every time a yellow tile disappears, a glowing key flies down from the board and lands into one of the keyholes in your tray. You will hear the locks click open and reveal the blocks hidden beneath them. This action is absolutely vital. It frees up the crucial blocks you need to complete the final stages of the level. Always make sure you do not block the path to the yellow tiles or you will fail to collect the keys and you will lose the level.
Step 6: Clear the final details with connected pink and light blue blocks.
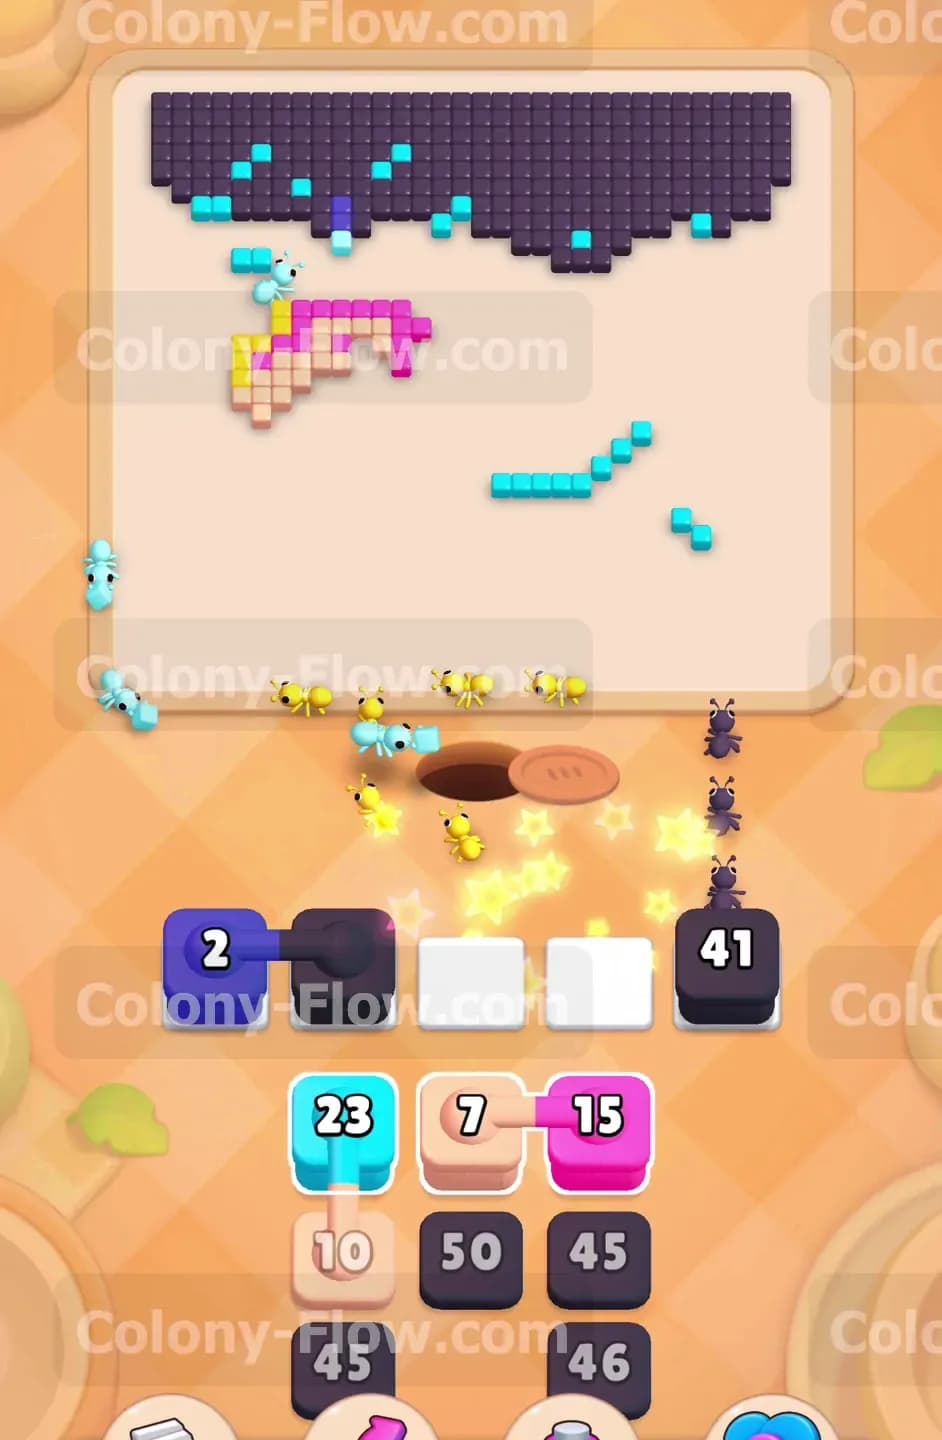
The newly unlocked tray now offers a fresh pair of connected blocks holding a 15 pink and a 15 light blue. Bring these directly into your waiting slots. The pink ants will march up and finish off the last remaining pink blocks on the top curve of the whale head. The light blue ants will chase down the remaining scattered light blue tiles including the tips of the propeller and the very end of the tail fin. At this point, the beautiful whale picture is completely destroyed. The entire central area of the board becomes a wide open empty space. The only things left on the board are a few peach colored tiles on the face area and a thick horizontal strip of dark purple background across the very top edge. You are very close to the end, but you must remain disciplined with your slot management to avoid a jam near the end.
Step 7: Release the peach ants and drain the remaining tray blocks.
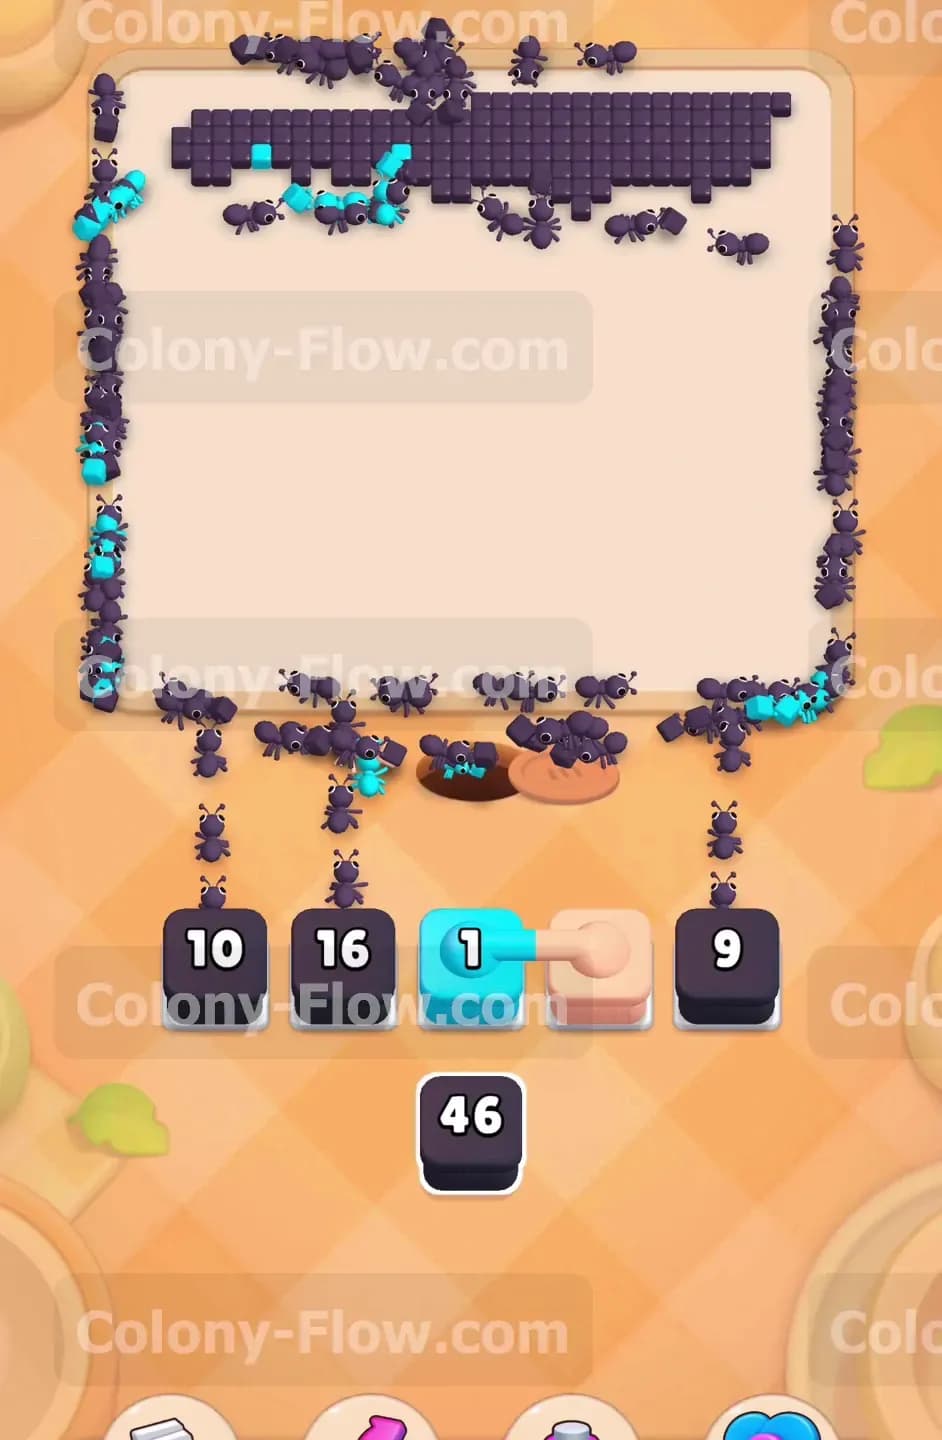
Look closely at your tray to find a newly revealed 7 peach block and a 10 peach block. Pull them up into the slots to let the peach ants eat the very last colored tiles marking the whale face. Once those peach tiles vanish, the board center is entirely clear. All that stands between you and victory is the top border of the dark purple background. Your tray contains a few final heavy blocks to handle this job including a 50 dark purple, a 45 dark purple, and a 46 dark purple. Pull them into the slots one by one as space allows. This is your victory lap. The dark purple ants will surge across the massive empty space with completely unobstructed paths to the top. They reach the top edge and devour the final tiles in a long line. The board turns completely blank, the waiting slots clear out, and you conquer the level.
Final Thought
This level provides a great test of how well you can juggle massive background blocks with tricky connected color blocks. The real key to winning is total patience. If you rush and pull too many heavy blocks at once, your waiting slots will lock up and you will instantly lose. Always let the ants clear a path before you dump more blocks into the queue. Taking your time guarantees a smooth flow and prevents frustrating bottlenecks. If you find yourself getting stuck on the key collection mechanics or the timing of the connected blocks, take a moment to watch the video above this article. Seeing the exact sequence in motion makes it much easier to copy the winning strategy and clear the board.