Colony Flow Level 524 Walkthrough Solution & Guides | How to solve Colony Flow 524

Guide By Liam Stone
Updated on July 30, 2026
The article below explains Level 524 in detail, but the video above gets you there faster.
Video doesn't match your screen?
Game updates frequently scramble layouts! Try our AI Screenshot Solver first to find your exact board instantly, or report broken guides to our team.
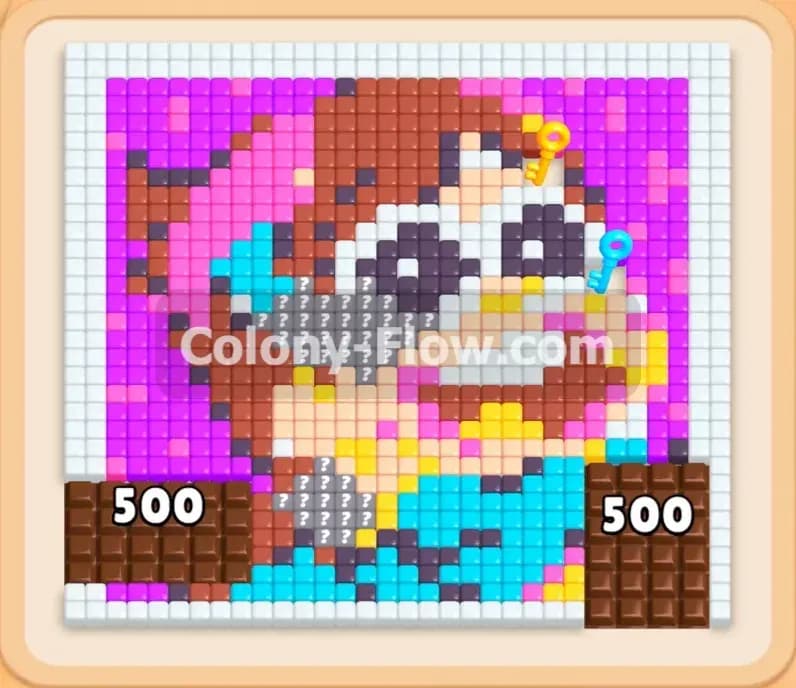
Colony Flow Level 524 is a busy puzzle that puts a massive obstacle right in your way from the very start. You face a colorful pixel art portrait of a girl with glasses, but giant pieces of chocolate block the entire bottom section. I played this level multiple times to perfect a strategy that clears the board without jamming the waiting slots. You must route your ants smartly to chip away at those massive blockers while collecting keys to unlock your crucial tray blocks. Follow my moves below to beat this board smoothly.
Colony Flow Level 524 Overview
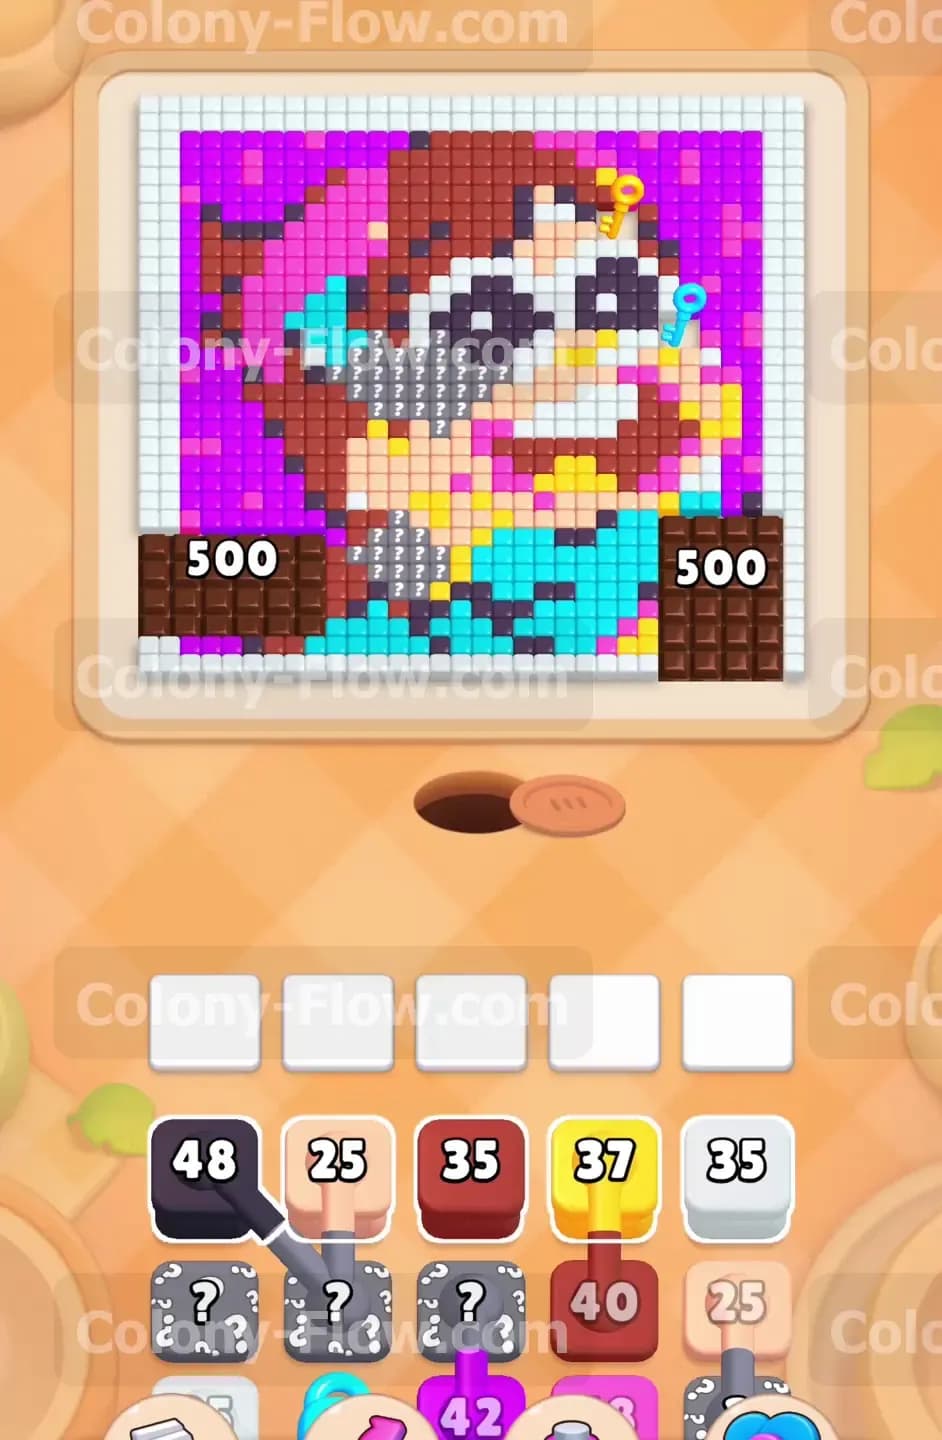
What You Are Working With
The puzzle board features a large pixel art portrait made of several bright colors. You have a white outer border, black outlines for glasses, brown hair, light pink skin, a magenta bow, and a cyan shirt. The biggest threats are the two huge chocolate blocks sitting in the bottom corners over the shirt. These chocolate blocks have a massive 500 count on them. You also have yellow keys scattered around the hair and eyes. In your tray at the bottom, you have a mix of standard colored blocks, a locked cyan block, connected boxes that link two colors together, and hidden boxes marked with question marks.
What It Takes to Clear Level 524 Board
Clearing this level means completely destroying those massive chocolate blocks and picking up every yellow key. The keys remove the lock on the cyan block in your tray so you can finally clear the shirt. You must pull blocks into your five waiting slots in a specific order so the ants always have an open path to the matching tiles. If you pull too many blocks that cannot reach their target tiles, your five slots will fill up. A full tray with no moving ants means you lose the level instantly. You win when every single pixel tile is gone and your ants return to the nest.
Colony Flow Level 524 Step by Step Solution
Step 1: Pull the black and white blocks to clear the outer borders and outlines
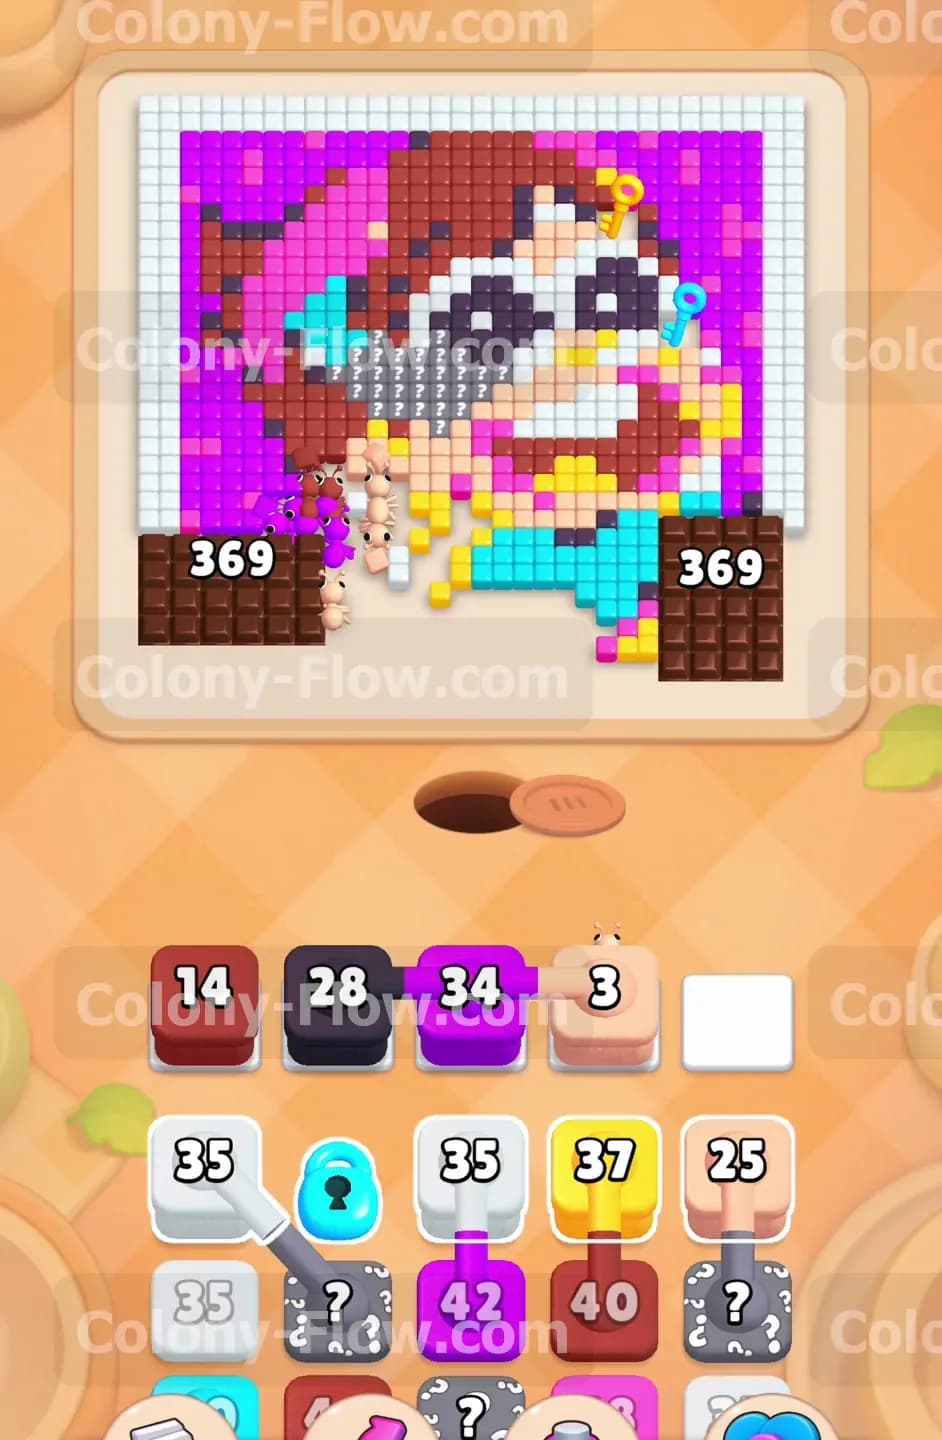
You need to get your ants moving immediately to create working space on the board. You start with a black block showing 48 and a white block showing 25. Pull the black block and the white block into your waiting slots. The black ants will rush out to eat the glasses outlines and the dark borders around the face. The white ants will target the thick white border wrapping around the entire picture along with the white tiles inside the eyes. Watch those numbers count down to zero as the ants find their targets. The ants move quickly in a long line, so you want to give them plenty of space to spread out. Starting with the black and white borders ensures you do not trap your ants in a bottleneck right next to the nest hole. This initial wave of ants opens up multiple new paths toward the center of the face. Always make sure the white and black blocks have an active path before you pull anything else.
Step 2: Deploy brown and purple blocks to attack the hair and bow
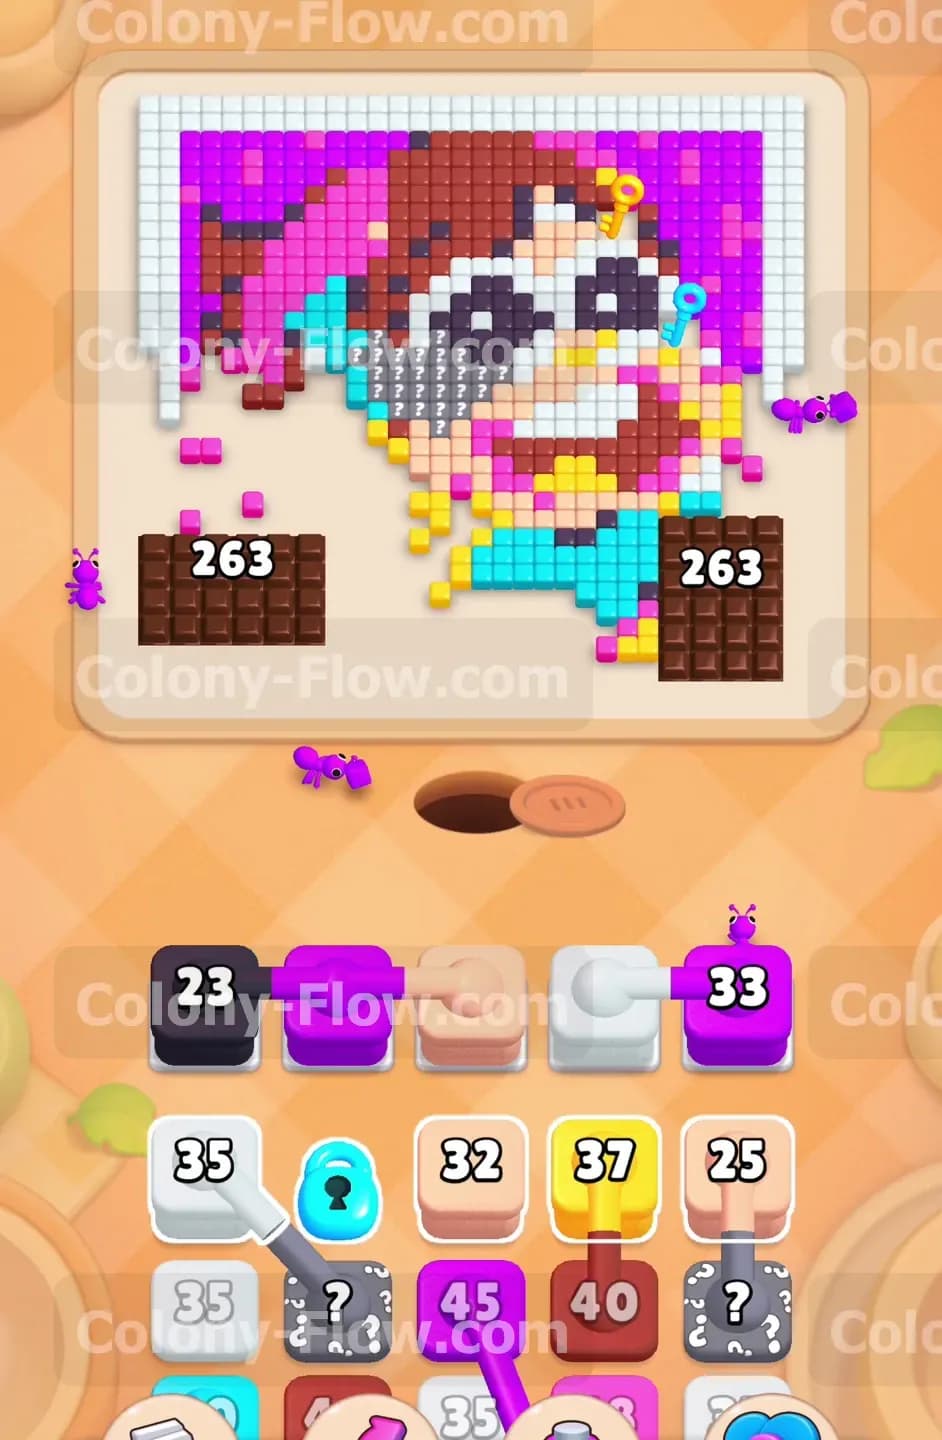
Once the black and white ants start clearing the outer edges, you can send in the next wave of colors. Pull the brown block showing 35 and the purple block showing 42 to send ants into the brown hair sections and the purple shadows on the magenta bow. You will notice that the chocolate blocks cover a huge portion of the bottom board. Taking them out early is not possible, so you have to rely on a gradual wearing down process. As your ants eat the tiles directly next to the huge chocolate blocks, you will see the 500 count on the chocolate start to drop rapidly. The chocolate takes damage when you clear adjacent tiles and when ants bump against it. Keep feeding brown and purple blocks into the slots to maintain a steady flow of ants hitting those chocolate corners.
Step 3: Use the connected boxes carefully to save slot space
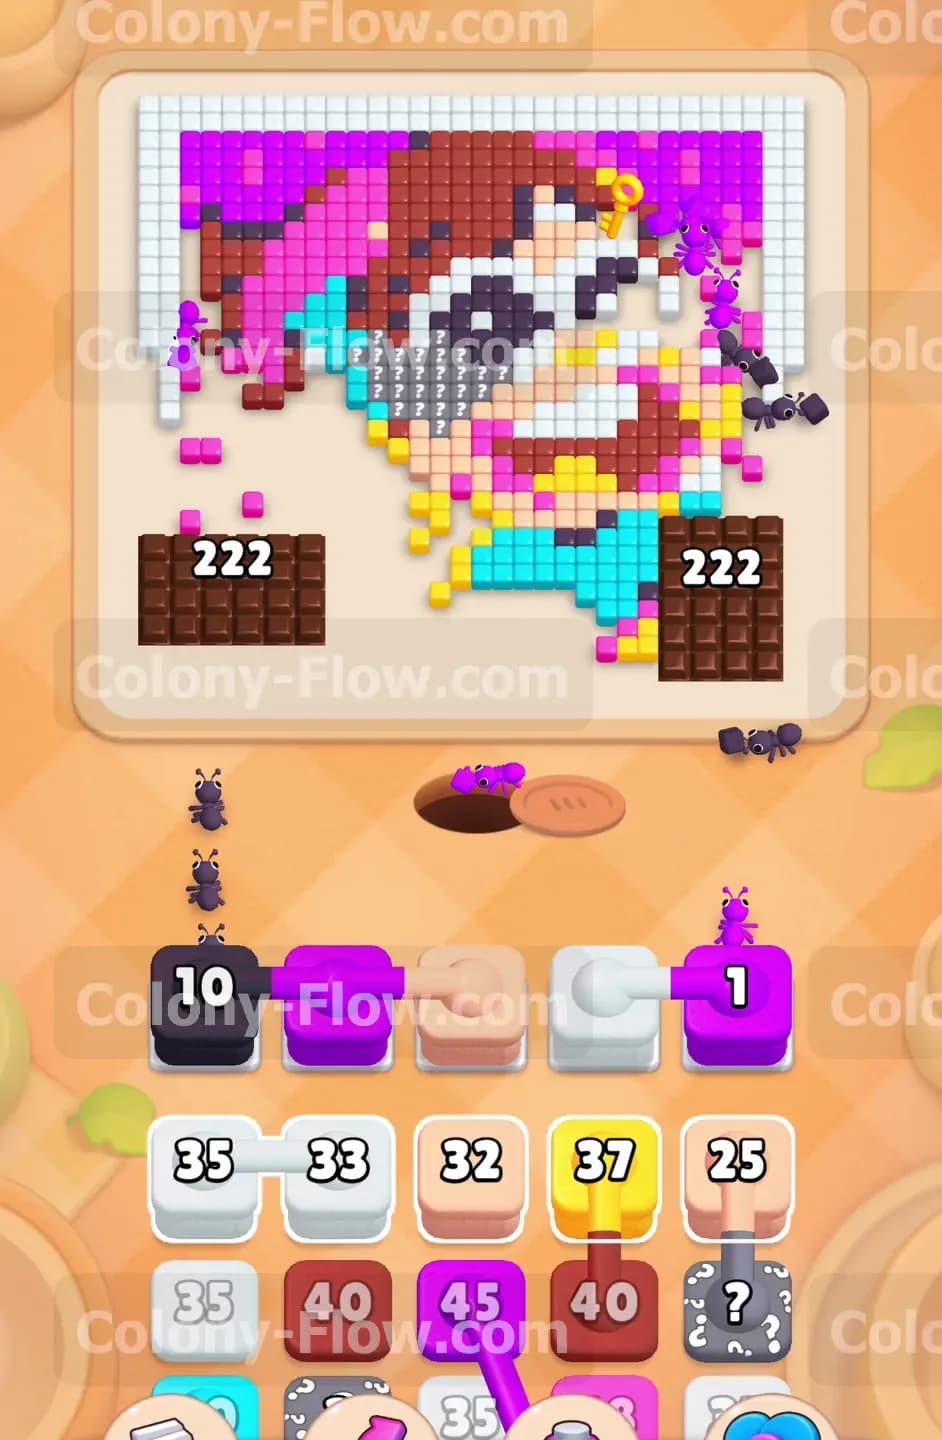
Your tray contains several connected boxes where two different colors are linked together. You will see a black block connected to a white block and a purple block connected to a light pink block. Pulling a connected box is a great way to save space in your five waiting slots because it only takes up one slot initially. However, you must guarantee that both colors have an open path on the board. The ants will process the first block completely before the second block activates. I always double check the board layout before touching a connected box. If the first color clears but the second color is completely blocked, your waiting slot becomes frozen. Take your time and verify that both the purple and light pink paths are open before making your move.
Step 4: Collect the yellow keys to unlock your cyan block
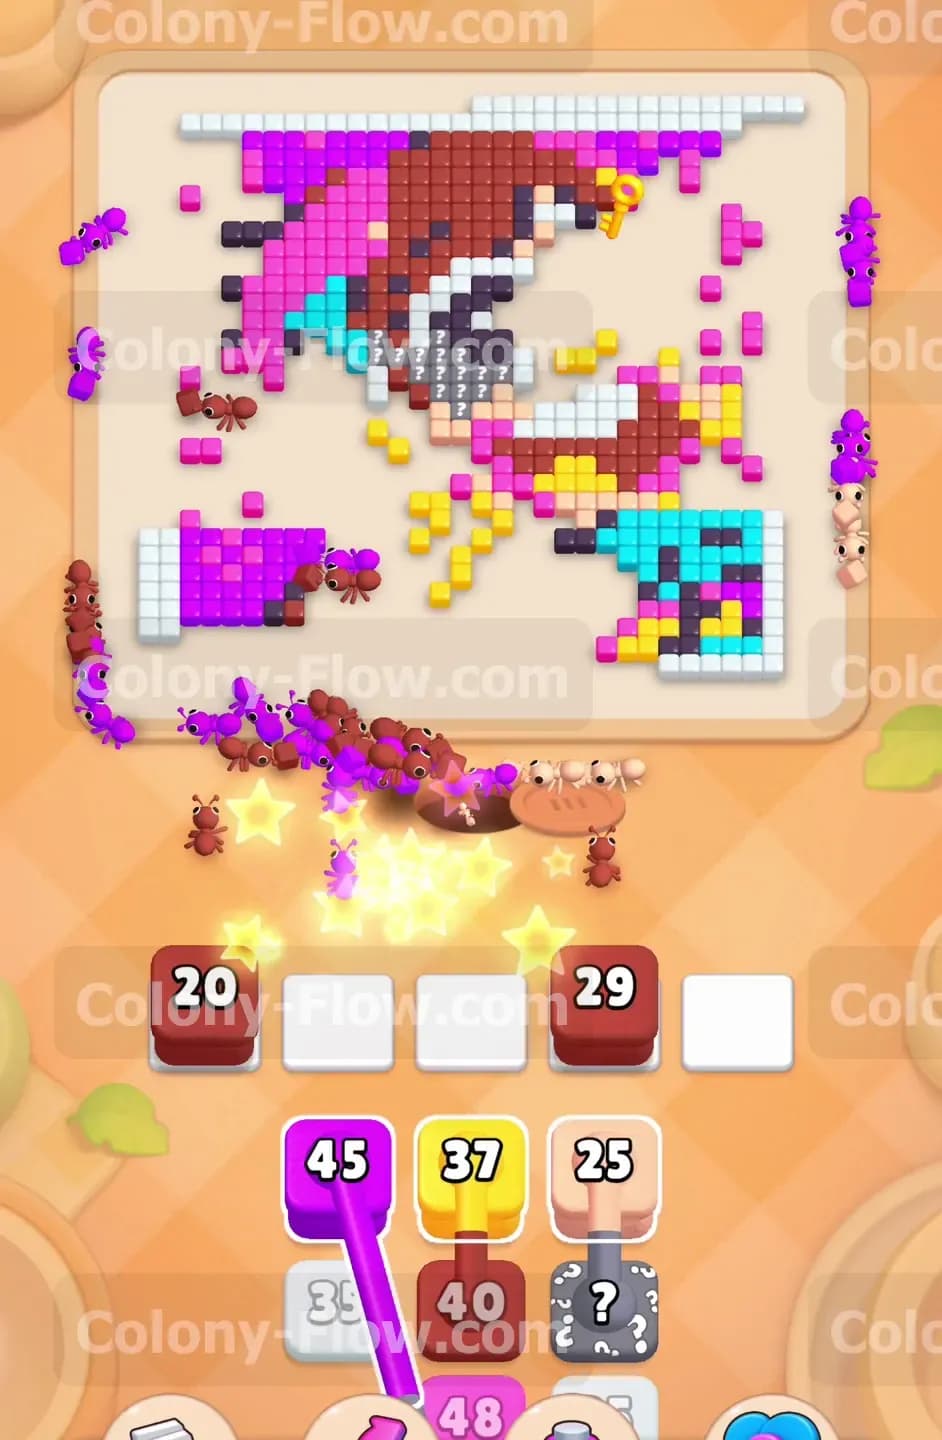
The cyan tiles making up the shirt are trapped under the chocolate, but your cyan block in the tray is also trapped under a lock. You can see the lock icon hovering right over the cyan block in your tray, blocking you from using it. Gathering keys is the only way to remove that restriction. You must collect the yellow keys located in the hair and near the eyes to break that lock. Wait until the brown and light pink ants clear the tiles surrounding the keys. Once a clear path opens up to a yellow key, pull a yellow block into your waiting slot. Yellow tiles are rare on this board, so grab the keys the moment the path opens. The yellow ants will march straight to the keys and grab them. Collecting all the keys shatters the lock on the cyan block so you can use it later.
Step 5: Reveal the hidden boxes once you have empty tray space
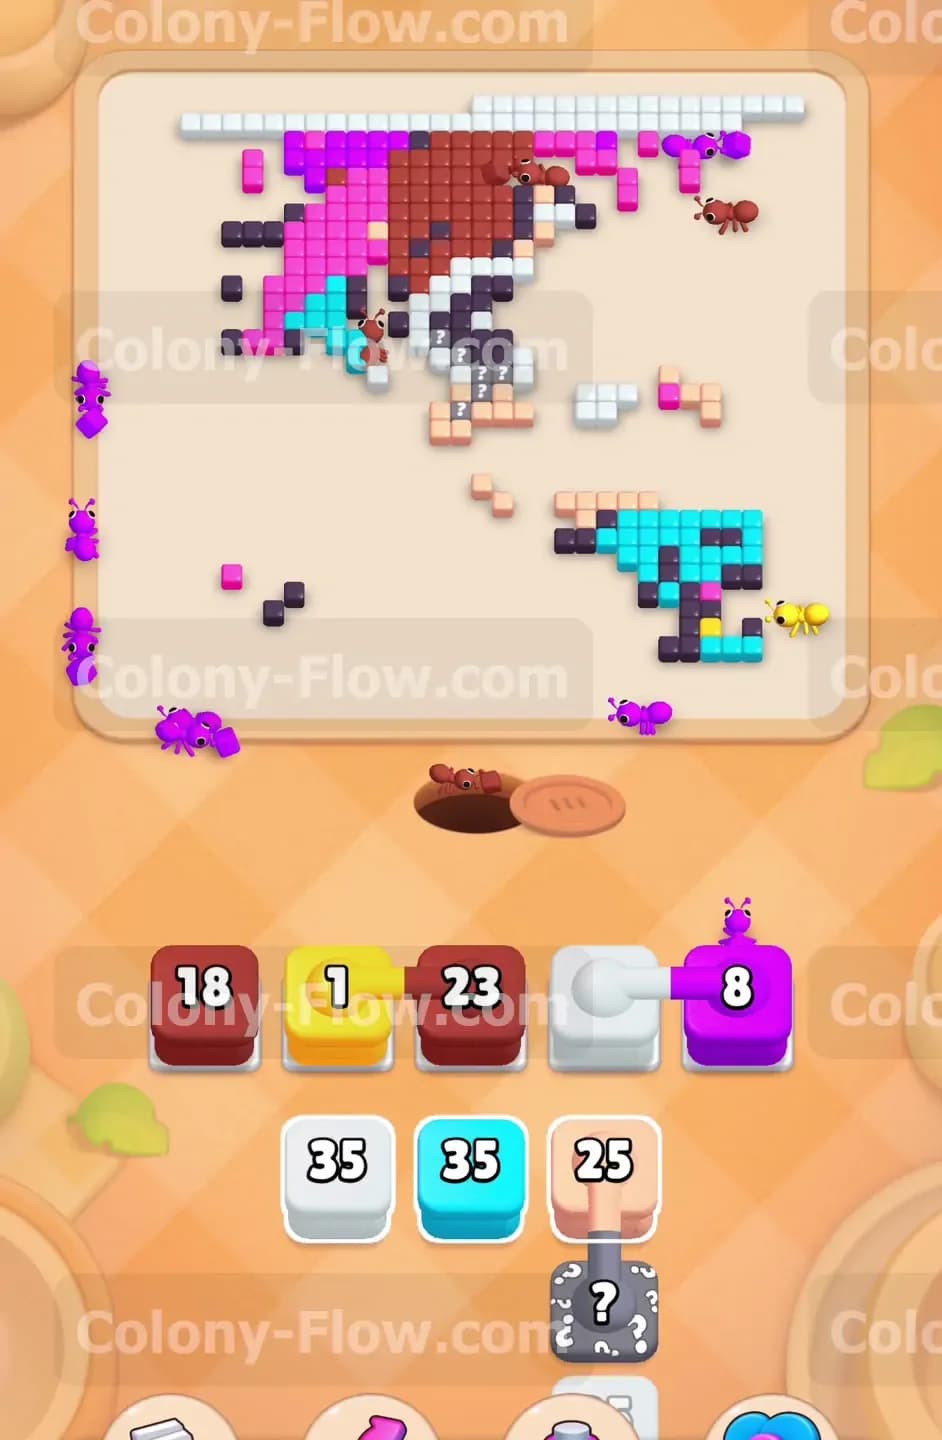
As you clear the visible blocks from your tray, you will uncover hidden boxes marked with question marks. A hidden box conceals its true color until it has a valid path to move onto the board. The hidden mechanics can easily ruin a good run if you are too aggressive. Never pull a hidden box into your waiting slots if your board is severely blocked. You risk pulling a color that has no open path, which will permanently jam one of your five slots. I prefer to leave the question mark boxes alone until the tray is almost empty. Wait until you have large open sections of magenta bow and brown hair available. When you pull the hidden boxes on this level, they reveal themselves as magenta and brown blocks ready to clear the remaining hair and hat tiles.
Step 6: Obliterate the remaining chocolate blocks at the bottom
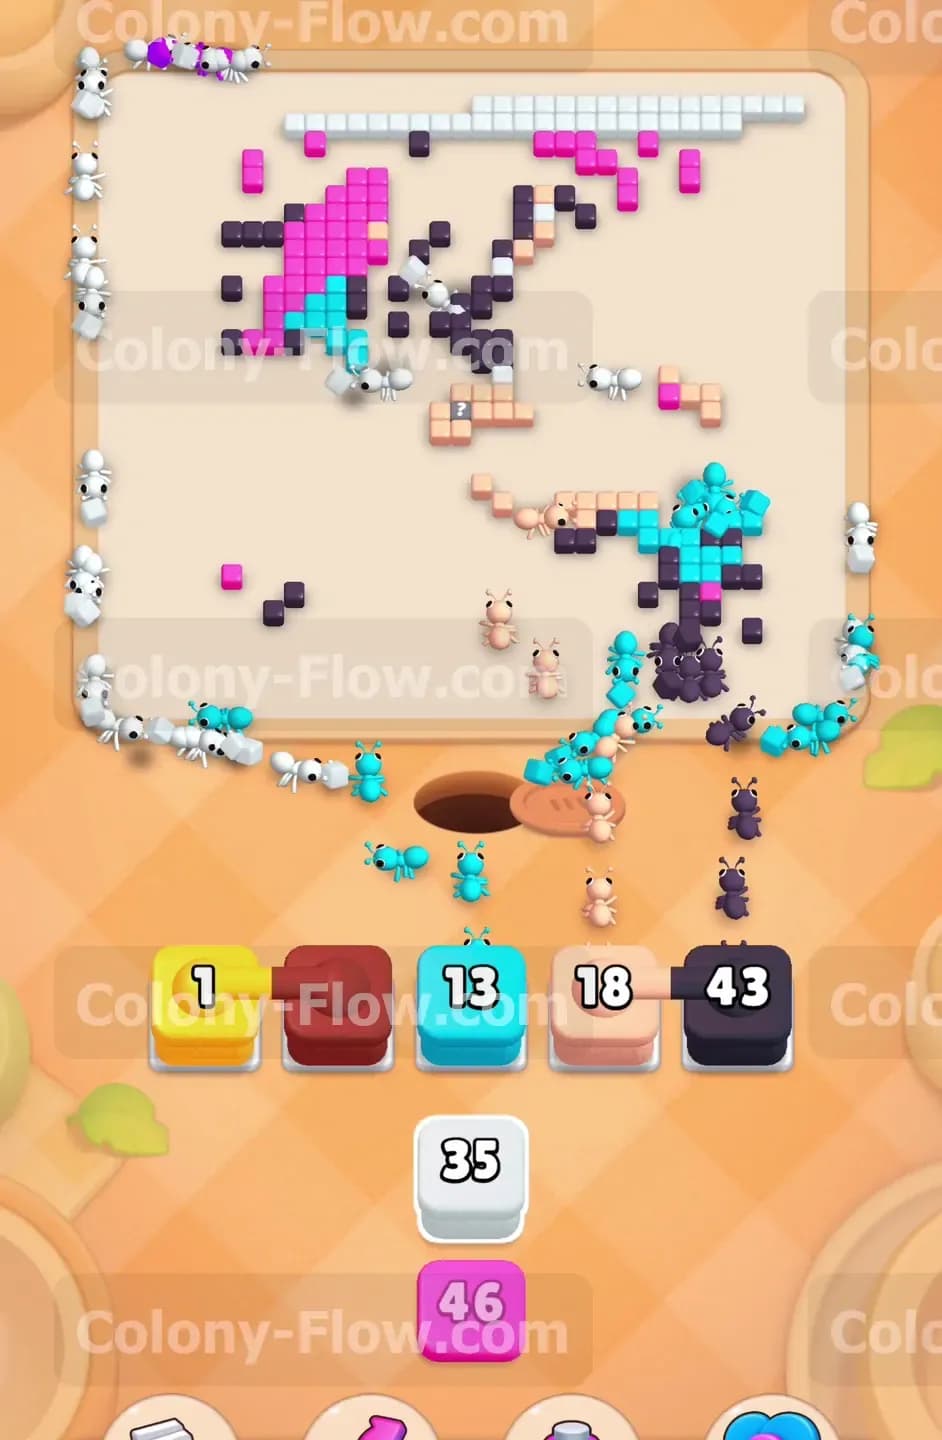
By the time you clear the majority of the face and the hair, your constant ant traffic will have severely weakened the two chocolate blocks. Keep pulling your magenta, brown, and light pink blocks to clear the bottom half of the portrait. Every single tile you clear near the bottom corners strips more numbers away from the chocolate. Watching that massive 500 count hit zero is incredibly satisfying. Once the chocolate breaks, a massive chunk of the board suddenly becomes available. This massive clearance finally exposes the bright cyan tiles of the shirt underneath. This is the turning point of the level where the pressure on your waiting slots finally drops.
Step 7: Deploy the unlocked cyan block to clear the shirt
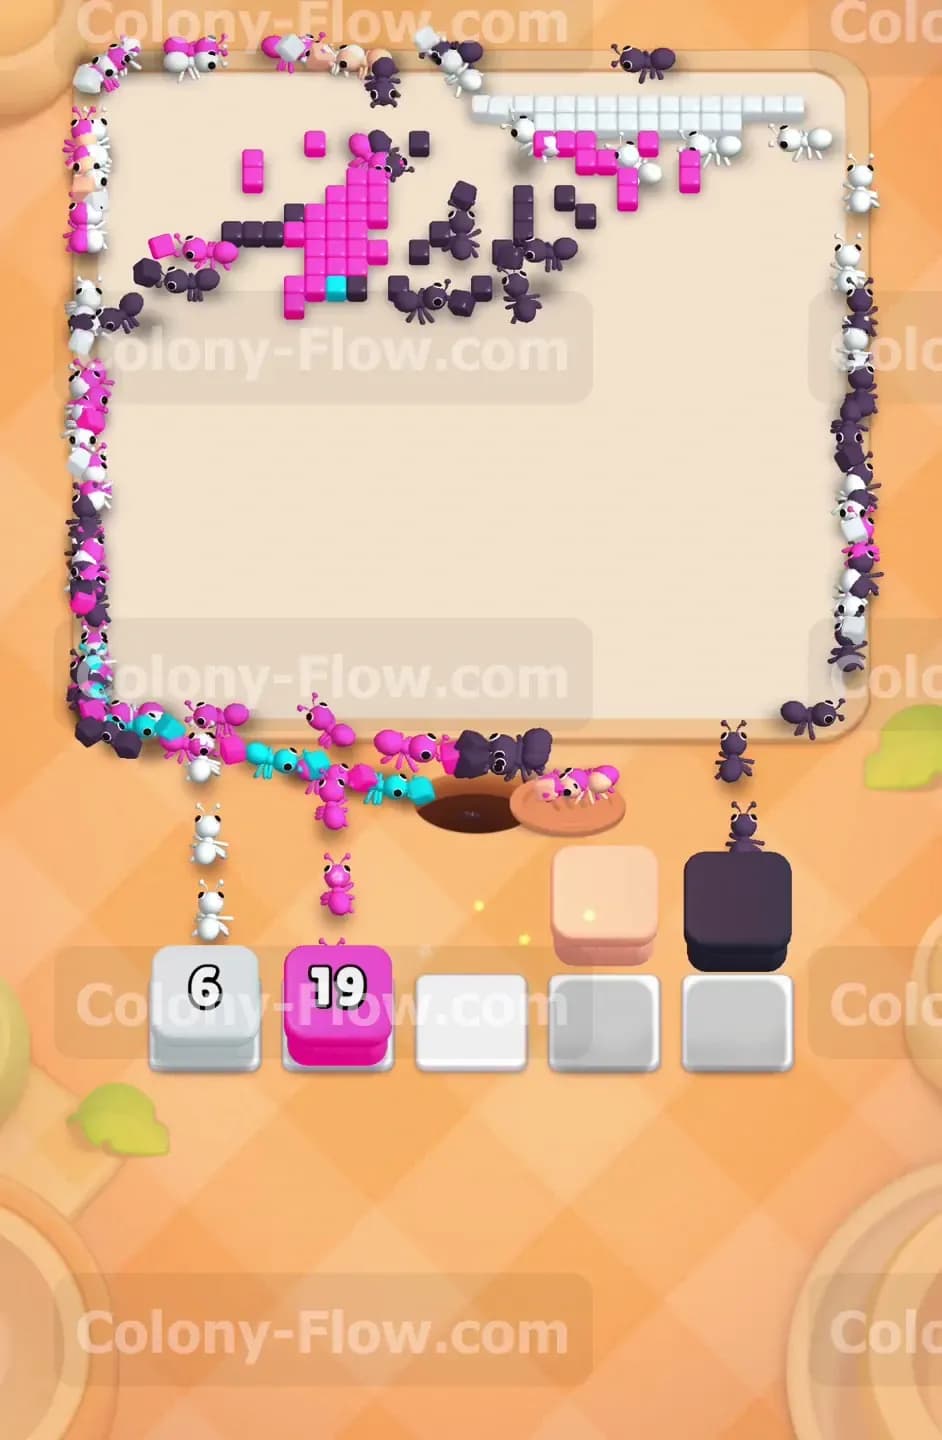
Now that the yellow keys have unlocked your cyan block and the chocolate is completely gone, you can finally clear the bottom right section. Pull the cyan block into a waiting slot. The cyan ants will flood out of the nest hole and march down to eat all the cyan shirt tiles. Because this area was protected for so long, the ants have a wide open path to swarm the tiles quickly. Make sure no other colors are blocking the route to the shirt. Watch the large number on your cyan block drop as the shirt disappears from the board. The cyan ants will wrap around the bottom edge and eat up every single blue tile in one smooth motion.
Step 8: Clean up the final magenta bow and white border tiles
The board is nearly empty now, but you still have a few stray tiles scattered around the edges. You will have a few white blocks showing low numbers like 6 and a large magenta block showing 19 left in your tray. It is easy to get careless at the very end and pull the wrong block. Double check the top edges to see exactly where the remaining white and magenta tiles sit. Pull the magenta block to finish off the very top corner of the pink bow. Pull the remaining white blocks to clean up the last few pieces of the white border framing the top of the picture. Once the final white ant finishes its meal, the victory screen will appear. Your waiting slots will empty out completely and you will win the level.
Final Thought
Beating this board requires patience and a steady rhythm to wear down those massive chocolate obstacles without trapping yourself. Always verify your paths before pulling connected boxes or hidden boxes into your tray. If any of these steps feel hard to follow in text, I highly encourage you to watch the video above this article. Watching the exact ant movements in the video will show you exactly how to manage your slots and achieve victory.