Colony Flow Level 620 Walkthrough Solution & Guides | How to solve Colony Flow 620

Guide By Liam Stone
Updated on August 8, 2026
The Level 620 solution is right there in the video above, so read on only if you want the extra detail.
Video doesn't match your screen?
Game updates frequently scramble layouts! Try our AI Screenshot Solver first to find your exact board instantly, or report broken guides to our team.
Welcome back to another puzzle guide. Today we are tackling Colony Flow Level 620. This board features a beautiful pixel art planet surrounded by the dark vastness of space. You face some heavy obstacles right from the start including thick chocolate blocks and a massive hungry door. I will walk you through exactly how to manage your tray and keep your ants moving so you can beat this board on your first try.
Colony Flow Level 620 Overview
What You Are Working With
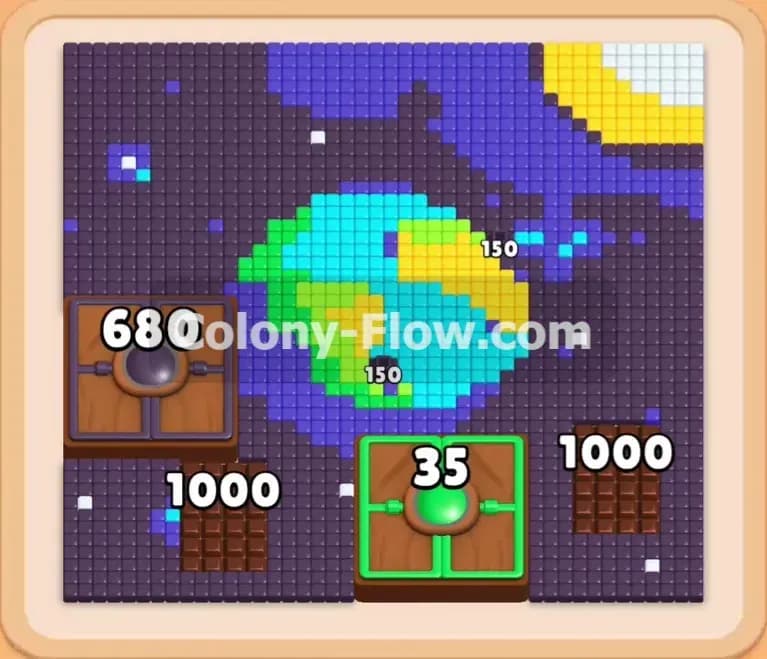
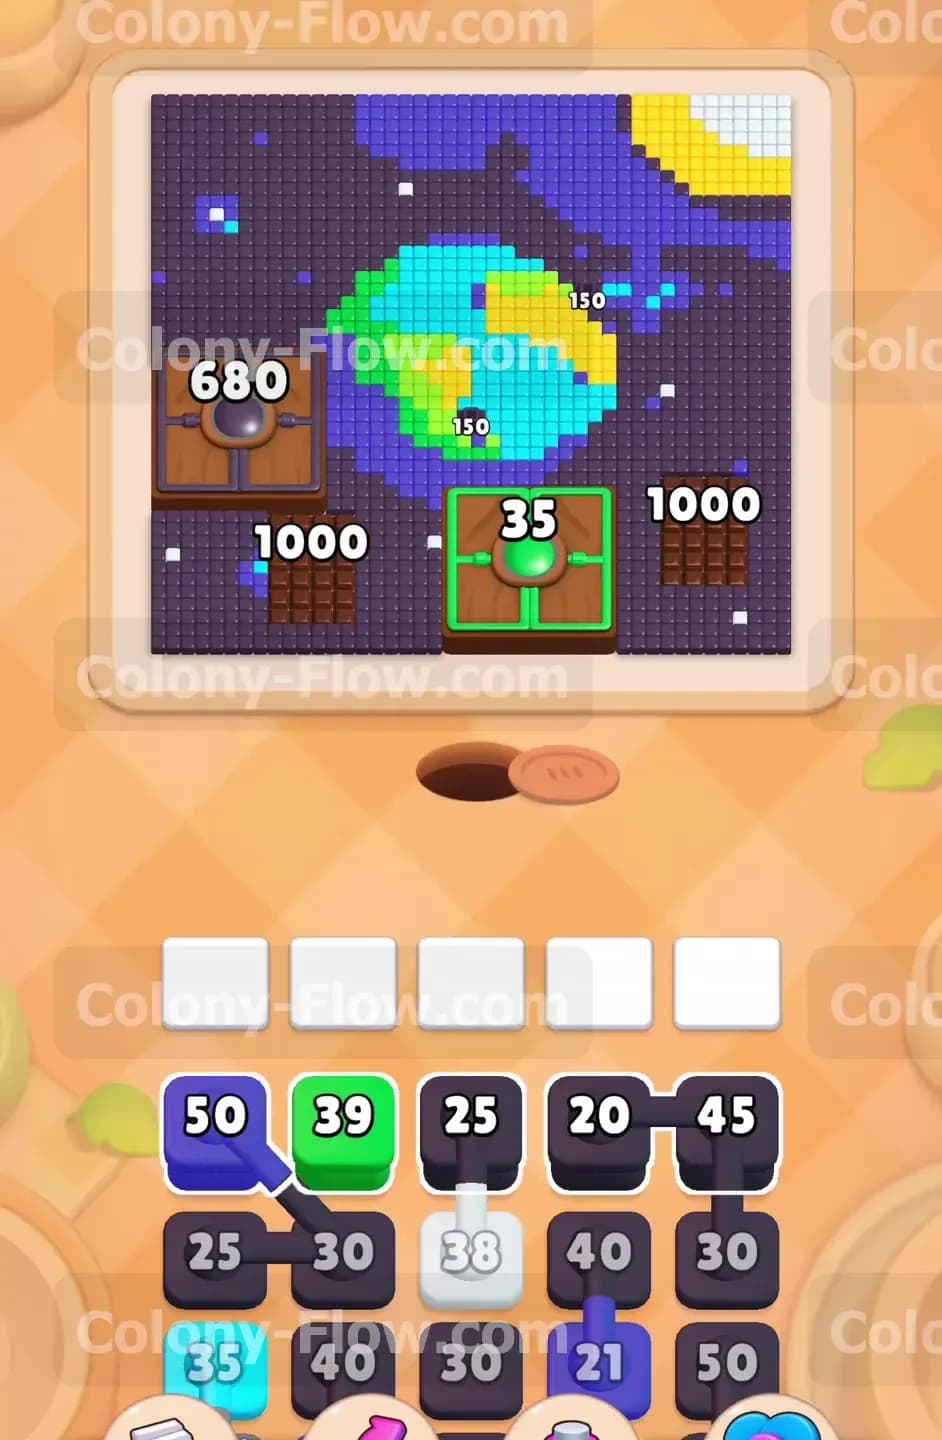
The layout of Level 620 commands your attention immediately. The picture shows a bright blue and green planet floating in a very large dark blue space background. The sheer number of dark blue tiles dominates the board entirely. You also have some serious obstacles blocking your path. Two large chocolate blocks sit on the board with a starting count of 1000 each. These chocolate blocks cover a huge amount of food tiles and they will not budge until you clear the surrounding areas. On the left side of the planet sits a hungry door with a starting requirement of 680. Right in the middle of the board you will find a locked green tile starting at 35. Looking at your starting tray you have a mix of large number blocks. You see a dark blue 50 block connected directly to a dark blue 30 block. You also have a green 39 block and several black and light blue blocks waiting for their turn.
What It Takes to Clear Level 620 Board
Winning this level requires a massive initial push against the dark space background. You must deploy your highest capacity dark blue blocks early to flood the board with ants. As the ants consume the dark space pixels you will notice the numbers on the chocolate blocks and the hungry door start to drop rapidly. You need to keep up this momentum without jamming your five waiting slots. If you pull up colors that do not have an open path to their matching food tiles your slots will fill up and you will lose. The key is to clear enough dark space to open paths to the green yellow and light blue planet tiles in the center. Once you expose the planet you can cycle through your tray much faster and never dead end the board.
Colony Flow Level 620 Step by Step Solution
Step 1: Start with the connected dark blue blocks to clear the space background
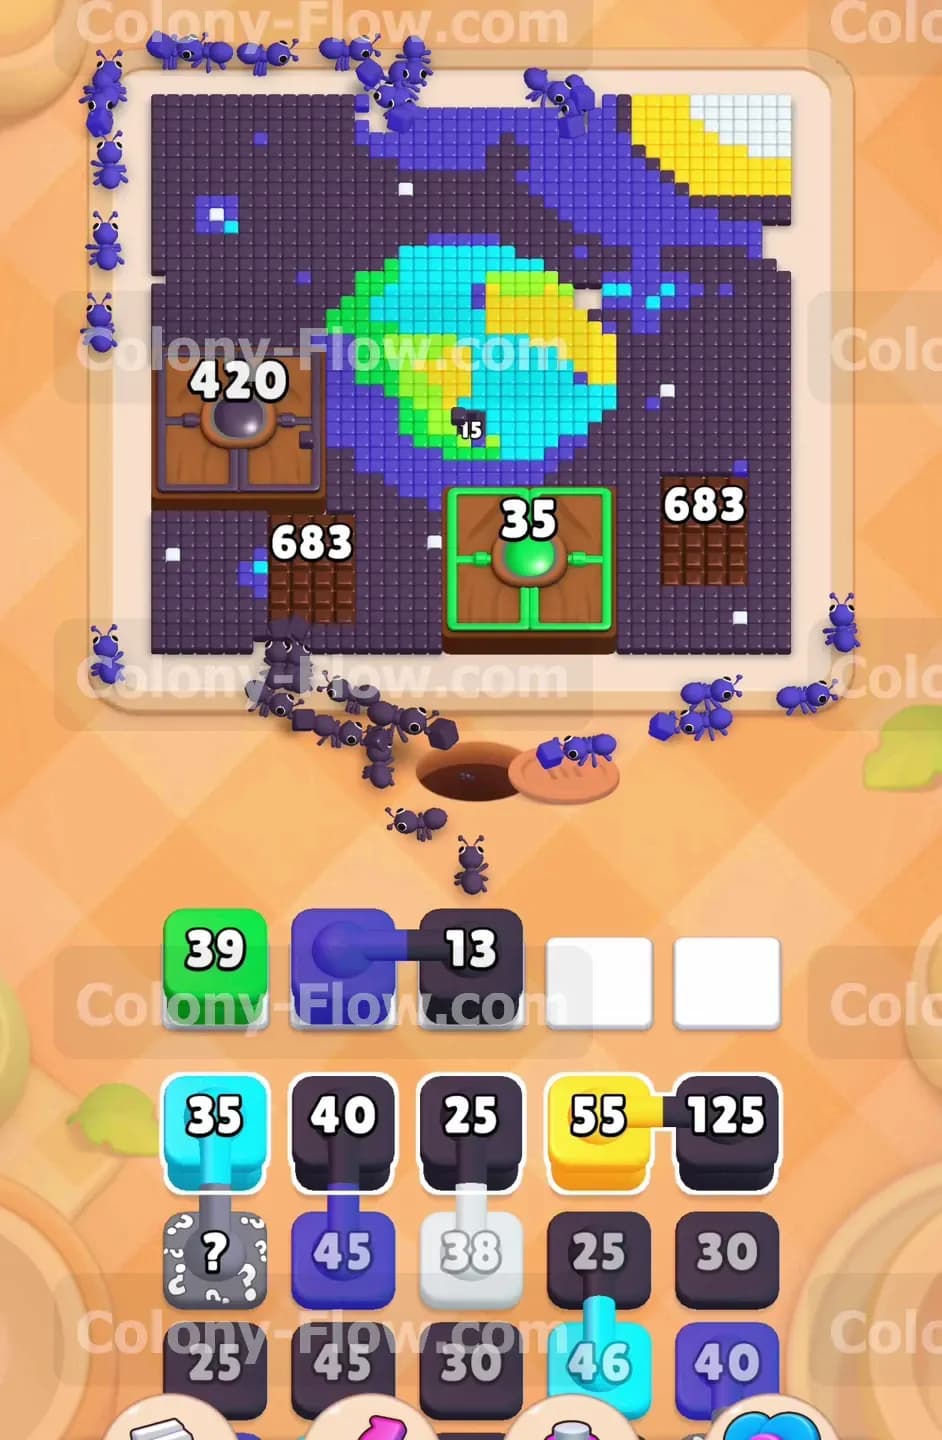
Your first move requires you to tackle the massive dark blue space background that surrounds the planet. Look at your tray and pull the dark blue 50 block that connects directly to the dark blue 30 block. Sending these two blocks up to the waiting slots triggers a massive wave of ants from the nest hole. The ants stream upward and begin eating away at the outer edges of the dark blue space. This initial swarm is crucial because every dark blue tile they consume chips away at the requirements for the hungry door and the heavy chocolate blocks. You will watch the hungry door number drop from 680 down into the 400s. The chocolate block numbers will also fall rapidly. Keep your other slots clear for now so the dark blue ants have plenty of room to work without jamming your tray.
Step 2: Bring out the green block to target the planet landmasses
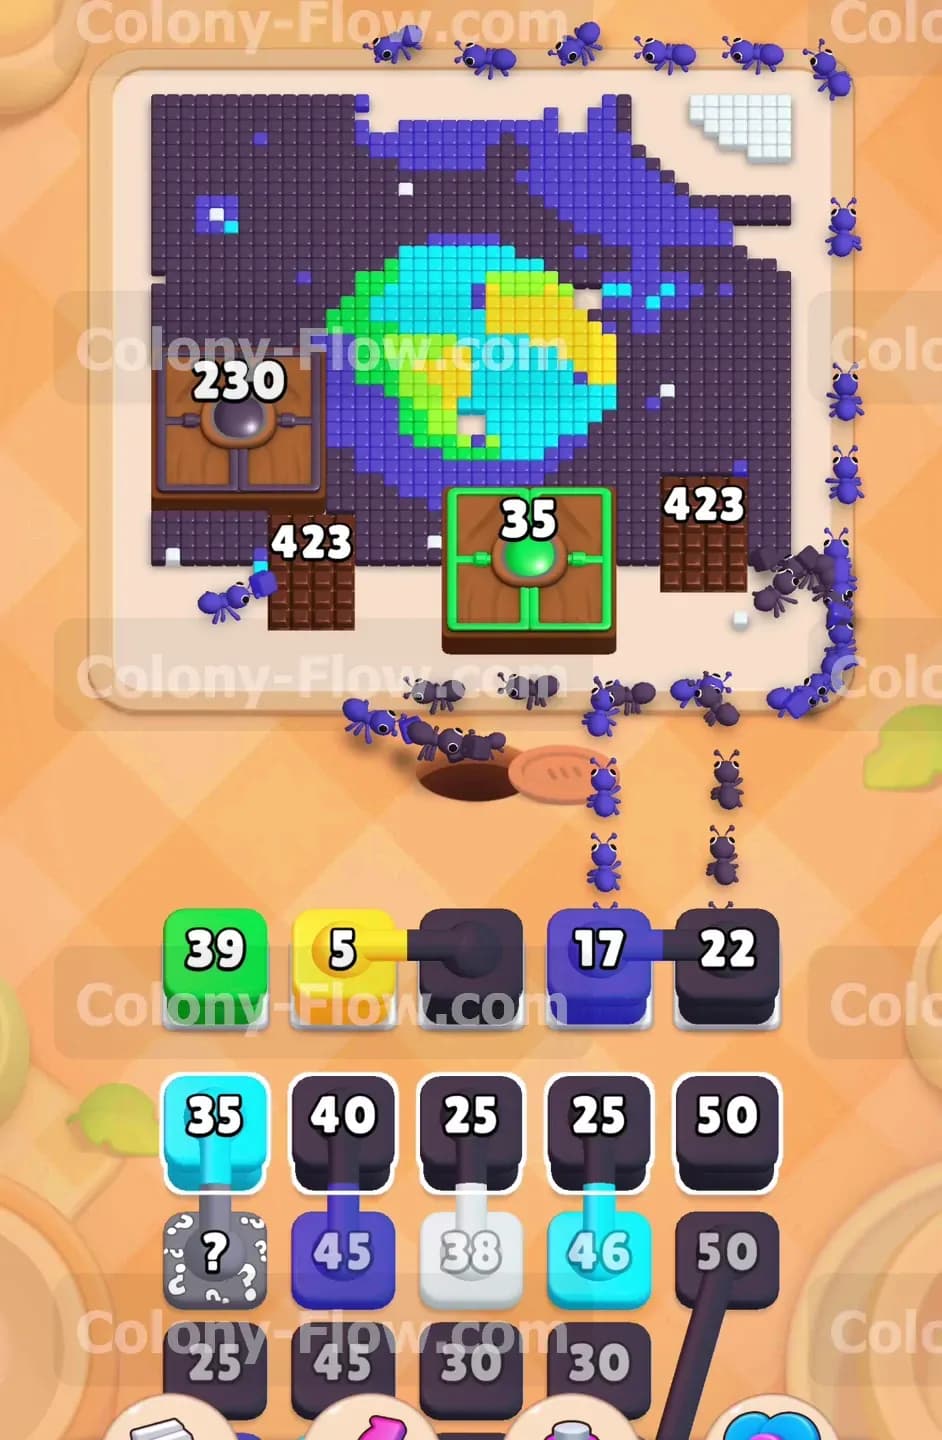
Once the dark blue ants clear enough of the space background you will expose the outer edges of the planet. Now you have a clear path to the green pixels that make up the landmasses. Pull the green 39 block from your tray and place it into an open waiting slot. The green ants will immediately exit the nest hole and march past the busy dark blue ants to reach the center of the board. They will start clearing the green continents on the planet picture. This move is critical because it keeps your tray cycling and prevents a dead end. If you only played dark blue blocks your slots would fill up entirely. Mixing in the green block ensures you always have at least one active path open while the hungry door and chocolate blocks continue to weaken.
Step 3: Deploy the yellow blocks to clear the smaller continents
As the green ants eat away at the larger landmasses they will uncover the bright yellow sections of the planet. Look through your tray options and select the yellow 5 block. Move it up to the waiting area to keep your tray moving. Even though this block holds a small number it plays a vital role in opening up the map. The yellow ants will rush in and clear the smaller continent pixels on the right side of the planet. Clearing these yellow tiles creates a wider path for your future light blue blocks to reach the ocean sections. You will also notice the hungry door count dropping down to 230 as the combined efforts of the dark blue green and yellow ants strip away the board. Your waiting slots remain safe and flowing perfectly.
Step 4: Feed more connected dark blue blocks to clear the upper space quadrant
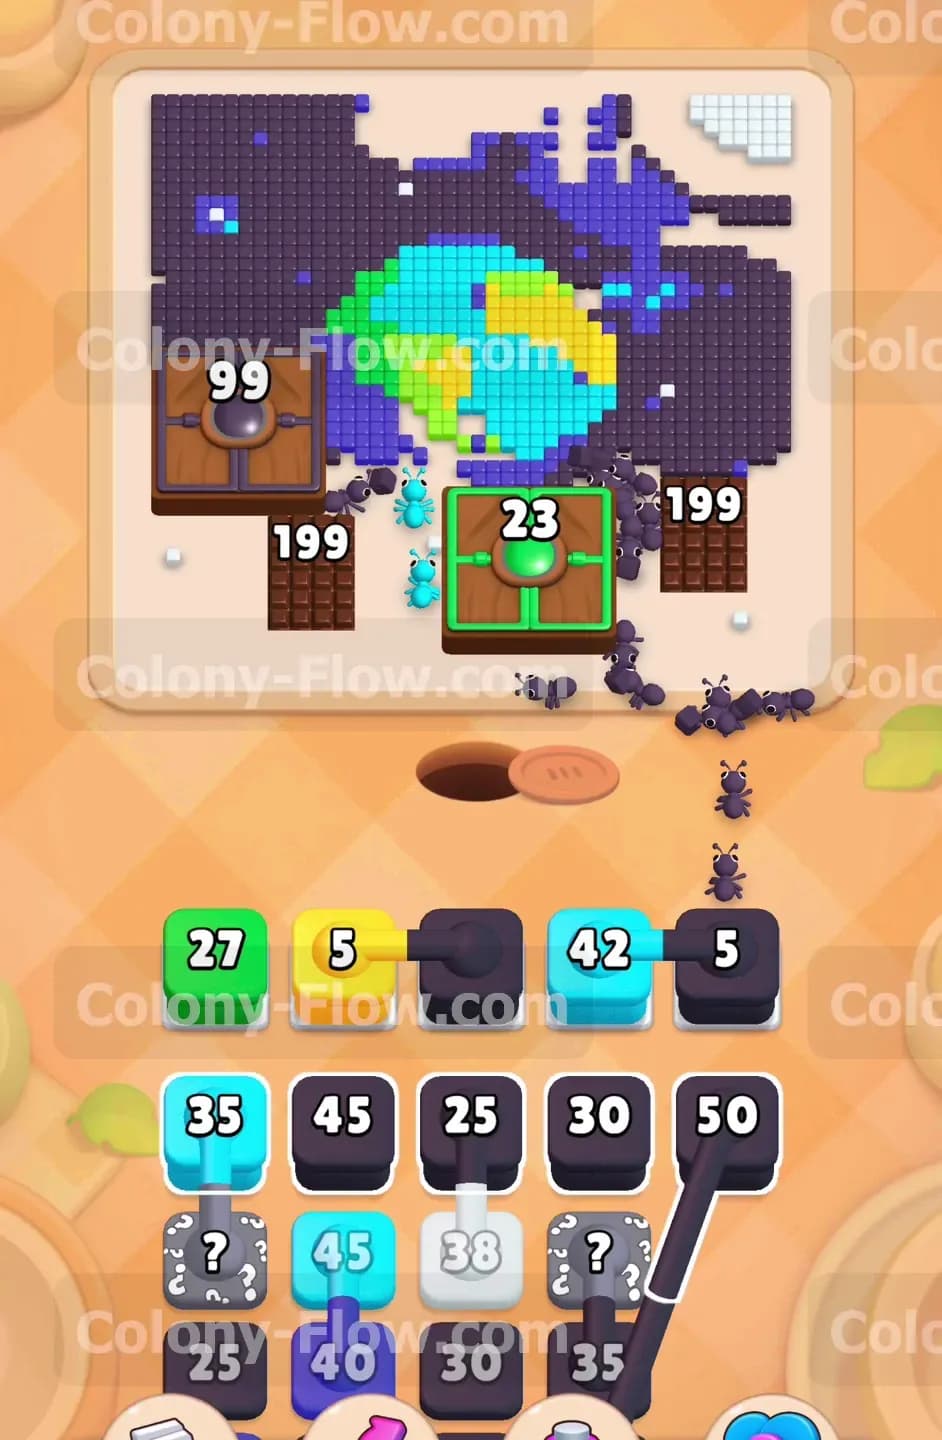
You still have a massive amount of dark space pixels lingering at the top of the picture. Find the next set of connected dark blue blocks in your tray and slide them up to the waiting slots. You will see a dark blue 17 block and a dark blue 22 block ready for action. Sending these into the fray commands a fresh army of ants to sweep through the upper corners of the board. The heavy presence of dark blue tiles means these ants will stay busy for quite a while. This sustained eating action drives the chocolate block numbers below 200. You are now very close to breaking those massive barriers. Always remember to watch your waiting slots closely during this heavy dark blue phase so you do not accidentally pull a color that has no open path.
Step 5: Send in the light blue blocks to consume the oceans
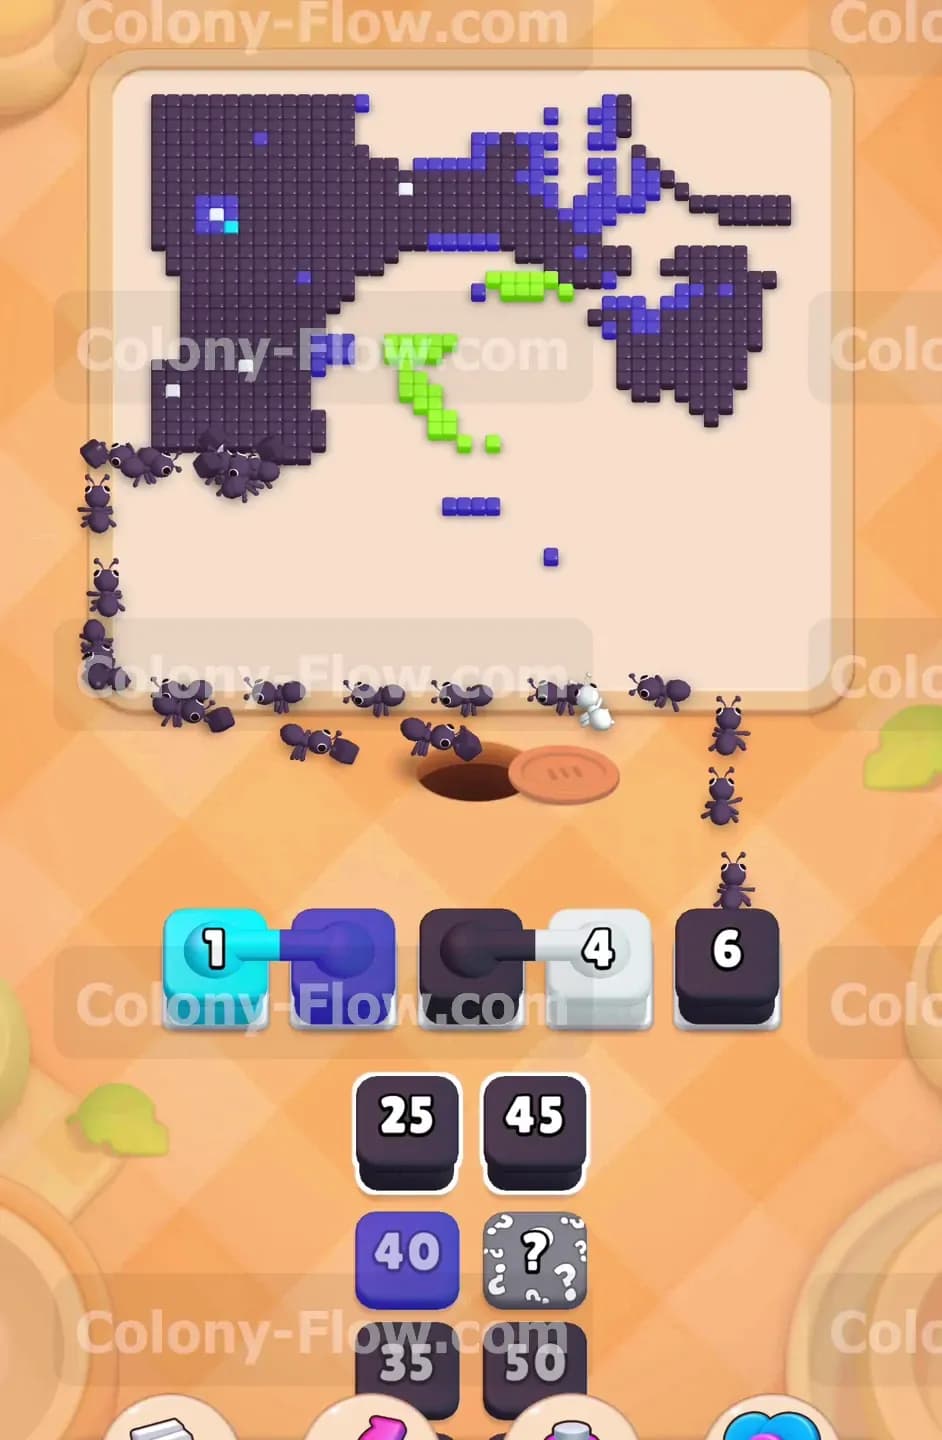
With the landmasses mostly cleared and the upper space thinning out you finally have total access to the light blue ocean tiles. Pull the light blue 35 block into one of your open slots. A large colony of light blue ants will pour out of the nest hole and flood the center of the board. They will systematically consume the water sections of the pixel art planet. This action completely changes the look of the board as the bright center disappears leaving only scattered green pieces and the outer space borders. During this phase the locked green tile in the center drops its requirement count down to 23. You are setting yourself up perfectly for the final cleanup phase by keeping multiple color paths open simultaneously.
Step 6: Break the chocolate blocks and open the hungry door completely
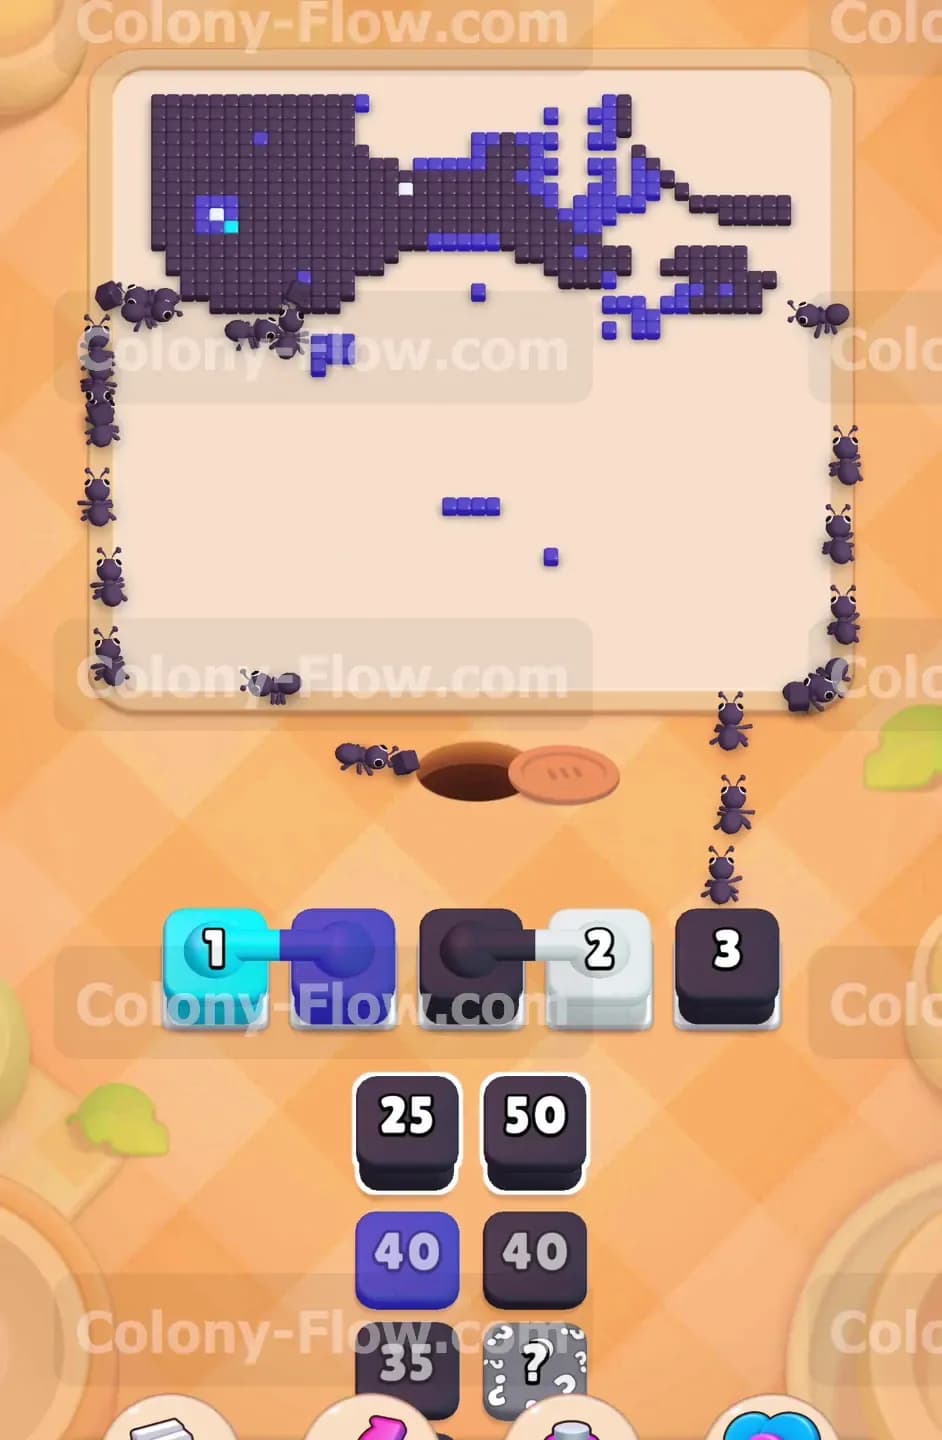
This is the turning point of the level where your persistent clearing finally pays off. Keep feeding any available dark blue blocks into the active slots. As the ants consume the dark blue tiles right next to the special structures you will achieve a breakthrough. The hungry door requirement drops to zero and the door springs open. At the exact same time the heavy chocolate blocks finally shatter and disappear from the board entirely. Breaking these obstacles clears away the most restrictive parts of the board and reveals the final hidden tiles underneath. You now have wide open paths leading to every remaining corner of the screen. Your waiting slots are completely safe from jamming now because the ants can easily reach any tile they need.
Step 7: Finish the locked green tile in the center to clear the planet
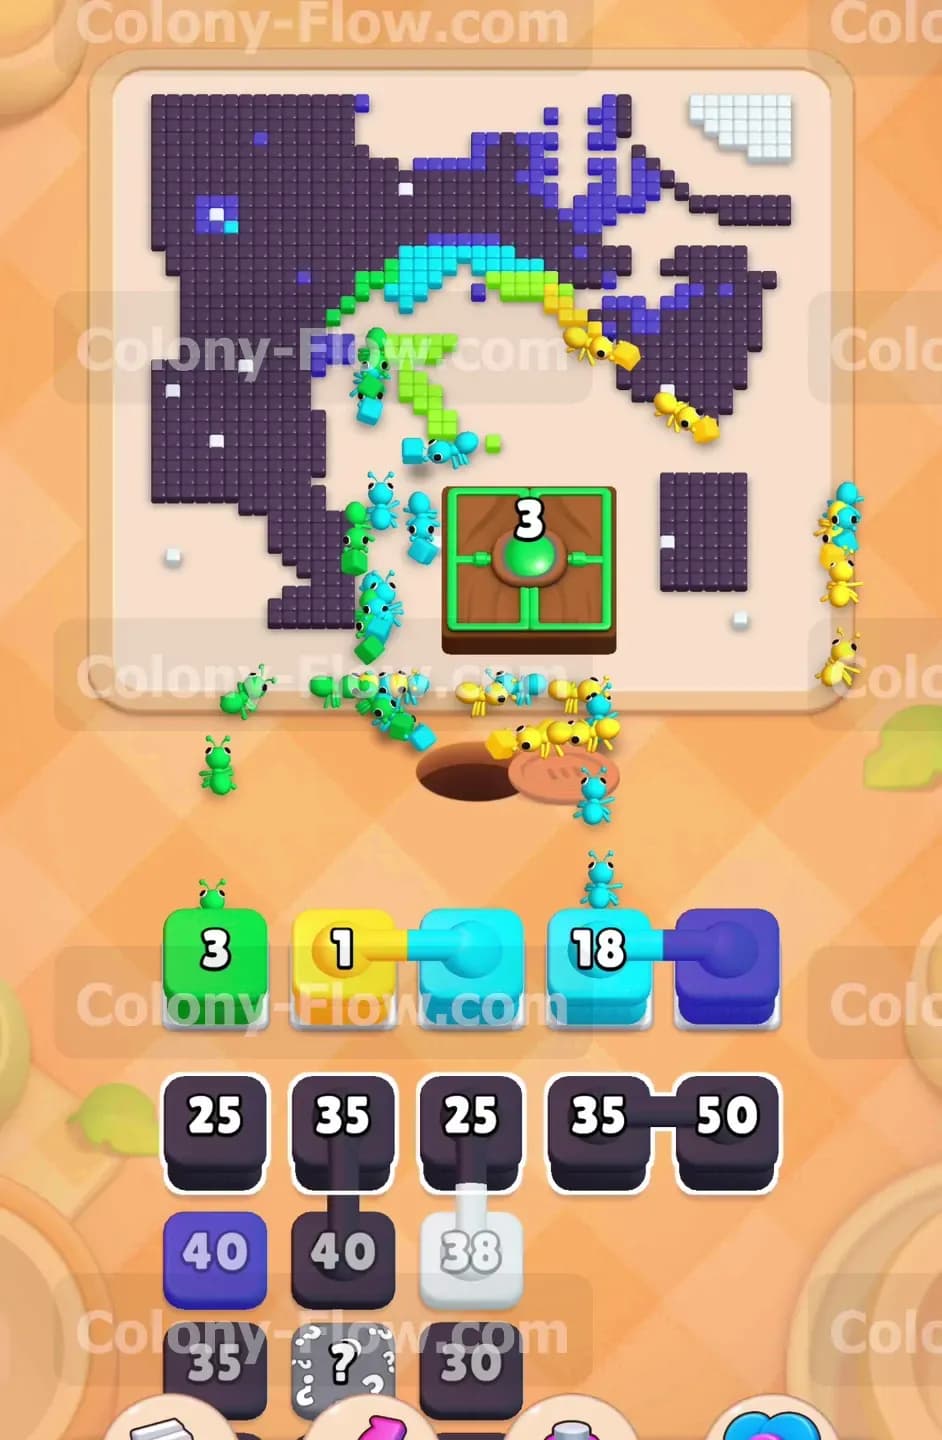
You can now focus your attention on the few remaining green tiles and the locked green tile in the center. Pull your remaining green blocks into the tray including the green 3 block. The ants will quickly march up the wide open center path and consume the final landmass pixels. They will also swarm the locked green tile and knock its requirement down from 3 to zero. The locked tile clears from the board completely leaving a massive empty space in the middle of your screen. You have successfully deleted the entire planet from the pixel art picture. Only the dark borders of space remain to be cleared.
Step 8: Deploy the large black blocks to eat the final borders
Now that the center is totally empty you must deal with the dark black and blue edges of the board. Look at your tray and find the black 40 block connected to the black 25 block. Pull them up into the waiting slots. A huge wave of black ants will emerge and split up to trace the outer edges of the picture. They will march all the way around the empty center to reach the top right and top left corners. The border tiles are spread out so the ants will take a little extra time traveling to their destinations. This is why you saved the black blocks for the end. You have plenty of open waiting slots so the travel time does not put you at risk of losing the level.
Step 9: Empty your tray of the final blocks to win the level
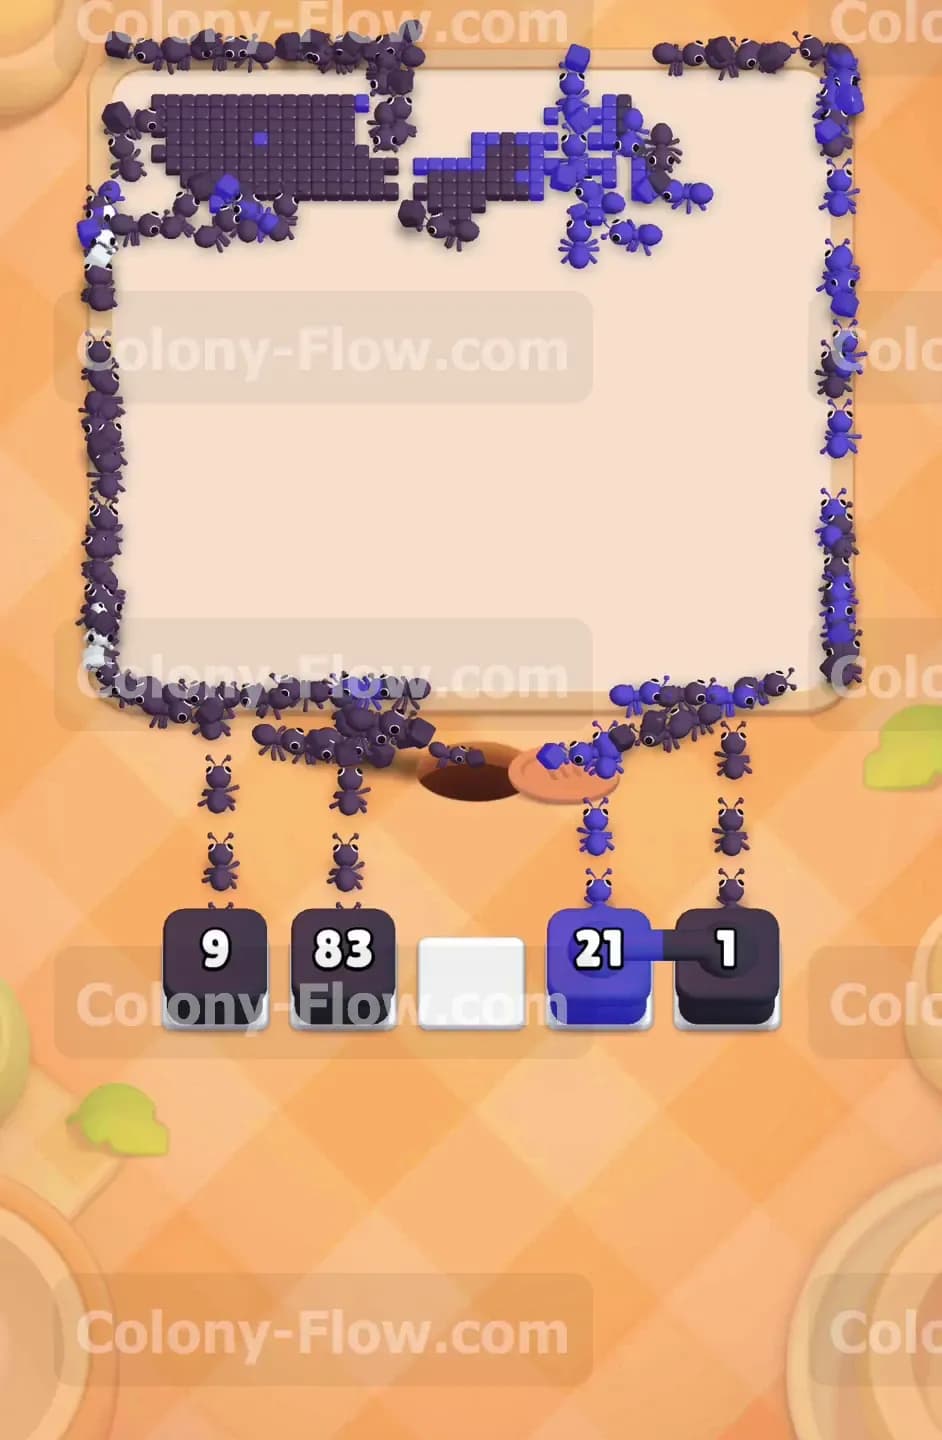
The board is mostly empty sand now with just a thin outline of dark pixels remaining. You have a handful of blocks left in your tray including a black 9 block a black 83 block and a dark blue 21 block. Pull every remaining block up into the waiting slots. Since the board is totally open the ants will simply rush the final few pixels and consume them instantly. The last pieces of the space background vanish into thin air. Your waiting slots clear out completely and the level ends in a decisive victory.
Final Thought
You have conquered a very intimidating board by managing your dark blue blocks perfectly and breaking down the heavy obstacles early. Never let those chocolate blocks scare you into making a bad move that jams your tray. Always keep your ants flowing and your paths open. If you want to see exactly how I timed these final block placements feel free to watch the video above this article for a closer look.