Colony Flow Level 1120 Walkthrough Solution & Guides | How to solve Colony Flow 1120

Guide By Liam Stone
Updated on August 12, 2026
You can follow along with the video above for the complete Level 1120 solution instead of reading below.
Video doesn't match your screen?
Game updates frequently scramble layouts! Try our AI Screenshot Solver first to find your exact board instantly, or report broken guides to our team.
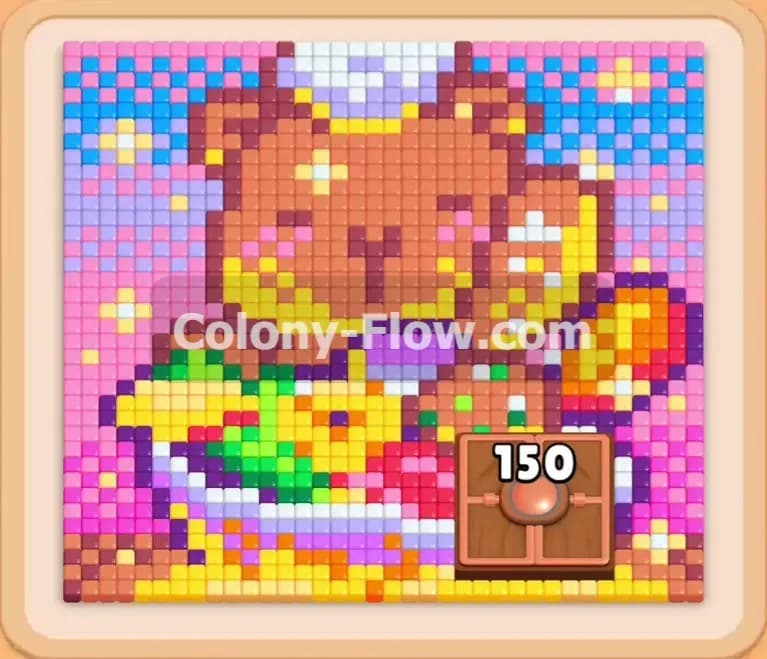
Welcome to Colony Flow Level 1120. This puzzle features a highly detailed pixel art picture of a cute capybara sitting inside a massive fruit bowl. I played this level myself multiple times to figure out the absolute safest path through the block tray. As a puzzle game content creator, I know how frustrating it is when your waiting slots jam up right at the end of a long level. You need to manage your tray space perfectly to avoid a dead end. I will walk you through exactly how I clear this board without ever getting stuck.
Colony Flow Level 1120 Overview
What You Are Working With
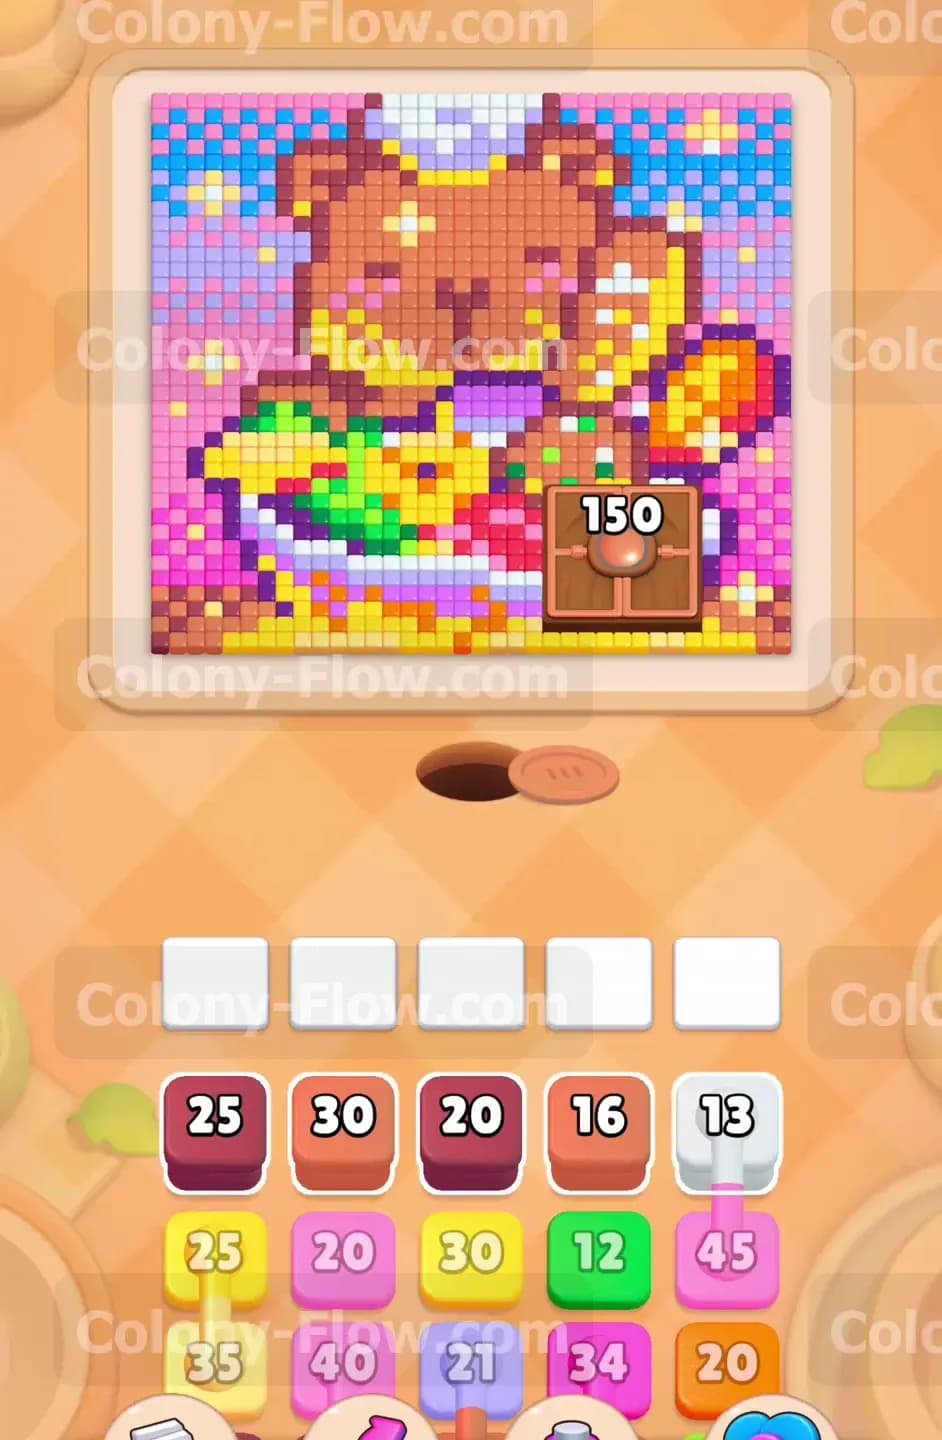
The picture at the top of your screen shows a brown capybara surrounded by a colorful fruit bowl and a bright sky background. The colors include a massive pink outer border, blue and white sky tiles, green leaves, bright yellow fruit pieces, and the brown capybara itself. Right near the bottom right area of the capybara sits a large wooden box with the number 150 on it. This is a Hungry Door. You have to feed it 150 ants to break it open and access the tiles hidden behind it. This door acts as the main obstacle for the entire middle section of the puzzle.
Your tray holds a wide variety of colored numbered blocks stacked in multiple rows. You will see maroon, pink, orange, white, yellow, and green blocks right from the start of the level. As you progress deeper into the tray, you will also encounter Connected Boxes. These are two separate color blocks physically glued together with a small pipe. When you pull one of these into your waiting slots, the attached block automatically comes with it. This means you must have two empty waiting slots available to pull a connected pair. If you only have one slot open and try to pull a connected pair, you will fail the level instantly.
What It Takes to Clear Level 1120 Board
Clearing Level 1120 means feeding your ant colony every single pixel in the capybara picture. The ants spawn from the dark nest hole at the bottom of the board and need an open physical path to reach the matching colored tiles. You pull blocks from the tray into your five waiting slots to command the ants. The ants read the color in your slots and march toward the matching pixels on the board. The number on the block dictates how many ants will spawn to eat that specific color.
The main rule of the game is simple but unforgiving. You lose the level if all five waiting slots fill up and no ants can reach the matching colors on the board. You must constantly watch the picture to see which outer tiles are currently exposed. If you pull a green block but the green leaves are trapped behind the solid pink border, that green block will just sit idle in your waiting slots. This traps that slot and blocks you from pulling other necessary colors. Never crowd your slots with colors the ants cannot reach yet. Always prioritize the outside edges first to peel the picture away layer by layer until you reach the center capybara.
Colony Flow Level 1120 Step by Step Solution
Step 1: Clear the outer pink border and white sky details
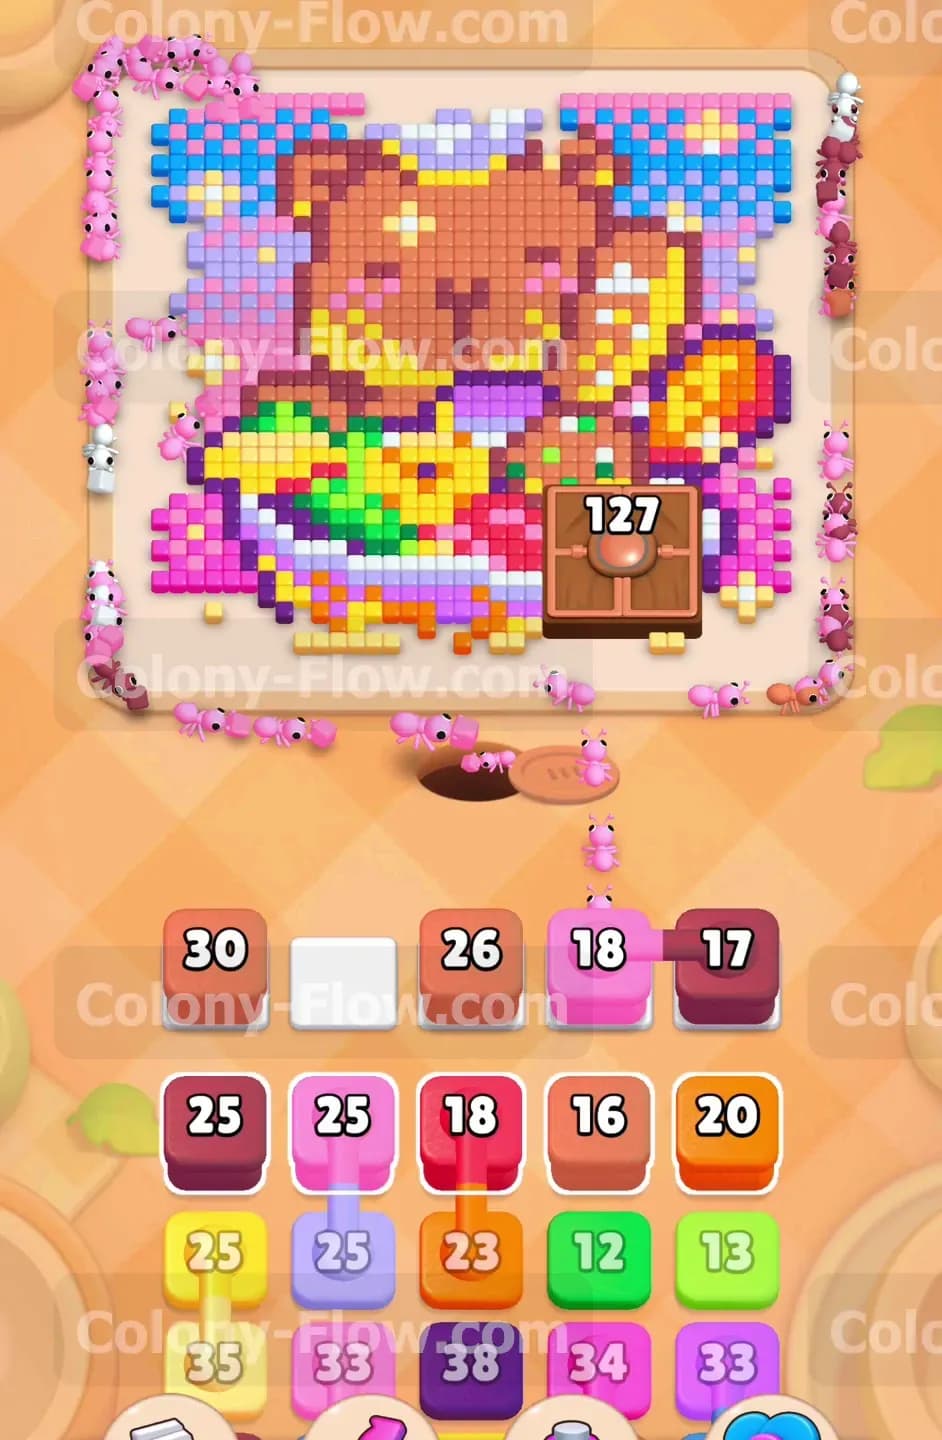
You start with a solid wall of pink tiles wrapping around the entire outer edge of the picture. This border completely blocks access to the interior shapes. Pull the 30 pink block from your tray first to give the ants an immediate target. The ants will rapidly march up the left and right sides of the board to start eating away this thick boundary. This action opens up the edges of the blue sky and the fluffy white clouds near the top corners. Follow up by pulling the 13 white block and a 20 maroon block. The ants will divide their attention beautifully between the newly exposed white sky tiles and the dark maroon shading on the lower edges of the fruit bowl. Keep your remaining two waiting slots completely empty for now so you have room to react to the changing board.
Step 2: Feed the Hungry Door and clear the maroon shading
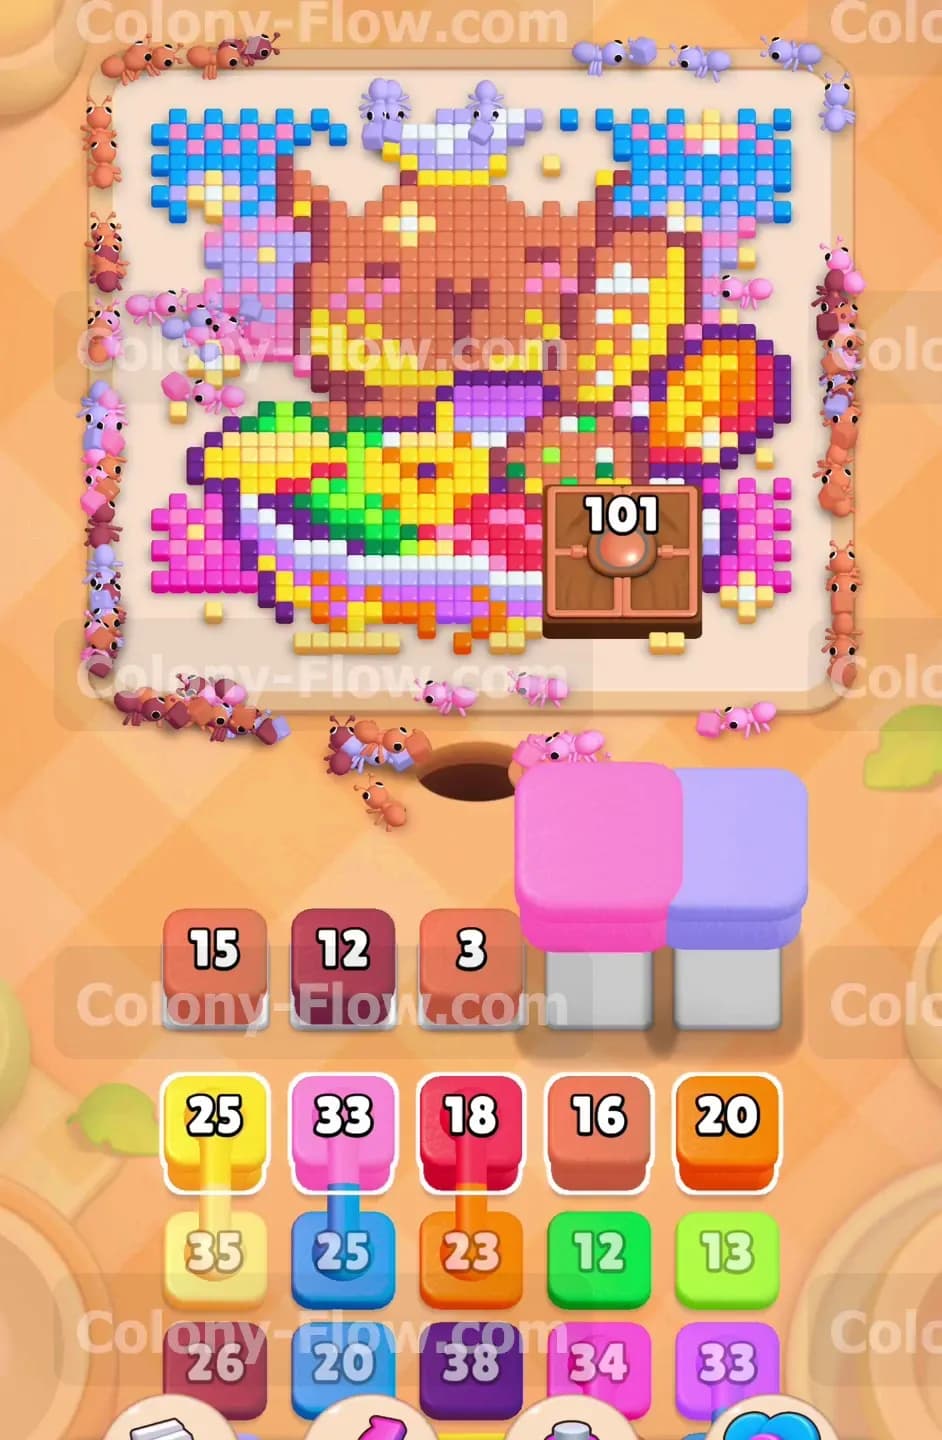
With the pink border broken apart, the ants have a direct path to the 150 Hungry Door box in the bottom right center area. Pull the 25 maroon block and the 26 orange block from your tray. The ants will stream toward the orange fruit pieces and the dark maroon shadows around the capybara neck. At the same time, many ants will start pouring directly into the Hungry Door. You will watch the number on the wooden box drop rapidly from 150 down past 127. Let the ants do their work and do not worry if the box takes a while to break. It is designed to act as a massive speed bump. Just keep feeding the active board colors like orange and maroon into your waiting slots as your previous blocks run out of numbers.
Step 3: Manage your first set of Connected Boxes
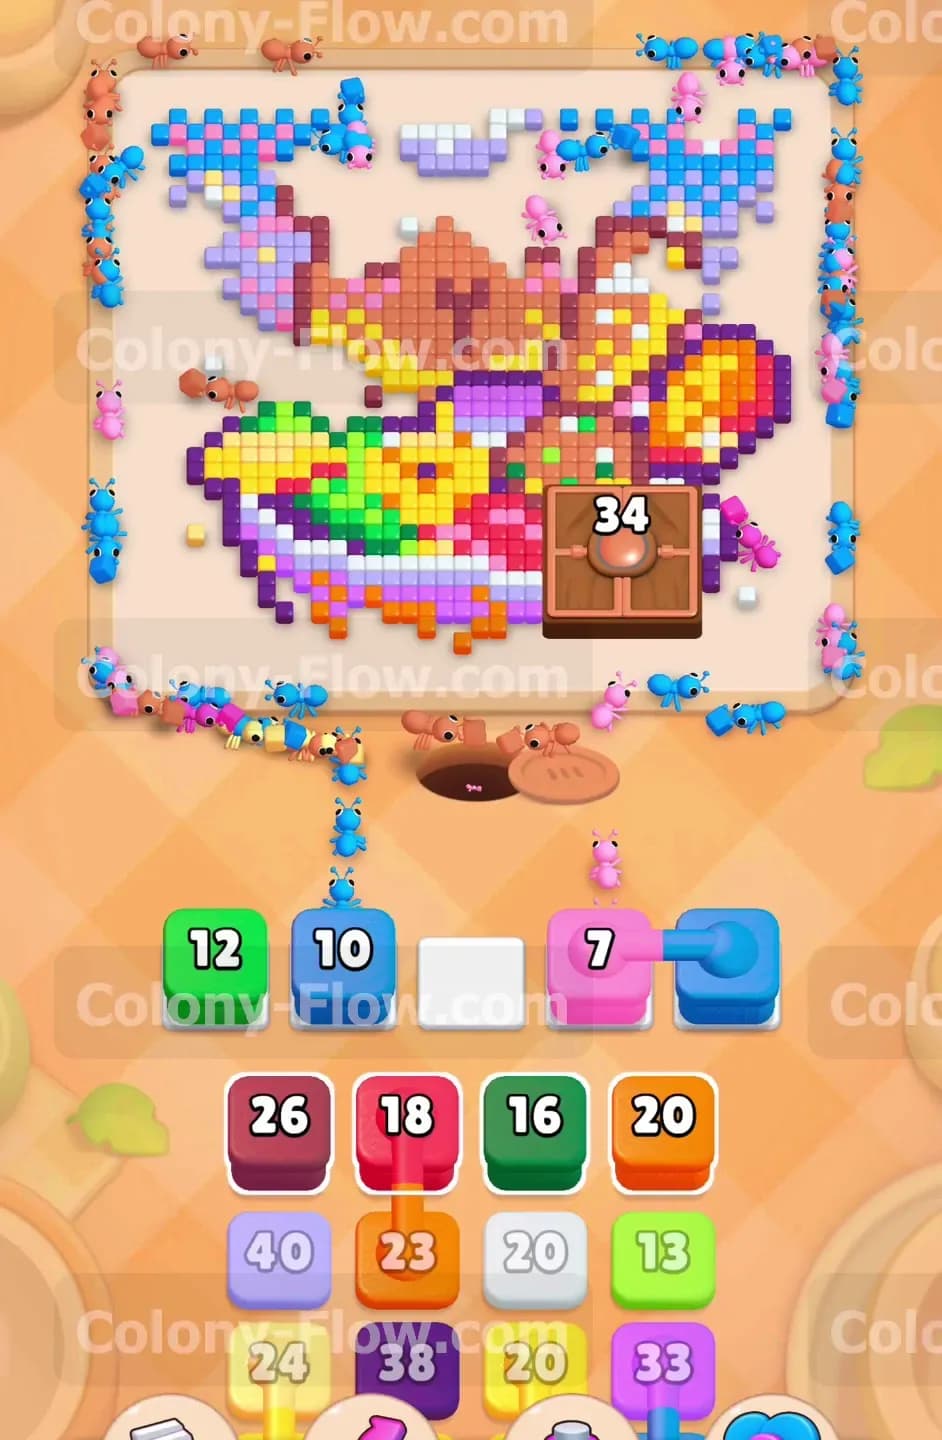
The tray will soon present a pair of Connected Boxes featuring pink and light purple colors. When you tap this pair, they both jump into your waiting slots together because they share a physical link. Make sure you have at least two empty slots before you touch them to avoid a sudden jam. Pulling them will send ants to clear the remaining pink border fragments and the light purple sky accents at the very top of the board. Your slots might look a bit crowded at this exact moment. You will likely have the pink and purple connected pair sitting alongside a 15 orange block and a 12 maroon block. Wait patiently while the ants travel up the long vertical paths. The colony will naturally find the open routes to the orange fruit and the purple sky tiles without failing the level.
Step 4: Remove the blue sky and green leaves
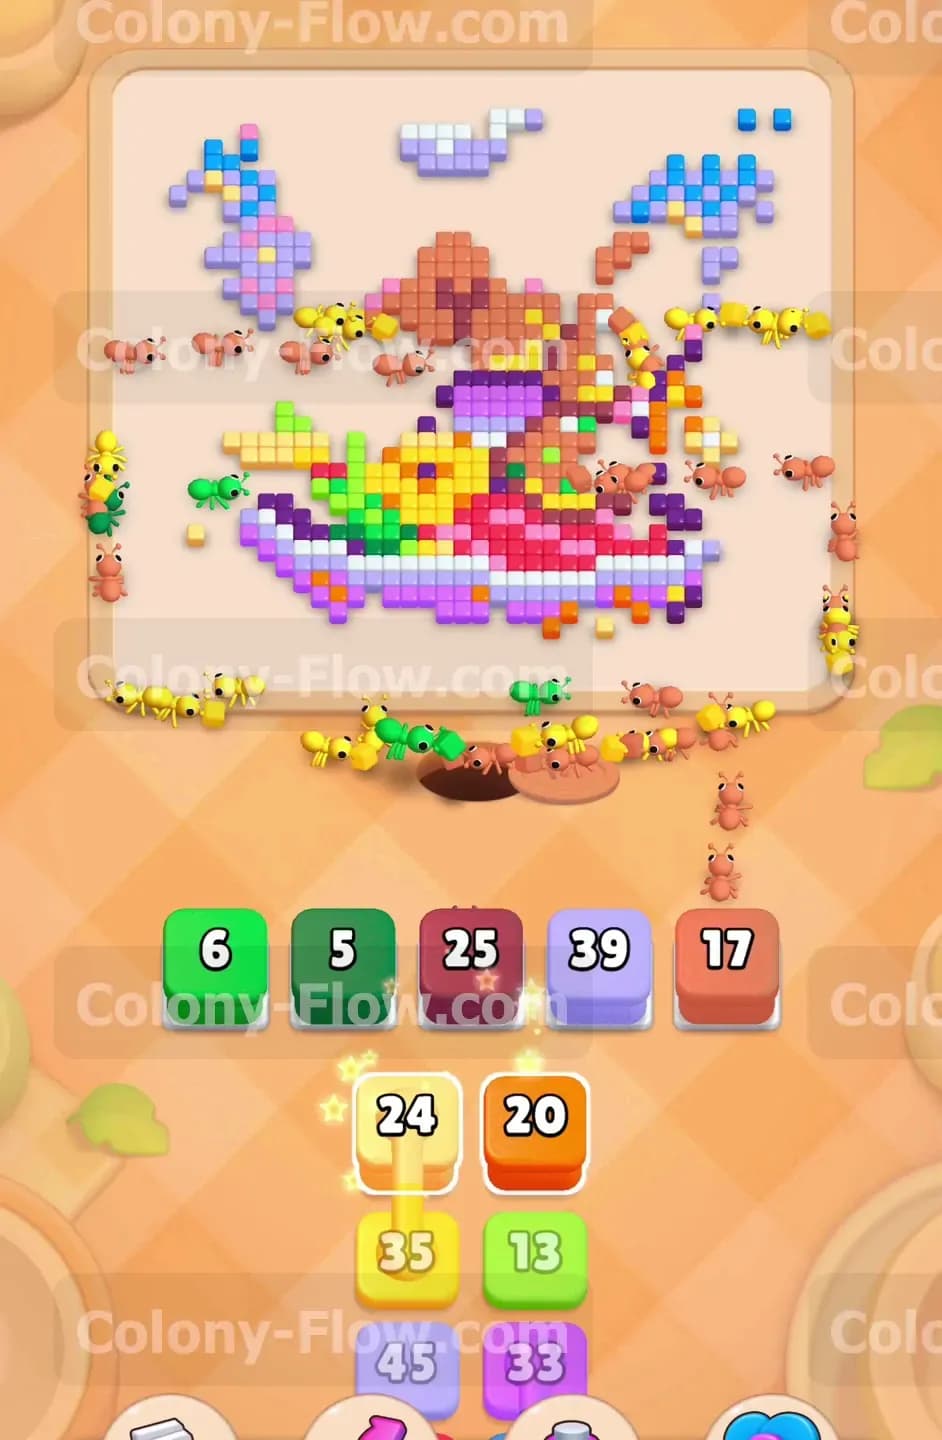
The top half of the picture is now mostly exposed blue sky. Pull the 10 blue block and the 12 green block from your lower tray. The ants will swarm the top left and top right areas to eat the blue pixels surrounding the capybara ears. The green block directs another large group of ants to eat the bright green leaves scattered around the base of the fruit bowl. You will also see another set of Connected Boxes arrive in your tray during this phase. This specific pair includes a pink block and a blue block. Wait until your current blue block finishes completely before you pull the new connected pair. This pacing ensures your ants always have an immediate target and your five slots never lock up. The Hungry Door counter will drop below 34 as you clear these middle colors.
Step 5: Break the Hungry Door and eat the capybara body
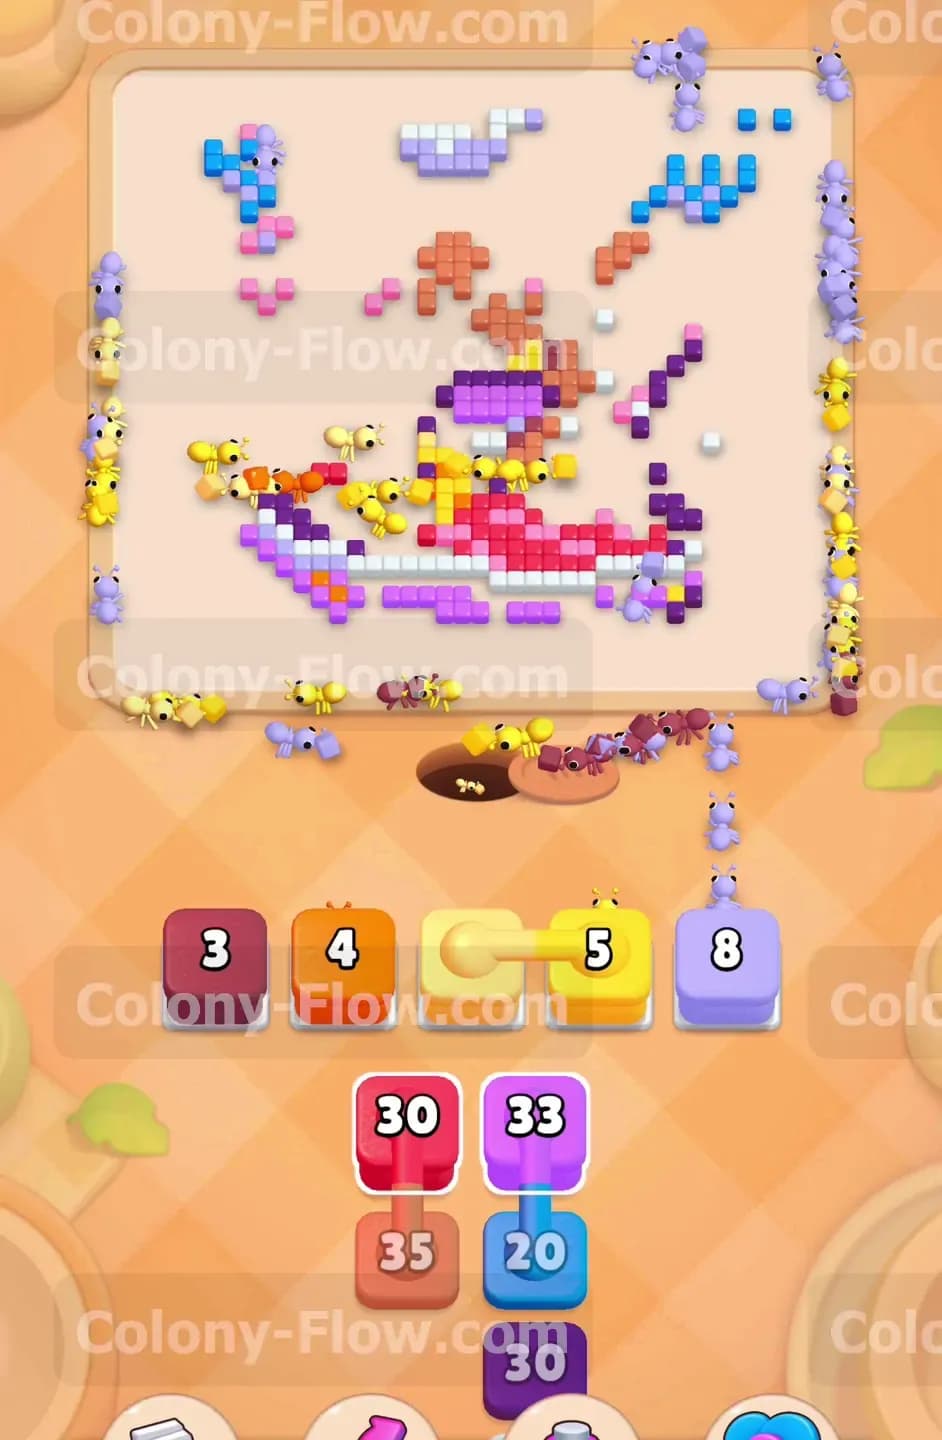
The center of the board is now entirely open to the ants. The main capybara body consists of brown and yellow tiles. You will also notice a red and orange pair of Connected Boxes sitting in your tray. Pull the 32 purple block first to clear the dark purple rim of the fruit bowl. Then pull the red and orange Connected Boxes. The ants will finally break the Hungry Door completely open. With the bulky wooden door gone, the ants gain full unobstructed access to the bottom section of the picture. They will devour the red fruit details and the orange shading on the capybara face. Make sure you keep pulling the 22 maroon block and the 16 green block to clear out the remaining leaves and deep shadows hiding near the bowl bottom.
Step 6: Clear the yellow fruit and finish the picture
The only things left on the board are the bright yellow fruit pieces, the light green accents, and the last bits of the bowl. Your waiting slots will clear out nicely as the physical board shrinks and travel times decrease. Pull the 24 yellow block and the 20 orange block to clear the center mass. You will encounter one final pair of Connected Boxes containing a yellow block and an orange block. Pull them into your slots when you have enough space. The ants will easily path to the remaining yellow fruit and the orange face details. Finally, pull the 30 pink and 33 purple blocks from the very bottom of your tray. The ants will sweep through the last few pixels of the bowl structure. The entire picture will vanish and you will achieve victory.
Final Thought
Colony Flow Level 1120 tests your patience with the massive Hungry Door and your space management skills with the Connected Boxes. Always double check your open paths before pulling a connected pair into your slots. Taking it slow prevents you from accidentally filling your tray with trapped colors. If you find yourself getting stuck on a specific wave of colors, feel free to watch the video above this article to see exactly how I timed my blocks.