Colony Flow Level 1270 Walkthrough Solution & Guides | How to solve Colony Flow 1270

Guide By Liam Stone
Updated on August 12, 2026
If you want the fast route, watch the video above. It covers Level 1270 from the first move to the last.
Video doesn't match your screen?
Game updates frequently scramble layouts! Try our AI Screenshot Solver first to find your exact board instantly, or report broken guides to our team.
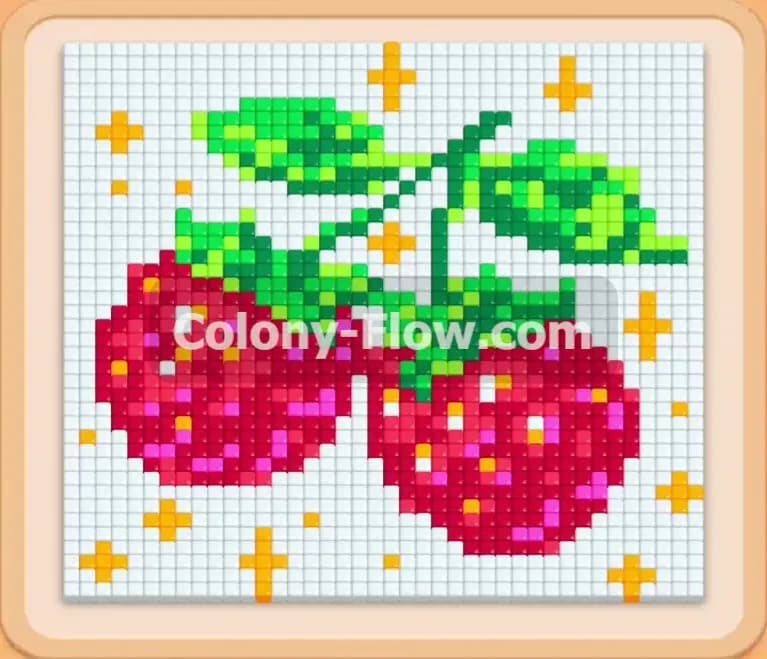
Welcome back to another puzzle guide. Today we are taking on Colony Flow Level 1270. This board features a beautiful pixel art design of two ripe raspberries with leaves and sparkles. I play every single level myself to find the most reliable paths for your ants. I will show you exactly how to manage your tray blocks so you never run out of space in your waiting slots. This specific layout requires careful timing to open the board without creating a traffic jam. Follow my moves and you will clear this beautiful picture with ease.
Colony Flow Level 1270 Overview
What You Are Working With
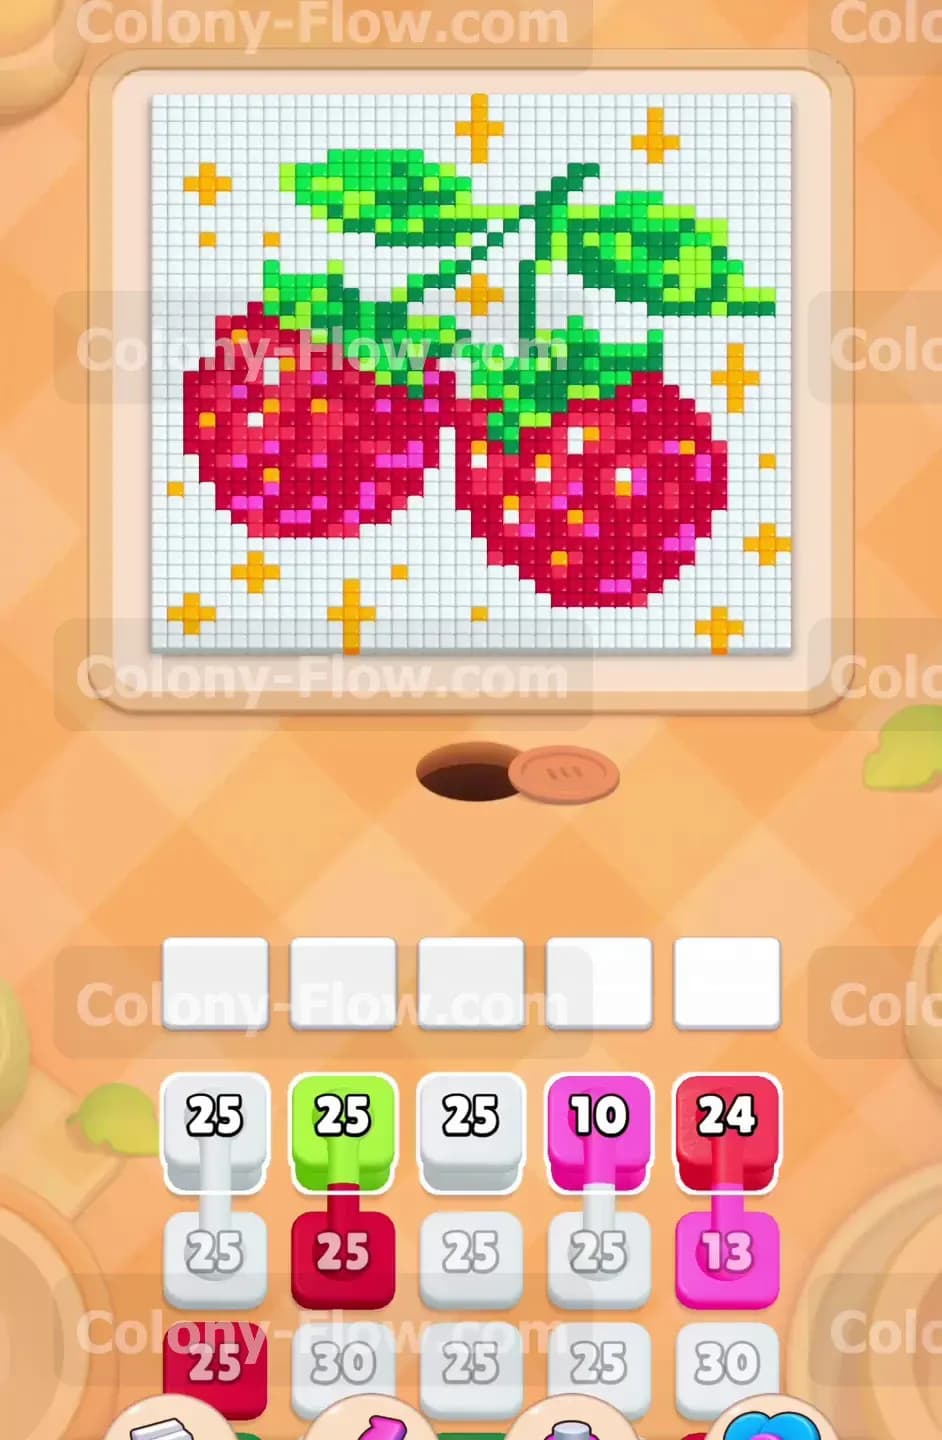
The picture at the top of your screen is a pair of bright red raspberries. They feature bright green leaves and long green stems connecting them together. There are orange and yellow sparkles floating around the outside of the fruit. The entire design sits on a massive white grid background. Your tray at the bottom contains dark red light green dark green pink orange and white numbered blocks. You will notice that many of these numbered blocks are joined together by small silver pipes. These are connected boxes. When you pull the top box the linked box below it automatically fills the next waiting slot. You must account for both colors when you make a move. The dark red tiles sit right above the nest hole so they block access to everything else.
What It Takes to Clear Level 1270 Board
You win this level by clearing every single colored tile from the picture above. Your colony of ants streams out of the nest hole and eats the tiles that match the blocks in your waiting slots. You have exactly five waiting slots available at the bottom of the screen. You lose the level if you fill all five slots and the ants have no open paths to reach their matching target tiles. Managing the order of the colors is your primary objective. Every move you make must keep at least one path open so the ants keep moving and the waiting slots never jam. You will use the connected boxes to feed multiple colors onto the board at the same time.
Colony Flow Level 1270 Step by Step Solution
Step 1: Open the bottom of the right raspberry with a single dark red block
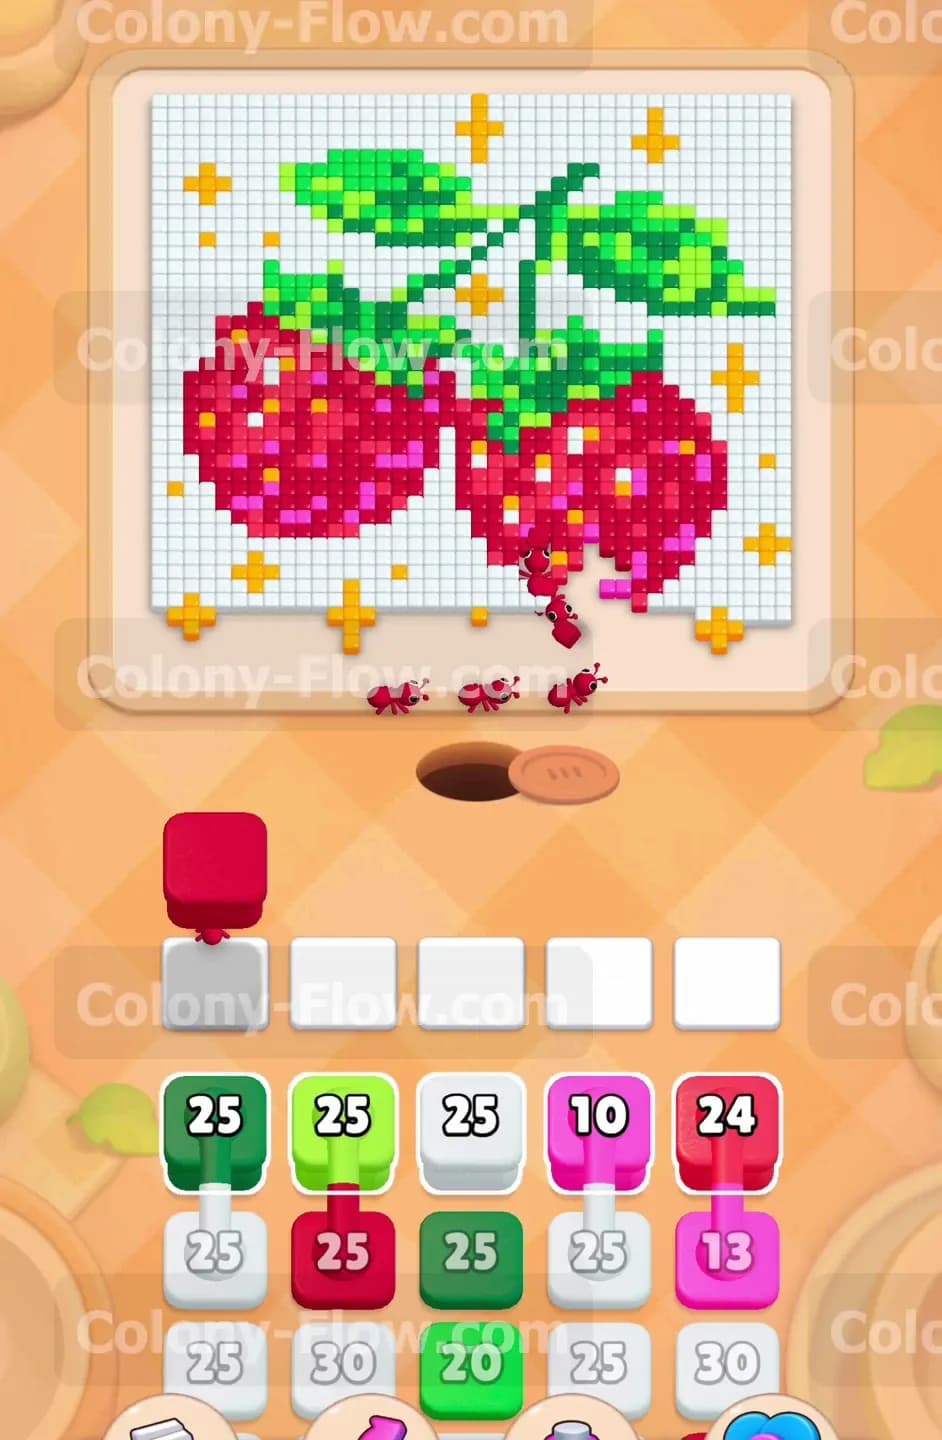
Begin your run by pulling a single dark red block from the top row of your tray. This block drops into your first waiting slot and activates immediately. The dark red ants emerge from the nest hole at the bottom of the screen. They march straight up and attack the lowest hanging section of the right raspberry. You want to make this move first because it creates a vital opening for the rest of the puzzle. The dark red tiles sit directly above the nest hole and block the entire board. Clearing them provides a wide highway for all future ants to use. The number on your dark red block counts down rapidly as the ants consume the fruit tiles. Leave your other four waiting slots completely empty for a moment. You want this initial path to widen before you introduce new colors. Patience during this opening move guarantees you will not jam your board later on.
Step 2: Send in a light green block to attack the central stems
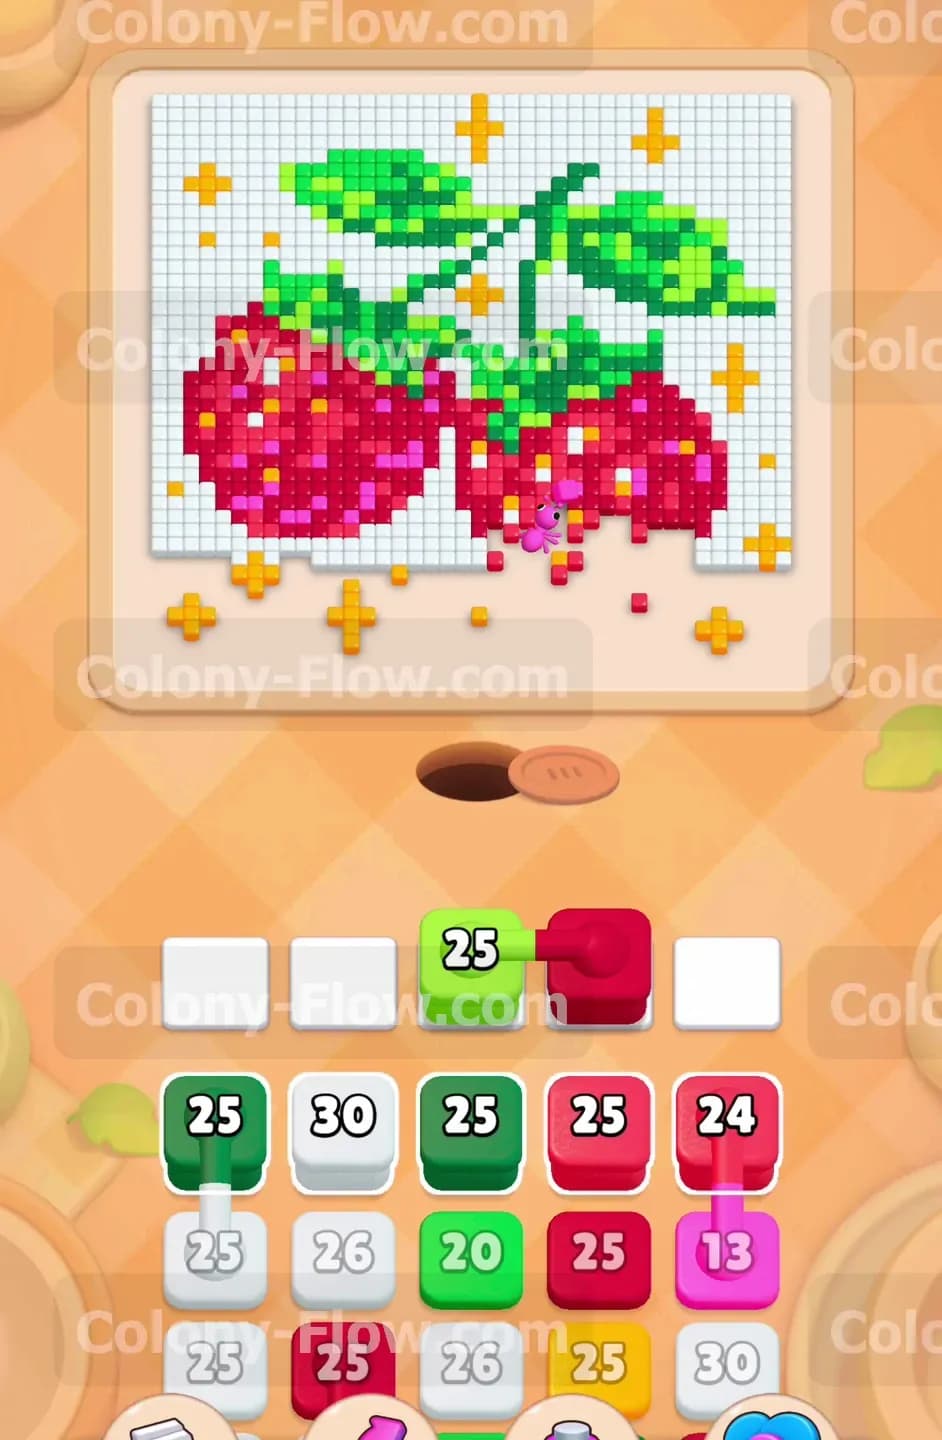
Once the dark red ants carve out a substantial opening you can introduce your next color. Pull a light green block into your second waiting slot. The light green ants will stream out of the nest and travel through the empty space created by the dark red ants. They bypass the remaining red fruit tiles and head directly for the stem structure. The green stem connects the two raspberries across the middle of the board. Breaking this connection early is a highly effective strategy. It splits the remaining picture into smaller manageable sections and gives your ants more surface area to attack. Your first slot still holds a dark red block and it continues to work. You now have two different streams of ants moving simultaneously across the board. They do not interfere with each other because the paths remain wide open. You still have three empty waiting slots which provides a massive safety net.
Step 3: Deploy pink and dark green connected boxes for the leaves
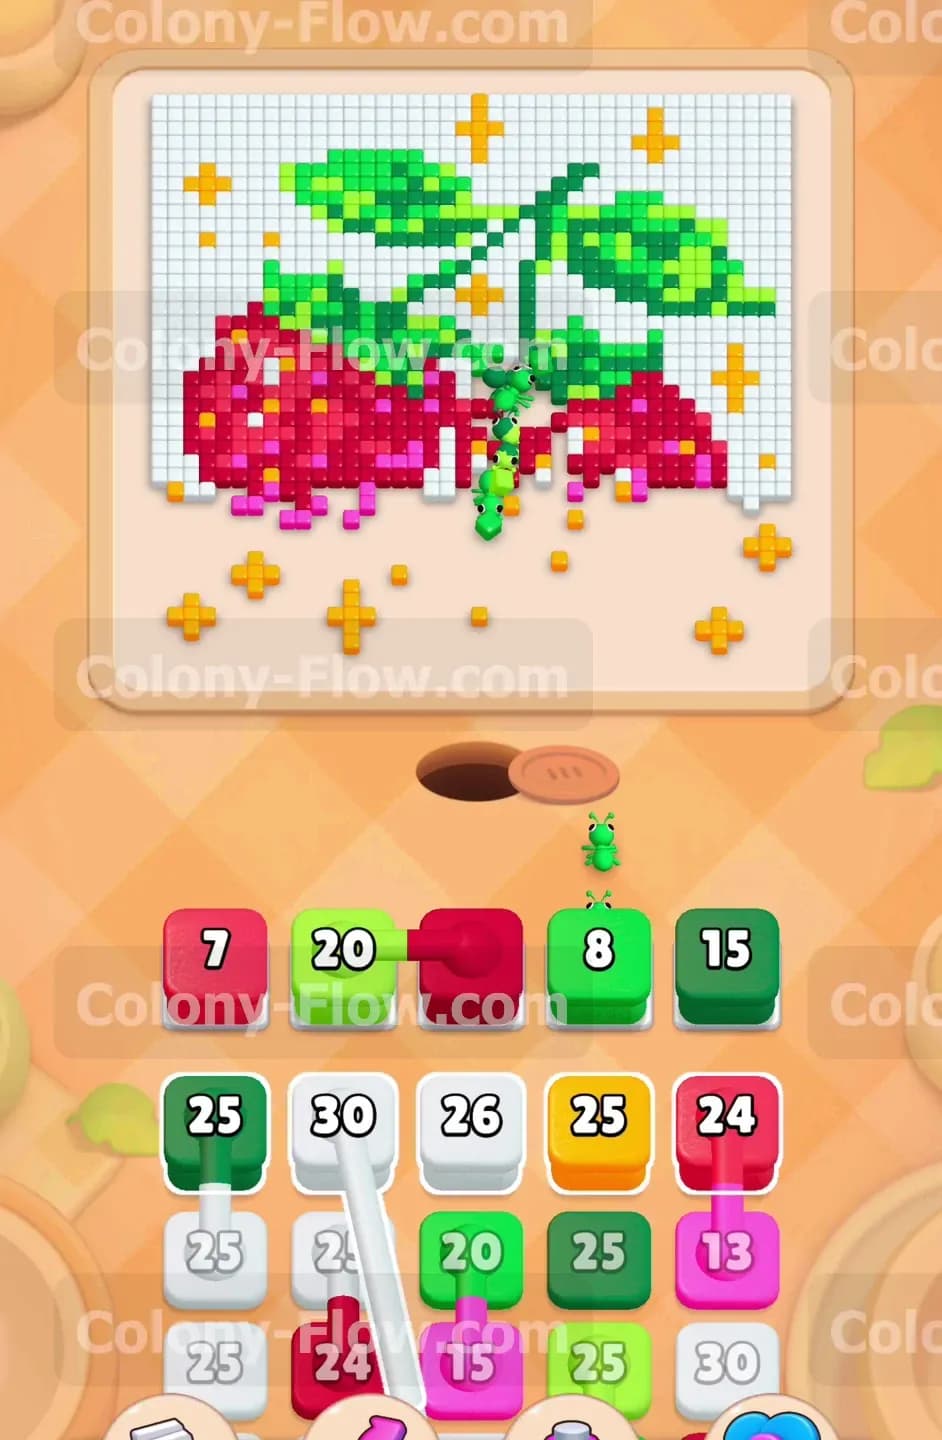
The board is much more open now so you can safely increase the pressure. Select a connected box pair from your tray containing a pink block and a dark green block. Place them into your third and fourth waiting slots. The pink ants will target the lighter pink highlight tiles scattered across the right raspberry. The dark green ants face a longer journey across the screen. They must travel all the way up the newly cleared stem path to reach the large leaves at the very top of the board. Watch the numbers on your tray blocks drop as the ants find their targets. A dark green block starts with a high count and quickly dwindles as the ants swarm the heavy foliage. A pink block vanishes even faster because the highlight tiles are sparse. You have four slots filled right now. This sounds dangerous but the ants flow freely without any roadblocks. Keep your eyes on the tray to plan your next sequence.
Step 4: Release the white blocks to clear the massive background grid
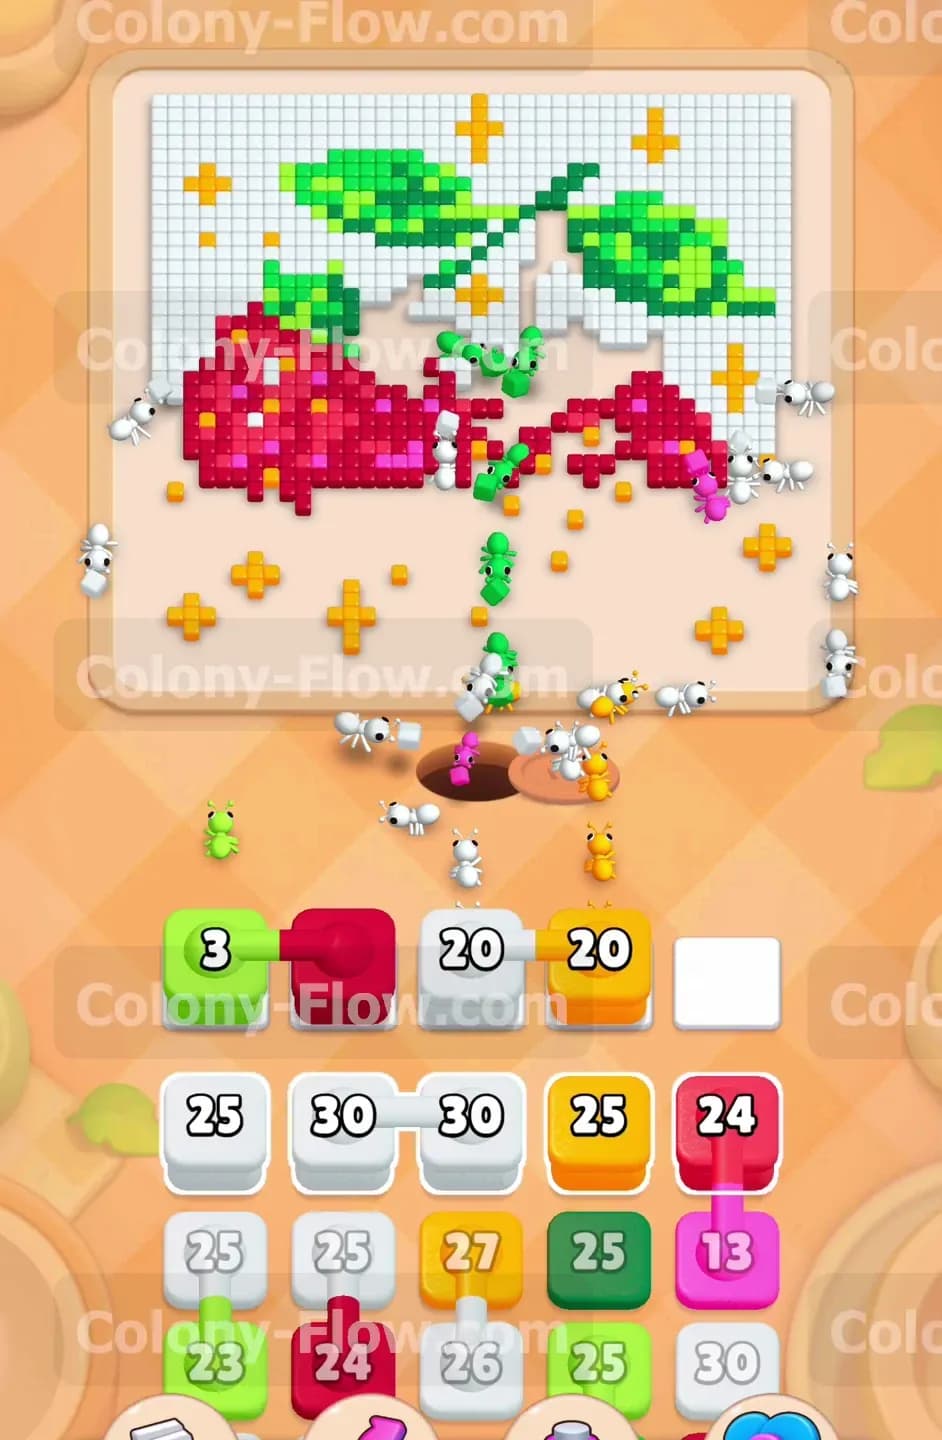
The white background grid makes up the largest single color group on this level. You must handle it correctly so you do not flood your slots and trigger a loss. Bring a large white block into your waiting slots. You will also pull an orange block from a connected box pair at the same time. The white ants explode onto the board in massive numbers. They spread out in every direction to eat the white grid tiles surrounding the fruit. The orange ants navigate through the chaos to eat the orange sparkles scattered in the background. The white ants work incredibly fast because they have access to so many exposed tiles at once. The entire background begins to dissolve from the inside out. Your five waiting slots are completely full during this chaotic phase. The rapid consumption rate of the white ants keeps the line moving perfectly and prevents a fatal jam.
Step 5: Focus on the solid left raspberry with more dark red blocks
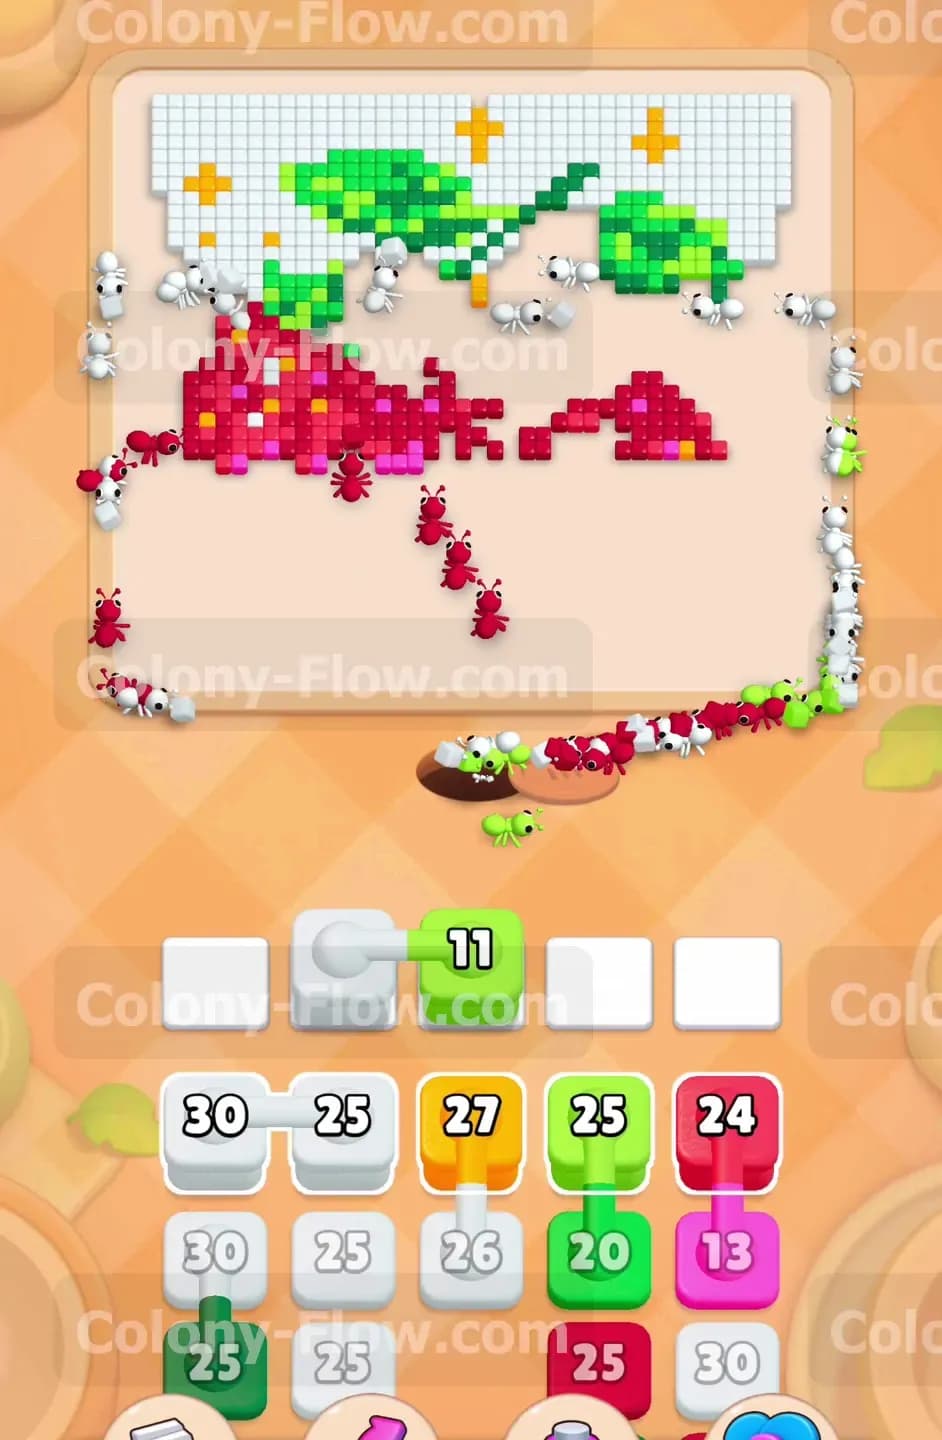
The right side of your board is almost entirely clear at this stage. You must now direct your attention to the solid left raspberry. Pull another dark red block from your tray and drop it into an open waiting slot. The ants emerge from the nest and take a sharp left turn. They travel across the cleared bottom section to reach the untouched left fruit. They begin tearing into the solid dark red structure from the bottom up. You will also pull a light green block to finish the remaining leaf fragments on the right side. Your tray options are shrinking as you pull these final connected boxes. Remember the main rule and only pull a block when a valid path exists. The left raspberry slowly shrinks as the dark red ants devour the lower half. The board feels much less crowded now and your risk of losing is very low.
Step 6: Clear the remaining pink highlights and orange sparkles
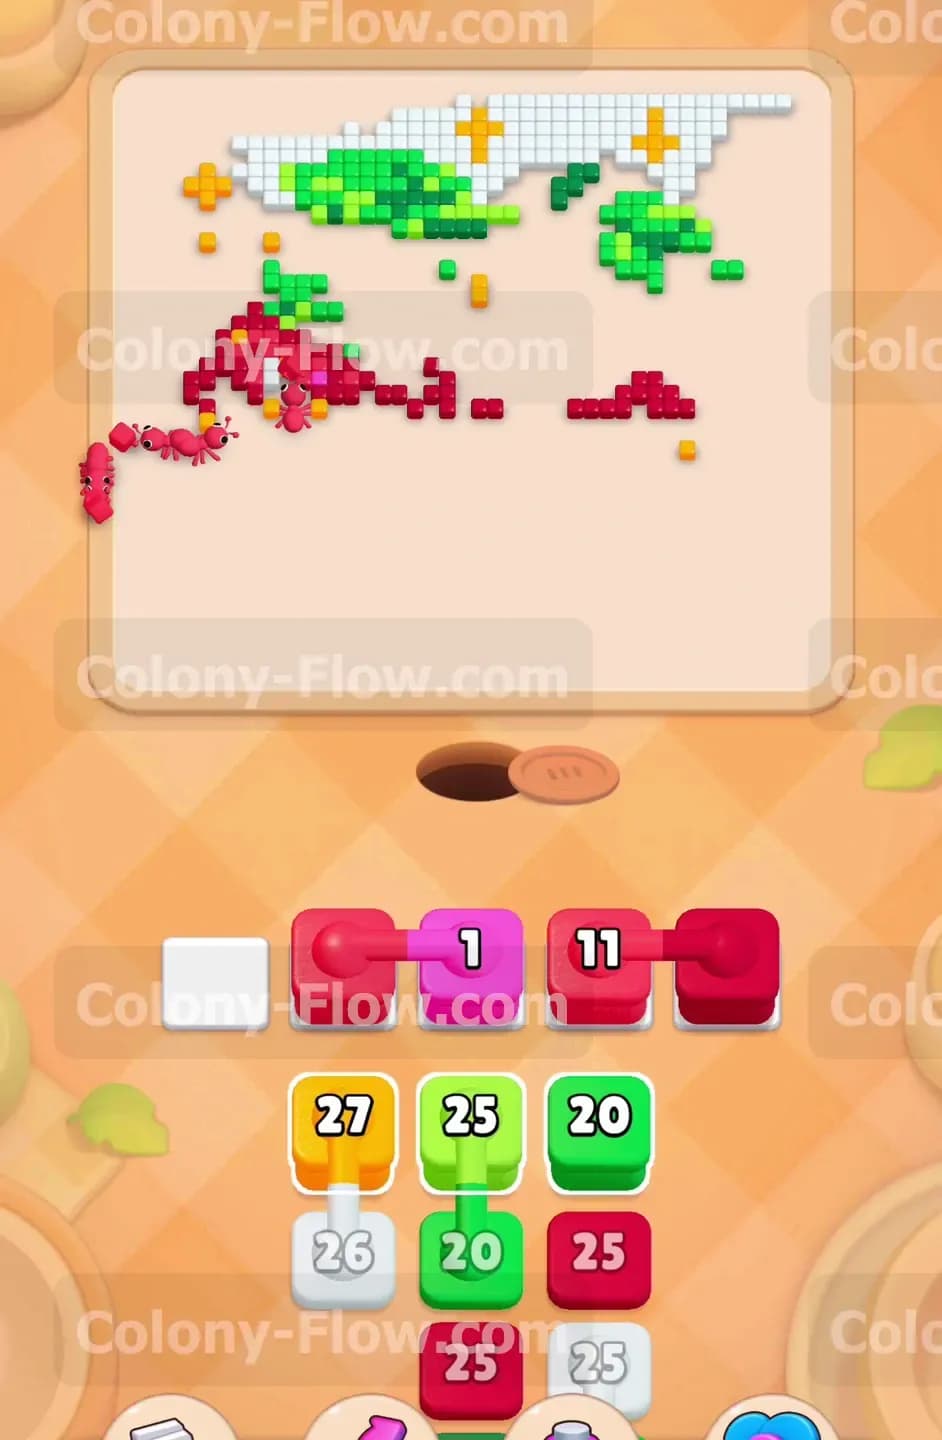
You are approaching the final phase of the level and the original picture is almost gone. You only have a few isolated dark red pieces and pink highlight pieces remaining on the left side. Pull a pink block with a low number into your waiting slots. A stream of pink ants will rush out and clean up the very last highlight tiles on the fruit. Follow this closely by pulling another dark red block. The dark red ants swarm the final chunk of the left raspberry. You will also pull a final orange block to clear the last sparkle on the left side of the screen. Your waiting slots remain mostly empty during this cleanup phase. The ants enjoy direct unbroken paths to every remaining tile on the screen. The structure of both raspberries has completely vanished leaving only the outer border.
Step 7: Sweep the final border pieces with the remaining tray blocks
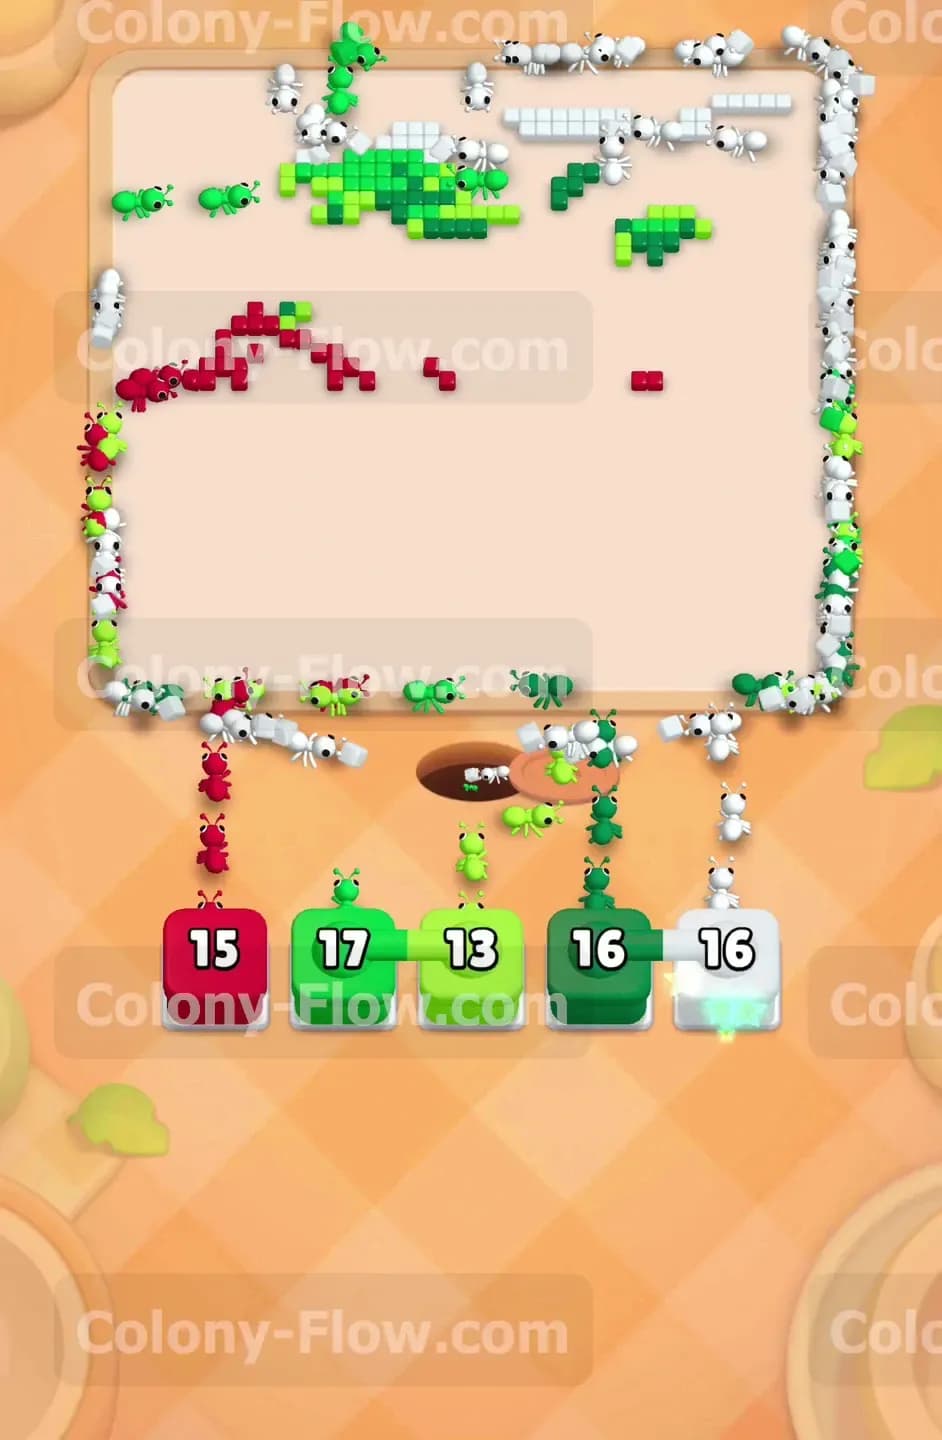
The final moves require you to sweep up the outer border of the grid and the last few leaf tips. Empty the very last connected boxes from your tray into the waiting slots. You will pull a dark red block a dark green block a light green block and a white block all at once. Your five slots fill up completely one last time. Do not panic about the full slots because the board is entirely open. The ants immediately form a massive ring around the extreme outer edge of the screen. They march in a continuous line along the perimeter. They consume the very last white grid tiles and the highest tips of the green leaves. The block numbers drop to zero in rapid succession. The board wipes completely clean and you win the level.
Final Thought
Level 1270 requires a steady pace and careful attention to your connected boxes. Opening the right raspberry first gives you the room you need to manage the massive white background grid later on. I highly encourage you to watch the video above this article if any step is hard to follow in text. Seeing the ants move in real time makes the pathing strategy much easier to understand.