Colony Flow Level 453 Walkthrough Solution & Guides | How to solve Colony Flow 453

Guide By Liam Stone
Updated on July 29, 2026
For a quicker option, watch the video above. It covers the same Level 453 steps you'll find written out below.
Video doesn't match your screen?
Game updates frequently scramble layouts! Try our AI Screenshot Solver first to find your exact board instantly, or report broken guides to our team.
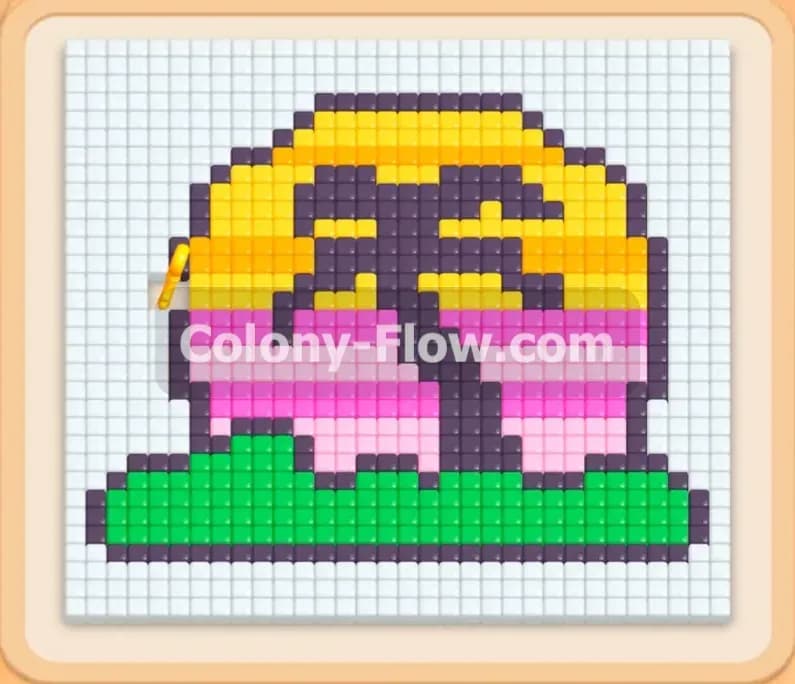
Colony Flow Level 453 brings a beautiful tropical sunset picture to your screen. You will guide your ant colony to eat away a colorful pixel art scene featuring a black palm tree against a bright sky. The layout looks simple at first glance but hidden boxes and connected boxes will test your slot management skills heavily. You must clear the board systematically to keep your ants moving and win the stage. I play every level to find the exact winning path and this one requires a very specific approach.
Colony Flow Level 453 Overview
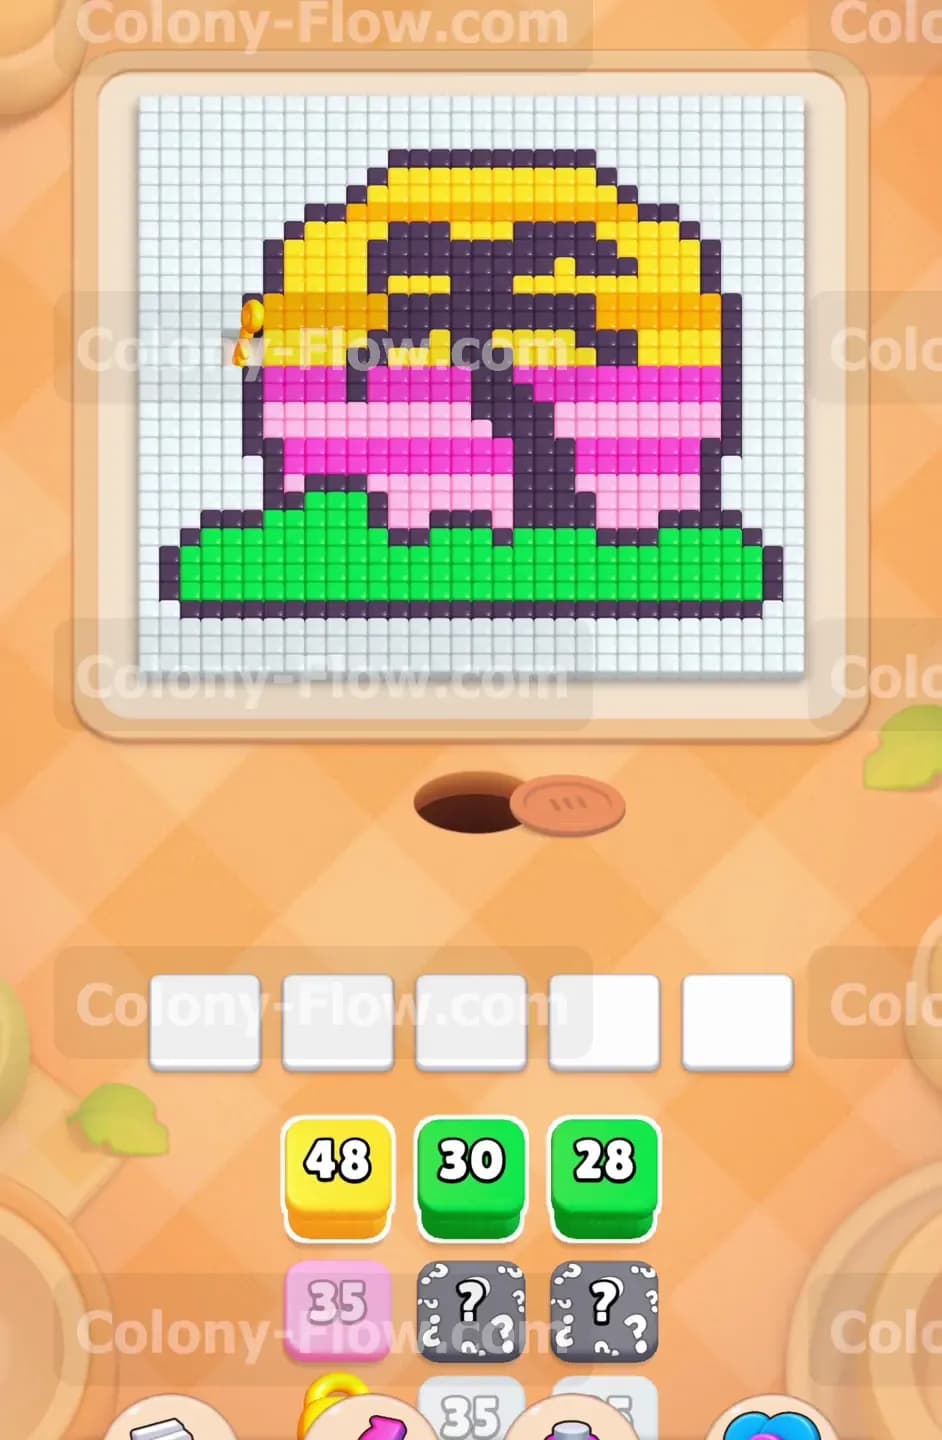
What You Are Working With
The pixel art displays a relaxing tropical scene made of hundreds of small colored square tiles. You see a green island resting at the very bottom of the grid. A black palm tree stands right in the center and stretches its leaves into the sky above. The sky features a massive bright yellow sun along with pink and magenta horizontal bands stretching across the background. The entire picture sits on a white background grid that you also have to clear. Your starting tray provides green blocks and yellow blocks alongside a few pink options. You will also notice special tiles rotating into your tray during this level. Hidden boxes sit in the tray marked with question marks and they only reveal their true color once they become active and find an open path. Connected boxes appear later in the tray. These linked blocks pull together at the exact same time and require a wide open path to avoid jamming your limited waiting slots.
What It Takes to Clear Level 453 Board
Winning this stage requires a strict clockwise clearing path around the central black tree. You start at the bottom left green island and work your way up the left side of the picture. Opening the left side exposes the pink sky and the yellow sun above it. You then carve your way across the top edge and work your way down the right side. The black palm tree in the center acts as a solid barrier that splits the board into two halves. You must wait to tackle the central black tree trunk until the surrounding sky clears completely. If your waiting slots fill up completely with blocks that have no open paths you will lose the level instantly. You win by feeding the final white background tiles to your ants without ever filling all five of your waiting slots.
Colony Flow Level 453 Step by Step Solution
Step 1: Clear the bottom left corner of the green island to open the left side.
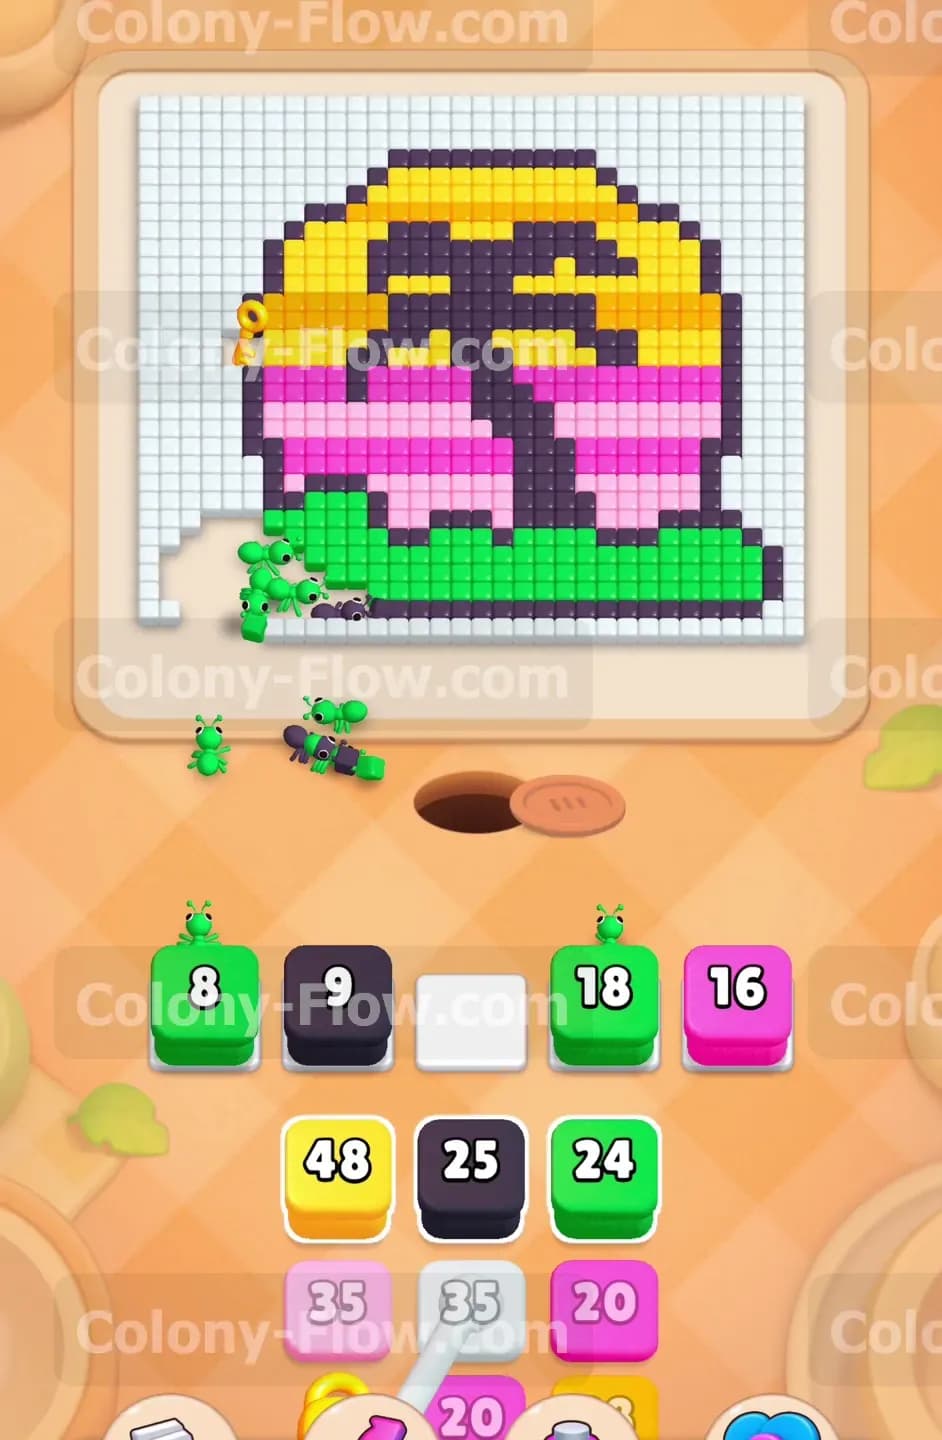
Start your game by focusing entirely on the green tiles at the base of the picture. The ants leave the nest hole at the bottom center of the screen and run directly toward the closest open food tiles. Right now they can only reach the left edge of the green ground. Pull your green blocks from the tray one at a time. Watch the numbers on the blocks count down as the green ants march up and eat the pixels. Do not pull any black blocks or yellow blocks yet. The black tree outline and the yellow sun remain completely blocked by the upper layers of the picture. Pulling wrong colors this early will fill your five waiting slots and cause you to lose before you even make progress. Keep pulling green blocks until the entire left side of the green island disappears. This action opens a direct and wide path to the colorful sky bands located just above the ground.
Step 2: Open the magenta and pink sky bands on the left side of the tree.
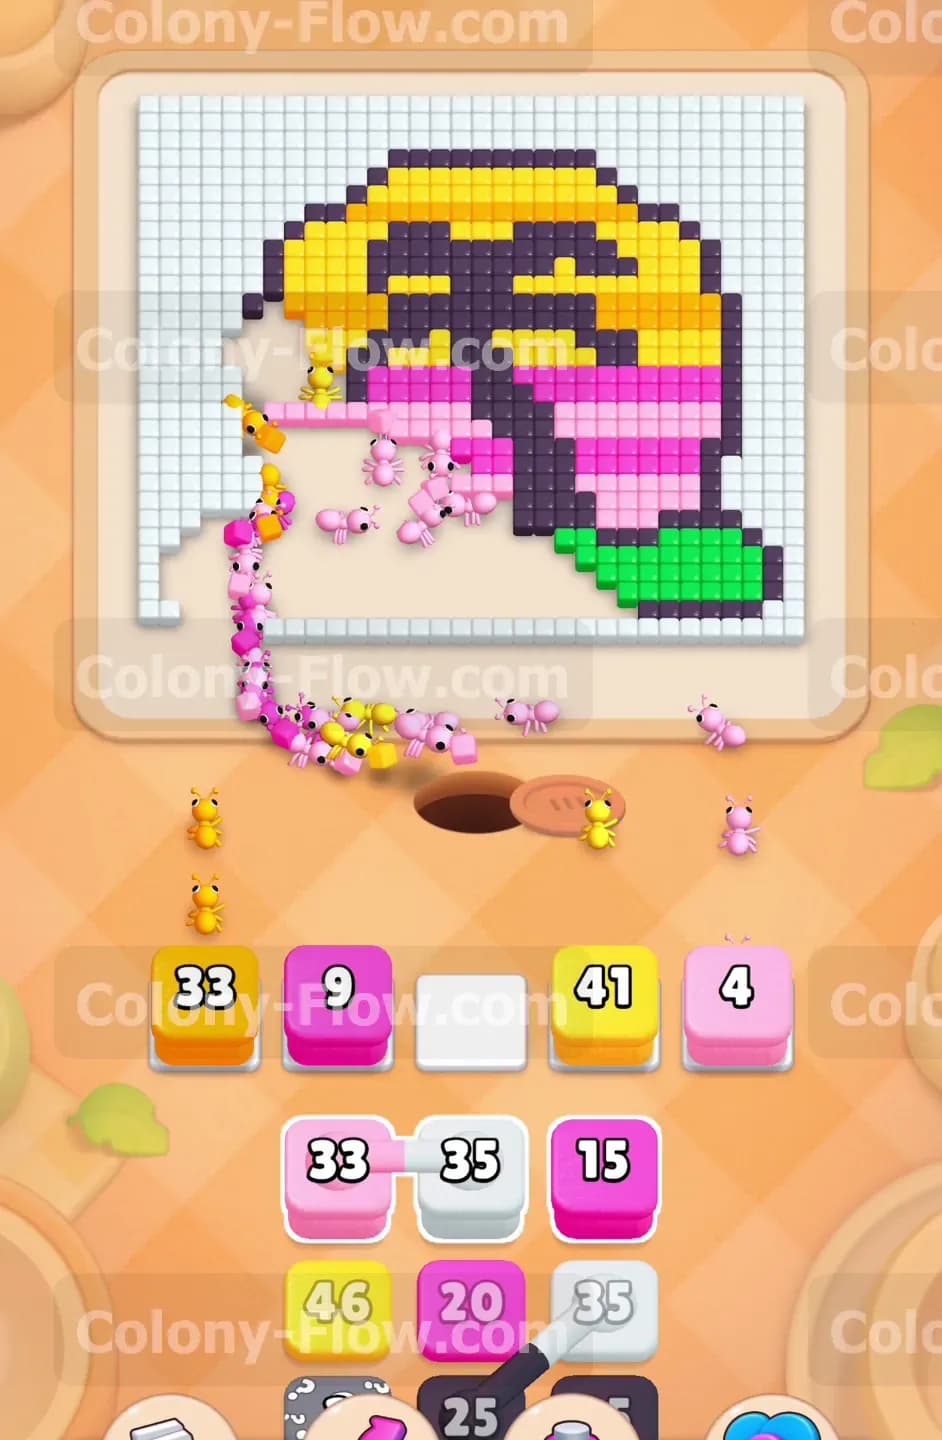
With the left side of the island gone your ants can finally reach the lower sky sections. The sky features a dark magenta band just above the ground and a lighter pink band above that. Check your tray for magenta blocks and pink blocks. Pull a magenta block first to clear the lower section of the sky. As the magenta tiles vanish the lighter pink tiles become accessible to your ants. Pull a pink block to send pink ants up the left side of the board. The hidden boxes in your tray reveal themselves as pink or magenta once the path opens up for them. Play these hidden boxes as soon as their color matches the exposed tiles on the board. Clearing these two bright bands on the left side exposes the bottom edge of the massive yellow sun.
Step 3: Carve into the yellow sun on the top left of the picture.
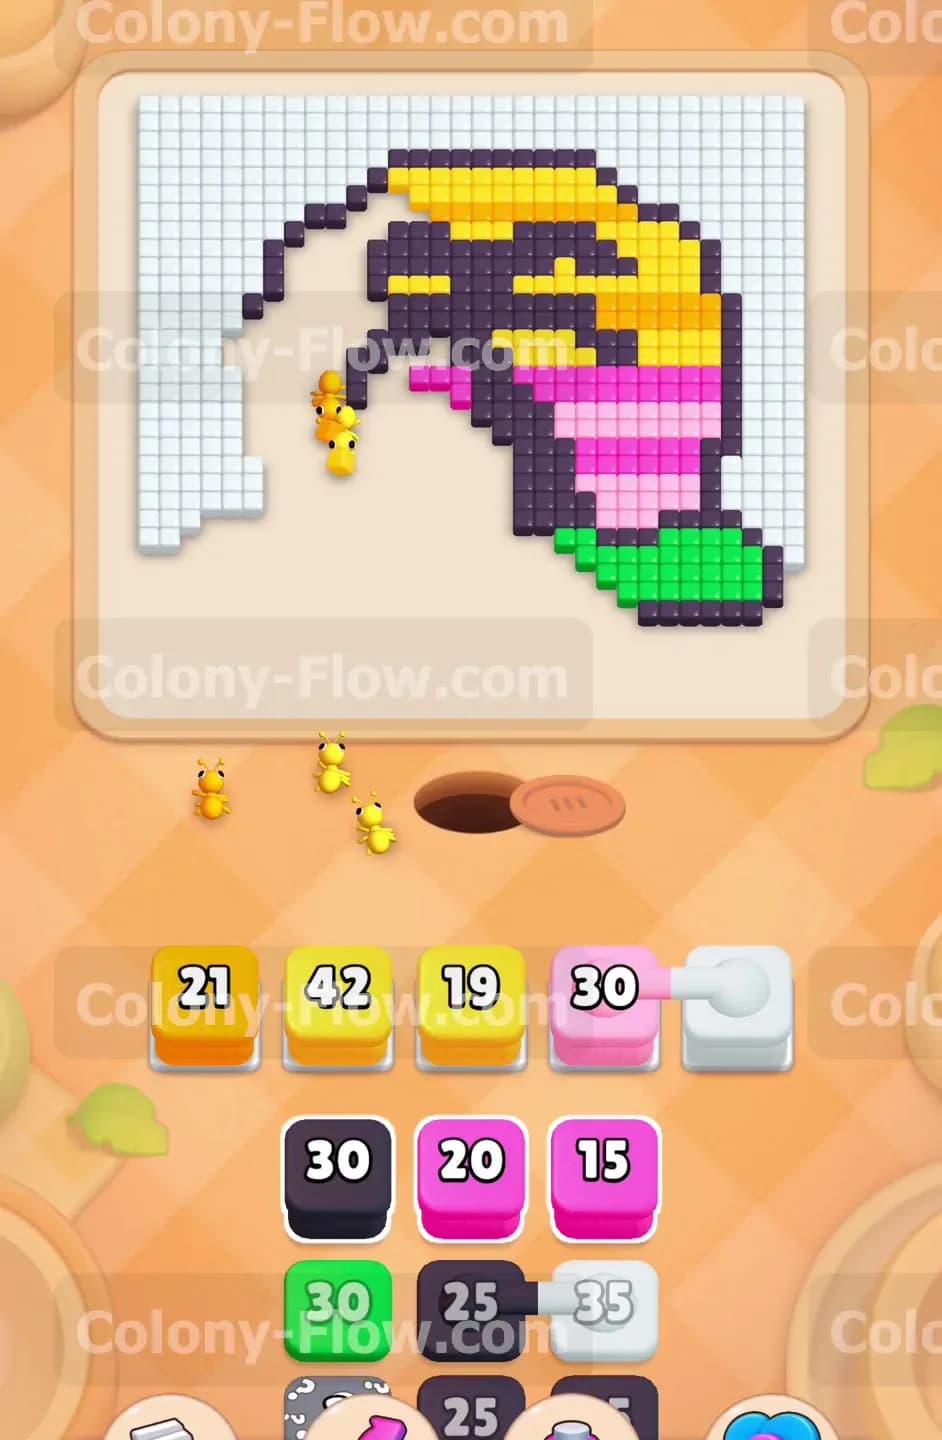
The yellow sun makes up a very large portion of the upper picture area. You now have a clear vertical path straight up the left edge of the board. Pull a large numbered yellow block from the bottom tray. The yellow ants will stream up the left side and begin eating away the sun tiles. The yellow block will count down quickly because so many yellow tiles sit completely exposed. You will also need to pull a black block at this time. The outer black outline of the picture becomes accessible as you eat into the left side of the sun. Managing the black outline tiles alongside the yellow sun tiles keeps your waiting slots rotating efficiently. Never let the black blocks pile up in the tray while you focus solely on the yellow sun.
Step 4: Navigate the top edge and expose the black palm leaves.
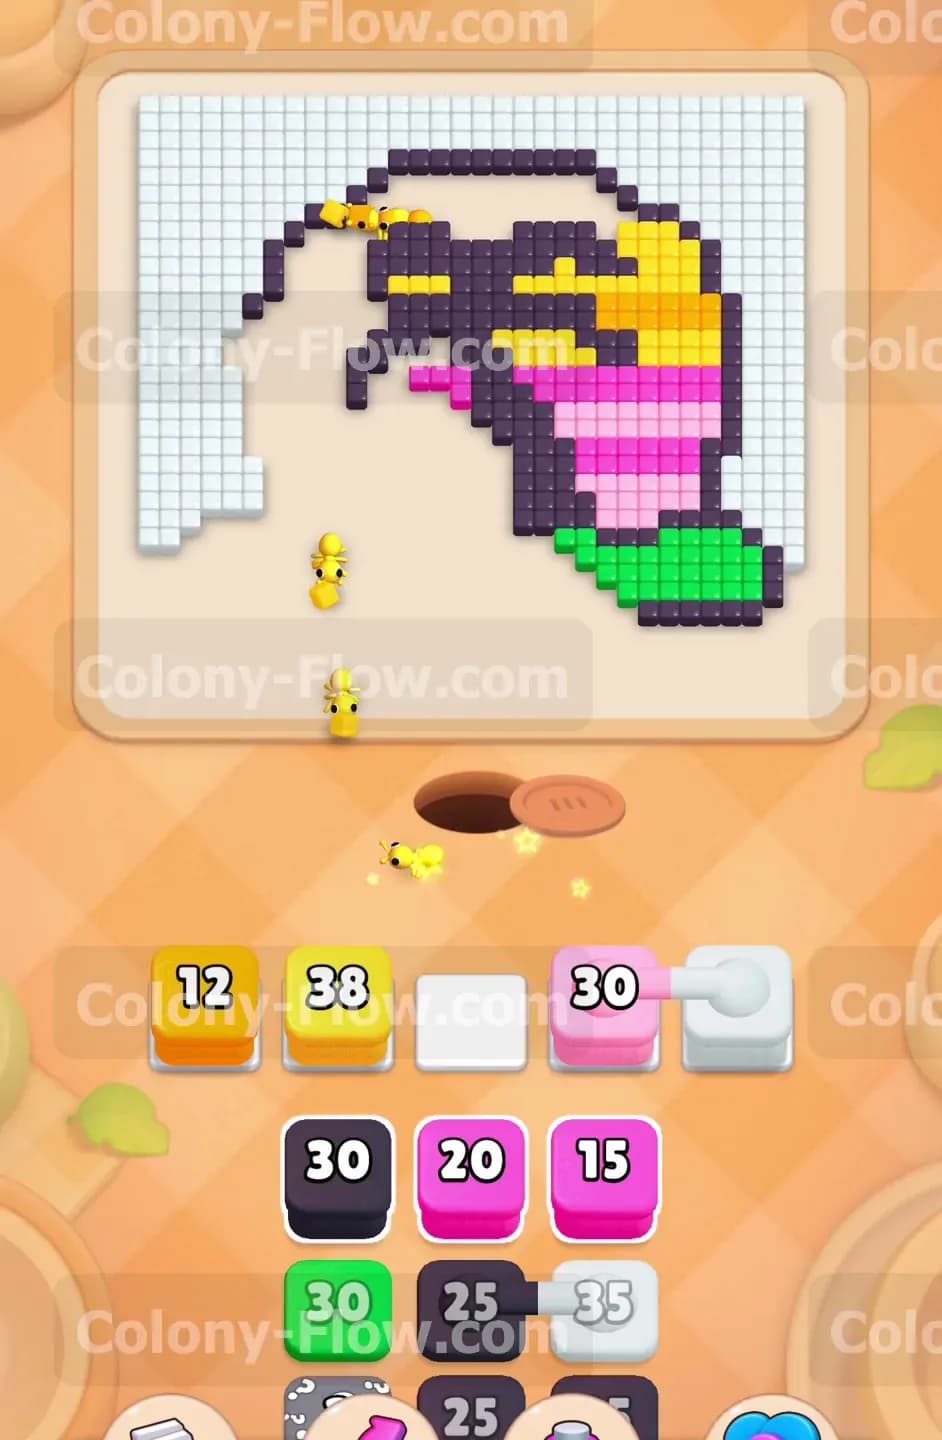
Your ants will eventually reach the very top left corner of the picture. You must now guide them carefully across the top edge. Continue pulling yellow blocks to clear the upper half of the sun. The black palm leaves extend directly into the yellow sky area. As the yellow tiles disappear the black leaf pixels open up for your ants. Pull another black block to send a line of black ants up into the palm leaves. Keep a very close eye on your five waiting slots during this sequence. You must always keep at least one active path open for the ants to travel. If a black block gets stuck in a slot because a specific leaf is blocked by yellow tiles you must immediately pull a yellow block to free up space. Balance the yellow blocks and black blocks to clear the entire top left quadrant smoothly.
Step 5: Deploy the connected boxes for the right side of the sky.
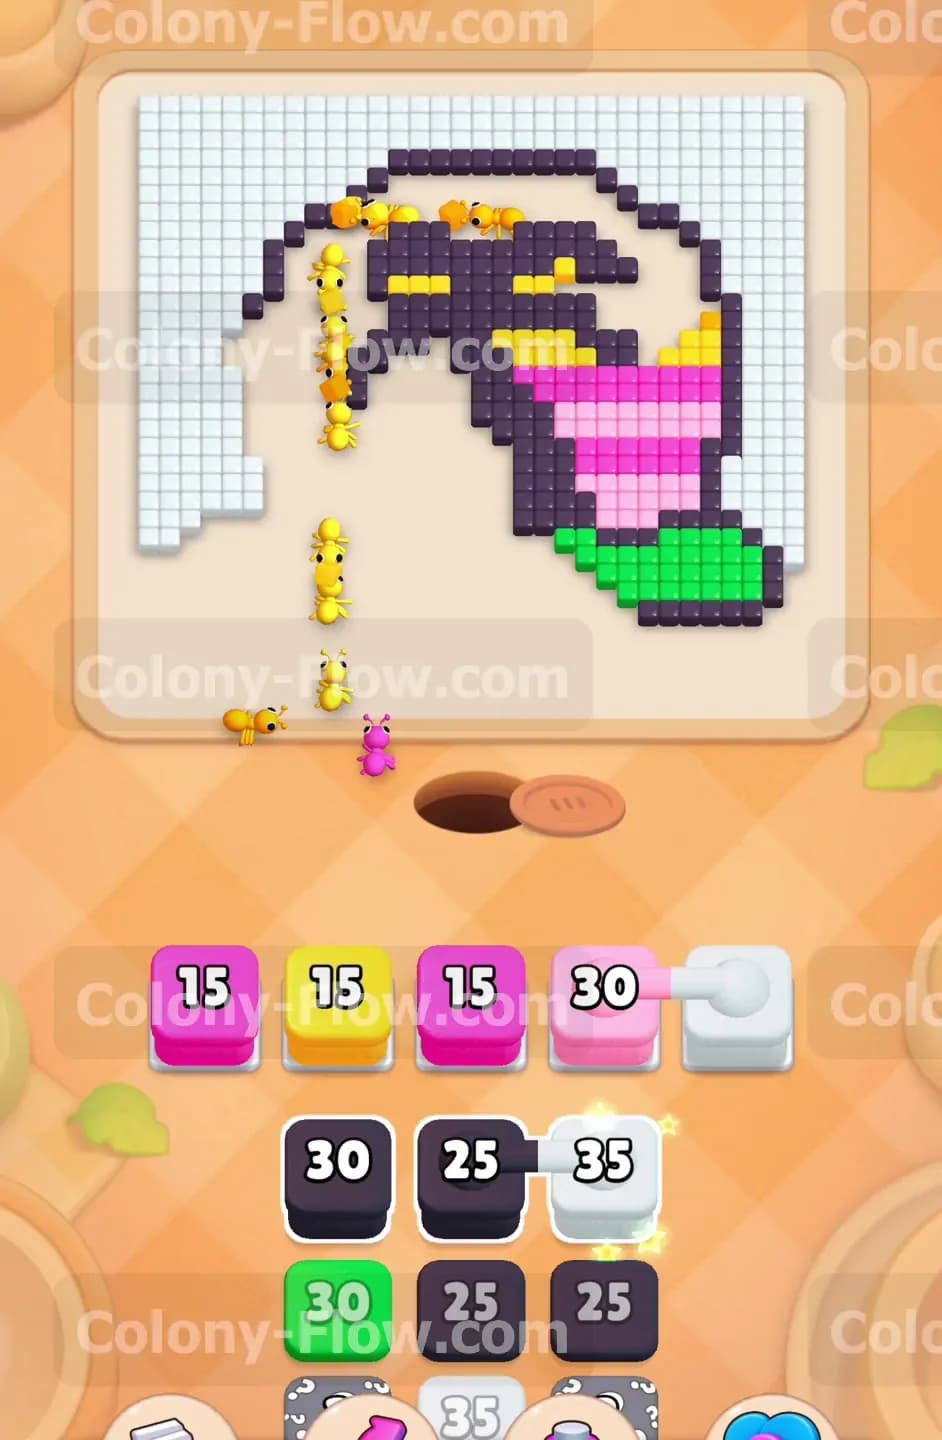
You will soon uncover connected boxes in your tray as you clear the top edge. These special blocks have a silver link joining them together permanently. In this specific level you will see connected pink blocks. You cannot pull one without pulling the other at the exact same time. They will take up multiple waiting slots instantly when you tap them. You must wait patiently until the pink sky on the right side of the tree is completely exposed before you pull them. Clear the remaining yellow sun on the top right to open a path down to the pink band. Once the pink band is wide open pull the connected pink boxes. The ants will swarm down the right side and drain the connected blocks very quickly. This massive move clears a huge chunk of the board without risking a dangerous slot jam.
Step 6: Clear the remaining magenta band on the right side.
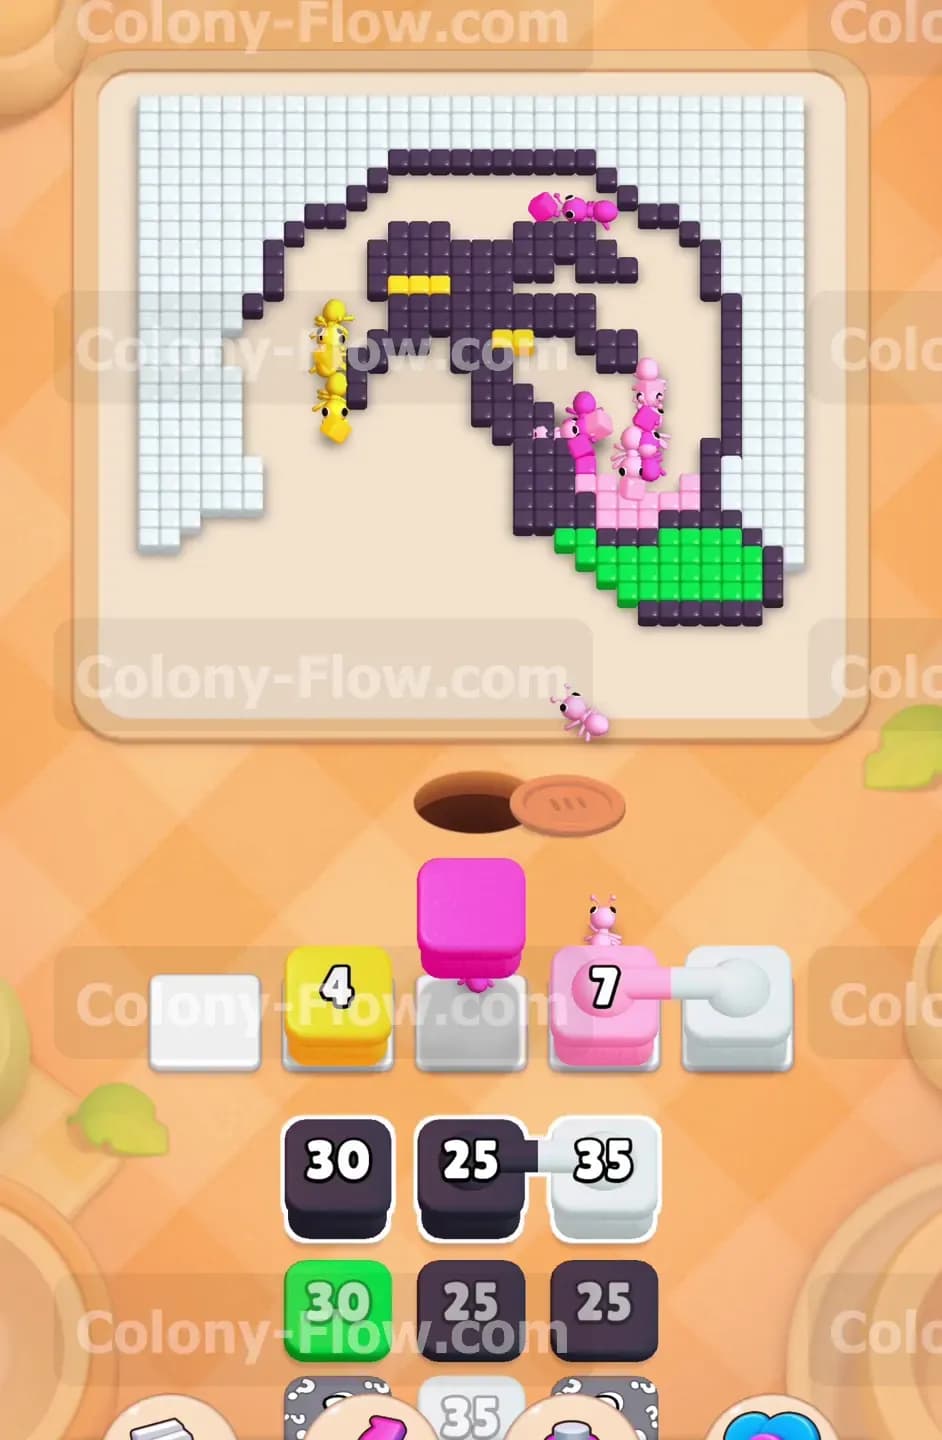
The connected pink blocks will vanish from your waiting slots and leave the magenta band below them totally exposed. Pull a magenta block to clear this next section. The ants will march down the right side of the black palm tree and eat the dark tiles. You now have open paths on both sides of the central trunk. Keep feeding the magenta tiles to your ants until the right sky fully matches the empty left sky. Only the central black palm tree and the white background grid should remain visible at this point. Your waiting slots should be nearly empty right now because you timed the connected boxes perfectly and never rushed your pulls.
Step 7: Finish the central black palm tree silhouette.
The central black palm tree stands completely uncovered from top to bottom. Pull a large black block to send a massive wave of black ants straight into the trunk and the remaining leaves. The ants will climb the central stalk and devour the rest of the tree in seconds. The block numbers will drop rapidly as the ants find easy paths to the black tiles. Make sure no other colors block the black tiles before you pull a heavy black block. If you see any stray green tiles sitting at the very bottom right of the island clear them now before moving forward. The board should look entirely empty except for the white grid holding the outer edges.
Step 8: Clear the white background grid to win the level.
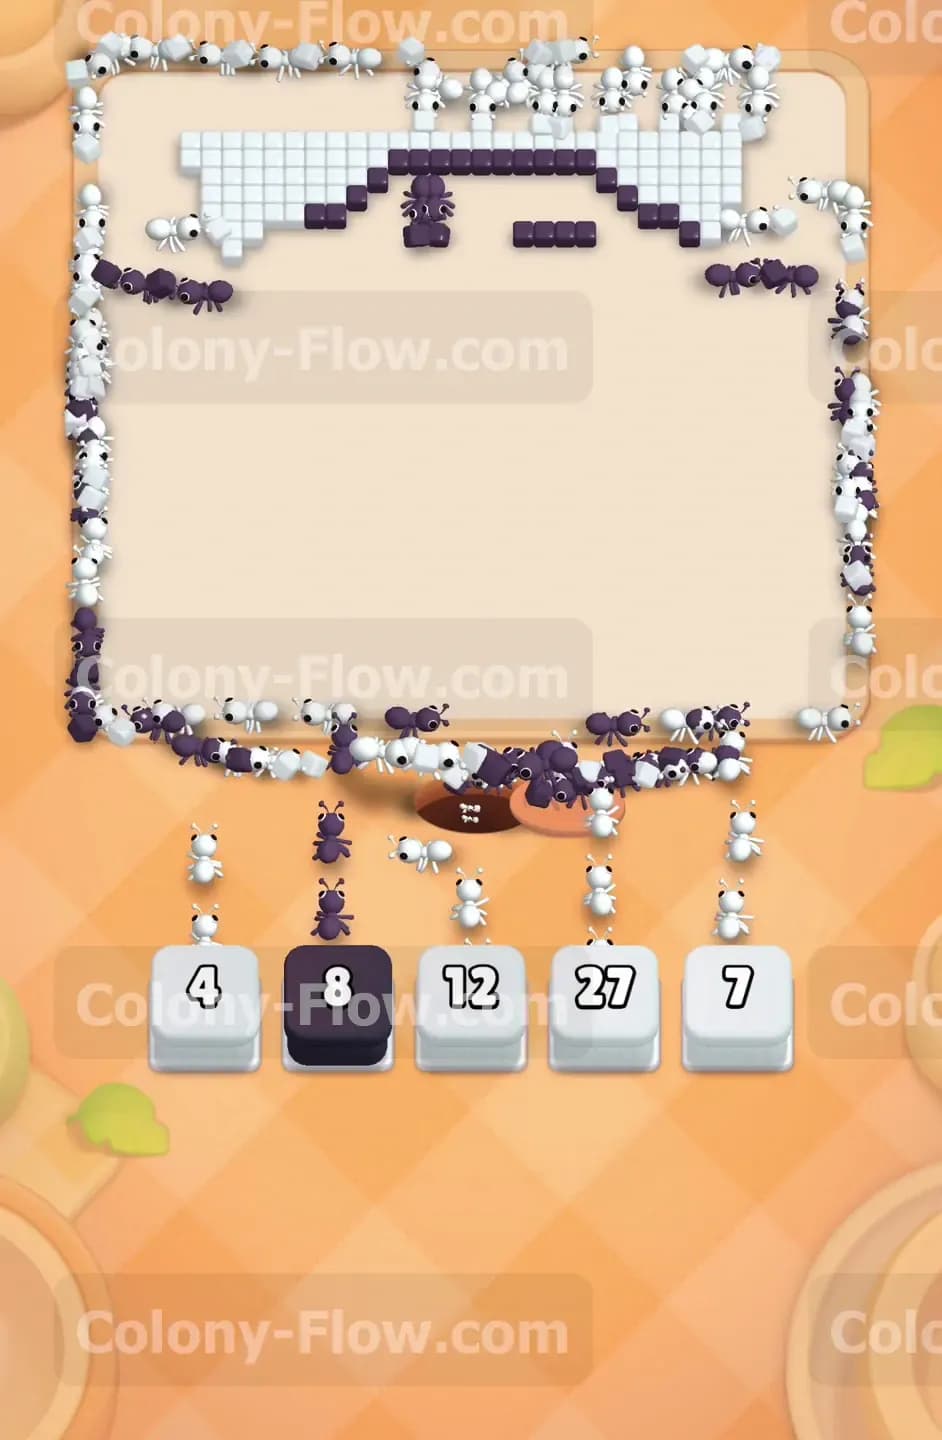
The final phase of the level involves the white background grid itself. The white tiles surround the exact area where the picture used to be. Your tray will fill up with white blocks and a few small black blocks. Pull the white blocks to release white ants onto the board. They will run all the way around the outer perimeter and eat the remaining background pixels. Pull any remaining black blocks to clear the final few outline pieces hiding on the edges. The white ants will finish the board completely. The level ends successfully when the last white tile disappears and your waiting slots remain perfectly clear.
Final Thought
Colony Flow Level 453 demands careful planning and very strict slot management from start to finish. Working your way around the central palm tree keeps your ant paths open and completely prevents tray jams. The hidden boxes and connected blocks add a serious layer of challenge but timing their release guarantees a smooth victory every single time. Watch the video above this article if any step is hard to follow in text format. Seeing the exact ant movements on the screen can help you master the perfect clearing sequence.