Colony Flow Level 1027 Walkthrough Solution & Guides | How to solve Colony Flow 1027

Guide By Liam Stone
Updated on August 8, 2026
The Level 1027 solution is right there in the video above, so read on only if you want the extra detail.
Video doesn't match your screen?
Game updates frequently scramble layouts! Try our AI Screenshot Solver first to find your exact board instantly, or report broken guides to our team.
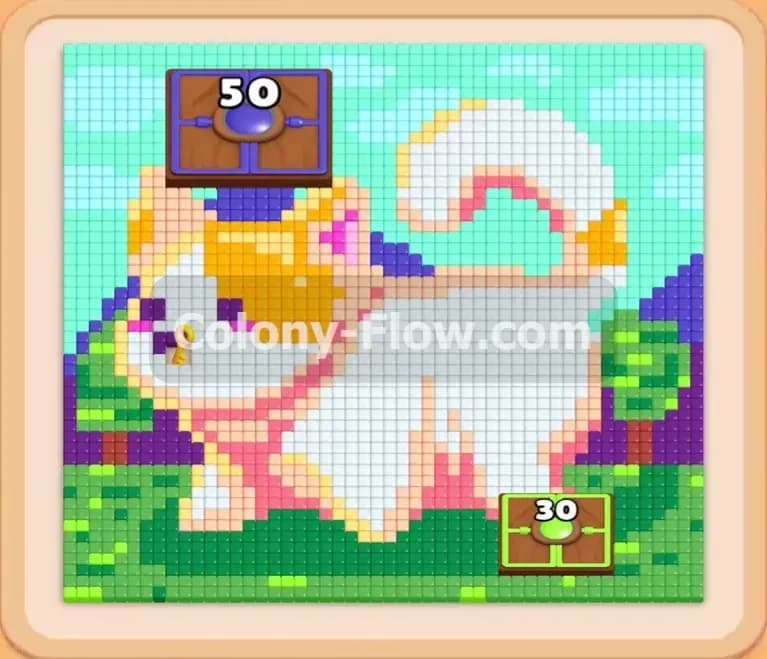
Welcome to Colony Flow Level 1027. This level presents a charming pixel art scene of a cat sitting outdoors surrounded by nature. You will face a busy board filled with special elements that demand careful planning and precise timing. Managing your five waiting slots is your absolute top priority because a single jam will end your run instantly.
Colony Flow Level 1027 Overview
What You Are Working With
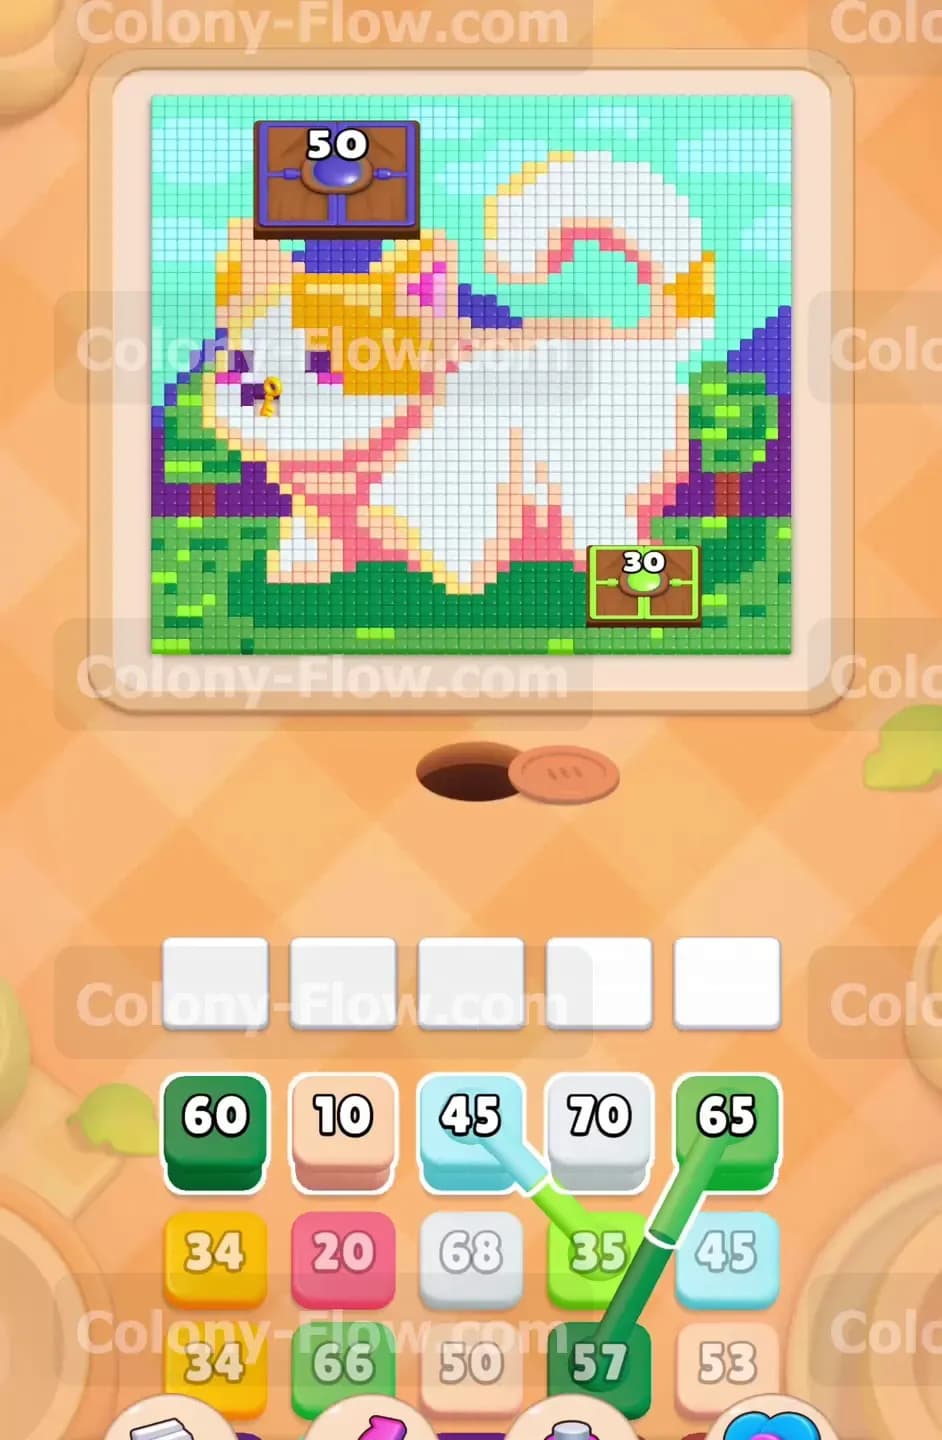
The pixel art picture displays a beautifully detailed white cat with yellow patches and a bright pink collar. Behind the cat you can see purple mountains on the left and green trees on the right. A massive light blue sky wraps around the entire background and forms a thick outer border. The board also features two large Hungry Doors that block your progress. One Hungry Door sits at the top with a 50 requirement. Another Hungry Door sits at the bottom right corner with a 30 requirement. Down in your tray you will find a mix of single color blocks and Connected Boxes. These Connected Boxes are linked together by a thick line and always move into your waiting slots as an attached pair.
What It Takes to Clear Level 1027 Board
To achieve victory you must feed the ants the exact colors they need to dismantle every piece of the picture. The ants march out from their nest hole at the bottom and seek open paths to their matching food tiles. You must strategically clear the outer scenery to access the main body of the cat. Every move you make must prioritize pathing. An open path means the ants can travel freely from the dark hole to their designated color. Opening the Hungry Doors early is completely essential because they hide vital sections of the board. The top door conceals a bright red heart that you must clear to finish the puzzle. You win the level when every single pixel tile vanishes and the final ants return home without filling your five waiting slots.
Colony Flow Level 1027 Step by Step Solution
Step 1: Open the center by pulling large white blocks
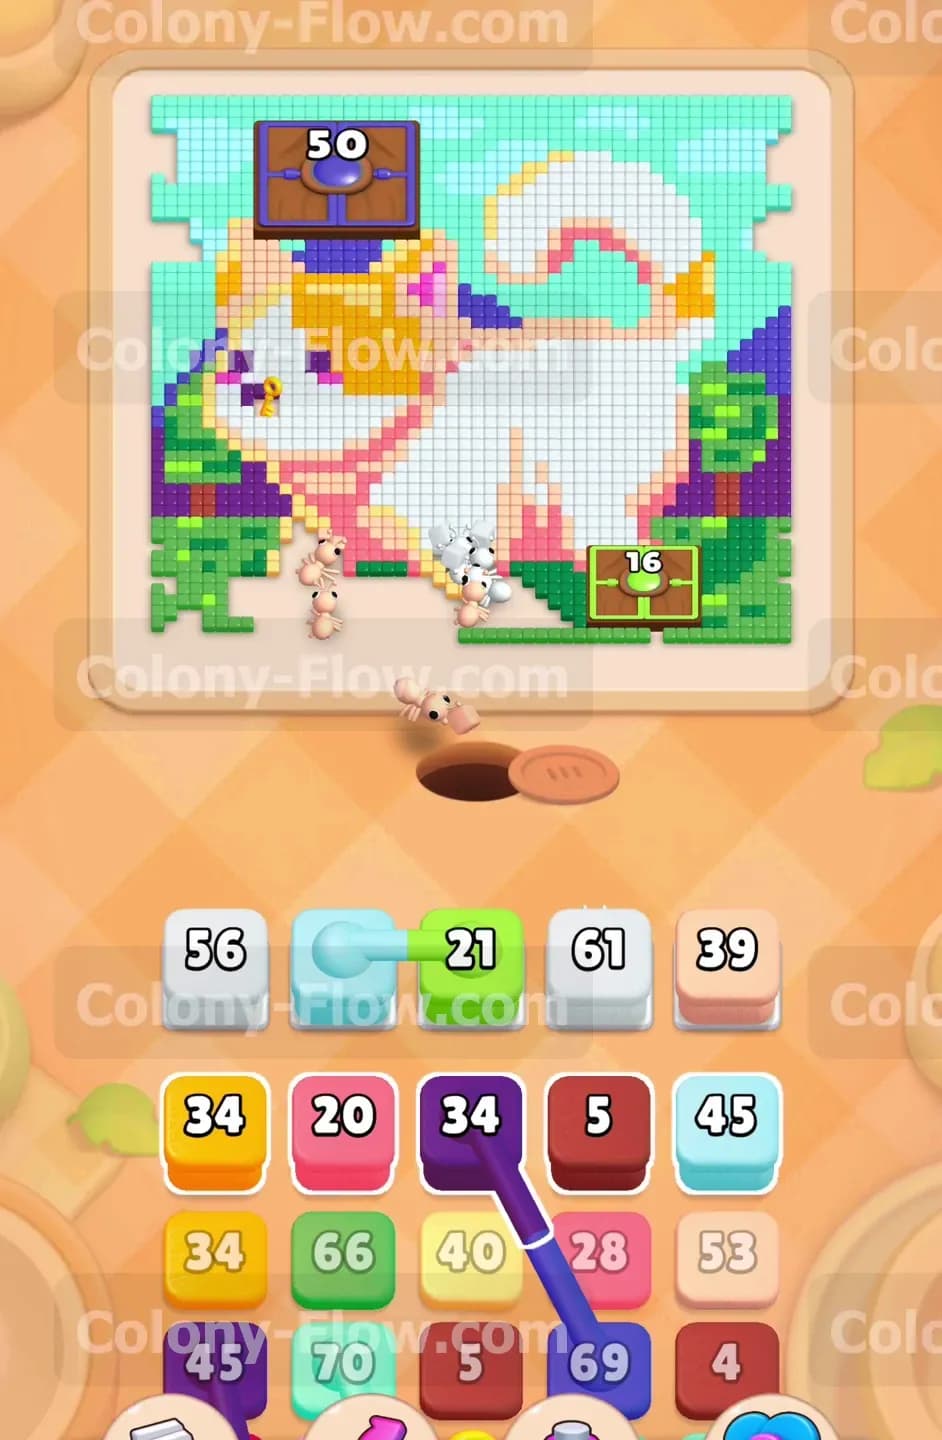
The white fur makes up the largest central portion of the picture. You want to start by opening a massive path right down the middle of the board. Look at your tray and pull the white blocks into your waiting slots. You will see large numbers like 56 and 61 on these initial blocks. The white ants stream out of the nest hole and immediately attack the center of the cat. This creates a wide open space on the board and gives your future ants multiple directions to travel. Clearing the center acts as a highway for all other colors. Watching the white ants chew through the pixels gives you a great sense of progress early on. You learn quickly that opening space is just as valuable as matching colors. You keep your waiting slots completely clear because the white ants have plenty of food tiles to consume without getting stuck. If you pull a color that cannot reach its target that block sits in your waiting slot forever. You only have five slots to work with so keeping them empty is your main goal.
Step 2: Remove the green trees to access the bottom Hungry Door
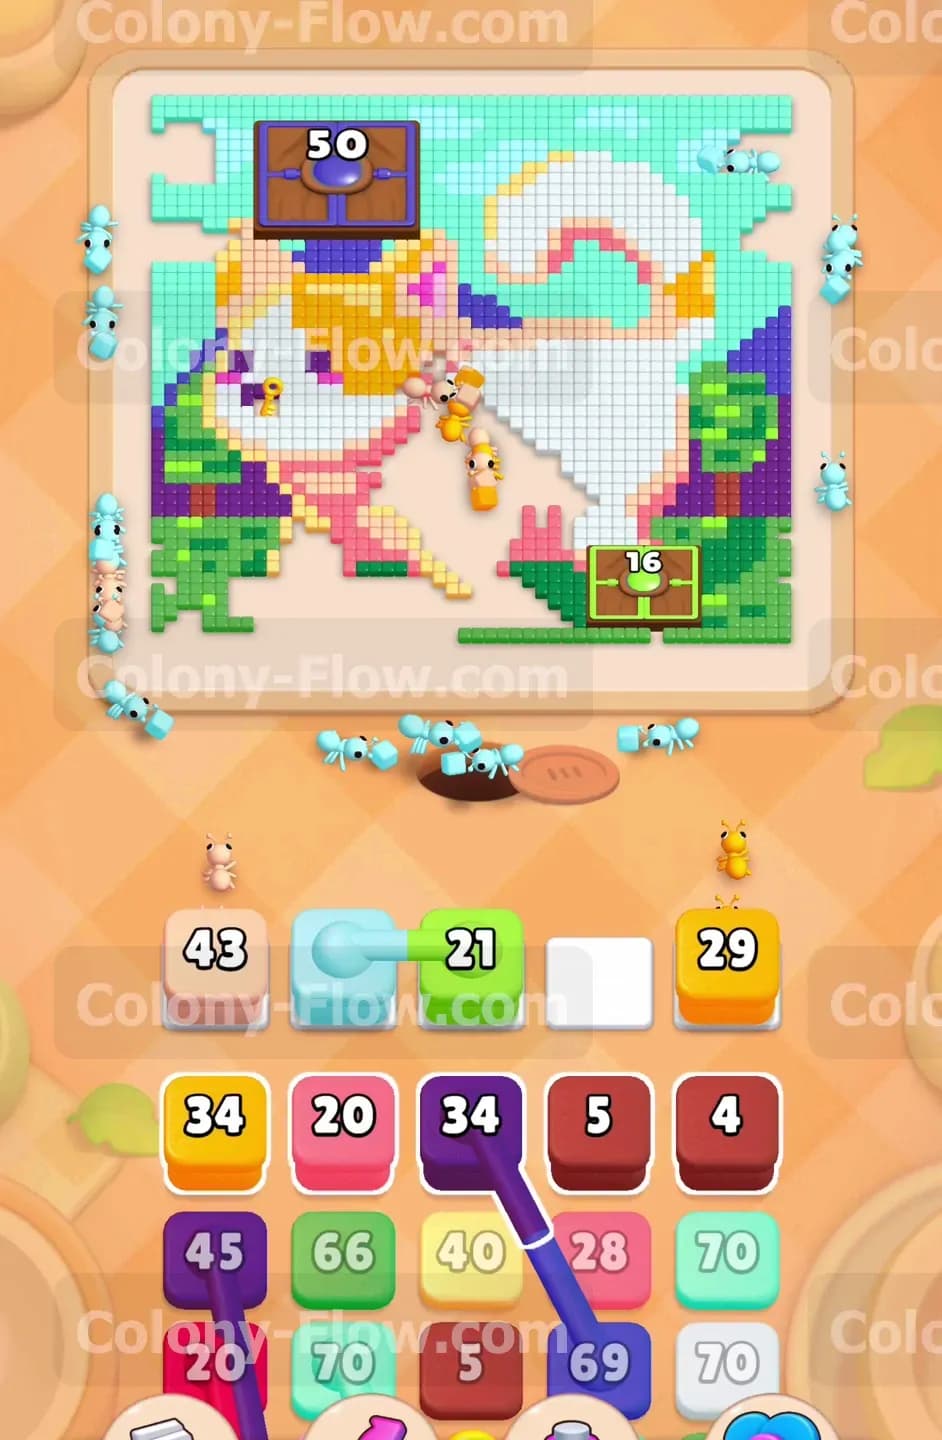
With the center open you should shift your attention to the right side of the board. The green trees block the lower section and surround a Hungry Door that requires 30 units to open. Look for the green Connected Boxes in your tray to tackle this obstacle. You will spot a 60 and a 65 linked together. Connected Boxes are highly dangerous because they instantly consume two of your five precious slots. Make sure you have at least two empty slots before pulling them so you do not cause a fatal jam. The green ants march out and devour the tree tiles rapidly. The green ants are highly efficient when they have a direct route. You will notice the counter on the 30 Hungry Door ticking down rapidly as each tree tile disappears. As the trees vanish the bottom Hungry Door receives its required units and opens up to clear a major roadblock. This gives your ants a clear path to the lower right corner.
Step 3: Handle the purple mountains and feed the top Hungry Door
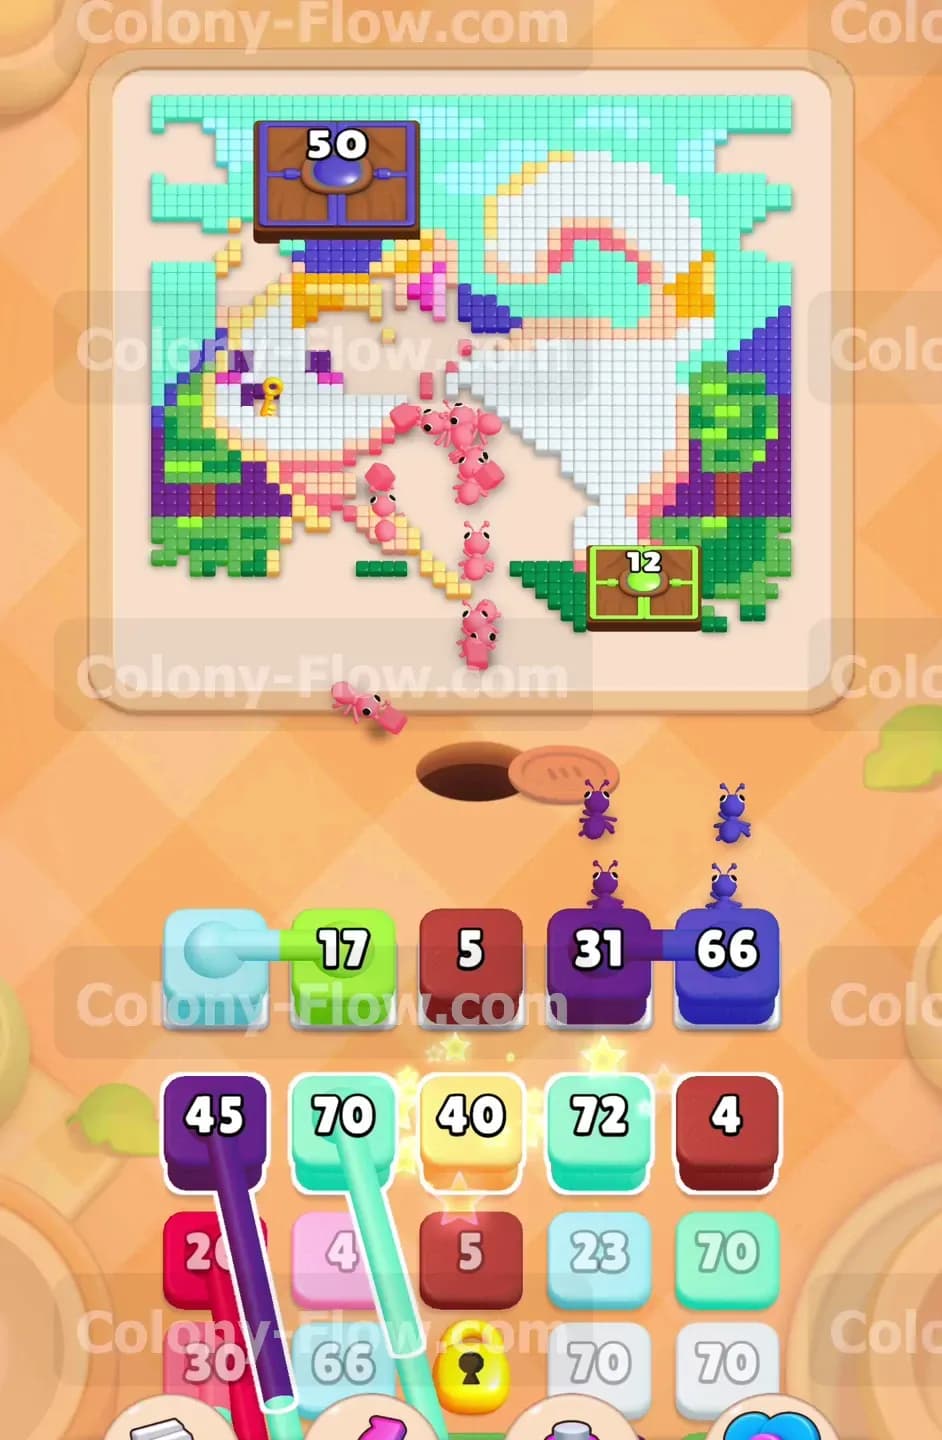
Now you must focus your efforts on the left side and the upper background area. Purple mountains sit directly behind the cat and block access to the massive top Hungry Door. Pull the purple blocks from your tray into your empty waiting slots. You will see numbers like 34 and a connected pair showing 31 and 66. The purple ants swarm the mountain tiles and begin breaking them down piece by piece. This action directly feeds the top Hungry Door which demands 50 units to unlock. The top Hungry Door is visually intimidating but you cannot simply ignore it. Every purple ant that eats a mountain tile contributes to that 50 unit requirement. The purple ants are relentless once they reach the mountains. You will see the counter on the 50 Hungry Door dropping steadily with every bite they take. Once the door receives enough food it pops open and reveals a hidden red heart underneath. You must keep pulling purple blocks steadily to ensure the ants do not run out of targets and back up into your tray.
Step 4: Erase the yellow spots and the pink collar
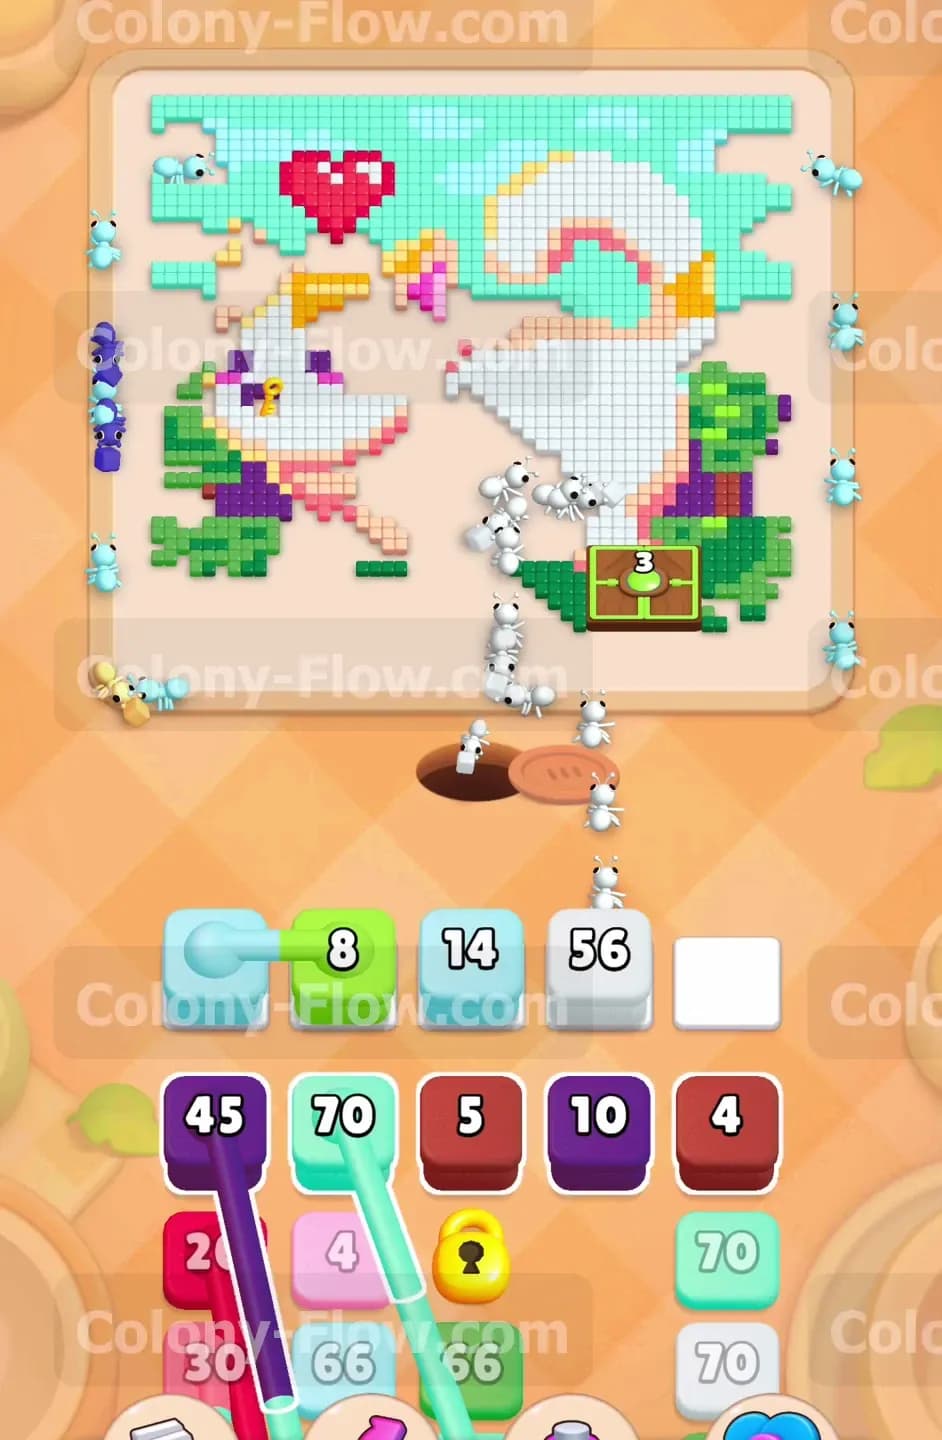
The cat still has several colorful details that you need to erase before moving to the background. The yellow spots on the head and body require your immediate attention. Pull the yellow blocks carrying numbers like 34 and 29 into your tray. The yellow spots give the cat its unique character but they also create annoying obstacles for your ants. The yellow ants will quickly clear these remaining patches and open up more maneuvering room. Next you must remove the bright pink collar around the neck of the cat. Find the pink blocks in your tray and pull them into the active slots. You will use numbers like 10 and 20 to send pink ants onto the board. You want your ants to move smoothly without bumping into random patches of leftover color. The yellow and pink ants handle this cleanup duty perfectly. The pink collar sits right in the middle of the chest and clearing it connects the bottom half of the board to the top half seamlessly.
Step 5: Break down the red heart revealed earlier
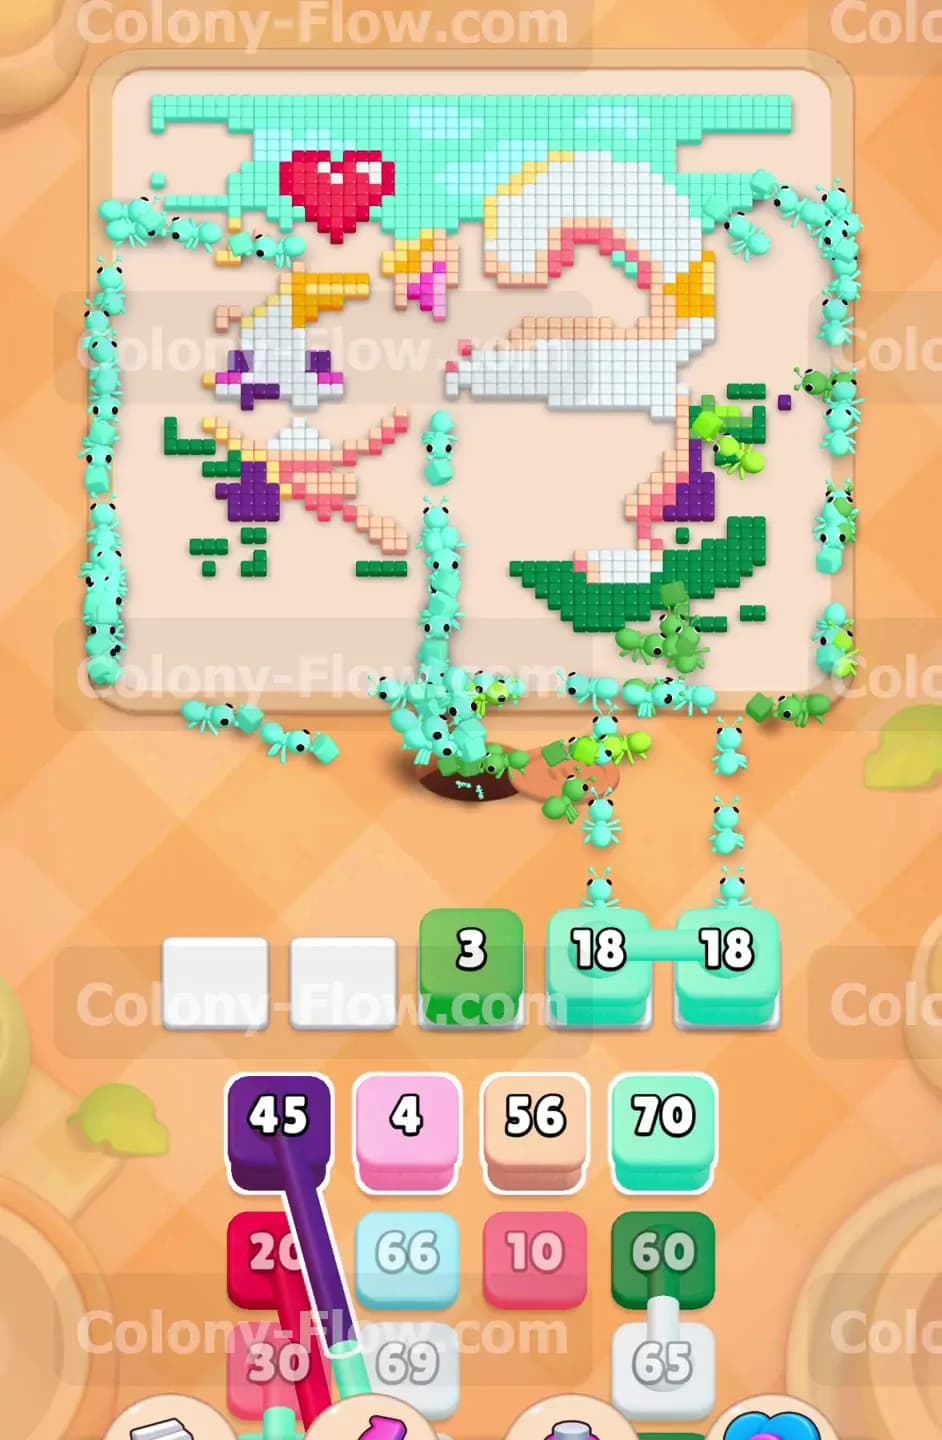
The red heart hidden behind the top Hungry Door is now fully exposed and ready for clearing. You must clear it right now before you get trapped by the large outer borders. Look for the dark red blocks resting in your tray. You will pull a 5 and a connected pair showing 17 and 24. Send the dark red ants up the middle path you created during the very first step. They will march straight to the top of the screen and consume the heart tiles. The red ants have a long walk from the nest hole to the top edge. You must be patient and let them travel the full distance before pulling new blocks. Dark red blocks are rare in this level so you must use them exactly when the heart becomes available. Do not pull the 17 and 24 connected pair until the top Hungry Door is completely gone. If you pull them early they will sit in your tray and block other colors from entering the board. Your slots remain clear because the red ants have direct access to their food.
Step 6: Tackle the massive light blue sky border
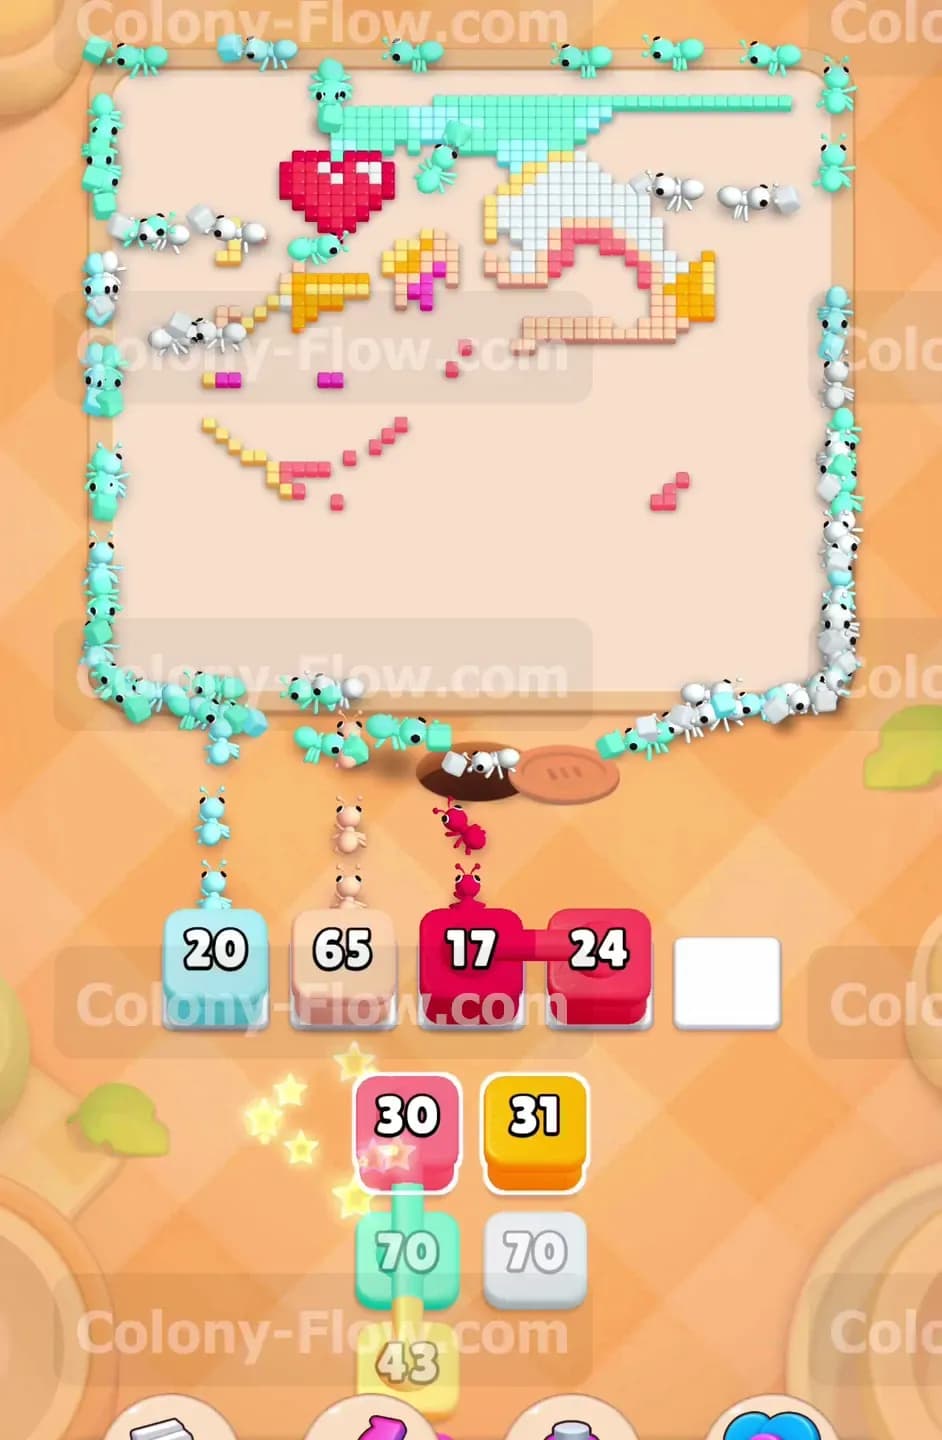
The final major obstacle is the sprawling light blue sky that wraps around the entire picture. This area requires a massive number of ants to clear completely and will take several moves. You will find multiple light blue Connected Boxes waiting in your tray. Pull numbers like 45 and 70 to get the blue swarm moving. The light blue sky contains hundreds of individual tiles which means you will spend the entire late game managing these blocks. The light blue ants will trace the outer edges of the board and eat away the sky from the outside in. They form long fascinating lines as they march around the perimeter of the empty white cat shape. The border shrinks visually as the light blue ants consume the sky. You will feel the tension dropping as the board gets emptier and emptier. You must carefully watch your five slots during this intense phase. Only pull a light blue block when you are absolutely certain the ants can reach the edge without getting stuck behind other colors.
Step 7: Clean up the final scattered tiles to win
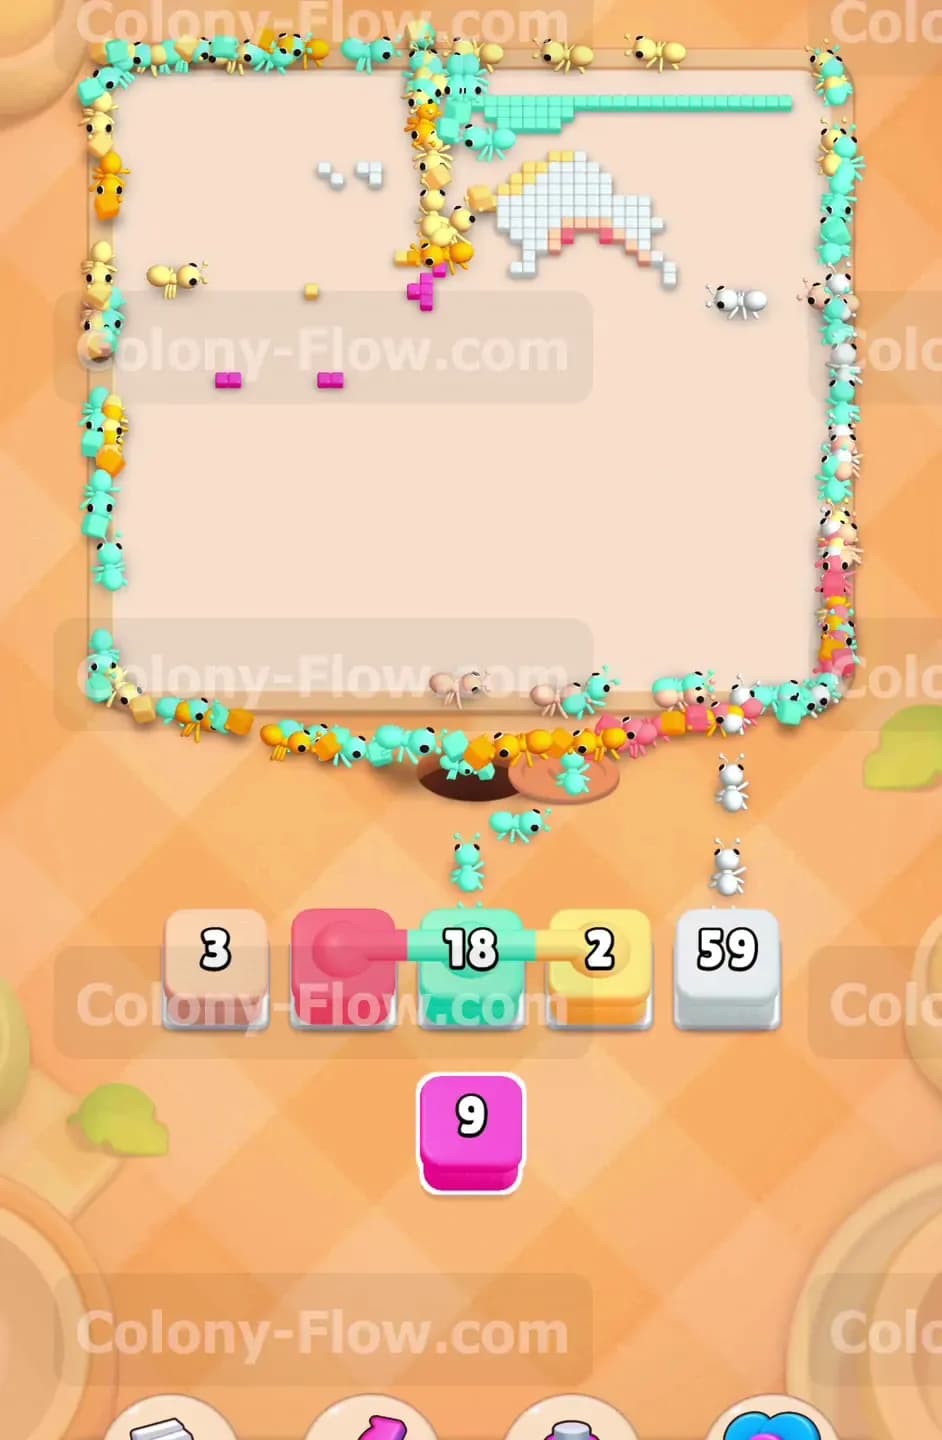
Only a few random tiles remain scattered on the board at this final stage. You might see a stray pink tile or a couple of yellow and white pixels holding on. Pull the lowest number blocks left in your tray to finish the job. You will use a pink 3 and a yellow 2 to send out the final waves of ants. There is a unique tension when you only have a few blocks left in the tray and you might feel tempted to pull them all at once. Resist that urge entirely. Pull the pink 3 and watch the ants finish their job before you pull the yellow 2. Discipline in these final moments guarantees your victory. They will run quickly across the empty board and snatch up the last pieces of food. The final moments are always deeply satisfying. You get to watch the last few ants complete the beautiful sequence you orchestrated from the very beginning. Once the final tile disappears the ants return to their nest hole and you successfully beat the puzzle.
Final Thought
This level tests your ability to juggle large connected blocks while managing limited tray space. You must always plan your moves around the Hungry Doors to avoid early dead ends and frustrating slot jams. Keeping the center path open is the real secret to surviving the final border cleanup. If you find any part of this guide tricky to visualize just watch the video above this article. Seeing the ants in motion makes the entire strategy perfectly clear and easy to follow.