Colony Flow Level 910 Walkthrough Solution & Guides | How to solve Colony Flow 910

Guide By Liam Stone
Updated on August 8, 2026
The video above has the full walkthrough for Level 910, so use it if you'd rather skip the article.
Video doesn't match your screen?
Game updates frequently scramble layouts! Try our AI Screenshot Solver first to find your exact board instantly, or report broken guides to our team.
Colony Flow Level 910 presents a colorful round creature face that requires careful path management. You must guide your ants to clear the portrait without filling your waiting slots. This stage includes a tricky lock and key mechanic that blocks necessary colors in your tray. I will walk you through exactly how to clear the board safely.
Colony Flow Level 910 Overview
What You Are Working With
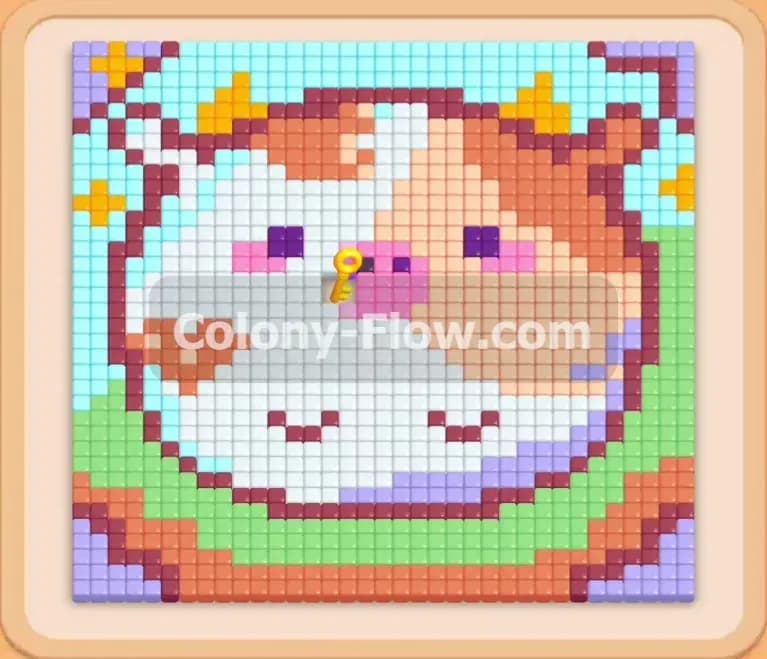
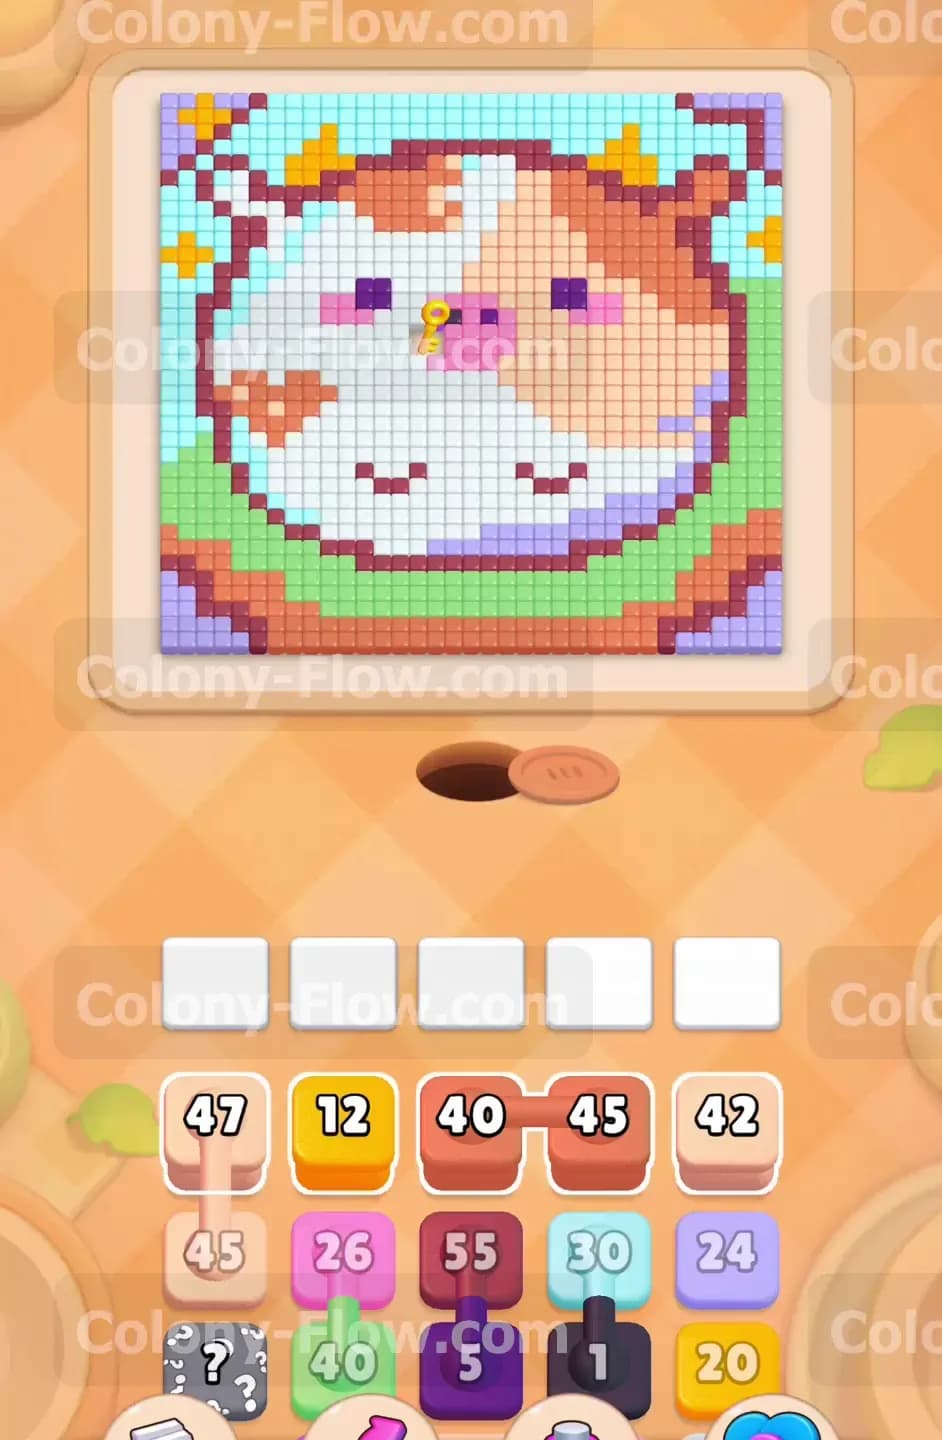
The puzzle board displays a cute pixel art face made of multiple colored tiles. The design features a large white center with light orange spots. You will notice pink cheeks and dark black eyes. Brown tiles form the ears at the top. A dark purple edge wraps around the bottom and sides. A bright green rim sits right under the chin area. Light blue tiles fill the four corners to complete the square shape. A yellow key sits directly on the white and light orange tiles on the left side of the face. This key is your main obstacle. Down in your tray you will see a yellow lock holding a hidden block hostage. You also have a hidden box marked with a question mark. This hidden box will only reveal its color once you free up space and clear its path. Several blocks connect together in the tray. You must pull the top blocks before the lower blocks become available. Some blocks share a solid connecting line. This connection means they move as a sequence. You cannot access the bottom block until the top connected block finishes its job. Your tray holds high number blocks like white seventy and dark purple fifty five.
What It Takes to Clear Level 910 Board
Winning this stage means eating every single pixel on the board and returning the ants to their nest. Your five waiting slots control the entire flow of the game. Tapping a colored block sends it to a slot. Ants match that color and run up the board to eat matching tiles. The block number counts down with each bite. The block disappears from the slot once the number hits zero. You lose the level if you fill all five slots with blocks that have no clear path to their matching tiles on the board. You must always verify that your ants can reach the target color before you tap a block. Clearing this level requires opening the right side first to access the white tiles. You will use the white ants to dig across the face and grab the yellow key. Once the lock opens you can unleash the remaining colors and sweep the left side and background.
Colony Flow Level 910 Step by Step Solution
Step 1: Open the right side border and the right brown ear
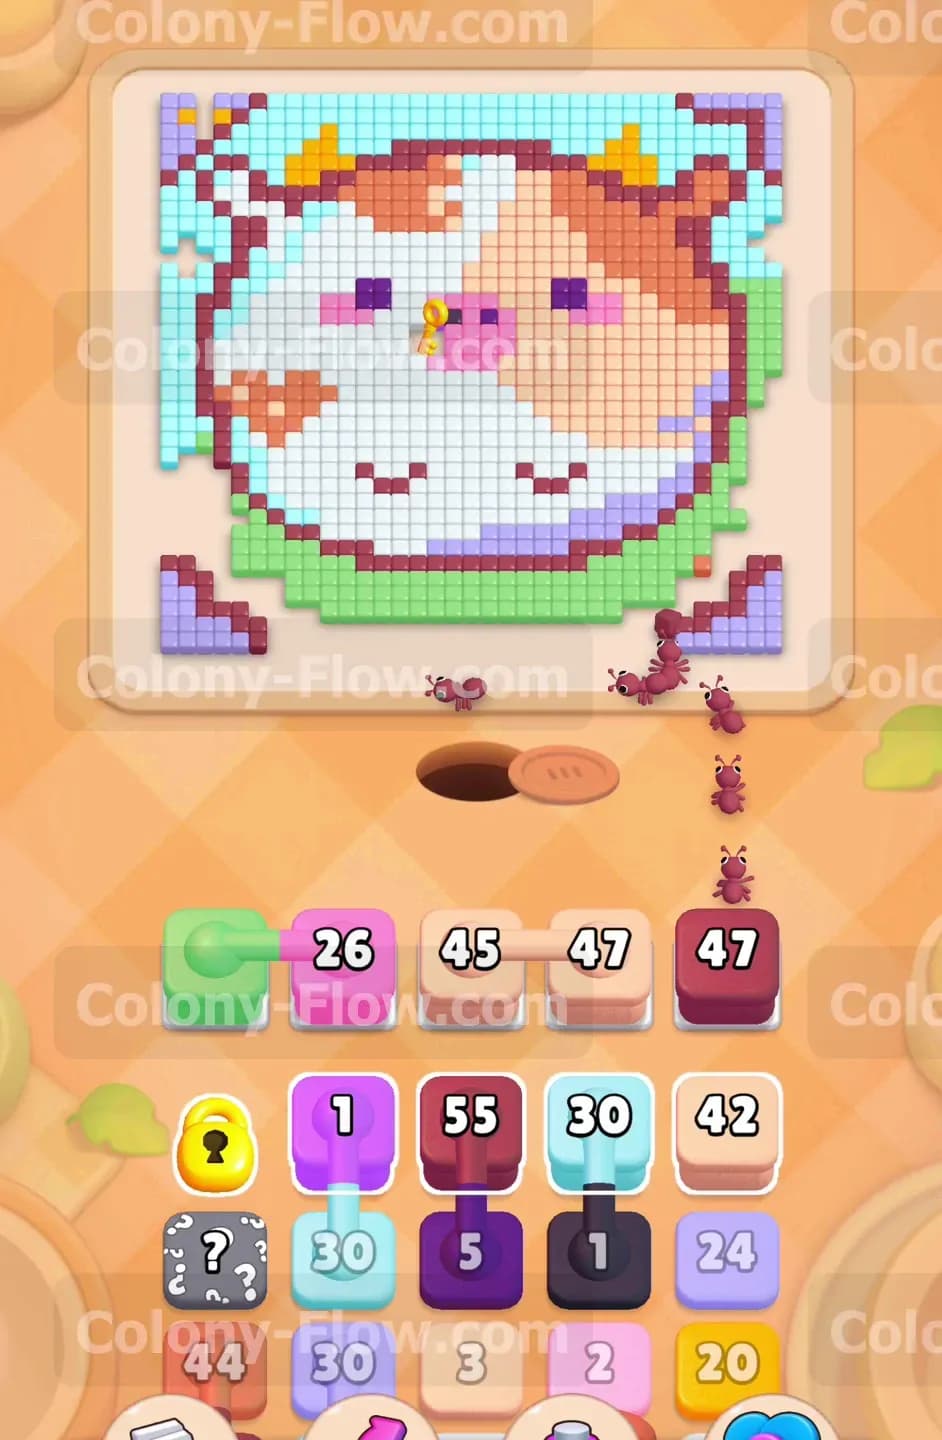
You start the level by targeting the exposed right side of the creature. Tap the dark purple forty seven block to send it to your waiting slots. Dark purple ants will stream out of the hole and begin eating the dark purple bottom border on the right. Tap the brown forty block next. The brown ants will run up the right side and start clearing the brown ear. You will also tap the first light orange forty seven block. These light orange ants will attack the fur spots on the upper right side. Watch the numbers drop as the ants work. You want these blocks to finish and vanish from your slots quickly. The dark purple and brown tiles sit right on the outer edge. They offer a completely open path for the ants to travel. This open path guarantees your slots will not jam early on. Keep your eyes on the dark purple block as it counts down. Freeing that slot gives you room to prepare your next move.
Step 2: Clear the right pink cheek and inner orange spots
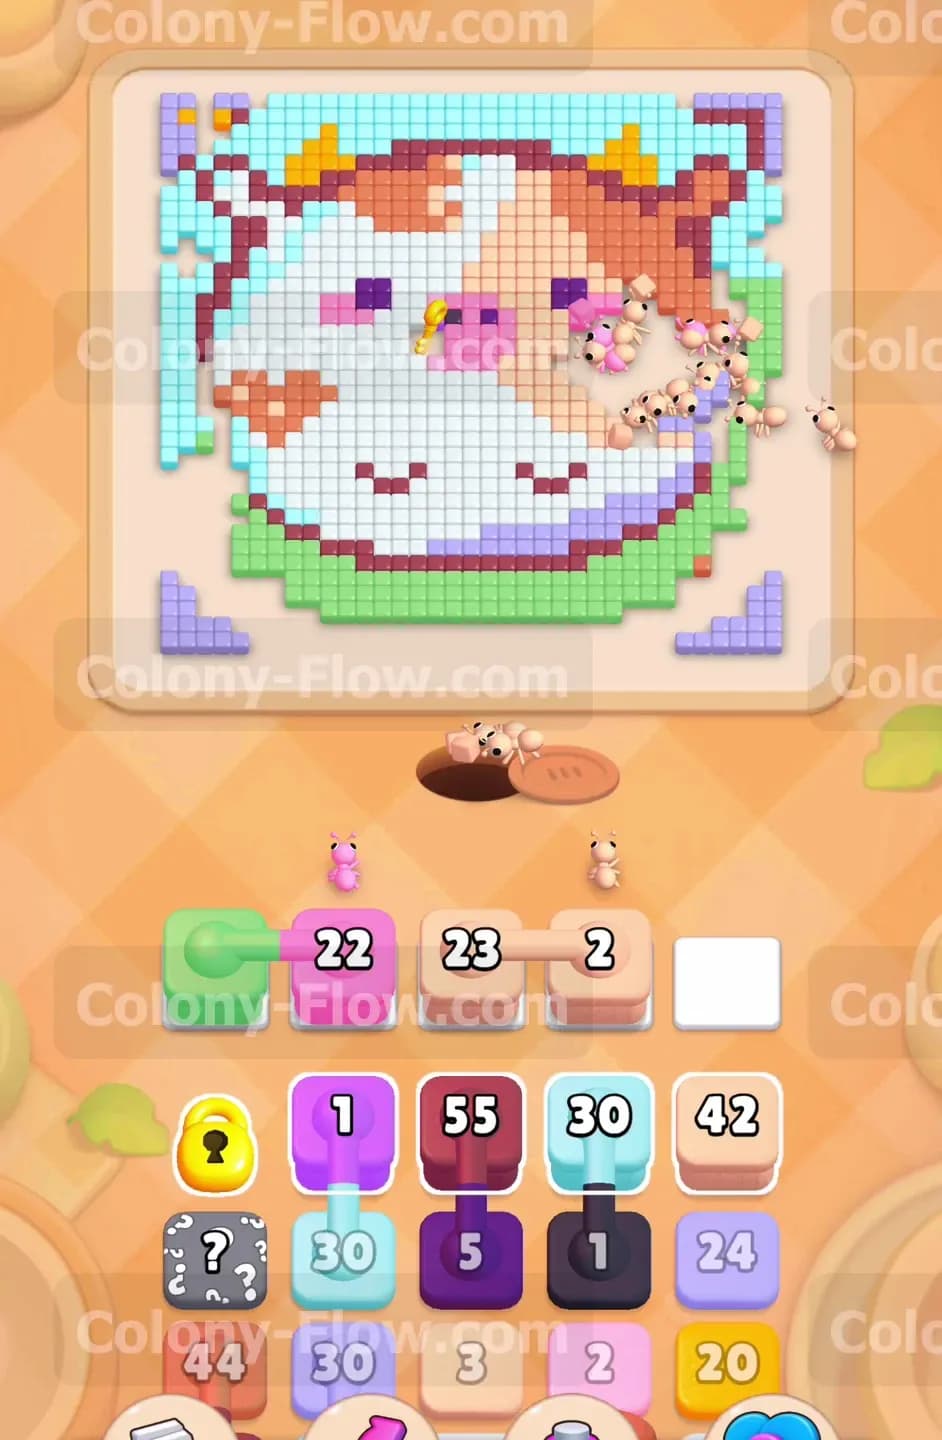
Now that the right edge is clear you can access the inner face. Tap the pink forty five block to target the right pink cheek. The pink ants will rush in and clear those bright pixels. You should also tap the next light orange block to continue clearing the right side spots. A light green block will become available in the tray. You can pull the light green block into a slot so the ants can start chipping away at the right side of the green rim underneath the chin. Managing your space here remains very important. Do not tap any blocks that target the left side yet. The left side is still blocked by the outer layers. You must focus all your attention on peeling away the right side to expose the large white section in the middle. The pink and light orange ants will quickly finish their meals. Their blocks will leave the waiting slots and give you plenty of room for the main push.
Step 3: Unleash the white ants to collect the yellow key
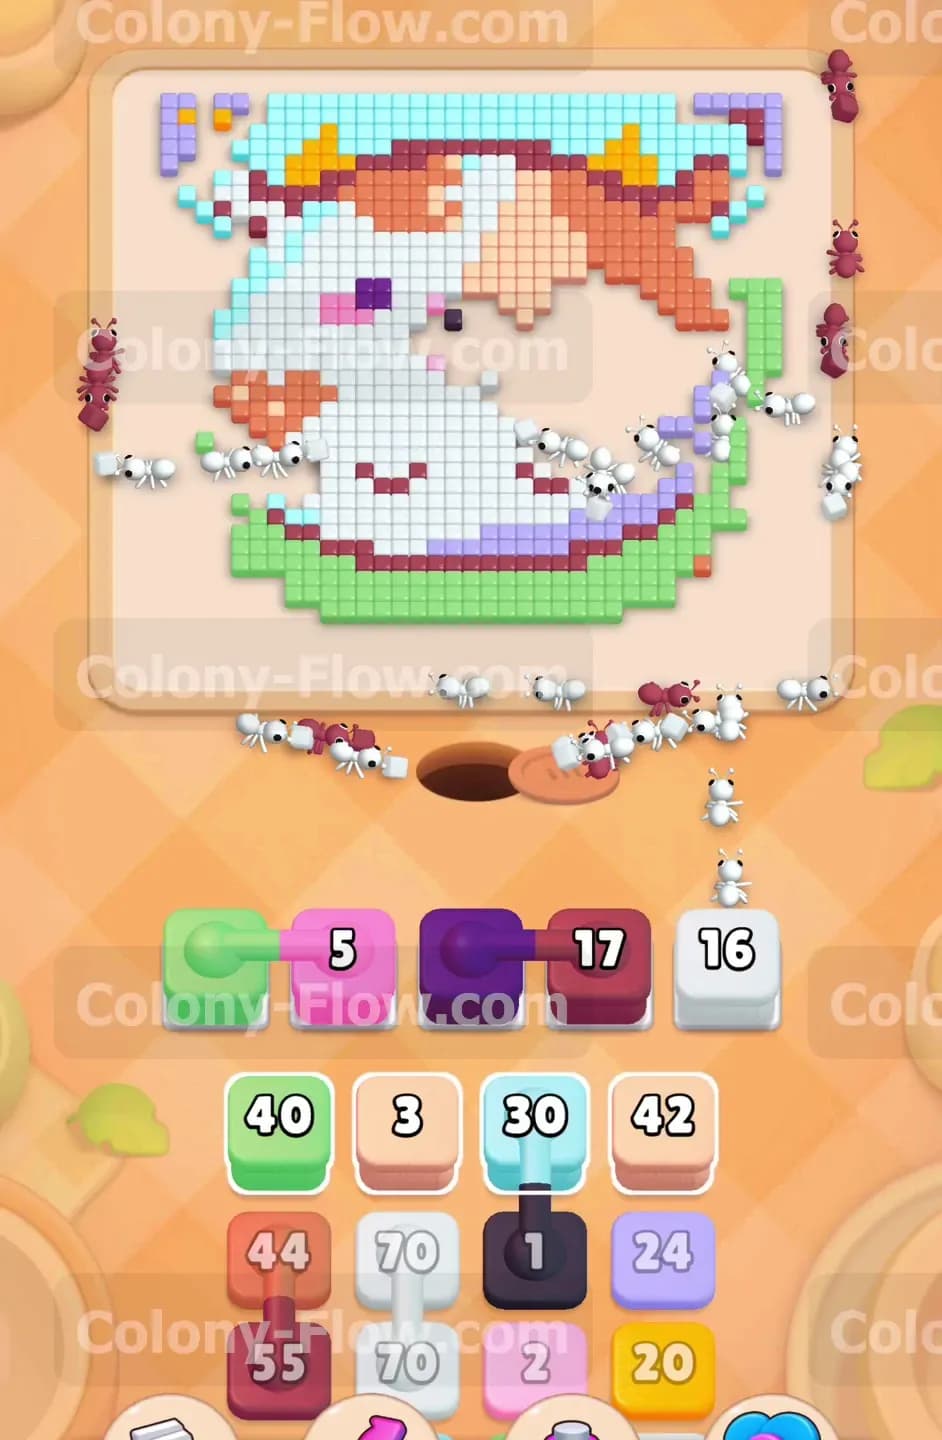
The entire right side of the white face is now completely open. Look down at your tray and find the massive white seventy block. Tap it to send it into your active slots. A huge swarm of white ants will pour out of the nest. They will flood the board and start devouring the white face tiles from right to left. This swarm acts as your primary excavation tool. The yellow key sits on the left side of the face surrounded by these white tiles. The white ants will eat their way directly toward that key. You do not need to tap anything else while this happens. The white seventy block is massive and takes a long time to count down. You must leave plenty of empty slots available while this big block does its work. Filling your slots with other colors right now would cause a traffic jam. Once the ants eat the tile holding the yellow key the key will fly down to your tray. The yellow lock will shatter. This action frees the trapped block and opens up the rest of your tray.
Step 4: Attack the left edge and reveal the hidden box color
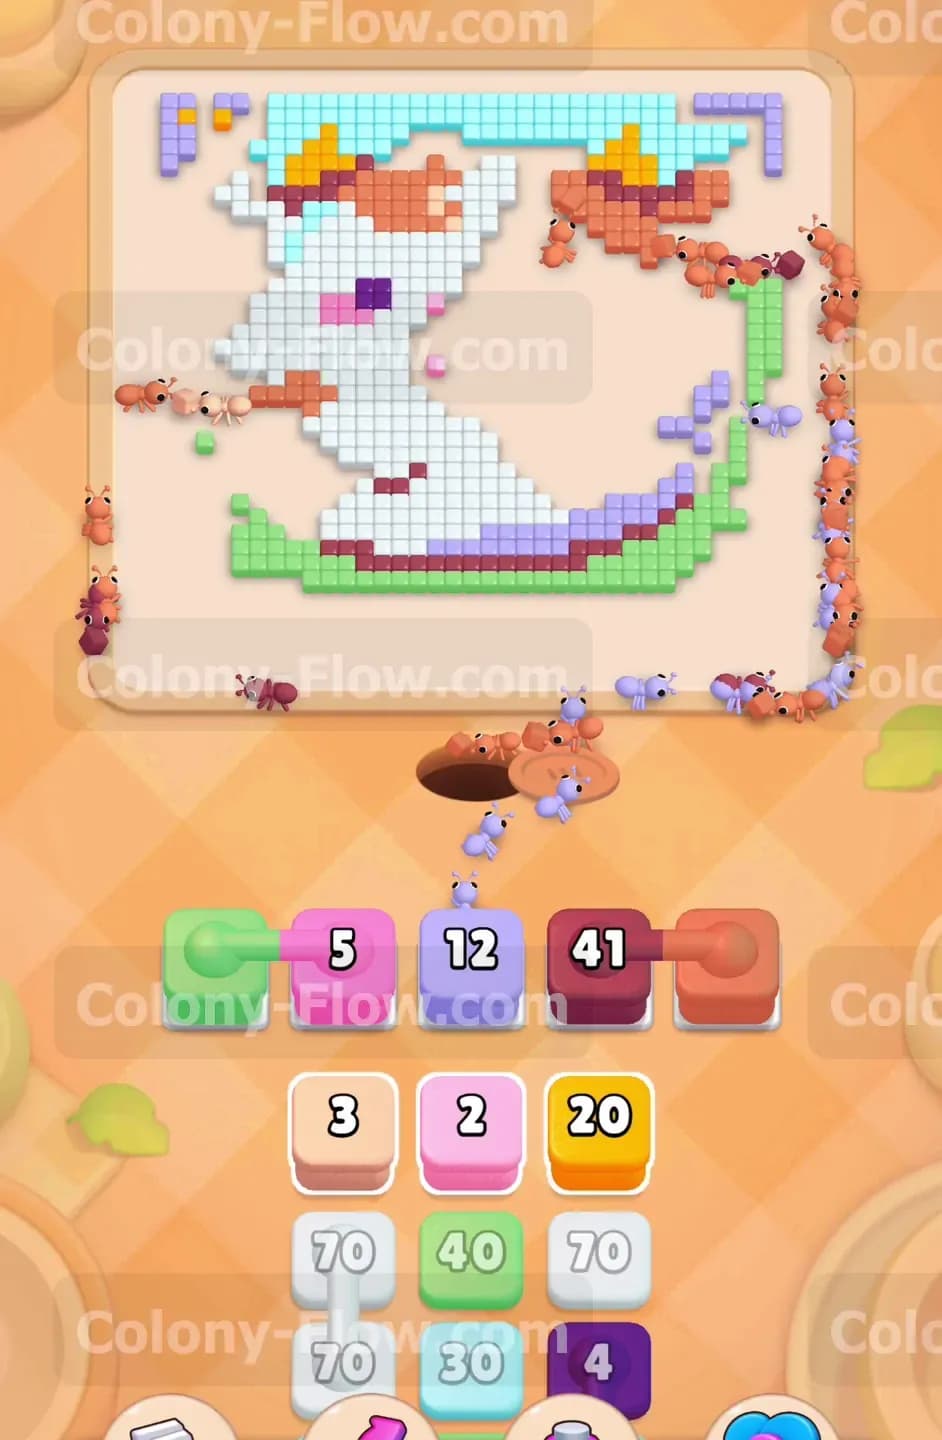
With the yellow lock gone you can now safely target the left side. Tap the light purple block and the next pink block. The light purple ants will clear the background border on the left. The pink ants will consume the left pink cheek. Tap the second brown block to send ants to eat the left brown ear. As you clear these tray blocks the hidden box with the question mark will finally reveal its color. It turns into a dark purple block. Pull this dark purple block up into your slots. The ants will run up and finish off the remaining dark purple border on the bottom left. The board opens up drastically here. You have plenty of open paths to the remaining tiles. Just make sure you wait for a slot to open before you tap the next color.
Step 5: Consume the green bottom rim and finish the face
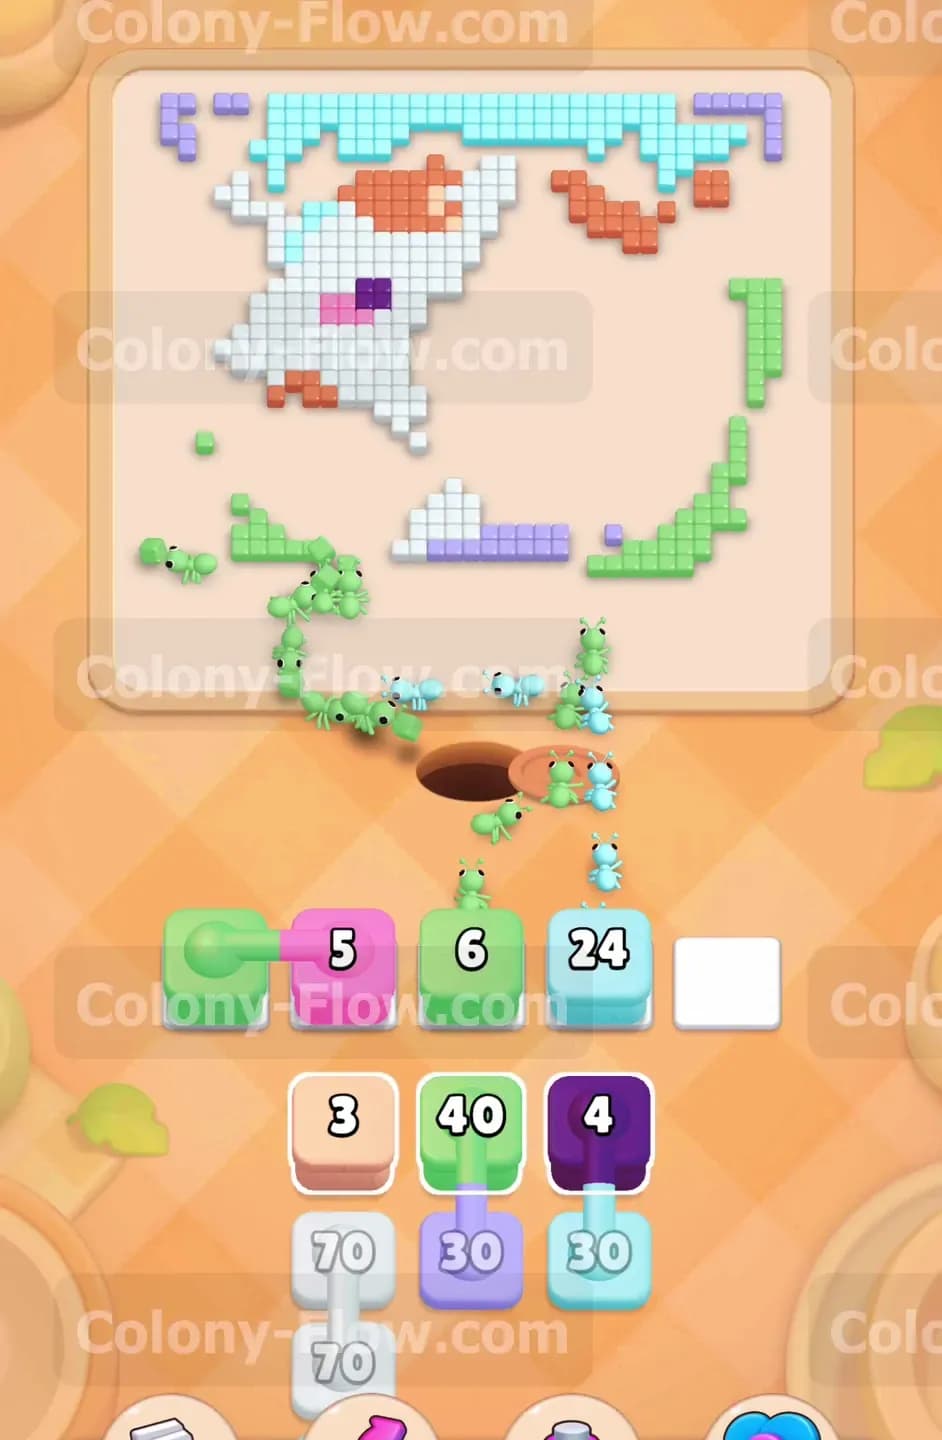
The green rim under the creature face is fully exposed now. Tap the large light green forty block from your tray. The green ants will march up and quickly devour the entire green curve. You will also see another white block in your tray. Tap that white block to send more ants to clean up the left side of the face. This section goes very fast because the ants have a short straight path to the tiles. The white and green blocks will count down to zero and vanish from your slots. A yellow block will become available for the cheek area but you already cleared the key. Just use the yellow block to clear any remaining yellow spots on the board. Keep an eye on the black block as well. Send the black ants up to eat the two small black eyes. The black block only holds a single charge. The black ants will run up and eat the eye pixels instantly. This clears a slot almost immediately. Small number blocks are great for freeing up space in a pinch.
Step 6: Clear the light blue background corners to win
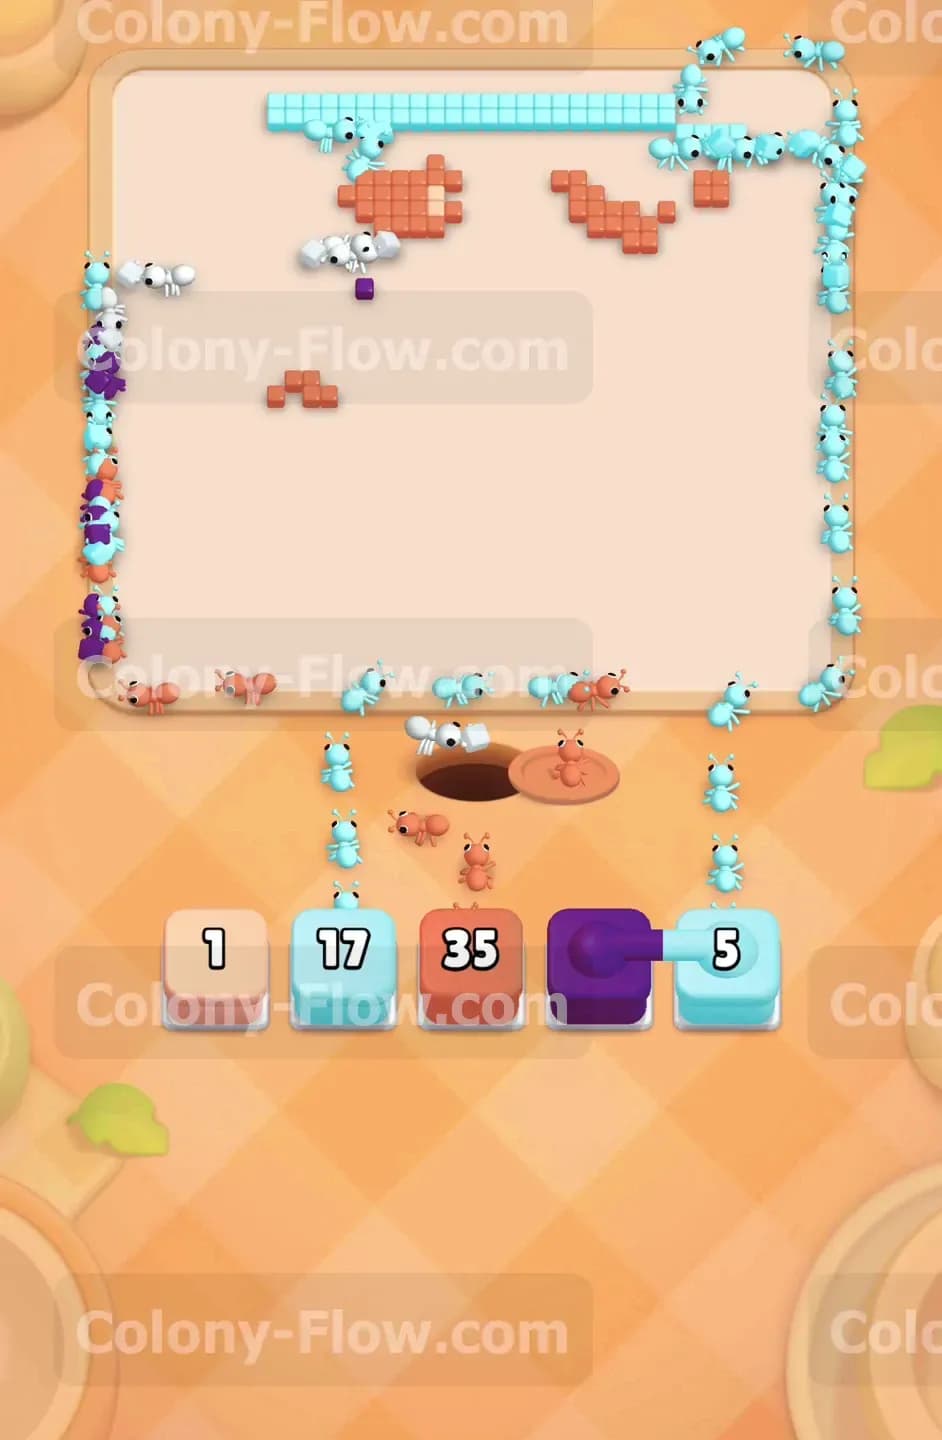
Only the light blue corner tiles remain on the board. Tap the light blue thirty blocks in your tray to fill your waiting slots. The light blue ants will split up and run to all four corners of the screen. They will eat the corner frames and the background pieces. The background tiles are separated into chunks. The ants will naturally divide their forces and tackle each chunk at the same time. You might have one final light orange block left in the tray. Tap it to clear the last few light orange spots mixed into the top corners. The light blue blocks will drop to zero and disappear. This is a very satisfying moment. Your path management pays off right here at the very end. The final ants will return to the nest hole. The completely blank board triggers the victory screen.
Final Thought
Level 910 demands strict patience and a clear focus on path creation. You will easily beat this stage if you clear the right side first and let the white ants dig across to the yellow key. Watch the video above this article if any step feels hard to follow in text format. You can see the exact timing for pulling each color into the waiting slots.