Colony Flow Level 1154 Walkthrough Solution & Guides | How to solve Colony Flow 1154

Guide By Liam Stone
Updated on August 12, 2026
Watch the video above first if you want to see Level 1154 solved before reading the written steps.
Video doesn't match your screen?
Game updates frequently scramble layouts! Try our AI Screenshot Solver first to find your exact board instantly, or report broken guides to our team.
Welcome to Colony Flow Level 1154. You will face a beautiful and highly detailed butterfly pixel art puzzle in this level. The board presents a complex challenge with heavily layered colors and a tricky special tile mechanic that can end your run early if you are not careful. I played through this level multiple times to find the most reliable way to clear the board without jamming the tray. You need to pull the right colors in the right order to keep your ants moving and your waiting slots open.
Colony Flow Level 1154 Overview
What You Are Working With
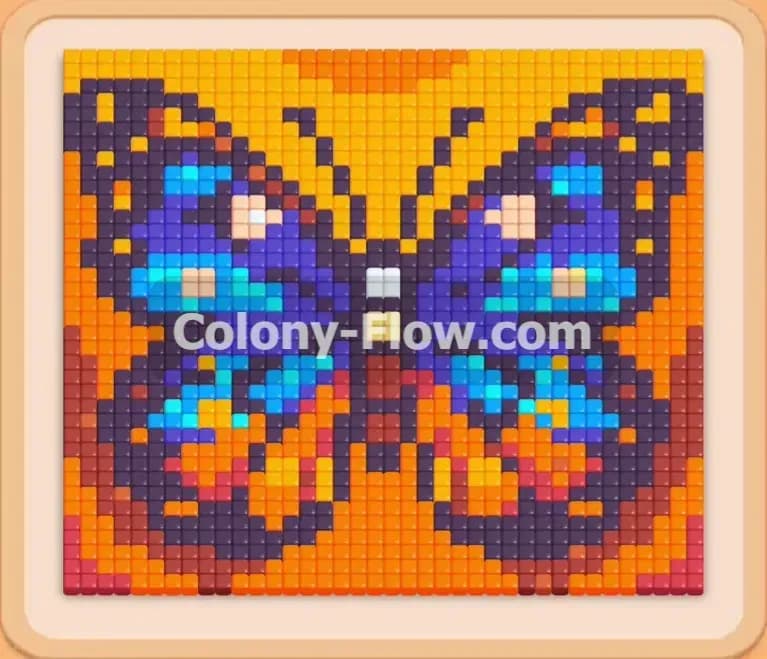
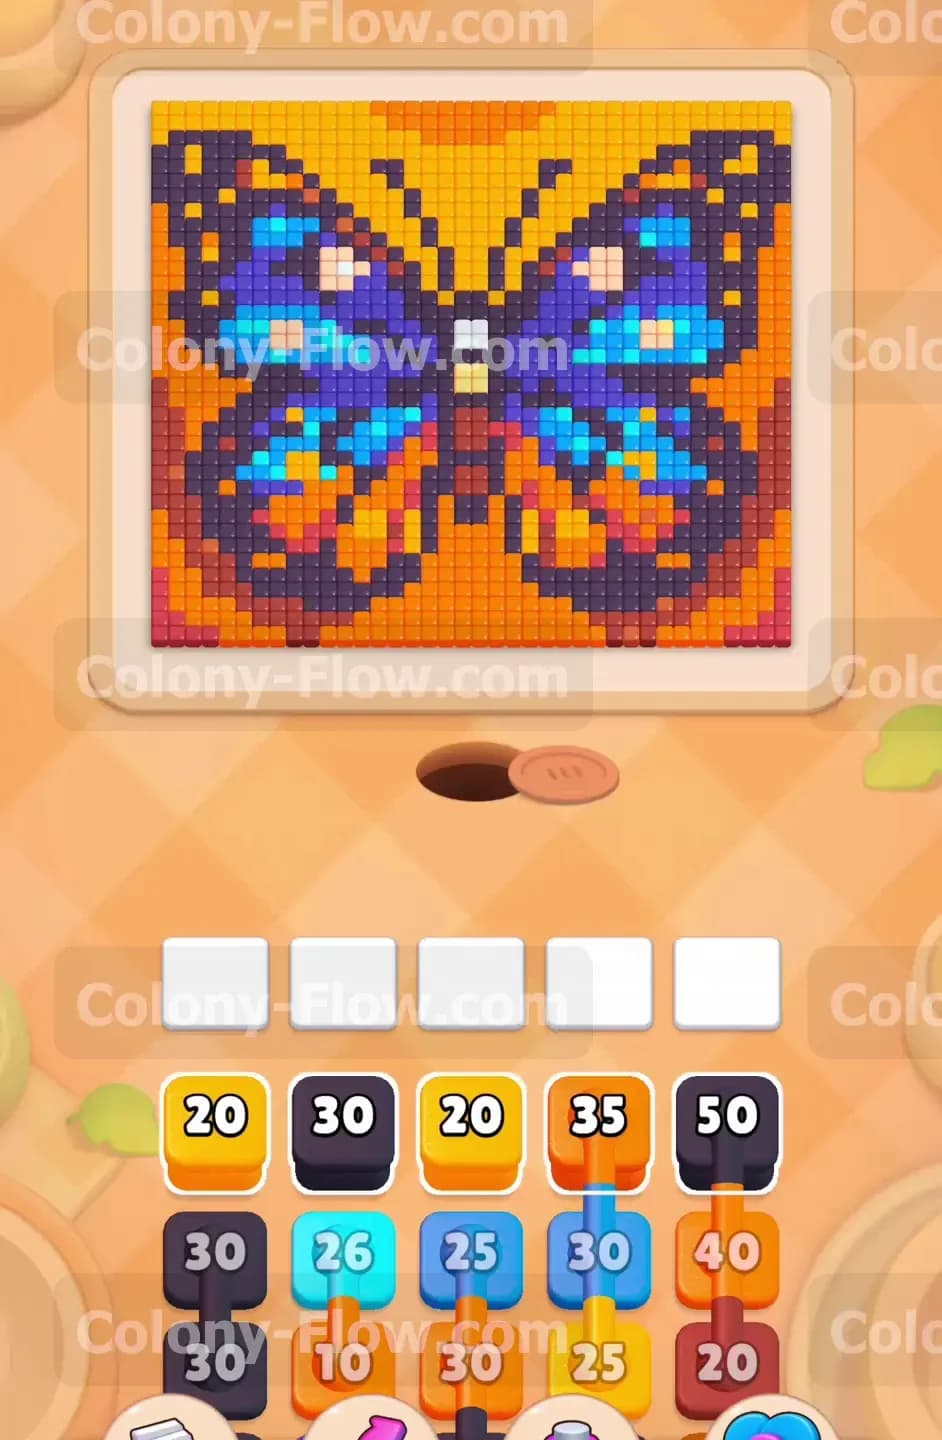
The picture you need to clear is a massive butterfly taking up most of the screen. You have a thick dark purple border surrounding the entire insect. Inside that border you find bright orange outer wings. The inner wings hold large dark blue sections dotted with small light blue spots. The top of the butterfly features a wide yellow crown. The center body uses white and dark purple tiles. The bottom tail sections include some dark red and brown pixels. The main special element in this level is the Connected Boxes. You will see colored blocks in your tray linked together by thick cords. When you pull one block from a connected group all the linked blocks move into your waiting slots together.
What It Takes to Clear Level 1154 Board
You win the level when every single pixel of the butterfly is gone and the ants return to the nest. The core challenge comes directly from managing those linked blocks. Your waiting area only holds five blocks at a time. If you pull a chain of three connected boxes and none of them have an open path to their matching food tiles your slots will jam. If your slots fill up completely and no ants can clean the board you lose the level immediately. You must clear the outer layers of the butterfly first to expose the inner colors. Every single move requires you to verify an open path exists before you pull a new color from the tray. You survive by ensuring your board never hits a dead end.
Colony Flow Level 1154 Step by Step Solution
Step 1: Clear the dark purple outer border to open the wings
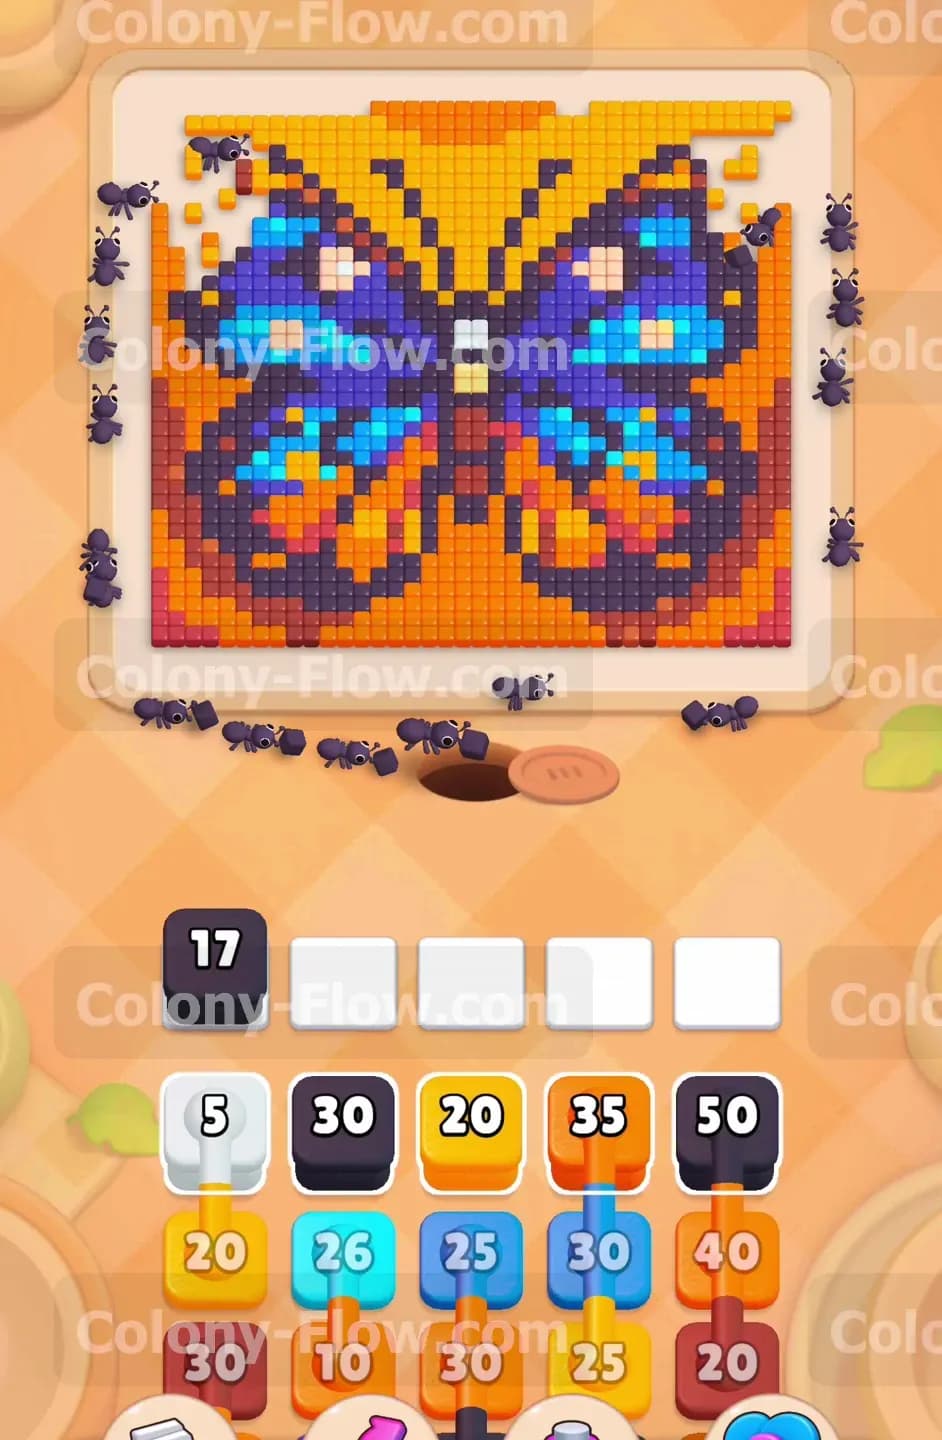
Your very first move sets the pace for the entire board. A thick dark purple outline surrounds the entire insect and acts as a solid wall blocking your ants from reaching the colorful inner wings. You must dismantle this wall before you do anything else. Look down at your tray and locate a dark purple block with a high number. Tap and drag that dark purple block into one of your five empty waiting slots. Immediately a massive line of dark purple ants will pour out of the nest hole at the bottom of the screen. Watch them march up the board and spread out along the perimeter of the butterfly. As each ant grabs a pixel of food the number on your block ticks down. The ants eat away the thick border rapidly. This clears a massive amount of space and fully exposes the orange edges of the wings underneath. Always start with the outermost layer on a board like this because it creates multiple entry points for your next wave of ants. Keep your eyes on the remaining count on your dark purple block. When the number reaches zero the block vanishes from your waiting area and gives you a free slot.
Step 2: Send orange ants to consume the outer wing edges
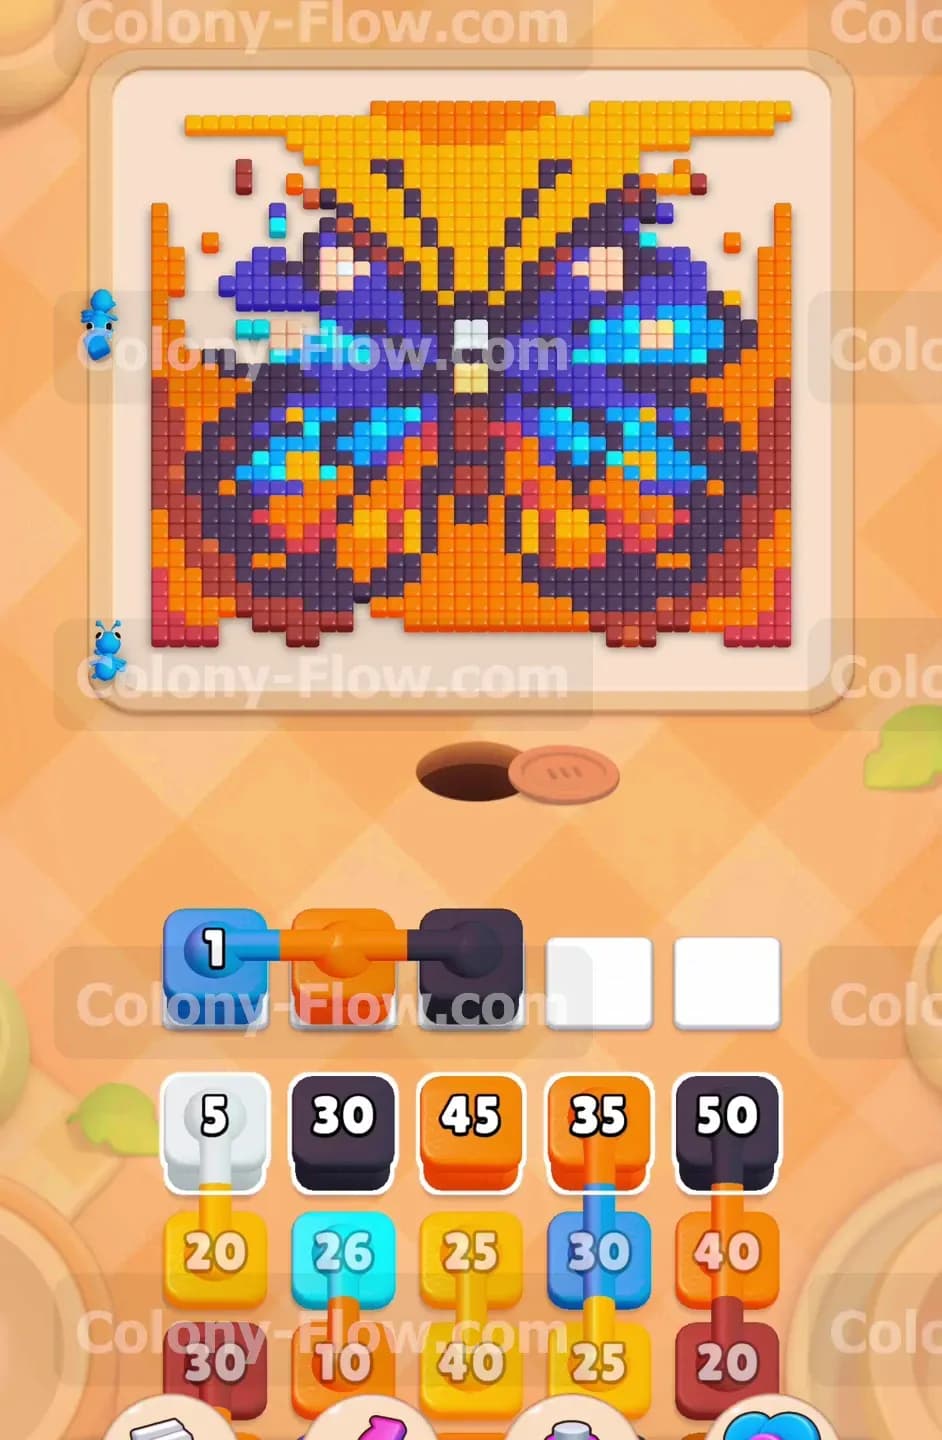
With the dark purple wall mostly gone the orange tiles are fully exposed and ready to clear. You can now pull an orange block from your tray and bring it up to the waiting area. The orange ants will flood the newly opened paths and start chewing through the thick orange bands on the left and right sides of the wings. This is a crucial move because it carves deep channels into the center of the butterfly. You need these empty channels to reach the blue interior sections later. Make sure the orange block you pull has a large enough number to clear a significant portion of the edge. If the orange block finishes and there are still some orange tiles blocking the way just let them sit. You will deal with the remaining pieces later. Your primary goal right now is simply opening a wide enough route to access the dark blue and light blue tiles inside the wings.
Step 3: Pull the first set of connected boxes to handle the blue spots
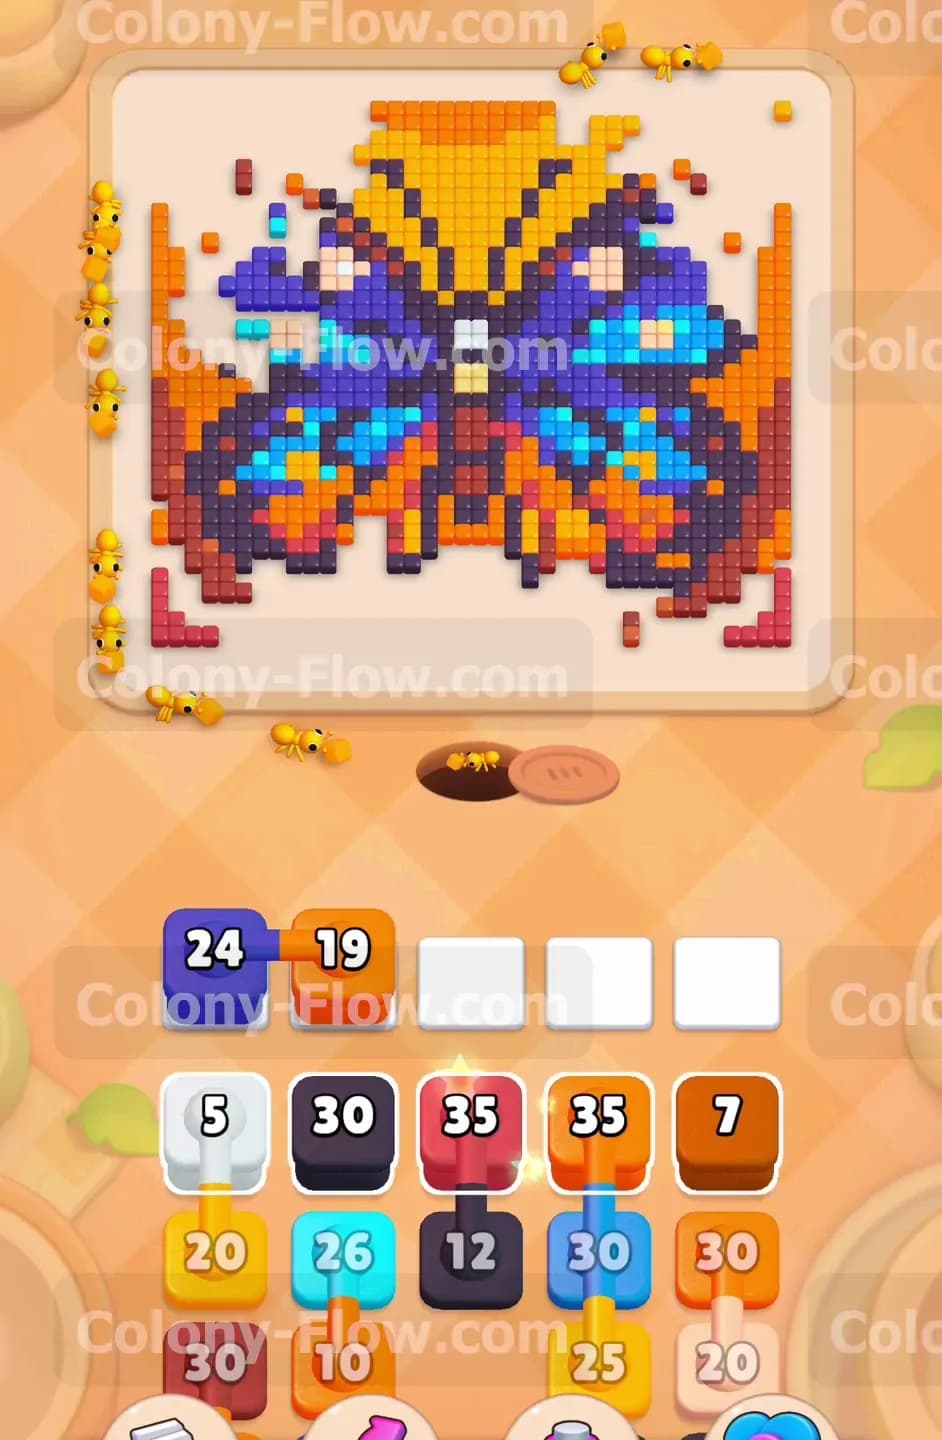
Now you will encounter your first set of linked blocks in the tray. You should see a light blue block connected to an orange block and a dark purple block. This chain takes up three waiting slots at once when you pull it. You must confirm your paths are ready before making this dangerous move. You already opened the orange and dark purple paths in your previous steps so those colors are safe. Pull this linked chain up into your tray. The orange and dark purple ants will immediately deploy to clean up the remaining outer edges of the wings. This keeps two of the three blocks active and prevents your slots from jamming. Meanwhile the light blue ants will navigate the empty channels you just created and begin eating the light blue spots scattered across the inner wings. Because you planned ahead all three colors have a valid path and your board keeps flowing smoothly.
Step 4: Attack the massive dark blue core of the wings
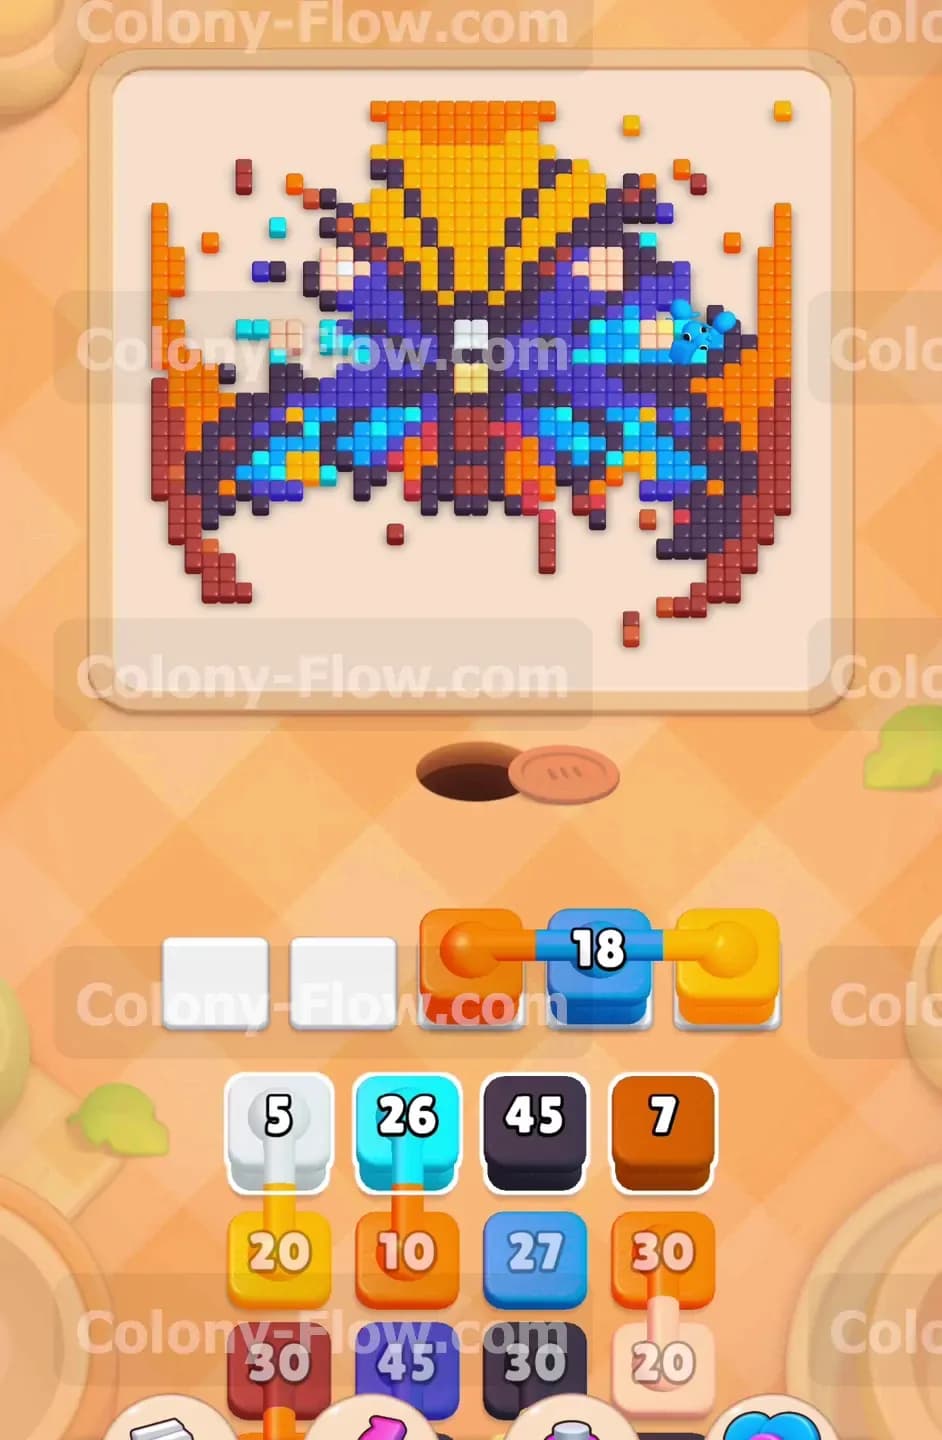
The inner sections of the wings contain huge blocks of dark blue tiles. You need to clear these large chunks to expose the center body and the top yellow crown. Find a large dark blue block in your tray and move it into an open waiting slot. A massive swarm of dark blue ants will rush out of the nest and attack the inner wing sections. You will see a huge portion of the picture vanish during this step. This creates a massive empty space in the middle of the board. An open board is exactly what you need when dealing with the connected boxes. The more space you clear the easier it becomes to find a valid path for any new color you pull. Let the dark blue ants finish their work completely before moving on to the next chain.
Step 5: Navigate the triple linked chain for the upper sections
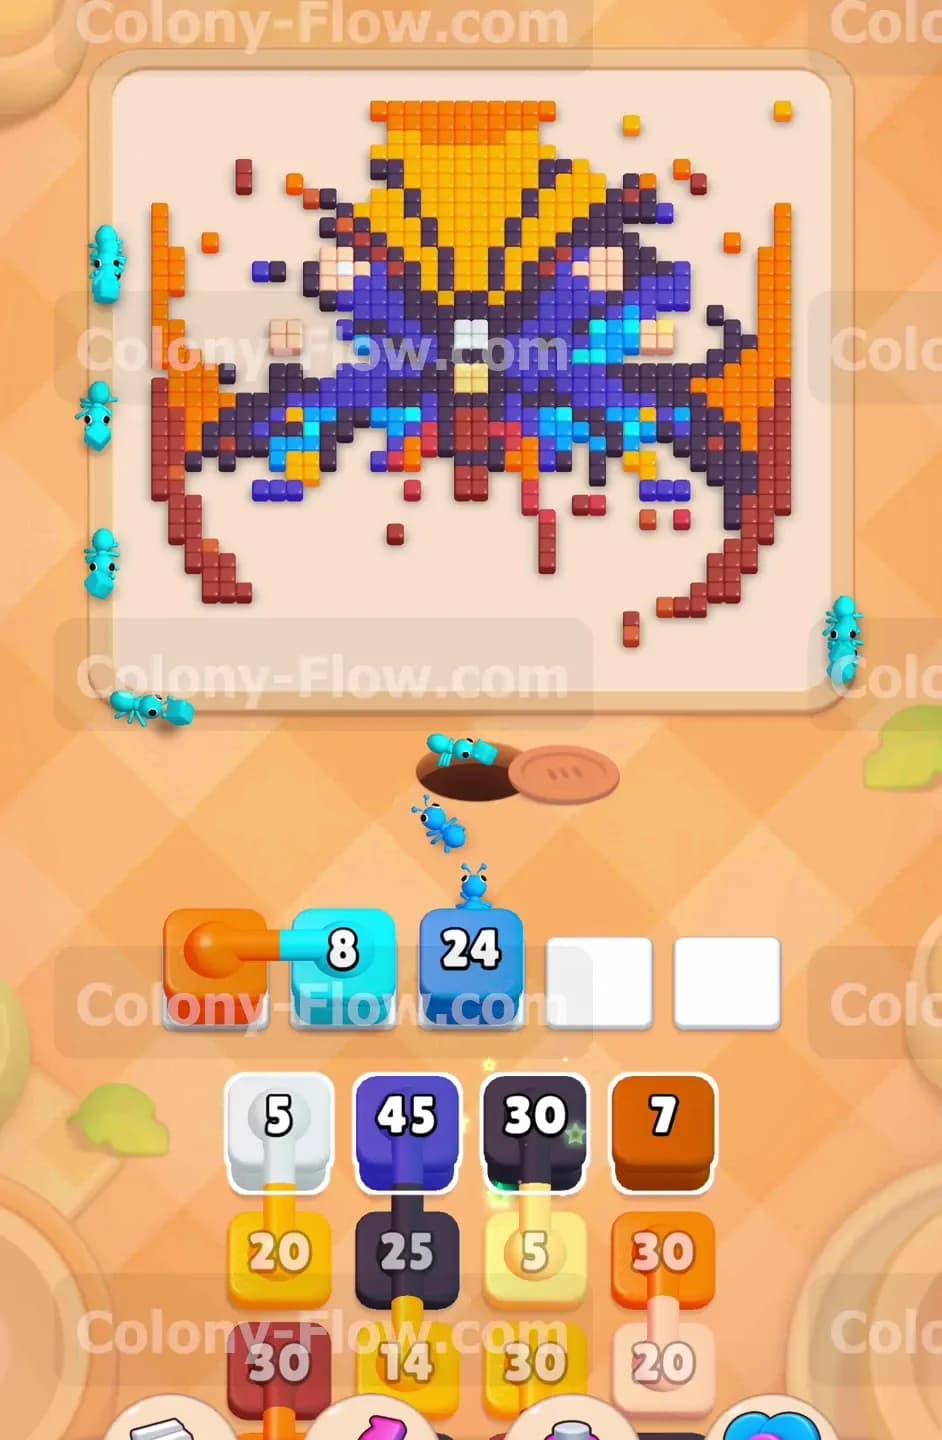
Your tray will present another challenging set of connected boxes right after the dark blue clears. This group links an orange block to a light blue block and a dark blue block. Because you cleared massive sections of the wings in the previous step all three of these colors now have wide open paths. Pull the chain into your waiting slots without hesitation. Since the paths are completely clear the ants for all three colors will stream out of the nest simultaneously. They will eat away the remaining spots and edges on the middle and upper wings. This move clears out the final remnants of the main wing structure and leaves only the yellow top section and the center body. Managing these linked chains perfectly by ensuring paths exist beforehand is how you keep the board moving and avoid a dead end.
Step 6: Clear the center body and prepare for the yellow crown
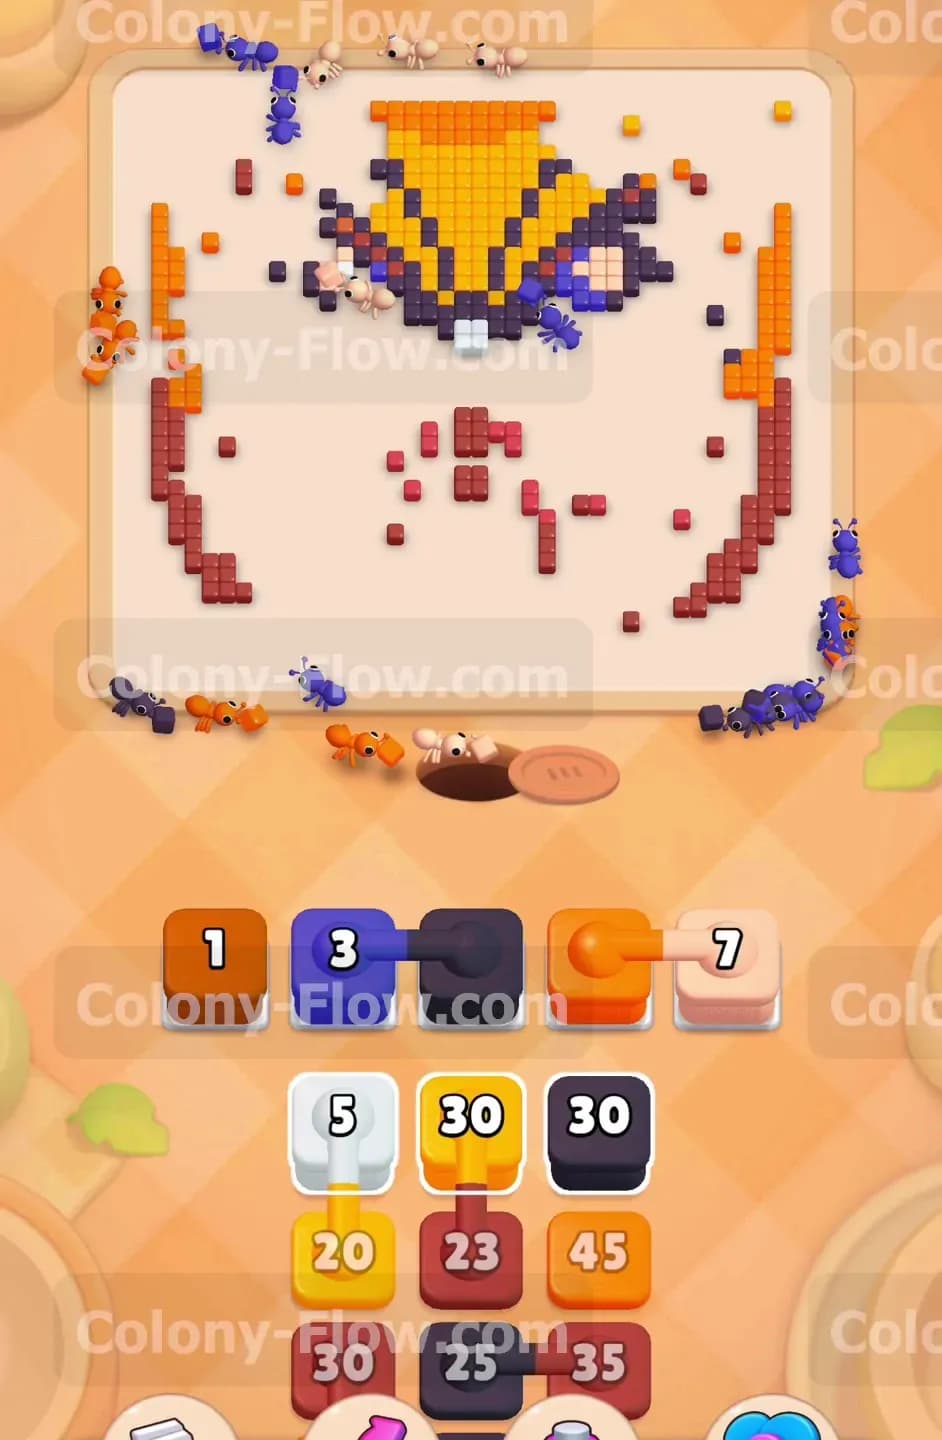
The butterfly body consists of a vertical line of white and dark purple tiles running straight down the middle. You need to remove this central pillar to fully open the top half of the board. Locate a white block in your tray and pull it up to an empty slot. The white ants will march straight up the middle and eat the center line of the body. Next pull another dark purple block to finish off the lower body segments. This action completely disconnects the left and right sides of the puzzle. The ants now have a straight empty shot at the large yellow crown at the very top of the screen. You always want to clear the center out before tackling the top edge because it gives the ants the shortest possible travel distance from the nest.
Step 7: Deploy the massive five block chain to clear scattered chunks
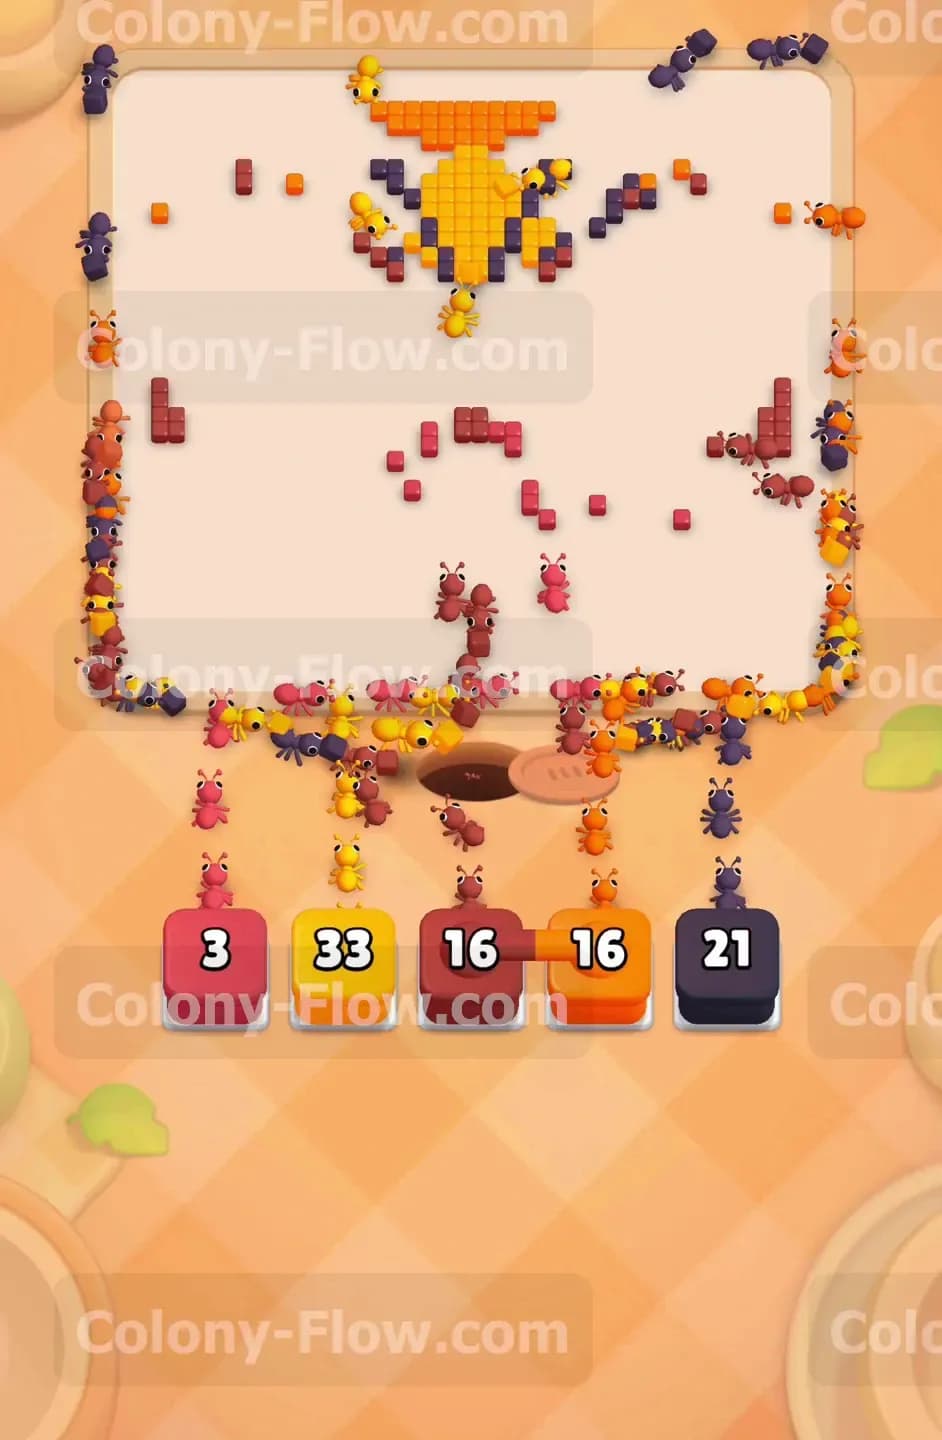
Late in the puzzle you will face a huge group of five connected boxes. This massive chain includes brown dark blue dark purple orange and white blocks all linked together. Pulling this chain fills your entire waiting area in a single move. This is the most dangerous moment in the level. You survive this by ensuring the board is completely open before you pull. Because you followed the previous steps the paths are totally clear for every color. Pull the massive chain into your slots. Ants of every color will explode from the nest and scatter across the board. They will hunt down the scattered remaining chunks of the body the wing tips and the lower tail segments. Watching five different colors of ants swarm all at once without jamming the tray proves you managed the board perfectly.
Step 8: Clean up the final scattered pixels to finish the puzzle
The board is nearly empty now. You will only see a few isolated red yellow and dark purple tiles scattered randomly around the wide open space. Your tray holds the final connected groups containing red and yellow blocks alongside one last dark purple block. Pull these remaining blocks up into your waiting slots. The red and yellow ants will sprint across the empty board to consume the last few scattered pixels on the tail and the wings. The yellow ants will finally dismantle the large crown at the top of the picture. The final dark purple ants will clean up any leftover border pieces. Once the very last pixel disappears from the screen the level ends in a win.
Final Thought
Level 1154 requires careful planning around the connected blocks to prevent your tray from filling up. You must open paths by clearing the outer borders before you pull those long chains into your waiting area. Keep your board clear and you will win easily. Watch the video above this article if you find any step hard to follow in text.