Colony Flow Level 90 Walkthrough Solution & Guides | How to solve Colony Flow 90

Guide By Liam Stone
Updated on August 1, 2026
You can jump straight to the video above and watch the full Level 90 solution instead of reading on.
Video doesn't match your screen?
Game updates frequently scramble layouts! Try our AI Screenshot Solver first to find your exact board instantly, or report broken guides to our team.
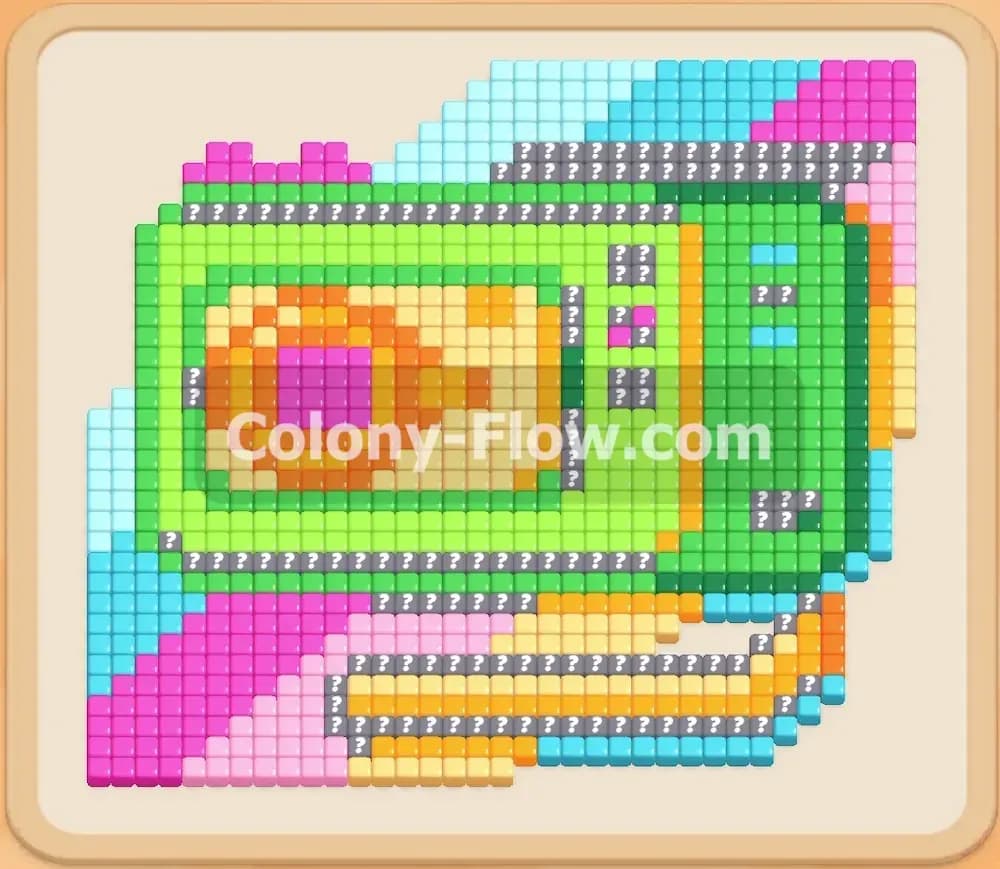
Welcome to Colony Flow Level 90. This stage brings a dense and colorful rectangular design that reminds me of an old retro gadget. I played through this exact board to figure out the perfect sequence of moves. The challenge here comes from managing a very tight tray while peeling back multiple thick layers of colored blocks. You need to feed this entire pixel art picture to your ant colony while making sure your waiting slots never jam up. I will walk you through the entire process so you can clear the board smoothly.
Colony Flow Level 90 Overview
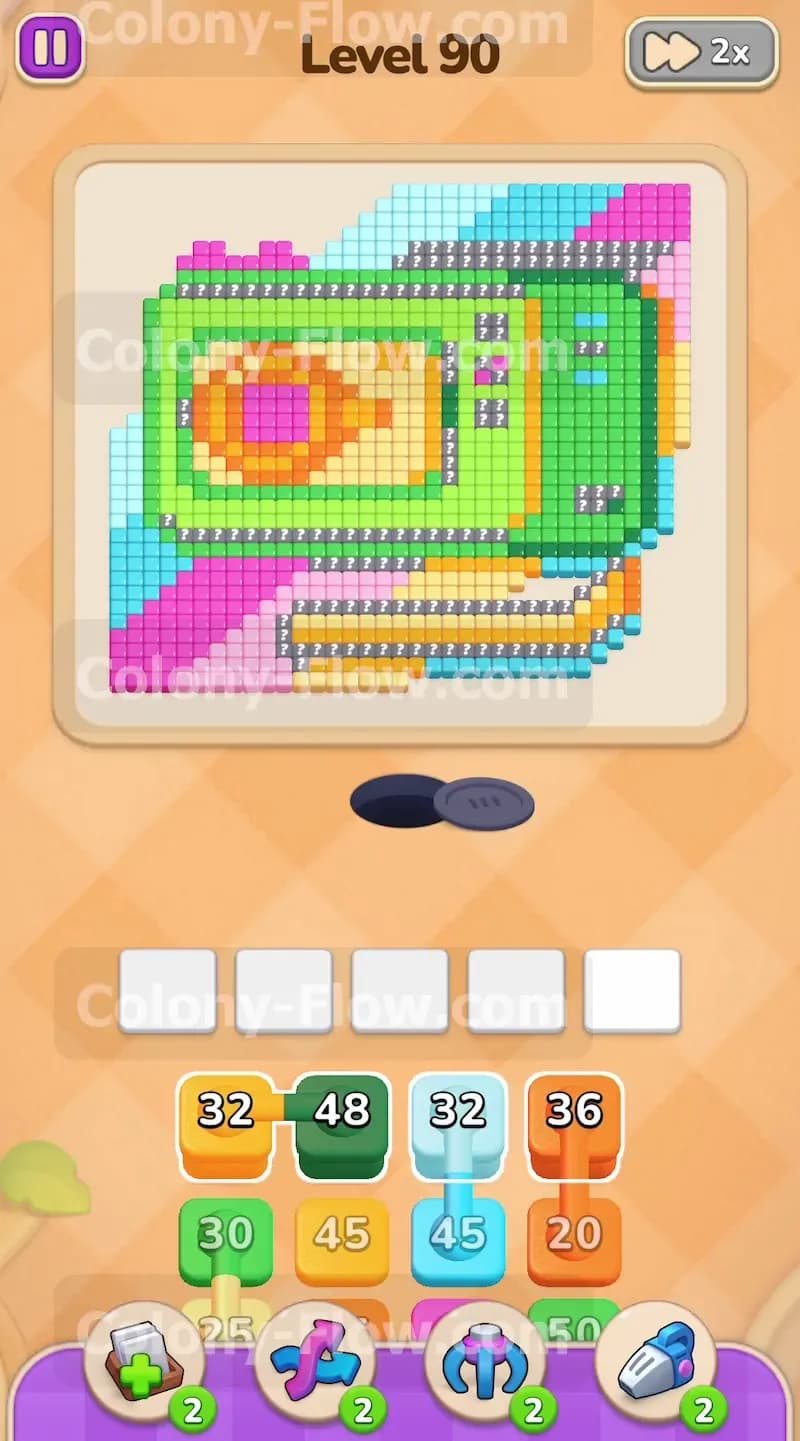
What You Are Working With
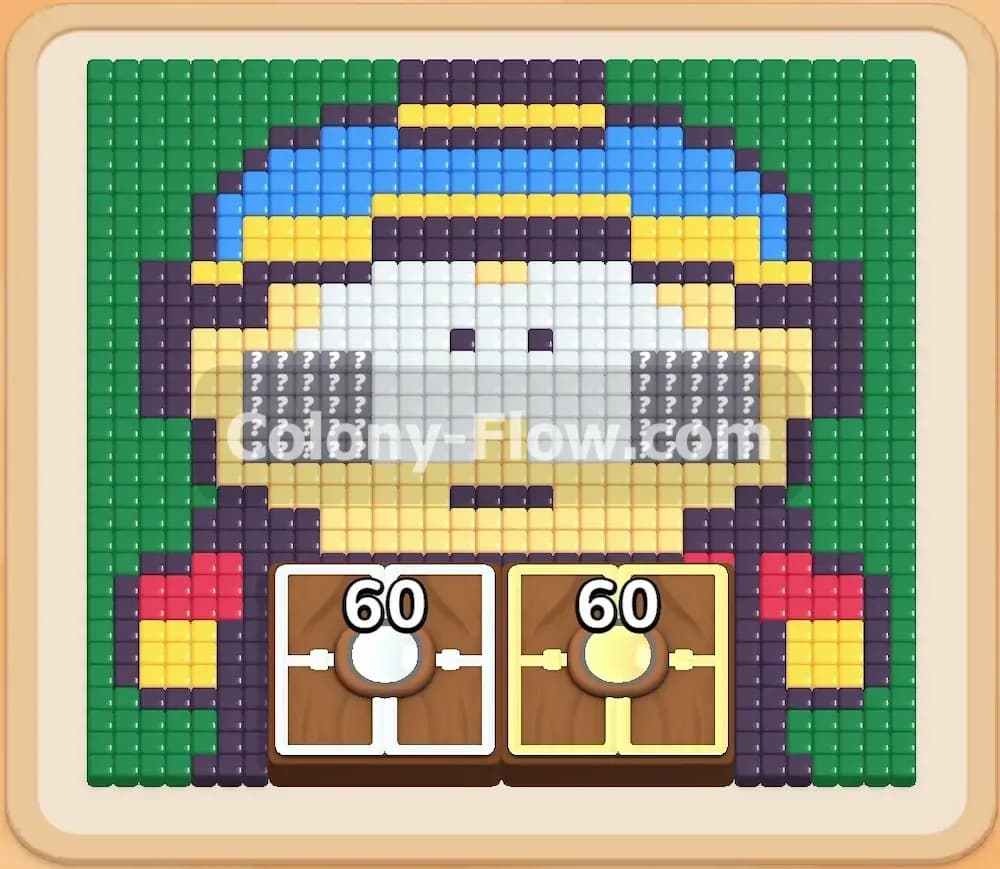
The board starts with a massive block of colored tiles stacked tightly together. A thick green border wraps around most of the shape. Inside there is a bright orange and yellow center core. The bottom left features a huge chunk of pink tiles while the bottom right has orange and yellow paths sticking out. The nest hole sits at the very bottom center of the screen. Your tray holds some very large numbers. Some blocks require thirty or forty ants to clear completely. You will also deal with two special mechanics in the tray for this puzzle. Connected boxes will appear frequently. These are two blocks glued together that move as a single unit. Hidden boxes also show up later in the stack. They look like gray blocks with a question mark and they hide their true color until they slide up into the active top row.
What It Takes to Clear Level 90 Board
To win this level you must completely clear the board before your five waiting slots fill up. The core lose condition happens when you tap too many blocks that do not have an open path on the grid. If all five slots fill up and no ants can move you fail the level immediately. Because connected boxes take up two slots at once they drastically increase your risk of jamming the tray. You must always verify that an open path exists on the board before you pull up any blocks. Your main strategy is to systematically peel away the outer borders. This slowly exposes the dense inner core and gives you more surface area to work with.
Colony Flow Level 90 Step by Step Solution
Step 1: Open the bottom right corners with yellow and cyan blocks
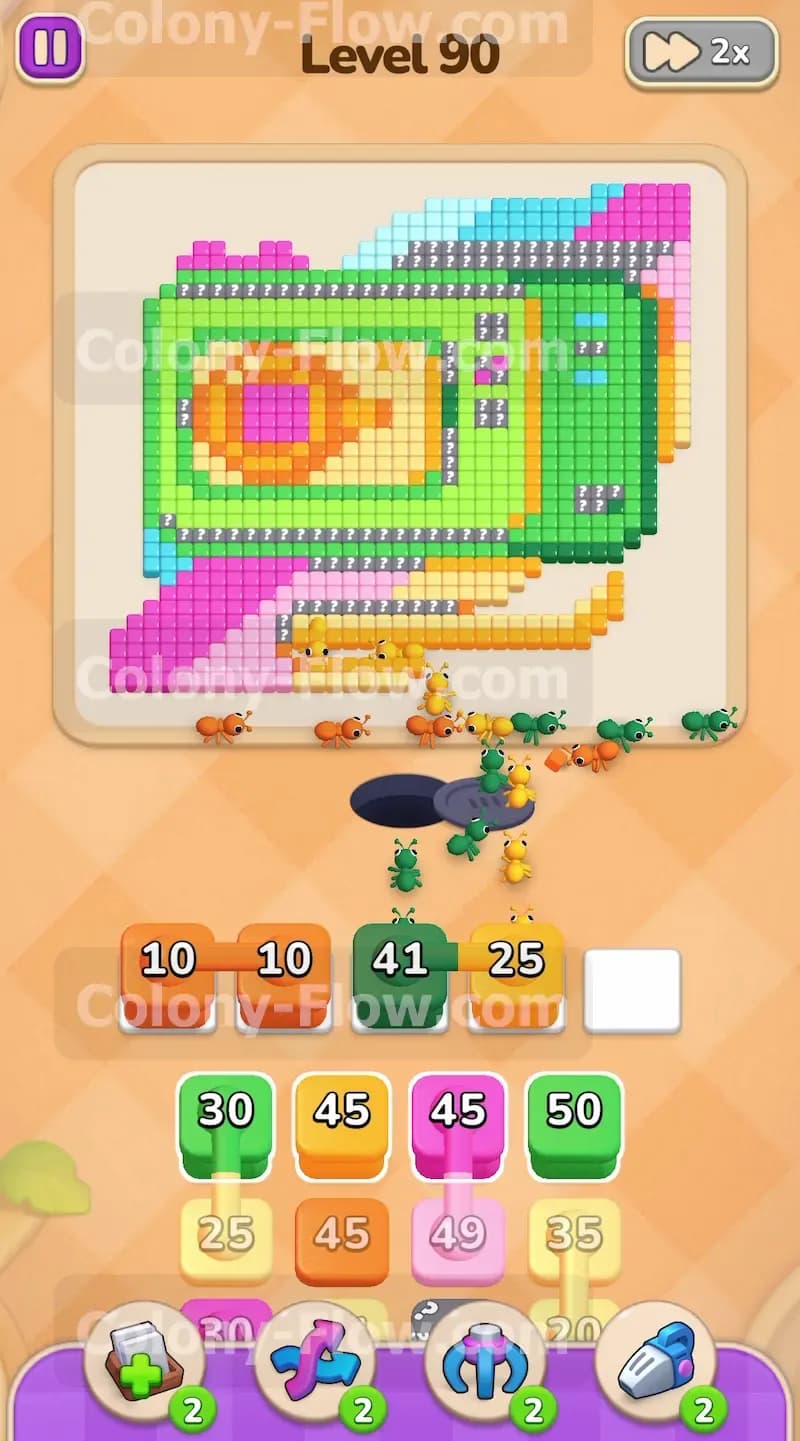
Start by addressing the immediate open paths on the bottom right edges. You will see open borders for cyan and yellow tiles. Tap the cyan block and the yellow block from your tray. The ants will stream out of the nest and march straight to the bottom right corner. This initial move is incredibly important because it creates more space for the next wave of ants. The numbers on your blocks will count down as the ants consume the tiles. You will see numbers in the thirties and forties which means you need a lot of open tiles to drain a block fully. Wait for these outer paths to clear completely. Do not tap the dark green blocks just yet because the green tiles are still blocked by other colors. Keeping your tray empty in these early moments sets a solid foundation for the rest of the puzzle.
Step 2: Deploy the first connected orange blocks to clear the lower paths
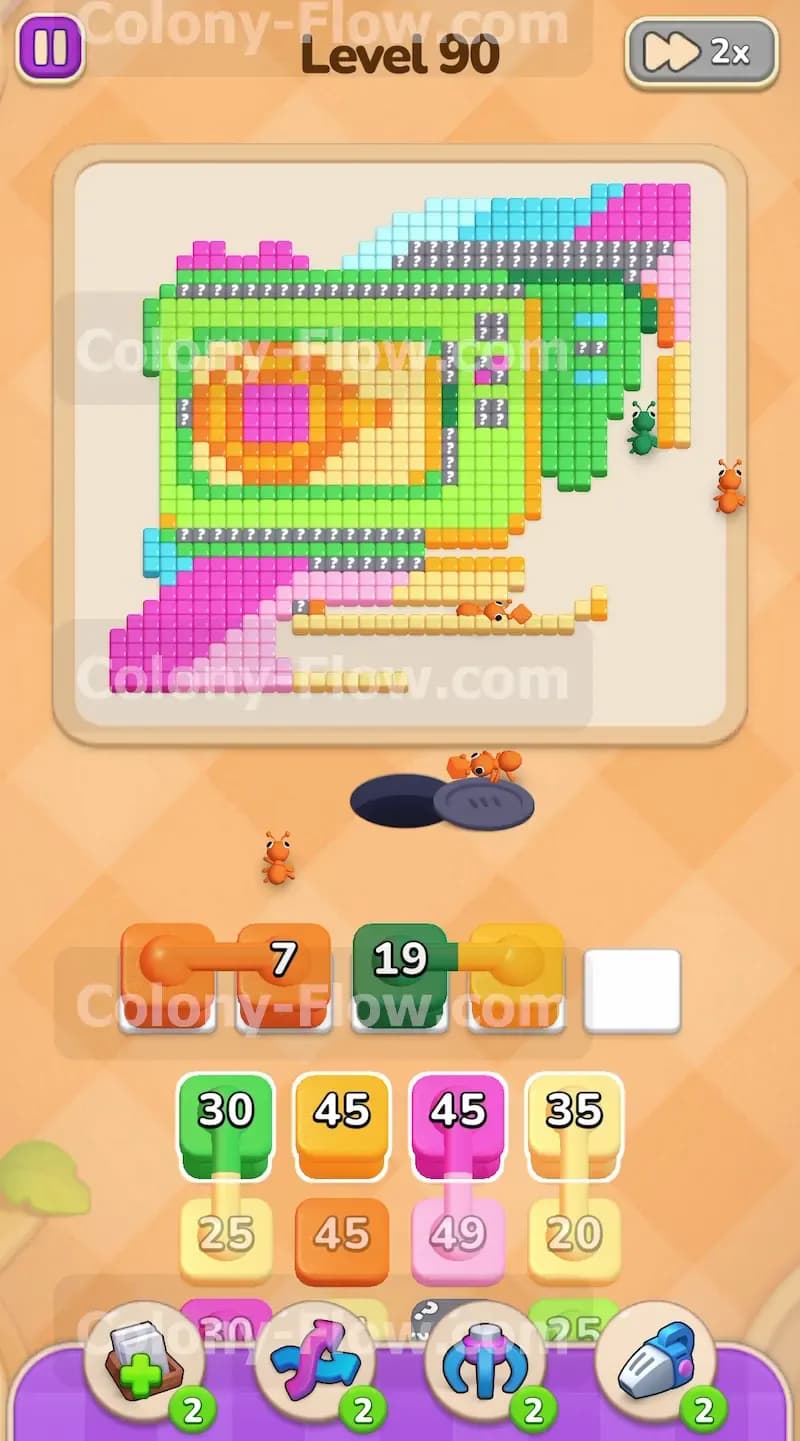
Now you must deploy the first connected blocks to clear the bottom sections. The tray will reveal two orange blocks linked together. Connected boxes are a real trap if you are not paying close attention. Pulling connected boxes means you occupy two of your five waiting slots at the exact same time. Look at the bottom of the board to make sure the orange path is open and ready. Tap the connected orange blocks and watch the ants flood the lower section. They will eat a huge chunk of the bottom orange strip. This clears the way to the inner green and yellow boundaries. The orange blocks have high numbers so expect a long stream of orange ants to pour out of the nest. They will slowly munch their way across the lower border. Always let the ants finish eating before you overload the remaining three slots.
Step 3: Send green ants to tackle the heavy right side boundary
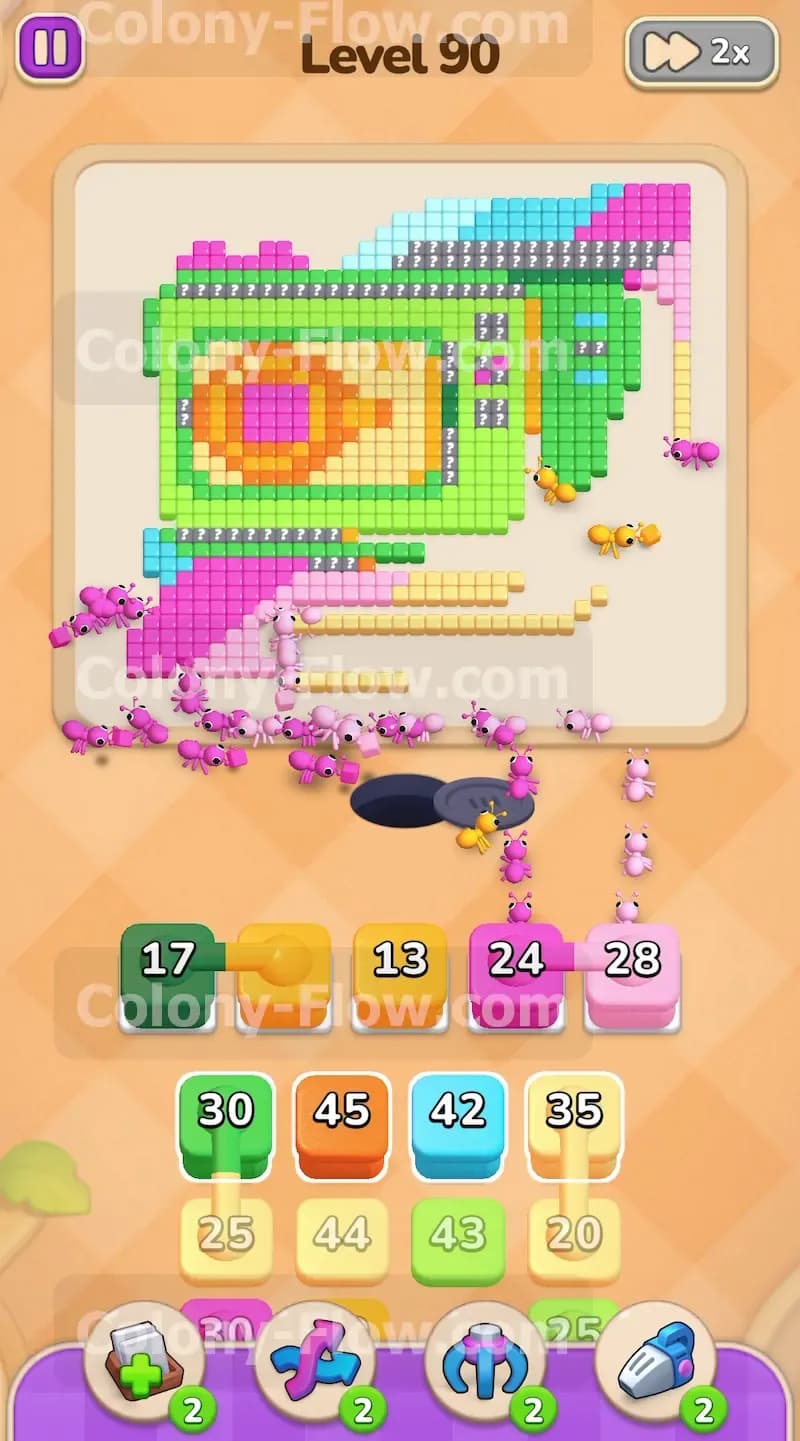
With the bottom starting to open up you can shift your attention to the right flank. The green tiles form a thick protective wall on the right side of the picture. Tap the large green blocks waiting in your tray. A massive swarm of green ants will march up the right side of the board and begin eating that thick green outer shell. This process takes a little time because the ants have to travel further up the board. Be patient and watch the numbers drop. You will notice that removing this green wall exposes the inner layers of pink and yellow tiles underneath. This steady progression keeps your waiting slots free and clear while constantly opening new avenues of attack.
Step 4: Unleash the pink ants on the massive bottom left section
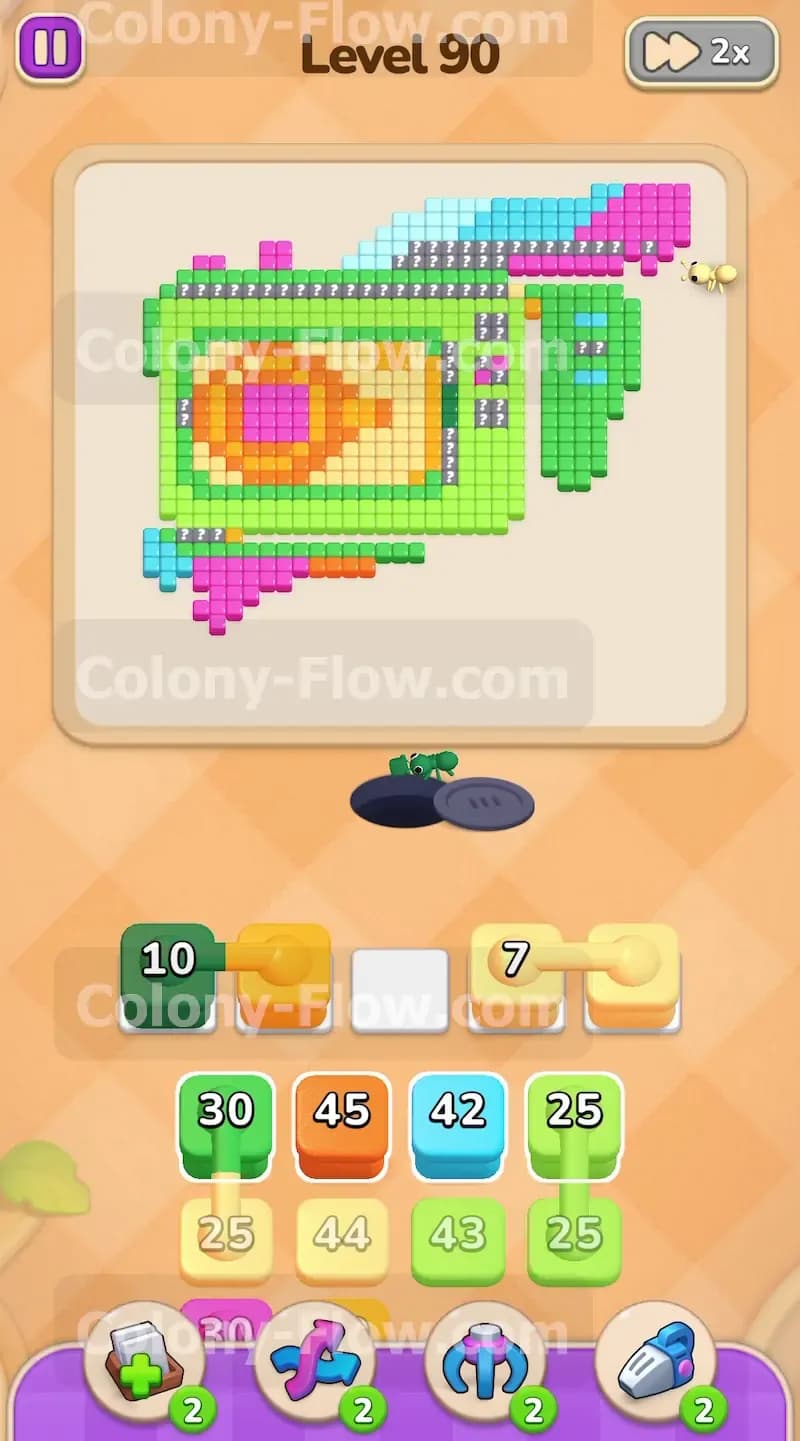
A huge block of pink tiles sits at the bottom left corner of the puzzle. This pink block is incredibly dense and requires a massive amount of ants to clear. Your tray will offer pink blocks with numbers in the high forties. Moving these into your waiting slots is a big commitment. Thankfully the pink path is wide open on the bottom left corner. Pull the high numbered pink blocks into your waiting slots. A giant wave of pink ants will exit the nest and swarm the entire bottom left quadrant. You will see a massive visual change on the board as this dense pink structure melts away. Getting rid of the pink tiles gives you a tremendous amount of breathing room. It completely removes a huge obstacle from your path and allows you to focus on the central core.
Step 5: Navigate the connected green and yellow blocks to access the core
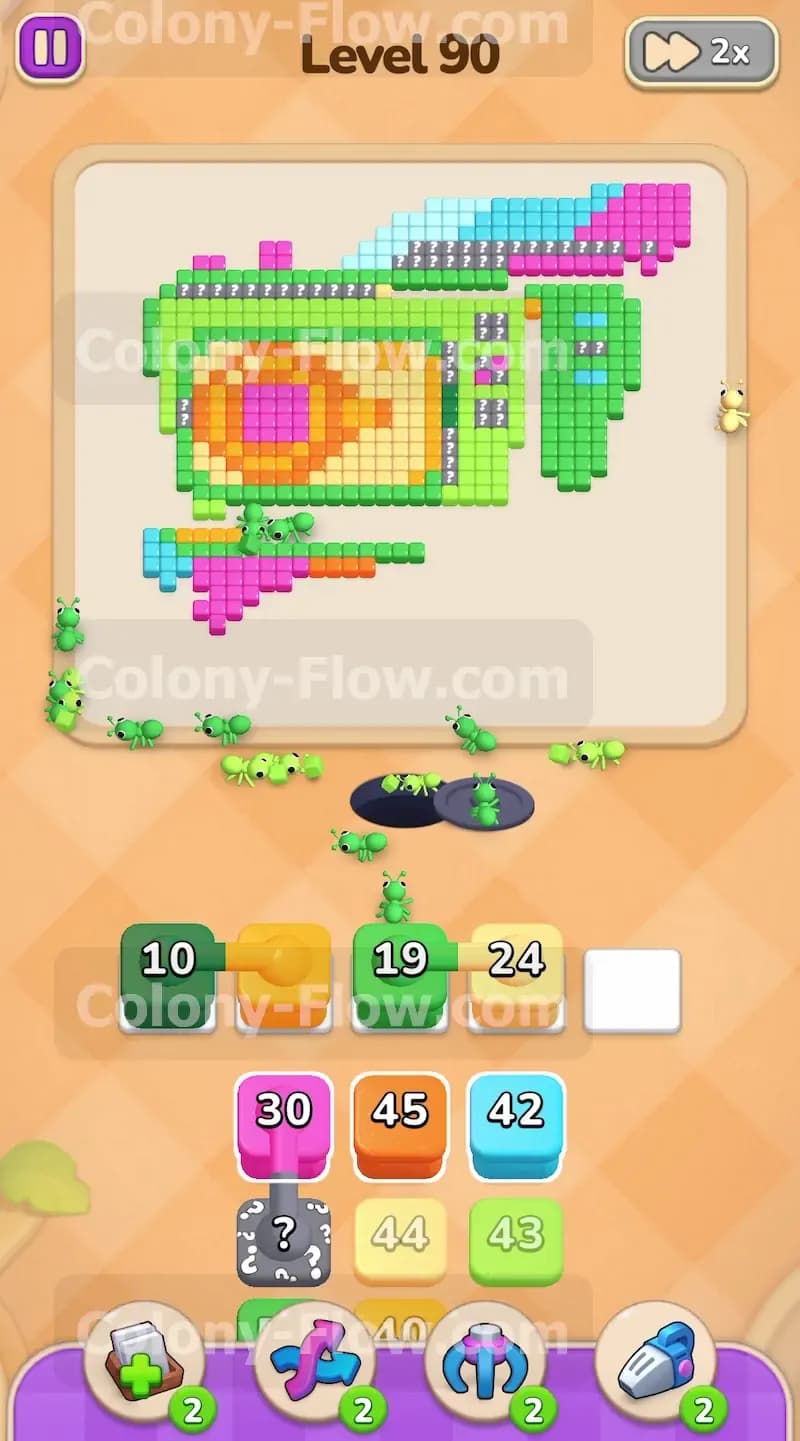
Your tray will continue to push up new connected boxes including a linked green and yellow pair. You must confirm that both paths are free before tapping the connected pair. The green ants need to continue pushing up into the top right corner. The yellow ants need to start chewing on the newly exposed middle sections. Tapping this connected pair sends out two different colored ant groups at once. The ants will divide into two separate streams. Watching two colors drain at the same time is very efficient and helps you cycle through your tray much faster. Balancing these simultaneous attacks is how you keep your waiting slots from reaching maximum capacity. Let the numbers tick down smoothly before pulling any more tiles.
Step 6: Handle the hidden boxes carefully as they rise up into the active row
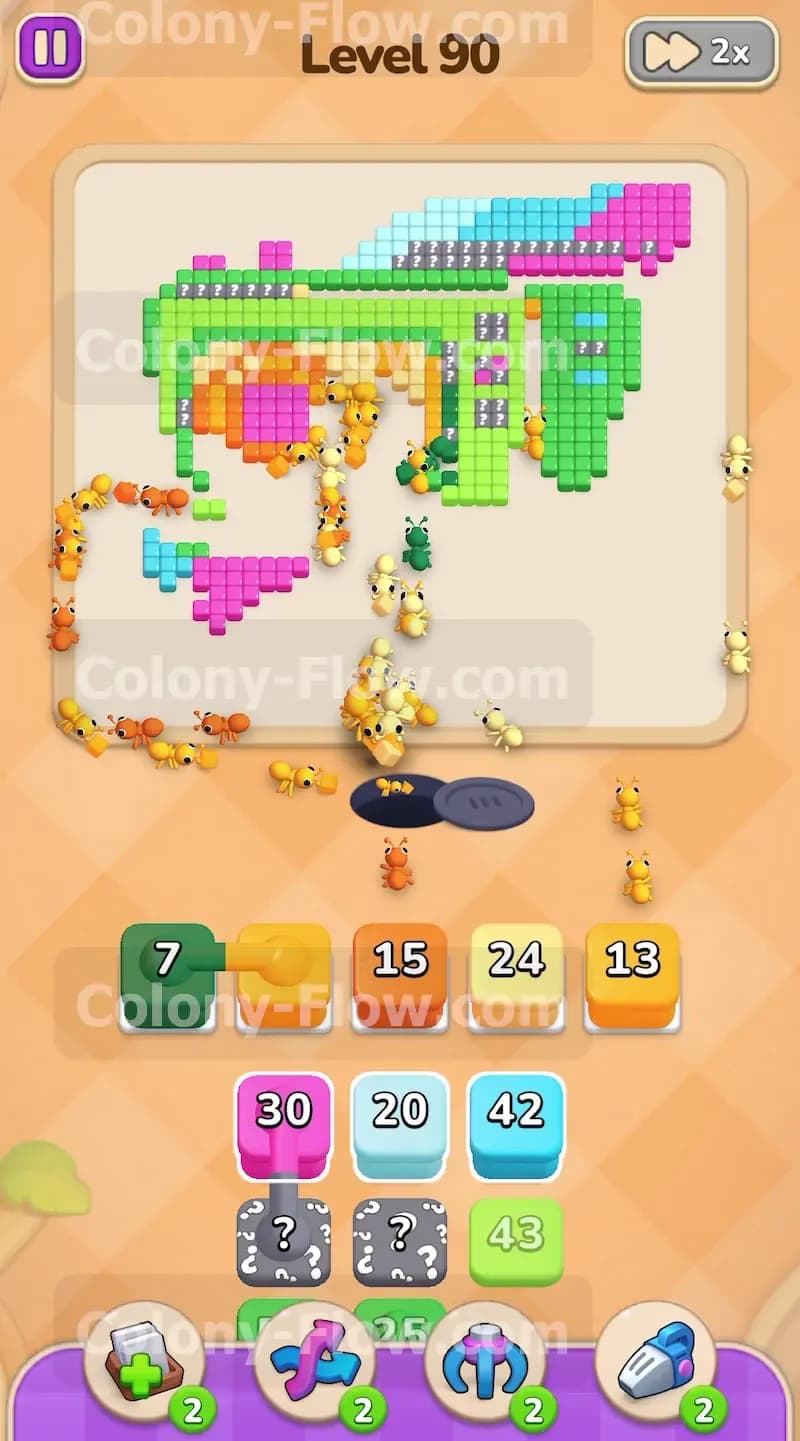
You will notice gray blocks with question marks sitting in the lower rows of your tray. You cannot plan your moves perfectly when these hidden boxes obscure the upcoming colors. The trick is to focus on the top row of the tray and make safe clear moves using the visible blocks. This action forces the hidden boxes to move upward. The instant a hidden box slides into the top row it flips and shows its true color. You must react immediately. Look at the board to see if that newly revealed color has an open path. If it does you need to tap it right away to get it out of your tray. Leaving it there is a huge mistake because it limits your options for the upcoming moves and risks a fatal jam.
Step 7: Clear the bright orange and yellow central core
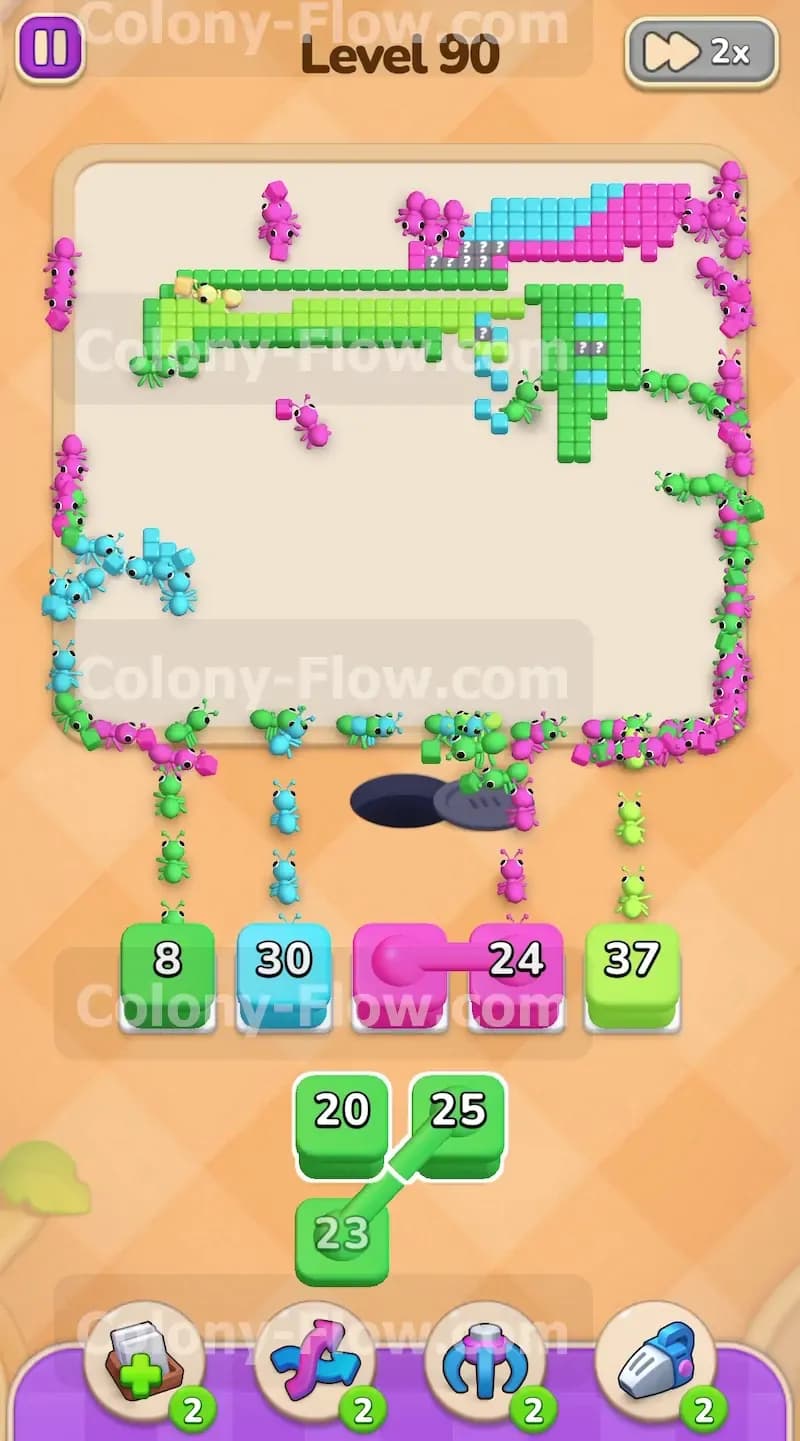
The middle of the board features a very thick square block of orange and yellow tiles. The outer borders protected this core until now. Now that the outer layers are gone you have a direct path into this central structure. Pull the required orange blocks and yellow blocks into your waiting slots. Your ants will rush straight into the middle of the design and start hollowing it out from the bottom up. This section requires dozens of ants because the tile count is so high. Keep feeding the required colors from your tray into the waiting slots. You will watch the thick center block slowly disappear piece by piece. Do not rush this phase and ensure one color finishes eating before you load up the next block. Once this phase is done only the thin top edge and the top left corner will remain.
Step 8: Sweep the final top borders with cyan and green blocks
The board is almost entirely empty now. Only a thin green and cyan border remains near the top edge and the top left corner. Send your cyan ants and green ants to finish the job. Because the board is so empty the ants must march a very long distance from the nest to reach these final tiles. This travel time means your waiting slots will clear out a bit slower than before. Just keep pulling the matching single blocks from the tray. Watch the numbers count down from the twenties and thirties down to zero. The very last ant will take the final green pixel. Once the final tile is eaten the board is totally clear and you beat the puzzle.
Final Thought
Level 90 demands a lot of patience and very careful tray management. Dealing with connected boxes and hidden boxes at the same time is tricky but totally manageable if you follow this sequence. Keep your eyes on the open paths and never crowd your waiting slots. Take your time and let the ants do the heavy lifting. If any step feels hard to follow in text please watch the video above this article to see exactly how I cleared it.