Colony Flow Level 197 Walkthrough Solution & Guides | How to solve Colony Flow 197

Guide By Liam Stone
Updated on July 13, 2026
Watching beats reading for some players. The video above has the entire Level 197 walkthrough ready to go.
Video doesn't match your screen?
Game updates frequently scramble layouts! Try our AI Screenshot Solver first to find your exact board instantly, or report broken guides to our team.
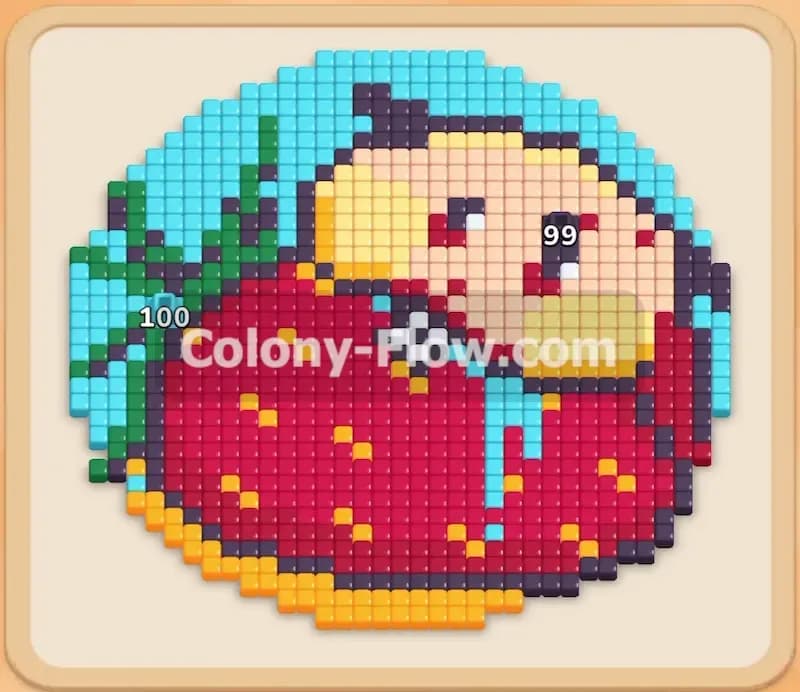
Playing Colony Flow Level 197 requires careful attention to the order in which you pull blocks from your tray. You face a large pixel art apple surrounded by a thick outer perimeter and massive numbered obstacles. I played through this board to find the exact sequence that keeps your ants moving. This guide will help you clear the board without filling your five waiting slots and losing the game.
Colony Flow Level 197 Overview
What You Are Working With
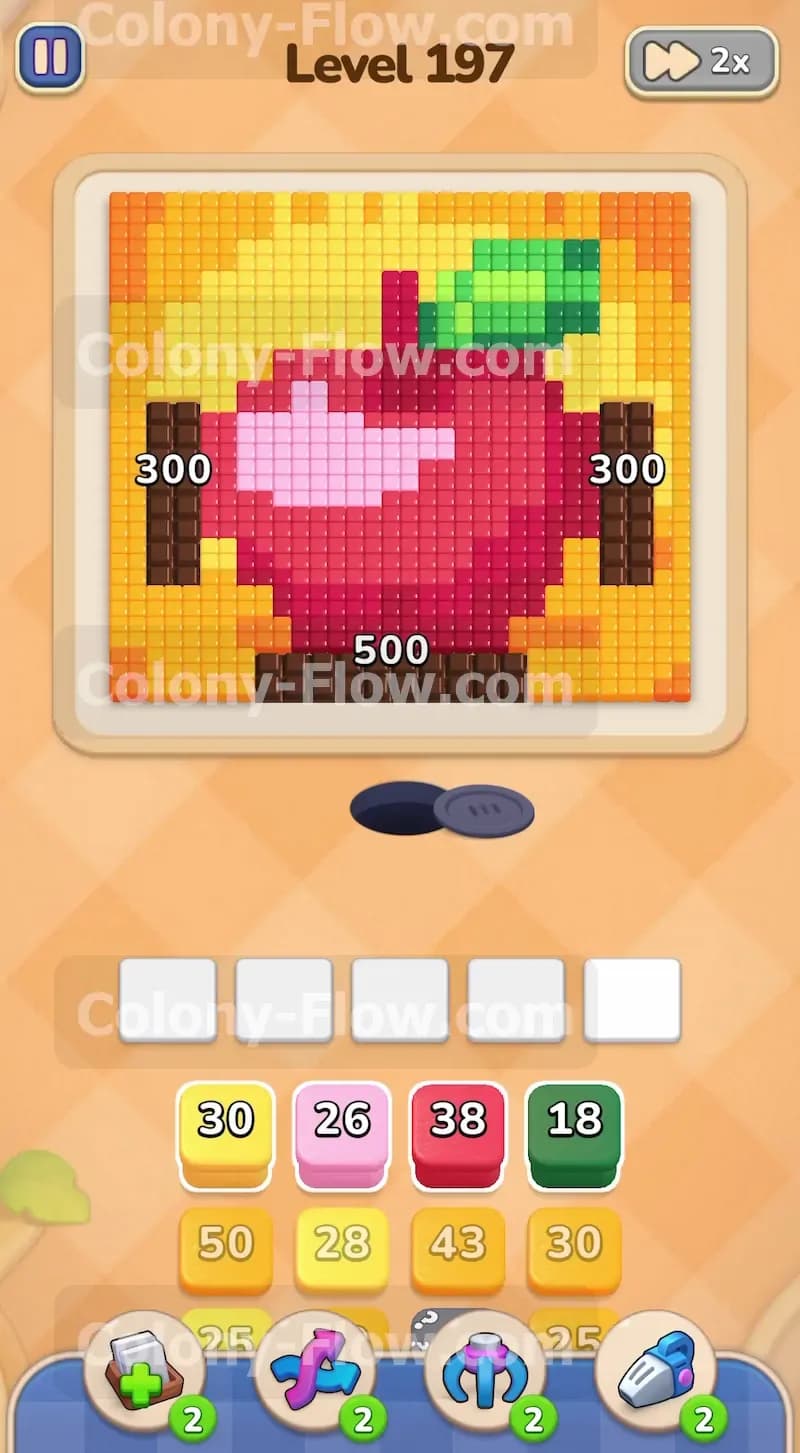
The picture on this board features a bright red apple with a pink reflection and a green leaf. It sits on top of a checkered orange and yellow background. The most dangerous elements on this board are the three large chocolate obstacles. Chocolate covers and blocks the food tiles underneath until cleared. These massive chocolate structures sit on the left edge, the right edge, and the bottom edge of the board. They start with incredibly high numbers. The side chocolate sections require three hundred points each. The bottom chocolate section demands five hundred points. Down in your tray you will find numbered blocks in yellow, orange, red, dark red, pink, and green. You will also encounter Hidden Boxes in your tray. A Hidden Box displays a grey face with a question mark and hides its color until it has a valid path to move.
What It Takes to Clear Level 197 Board
You win this level by clearing every single food tile and destroying the chocolate obstacles without jamming your tray. If you fill your five waiting slots with blocks that have no open paths, you cause a dead end and lose immediately. You must carefully deploy your ants to eat the outer yellow and orange background first. Clearing the food tiles adjacent to the chocolate obstacles chips away at their massive point totals. Once the chocolate obstacles break, the inner paths open up completely. You then safely deploy pink, red, and finally green ants to clear the fruit itself.
Colony Flow Level 197 Step by Step Solution
Step 1: Deploying yellow ants to chip away the outer obstacles.
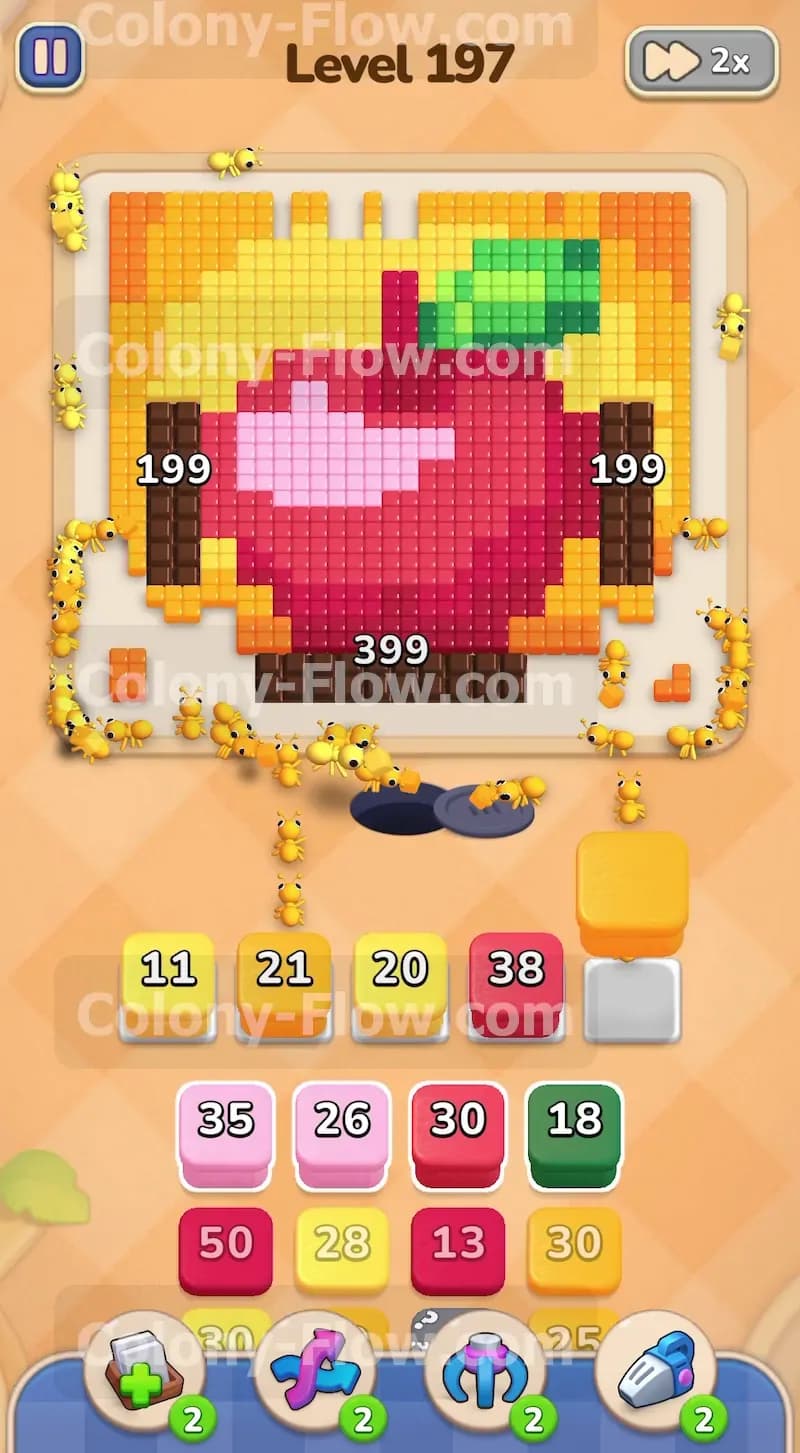
You begin by examining the outer edges of the board where the orange and yellow tiles wrap completely around the central apple shape. Your first move is to pull the yellow blocks from your tray into the waiting slots. You will see a yellow block holding thirty ants and another holding twenty eight. Select them and let the yellow ants flow to the top corners of the background. As the yellow ants eat the background tiles adjacent to the chocolate obstacles, you will notice the chocolate numbers dropping. The side obstacles fall from three hundred down to one hundred ninety nine. The bottom obstacle drops from five hundred to three hundred ninety nine. This confirms your strategy to break the barriers. You do not need specific dark brown blocks to break the chocolate. You simply need to clear the food tiles touching them. Keep pulling yellow blocks to maintain the flow and ensure your five waiting slots stay completely clear.
Step 2: Using orange blocks to push the chocolate numbers down further.
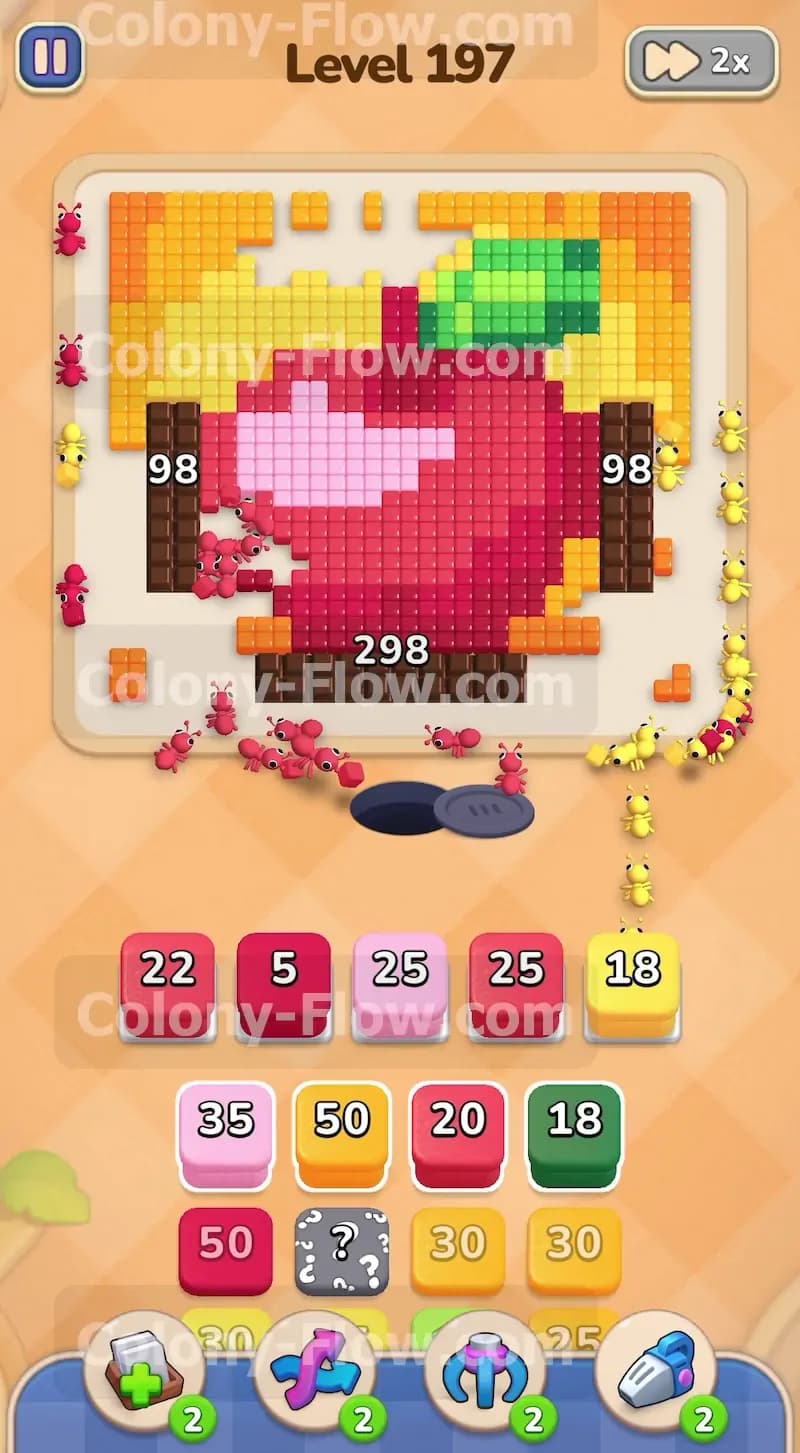
With the yellow ants doing their work you will see orange blocks move forward in your tray. Pull the orange block holding twenty one ants into your waiting slots. These ants stream out of the nest hole and target the remaining orange tiles on the outer border. As they consume more of the perimeter the chocolate obstacles take another massive hit. The numbers on the left and right chocolate obstacles drop dramatically down to ninety eight. The bottom obstacle falls to two hundred ninety eight. Your tray then offers red blocks holding thirty eight ants and pink blocks holding thirty five ants. Do not pull these yet. The red body of the apple and the pink reflection are still blocked by the remaining background and the massive chocolate obstacles. If you pull a red or pink block right now it will sit in your waiting slots and block new blocks from coming up. You wait until a clear path to the apple opens up.
Step 3: Breaking the side chocolate obstacles entirely to open the paths.
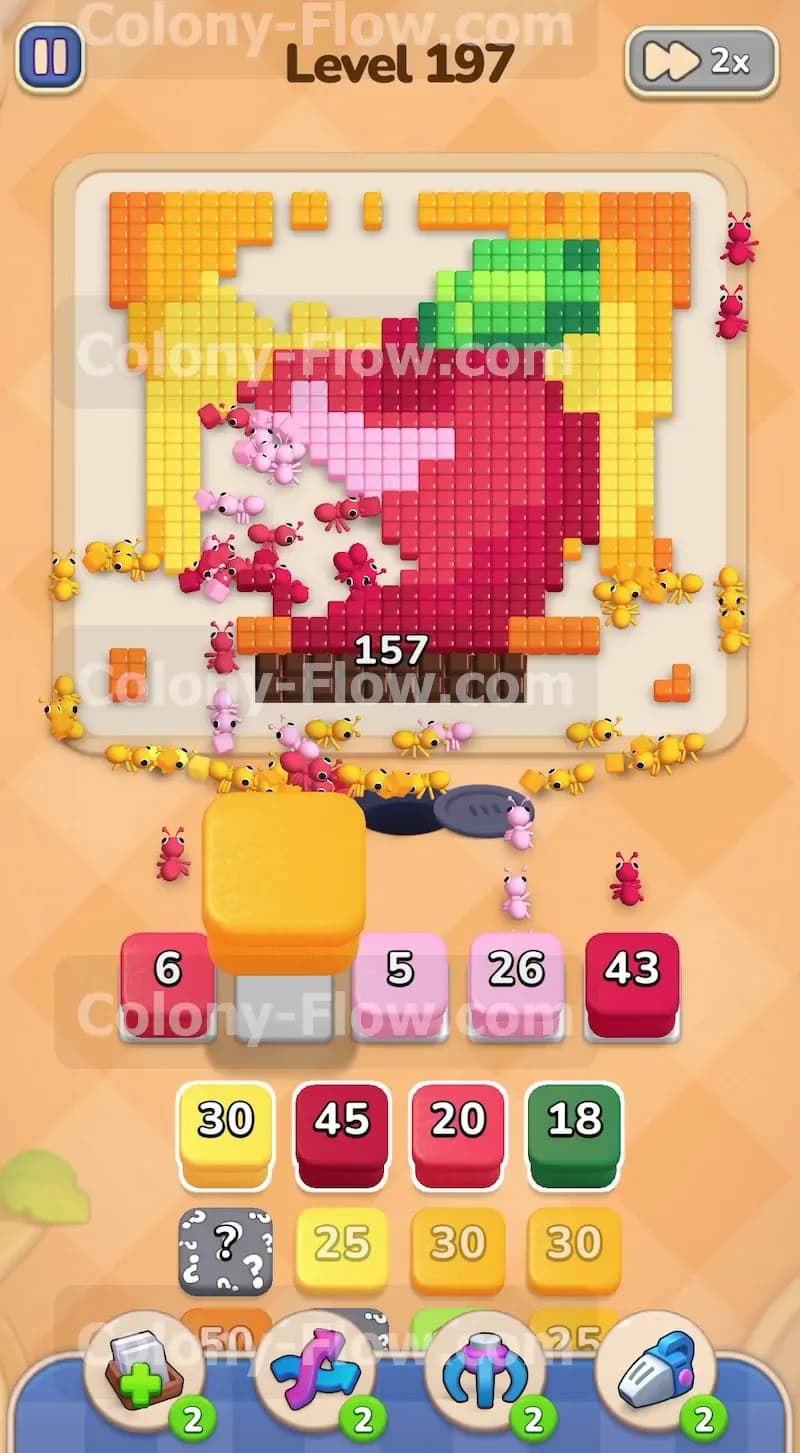
Continue feeding yellow and orange blocks into the slots. You pull another yellow block holding twenty ants. As these ants clear the last of the middle background sections the side chocolate obstacles finally run out of points. The ninety eight count drops to zero. Both side chocolate obstacles vanish from the board completely and unblock the space underneath them. This is a major breakthrough for your board. It opens up wide paths directly to the sides of the red apple. The bottom chocolate obstacle is still present but its count drops heavily to one hundred fifty seven. Now that the side paths are open you look at the bright pink reflection tiles on the left side of the apple. The game pushes pink blocks forward in the tray. You safely pull a pink block holding twenty five ants because the ants now travel freely through the empty space left by the broken chocolate obstacles.
Step 4: Clearing the pink reflection and handling the Hidden Boxes.
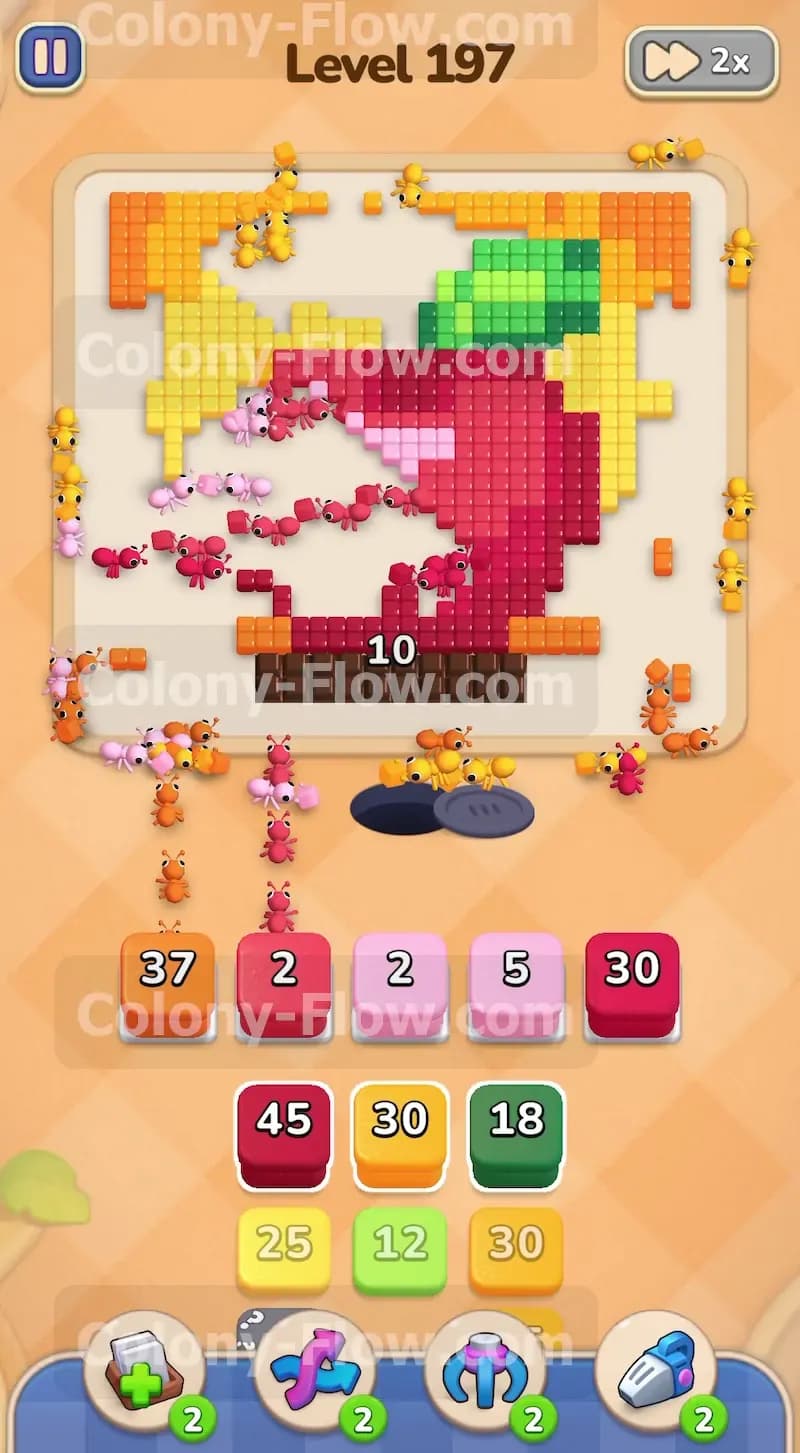
You notice grey blocks with question marks resting in your tray. These are Hidden Boxes. A Hidden Box hides its color until it has a valid path to move. Because you opened the side paths the game recognizes that new colors can be played. The Hidden Boxes reveal their true colors as they move into the active row. They reveal themselves as pink or red blocks exactly when you need them. Pull the pink blocks holding six ants and five ants to swarm the bright reflection area on the apple. The ants quickly strip the pink tiles away. This exposes the deep red tiles underneath. Meanwhile the bottom chocolate obstacle takes more collateral damage and drops down to a mere ten points. Your waiting slots remain perfectly clear because every block you pull has an open route to its target.
Step 5: Destroying the bottom obstacle and attacking the red apple body.
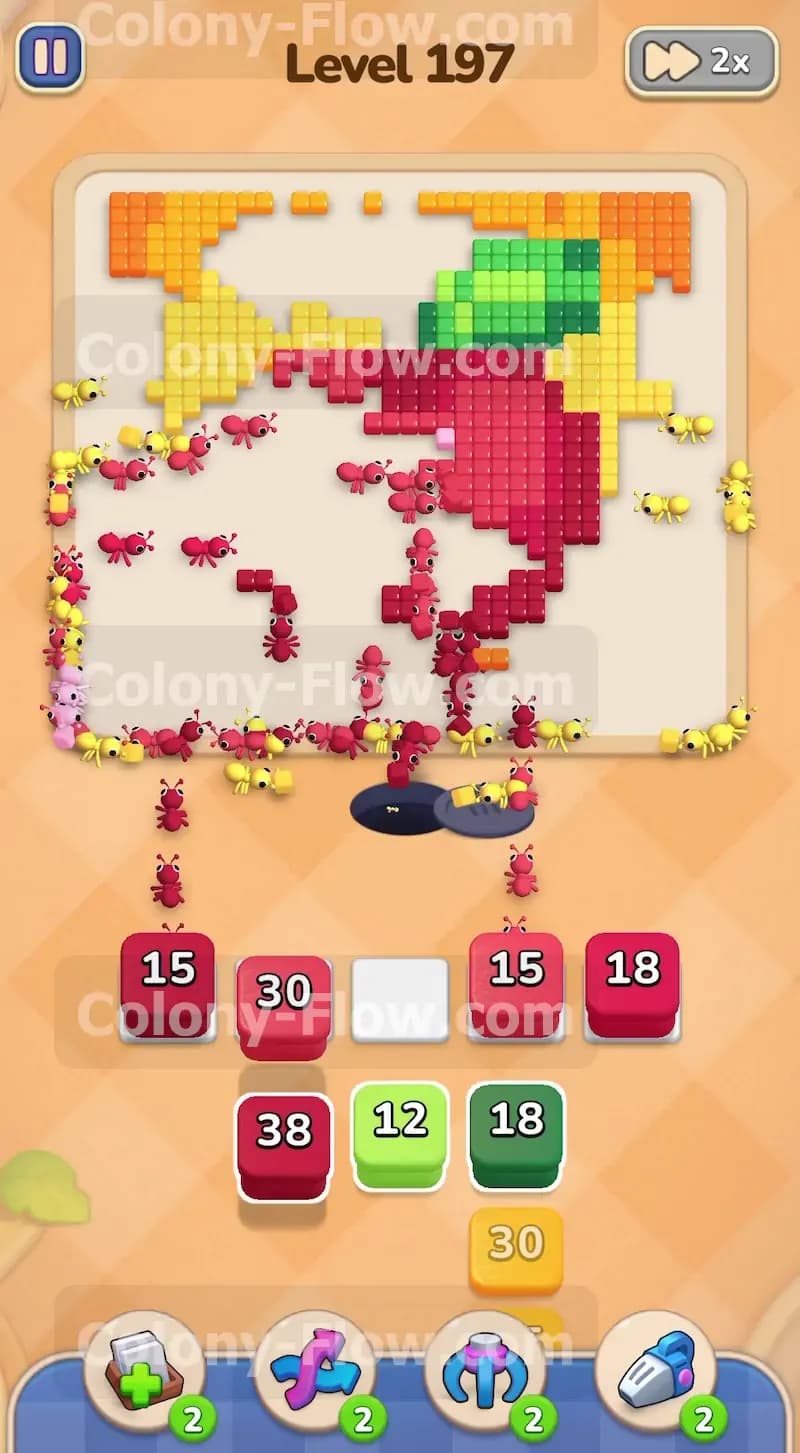
Now you unleash the red ants onto the board. Your tray provides a large red block holding twenty six ants and another holding thirty. Pull these into the waiting slots immediately. The red ants flood the large main body of the apple and consume huge chunks of the fruit. As the first few red tiles vanish the bottom chocolate obstacle takes its final hits. The remaining ten points disappear and the massive bottom barrier breaks completely. This removes the last major obstacle on the board. The entire bottom section of the dark red apple is now fully exposed. You have a wide open board but you must still remain cautious. Do not pull the green blocks yet. The green leaf sits at the very top of the board and remains surrounded by red tiles and a few stray orange background tiles. Keep feeding red blocks into the slots to eat away the core of the fruit.
Step 6: Using dark red blocks to clear the bottom shading.
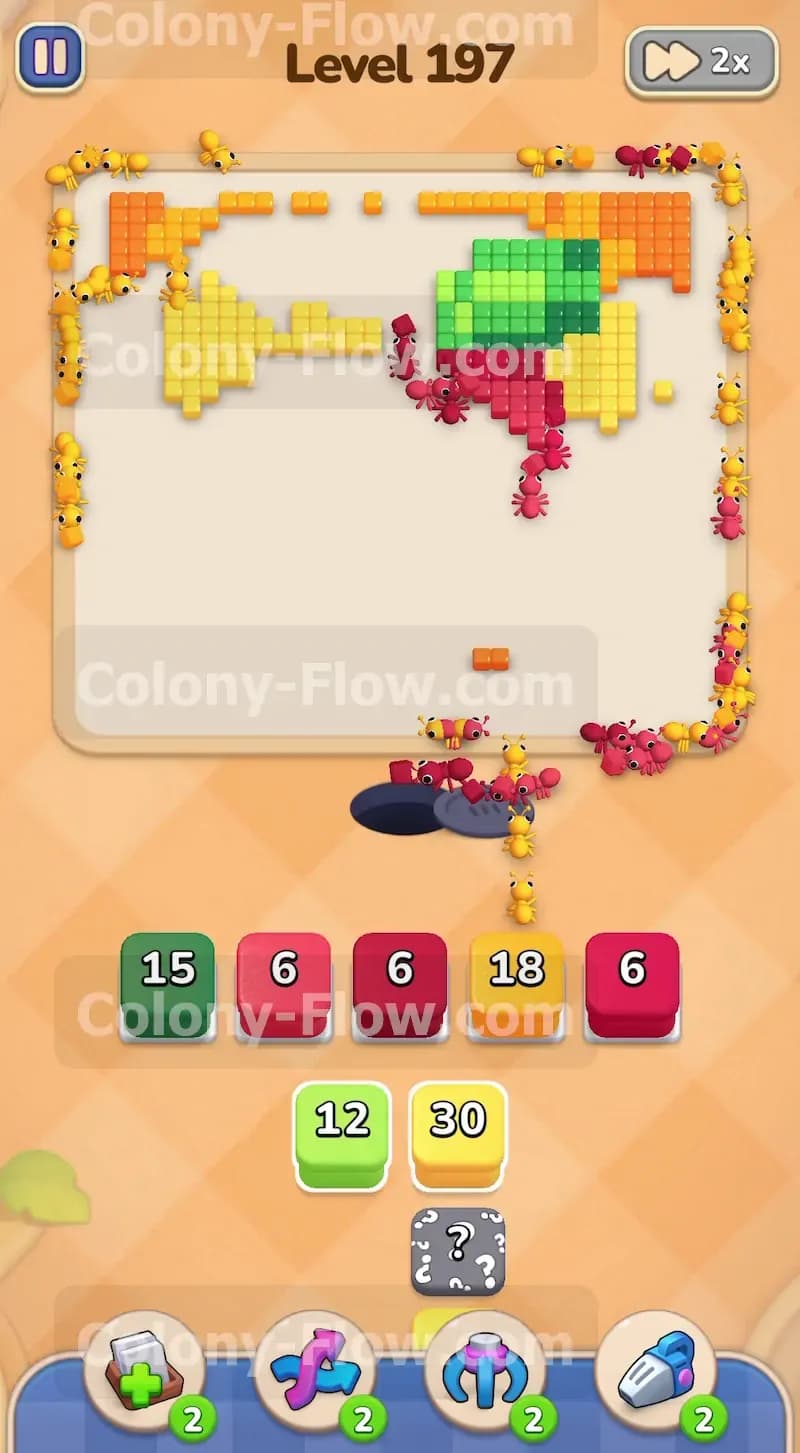
The lower half of the apple consists of dark red tiles that create a nice shadow effect. Your tray pushes forward several dark red blocks holding numbers like forty three and forty five. Since the bottom chocolate obstacle is completely gone these dark red ants have a straight and incredibly short path from the nest hole to the food. Pull these dark red blocks into your tray without hesitation. The dark red ants rapidly clear the entire bottom curve of the apple and remove the shadow details. As they work they open up the empty spaces around the green stem and leaf. You also see another Hidden Box appear in the tray at this stage. Once again it hides its color until the green or orange tiles it matches become perfectly accessible. Continue pulling dark red blocks holding fifteen or eighteen ants to finish off the remaining fragments of the main apple body.
Step 7: Deploying green blocks to clear the leaf and stem.
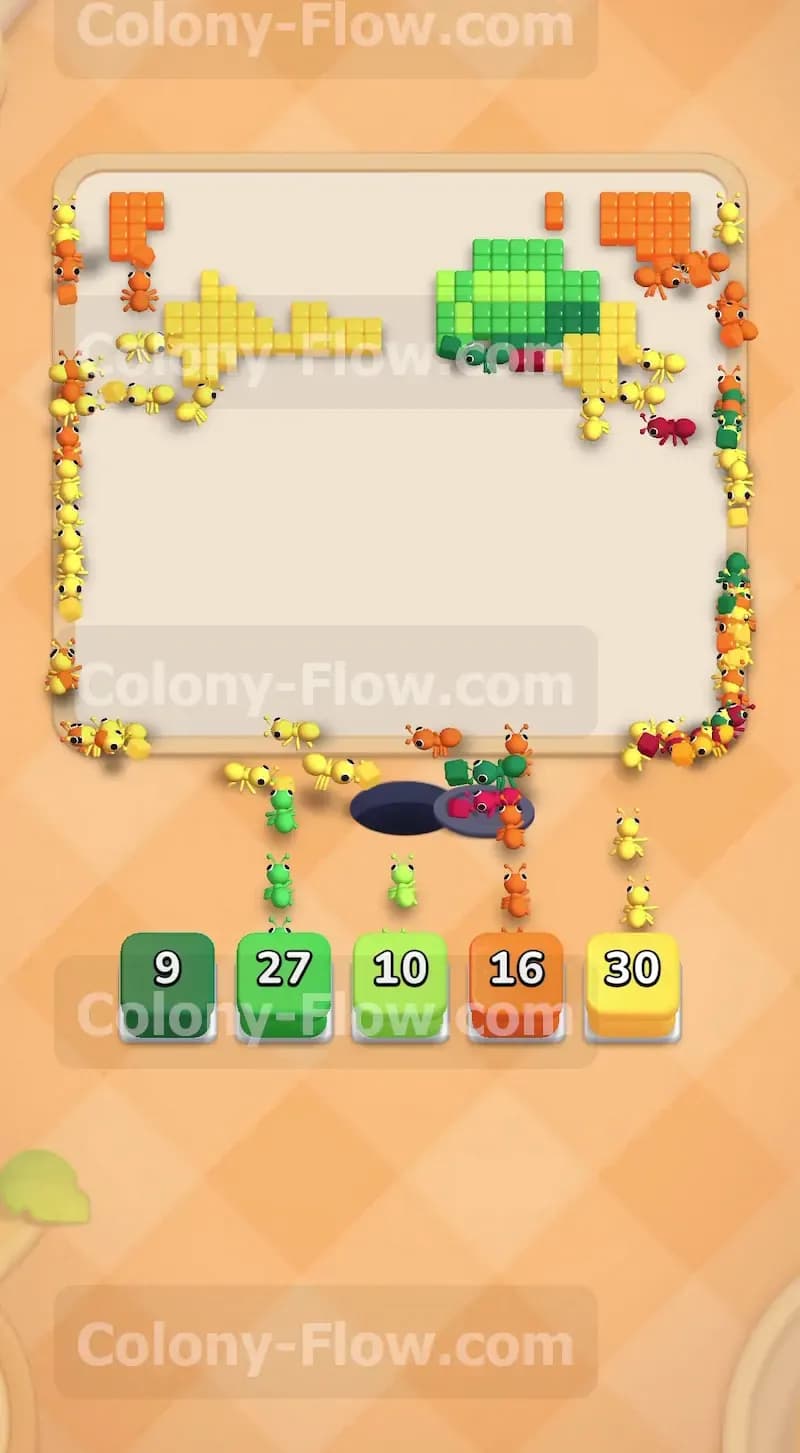
With the red and dark red tiles completely gone the only things left on the board are the green leaf and a few stray patches of orange background near the top corners. Now is the perfect time to pull the green blocks from your tray. Your tray offers a green block holding twenty seven ants and another holding ten. Pull them into your waiting slots right away. The green ants march in a massive line straight up the middle of the empty board and quickly consume the green leaf and stem at the top. Because you waited until the red tiles were entirely clear these green ants face zero delay. They find their path immediately and clear out of your waiting slots just as fast. This perfect timing ensures you never face a dead end in the final moments of the level.
Step 8: Sweeping up the last orange background tiles for the win.
You are now in the final cleanup phase of the game. The tray supplies the exact blocks you need to finish the board. You see orange blocks holding sixteen and thirty ants. Pull these final orange blocks from your tray into your open waiting slots. The ants scatter to the top left and top right corners to eat the last remaining background tiles. Once these tiles are gone the board is fully cleared and you win the level. Your patience in dealing with the massive chocolate obstacles first and saving the green blocks for last guarantees your success.
Final Thought
Playing through this level tests your ability to manage massive obstacles and hold back on tempting moves. You must trust the process of chipping away at the background to break the chocolate before you attack the center fruit. If any move gives you trouble, please watch the video above this article to see exactly how I keep the paths open and manage the tray.