Colony Flow Level 603 Walkthrough Solution & Guides | How to solve Colony Flow 603

Guide By Liam Stone
Updated on August 1, 2026
The video above shows you how to clear Level 603 without needing to read a single step below.
Video doesn't match your screen?
Game updates frequently scramble layouts! Try our AI Screenshot Solver first to find your exact board instantly, or report broken guides to our team.
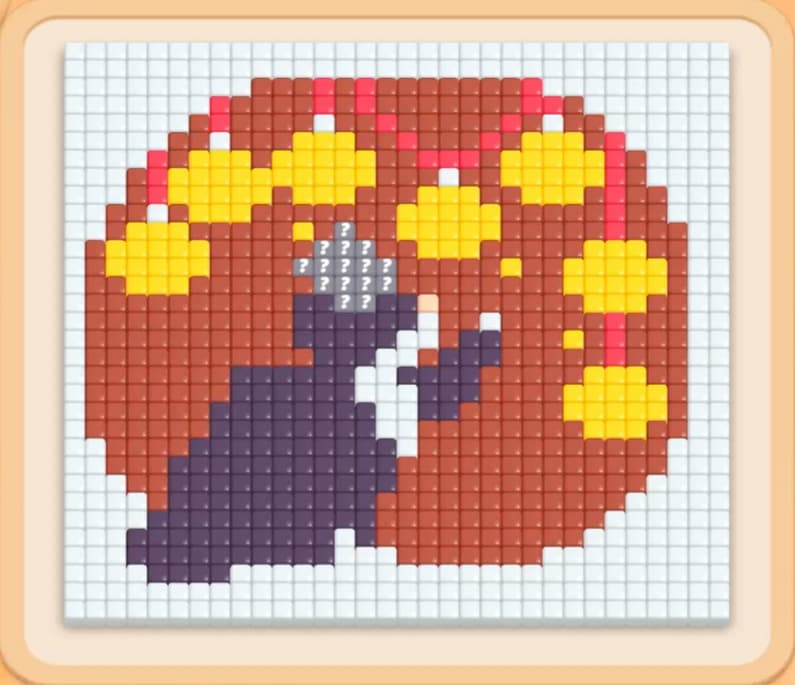
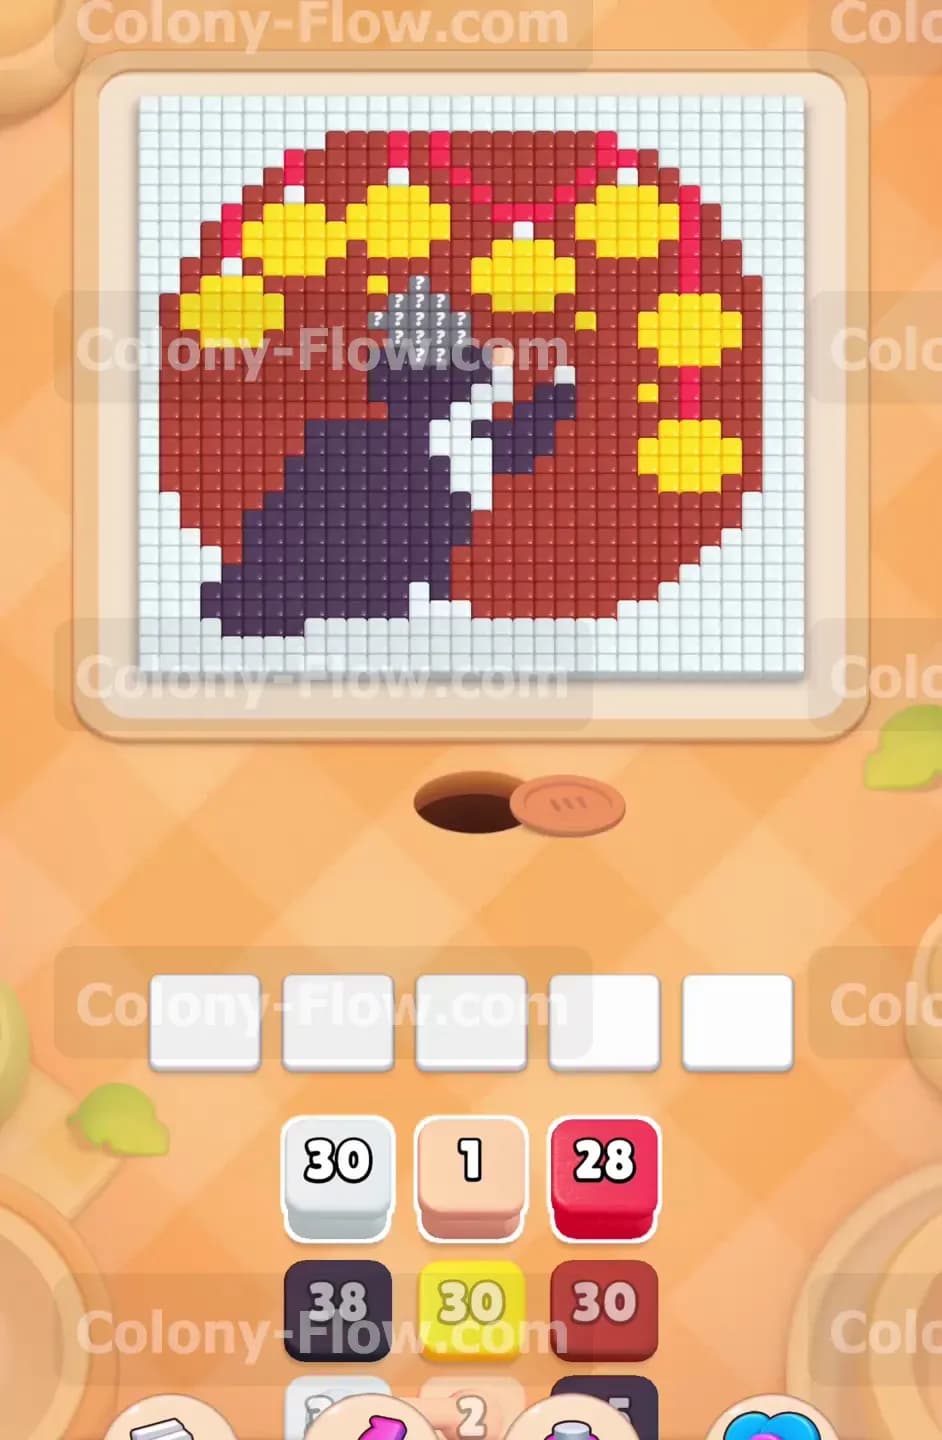
Colony Flow Level 603 drops you into a very colorful pixel art puzzle. The image features a dark purple animal sitting against a bright red background filled with yellow circles. I play every stage focusing strictly on the pathing and tray management because that is how you build a consistent winning streak. You have to control the flow of ants carefully to win this one without getting trapped. Keep your eyes on the board and your waiting slots at all times.
Colony Flow Level 603 Overview
What You Are Working With
The board presents a large pixel art picture centered directly around a dark purple animal. The animal holds a small white object in its paws. A large solid red background completely surrounds the central figure. Inside this red background space you will see several bright yellow circles clustered closely near the top. A complete white border frames the entire puzzle picture. Down at the very bottom of your screen your tray holds tall stacks of numbered blocks. These blocks come in white, red, dark purple, and yellow. As you dig into the tray you will encounter connected boxes. These are blocks permanently linked together by a thick grey line. When you pull one connected block the other follows it automatically. This takes up two spaces in your waiting area at the exact same time.
What It Takes to Clear Level 603 Board
Winning this level requires you to clear every single pixel tile from the picture above. The ants climb out of a nest hole positioned at the bottom of the screen. They crawl up and eat the tiles that match the color of the blocks sitting in your waiting slots. The absolute most important rule is managing your five waiting slots. If you fill all five slots with blocks and none of those colors have an open path on the board the ants will stop moving completely. When the ants stop your slots jam and you lose the level immediately. You must carefully alternate between clearing the outer white border, breaking down the massive red background, and eating the dark purple animal. You always need to keep at least one active food path open to survive.
Colony Flow Level 603 Step by Step Solution
Step 1: Open the bottom boundary by playing the white blocks
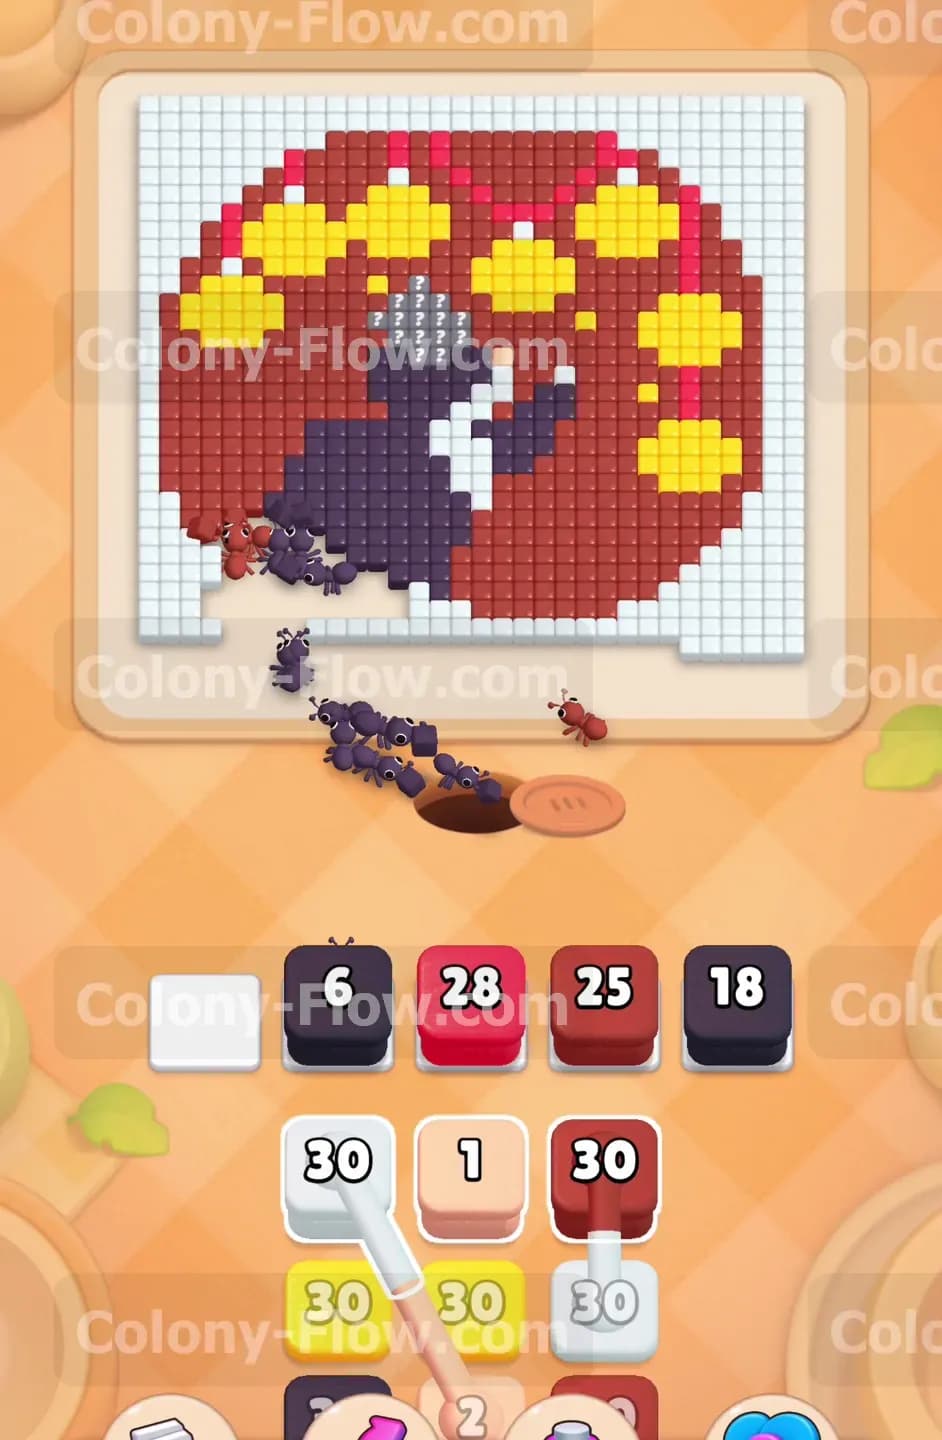
The very bottom edge of the picture sits right above the ant nest hole. This bottom edge consists entirely of the white border tiles that frame the whole image. Start the level by pulling a white block from the top of your tray stacks. The white ants will emerge from the hole and start chewing away the bottom boundary line. This action serves as your key to unlocking the whole board. You must break this outer shell to let the other colors reach their specific targets inside the picture. Watch the number on the white block count down as the ants consume the tiles. Do not pull any other colors just yet. Give the white ants a moment to clear enough space so the dark purple animal and the red background become fully exposed to the nest hole. Rushing this step will easily clog your tray and end your game early.
Step 2: Target the dark purple animal from the lower left side
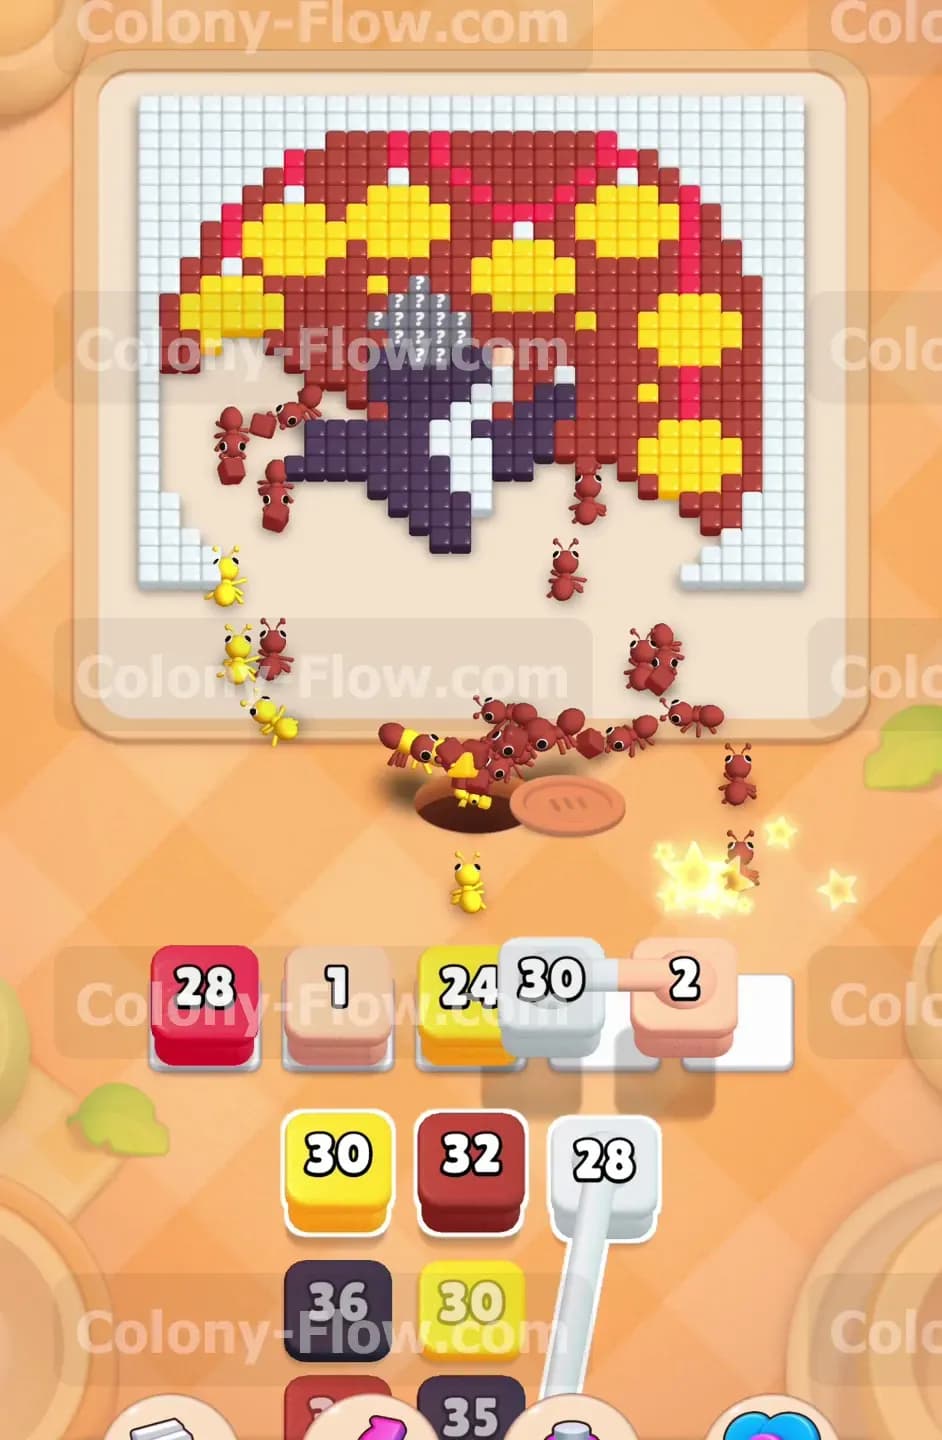
Once the bottom white border breaks open the dark purple tiles of the animal become accessible. Pull a dark purple block into one of your waiting slots. The dark purple ants will march out and attack the bottom left section of the animal shape. While they do this you can also pull a red block into another slot. The red ants will begin eating the red background on the lower right side. By running red and dark purple blocks at the exact same time you create two distinct paths on the board. This strategy keeps the ants flowing smoothly without bumping into each other. Keeping two active colors prevents your waiting slots from jamming because the numbers on both blocks will count down continuously. The dark purple block will eventually hit zero and vanish to free up a precious slot for your next move.
Step 3: Navigate the connected blocks safely
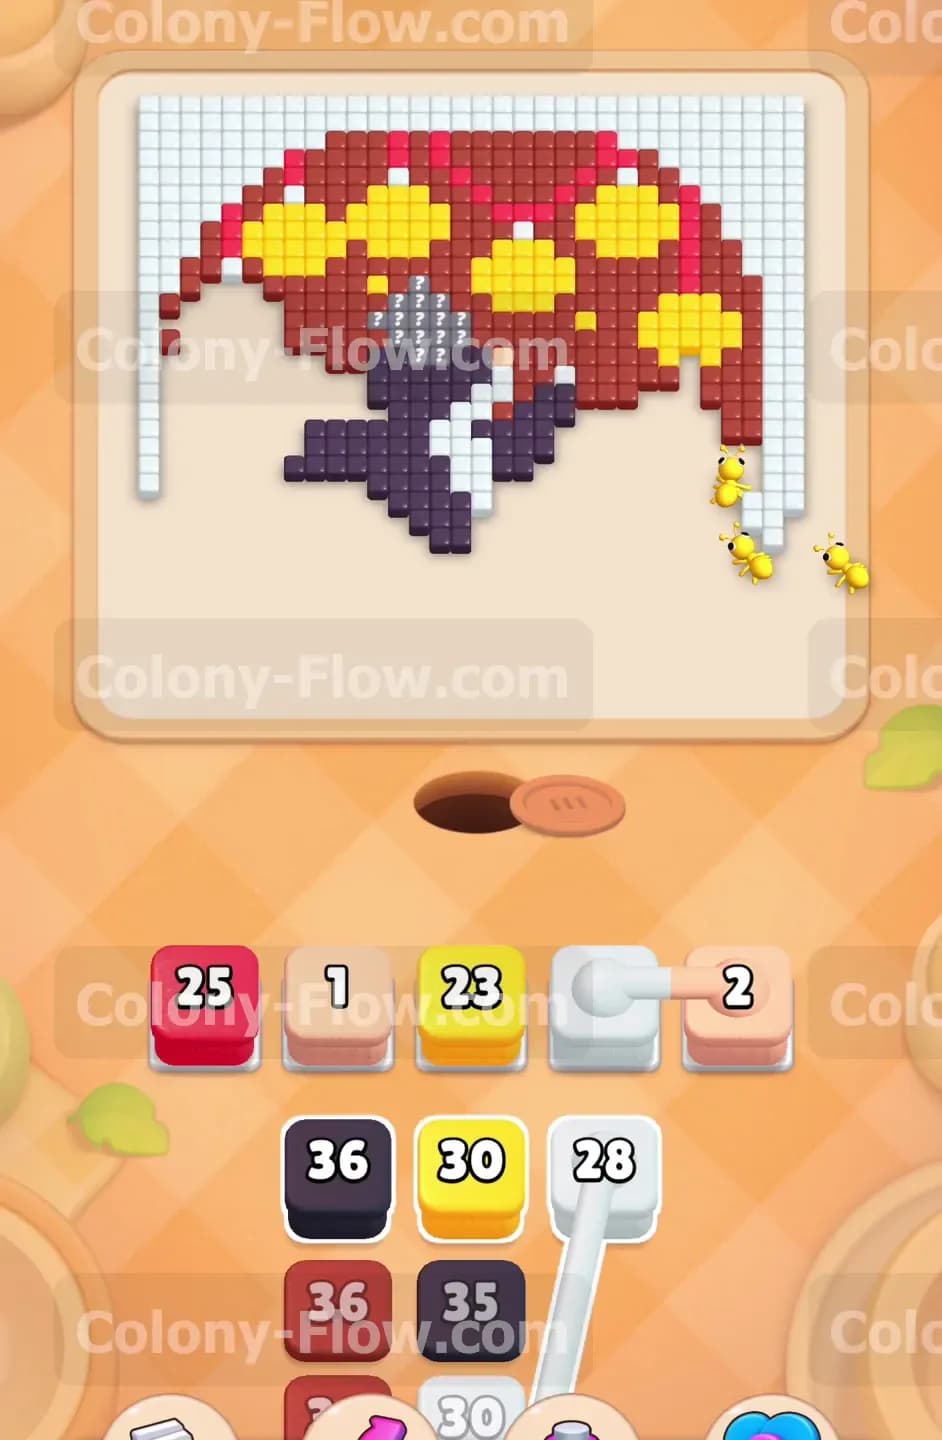
As you pull blocks from the tray you will eventually uncover connected boxes. You will see a yellow block and a white block permanently linked together by a thick grey line. When you pull one into your waiting slots the other follows automatically. This means they instantly take up two of your five precious slots. Before you pull these connected boxes you must verify that both colors have a clear path on the board. Look closely at the red background tiles. You need to make sure the red ants have eaten enough tiles to expose at least one yellow circle. If the yellow circles are still completely surrounded by red tiles the yellow block will sit dead in your slot. Wait until a yellow circle is exposed and the white border is still accessible. Then pull the connected boxes so both the yellow and white ants can deploy at the same time without stalling.
Step 4: Carve out the heavy red background on the right
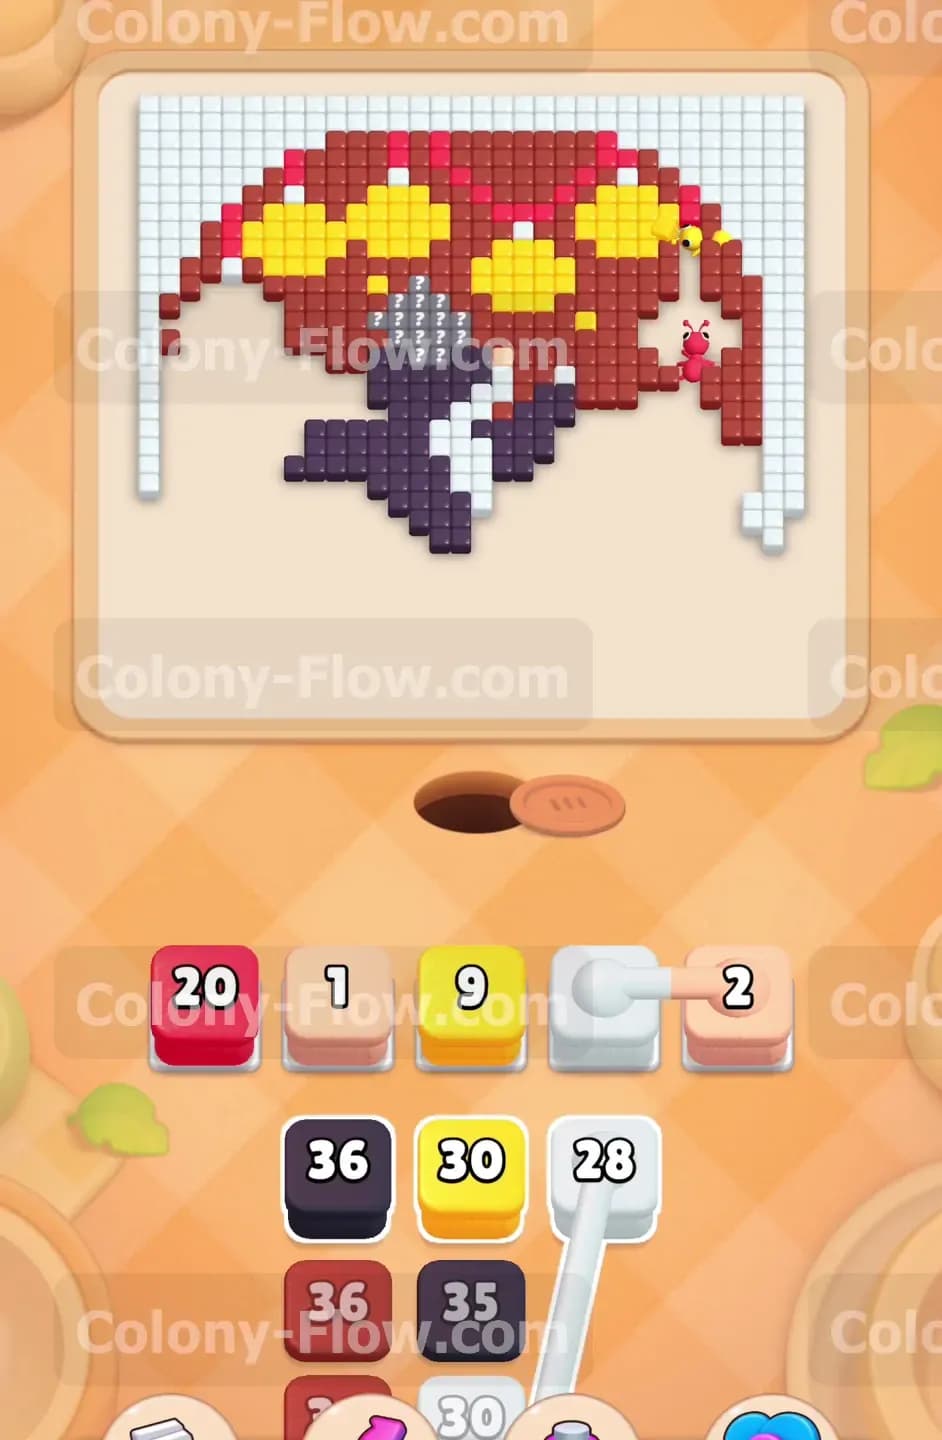
The red background makes up the largest solid block of color on this entire board. You need to pull a high number red block to keep chipping away at it. The red ants will aggressively swarm the right side of the picture. You want them to hollow out this red space to reveal more of the yellow circles located higher up. Be very cautious with your waiting slots here. It feels very tempting to pull three or four red blocks to speed things up. Resist that urge entirely. If you fill too many slots with red blocks you will hit a bottleneck where the path narrows. Keep only one or two red blocks active at any given moment. Leave your other slots empty so you can react quickly when a new yellow circle or a dark purple section opens up.
Step 5: Eliminate the remaining dark purple center
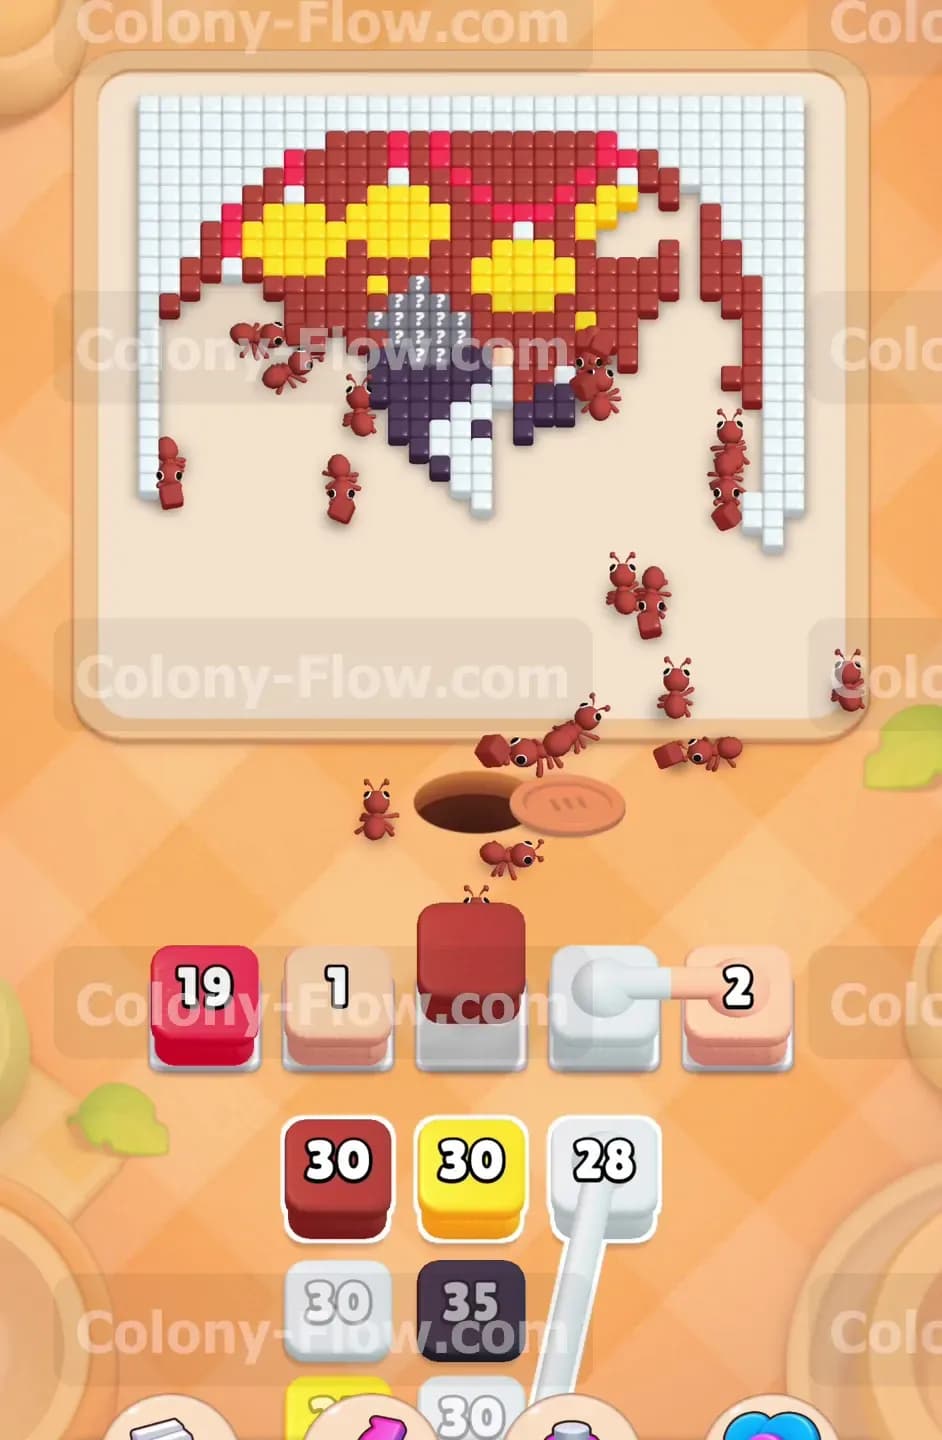
The dark purple animal still occupies the direct center of the board. The head and upper body physically block the middle path to the top yellow circles. Pull your next dark purple block to finish this section. The ants will swarm the middle and consume the last of the animal tiles. Removing this central obstacle completely opens up the middle of the board. This gives your red and yellow ants much shorter travel times to reach the upper sections of the picture. Let the dark purple block hit zero and disappear from your tray before you pivot back to the background colors. A clean empty slot serves as your best defense against a game over. You want to maintain a completely open board before bringing up the next round of heavy blocks.
Step 6: Swarm the top yellow circles
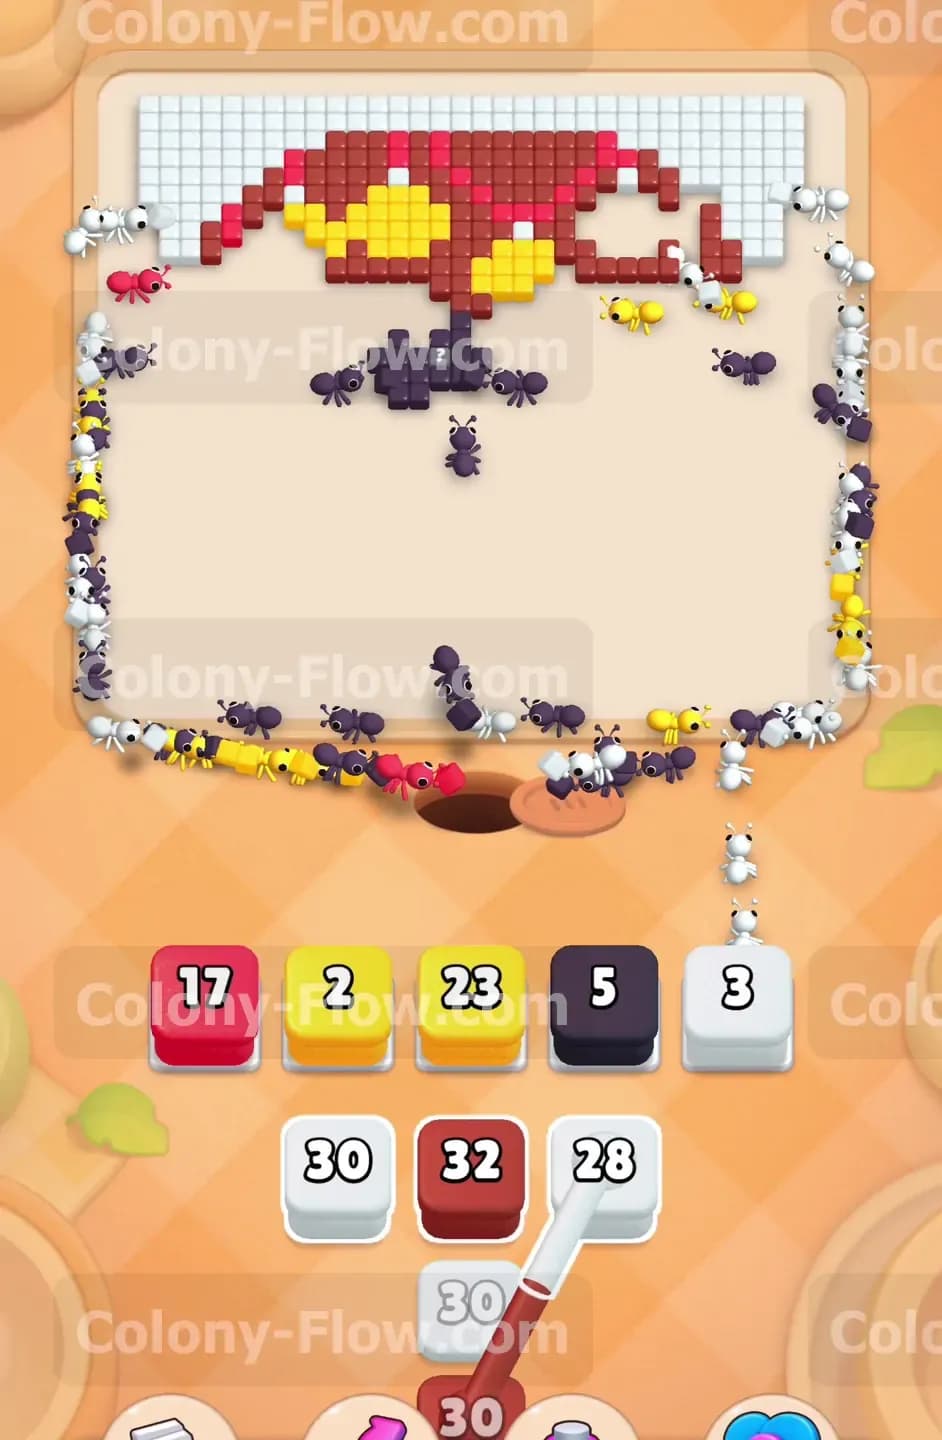
With the dark purple animal gone and the lower red background completely cleared out the top half of the board is wide open. The remaining yellow circles are fully exposed and ready to eat. Pull your remaining yellow blocks into the waiting slots. The yellow ants will race up the middle path and begin devouring the circles. You will find a few small red tiles clinging to the edges of the circles. Pull a small red block to help clean up those stubborn edges. The combination of yellow and red ants working together at the top of the board will rapidly reduce the remaining tile count. Keep checking your slots to ensure every block you pull has an immediate target. Do not let a yellow block sit idle if a red tile blocks the final path.
Step 7: Clean up the final top border pieces
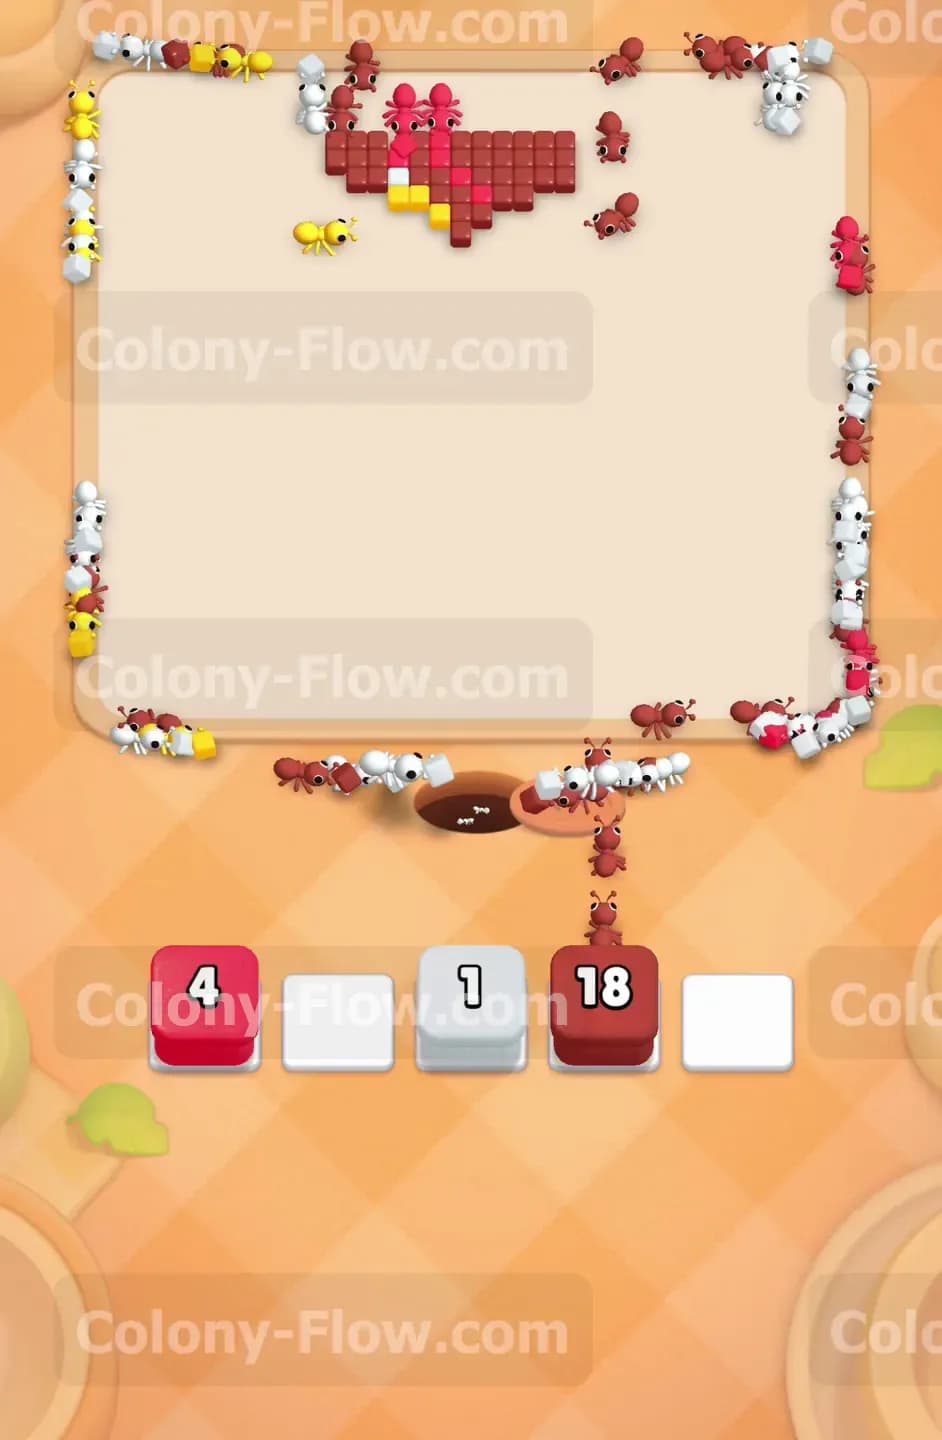
Only the very top strip of the white border and a tiny patch of red tiles remain on the board. Pull your final red and white blocks from the tray. Because the entire bottom and center of the board are completely empty the ants have a massive open field to run through. They will sprint straight from the nest hole to the top edge without any delays. Watch the final numbers on your blocks drop rapidly to zero. The white border will vanish and the last red background pieces will fade away. Once the final pixel tile is eaten and your waiting slots are completely empty you have successfully beaten the level. You can now move on to the next puzzle with confidence.
Final Thought
Managing your tray space forms the true test of this puzzle. You must always plan one move ahead to ensure your ants never get stuck behind a blocked path. If you find any of these written steps difficult to picture I highly recommend watching the video above this article. Seeing the physical paths open up on screen makes the strategy much easier to learn and apply to your own game.