Colony Flow Level 877 Walkthrough Solution & Guides | How to solve Colony Flow 877

Guide By Liam Stone
Updated on August 8, 2026
The video above has the full Level 877 walkthrough, so skip the reading if you just want to watch.
Video doesn't match your screen?
Game updates frequently scramble layouts! Try our AI Screenshot Solver first to find your exact board instantly, or report broken guides to our team.
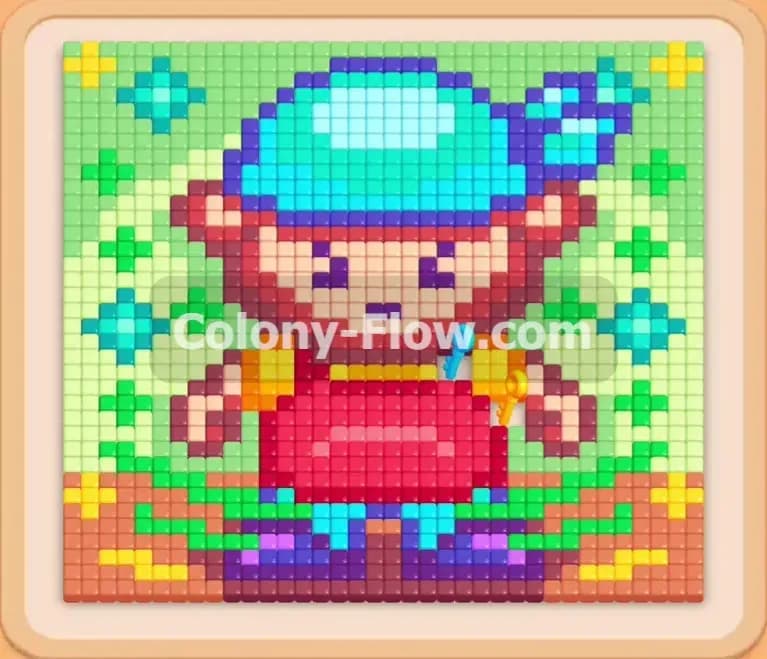
Colony Flow Level 877 drops you into a massive pixel art puzzle featuring a young character wearing a blue hat and red shirt. You need to manage your tray carefully to avoid filling all five waiting slots. I play every level myself and I will walk you through exactly how I clear this board from start to finish. You start with a board completely filled with bright colors and a tray that gets complicated fast. I clear this level by opening the outer edges first and working my way to the center so the ants always have a clear path. Follow my strategy to beat this board without filling your waiting slots and secure your win.
Colony Flow Level 877 Overview
What You Are Working With
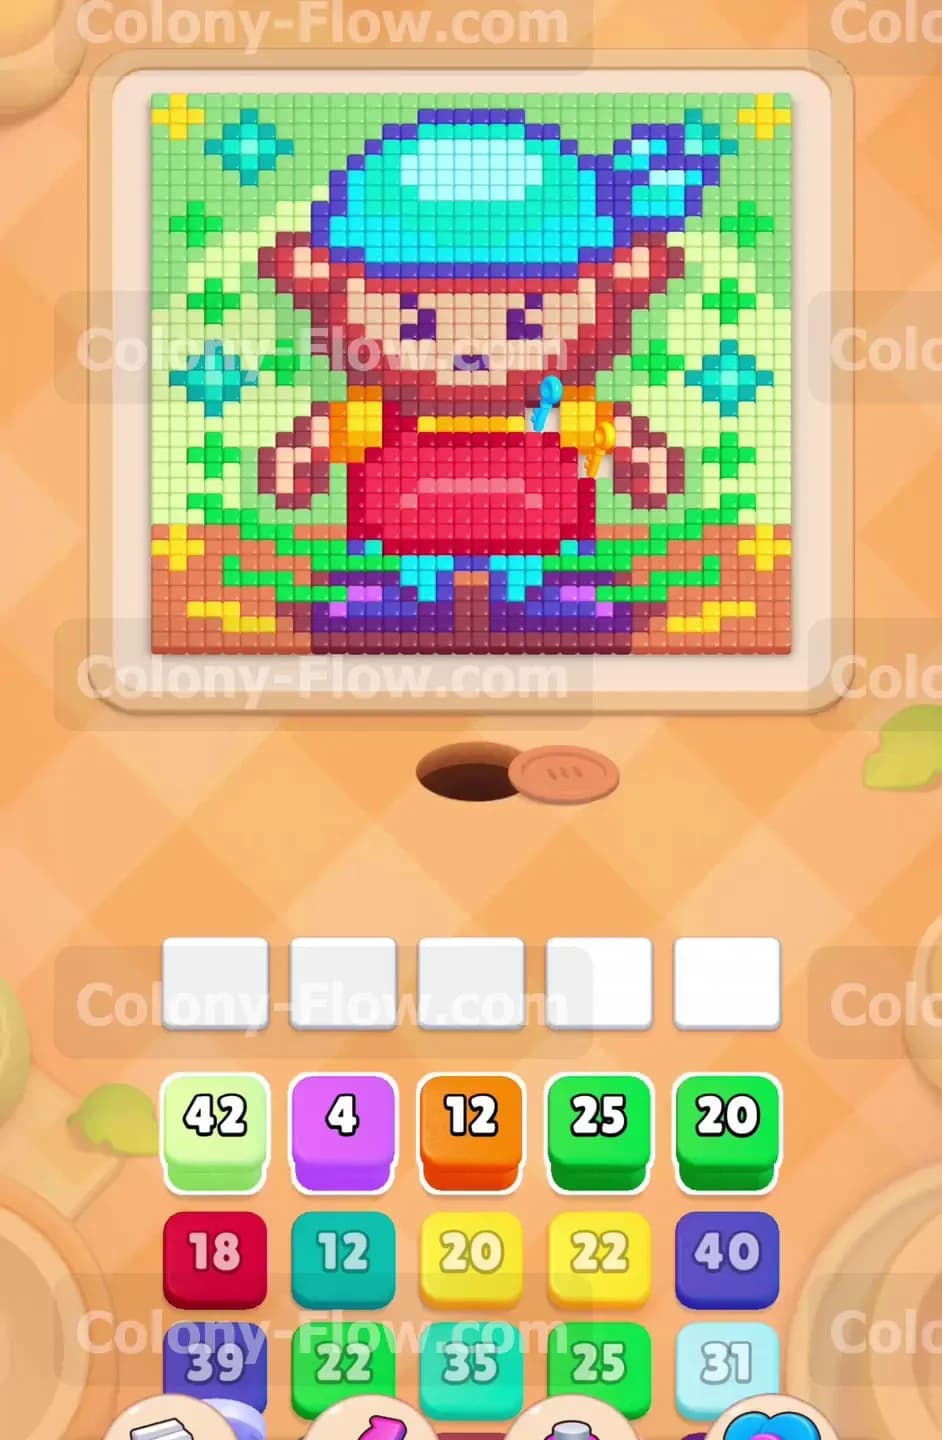
The board features a large pixel art character resembling a young boy wearing a light blue and dark blue hat along with a bright dark red shirt. He has tan skin and brown hair and sits directly on a wide orange ground area. The background contains a thick light green border and green diamond clusters floating on the sides. Your tray provides large numbered blocks in light green, purple, orange, green, dark red, light blue, yellow, and dark blue. This level also introduces two major special mechanics. You will encounter Lock and Key elements where padlocks freeze certain tray blocks until you clear matching key tiles from the main board. You will also manage Hidden Box tiles that hide their color behind a question mark until a valid path opens up for them. You will see exactly how to approach each color group without creating traffic jams. The combination of bright colors and specific unlock requirements makes this puzzle incredibly satisfying to solve.
What It Takes to Clear Level 877 Board
You win the level when your ants consume every single pixel on the board and return safely to the nest hole. You lose the game entirely if you fill all five waiting slots in your tray without providing an open path for the ants to reach their target colors. Every single move you make must prioritize keeping at least one path completely clear. You accomplish this strict requirement by stripping the outer layers of the picture before digging into the center. The waiting slots at the bottom of your screen act as a queue. When you tap a block it goes into the queue until the ants can access the matching color. You manage this queue by only selecting blocks that have an immediate clear path. Planning your block pulls prevents traffic jams and ensures your waiting slots never fill up completely.
Colony Flow Level 877 Step by Step Solution
Step 1: Clear the outer light green boundary frame
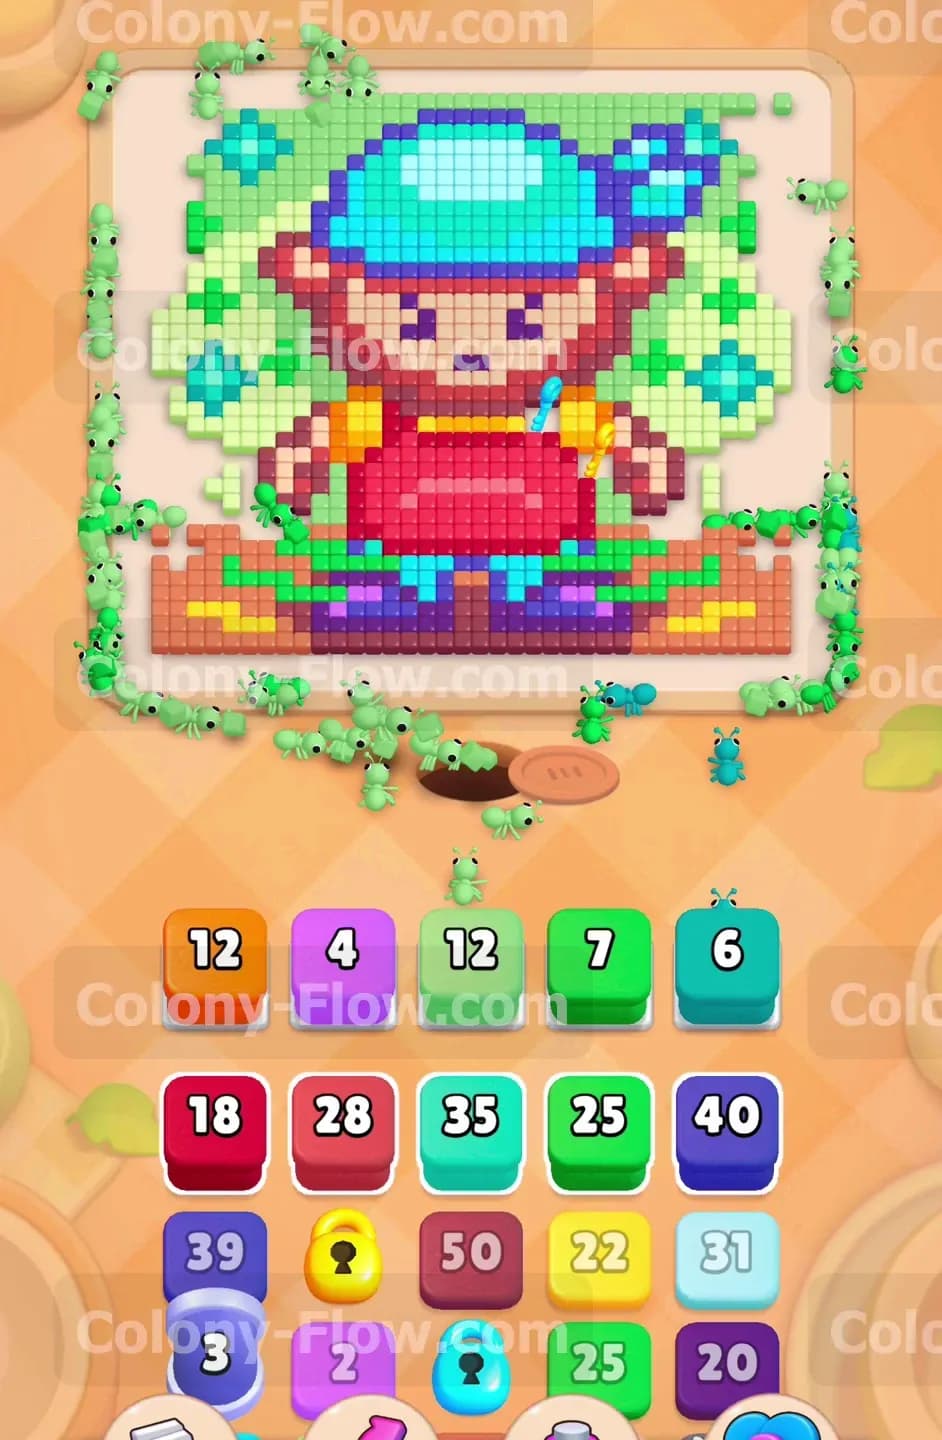
Deploy the massive light green block first to send your ants around the entire perimeter of the picture. The ants will stream out of the nest hole at the bottom and eat away the thick light green border enclosing the character. This move is vital because it exposes the orange ground at the bottom and the green diamond shapes on the sides of the screen. You keep your waiting slots totally empty here because the outer edge has absolutely no obstructions blocking the light green ants. Getting this outer shell removed opens up multiple avenues for your next moves and sets a strong foundation for the rest of the level. The visual transformation is immediate. The picture looks much smaller and more manageable once the border disappears.
Step 2: Remove the orange ground and purple shoes
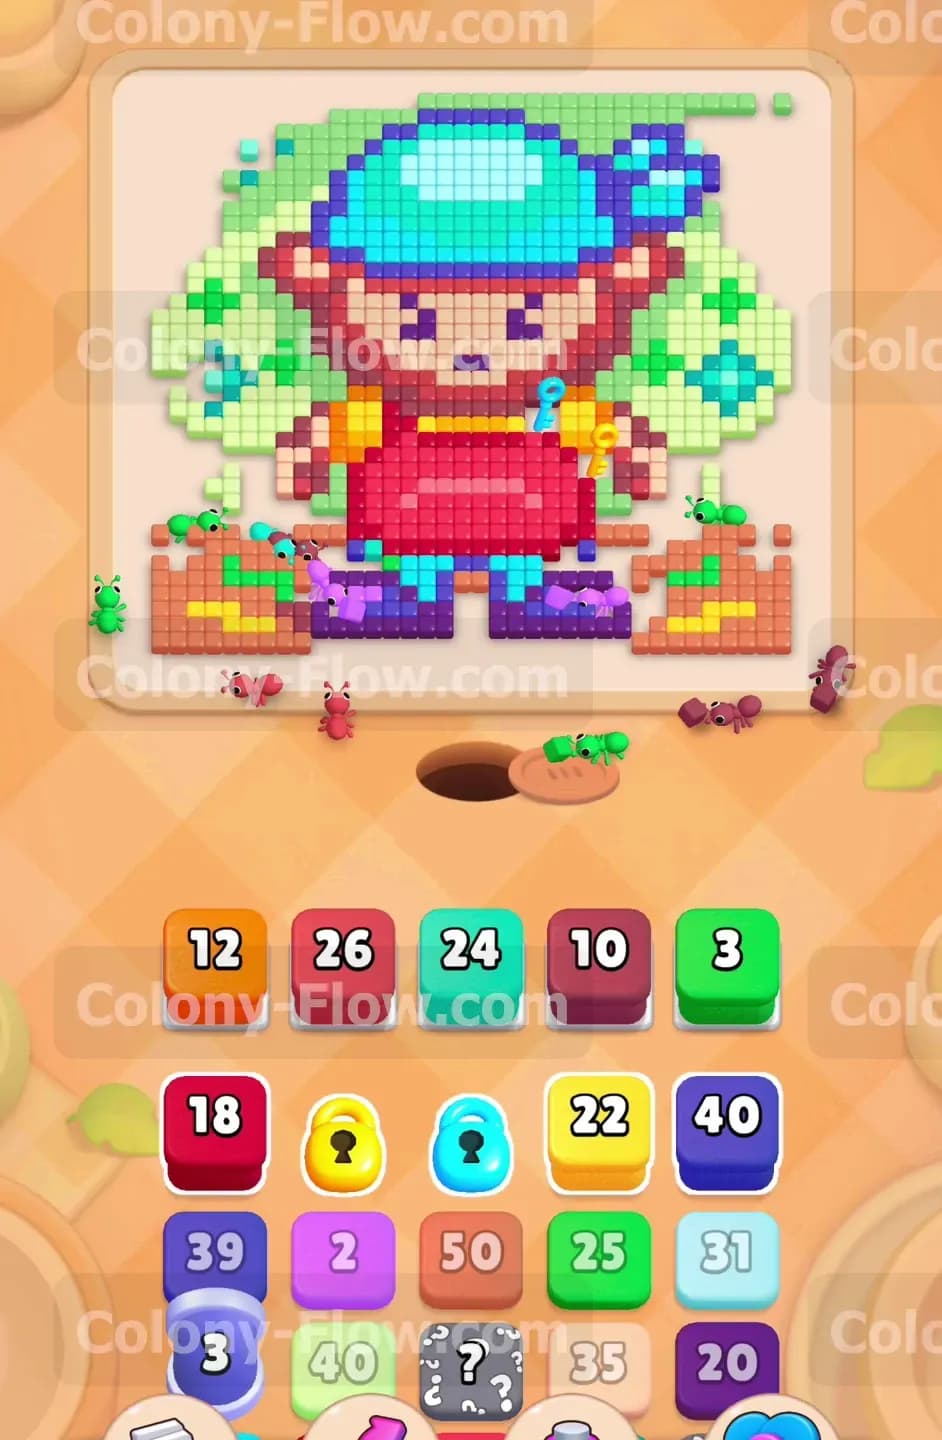
Pull the orange blocks followed by the purple block to clear the bottom section of the screen. The orange ground tiles disappear very quickly and create a massive open space right above the nest hole. The purple ants then easily march in and reach the purple shoes of the character without any delay. By clearing the bottom ground first you give all future ants a straight shot upward without getting trapped behind lower obstacles. This direct access means your tray blocks spend almost no time sitting in the waiting slots. You keep the flow of ants completely unobstructed.
Step 3: Target the green background diamond clusters
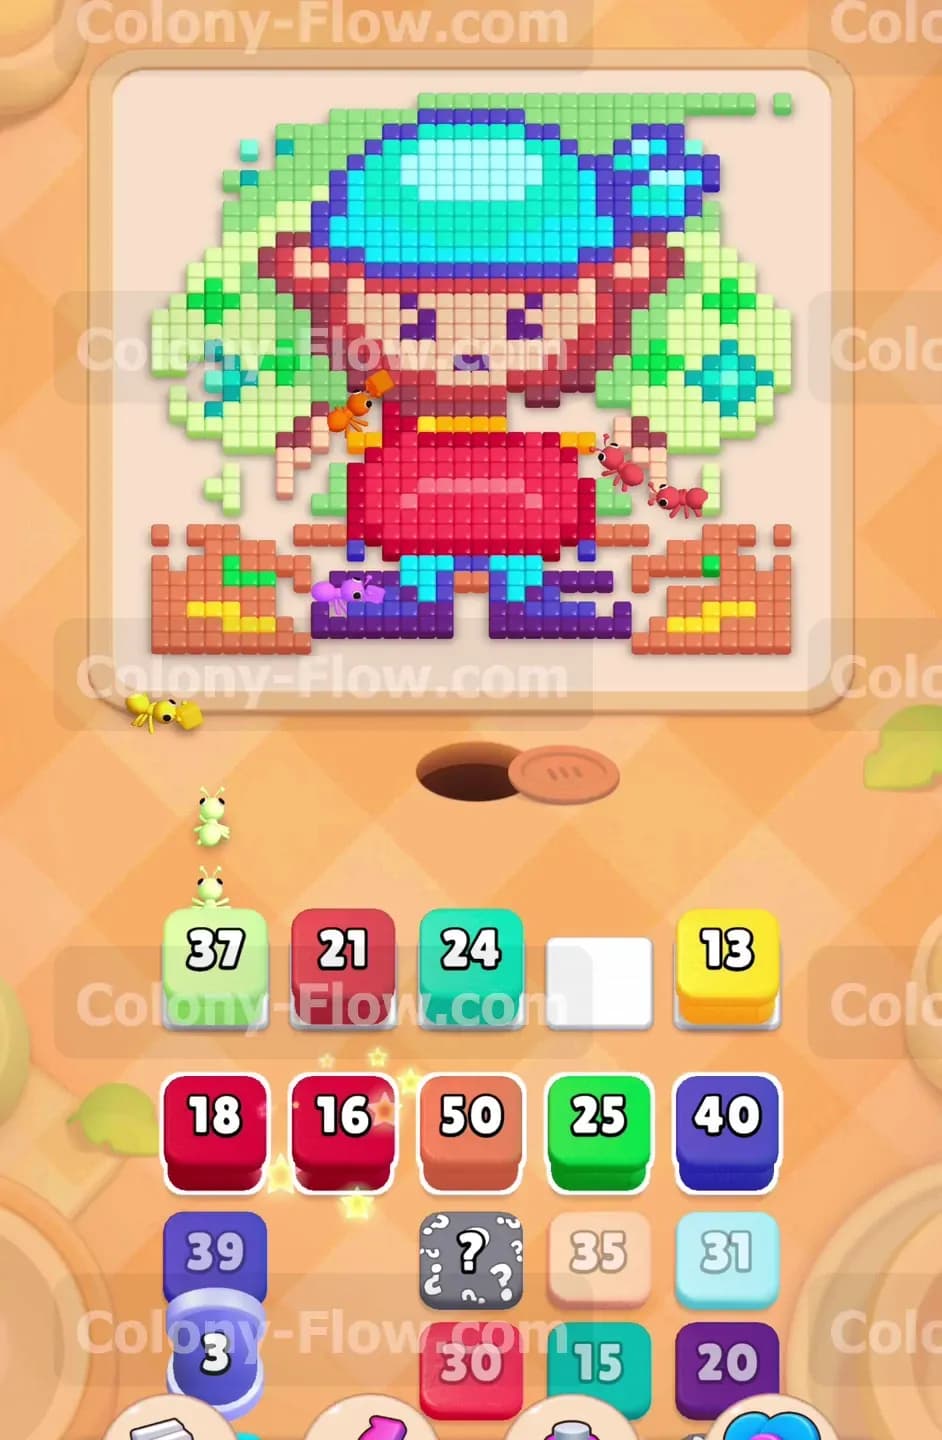
Use your green blocks to consume the floating diamond shapes on the left and right sides of the character. The green ants will travel up the newly opened side paths you created in the first step. Clearing these green tiles is incredibly important because they physically block your access to the yellow hands of the character. You must maintain this smooth upward flow along the sides to prevent your tray from jamming up. Sending the ants up the flanks keeps the center area undisturbed while you prepare for the next major phase of the puzzle.
Step 4: Collect the yellow keys to unlock the tray
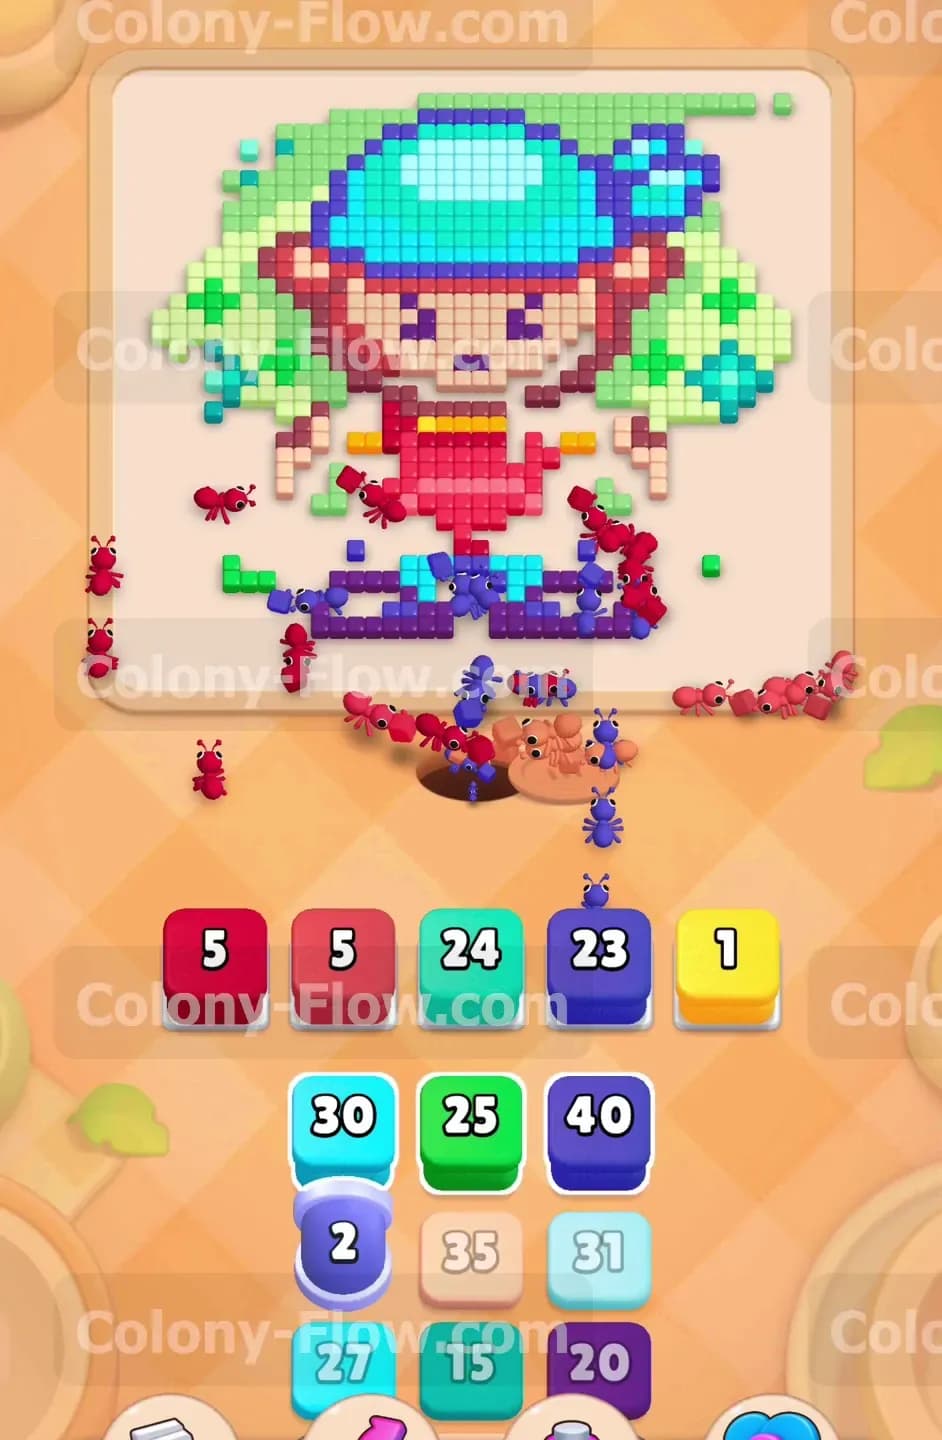
Send your yellow ants to eat the yellow hands located on the sides of the character. These hands act as key tiles that correspond directly to the padlocked yellow blocks currently stuck in your tray. Once the yellow ants consume the hands the padlocks instantly break open and free up crucial space in your waiting slots. Unlocking these blocks early completely removes the severe risk of a dead end forming from trapped yellow blocks. You need this tray space available before you start tackling the huge sections of the torso and head.
Step 5: Expose and resolve the first hidden box
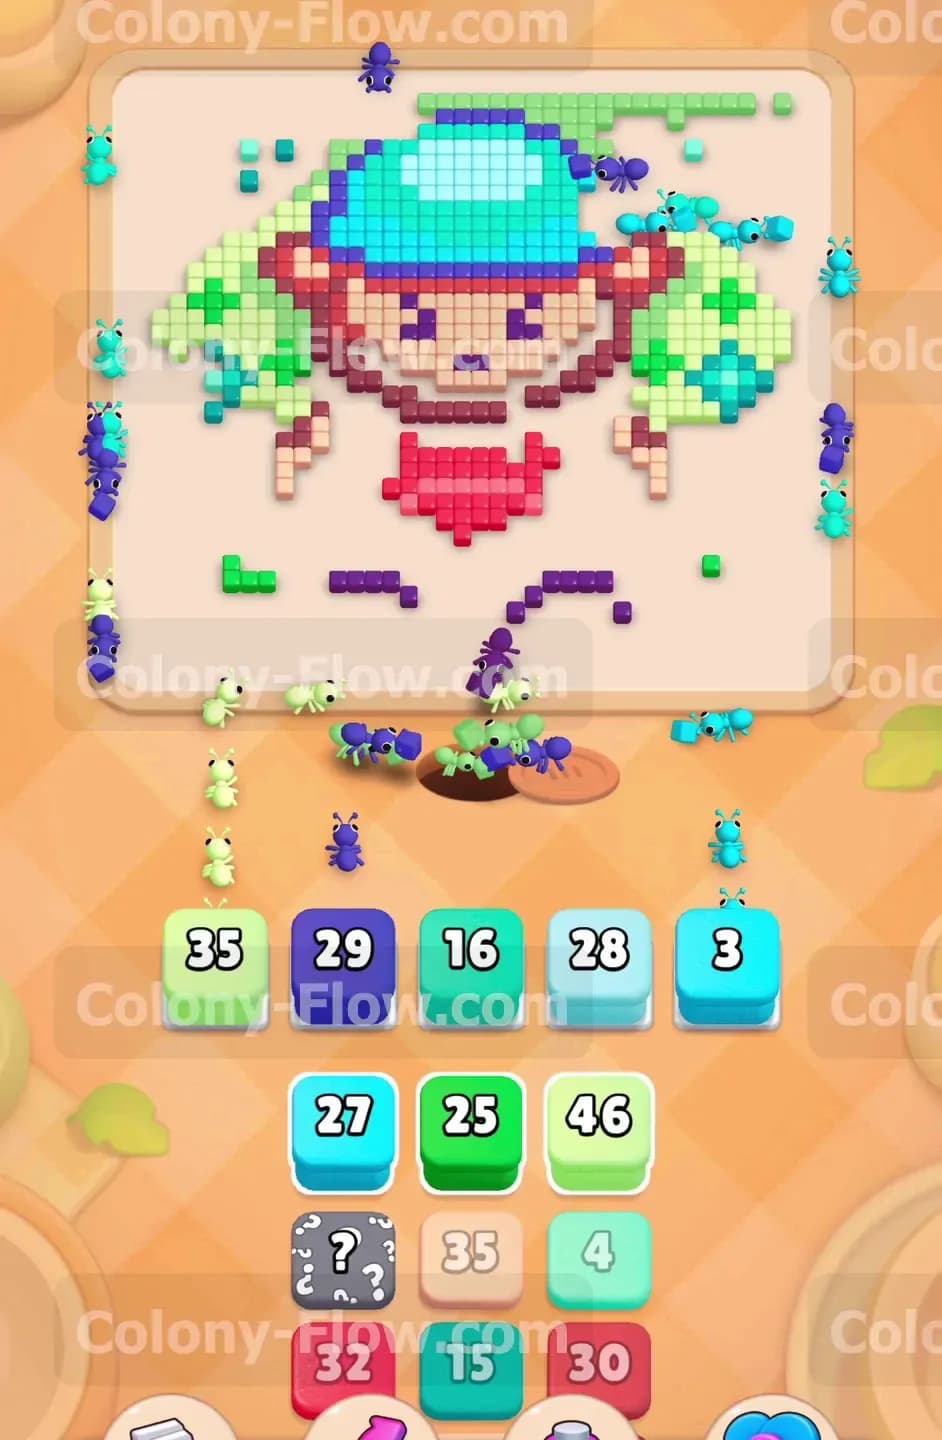
A hidden box marked with a large question mark drops into your tray as you clear the lower sections. This special tile hides its color until it detects a completely valid path to a matching pixel on the board. Since you already cleared the ground and the sides this box finds an open route instantly and reveals its true color. Deploy the newly revealed block immediately to keep your tray organized and prevent a bottleneck. You never want a hidden box taking up a valuable waiting slot for longer than absolutely necessary.
Step 6: Tackle the dark red shirt and dark blue pants
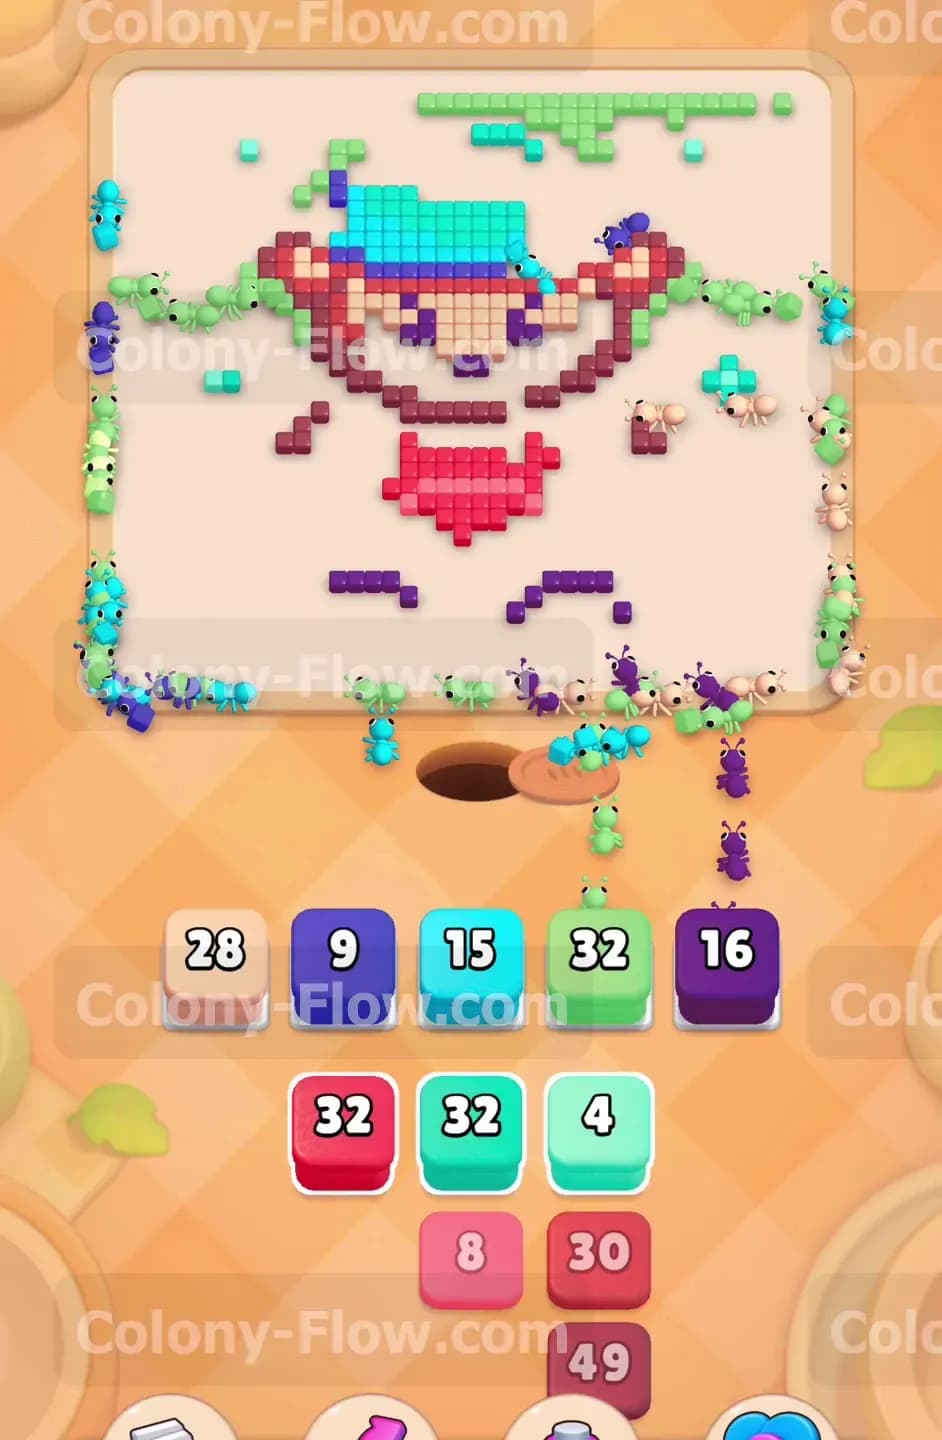
Pull the dark red blocks to start tearing down the large dark red shirt covering the chest of the character. Follow that up by deploying the dark blue blocks to clear the dark blue pants. The ants swarm the dead center of the picture and create a massive empty gap right in the middle of the board. This massive clearing operation also triggers the removal of a purple lock holding back other tray blocks. Your waiting slots remain perfectly safe during this heavy deployment because the center provides a massive and easily accessible target area.
Step 7: Dismantle the light blue and dark blue hat
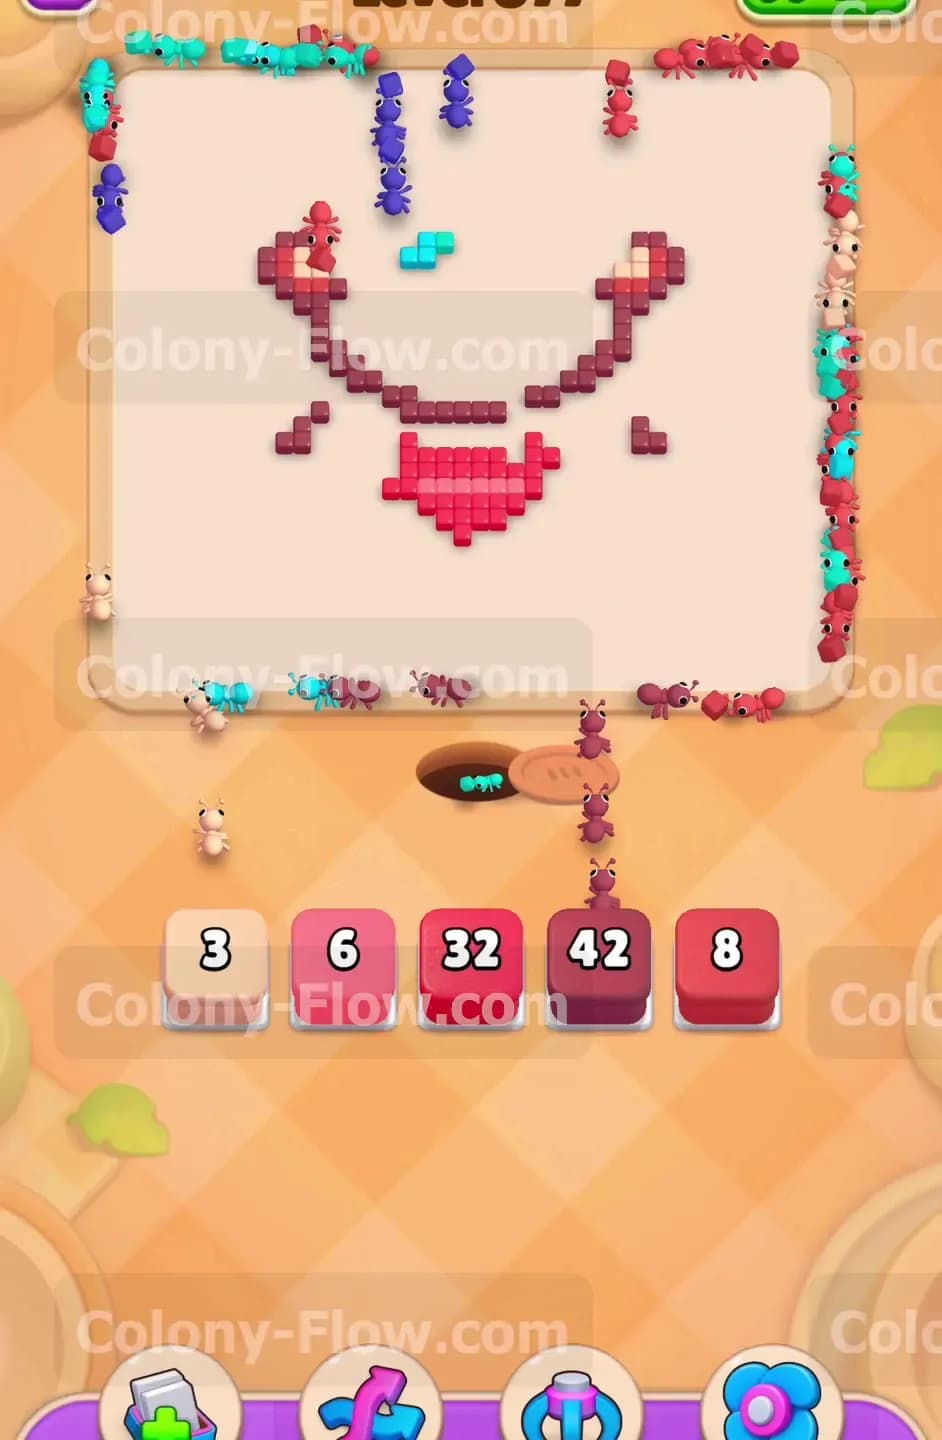
Deploy your light blue and dark blue blocks to break apart the large hat sitting on the head of the character. The ants march straight up through the empty chest cavity you just created in the previous step. The hat breaks apart in huge chunks very quickly. This step also clears the final light blue key tiles located on the sides of the hat which unlocks the remaining light blue blocks sitting in your tray. Freeing up these light blue blocks gives you the exact resources you need to finish the top half of the board.
Step 8: Handle the second hidden box and remaining background
Another hidden box appears in your tray just as you finish dismantling the main parts of the hat. The wide open board guarantees it finds a clear path instantly and reveals its color without any delay. Play this block right away to keep your momentum going strong. Then pull the remaining light green and light blue blocks to clear the small clusters left near the top corners of the screen. The tray numbers drop down to single digits as the board empties out and the ants clean up the straggling background pieces.
Step 9: Clean up the tan face and brown hair outlines
The final phase requires you to clear the intricate facial features and outlines. The board now only contains tan skin tiles along with brown hair and dark red border pixels. Pull the tan blocks to clear the face completely. Then deploy the dark red blocks to consume the thick outlines shaping the head and mouth. Finally use the brown blocks to let the ants eat the last pieces of hair. The ants clean up the final pixels and the board clears completely to give you the win. Managing the tray carefully through these final blocks ensures you cross the finish line without a sudden jam.
Final Thought
Beating this board requires patience and a strict focus on keeping paths clear from the outside in. Planning your tray pulls prevents blocks from piling up in your waiting slots. I encourage you to watch the video above this article if any step is hard to follow in text.