Colony Flow Level 950 Walkthrough Solution & Guides | How to solve Colony Flow 950

Guide By Liam Stone
Updated on August 8, 2026
Some players learn faster by watching. The video above walks through Level 950 move by move.
Video doesn't match your screen?
Game updates frequently scramble layouts! Try our AI Screenshot Solver first to find your exact board instantly, or report broken guides to our team.
Welcome to Colony Flow Level 950. This stage presents a massive starry night picture that requires careful management of your waiting slots. The board is packed with high tile counts and tight corners that demand a solid plan. You will need to carve out specific paths to keep your ants moving and prevent a traffic jam in your tray.
Colony Flow Level 950 Overview
What You Are Working With
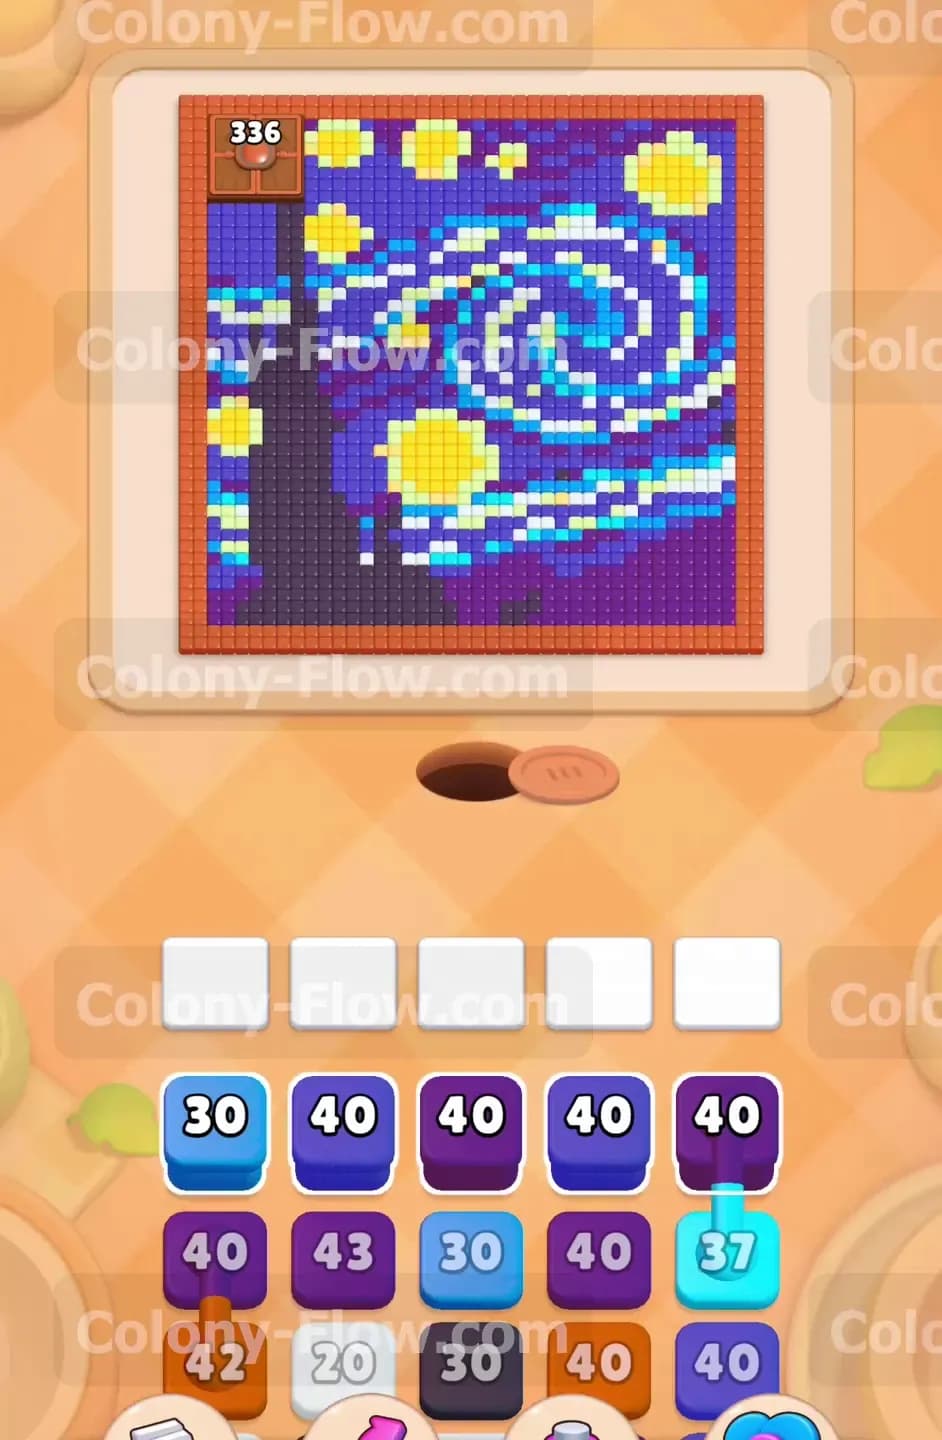
The pixel art for this puzzle displays a beautiful nighttime scene that resembles a famous painting. A thick orange border surrounds the entire canvas and acts as a solid wall holding the picture together. Inside this border you will see a massive dark purple structure rising on the left side of the screen. The remainder of the space holds a swirling mix of dark blue, light blue, and cyan sky tiles. Several bright yellow stars dot the sky and draw your attention. A few white and light green pixels accent the swirling wind patterns blowing across the background. The tray at the bottom holds a large collection of massive blocks waiting for your command. You have multiple dark purple and dark blue blocks boasting numbers up to 40. Dealing with these huge numbers is the main challenge of this board.
What It Takes to Clear Level 950 Board
Winning this stage means you dismantle the sky section piece by piece before you sweep the outer border. You must clear a total of 336 tiles to finish the picture and complete the level. The real challenge comes from managing the big blocks sitting in your tray. There are five waiting slots at the bottom of your screen. If you pull a block with a count of 40 but only three matching tiles are exposed on the board, that block will sit there and clog one of your slots. You lose the level the second all five slots fill up and no ants can reach matching tiles to drain the numbers. Success requires opening multiple color paths early in the game. This ensures every block you pull can immediately send ants into the board to clear tiles. You have to keep the board moving and never create a dead end for your colony. You always want at least one open path for your highest count blocks.
Colony Flow Level 950 Step by Step Solution
Step 1: Open the bottom right edge of the dark purple structure to create your initial paths.
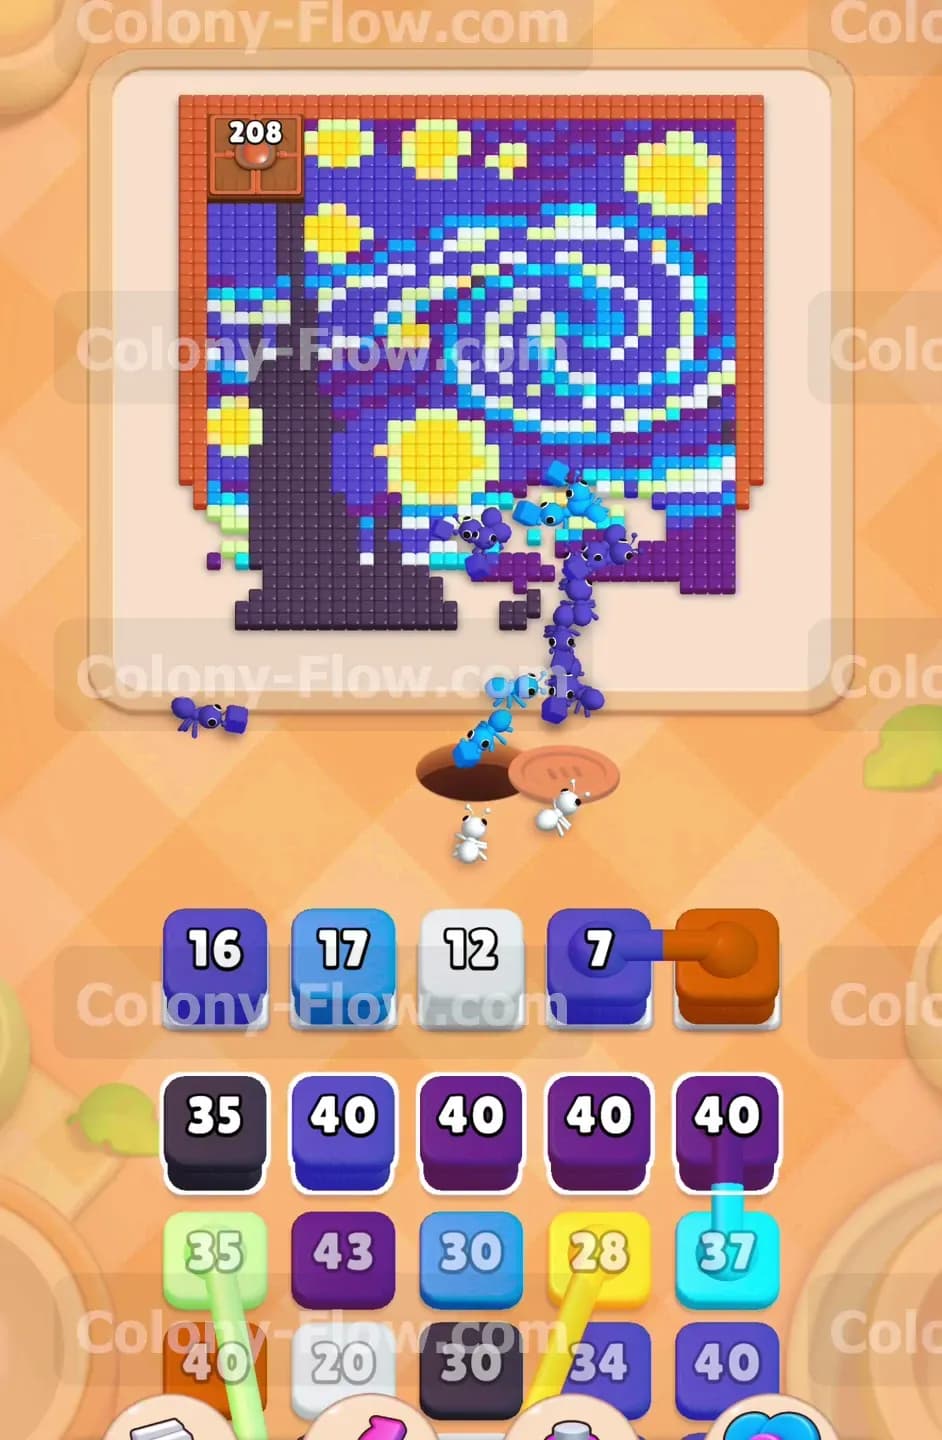
The ants start their journey at the nest hole located near the bottom center of the board. The closest available tiles are the dark purple pieces making up the bottom of the tall structure. You pull a large dark purple block from the tray to get the ants working on this lower section. This carves out an empty space at the bottom of the picture and creates room for your ants to move. At the same time you want to pull a dark blue block and a light blue block to begin attacking the lower sections of the sky on the right side. The ants march out and divide their numbers between the purple base and the blue sky tiles. Opening the right half early gives the ants plenty of exposed tiles to consume. This prevents your first few massive blocks from getting stuck in the waiting slots. You establish a solid rhythm right from the start.
Step 2: Send ants into the swirling cyan and dark blue sky patterns to hollow out the center.
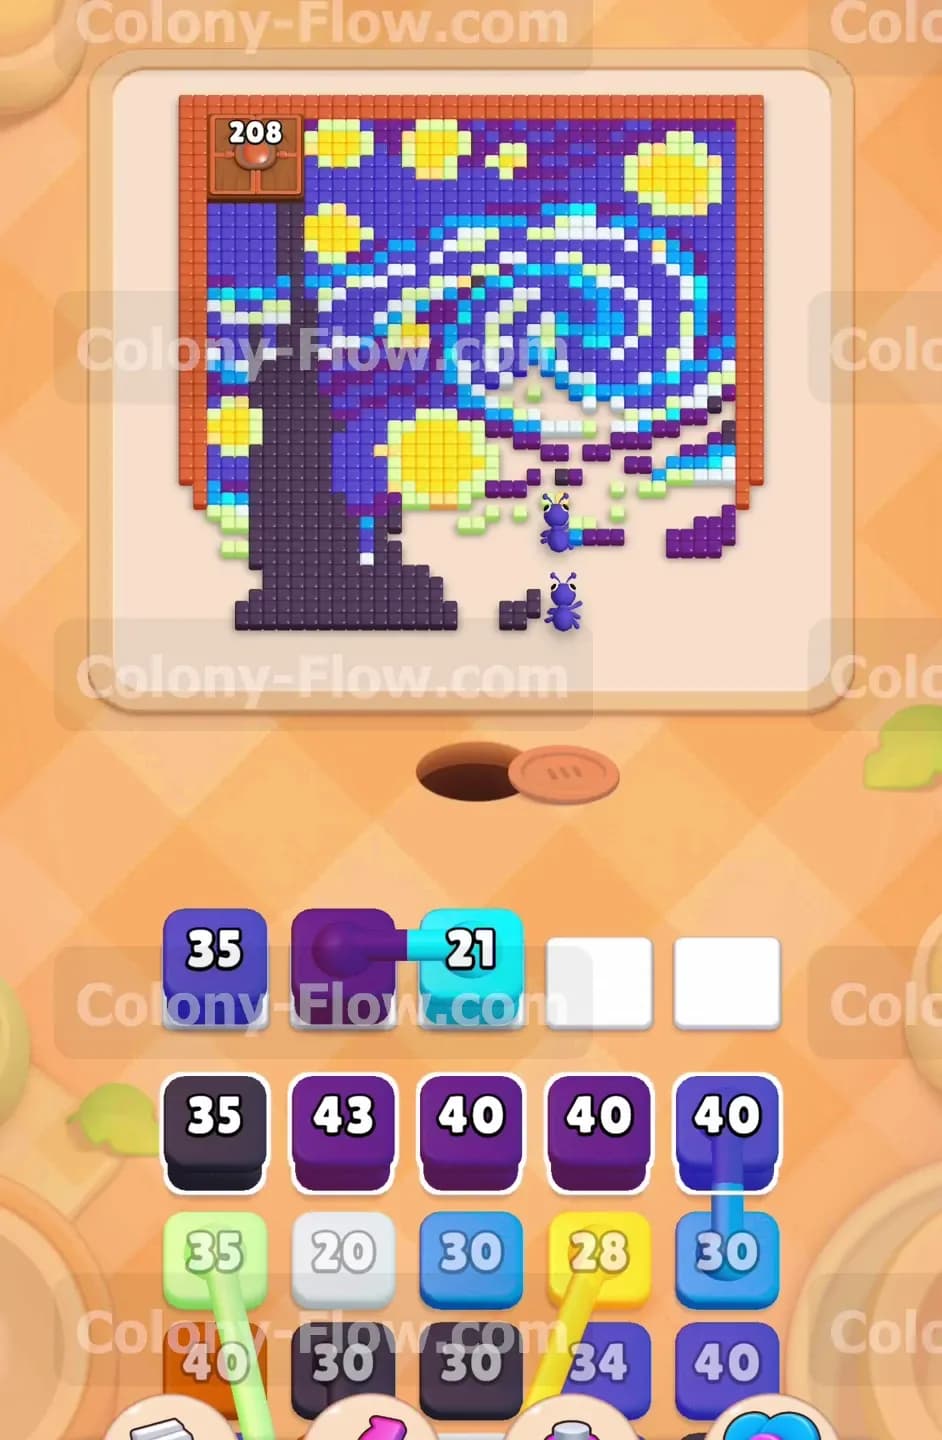
With the bottom right corner completely clear, your ants gain access to travel further up into the main picture. You bring a cyan block into the waiting area to target the bright blue swirls in the middle of the sky. The cyan tiles sit directly next to a dense cluster of white tiles. Pulling a white block alongside the cyan one creates a great clearing zone for your colony. The ants stream up the newly opened right side and devour the swirling wind pattern. You also pull another dark purple block to keep chipping away at the massive tower on the left side of the canvas. Attacking both the sky and the tower gives you constant targets for your big blocks. You keep your waiting slots flowing smoothly without hitting any roadblocks. Your ants are always busy chewing through the highest tile counts.
Step 3: Clear the yellow stars and light green accents on the right side of the canvas.
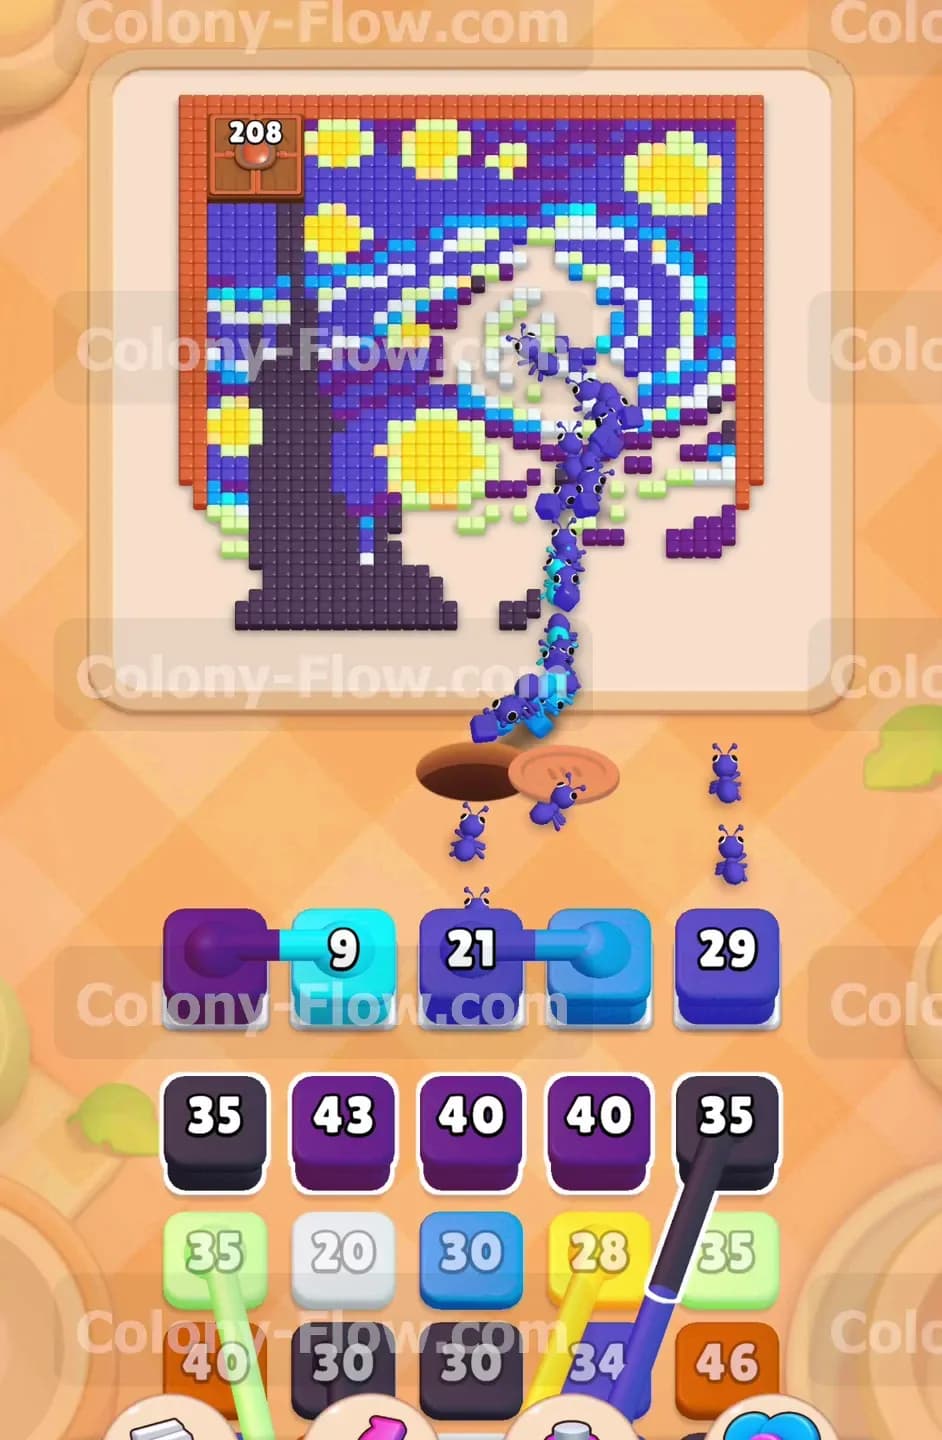
The destruction of the blue swirl exposes the bright stars located in the top right quadrant. You pull a yellow block and a light green block into the tray slots to target these isolated pieces. A huge line of ants rushes up the right wall to reach these glowing star tiles. Because you waited until the blocking blue tiles were gone, the yellow and light green blocks drain very quickly into the board. If you had pulled them too early they would have jammed your slots and cost you the entire level. The dark blue blocks continue to process the remaining sky background while the stars disappear one by one. Your board now looks completely empty on the right side. This gives you a massive open area for ants to travel through. They can run freely without bumping into any walls.
Step 4: Shift your focus to the stars and sky background on the far left side.
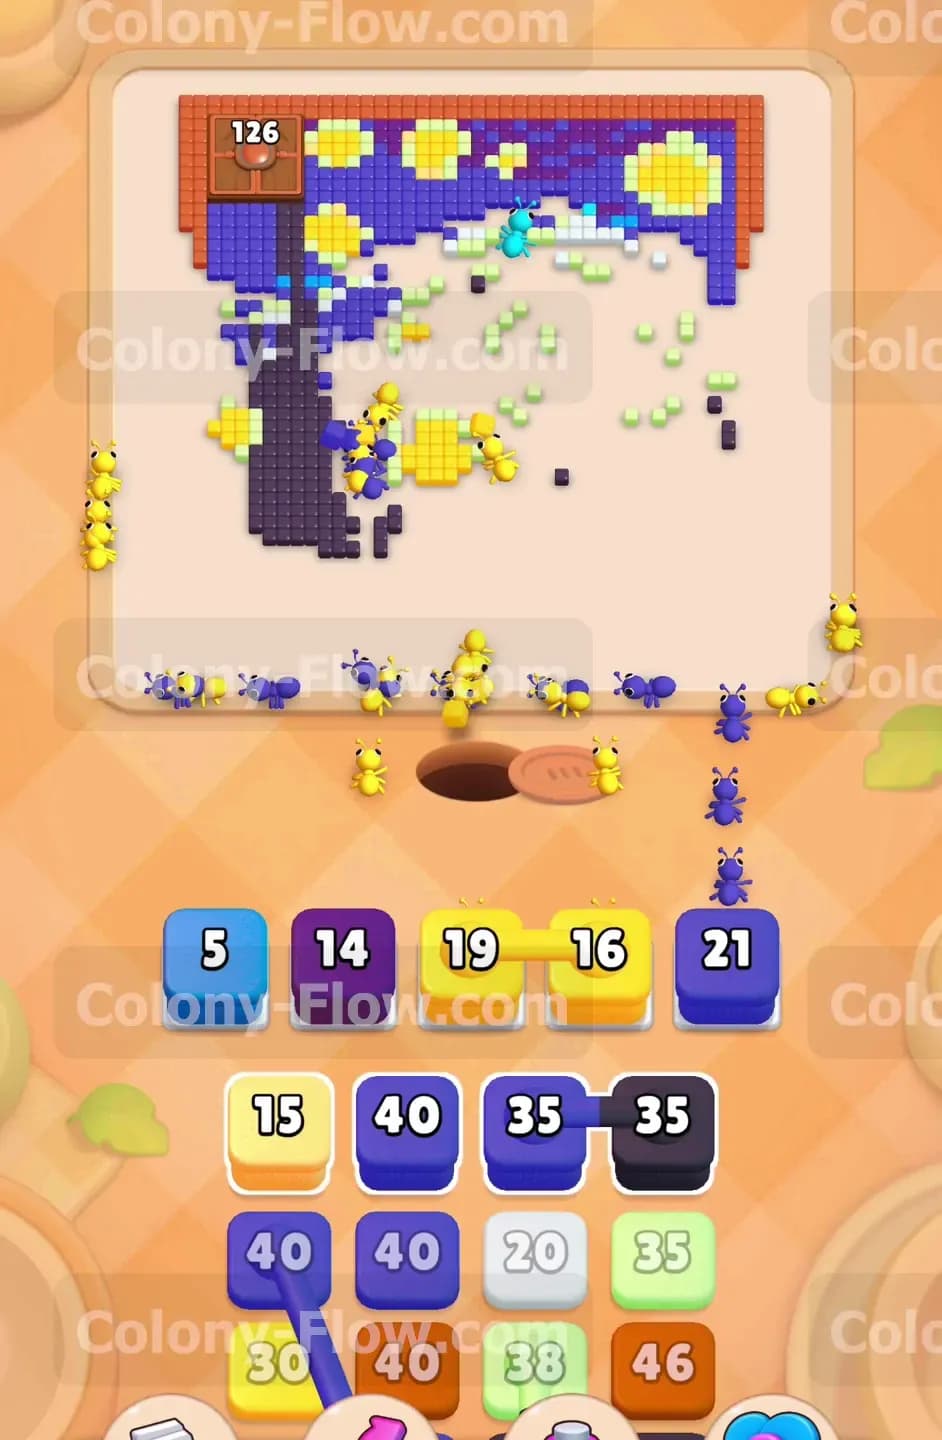
Now that the right half is completely empty space, your ants have to march a long distance to reach the remaining tiles on the left side. You load up another set of dark blue, light blue, and yellow blocks into the waiting area to direct them. The ants travel straight up from the hole and hook left across the empty canvas. They begin tearing into the top left corner of the painting. This section contains another large yellow star and more swirling blue patterns. The dark purple tower still stands tall, but you want to hold off on pulling too many purple blocks right now. You let the ants focus entirely on finishing the sky and stars so those specific colors can be retired from the board completely. This clears out more room and keeps your path open. Your tray becomes much easier to manage with fewer colors remaining.
Step 5: Release the ants to consume the entire outer orange border surrounding the picture.
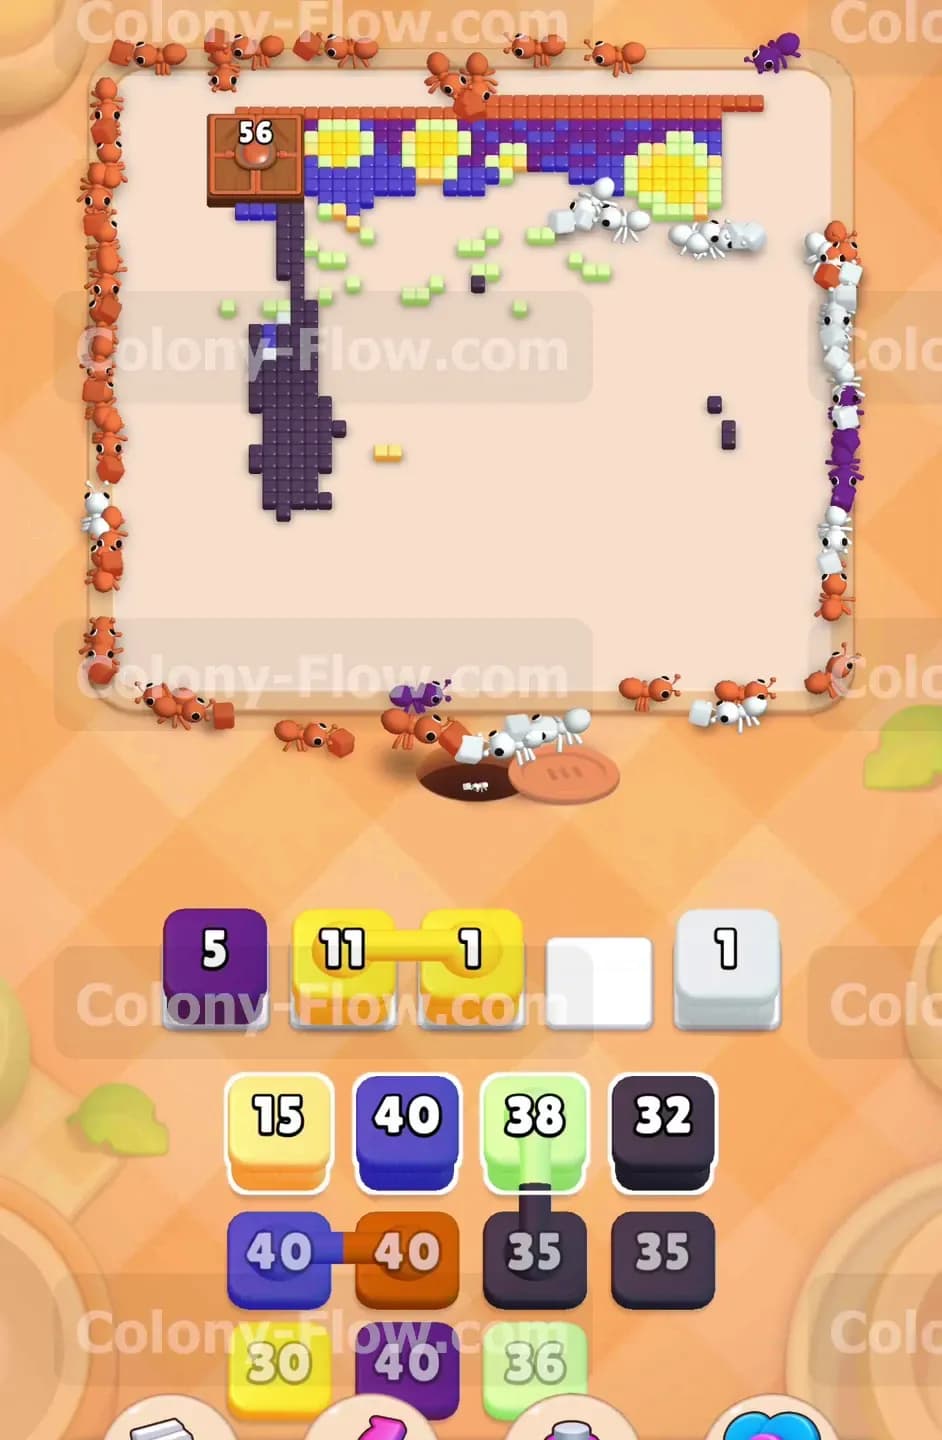
By the time the sky is mostly gone, you will notice the thick orange frame surrounding the entire picture is now fully exposed on the inside edge. You pull the orange block that has been waiting patiently in your tray. A massive swarm of ants pours out of the hole and splits in both directions to tackle the border. They march in a huge square all the way around the empty canvas to eat the bright outer frame. The orange block number drops fast as the ants surround the picture. While they eat the frame, you also pull a final yellow and white block to clean up the last few star fragments scattered near the top edge. Your slots remain clear and ready for the final push. The board is mostly blank empty space at this point.
Step 6: Demolish the remaining dark purple structure to finish the level and claim your win.
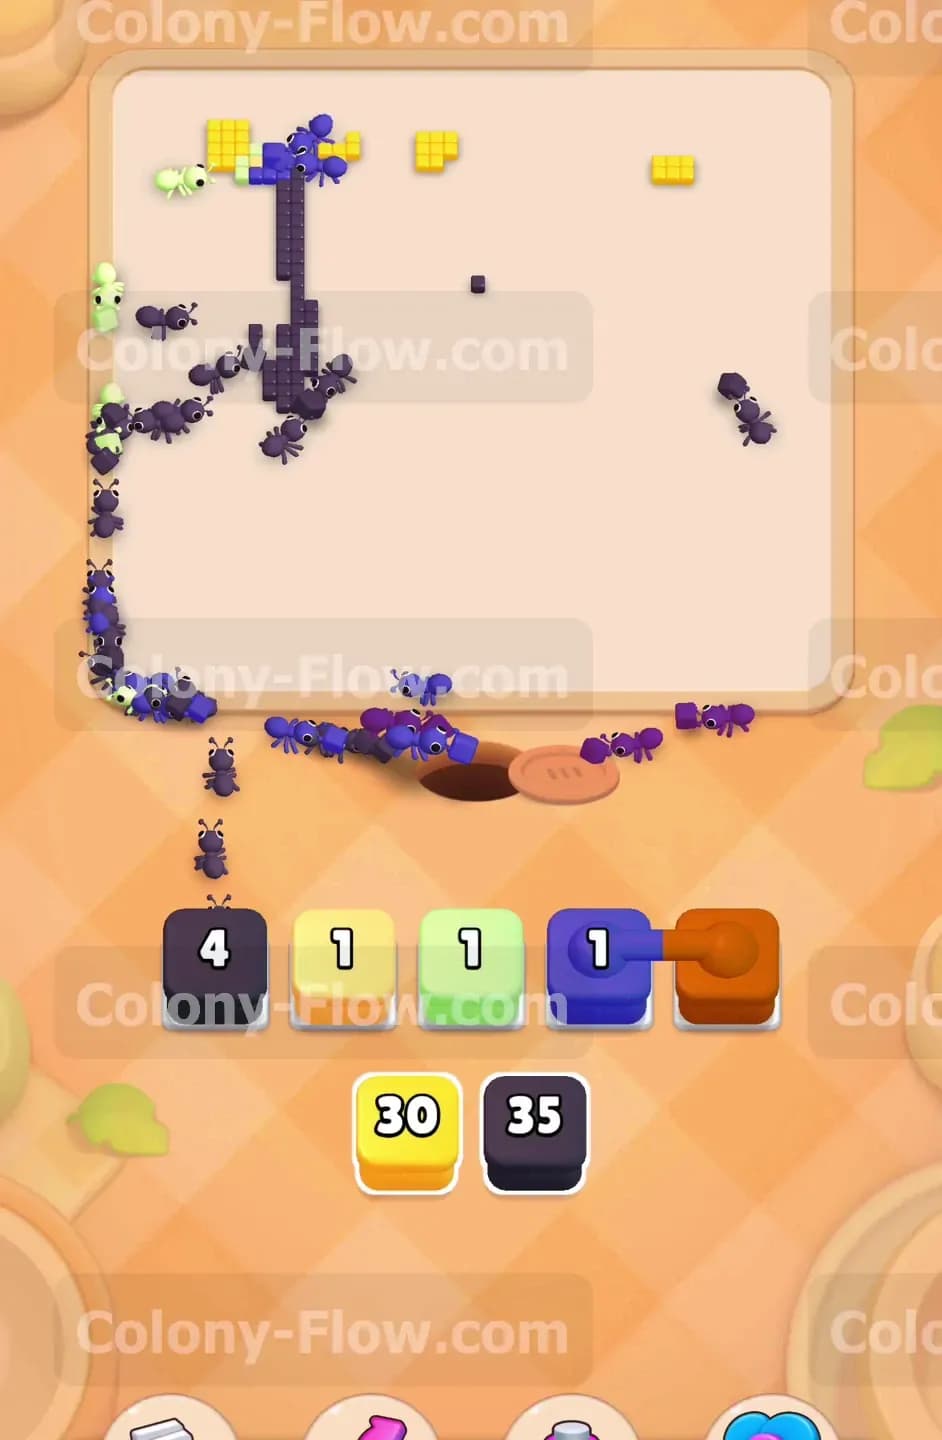
Only the tall dark purple structure remains standing on the left side of the board. You have saved your final dark purple blocks for this exact moment. You pull them into the waiting slots and watch as the ants swarm the dark tower from all sides. Since there are no other colors blocking their path, the ants can attack the entire surface area of the structure at once. The block numbers count down rapidly from massive numbers like 35 straight down to zero. The last few purple pixels vanish into the mouths of the ants and the board clears completely. You manage your slots perfectly without ever filling all five spaces with useless blocks. The ants return to the nest and you secure the victory.
Final Thought
Level 950 demands a clear plan for your big blocks and a steady pace. You have to carve out your paths methodically so your ants always have room to work and your slots never jam. Keeping the right side open early is the true key to victory on this board. If you find yourself struggling with the order of colors or getting your slots jammed, be sure to watch the video above this article for a clear visual guide. You will beat this level easily once you see the pattern in action.