Colony Flow Level 987 Walkthrough Solution & Guides | How to solve Colony Flow 987

Guide By Liam Stone
Updated on August 8, 2026
Some players learn faster by watching. The video above walks through Level 987 move by move.
Video doesn't match your screen?
Game updates frequently scramble layouts! Try our AI Screenshot Solver first to find your exact board instantly, or report broken guides to our team.
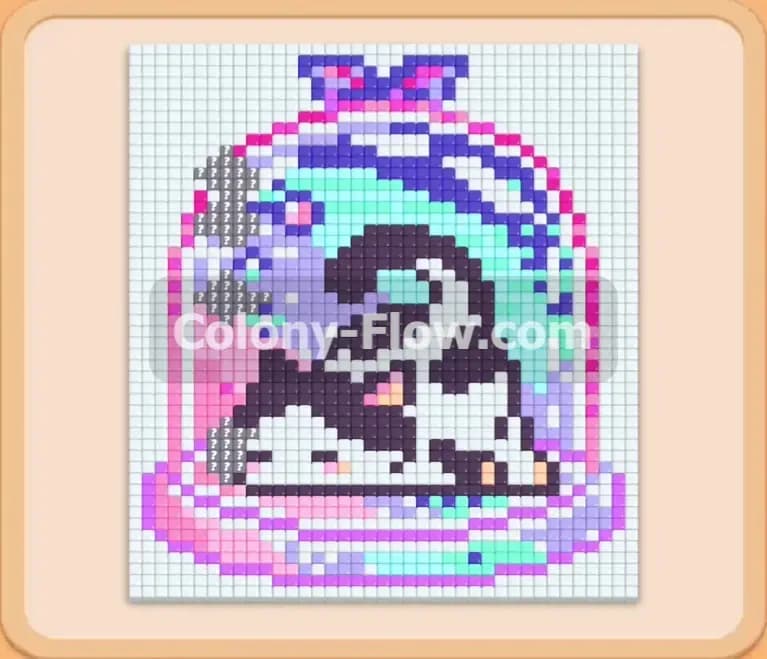
Welcome back to another puzzle guide for your favorite mobile game. Colony Flow Level 987 gives you a very cute pixel art cat resting inside a colorful glass terrarium dome. The board looks quite packed at the start but you can easily beat it if you manage your tray blocks the right way. I played through this puzzle multiple times to find the perfect sequence of moves. The pixel art designs make this game incredibly satisfying to play when you get the flow right. My strategy ensures you never jam your waiting slots and keep your ants moving at all times. Read on for the full solution to this puzzle.
Colony Flow Level 987 Overview
What You Are Working With
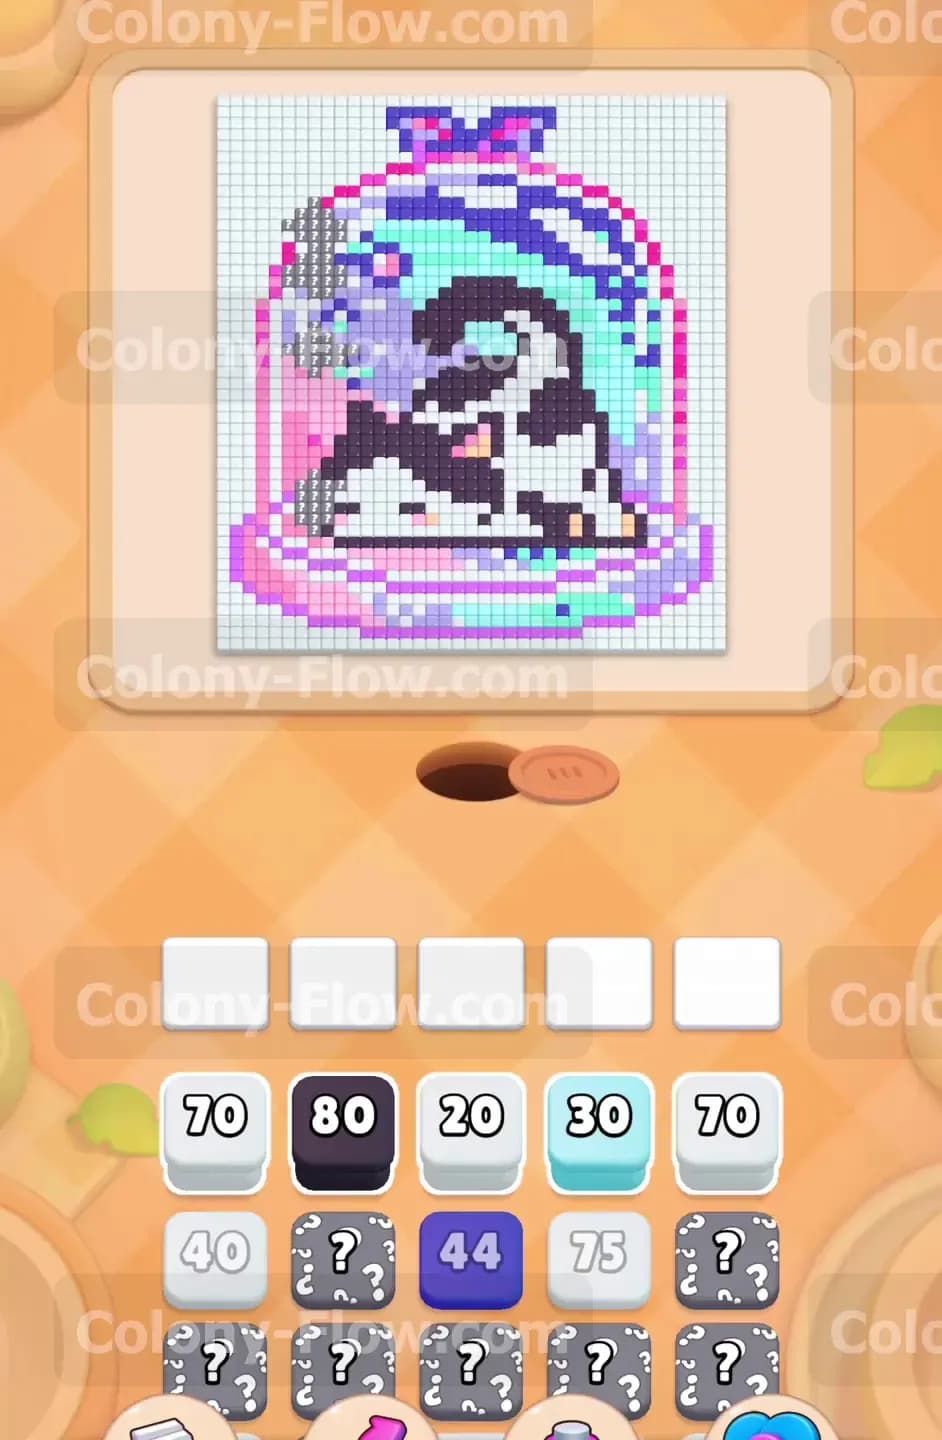
The pixel art shows a cat with dark purple and black fur. The cat sits on a light pink and magenta base. A bright cyan glass dome covers the entire cat. A large magenta bow decorates the very top of the cyan dome. The background surrounding the dome is made entirely of white tiles. Down in your tray you start with a large selection of blocks. The top row holds a white 70 block, a black 80 block, a white 20 block, a cyan 30 block, and another white 70 block. The bottom row features a white 40 block, some hidden boxes showing question marks, a purple 44 block, and a white 75 block. This level also features connected boxes. These are two or more blocks permanently joined together by a solid line. When you tap one connected box the entire group moves into your waiting slots.
What It Takes to Clear Level 987 Board
You win the level when your ants eat every single pixel art tile and the board is completely empty. The nest hole sits at the very bottom center of your screen. Every ant originates from this exact spot and seeks out a valid target. You must match the block color in your tray to the available food tile color on the board. The main challenge comes from managing your five waiting slots. If you pull blocks that lack an open path to their matching color on the board, those blocks get permanently stuck in your slots. If all five waiting slots fill up with stuck blocks and no ants can move, you lose the puzzle immediately. Every move you make must keep at least one open path so the ants can continue working and your slots remain clear. You have a large variety of numbers to work through so careful planning is required.
Colony Flow Level 987 Step by Step Solution
Step 1: Start by clearing the massive outer white background.
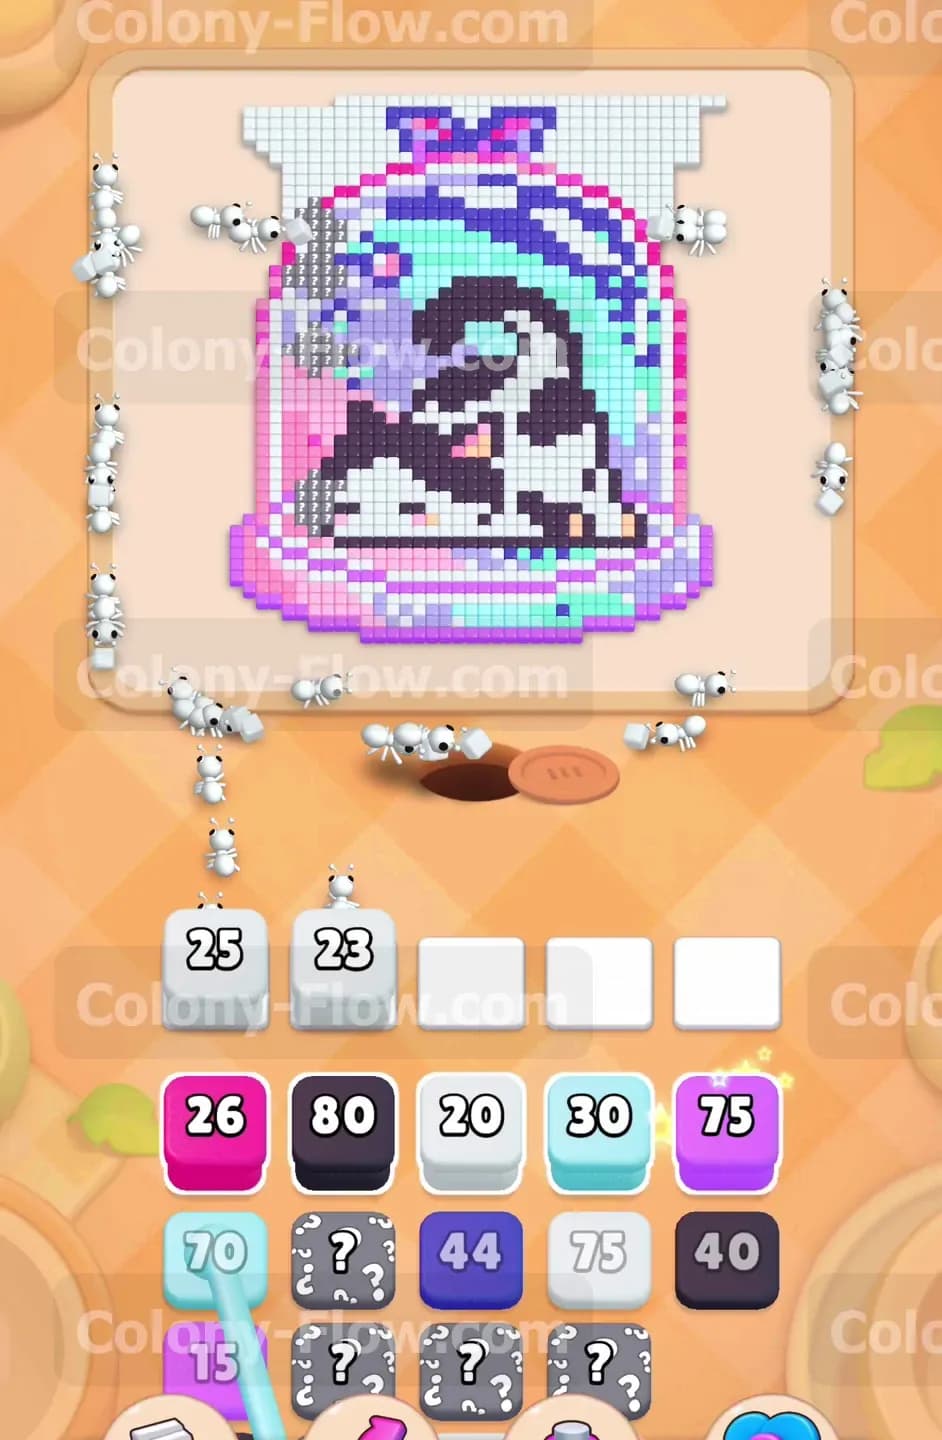
Your very first move requires focusing on the massive white space surrounding the glass dome. Look at your tray and tap the large white 70 blocks. The white background tiles are completely exposed on the left edge, right edge, and top edge of the board. This means the white ants have an immediate and open path to start eating. Your white blocks will slowly count down as the ants break down the background tiles. You will see the numbers drop from 70 down to 25 and 23 in your waiting slots. Let the ants keep chewing through this thick outer layer. The background represents a huge number of tiles so getting the white ants out early is incredibly important. Pulling the white blocks first is the safest play you can make. Keeping the white blocks active right away ensures your waiting slots stay moving and do not jam early in your playthrough.
Step 2: Bring out the magenta blocks to eat the top bow.
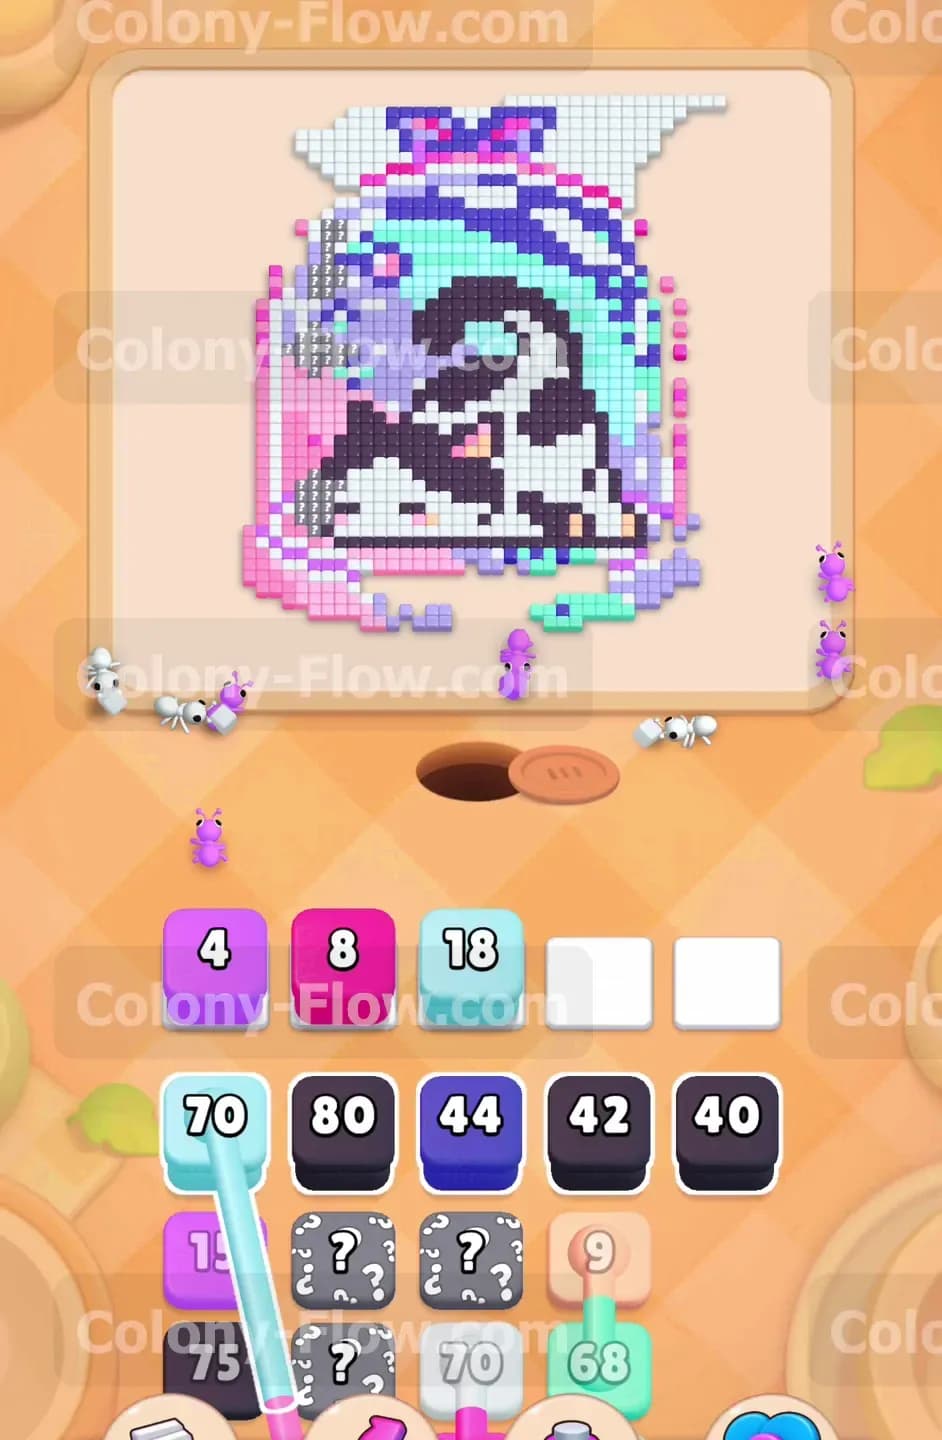
Once the white ants clear a significant portion of the white background, the magenta bow on top of the dome becomes fully accessible. Now you can safely pull the magenta 26 and magenta 75 blocks into your waiting slots. The magenta ants will march straight up the open sides of the board and begin eating the bow tiles. The magenta bow has many intricate curves. The ants will wrap around the top corners of the screen to reach these specific tiles. You want to clear this top section early because it opens up the upper edges of the cyan glass dome. Watch the countdown numbers on the magenta blocks as the ants work. The numbers will eventually drop down to single digits like 8 and 4. This clears plenty of space in your waiting area so you can bring in the next necessary colors.
Step 3: Deploy the first set of connected cyan and magenta blocks.
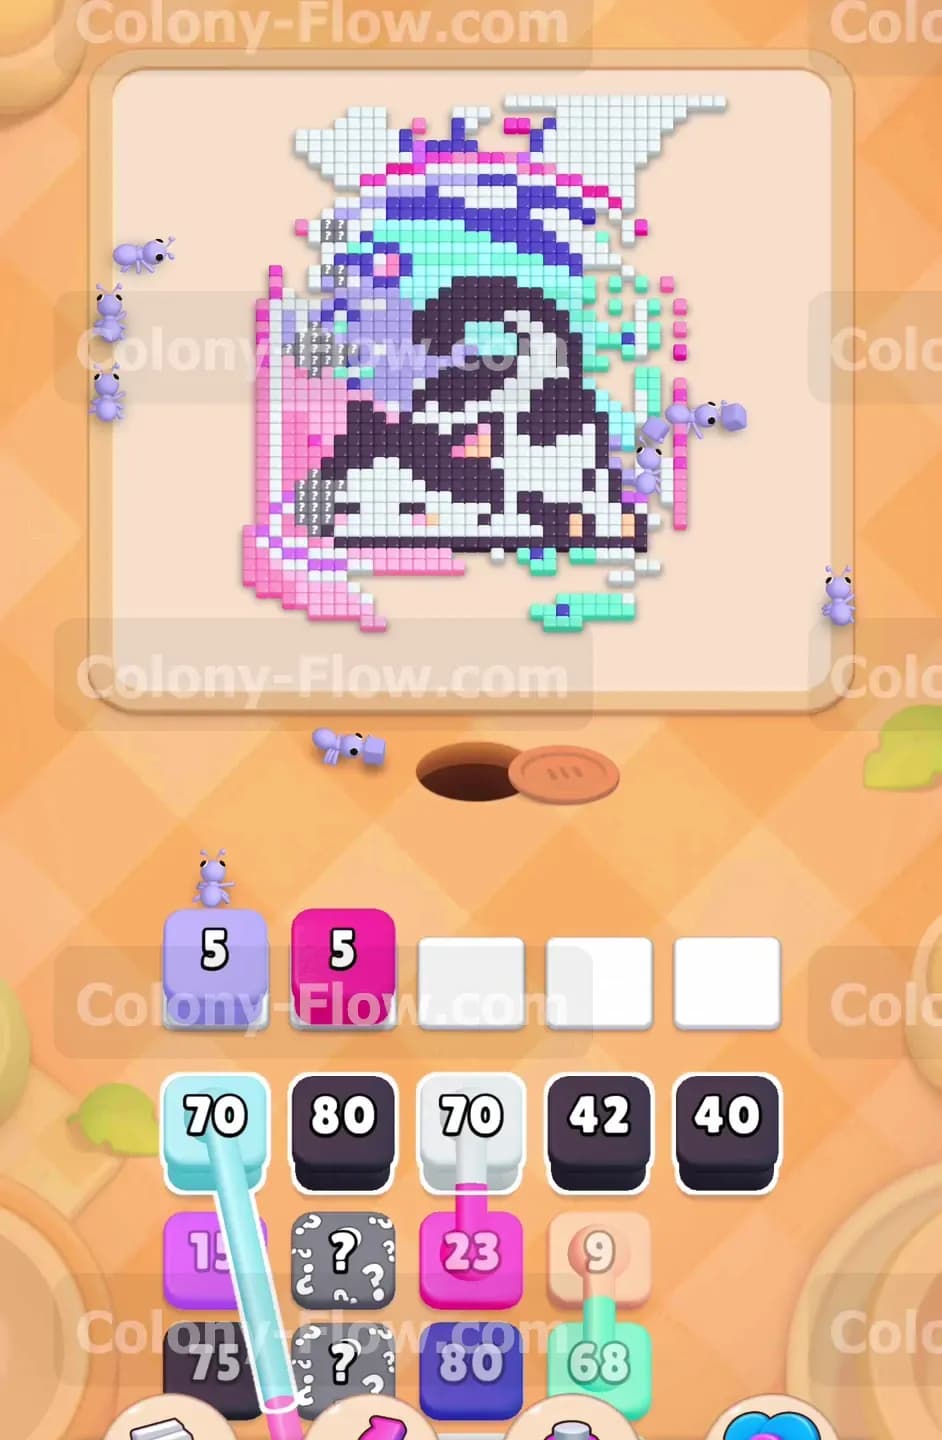
Now you face your first set of connected boxes in the tray. You will see a cyan 70 block linked directly to a magenta 15 block. Tap either one of these blocks to bring them both up into your waiting slots at the exact same time. The cyan ants will target the outer glass of the dome. The magenta ants will finish off the remaining bow pieces and start eating the pink ground tiles inside the base of the terrarium. Because you already cleared the top bow in the previous step, the cyan ants have a totally clear path to reach the glass tiles. Connected boxes introduce a high level of risk. If you misjudge the board state you could fill your slots and lose your entire run. This move is crucial for opening up the inner section where the cat sits without causing a dead end on your board.
Step 4: Send the dark purple ants to eat the cat shadows.
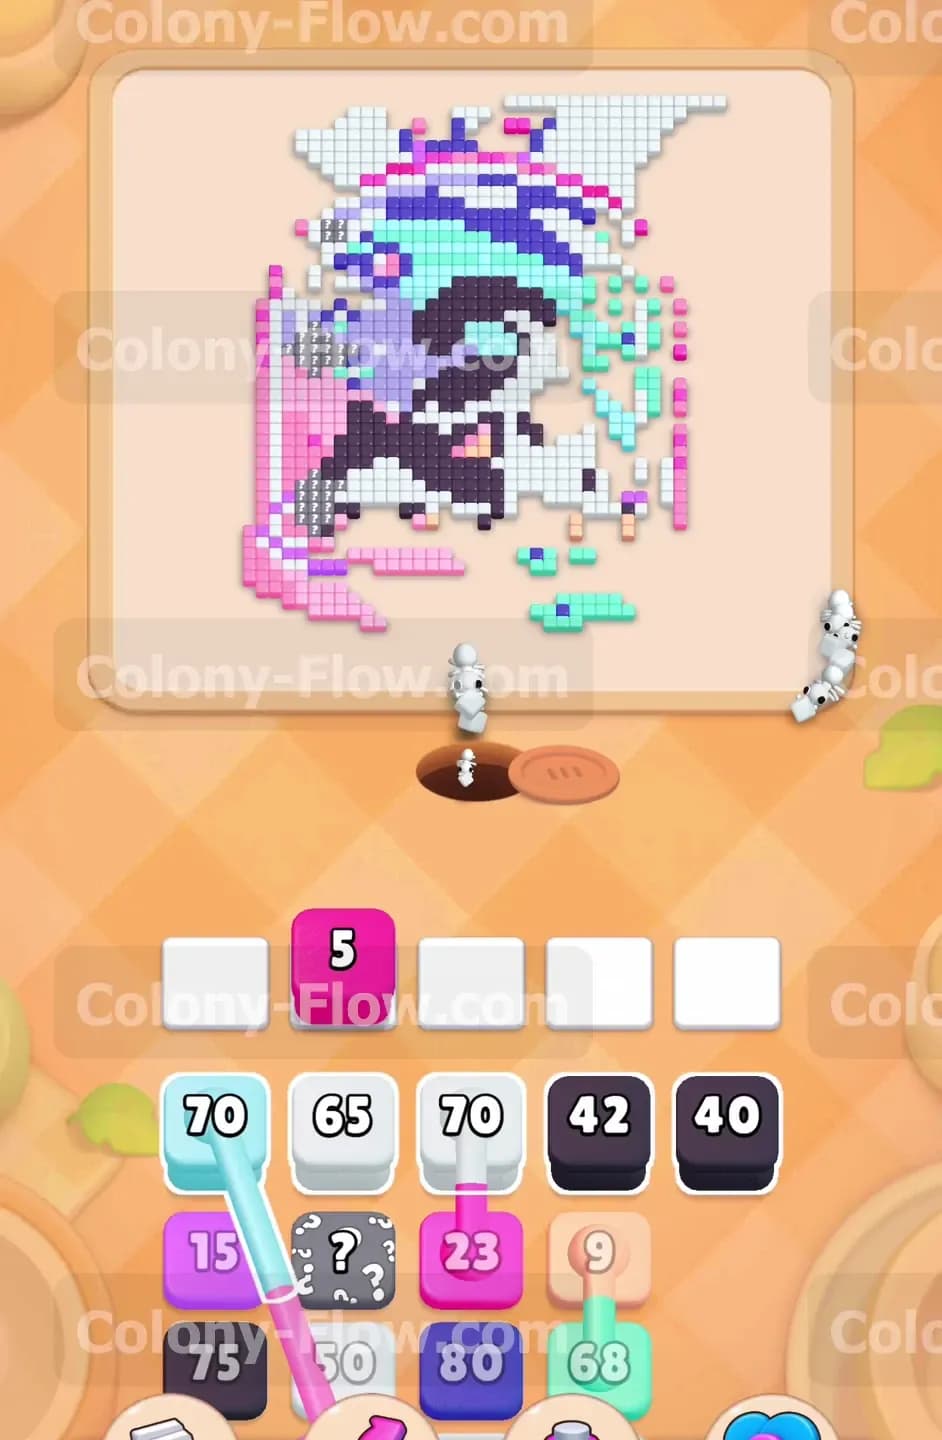
The dark purple tiles form the shaded areas of the cat fur inside the dome. The dark purple shadow tiles add depth to the cat design. They are buried under the cyan glass layer. With the cyan glass partially eaten away by the previous step, a path finally opens up for the dark purple ants to enter. Pull the dark purple 44 block from the tray into an empty waiting slot. The ants will weave through the new opening in the glass and start eating the shadow tiles on the cat. This block number counts down steadily and eventually drops to 15. You must let the dark purple ants work their way through the cat at their own pace. Always check that the dark purple tiles connect to an open edge before you pull the block so it does not get stuck.
Step 5: Activate the hidden boxes to reveal the needed black blocks.
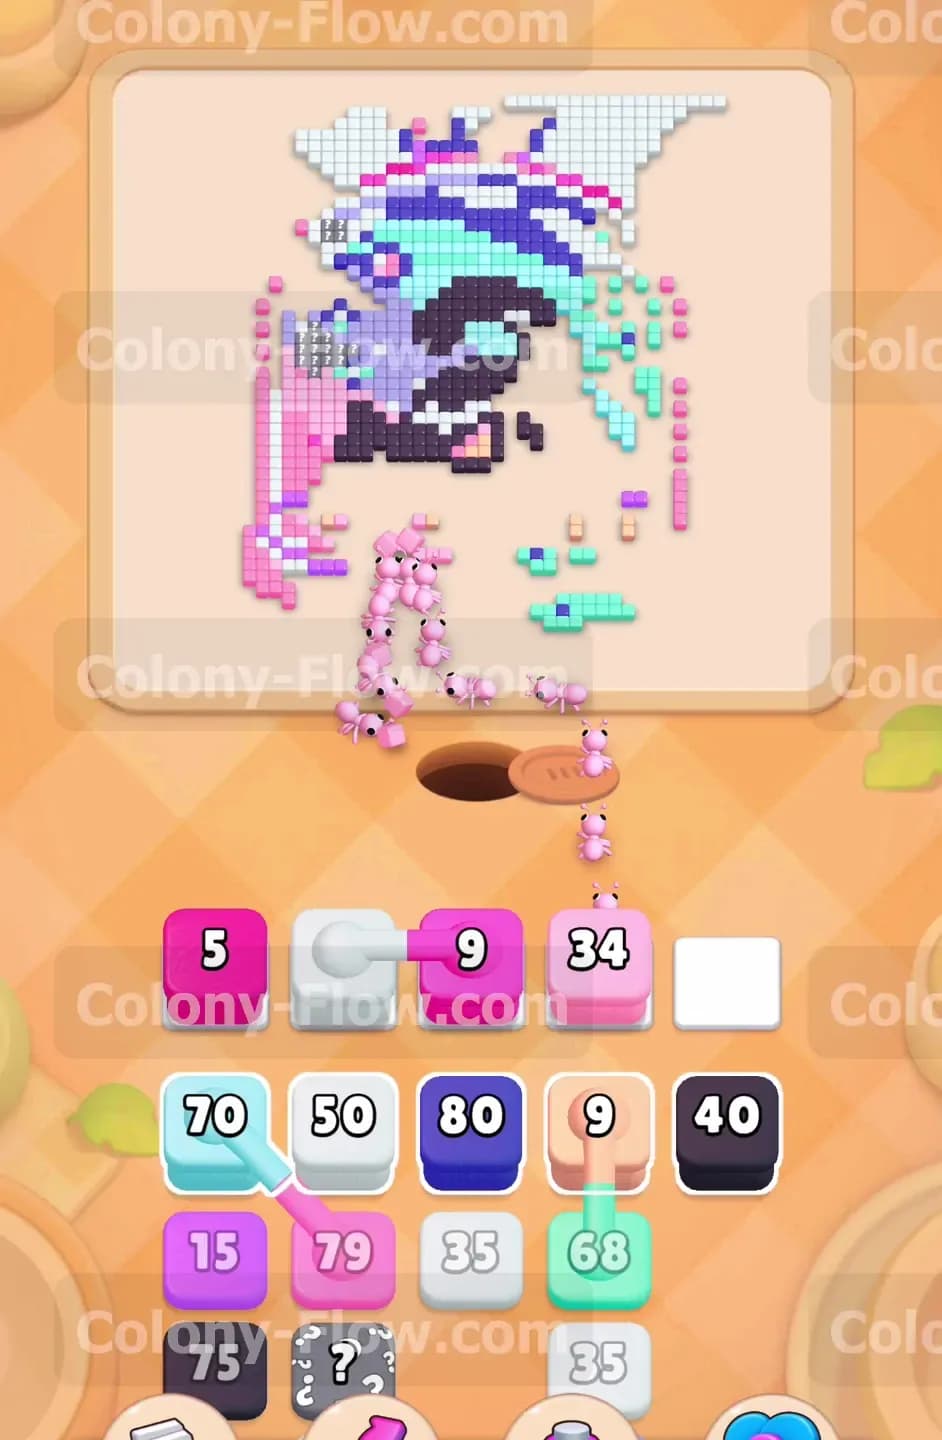
You start the puzzle with several hidden boxes covered in question marks. Hidden boxes add a layer of mystery to the board. You cannot plan for them until you clear enough surrounding tiles to pop their question marks. As you clear the white background and large sections of the dome, these hidden boxes finally reveal their true colors. Most of these boxes turn into black blocks. You absolutely need these black blocks to clear the main body of the cat. Wait until the dark purple ants finish opening a wider path into the center of the dome. Once a clear path exists, tap the black 80 and black 40 blocks. The black ants will flood into the center and begin eating the large sections of cat fur. You will notice a black 65 block joining your slots as the ants consume the tiles.
Step 6: Handle the complex connected blocks for the terrarium base.
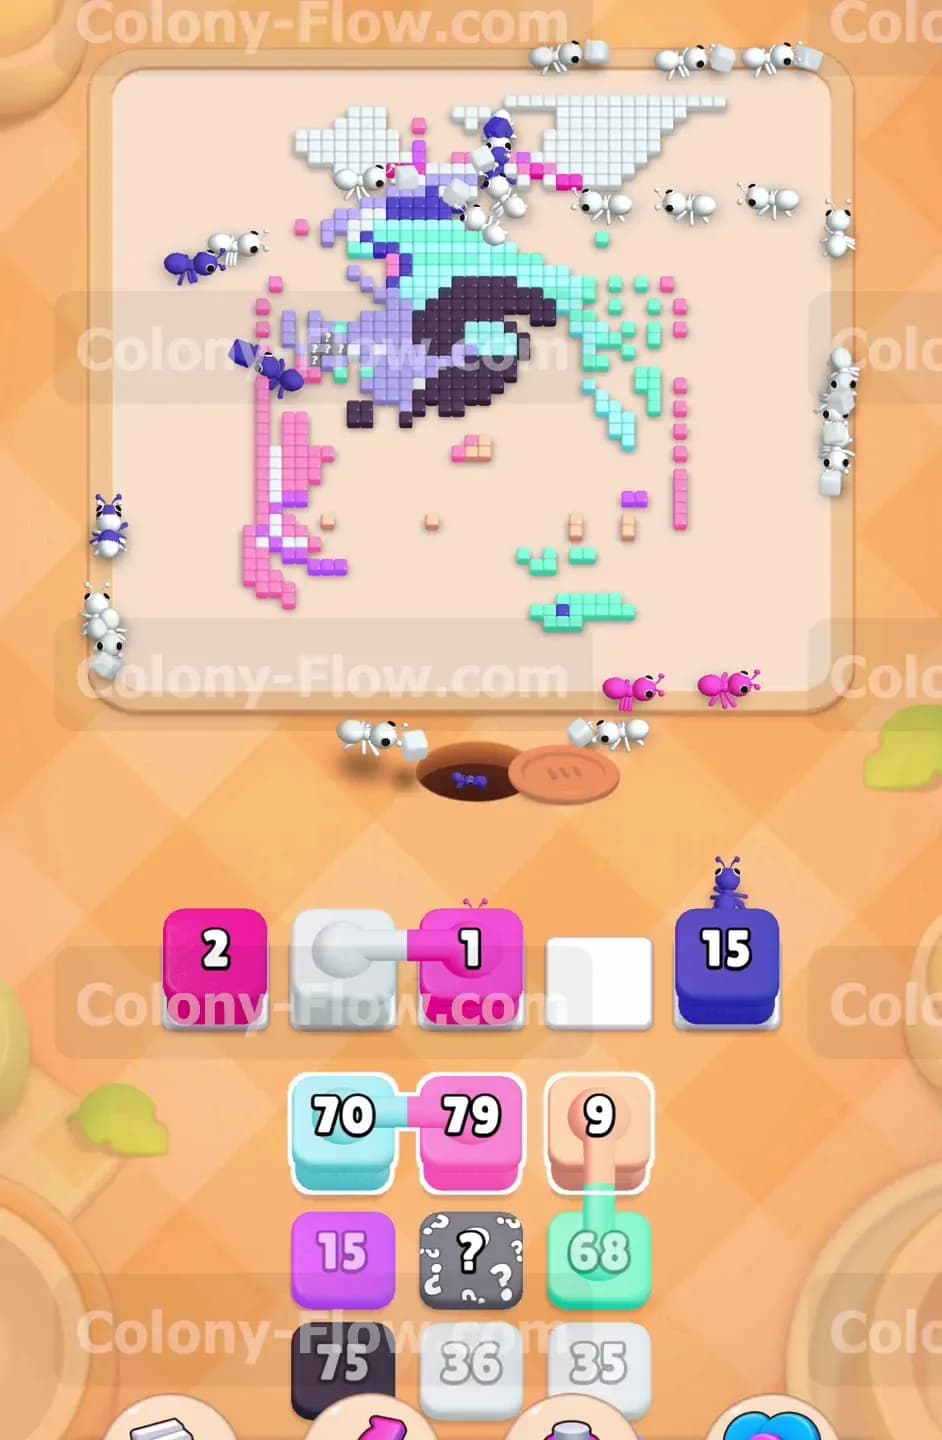
The bottom section of the picture features a tricky mix of pink, white, and magenta tiles. Managing the bottom section requires patience. The base of the terrarium contains many tight corners. You need to pull another set of connected boxes from the tray to clear them safely. Look for a white 9 block linked to a magenta 34 block and pull them into your slots. The white ants will eat the small white patches near the cat paws. The magenta ants will eat the rest of the pink floor tiles. Shortly after this move you will find a light pink 9 block connected to a cyan 68 block. Pulling these clears the remaining pink tiles and finishes off the bottom right side of the cyan glass dome. These connected blocks take up multiple slots at once so you must ensure both colors have an open path before you tap them.
Step 7: Clear the remaining scattered tiles with a final connected group.
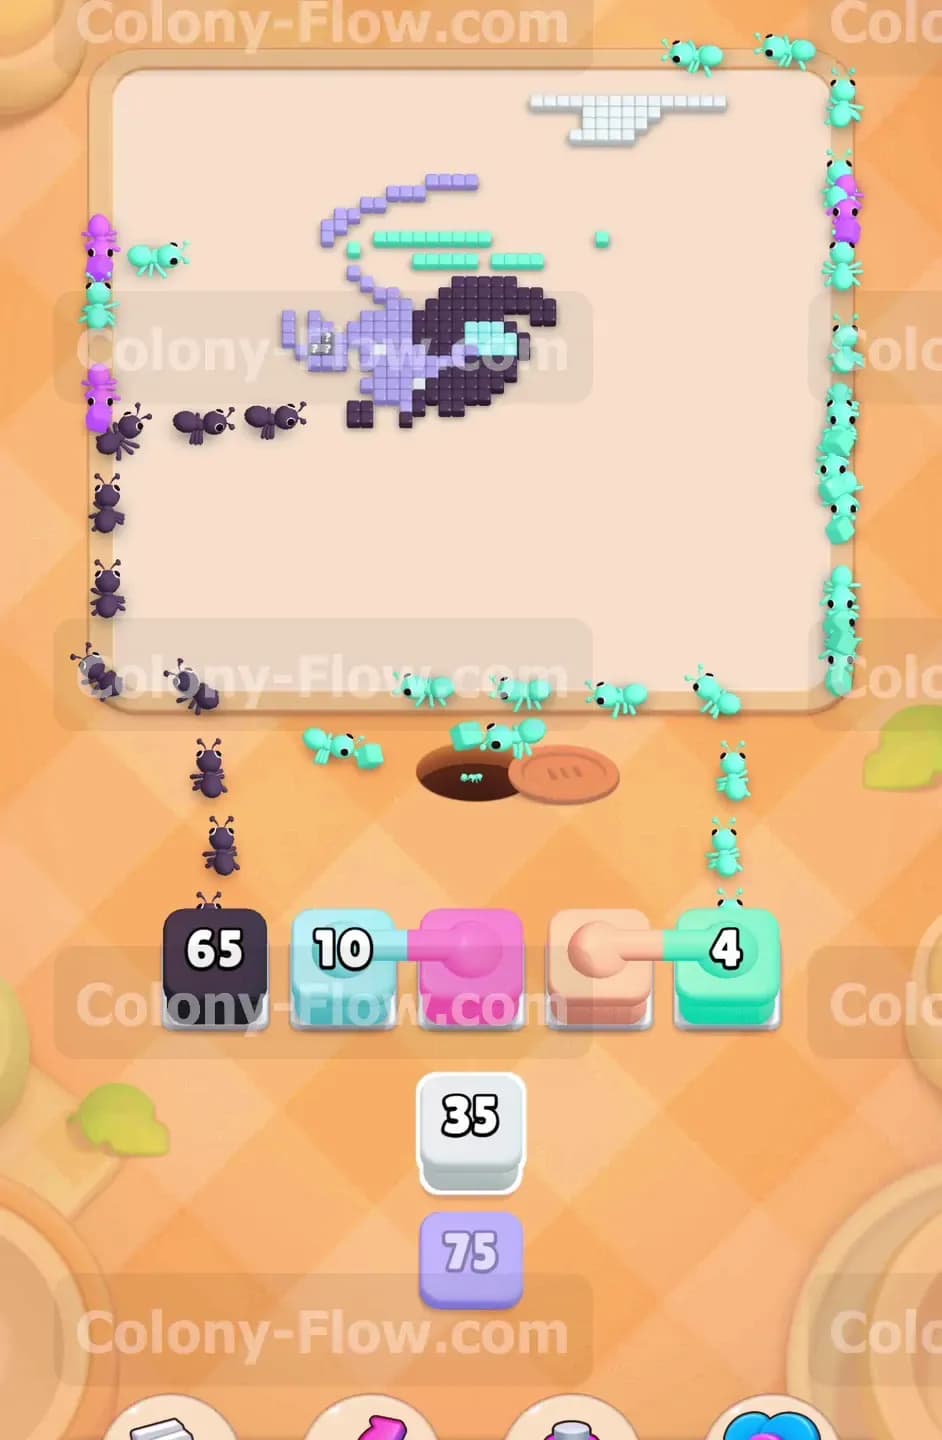
Your last major hurdle involves a massive three part connected group. You will pull a cyan 10 block linked to a magenta 4 block and a cyan 4 block. This single group takes up three of your five waiting slots instantly. You are close to the finish line now. You must play this large group only when the remaining scattered cyan glass pieces and the very last bits of the magenta base are completely exposed on the board. The ants will easily find their way to these final tiles if you timed it right. The final few ants will clean up the straggling tiles. Meanwhile your active black 65 block finishes off the rest of the cat body in the center. After these last few ants finish eating the puzzle will be completely clear.
Final Thought
Colony Flow Level 987 requires you to handle connected boxes with extreme care from start to finish. Always check the board for completely open paths before pulling any linked group from the tray. If you fill your slots with a connected block and one of those specific colors cannot reach its target, you will fail the level and have to start over. Every attempt teaches you something new about how the ants prioritize their targets. I highly recommend taking your time and watching the ant paths closely before every single move. Please check out the gameplay video above this article if you struggle with any specific section. Watching the moves in motion can really help you master the timing and block order.