Colony Flow Level 794 Walkthrough Solution & Guides | How to solve Colony Flow 794

Guide By Liam Stone
Updated on August 8, 2026
Reading not your style? The video above shows exactly how to beat Level 794.

Video doesn't match your screen?
Game updates frequently scramble layouts! Try our AI Screenshot Solver first to find your exact board instantly, or report broken guides to our team.
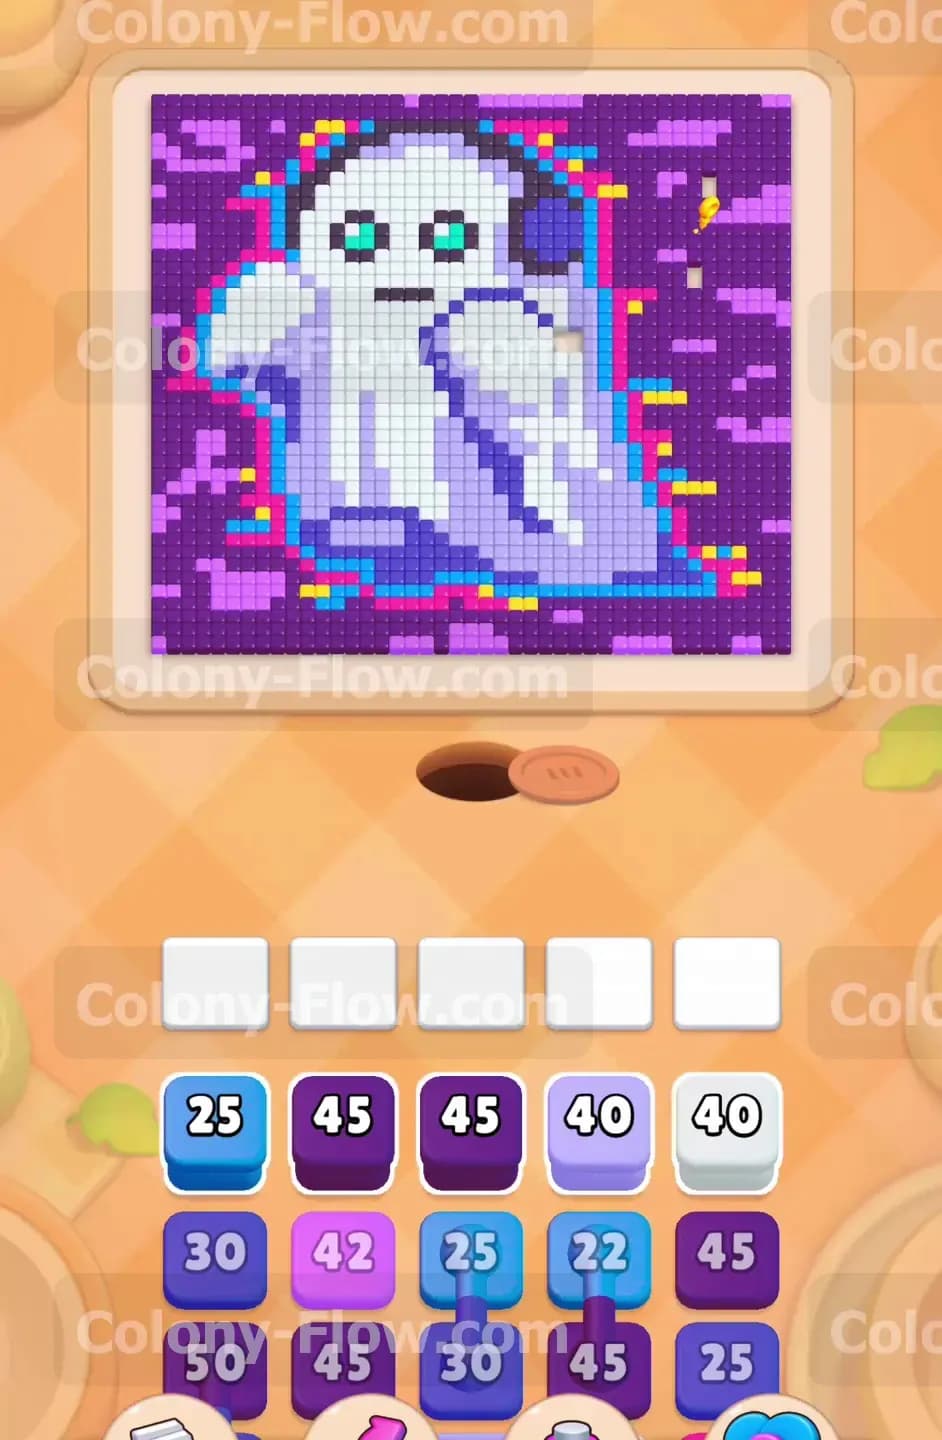
Welcome to Colony Flow Level 794 where things take a spooky turn. This board features a massive pixel art ghost surrounded by a very thick dark purple background. I played through this entire level myself and found that tray management is exceptionally tricky because of the connected boxes and the lock mechanics. You have to balance clearing the massive background while carefully picking apart the smaller details to avoid filling your waiting slots. Planning ahead is the only way to succeed here. You must look at the way the colors layer over each other and decide which paths to open first.
Colony Flow Level 794 Overview
What You Are Working With
The board displays a large white ghost figure with light blue outlines and teal eyes. The ghost is completely enveloped by a dense dark purple background scattered with light purple accents pink details and a few yellow stars. Down in your tray you will see a massive stack of blocks waiting to be used. You will primarily see dark purple blocks white blocks light blue blocks and light purple blocks.
This level also introduces several special elements you must manage. You will encounter Connected Boxes where two blocks are linked together and must be pulled to the waiting slots at the same time. You will also see a Yellow Lock block in the tray which requires you to collect keys from the teal key blocks before it can be used. Finally a Hidden Box sits near the bottom of your tray waiting to reveal its color later in the puzzle once it gets pulled up.
What It Takes to Clear Level 794 Board
To win this level you must completely erase the ghost and the night sky background by matching every single colored block in your tray to the corresponding food tiles on the board. The main challenge is the five waiting slots at the bottom of the screen. If you pull blocks into these slots and the ants cannot reach the matching colors on the board the slots will jam. If all five slots fill up and no ants can move you lose the level instantly.
You have to sequence your moves perfectly so that every block you pull has an open path to the food tiles. This means you must clear the outer layers before you attempt to pull blocks for the inner sections of the ghost. Never pull a color just because it is available. You must pull a color because the ants have a clear road to reach it. Balancing the massive background clear with the precise details of the ghost requires careful attention to your tray space.
Colony Flow Level 794 Step by Step Solution
Step 1: Start clearing the bottom right corner and the lower body
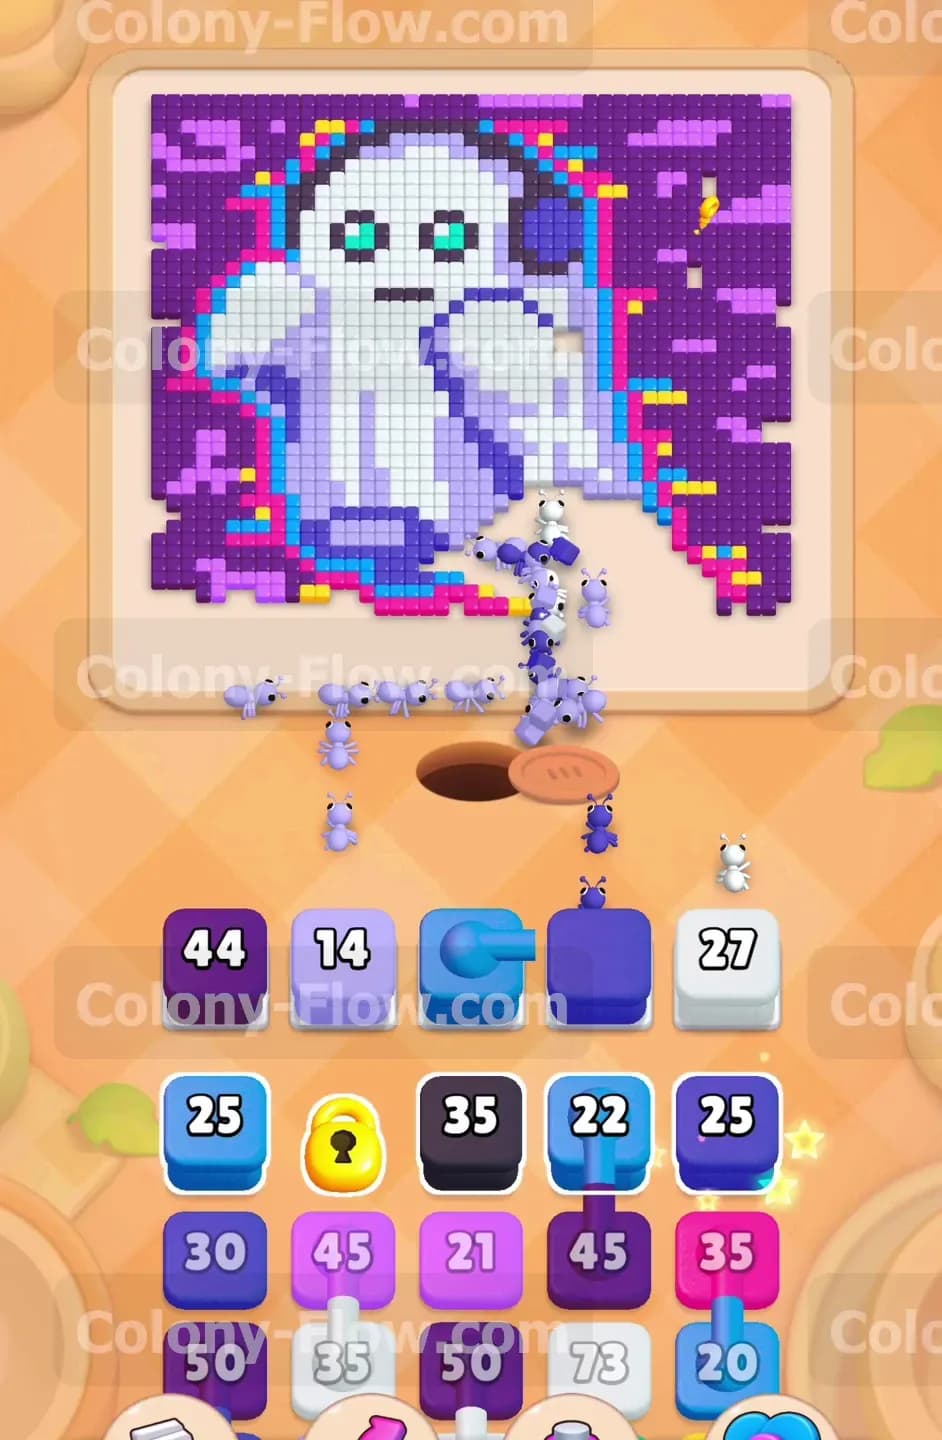
The best place to begin is the bottom right section of the board where the ghost meets the dark purple background. You want to pull a large white block and a dark purple block to get the ants moving. The white block drops to twenty seven as the ants swarm the lower body of the ghost. At the same time the dark purple block starts chewing through the heavy background on the right side. You should also pull a light purple block into your active slots to get the left side background moving. By targeting the bottom edges first you open up multiple pathways for the ants. This ensures your active blocks keep counting down and your waiting slots remain clear for the next wave of colors. Always clear the tiles closest to the nest hole first to create breathing room.
Step 2: Bring up the connected boxes and activate the teal keys
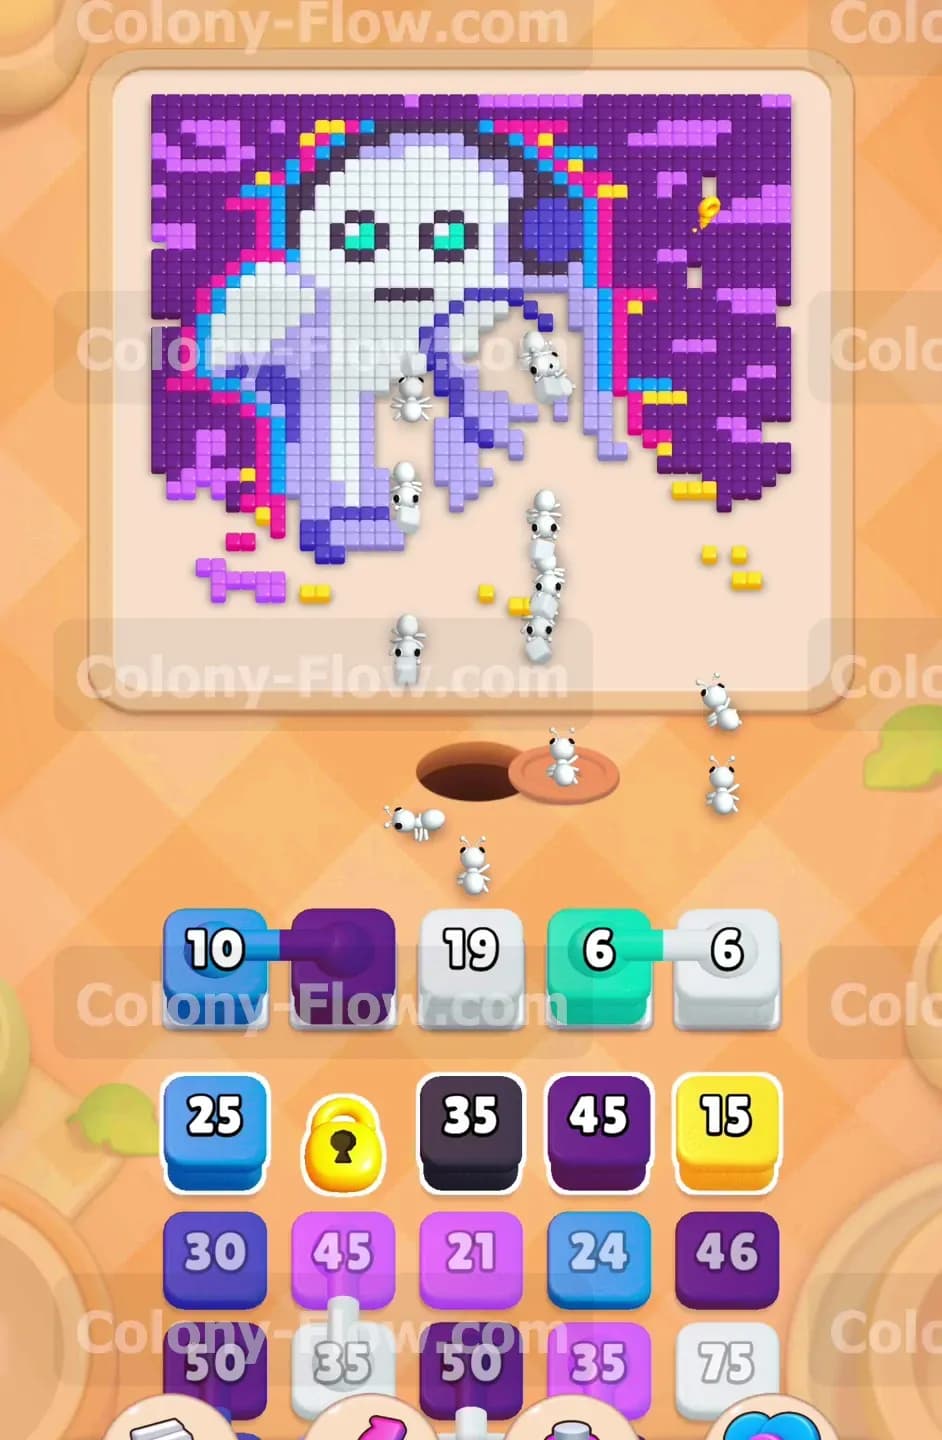
Once the bottom edges start to thin out you need to bring up your first set of Connected Boxes. You will see a light blue block connected directly to a dark purple block. Pulling these takes up two of your precious waiting slots at the same time so you must make sure the board is open for both colors. The light blue ants begin carving out the outer glow of the ghost. Now you must also pull the teal key block into the active area. The teal block holds the keys necessary to unlock the yellow block stuck in your tray. The teal ants march up to the ghost eyes and clear those tiles while simultaneously collecting the keys you desperately need. Always keep an eye on your remaining open slots when pulling these connected and special blocks.
Step 3: Deploy the massive white block to clear the main ghost body
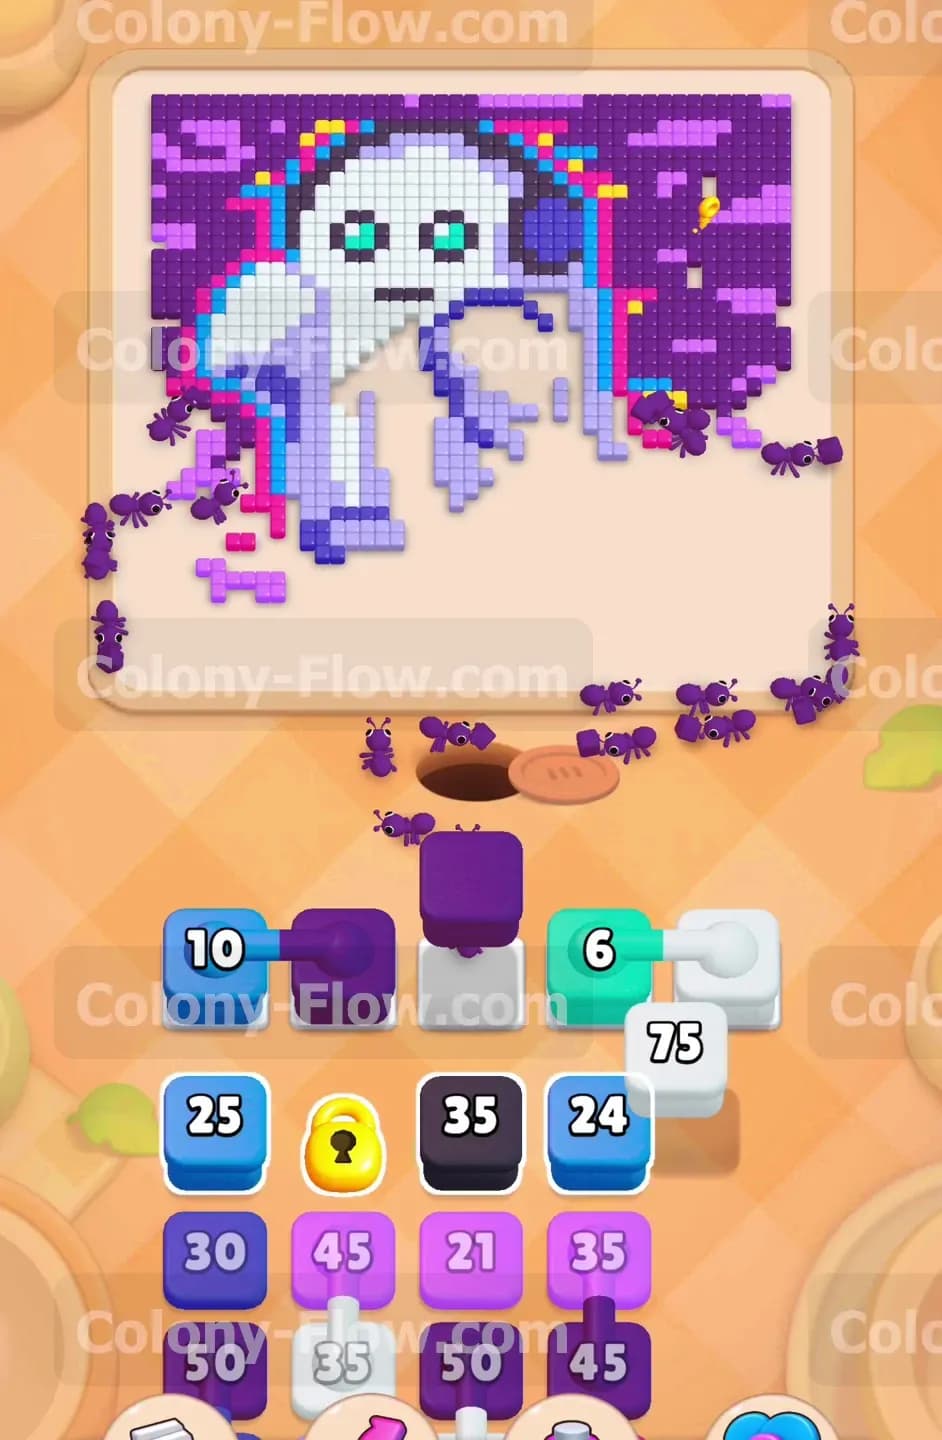
With the bottom cleared and the keys collecting you gain access to a massive white block with a value of seventy five. Pull this white block into an open slot immediately. This action sends a huge continuous stream of ants right into the center of the board to erase the main body of the ghost. Because this block takes a long time to count down you must support it by keeping the background clearing active. Pull another dark purple block to keep the right side of the background shrinking. The continuous flow of white ants keeps one of your slots busy for a while so the dark purple blocks are essential for preventing a tray jam. If you pull colors that are blocked behind the white tiles your slots will fill up and you will lose the level. Watching the massive white block melt away the entire ghost figure is incredibly satisfying but you cannot let it distract you from the waiting slots. You must keep pulling dark purple blocks to ensure the heavy background does not stop your progress.
Step 4: Erase the inner outlines and complete the key collection
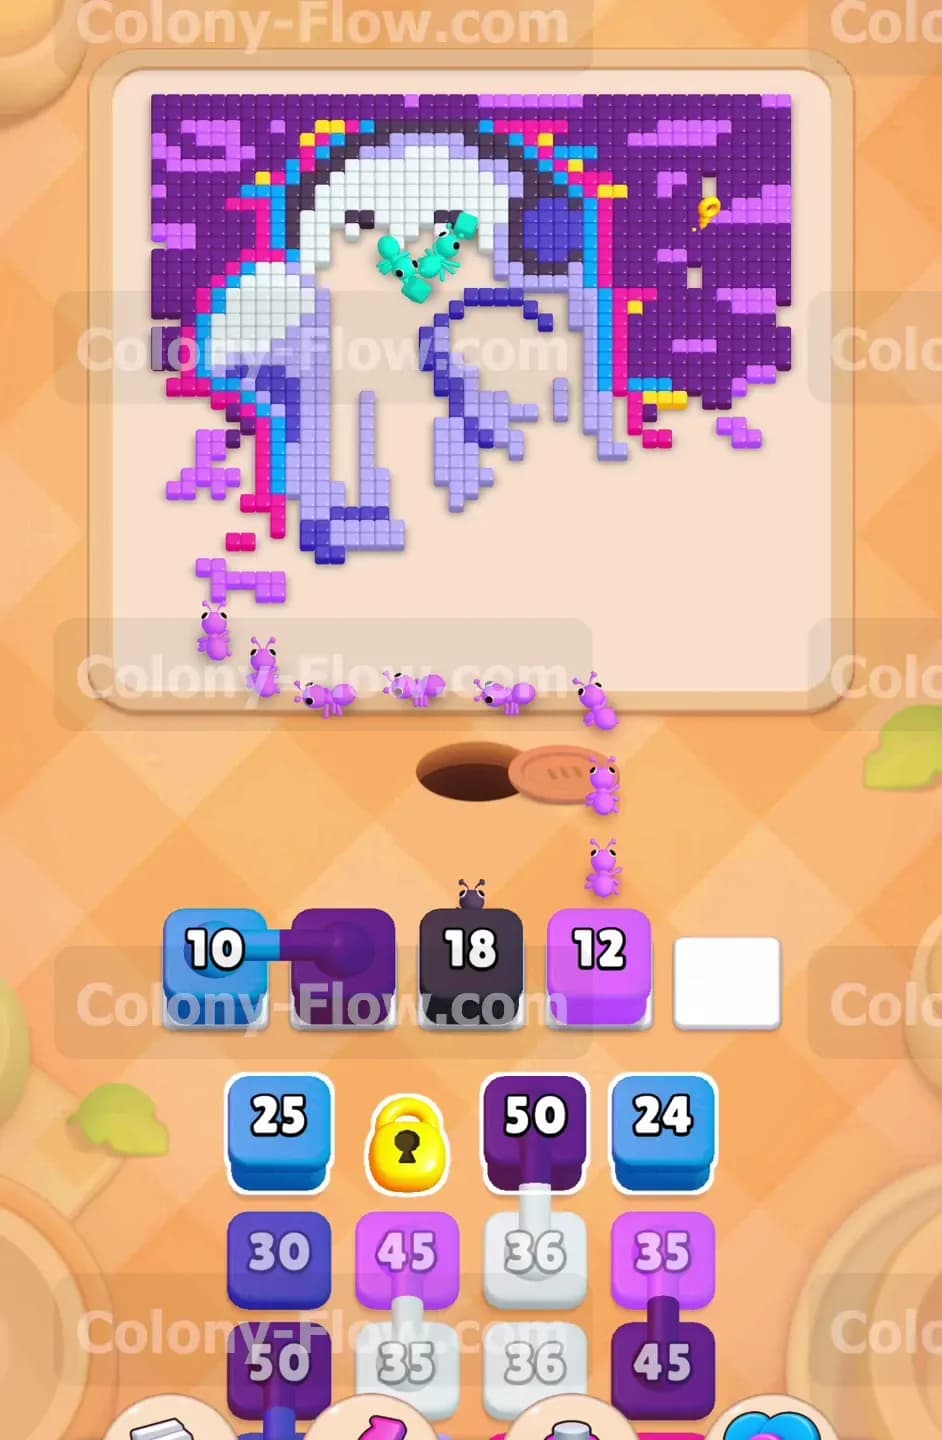
As the white body disappears the inner light blue outlines become fully accessible. You can now use a light blue block dropping from twenty five down to ten to clear out these borders. The ants stream along the edges of where the ghost body used to be. During this phase your teal block finishes its job on the eyes and collects the final keys needed for the tray. Once the teal block empties out it frees up a crucial waiting slot. Use this moment to pull a light purple block to clear the remaining light purple patches on the left side of the screen. Keeping the left and right sides shrinking equally prevents any one color from blocking a path. You must maintain this balance to survive the late stages of the puzzle. The light blue outline wraps all the way around the top of the ghost head so the ants have a long way to travel. Make sure you leave them a clear path through the surrounding background tiles so they can reach the very top of the outline without getting stuck.
Step 5: Unlock the yellow block and reveal the hidden box
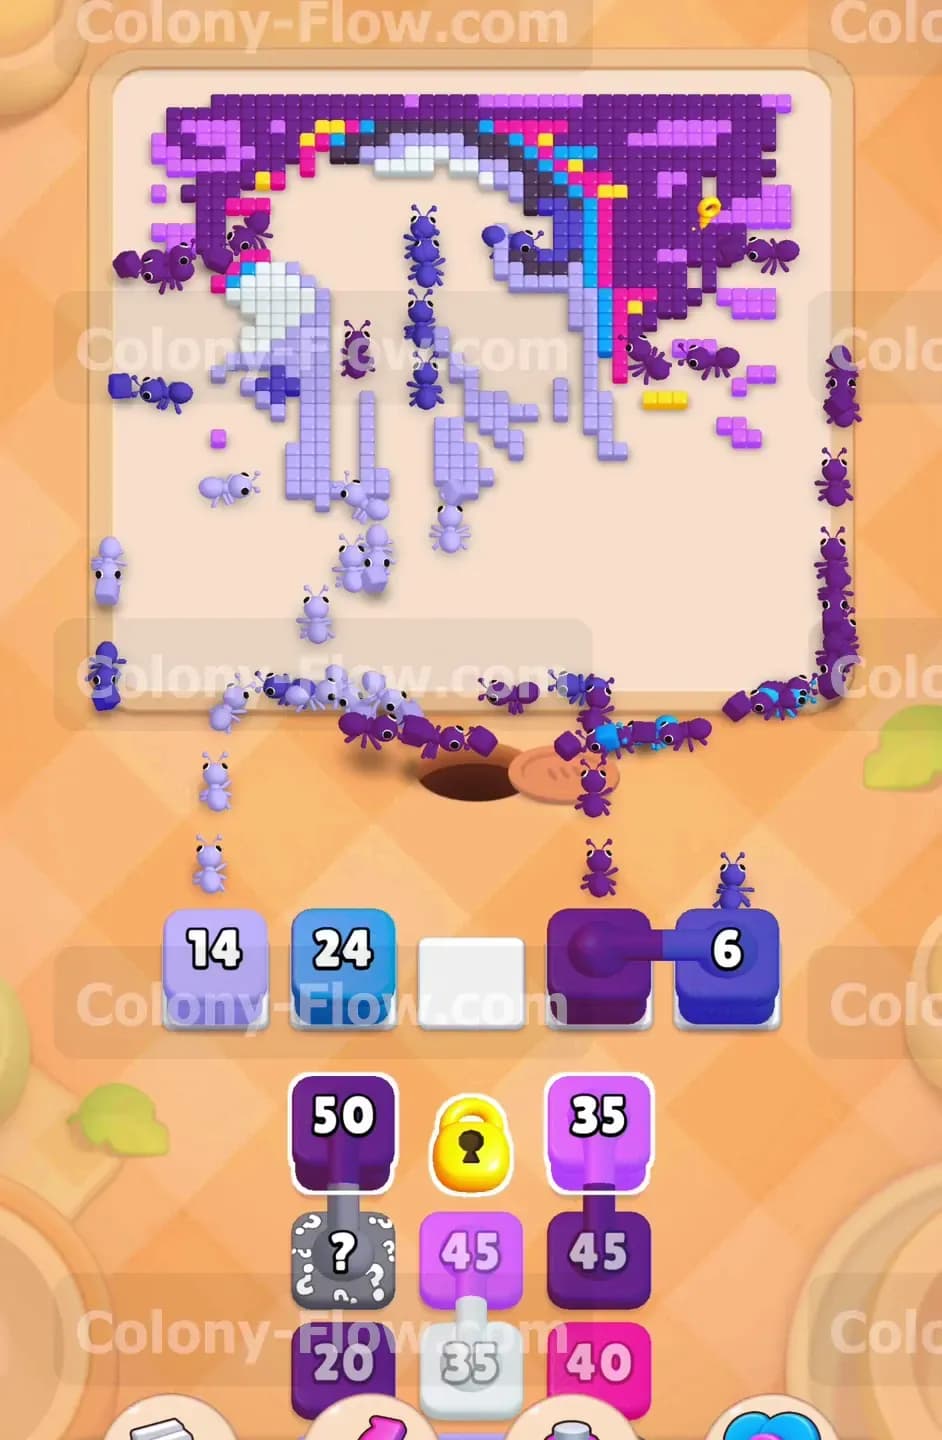
Now that all the keys are collected the yellow lock block in your tray finally opens. Pull this yellow block into an active slot so the ants can rush up and eat the yellow stars scattered across the dark purple background. Getting this block out of the way is critical because it has been taking up valuable space in the tray for a long time. Pulling the yellow block also shifts the tray up and brings the Hidden Box into play. The gray block with a question mark reveals its true color once it has a clear path. This block turns out to be a crucial dark purple block needed for the final cleanup phase. Pull it into the active area as soon as you have an open path for it to ensure your board keeps flowing. Waiting too long to deploy this block creates an unnecessary bottleneck in your tray.
Step 6: Clear the heavy top background and the pink accents
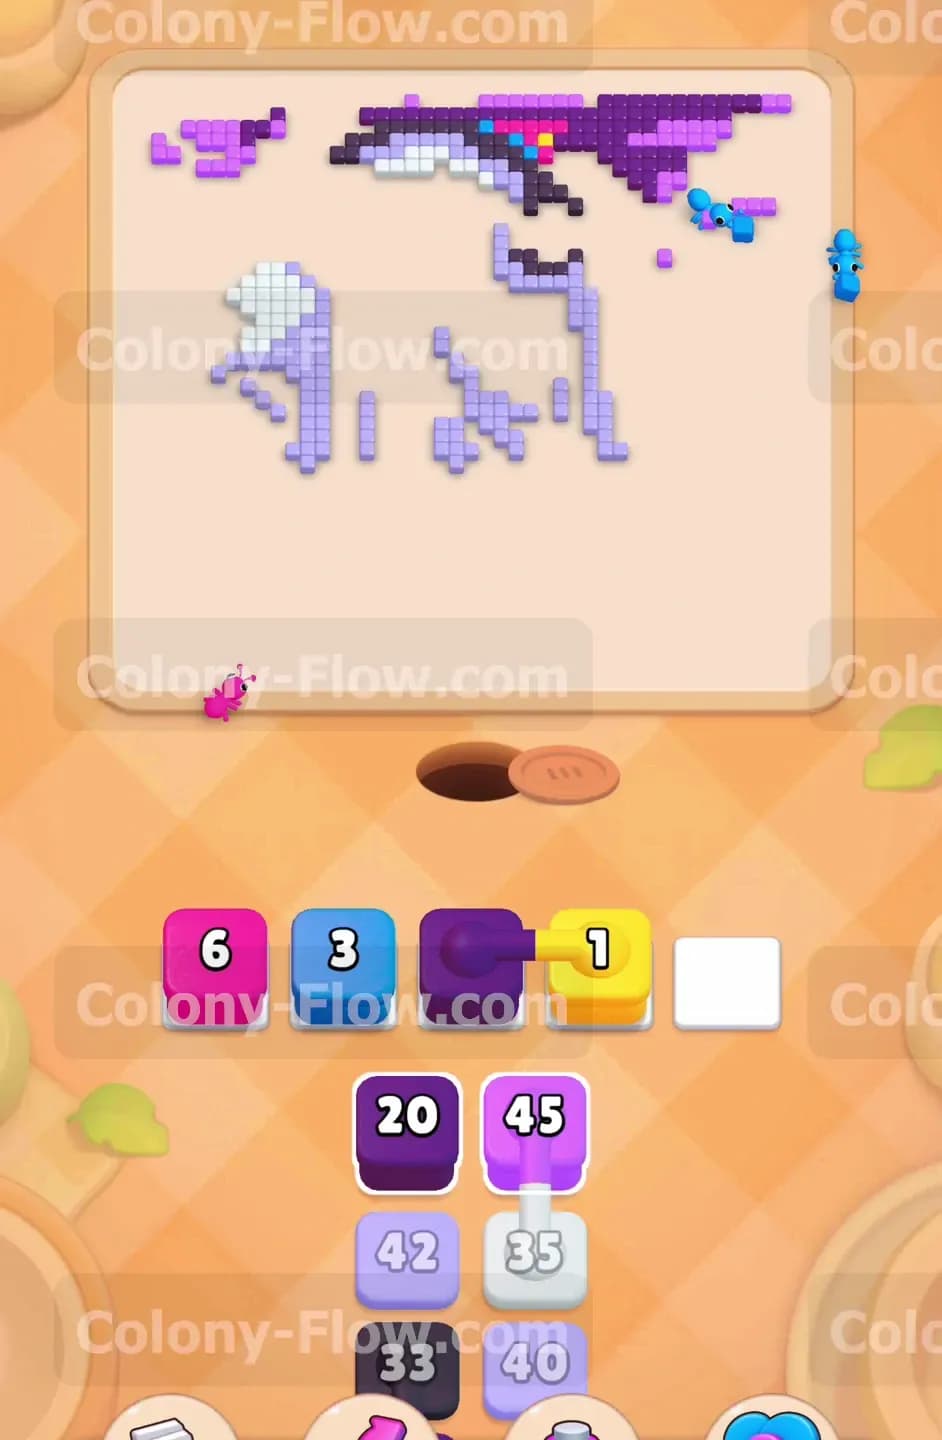
The board is now mostly empty except for the thick dark purple sky at the very top and a few pink details near the edges. You will notice another set of Connected Boxes in your tray featuring a dark purple block and another yellow block. Pull them up and let the dark purple ants swarm the massive top section. You also need to pull a pink block to clean up the bright pink accents scattered near the upper left and right boundaries. The dark purple block drops rapidly as it chews through the dense top layer. You must make sure you do not pull any blocks that rely on the pink tiles being gone before the pink block actually finishes. Always prioritize the colors that are physically closest to the ant nest hole at the bottom of the board. Letting the top section clear out naturally keeps the flow smooth and prevents any unexpected jams.
Step 7: Clean up the final scattered tiles to win the level
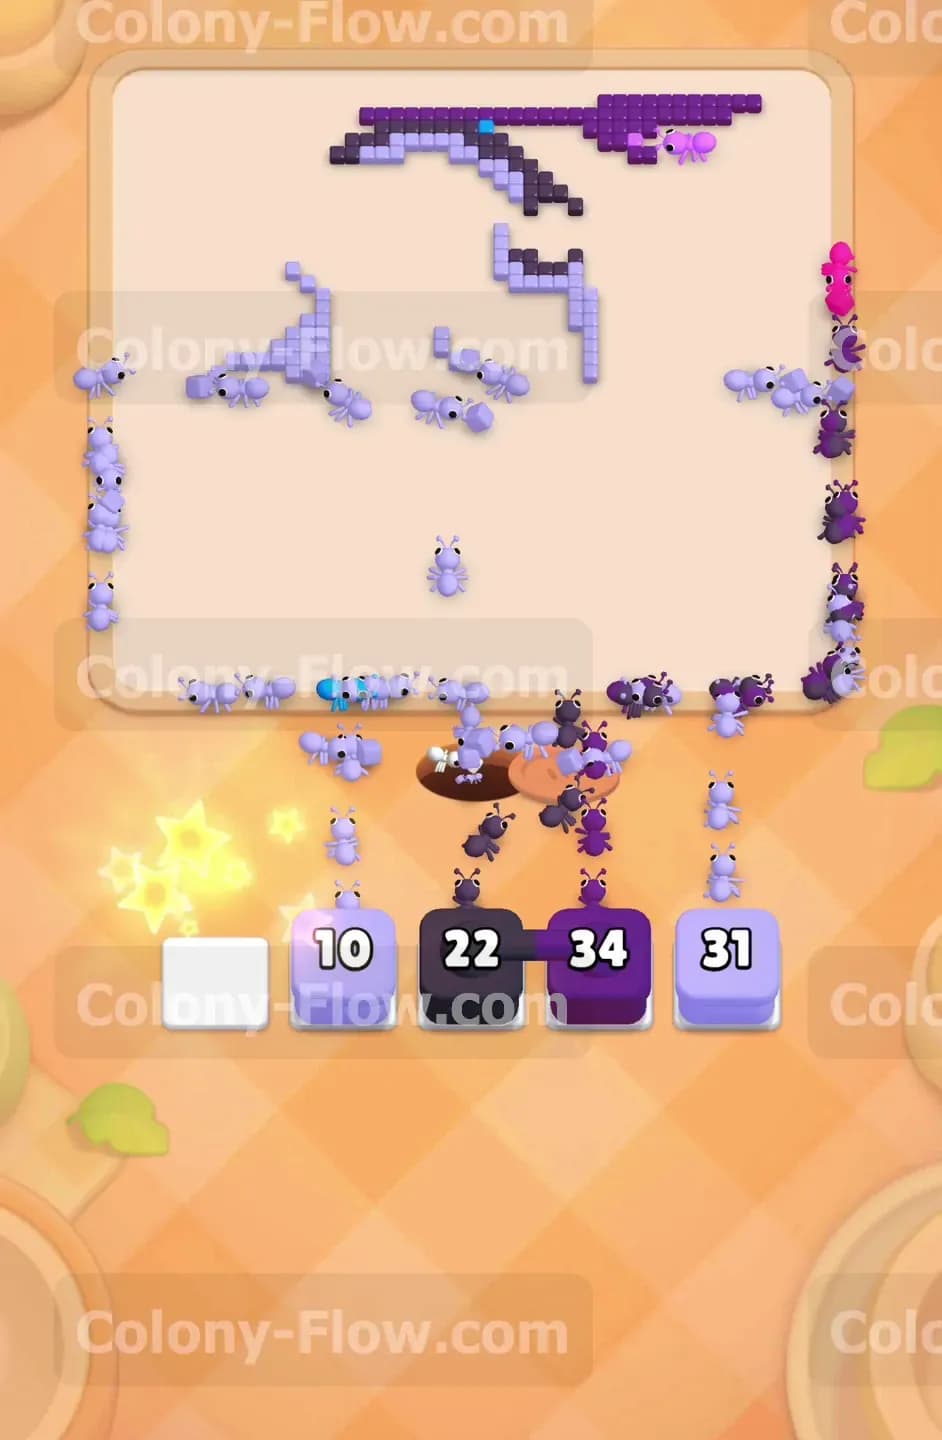
You are now in the final stretch with only a handful of scattered pixels left on the board. The ghost is completely gone and only a few fragments of the top background remain. Pull your remaining light purple block and the last dark purple blocks to send the final waves of ants up the screen. The light purple block clears a small patch on the top left while the dark purple blocks sweep across the very top edge. Since the board is completely open at this point you do not have to worry much about blocked paths. Just pull the colors that match the remaining tiles and watch the ants finish the job. Once the last tile is eaten the ants clear out and you win the puzzle.
Final Thought
This level requires strict attention to your tray space and careful timing with the connected boxes. If you manage the massive background sections while slowly picking apart the ghost details you will keep your slots open and the ants moving. I highly encourage you to watch the video above this article if any step is hard to follow in text. Seeing the exact timing for the lock and key sequence makes a massive difference when you try it yourself.