Colony Flow Level 800 Walkthrough Solution & Guides | How to solve Colony Flow 800

Guide By Liam Stone
Updated on August 8, 2026
The video above covers the entire Level 800 solution. Watch it if you want to skip the article and jump straight to the answer.
Video doesn't match your screen?
Game updates frequently scramble layouts! Try our AI Screenshot Solver first to find your exact board instantly, or report broken guides to our team.
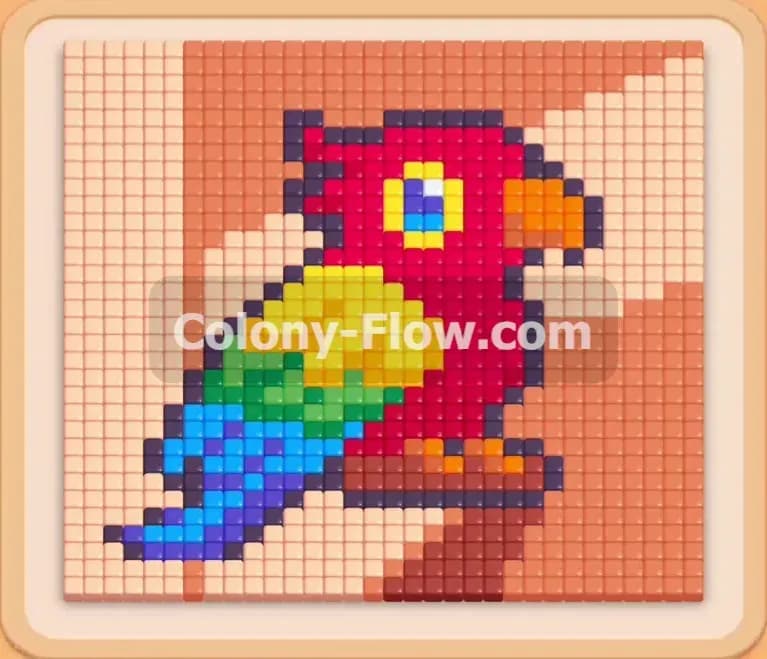
Welcome to Colony Flow Level 800. This puzzle features a beautifully detailed pixel art parrot resting on a wooden branch. You command a busy colony of ants that stream out of a nest to consume the colored food tiles making up the picture. The board challenges you with a mix of vibrant bird colors and a large two tone background. You must match the blocks from your tray to the food tiles on the board while navigating a tight space. I played through this level and found a reliable way to win without getting stuck.
Colony Flow Level 800 Overview
What You Are Working With
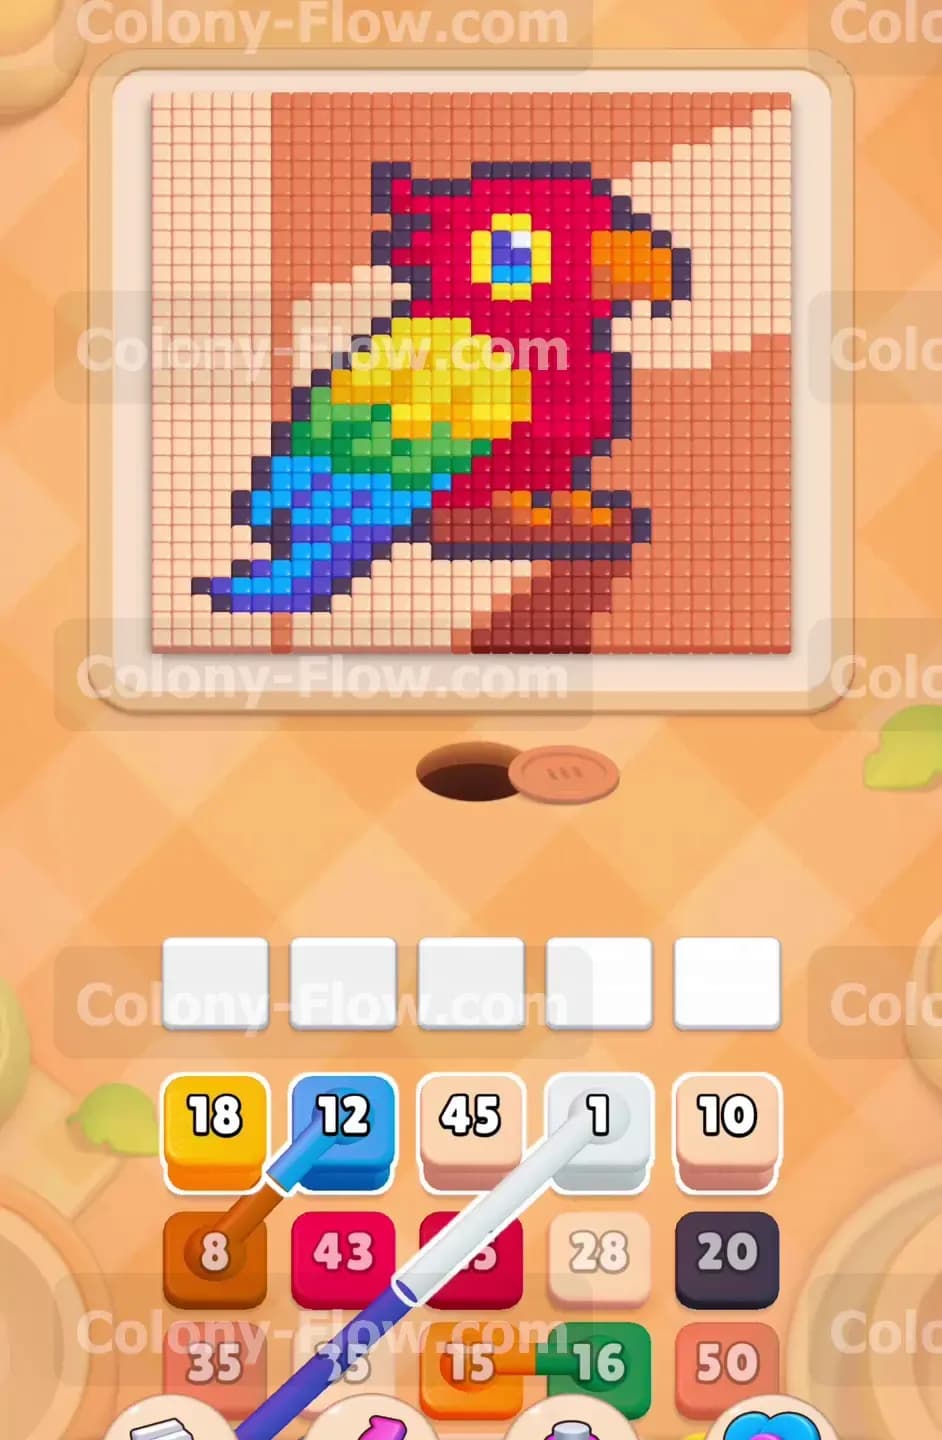
The puzzle board displays a colorful parrot with red, yellow, green, light blue, and dark blue sections. A dark purple outline separates the bird from the light orange and beige background tiles. The bird sits on a solid brown branch located right above the nest hole. Down at the bottom of the screen you have your tray filled with numbered colored blocks. Some of these blocks are Connected Boxes linked by visible pipes. You will also see a Hidden Box or two marked with question marks in the lower layers. These special tiles require you to plan your pulls carefully so you do not run out of room. The game tests your ability to read the board and predict which colors the ants can reach next. You must think a few steps ahead to keep the flow moving.
What It Takes to Clear Level 800 Board
Clearing this board requires strict control over your five waiting slots. The waiting slots hold your active blocks while the ants travel to the food tiles. If you pull a block and the ants cannot find an open path to the matching color the block stays in the slot. If you fill all five waiting slots with stuck blocks you instantly lose the level. Winning means you always leave at least one clear path open for the ants. You will start by feeding the ants the closest colors at the bottom and slowly work your way up to the background. By the time you reach the top edge your tray will be completely empty. The core rule to remember is that patience wins the level. You never want to rush and pull a block just because it looks ready. You pull a block only when you know the ants have a totally unobstructed path to those exact tiles. Let the colony do the heavy lifting while you manage the traffic.
Colony Flow Level 800 Step by Step Solution
Step 1: You start by clearing the lowest tiles to open the board.
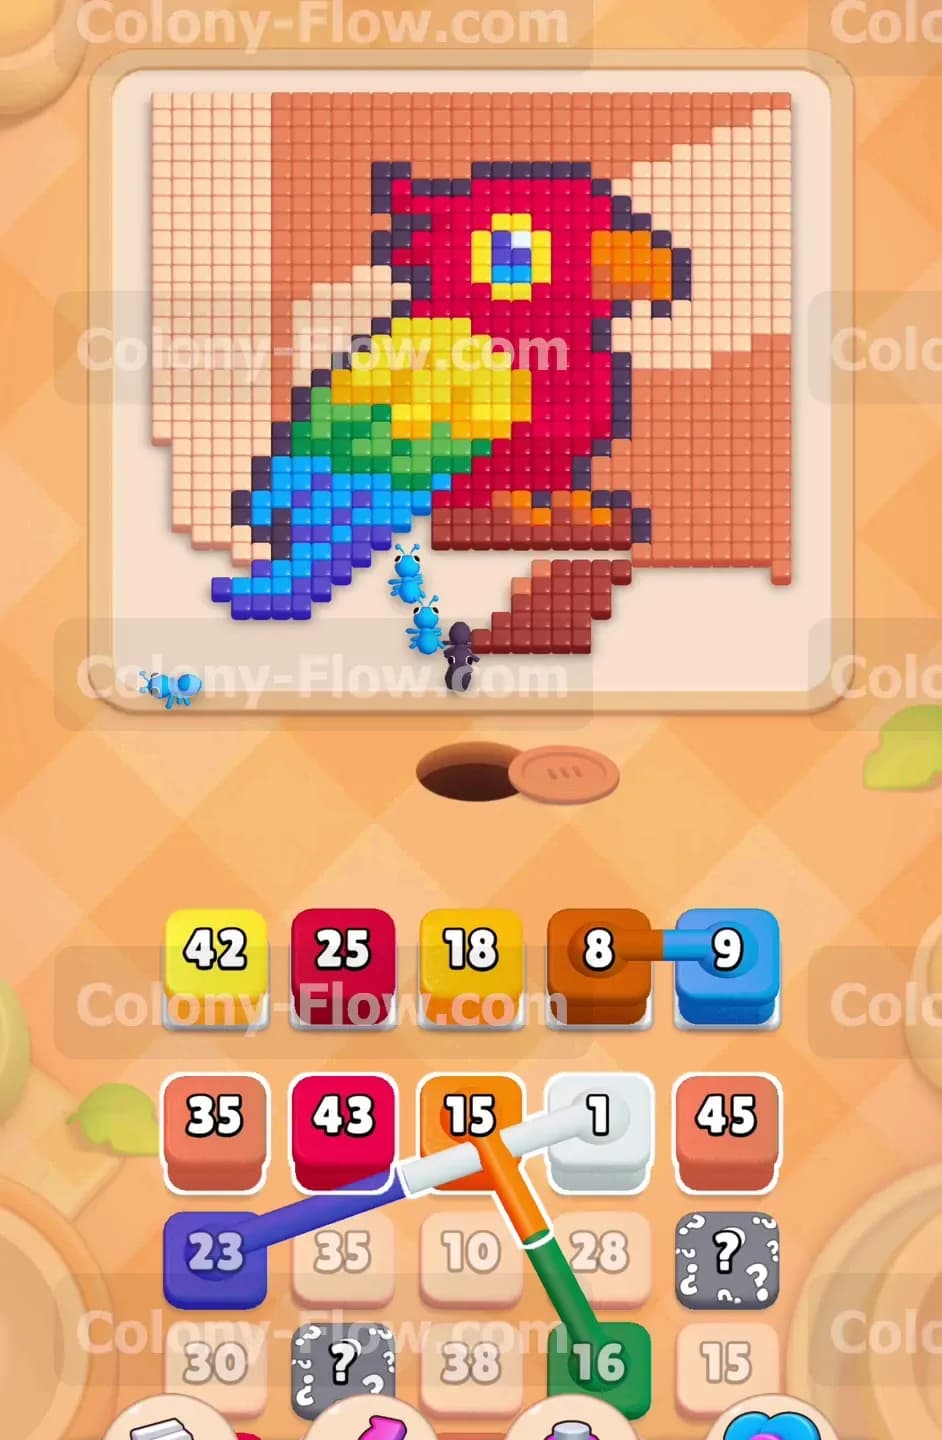
Focus on the very bottom of the board where the nest hole sits. The ants emerge from this hole and need an immediate target to eat. You will see the brown branch and the dark blue tail feathers right above the nest. These are the only open paths right now. Look at your tray and pull the brown block and the blue block into your waiting slots. The brown block has the number eight and the blue block has the number twelve. This means the ants must eat exactly eight brown tiles and twelve dark blue tiles. The ants rush out to devour the branch and the tail. You must wait for these blocks to reach zero and vanish completely. Do not pull any background colors yet. If you pull a beige block now the ants cannot reach the background tiles. The beige block would just sit in your waiting slot and threaten to jam your entire board. Managing these early moves sets up your entire victory.
Step 2: You feed the yellow ants to clear the upper wing.
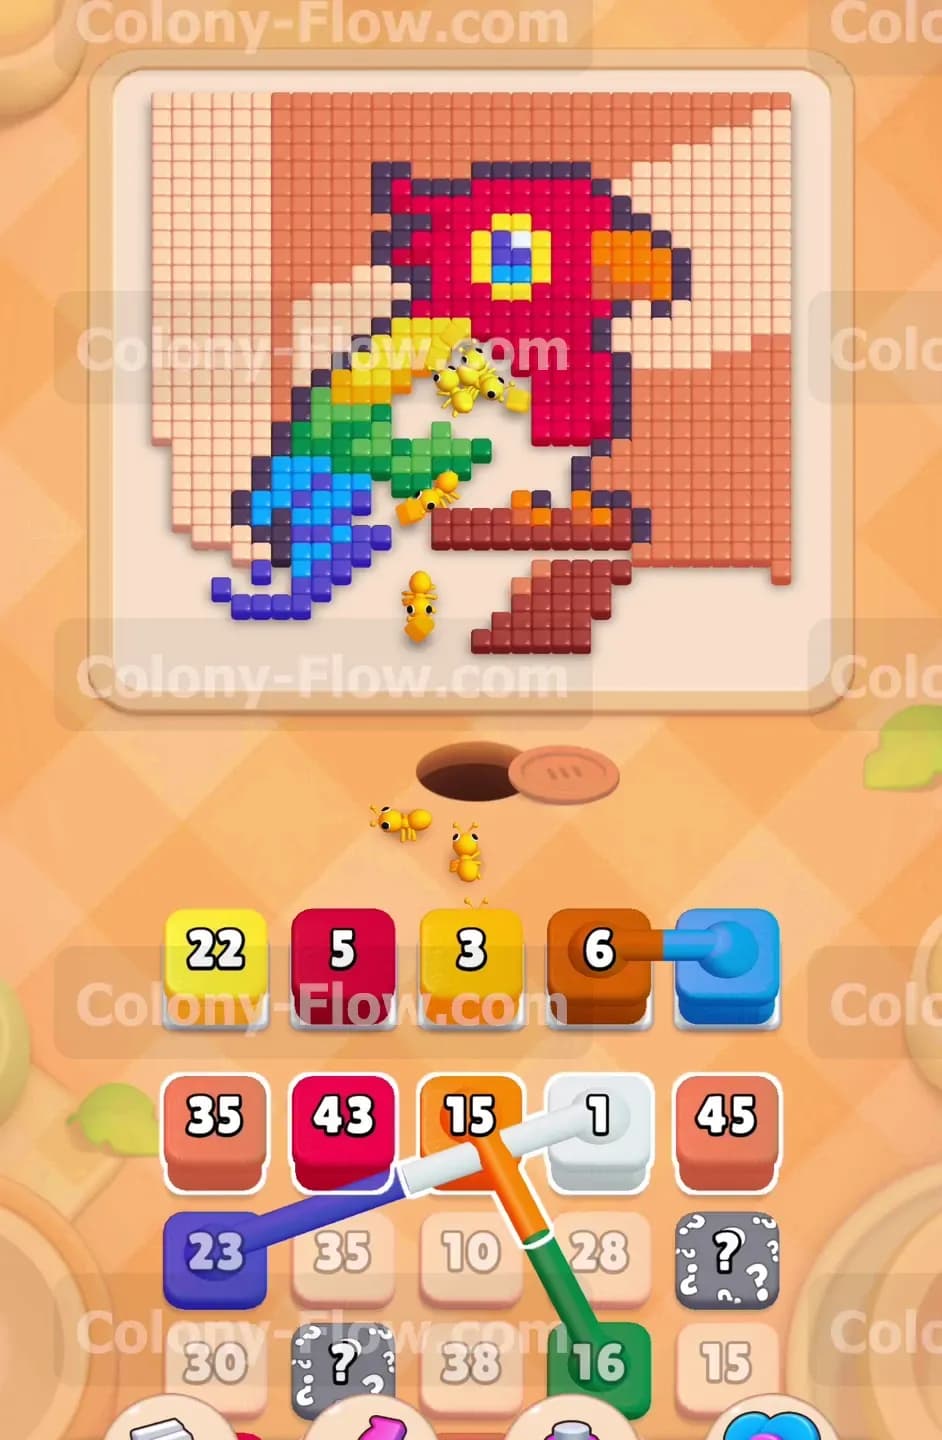
With the dark blue tail gone the lower part of the bird is completely open. The ants now have a clear path to the yellow wing tiles. Find the yellow block in your tray and pull it up to the empty waiting slots. This block holds a large number forty two. A huge stream of yellow ants will pour out of the nest hole. They travel over the empty spaces left by the tail and begin eating the yellow wing. They will also reach the tiny yellow eye on the parrot head. The yellow block will stay in your waiting slot for a long time because the number is so high. You might feel tempted to pull another color to speed things up. Resist that urge. Keep your remaining slots empty for now. Allowing the yellow ants to work without crowding the slots ensures you maintain perfect control of the board flow. You are building a safe zone for the tricky connected blocks coming up next.
Step 3: You use connected blocks to remove the red body.
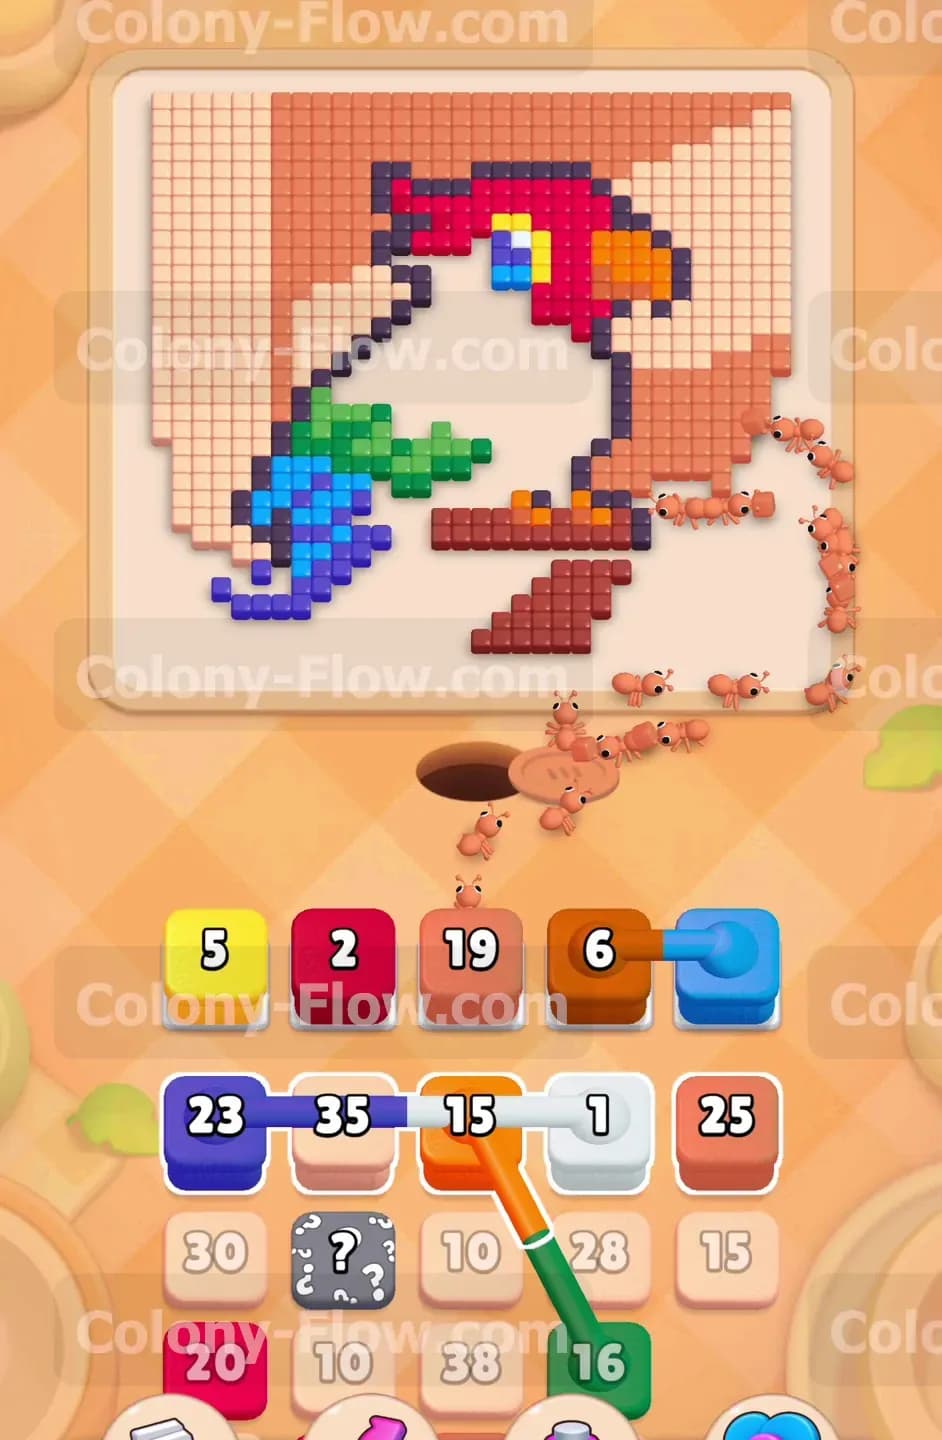
The main body of the parrot consists entirely of red tiles. To clear them you must pull the red blocks from the tray. Look closely at the tray and you will notice that some red blocks are Connected Boxes. A visible pipe links two blocks together perfectly. When you pull one connected block the other follows it directly into the waiting slots. This action takes up two of your five slots instantly. You must make sure you have enough room before making this move. If you only have one empty slot the game will not let you pull the connected blocks at all. Since you let the brown and blue blocks finish earlier you have plenty of space to work with. Pull the connected red blocks upward. The red ants will flood the board and rapidly eat the body and head of the bird. The massive red section disappears quickly and opens up the core of the board. The numbers drop fast as the swarm surrounds the remaining tiles.
Step 4: You break the dark purple outline to reach the background.
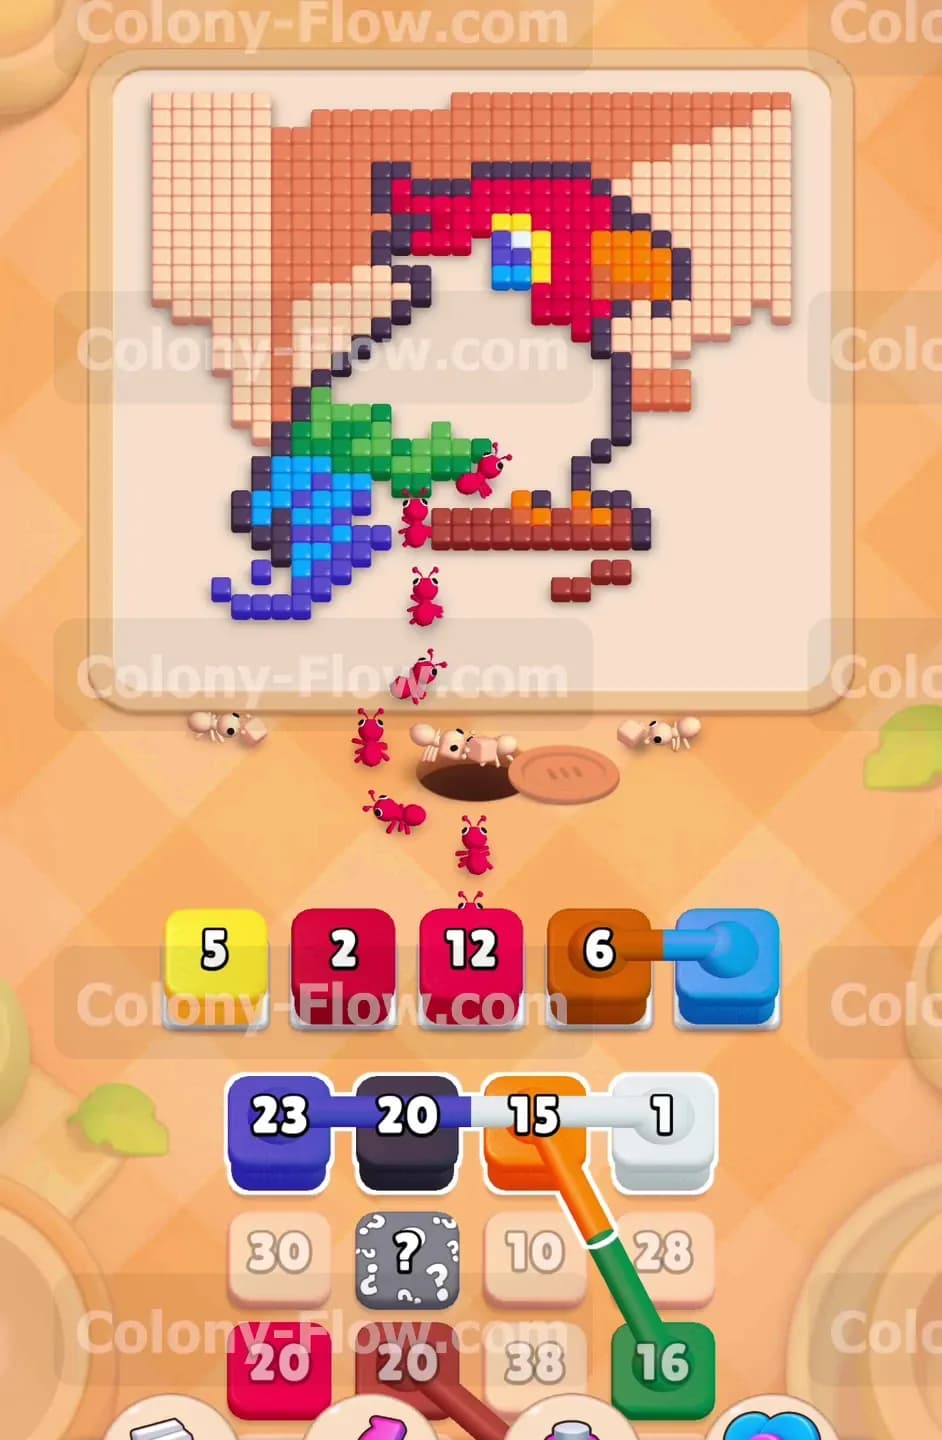
The parrot has a dark purple border separating it from the background. Now that the red body and the blue tail are gone the ants can easily reach this thick border. Look at your tray and find the dark purple block with the number twenty. Pull this block into an open waiting slot right away. The dark purple ants will trace the empty shape of the bird and eat the remaining outline. You want to clear this outline right now because it blocks access to the upper background tiles. By removing the purple barrier you create fresh paths for the final stages of the level. The dark purple block counts down steadily and leaves your waiting slot empty again. Always watch the ants finish their meals before rushing your next move. Patience here guarantees you will not trap yourself behind a full row of waiting slots.
Step 5: You reveal the hidden boxes in the tray.
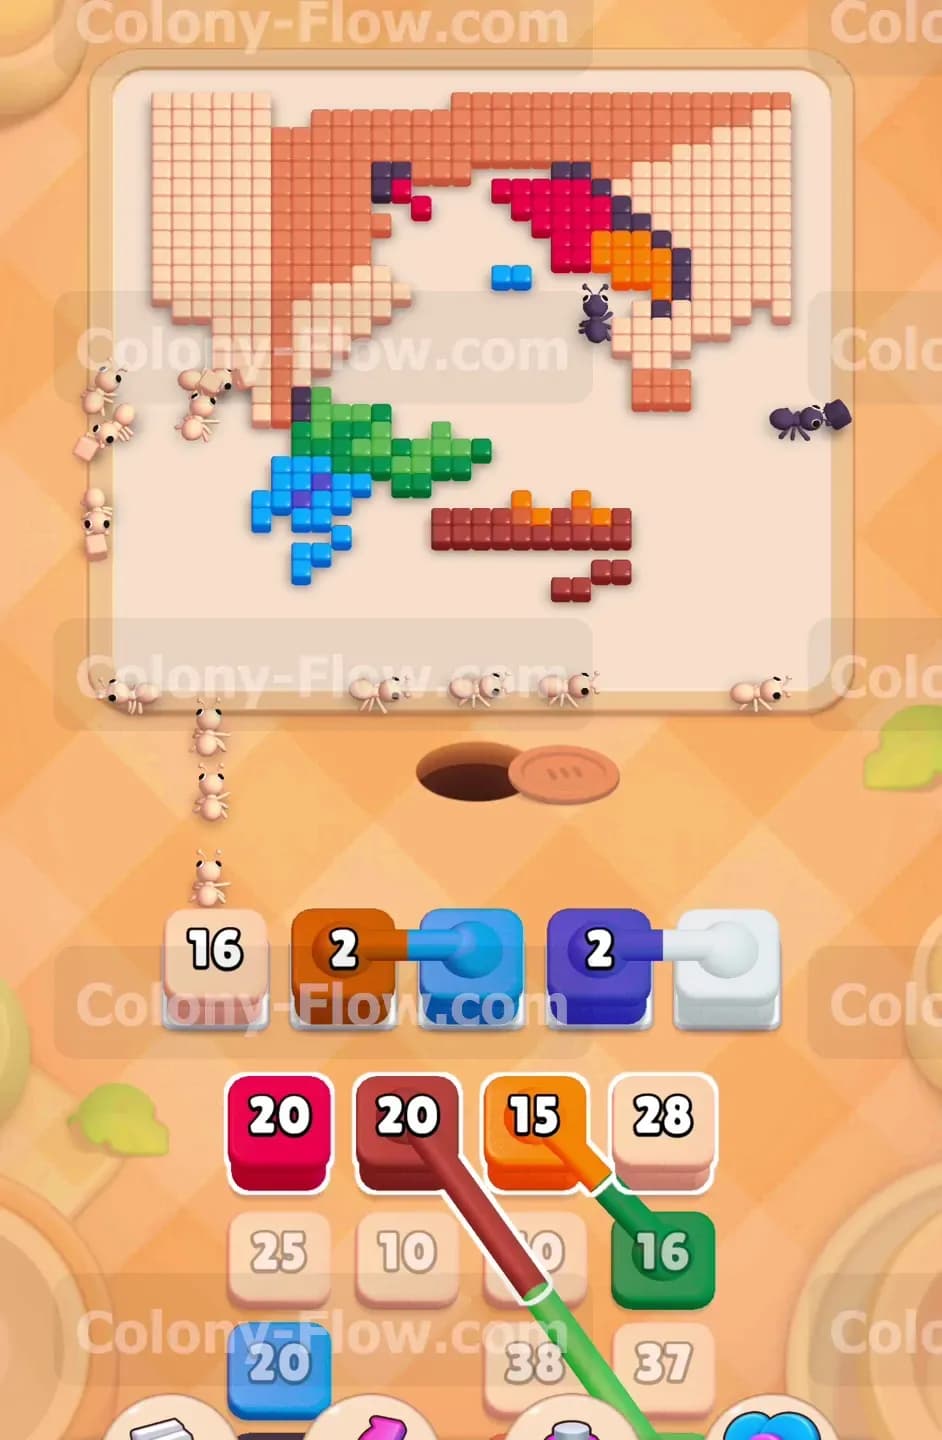
Your tray contains a few Hidden Boxes marked with large question marks. These boxes conceal their true colors until the blocks covering them are completely removed. By pulling the red and purple blocks earlier you successfully uncovered these hidden boxes. They will flip over and reveal themselves as beige and light orange blocks. You absolutely need these colors for the large background. However you should hold off on pulling them for just a moment. Look for the green block with the number sixteen instead. Pull the green block first. The ants will march up and eat the green middle section of the wing. Finishing the wing now prevents the green block from getting trapped behind the massive background blocks later. It is a small detail but it keeps your board perfectly balanced.
Step 6: You clear the light orange background sections.
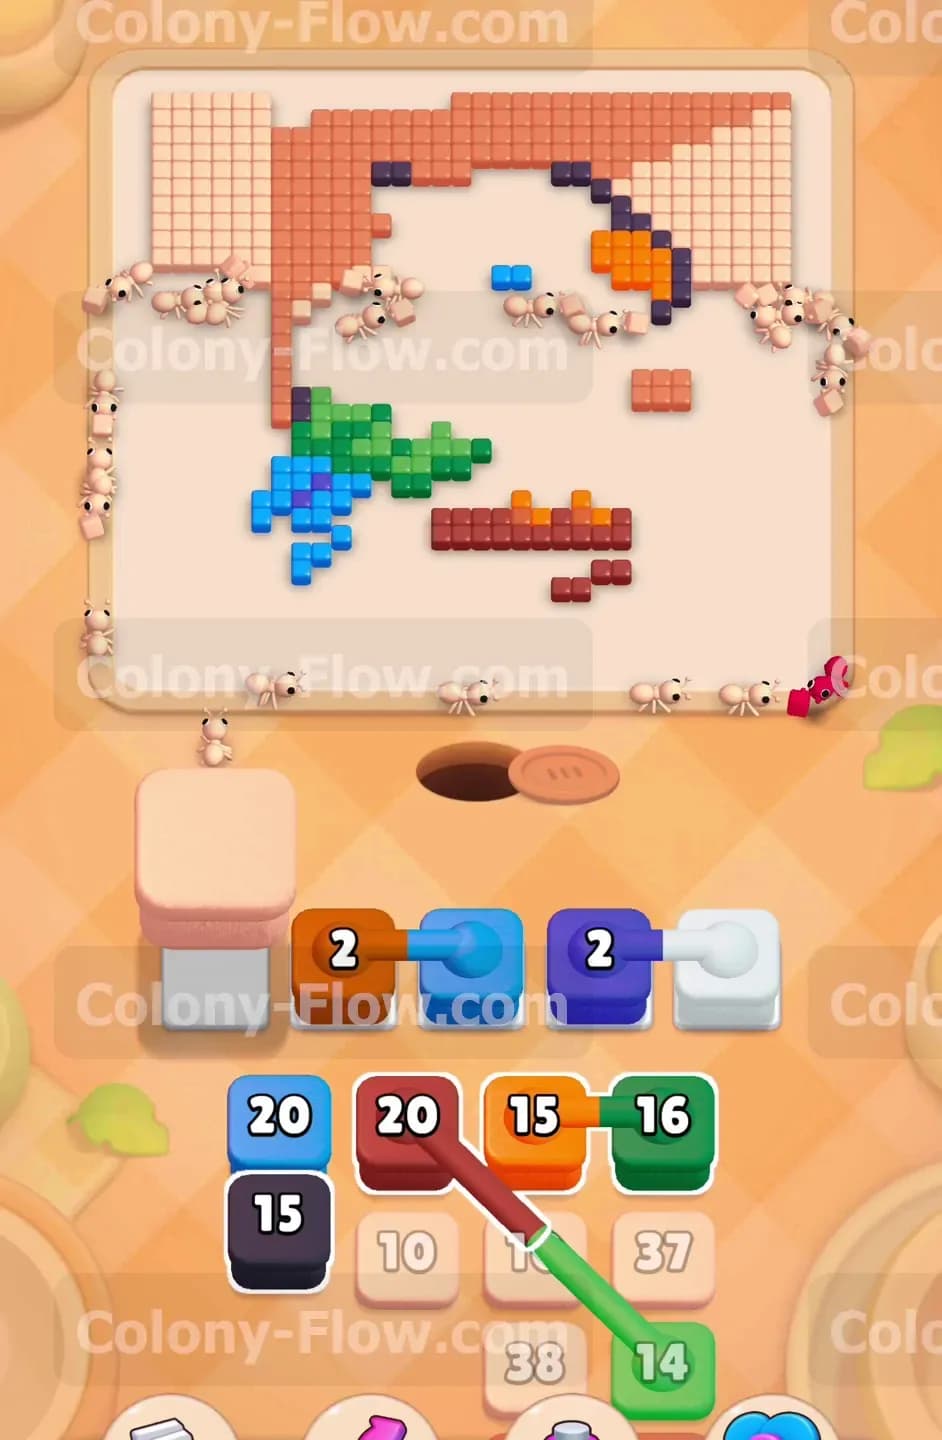
The upper left and right areas behind the bird are filled entirely with light orange tiles. Now that the purple outline is gone the ants have wide open paths to reach these distant areas. Go to your tray and pull the light orange blocks into your waiting slots. The ants will travel all the way up the sides of the empty board. You will see a large light orange block start to count down rapidly. Make sure you leave at least one or two waiting slots empty. You never want to pull all the background blocks at once. Staggering your moves keeps the blocks flowing and guarantees you never hit a dead end. The ants will chew through the light orange tiles and leave only the outer border. Watch the numbers decrease and prepare for your final pushes.
Step 7: You finish the beige background tiles to win.
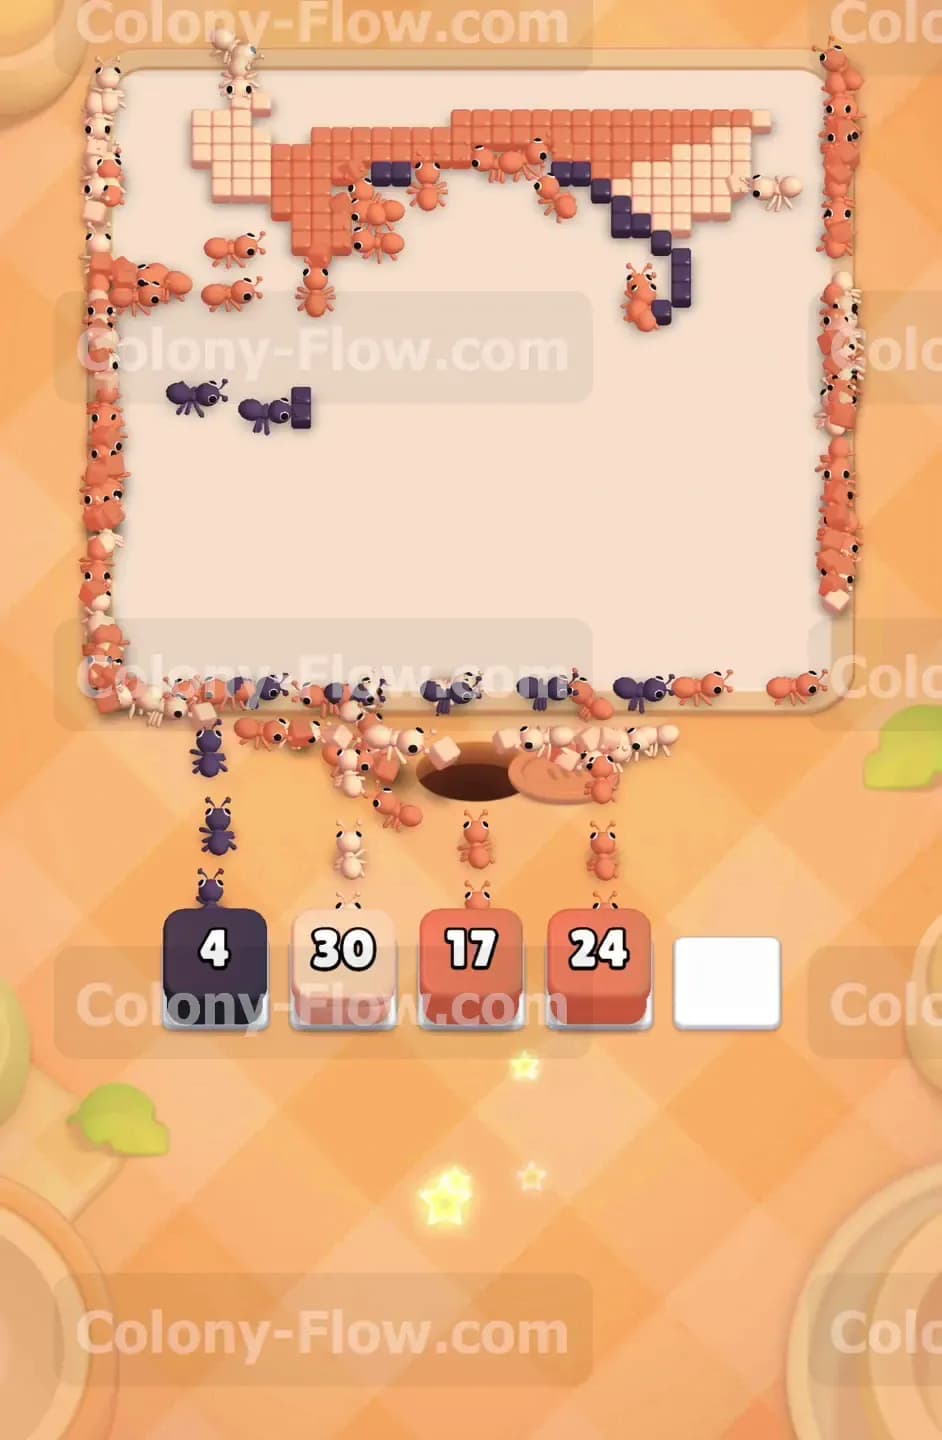
Only the outer beige tiles remain on the very edges of the board. Your tray is almost empty and holds only the final beige blocks. Pull the beige block with the number thirty into your active waiting slots. The beige ants will stream out of the nest and head straight for the top corners. The board is completely open now so the ants will spread out evenly and clear the remaining tiles very fast. You will watch the final numbers tick down to zero. The waiting slots empty out one last time and the entire picture vanishes from the screen. You have successfully outsmarted the puzzle and finished the level without a single jam. Enjoy the clean board and get ready for the next challenge.
Final Thought
This puzzle tests your patience and your ability to manage limited space. Always remember to clear the lowest tiles first and keep your waiting slots flowing smoothly. If any part of this guide feels hard to visualize you can watch the video above this article. Seeing the ants move in real time makes the trickiest parts much easier to understand.