Colony Flow Level 578 Walkthrough Solution & Guides | How to solve Colony Flow 578

Guide By Liam Stone
Updated on August 1, 2026
The video above has the full walkthrough for Level 578, so use it if you'd rather skip the article.
Video doesn't match your screen?
Game updates frequently scramble layouts! Try our AI Screenshot Solver first to find your exact board instantly, or report broken guides to our team.
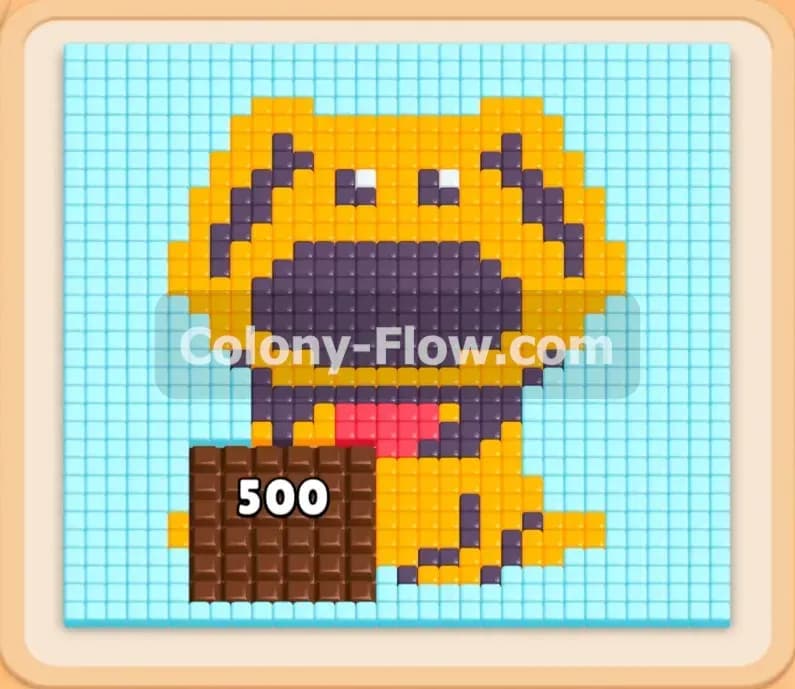
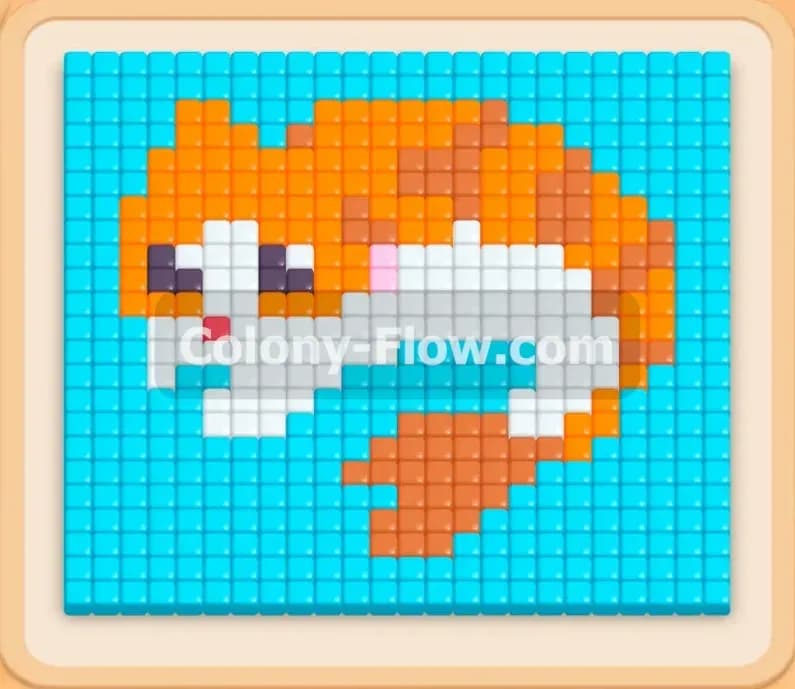
Colony Flow Level 578 puts a beautiful orange cat pixel art on your screen and challenges you to clear it without jamming your tray. The picture sits on a massive light blue background that takes up a huge number of tiles. You have exactly five waiting slots to manage your colored blocks as the ants stream out of the nest hole. I play every single level of this game and verify each strategy to make sure the board clears smoothly. I found a very reliable way to get the ants moving and beat this specific puzzle. You just need to follow the right order of operations to keep your paths open.
Colony Flow Level 578 Overview
What You Are Working With
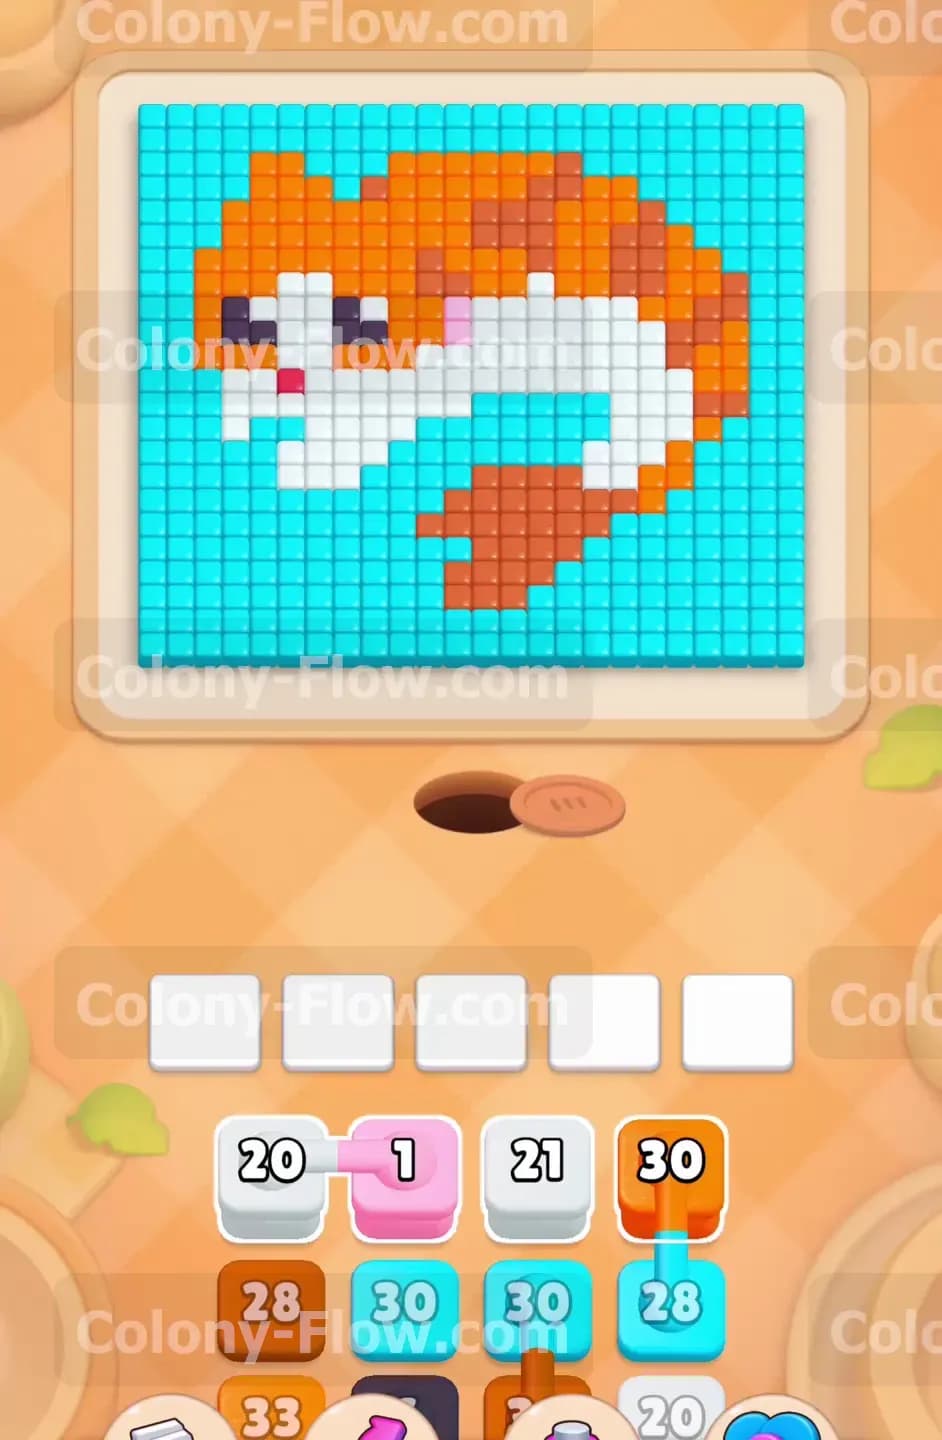
The main picture features an orange cat with a bright white belly and face. The cat also has brown detail tiles on its tail and ears along with pink blush marks and black eyes. A massive light blue background completely surrounds the entire animal shape. The tray at the bottom holds a mix of high capacity light blue blocks and various smaller blocks for the cat colors. You will also notice connected boxes sitting in your tray. Two or more boxes linked together by a line must be moved to the waiting slots as a single group. This mechanic forces you to take up multiple slots at once and severely limits your available space to maneuver. You have to handle these connected pairs with extreme care so you do not accidentally trap yourself.
What It Takes to Clear Level 578 Board
You win the level when every single pixel tile is eaten by the ants and your board is completely empty. You lose the level instantly if you fill all five waiting slots and the active blocks have no open path to reach their matching color tiles. The true key to clearing this board is carefully managing the vast light blue background. Since the blue tiles wrap completely around the orange cat shape you must clear specific sections just to open paths for your interior colors. You also need to plan your moves far ahead whenever you deal with the connected boxes. Keeping your tray flowing requires you to constantly monitor which colors have an open route and which ones are blocked behind other tiles.
Colony Flow Level 578 Step by Step Solution
Step 1: Open the bottom edge of the board with light blue and orange blocks
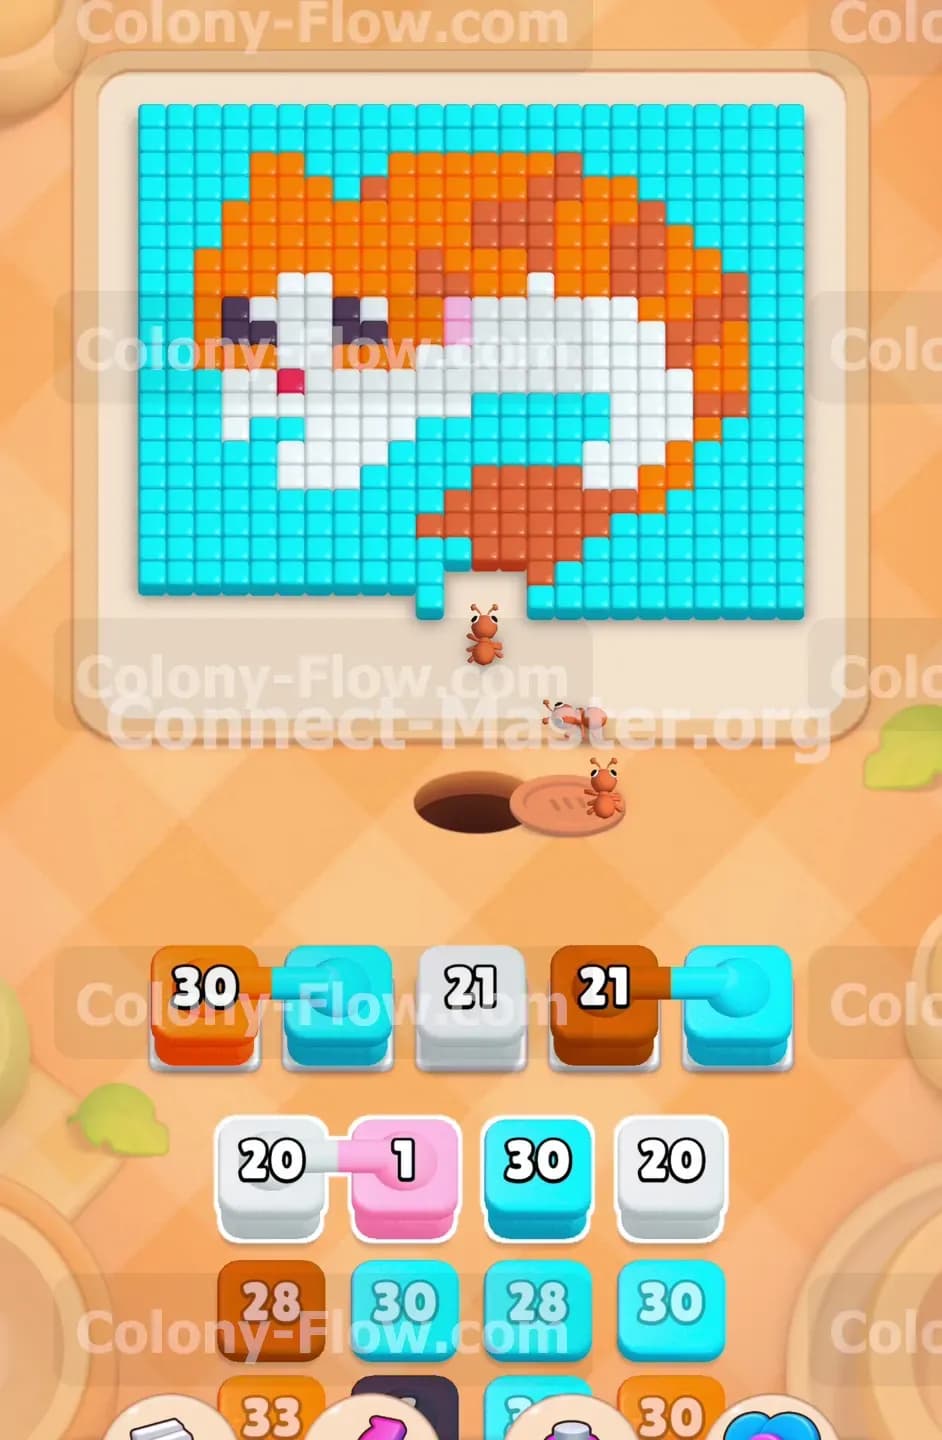
When you first start the level you face a solid wall of light blue and orange tiles right above the nest hole. Your absolute first priority is to break open this bottom boundary so your ants can reach the interior sections of the board. You need to pull one light blue block and one orange block from your lower tray into the empty waiting slots. The light blue ants will immediately pour out of the nest and attack the bottom right corner of the background. The orange ants will stream out and target the lowest exposed section of the orange cat tail. This dual attack creates a wide and vital opening at the base of the picture. You must let these two colors work for a while to carve out enough space for future moves. Pay very close attention to the tile numbers on your blocks as they count down. Your main goal in this opening phase is to clear away enough orange and blue tiles to fully expose the white tiles located on the lower belly of the cat. Do not rush to pull any more blocks until this white area is completely open and ready for action.
Step 2: Pull the first connected white and pink blocks into your active slots
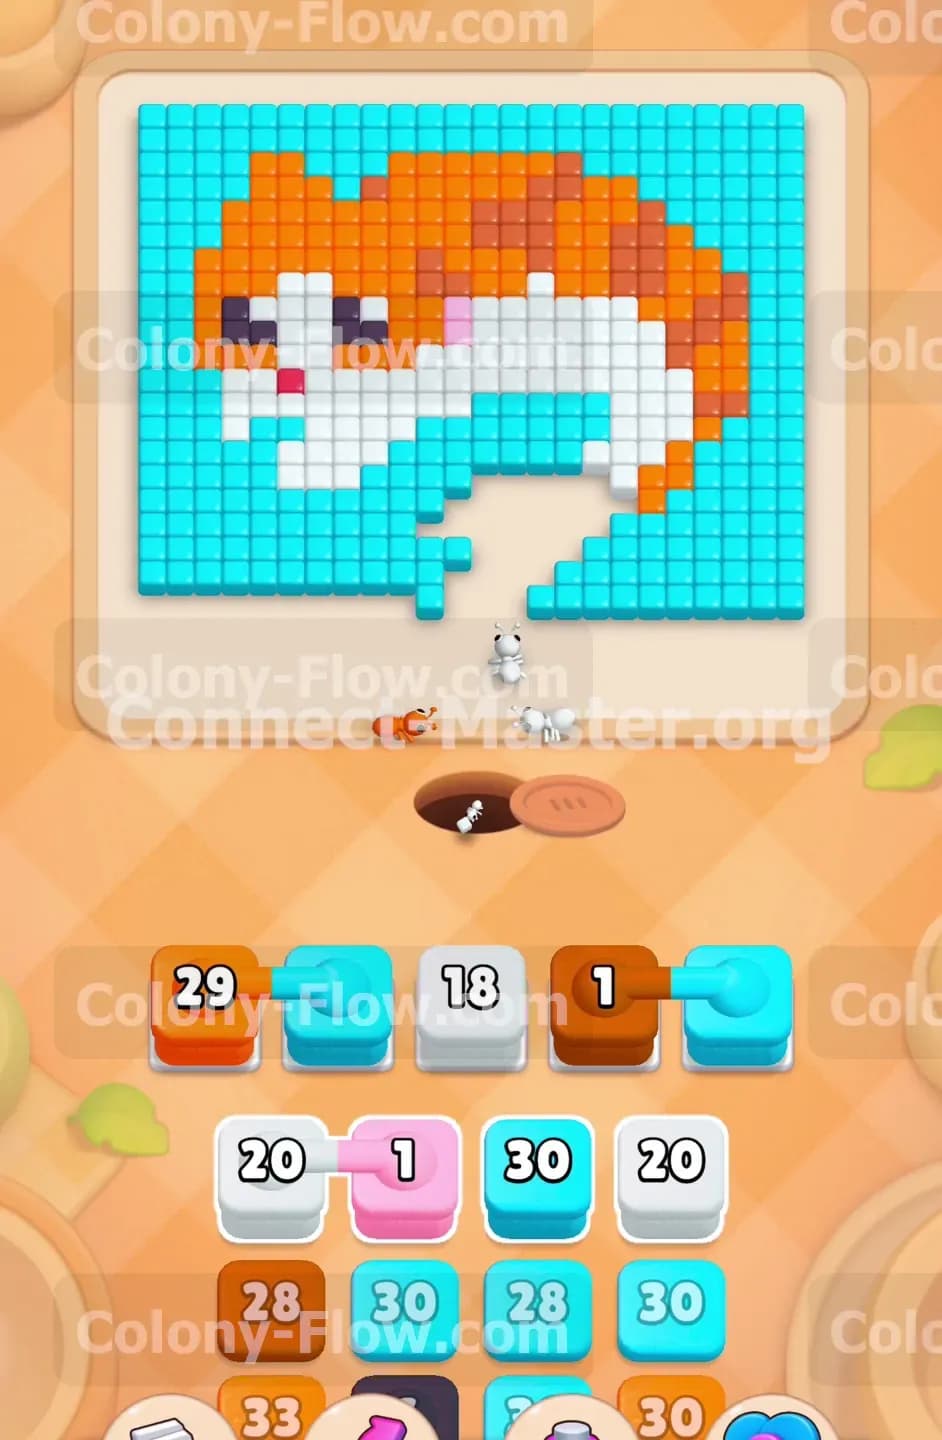
Once the white belly tiles are exposed you face your first major tray management challenge of the level. You will notice a white block and a pink block linked together in your tray. These are connected boxes and they must be moved up together as a single unit. Bringing them into play will instantly consume two of your precious five waiting slots. The white block contains a large number of ants ready to rapidly eat the belly tiles. The pink block only contains a single ant meant for the tiny pink blush mark on the cat face. That blush mark is buried deep inside the upper picture and has no open path yet. This means the pink block will sit completely stuck in your active tray while the white ants do all the actual work. You simply have to accept that one slot will be temporarily useless for a long time. Send the white ants out to clear the lower body and keep your other three slots cycling as quickly as possible to compensate for the jammed pink slot.
Step 3: Deploy more light blue blocks to eat the left and right background areas
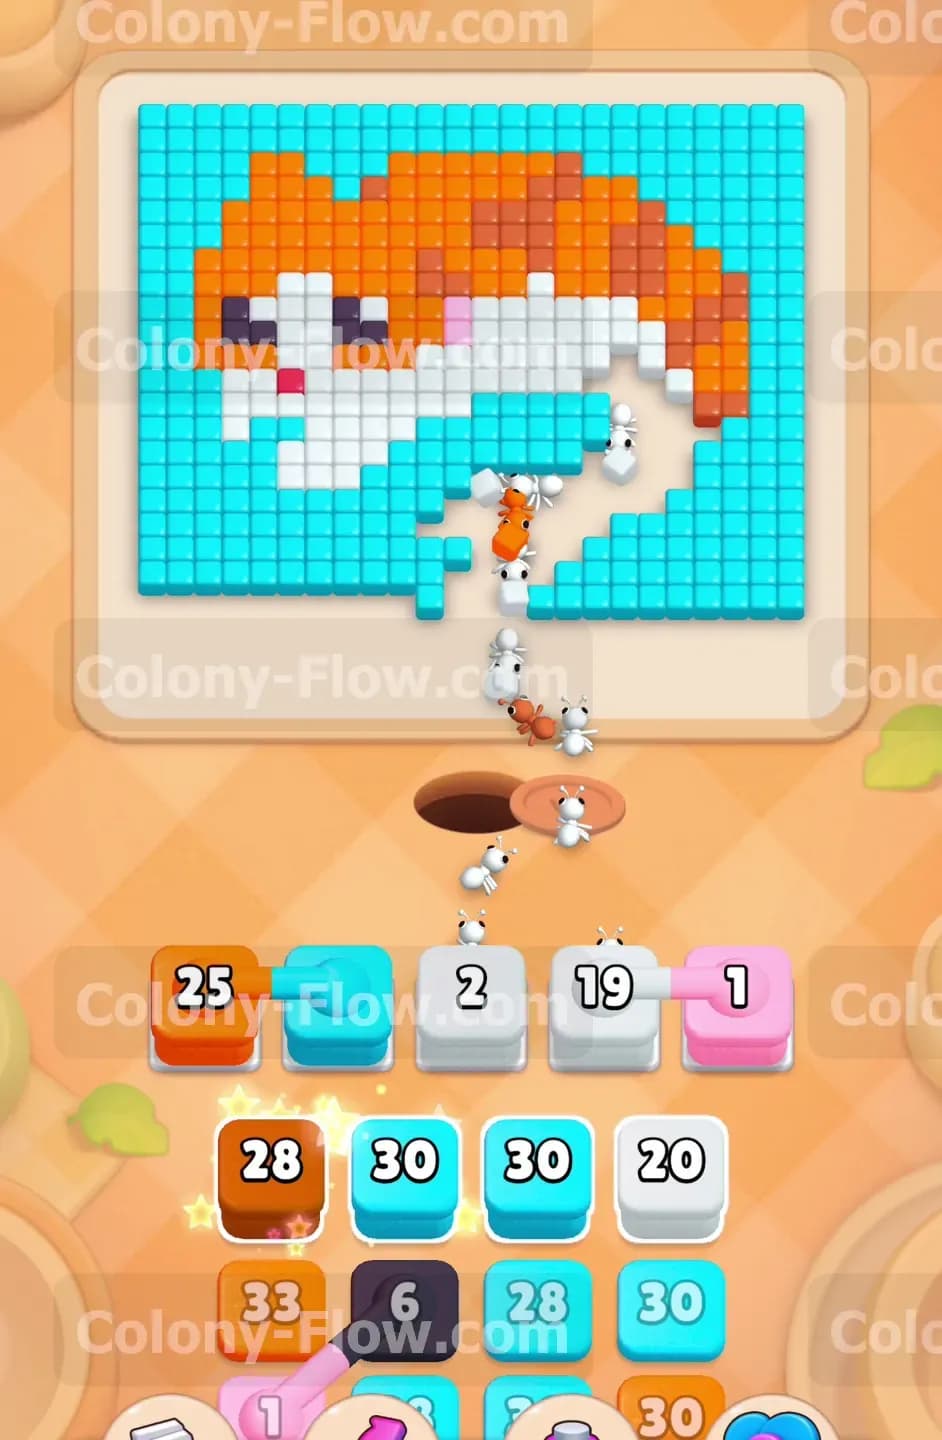
With the white ants working steadily on the center body you need to refocus your attention on the massive light blue background. The cat picture sits squarely in the middle of the board and blocks your ants from moving easily between the left and right sides. You need to pull another high capacity light blue block into your active lineup. These new light blue ants will split their forces naturally and march up both sides of the animal. A large group will stream up the right side behind the orange tail while another group pushes up the left side near the white face. Stripping away these side border tiles is extremely important for your overall late game success. It creates multiple wide paths around the main figure which prevents your ants from bottlenecking at the nest hole. Keeping the ant traffic flowing smoothly across the open board is exactly how you keep your waiting slots from jamming up.
Step 4: Introduce brown blocks to clear the tail and lower ear details
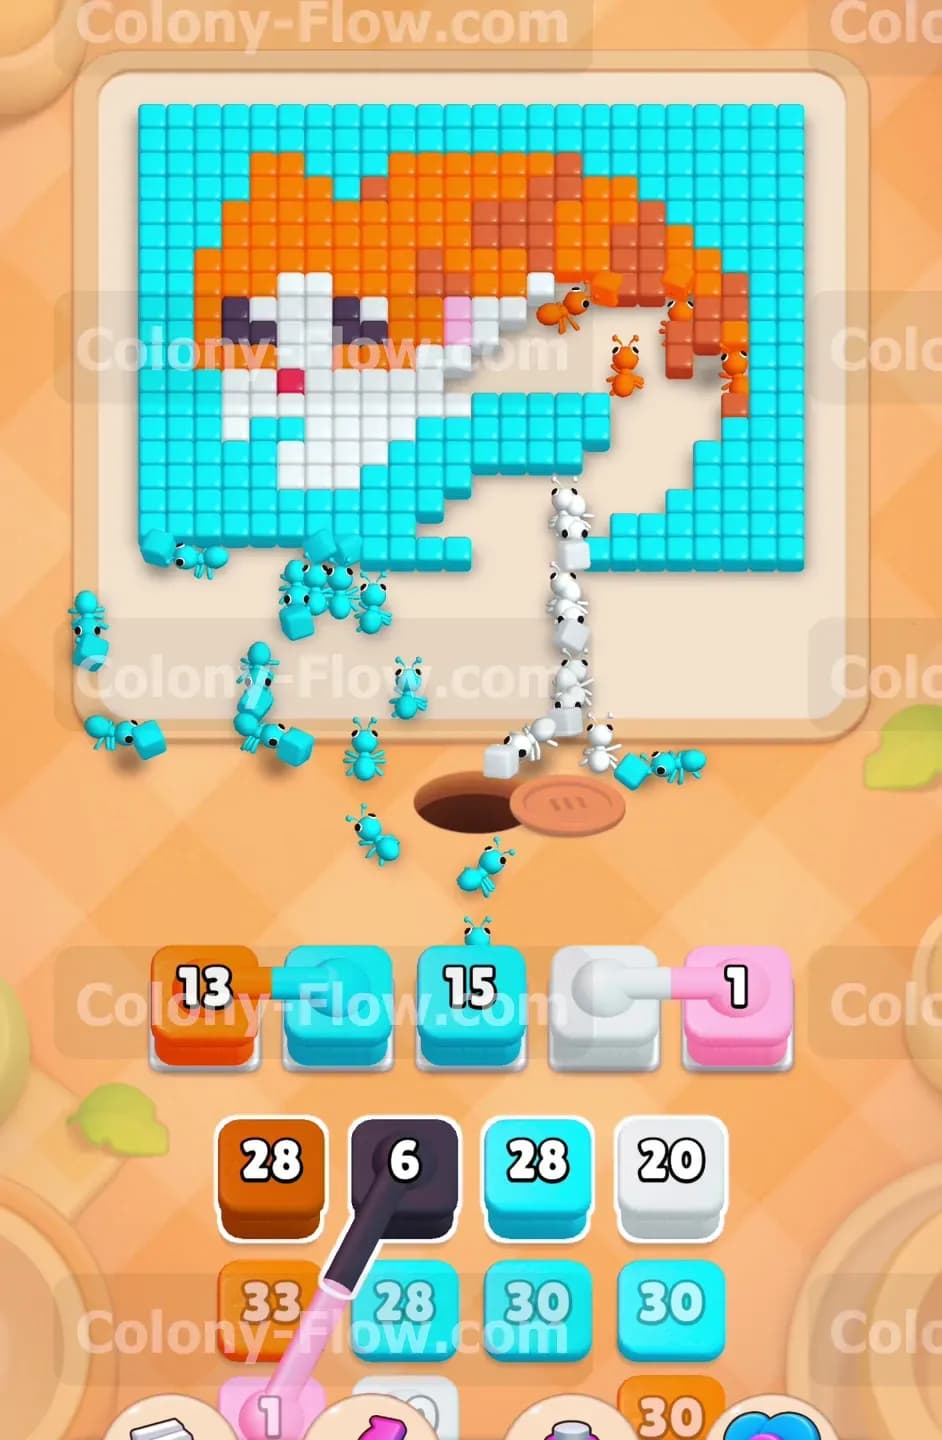
As the lower half of the cat slowly disappears you will finally uncover the brown tiles. These brown sections represent the dark shading on the bushy tail and the pointed tips of the cat ears. You can now safely bring a brown block into one of your available slots. The brown ants will rush out and head straight for the tail section because it is the closest valid target to the nest hole. Managing your tray capacity is highly critical during this busy phase. You now have light blue and orange and white and brown ants all running around the board at the exact same time. You also still have that stuck pink block taking up permanent space. You must always leave at least one slot completely empty to avoid a game over. Never pull a new block from the bottom unless you are absolutely sure an active block is about to finish its final tile and vanish from the tray.
Step 5: Manage the connected black block carefully to clear the eyes
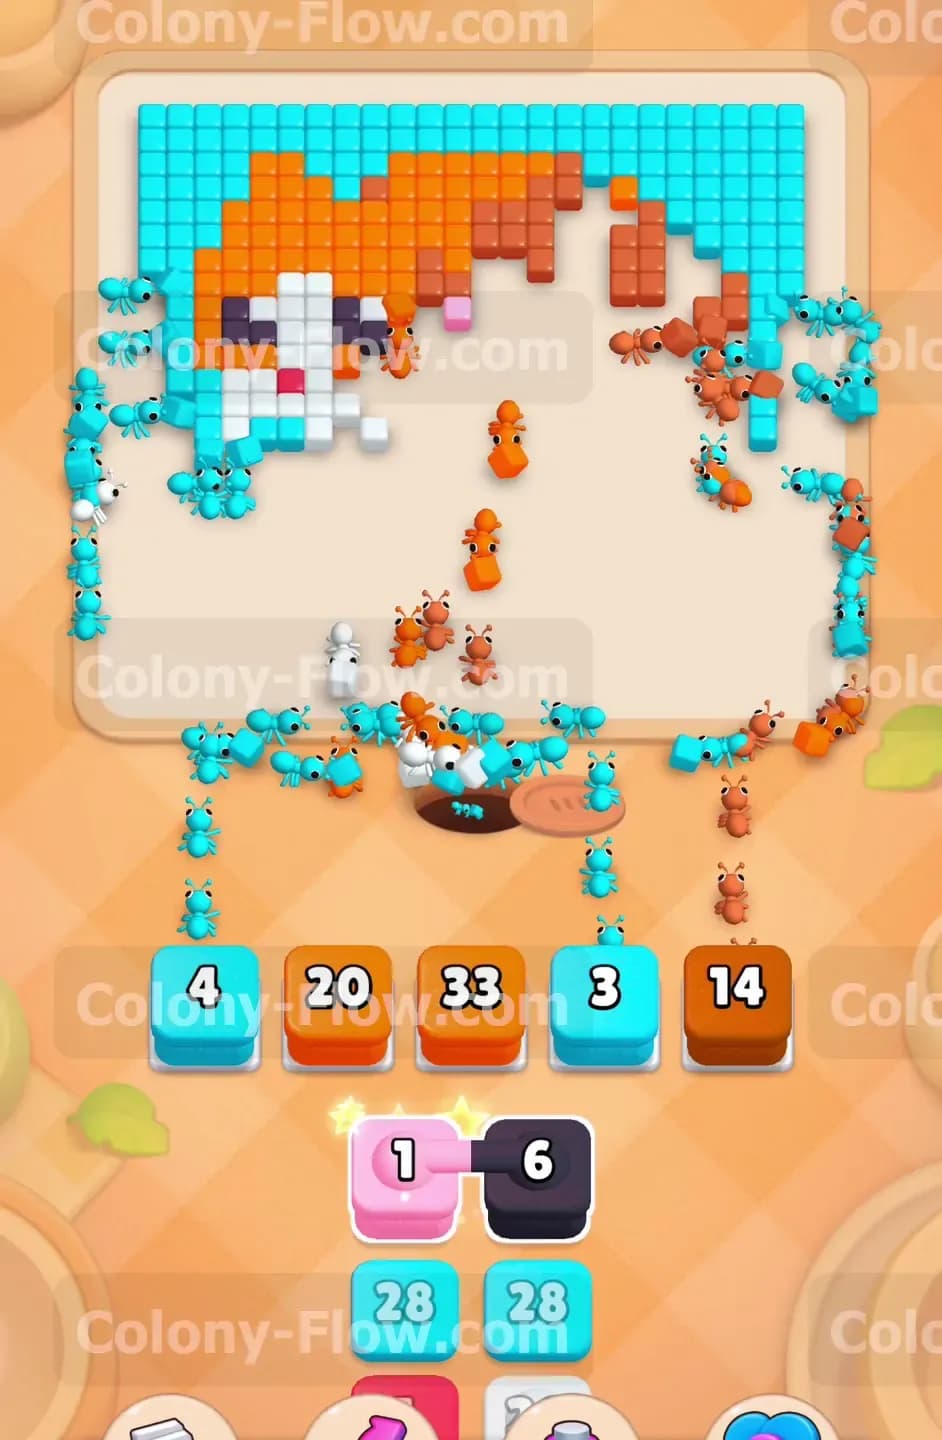
Your lower tray contains another tricky set of connected boxes featuring black tiles. The black tiles make up the eyes of the cat which are located very high up on the left side of the face. You must wait patiently and do not touch these connected blocks until the orange and white ants completely remove the lower face tiles. Once a clear open path reaches straight up to the eyes you can finally pull this connected pair into your active slots. The black ants will travel a very long way up the board to eat the eye tiles. Bringing this pair up takes away another crucial slot so your timing must be perfectly precise. Let the black ants finish their specific job quickly so their block disappears and frees up a space for your final push.
Step 6: Clear the upper orange body and remaining face tiles
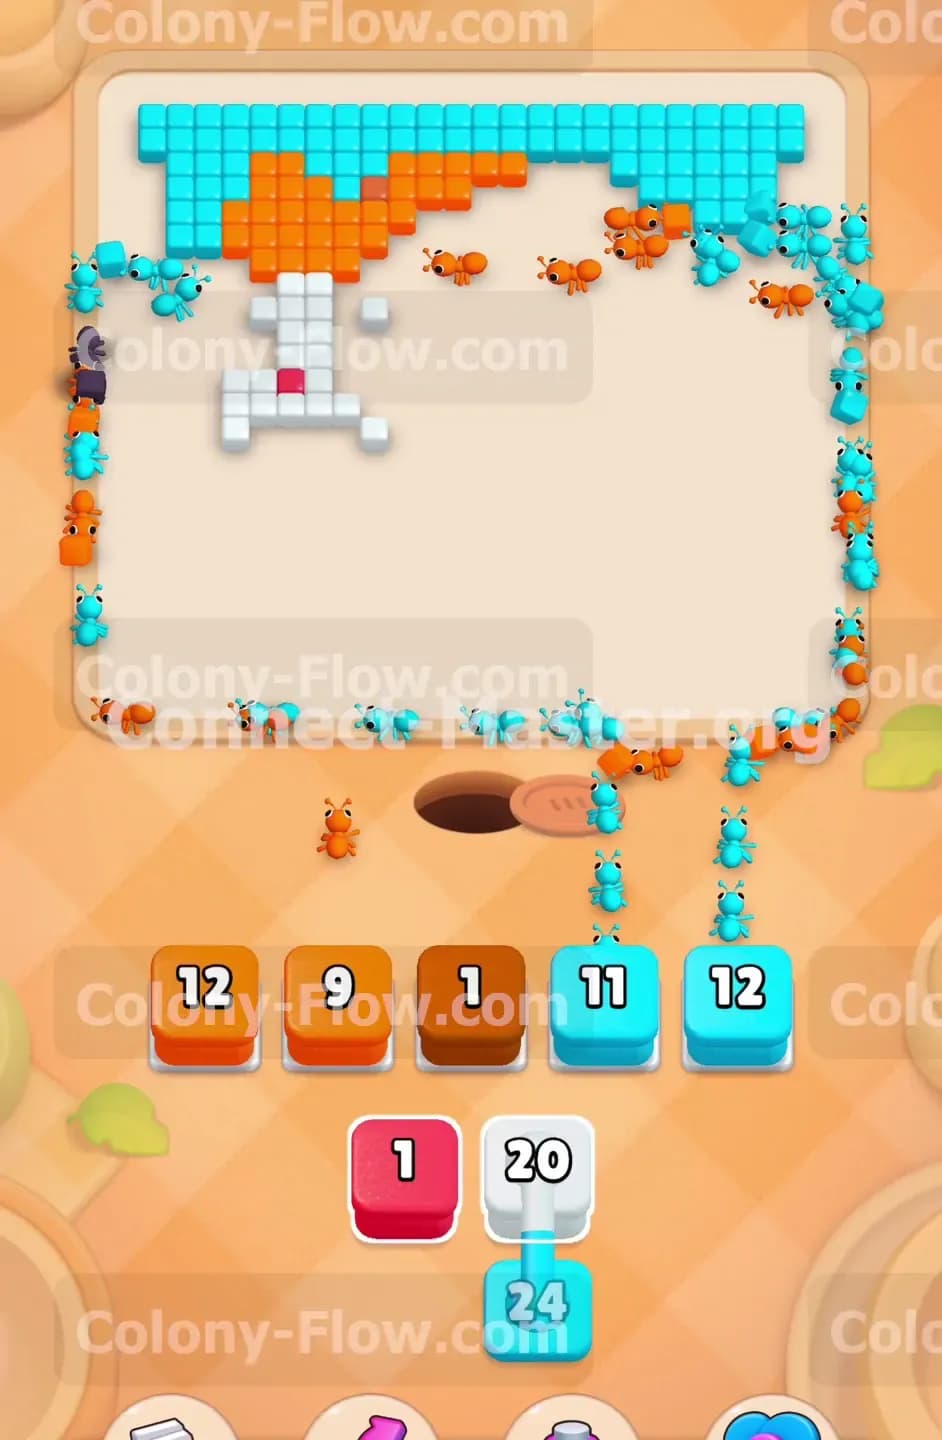
With the eyes and the entire lower body completely gone the picture is reduced to just the upper orange back and the top of the head. It is time to bring your remaining heavy orange blocks up to the waiting slots. These orange ants will swarm the middle of the board and devour the entire top half of the cat shape. During this massive clearing effort the path to the pink blush mark will finally open up. That pink block that has been clogging your tray since the early game will finally release its single ant. The pink ant will march all the way up and eat the blush tile freeing up that long stuck slot at last. Use any other small number blocks you have left in the tray to clean up the remaining brown ear tips or leftover white face tiles. Always clear the interior detail colors before you focus entirely on the outer background.
Step 7: Flood the board with light blue to finish the top background
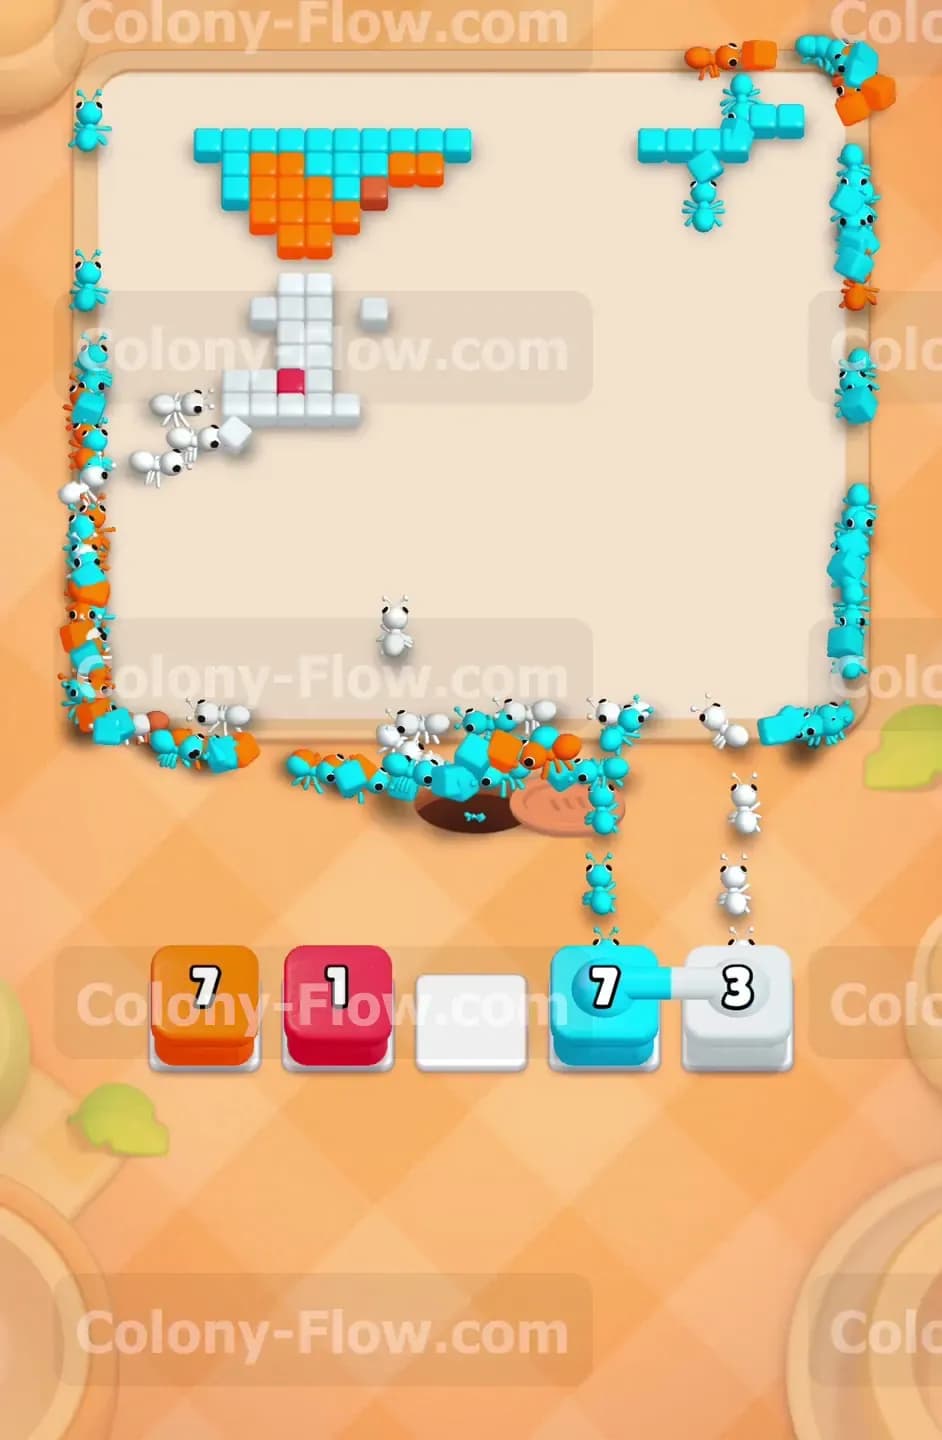
The final stage of the level leaves you with a huge canopy of light blue tiles spanning the entire top edge of the puzzle board. All of the colored cat tiles are completely gone by this point leaving a massive open area in the center. You should have several high capacity light blue blocks waiting at the very bottom of your screen. Pull them up into your active row one after the other. The light blue ants will flood the empty center area and march straight up to the top border. They will relentlessly eat away the remaining blue rows from left to right. Keep pulling your final light blue blocks as slots open up until every single tile is consumed. Once the last blue pixel disappears from the screen your board is fully clear and you win the level.
Final Thought
Managing your five slots perfectly is the only way to beat this puzzle. You have to balance the heavy background blocks with the tricky connected boxes that trap your space. If any of these written steps are hard to visualize or you want to see the exact block order in motion I highly encourage you to watch the video above this article. Seeing the ants clear the paths in real time makes the whole strategy much easier to understand.