Colony Flow Level 316 Walkthrough Solution & Guides | How to solve Colony Flow 316

Guide By Liam Stone
Updated on July 17, 2026
Want the shortcut? Watch the video above for the full Level 316 solution.
Video doesn't match your screen?
Game updates frequently scramble layouts! Try our AI Screenshot Solver first to find your exact board instantly, or report broken guides to our team.
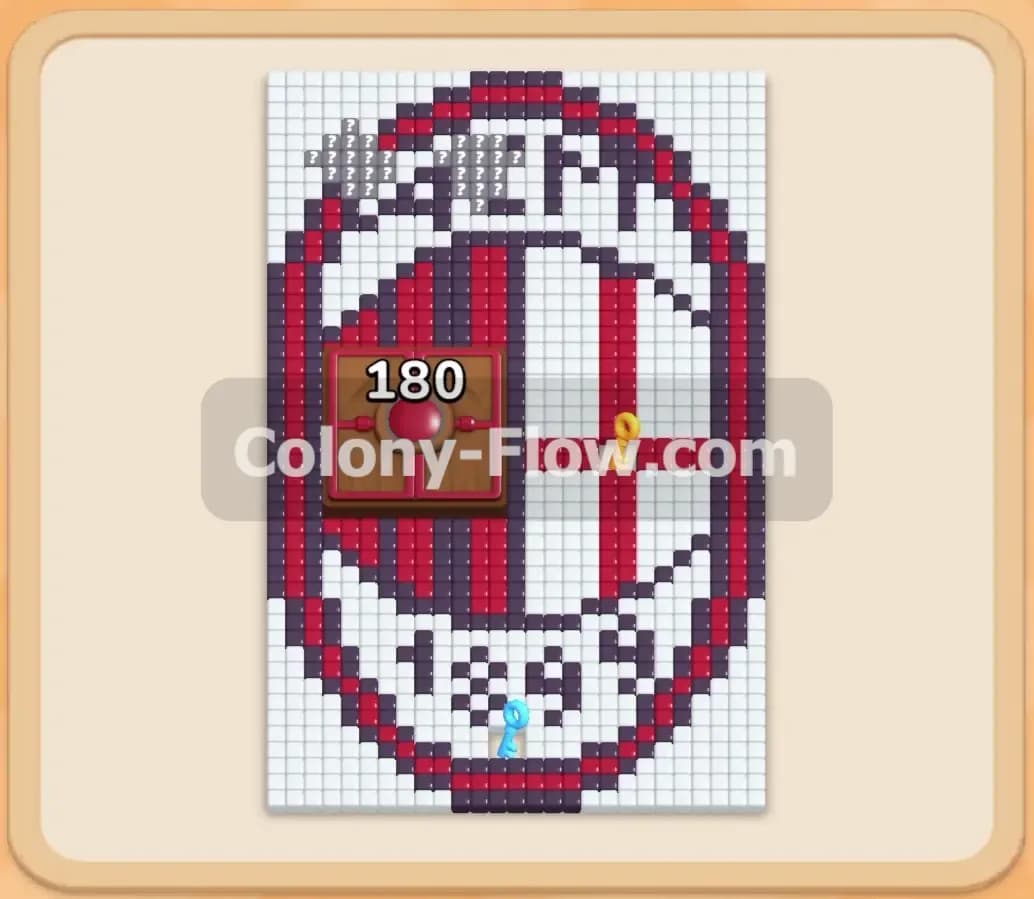
Colony Flow Level 316 throws a massive obstacle right in the middle of your board and asks you to carefully manage your space. You have to break down a giant center door while slowly chipping away at the pixel art logo surrounding it. I found that ignoring the center obstacle for too long will quickly cause a massive traffic jam in your tray. I played through this exact level and mapped out the best order to pull your blocks so you never run out of room.
Colony Flow Level 316 Overview
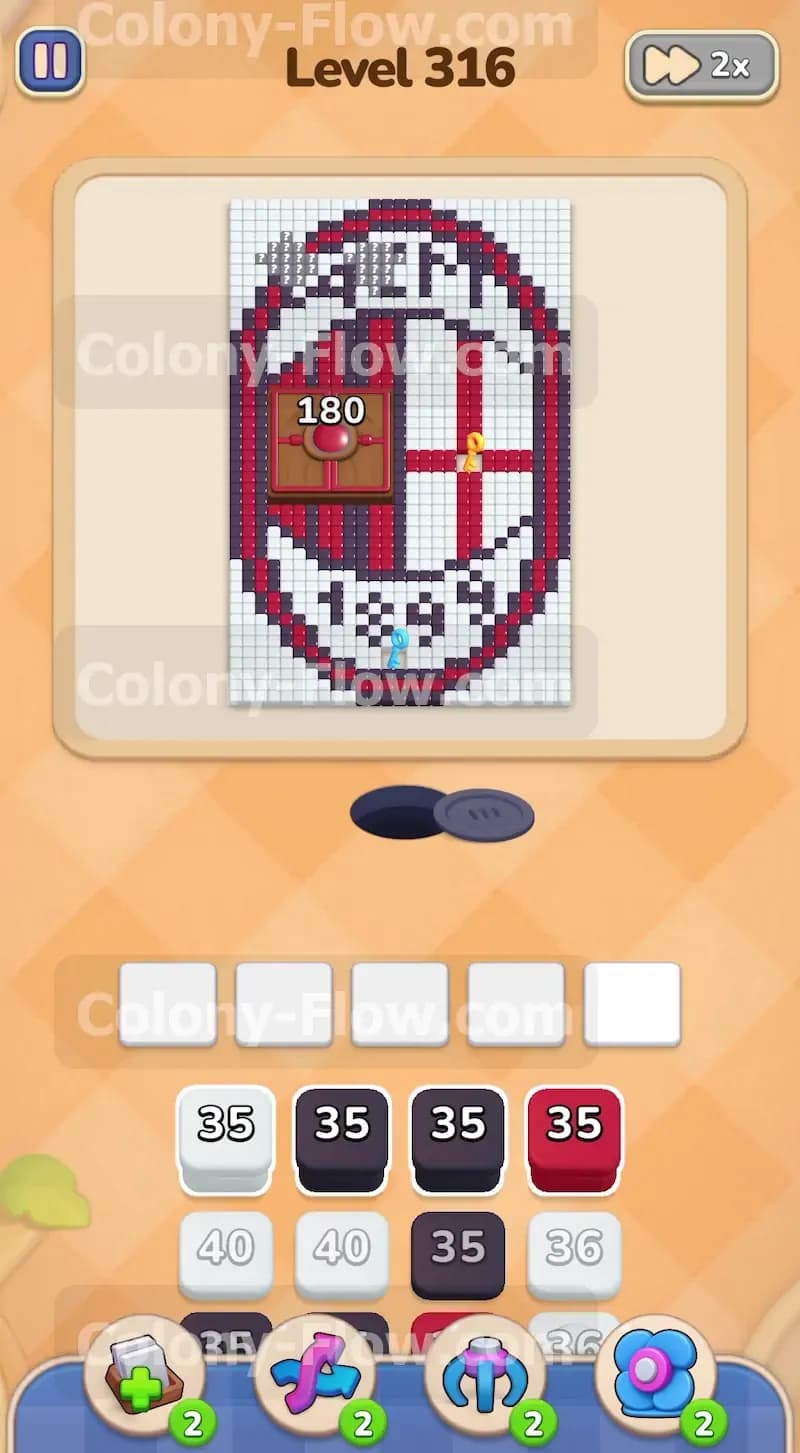
What You Are Working With
The board features a large oval crest designed in pixel art. The outer edge is a thick black border that wraps entirely around a white background. Inside this white background you will find vertical red and black stripes along with the letters ACM at the top and the numbers 1899 at the bottom. A giant Hungry Door sits directly in the middle of the design completely blocking the center stripes. This door displays the number 180 and requires red ants to open it. You will also notice two light blue keys resting on the board. The first key sits near the bottom right on the white background tiles. The second key rests slightly to the left near the bottom among the red and black stripes. Your tray at the bottom of the screen contains white blocks, black blocks, and red blocks with various numbers like 35 and 40. One of your black blocks in the tray has a yellow lock on it. You cannot pull this locked block until you collect a key.
What It Takes to Clear Level 316 Board
You win the level when your ants eat every single pixel tile and the board is completely empty. The core challenge is managing your five waiting slots at the bottom of the screen. If you pull blocks into all five slots and none of those ants have an open path to reach their matching color you lose the level instantly. You must constantly balance hitting the center Hungry Door with clearing the outer borders. Every move you make needs to keep at least one path open so your ants can continuously stream out of the nest hole. You will send red ants to chip away at the 180 count on the center door while your white and black ants dismantle the outside oval. Collecting both keys is absolutely required to access all your tray blocks and finish the puzzle.
Colony Flow Level 316 Step by Step Solution
Step 1: Open the bottom corners and attack the central obstacle right away.
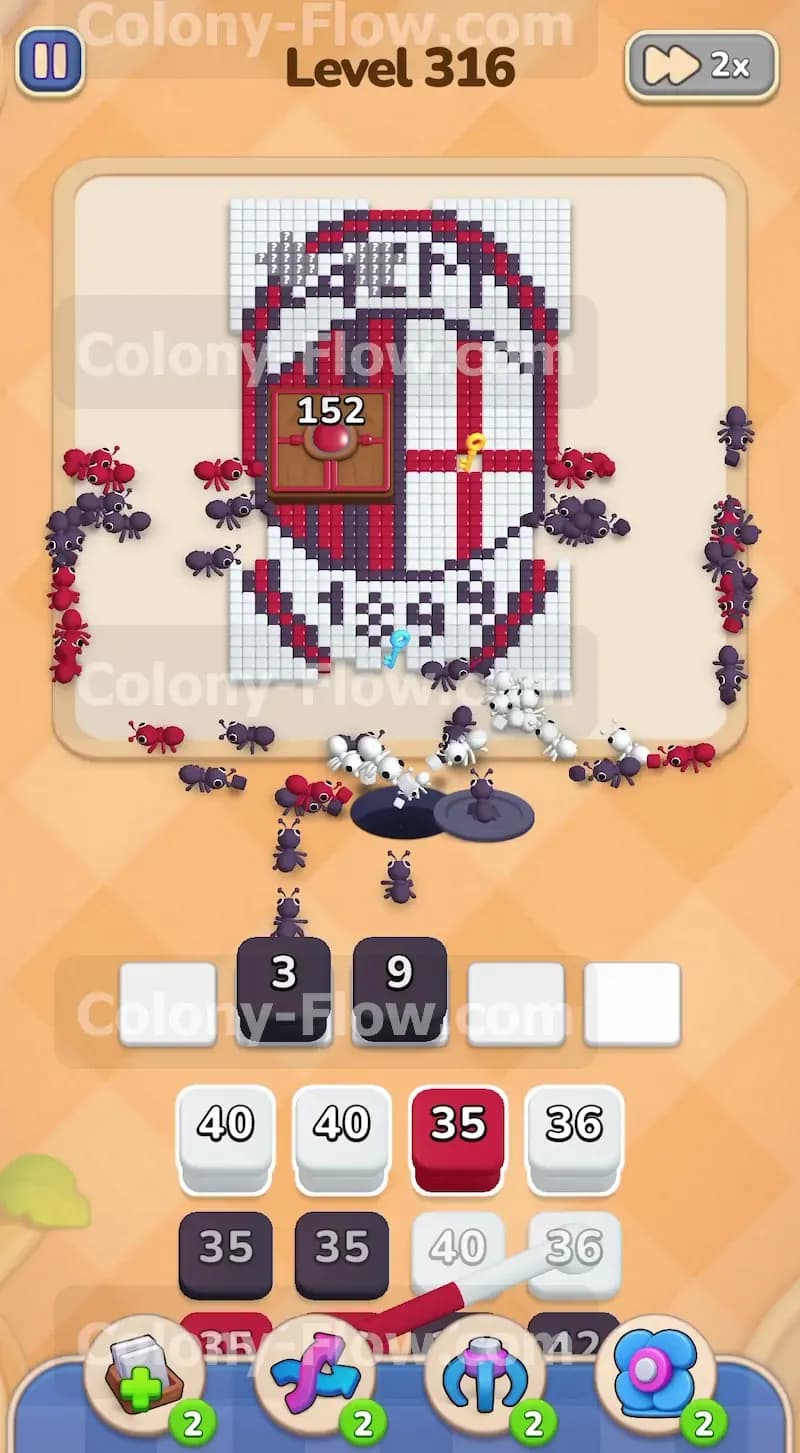
Start the level by pulling the top white block and the top black block from your tray. Both of these blocks hold 35 ants. The white ants will immediately stream to the bottom right and start eating the white background tiles. The black ants will march to the bottom left and carve into the black outer border. Next you must pull a red block into your waiting slots. These red ants have a direct open path to the giant Hungry Door in the center. Sending them right away starts dropping that massive 180 count down to a more manageable number. This opening sequence ensures you have three active colors moving at once. Keeping multiple paths busy prevents your five slots from jamming early on. You never want to leave a slot filled with a block that is just waiting around.
Step 2: Grab the first key to unlock your trapped tray blocks.
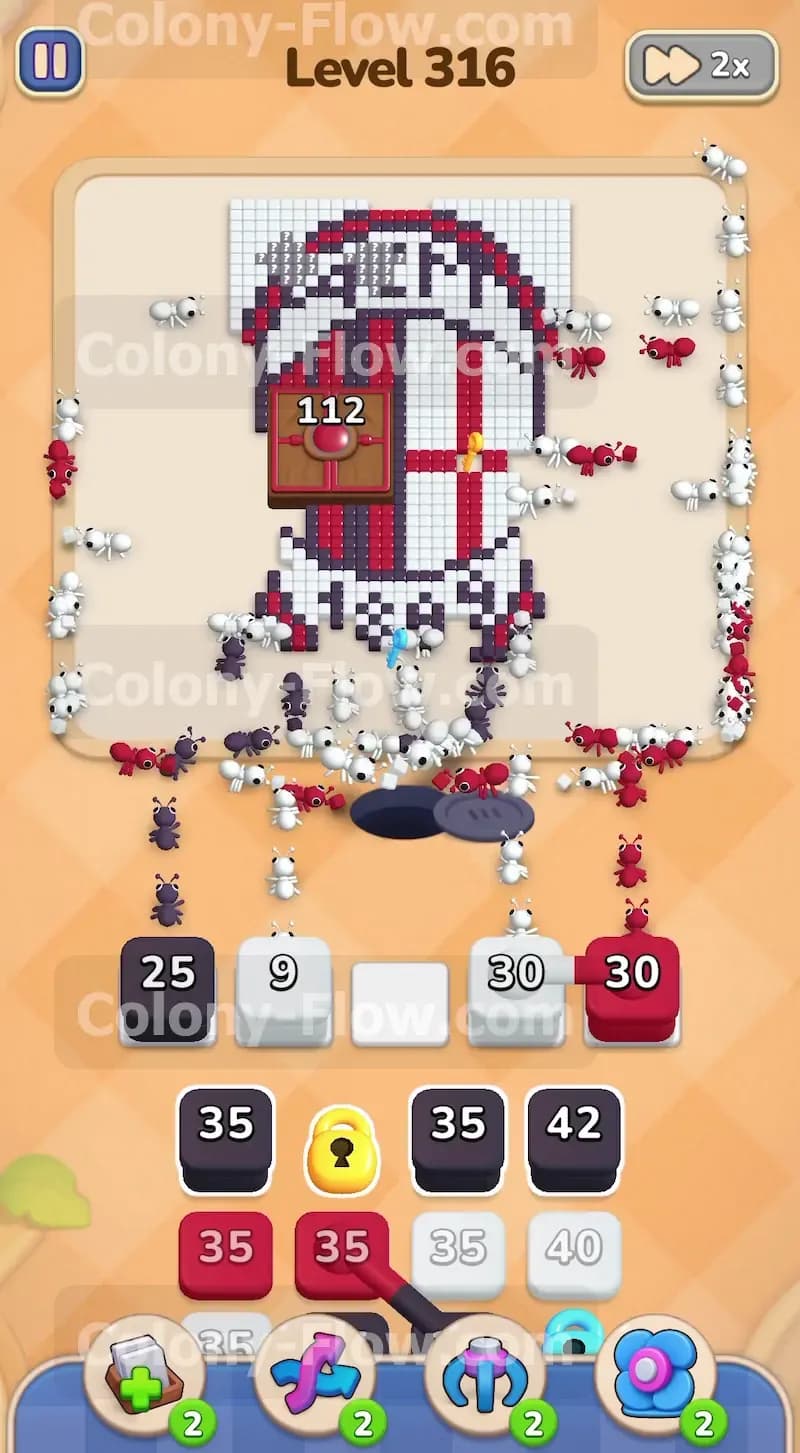
Your white ants are currently working their way along the bottom right side of the board. You need them to reach the first light blue key resting on the white tiles. Pull another large white block from your tray to keep the momentum going. As the white ants clear the specific white tiles under the key they will automatically collect it. This action immediately removes the yellow lock from the black block down in your tray. You now have access to the crucial black ants needed to clear higher up the border. During this time you should pull another red block into your slots. You want a constant stream of red ants hitting the Hungry Door to bring its count down past 152. Always make sure the red ants have an open lane before you pull their block.
Step 3: Push your ants higher up the sides of the oval border.
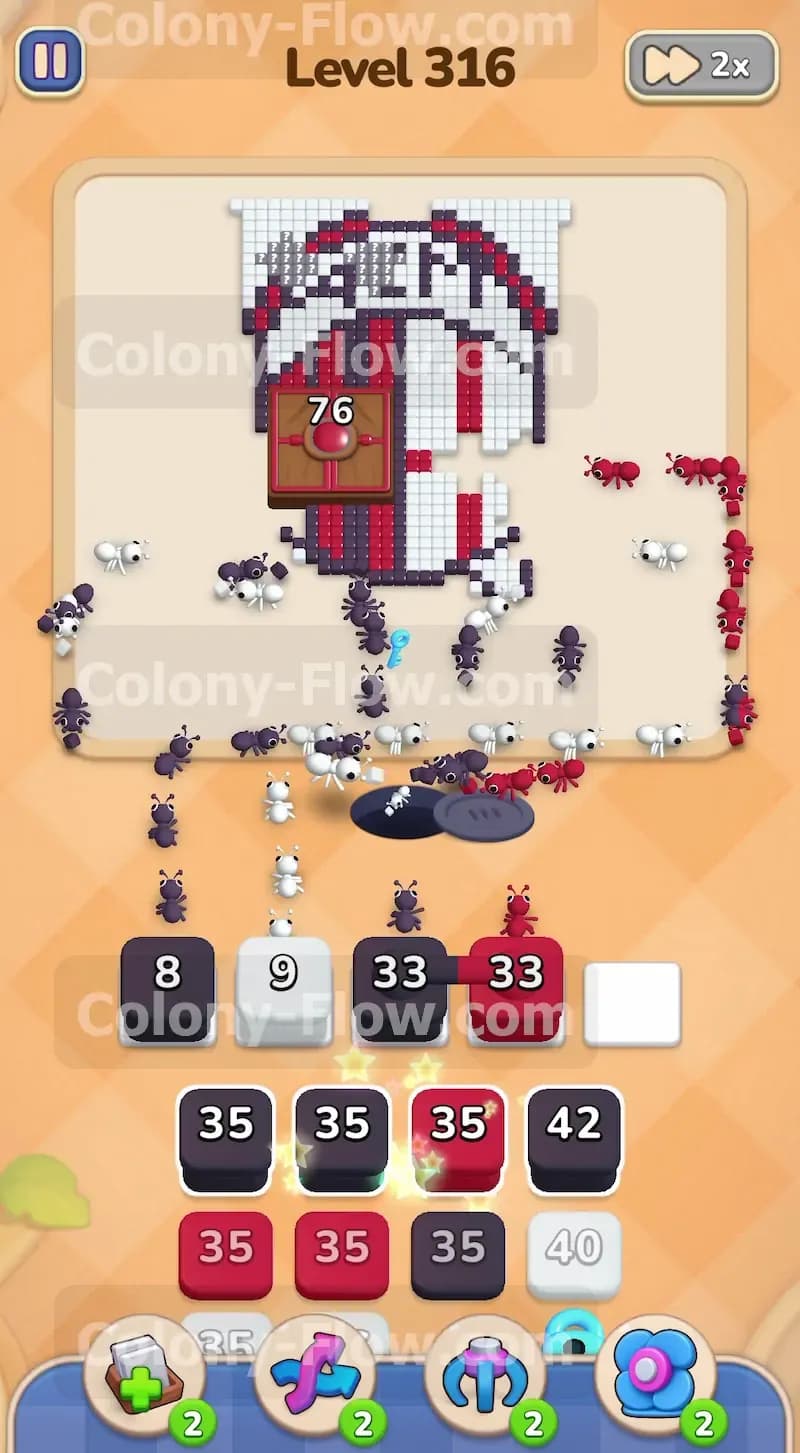
With the first key collected you can safely pull the newly unlocked black block. Add another black block and a white block to the waiting slots to keep the pressure on the outside edges. The black ants will push higher up the left side of the oval border and start rounding the curve. The white ants will continue up the right side of the white background area. You must monitor your five waiting slots very closely here. The paths on the sides can get narrow and slow down the ants. If you pull too many black blocks at once they might sit in the slots for a long time and leave no room for the red blocks you still need. Keep feeding one red block at a time to lower the Hungry Door count down toward 112 and then 76.
Step 4: Breach the inner stripes and secure the second light blue key.
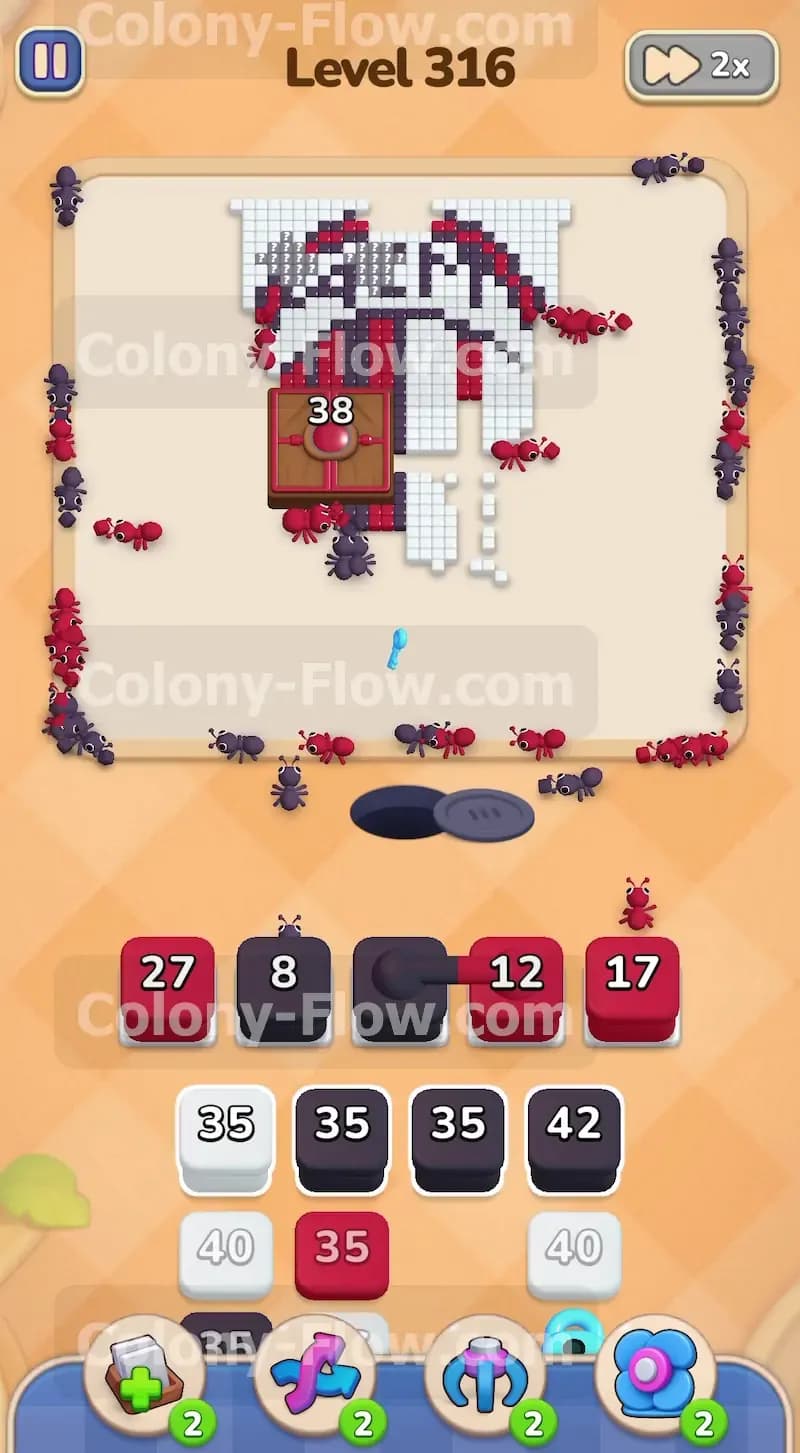
The bottom section of the outer border is now fully clear. This opens new paths leading into the center vertical stripes and the 1899 numbers. Pull a red block and a black block to send ants into these inner areas. As the ants eat the lower stripes they will expose the second light blue key. This key sits just below the Hungry Door area on a white tile. Keep pulling white and black blocks to clear the tiles around this second key. Collecting it ensures any remaining hidden locks in the deeper layers of your tray will vanish. You still need to maintain the attack on the central door so bring up another red block. The door count should drop down to 38 and then into single digits as your red ants swarm it. By this point your tray slots will be clearing out much faster.
Step 5: Destroy the Hungry Door completely to open the middle paths.
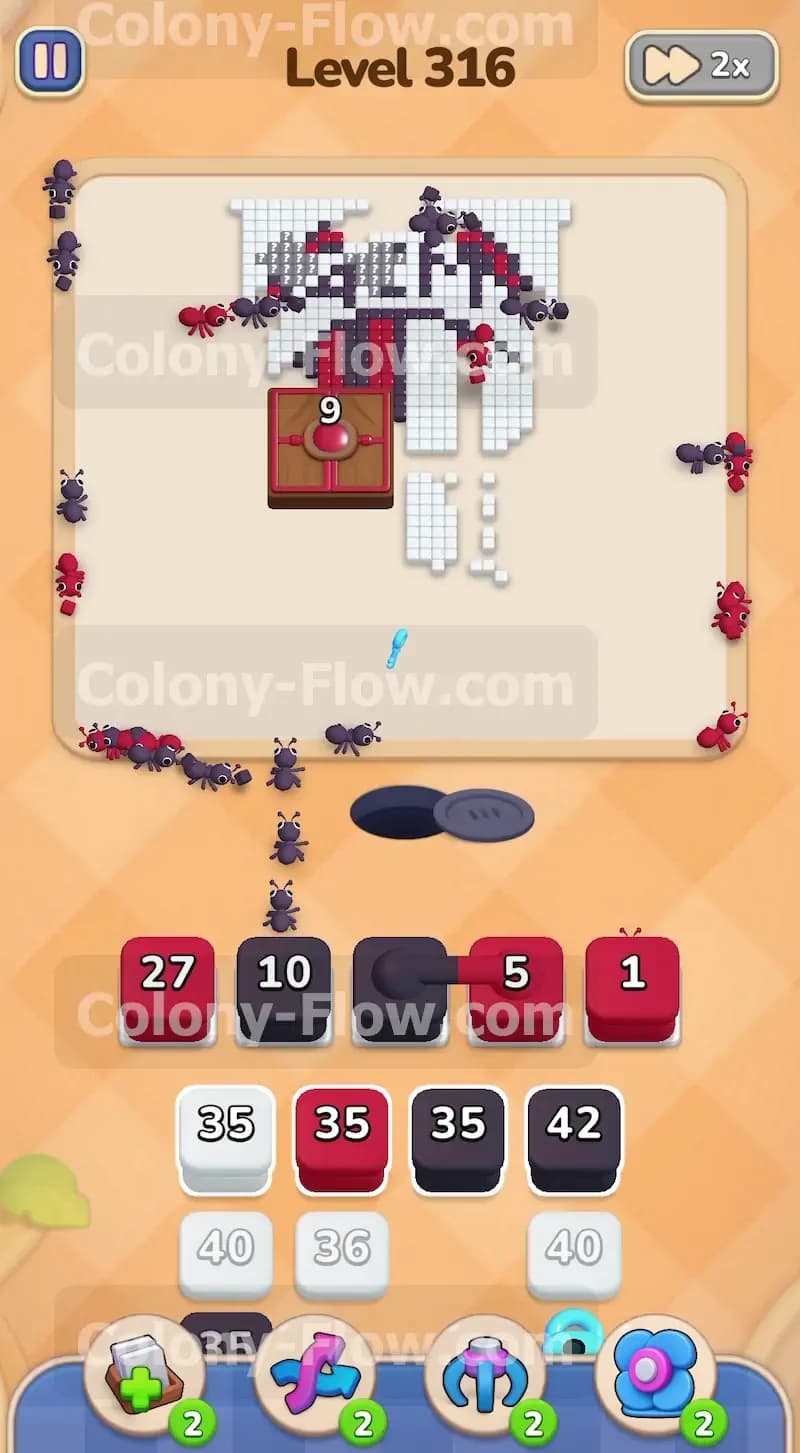
The giant obstacle in the center is finally almost broken. Pull your remaining low value red blocks into the slots. The red ants will rush the center and drop the door count from 9 down to zero. The Hungry Door will completely shatter and vanish from the board. This massive clearance is incredibly satisfying because it reveals the hidden red and black tiles that make up the very center of the logo. Breaking the door is a massive tactical advantage because it frees up the center paths. Your slots are much safer now that ants can move freely directly through the middle of the screen instead of walking all the way around the outside edges.
Step 6: Flood the large top background area with white ants.
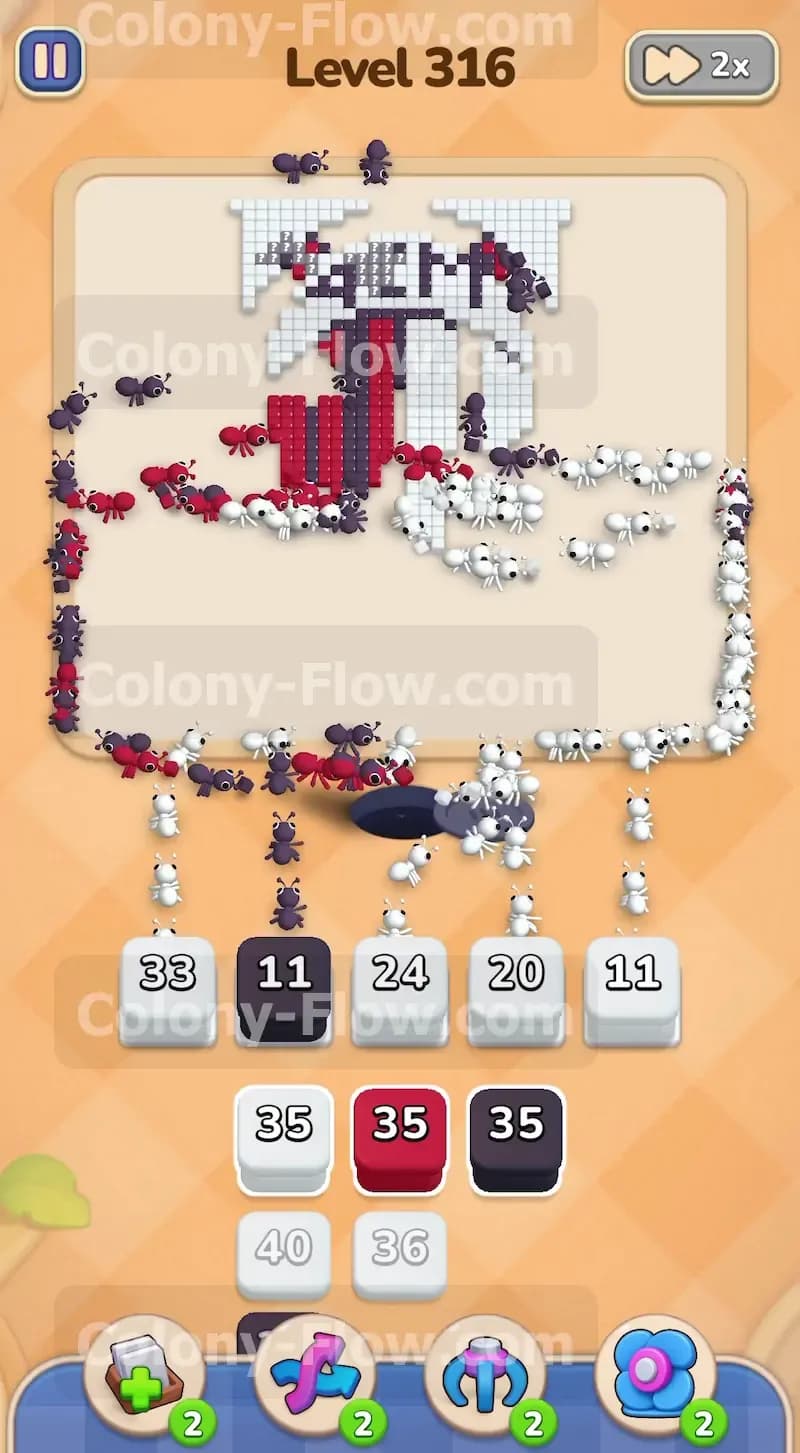
You now have total access to the large remaining chunks of white background at the top of the design. Your tray contains several large white blocks holding numbers like 33 and 24. Pull three white blocks into your waiting slots all at once. The white ants will divide and conquer the upper left and upper right sections simultaneously. Because the center is clear they have no trouble finding fast and open routes to the top. Watch the numbers on your blocks count down quickly as the white tiles disappear. Do not pull any black or red blocks until the white ants have significantly thinned out the background. Giving the white ants priority prevents any accidental slot jams while these massive white blocks empty out.
Step 7: Finish the top letters and clear the final remaining tiles.
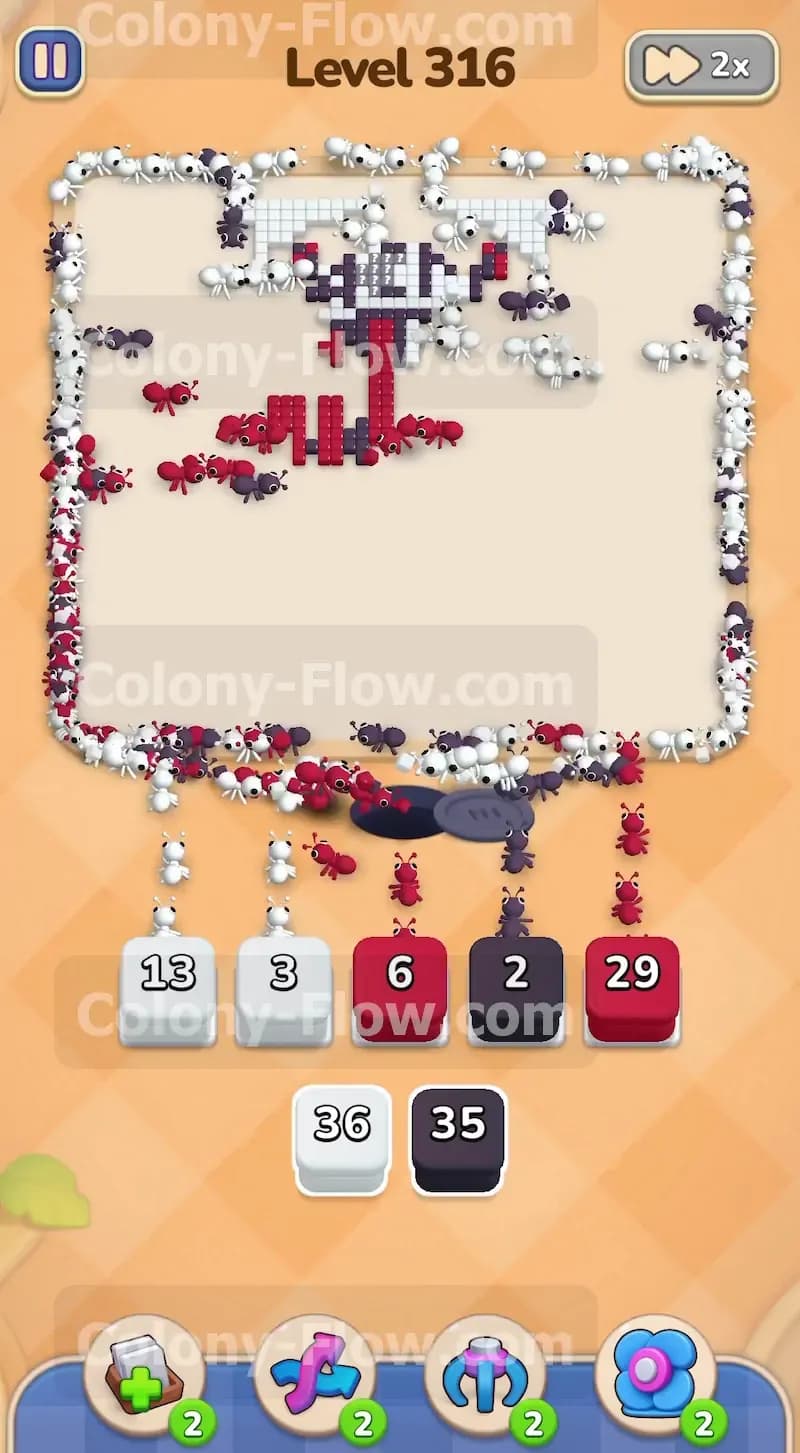
Only the top letters spelling ACM and the central vertical stripes remain on the board. Pull your final black blocks and red blocks from the very bottom of the tray. The black ants will march to the top and devour the black letters. The red ants will clean up the last few vertical red stripes in the middle of the crest. Since the board is completely open now your ants will rapidly move directly to their targets without any delays. Keep an eye on your slots and pull the last few blocks as space allows. The final ants will clear the last pixel tile and return to the nest hole to complete the level. You have successfully managed your tray and dismantled the logo.
Final Thought
Colony Flow Level 316 requires a steady rhythm of attacking the center door while simultaneously clearing the outside edges. You simply cannot ignore the giant center obstacle or you will run out of room in your tray very quickly. Keeping at least one open path for your ants is the secret to avoiding a frustrating loss. If you find any of these block pulling sequences hard to follow in text you should watch the video above this article. Seeing the exact timing of the moves will help you perfect your own strategy and claim the win.