Colony Flow Level 596 Walkthrough Solution & Guides | How to solve Colony Flow 596

Guide By Liam Stone
Updated on August 1, 2026
Prefer to watch rather than read? The Level 596 walkthrough video sits right above this guide.
Video doesn't match your screen?
Game updates frequently scramble layouts! Try our AI Screenshot Solver first to find your exact board instantly, or report broken guides to our team.
Playing Colony Flow Level 596 brings a fun pixel art challenge with some heavy obstacles blocking your open paths. I recently cleared this exact board and learned the best way to manage the tray so the ants never get stuck. You will need a careful strategy to break through the massive connected boxes in the middle of the screen without jamming your available space. I will walk you through the exact sequence of moves to keep your colony moving and clear the entire board.
Colony Flow Level 596 Overview
What You Are Working With
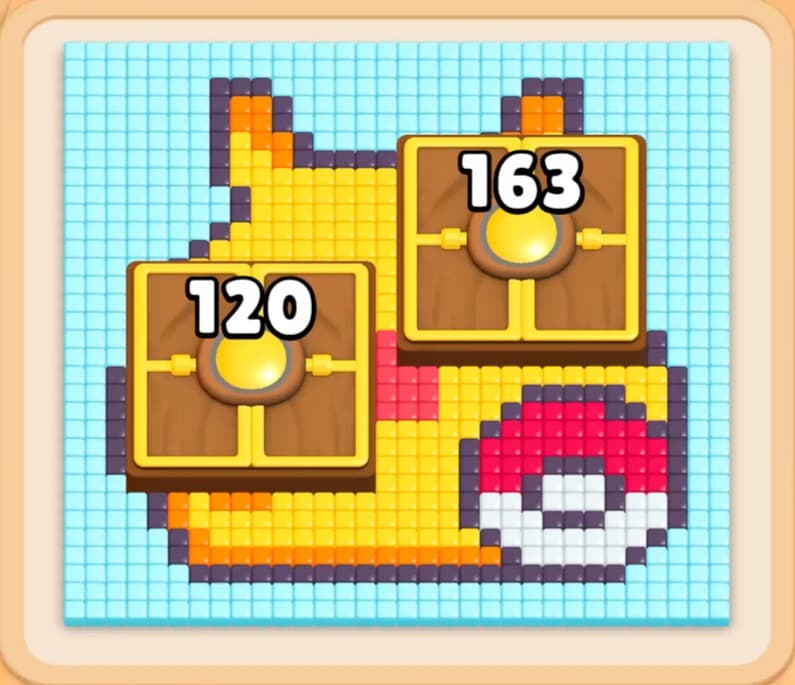
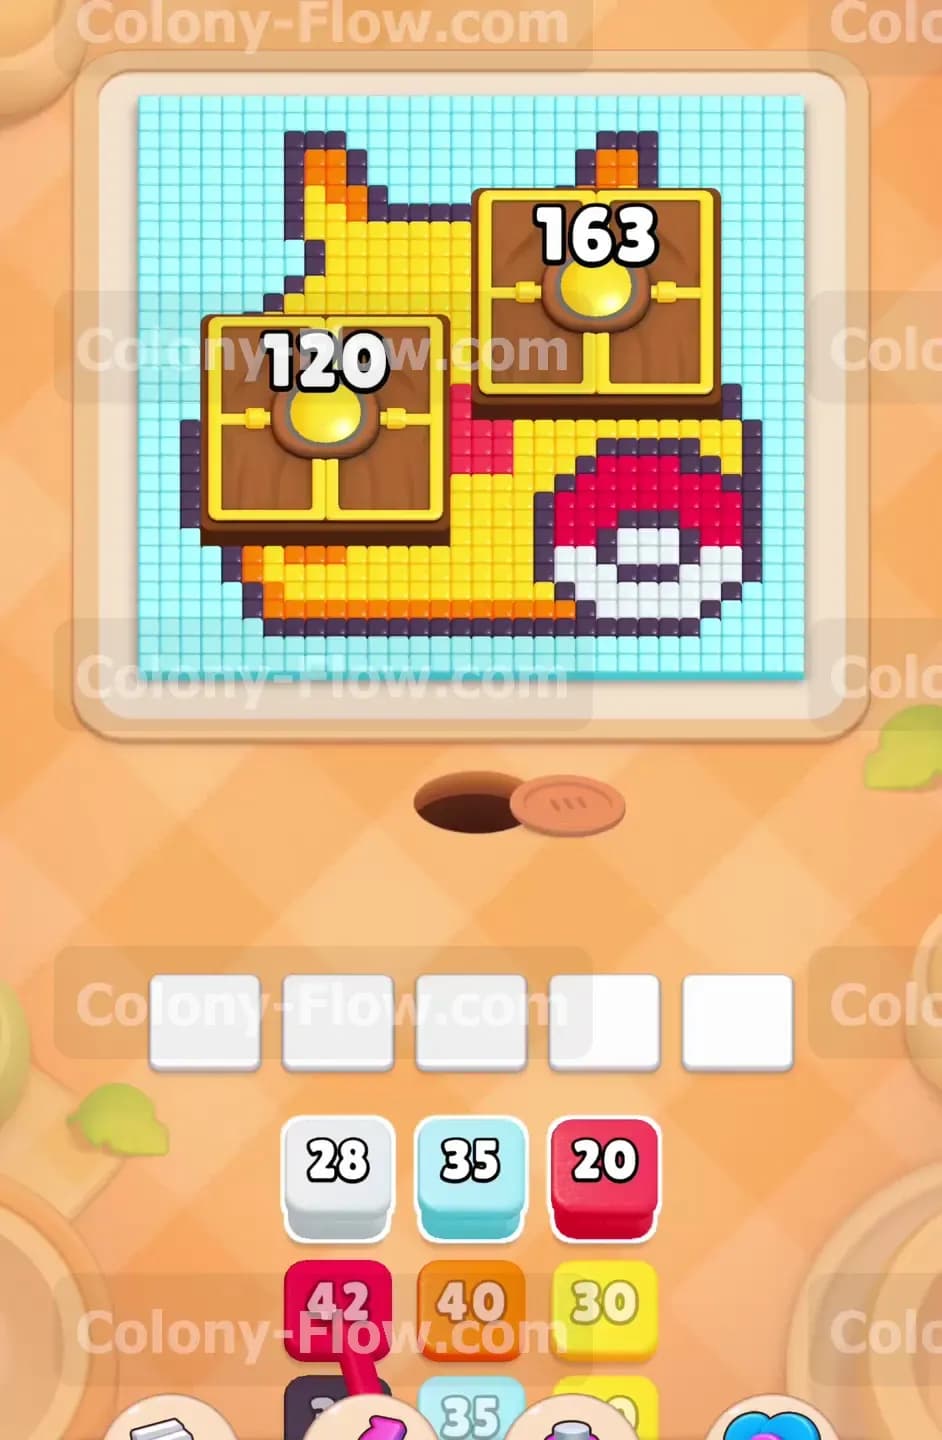
The board features a pixel art picture of a yellow electric monster character holding a red and white ball. A large grid of light blue tiles surrounds the character to form the background. The most dangerous elements on this level are the two large connected boxes sitting right on top of the character face. These wooden chests display high starting numbers of 120 and 163. They are linked together and physically block a massive portion of the yellow and red tiles underneath them.
Your tray at the bottom holds a mix of block colors needed to clear the picture. You have light blue blocks for the grid background and black blocks for the character outlines. You have red and white blocks for the round ball and the character cheeks. You also have orange and yellow blocks for the main body shading and body solid colors. Above these colorful options sit exactly five empty waiting slots.
What It Takes to Clear Level 596 Board
Winning this level requires you to clear every single colored tile on the board so the picture completely disappears. The ants emerge from the nest hole and follow the open routes to eat their matching colors. The biggest threat is filling all five waiting slots with blocks that have no clear path to their target colors. If your waiting slots fill up and no ants can move out of the nest hole, you fail the level immediately. To avoid a dead end you must always verify that the colors you pull from the tray have an open route on the board. The connected boxes demand constant attention because you must feed the ants to chip away at those large numbers. Once the connected boxes break apart the final central sections of the character become accessible and the ants can finish the job.
Colony Flow Level 596 Step by Step Solution
Step 1: Open the outer paths by clearing the background and outlines
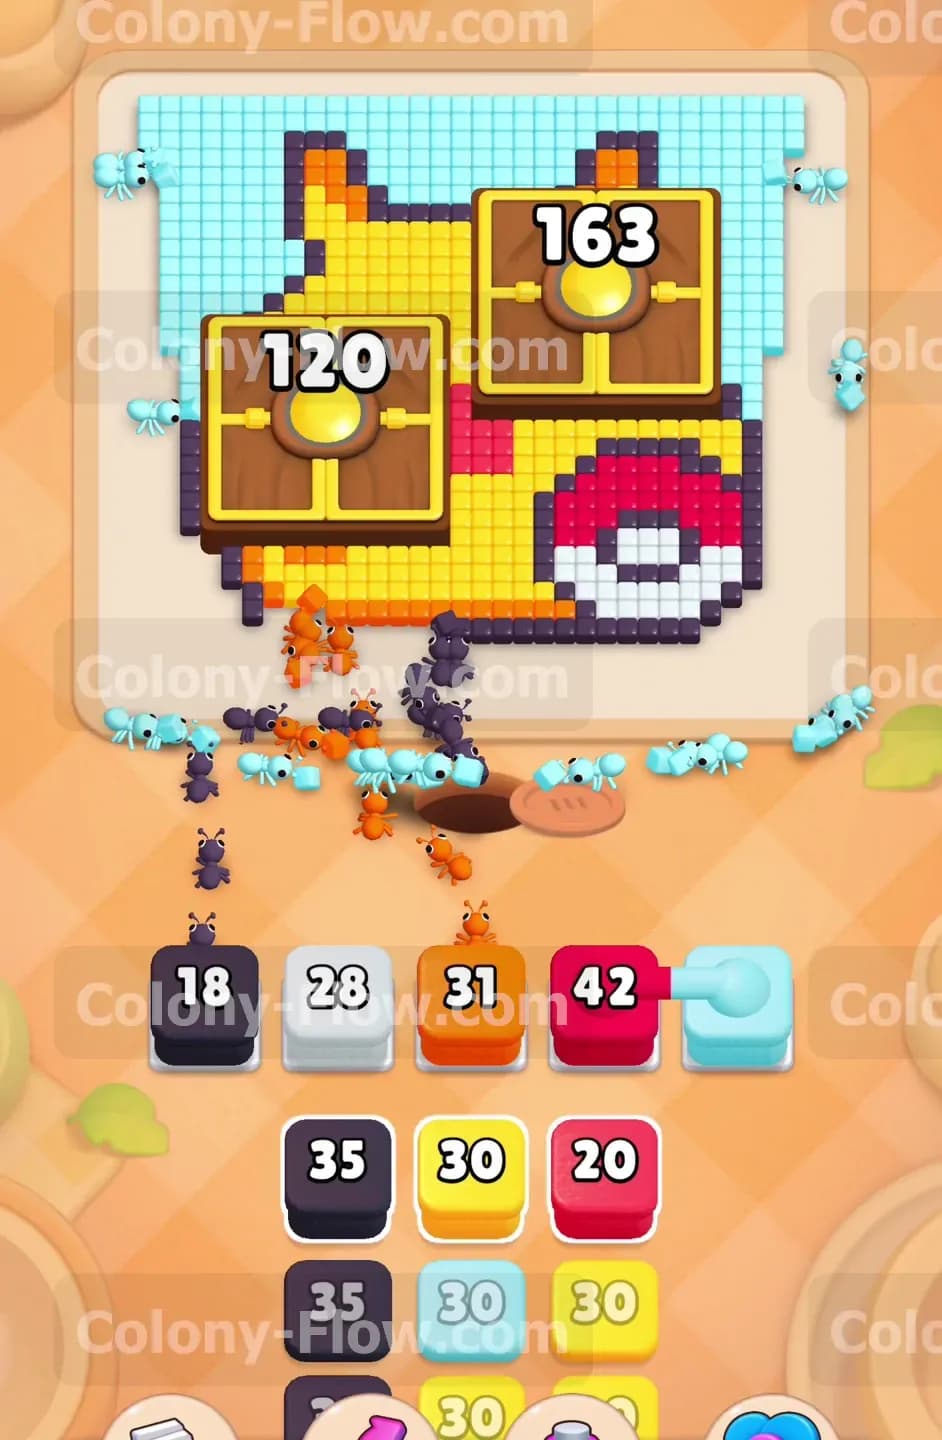
Start your run by focusing on the completely accessible outer edges of the picture. Pull a light blue block and a black block into your waiting slots to get the colony moving. The ants will immediately march out of the nest hole and head straight for the light blue grid background and the black character outlines. You can also pull a white block and an orange block at this early stage. The white ants will target the center of the ball while the orange ants begin eating the shaded edges of the character body. This combination keeps a steady stream of ants moving out of the nest hole. Your waiting slots remain safe because all these colors have immediate access to their matching tiles. The connected boxes will also start taking their first hits as the ants clear the surrounding tiles and reduce the numbers down from 120 and 163.
Step 2: Maintain the flow with red blocks to target the ball and cheeks
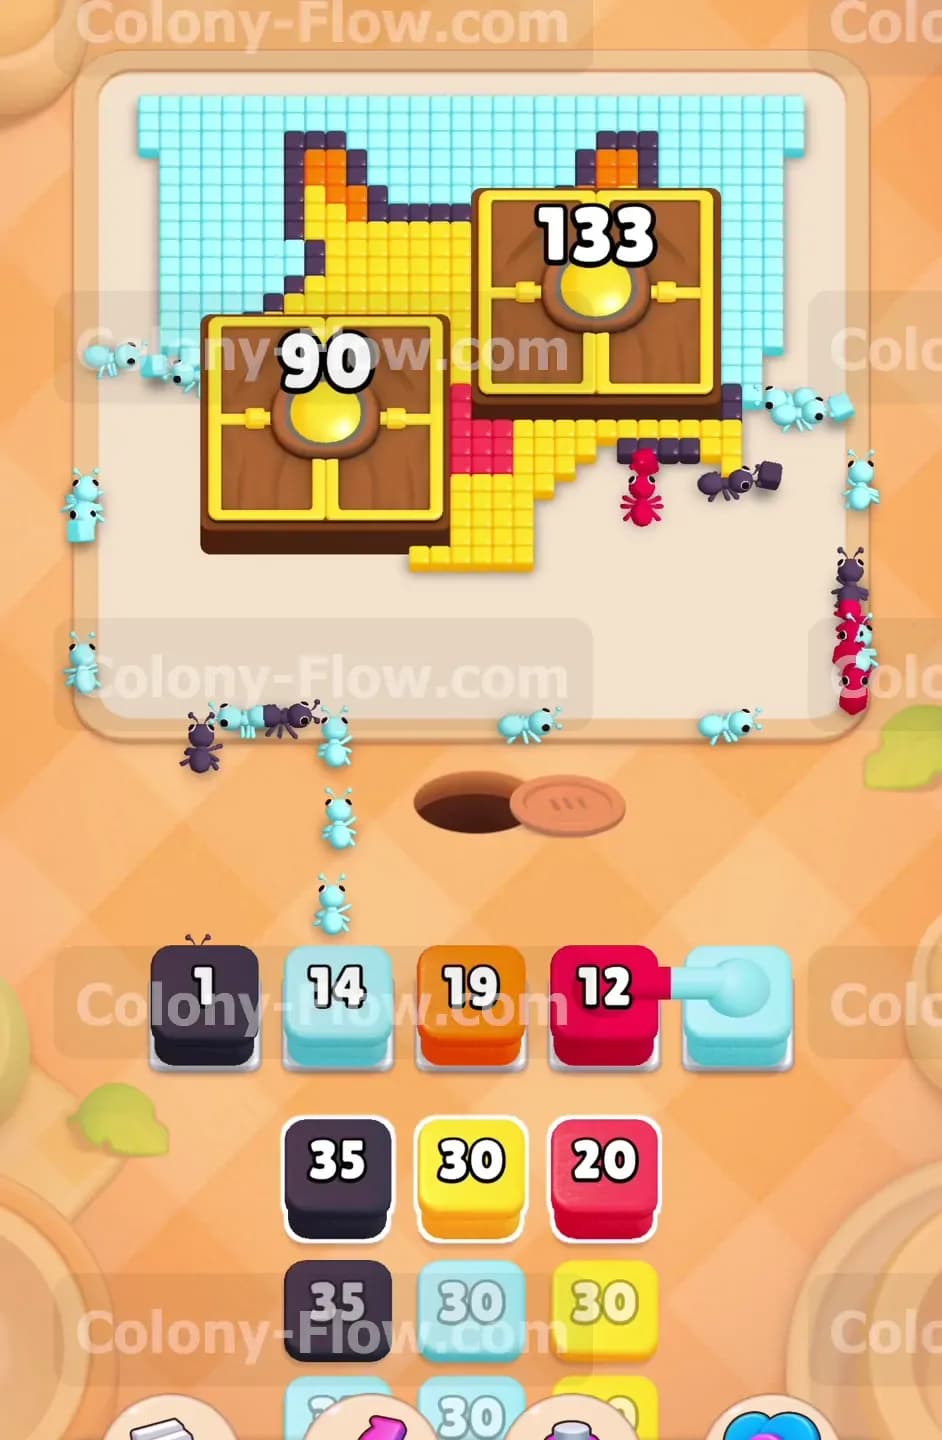
Once the first wave of ants opens up more physical space you need to bring in red blocks. Pull a red block into the tray alongside another light blue block. The light blue ants have a massive amount of background tiles to eat so you should almost always keep a light blue block active in your slots. The red ants will flood toward the bottom right section of the board to clear the top half of the ball and the red cheeks on the character face. Keeping these paths open ensures the ants never stop moving and your blocks count down quickly. The numbers on the two connected boxes will continue to drop steadily as the ants eat nearby tiles. You will soon see the left box fall to 90 and the right box fall to 133. This proves your current pathing strategy is working perfectly.
Step 3: Introduce yellow blocks to attack the main character body
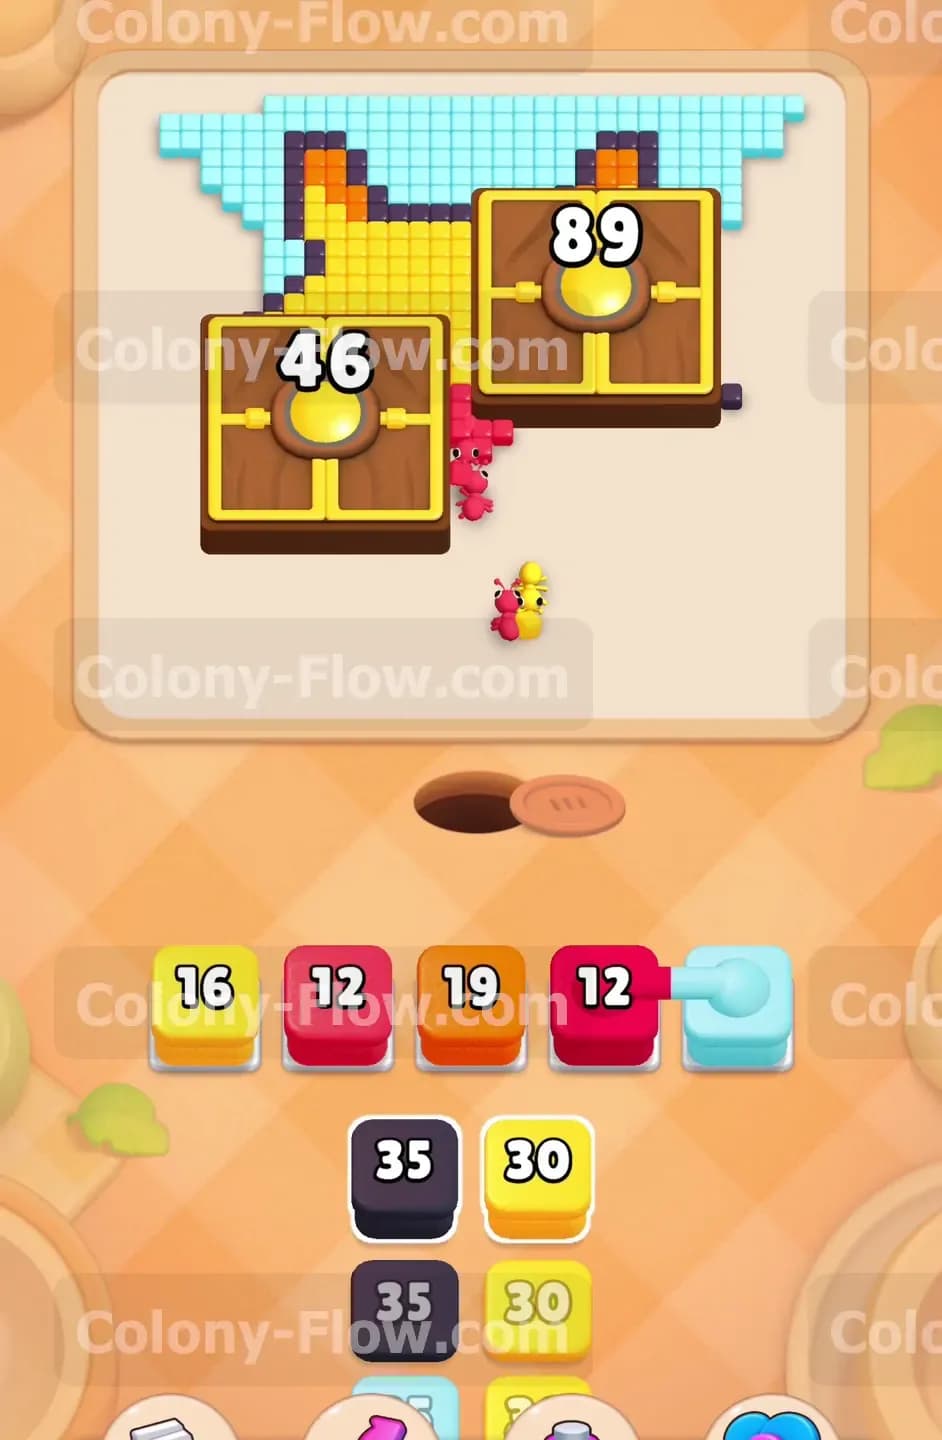
The black and orange ants have cleared enough of the outer boundary to expose the solid yellow body underneath. Now is the perfect time to pull your first yellow block from the tray. The yellow ants will pour out of the hole and head straight for the main sections of the character. You should also pull another red block and another orange block to keep chipping away at the remaining detail pieces. Your waiting slots will get a bit crowded here but the constant movement of the yellow ants prevents a complete jam. As the yellow tiles disappear the connected boxes take massive damage from the incoming colony. You will watch the numbers plummet down to 46 and 89 in a very short amount of time. This rapid drop happens because the connected boxes rest directly over the dense yellow sections of the board.
Step 4: Focus entirely on breaking the first connected box
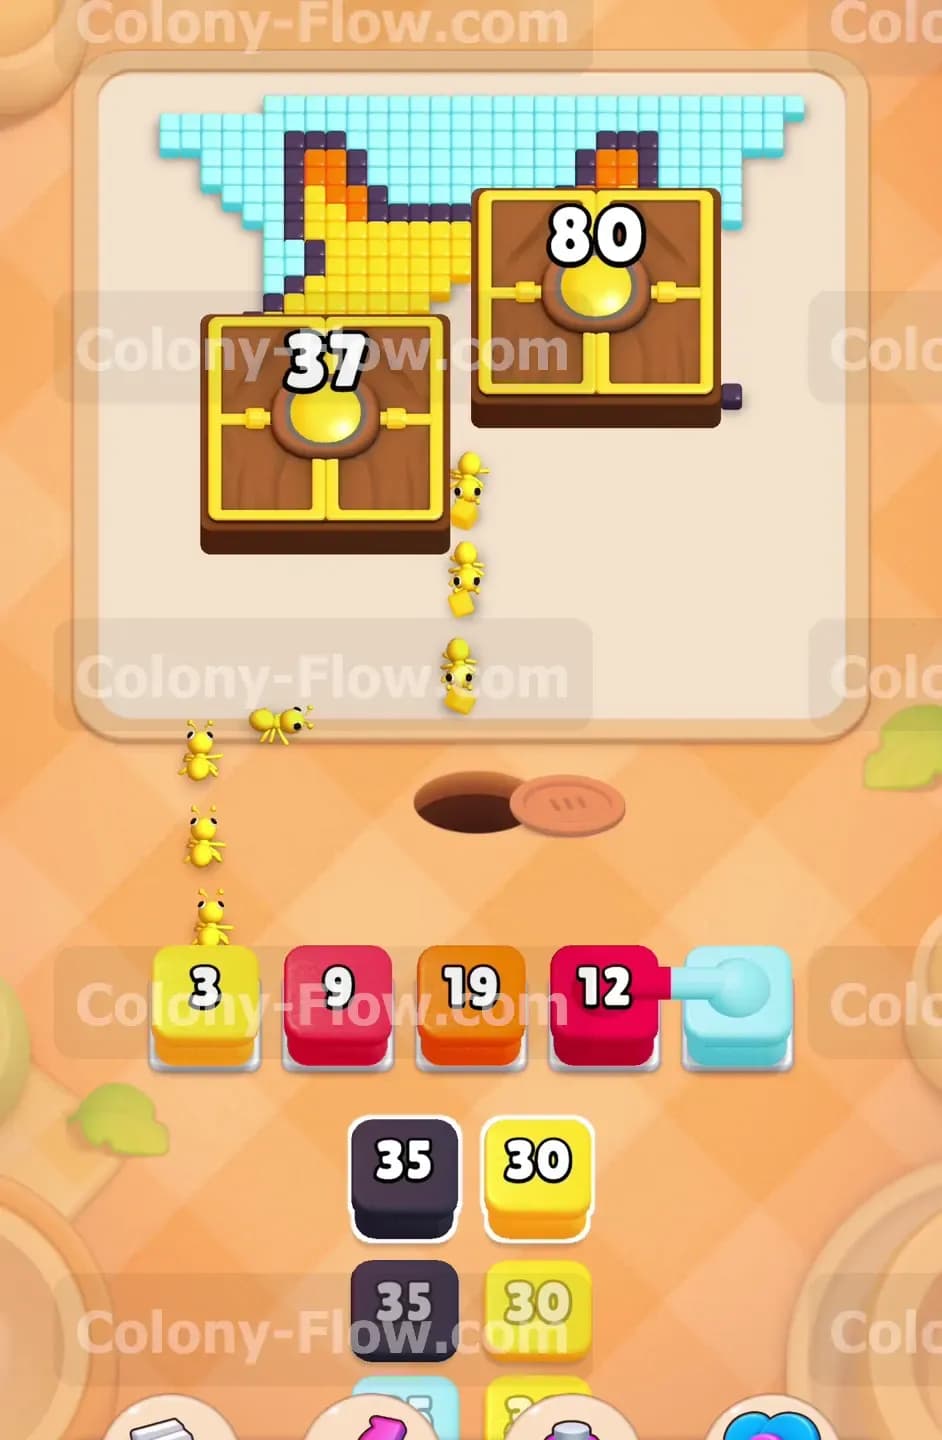
Your main goal right now is to shatter the left connected box to free up the center of the board. Pull another yellow block and keep your light blue block active to maintain a dual flow. The ants will eat through the remaining yellow tiles on the left side of the character face. The number on the left box will drop down to 37 and then finally break completely. When this box shatters it reveals the remaining yellow and black tiles underneath. This is a critical moment because it opens up brand new paths for your ants to travel. You must resist the urge to pull colors randomly from the tray. Look at the newly exposed area and only pull colors that match the completely available tiles.
Step 5: Shatter the second connected box to reveal the final tiles
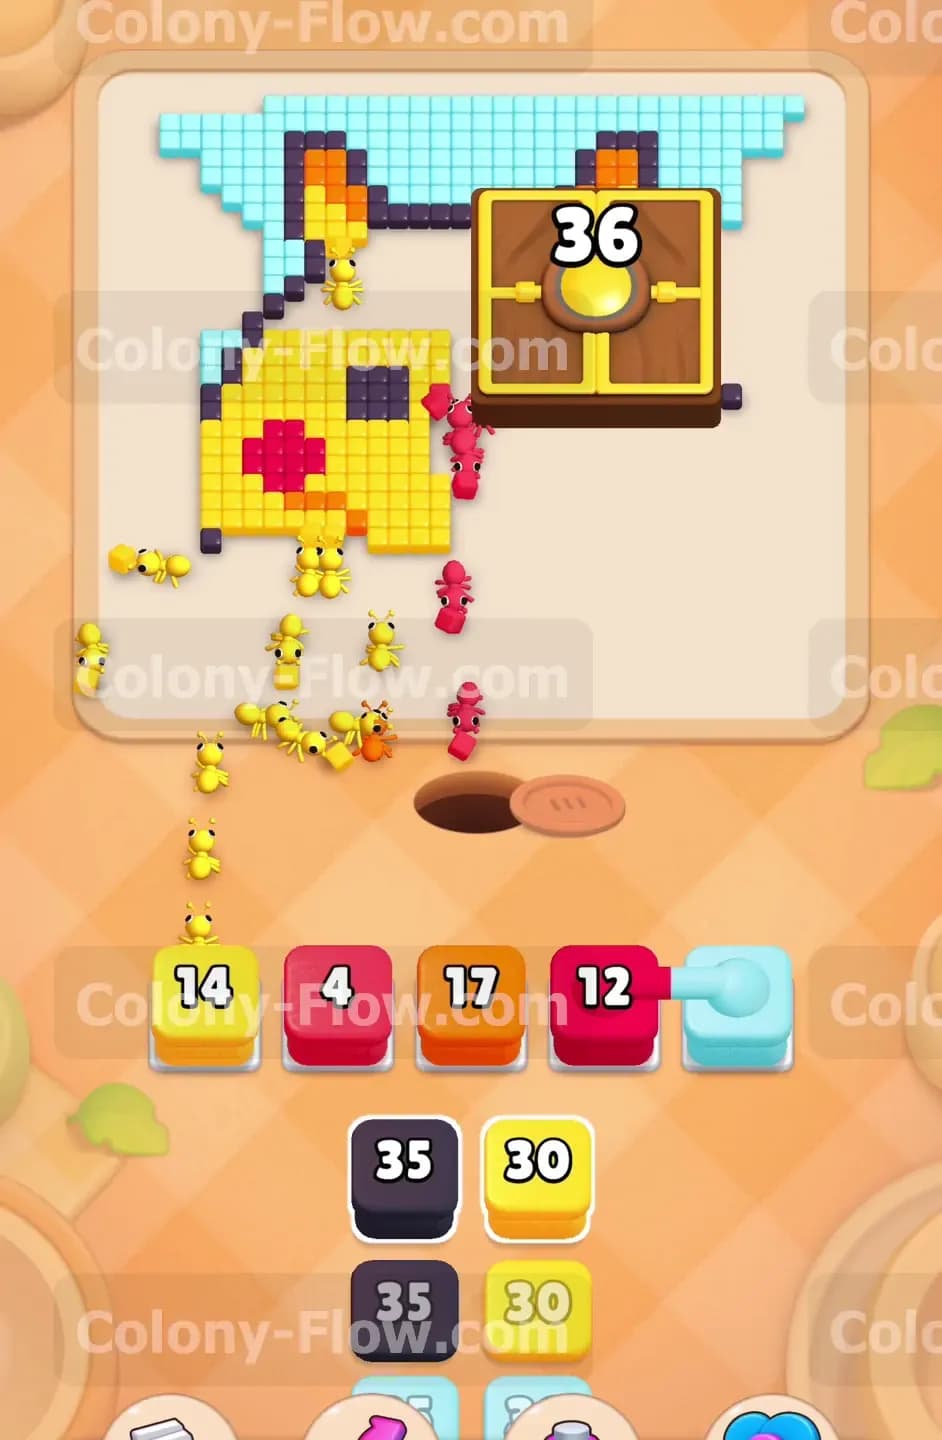
With the left side completely clear you can direct your attention to the right connected box. The number on it will be sitting around 36 and dropping fast. Pull yellow blocks and red blocks from the tray to send ants into this newly opened space. The ants will quickly devour the tiles supporting the right box. Once that final connected box shatters the most difficult part of the board is officially over. The entire center of the pixel art picture is now fully exposed to the colony. You will see a large empty space where the wooden chests used to be. The remaining tiles are mostly concentrated around the top ears of the character and the far outer edges of the light blue background grid. Your waiting slots are completely safe as long as you match your next pulls to these specific remaining border areas.
Step 6: Deploy black and light blue blocks for the cleanup phase
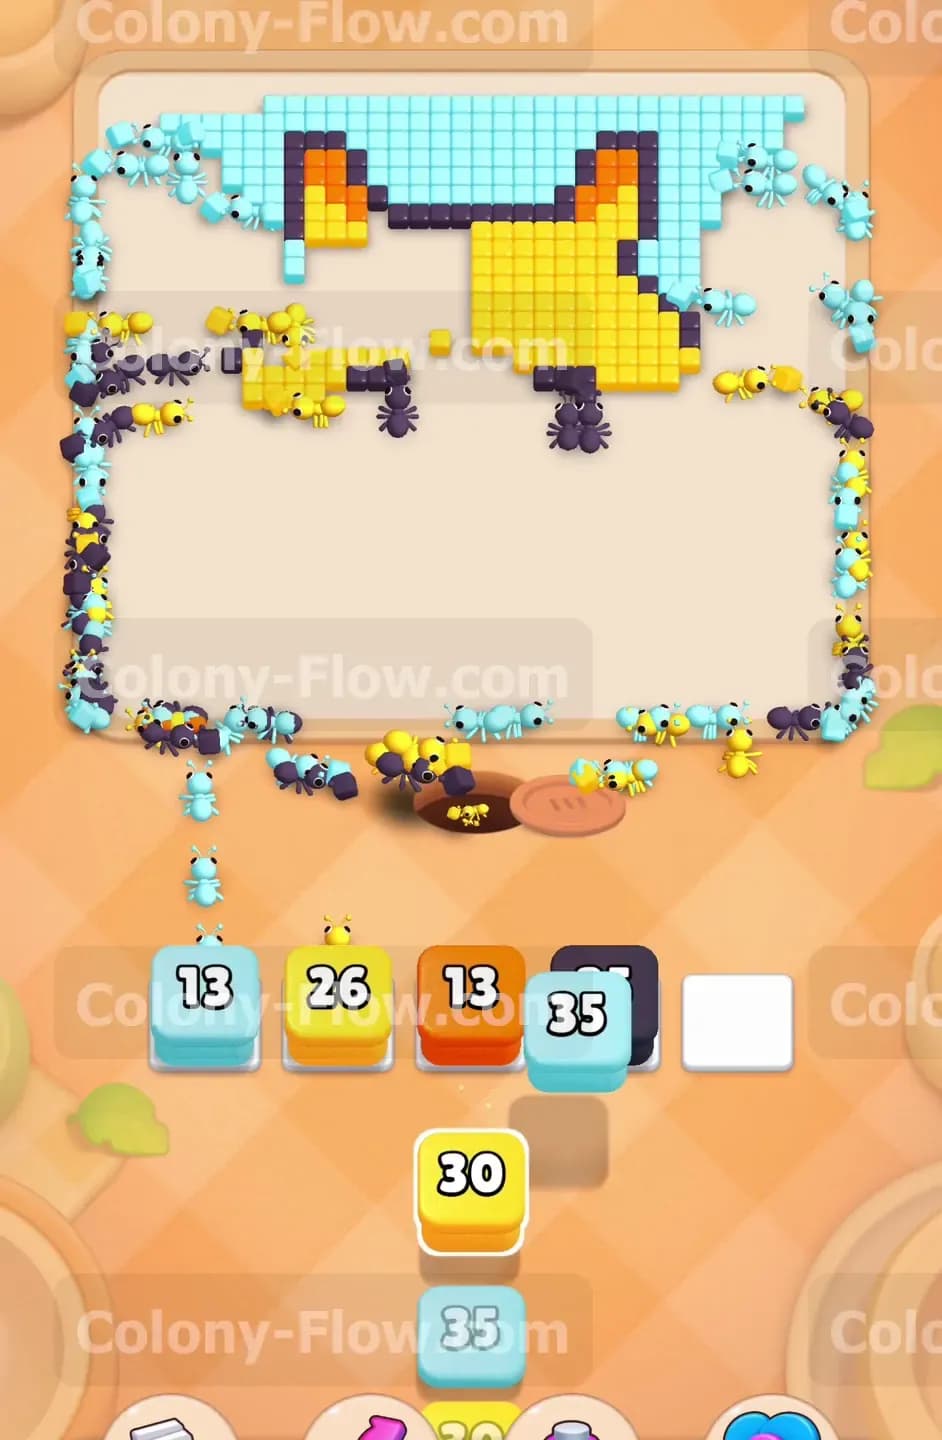
The board is now wide open and you have plenty of room to maneuver the colony. Pull a black block to clear the remaining outlines around the pointy ears at the top. Pull a light blue block to send a massive swarm of ants to eat the remaining grid tiles along the top border. You can also pull an orange block to finish the last few shaded spots near the bottom. The ants will form a long perimeter ring around the cleared center space as they march toward their outer targets. The numbers on your tray blocks will count down quickly because multiple paths are open at the exact same time. This rapid clearing speed means your waiting slots empty out almost as fast as you can fill them.
Step 7: Clear the final background tiles to finish the level
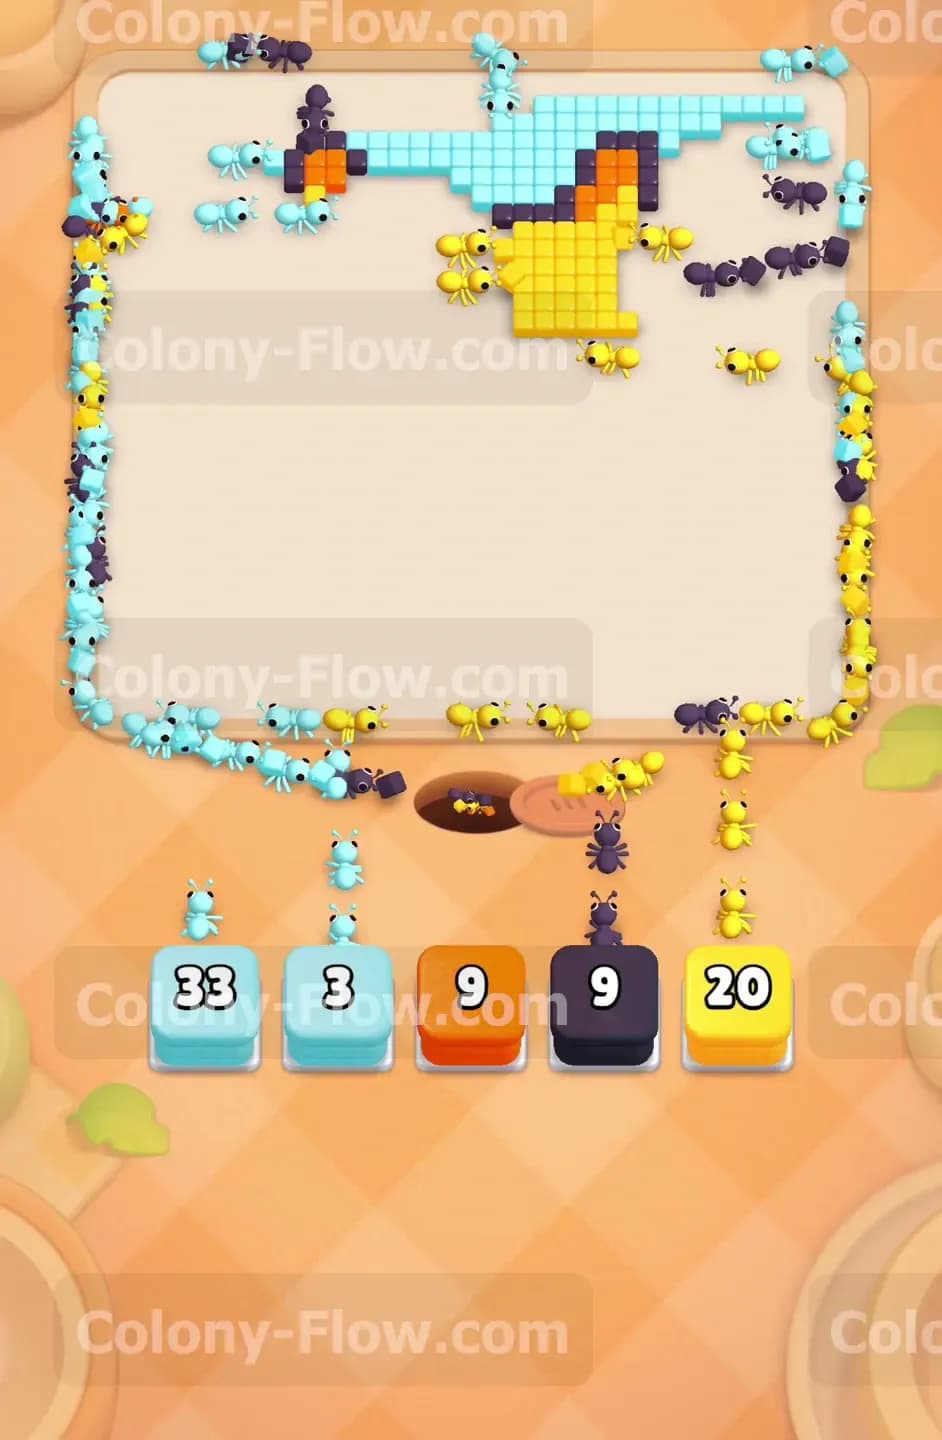
Only a handful of tiles remain scattered across the top edge of the screen. Look at your tray and pull the last light blue block and the last yellow block. The final wave of ants will exit the nest hole and travel all the way to the top left and top right corners of the board. They will eat the last few yellow ear tiles and the remaining light blue grid pieces. Once the very last tile disappears the picture is fully cleared. You have successfully navigated the connected boxes without ever letting your waiting slots jam. The board is entirely empty and you win the level.
Final Thought
This level tests your patience and your ability to manage big obstacles without panicking and pulling the wrong colors. Keeping a constant flow of ants moving around the connected boxes is the real secret to winning without filling your five slots. If any of these text instructions feel hard to visualize I highly encourage you to watch the video above this article. Seeing the ants clear the paths in real time makes it much easier to copy the winning strategy and beat the level yourself.