Colony Flow Level 477 Walkthrough Solution & Guides | How to solve Colony Flow 477

Guide By Liam Stone
Updated on August 1, 2026
You'll find the complete Level 477 walkthrough in the video above if reading isn't what you're after.
Video doesn't match your screen?
Game updates frequently scramble layouts! Try our AI Screenshot Solver first to find your exact board instantly, or report broken guides to our team.
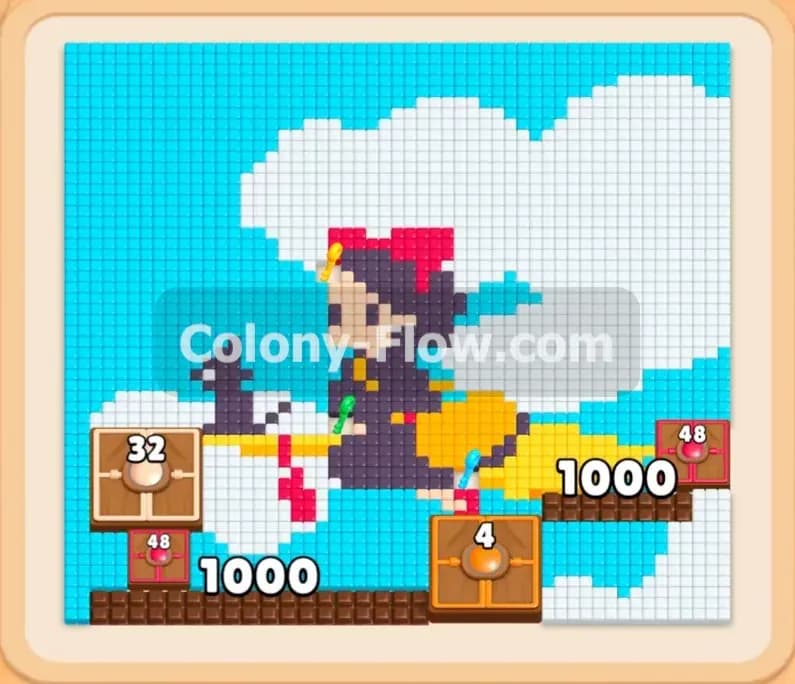
Welcome to Colony Flow Level 477. This puzzle presents a massive pixel art scene of a witch flying on a broom through a cloudy sky. You face a large board with heavy color blocks and several tricky elements hiding in your tray. I played through this one multiple times to find the safest route without jamming the waiting slots.
Colony Flow Level 477 Overview
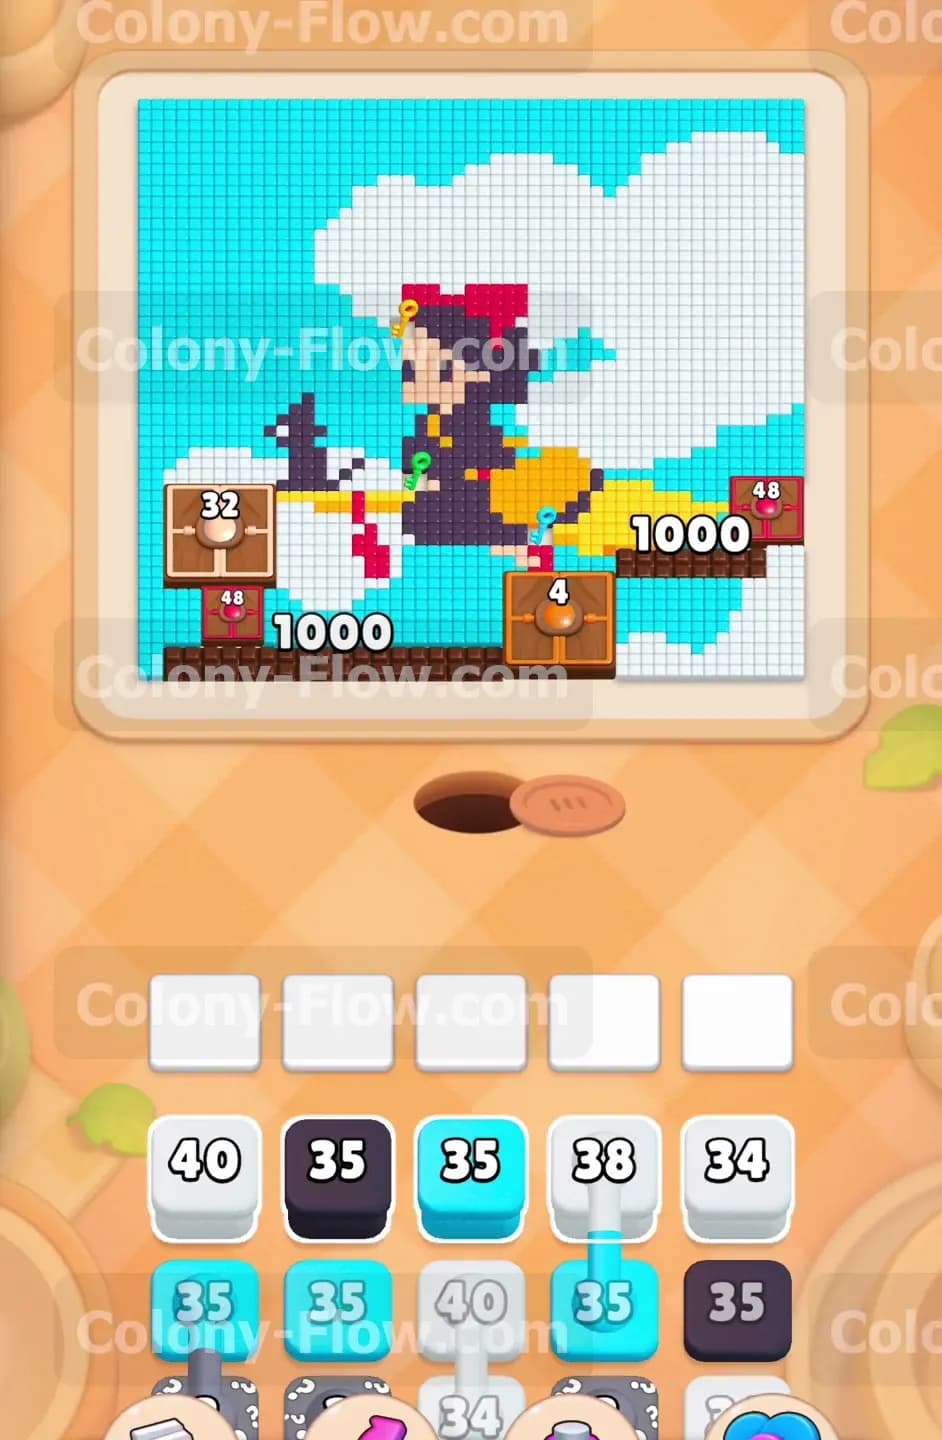
What You Are Working With
The board is dominated by a huge light blue sky and massive white clouds. The central figure features a black dress, a red bow, skin tone pixels, and a bright yellow broom. Your tray at the bottom is packed with high number blocks. You have White 40 and Light Blue 35 blocks right at the top of the stack. Digging deeper reveals special items that complicate your puzzle solving. You will face Connected Boxes where a Light Blue block is physically linked to a Red block. You will also encounter a Lock and Key mechanic with a green lock securing a vital Light Blue block. Further down the stack are Hidden Boxes covered in question marks.
What It Takes to Clear Level 477 Board
Winning means completely dissolving the witch and sky picture without ever dead ending your board. You have exactly five waiting slots at the bottom. If you pull blocks into all five slots and the ants cannot reach the matching colors on the picture, you fail immediately. Clearing this stage requires stripping the massive sky and cloud layers first to open paths to the witch and her broom. You must time your pulls perfectly so the special connected blocks and hidden boxes do not clog your limited tray space. You have to feed the colony in a specific order to keep the swarm moving and the slots open.
Colony Flow Level 477 Step by Step Solution
Step 1: Open the outer sky and cloud boundaries
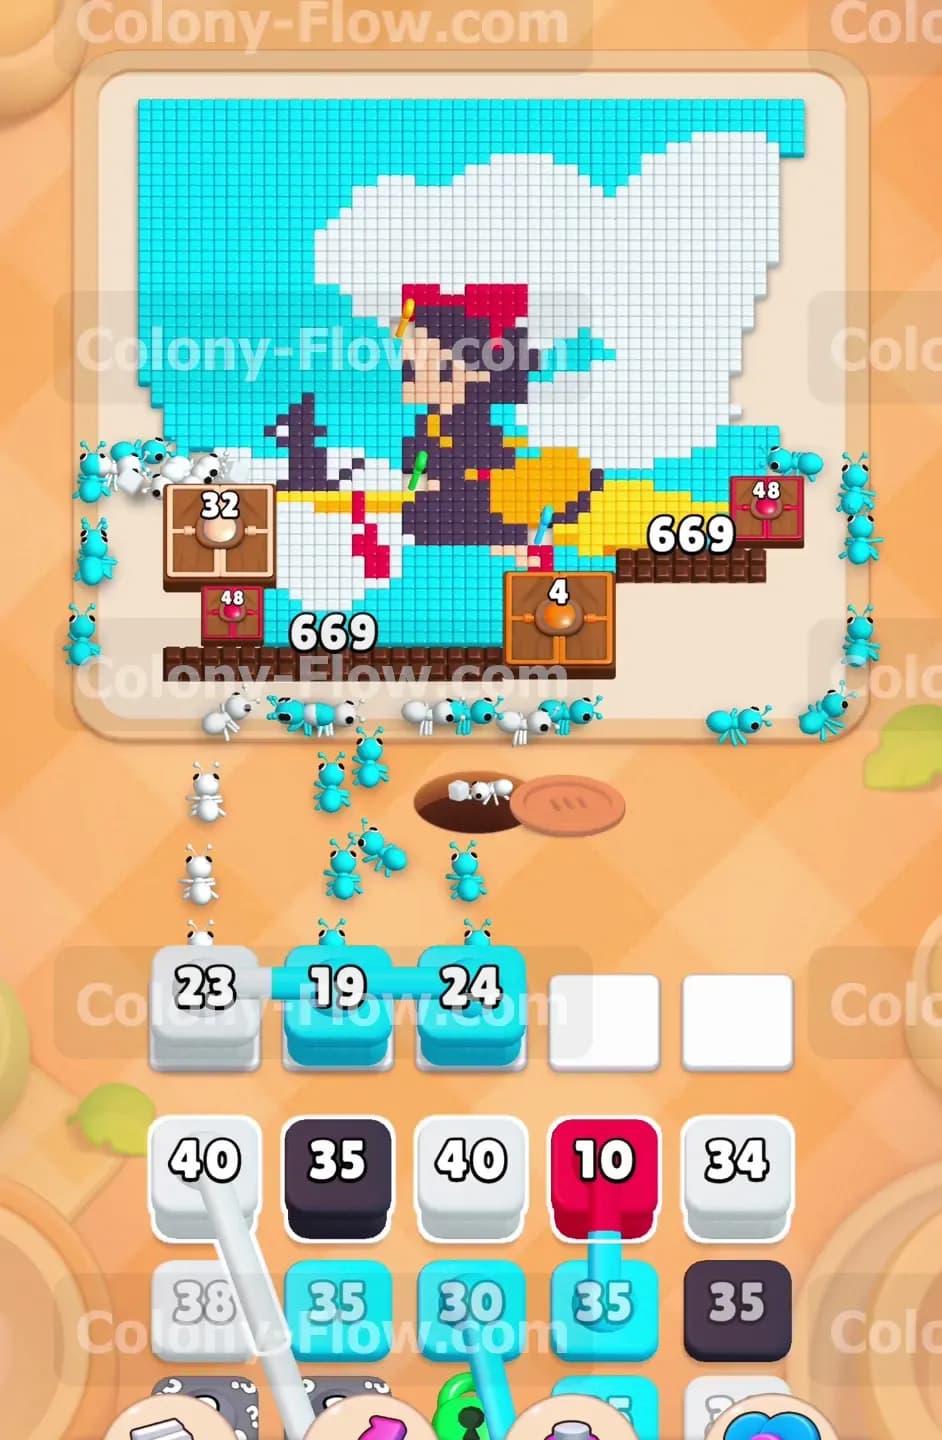
Start by addressing the massive outer edges of the picture. You need to pull a White 40 block and a Light Blue 35 block into your empty slots. The ants will immediately stream out of the nest hole and march toward the exposed light blue sky on the left and the white clouds on the right. Watch the numbers on your blocks count down rapidly as the swarm consumes the outer boundary. Always keep your eyes on the paths. The sky and clouds wrap around the entire scene. Opening these borders early guarantees your ants will always have a valid target for white and light blue colors. A heavy block like a 40 takes a significant amount of time to clear. You must ensure the path stays wide open the entire time so the block eventually leaves your tray.
Step 2: Dig deeper into the blue sky and reveal the green key
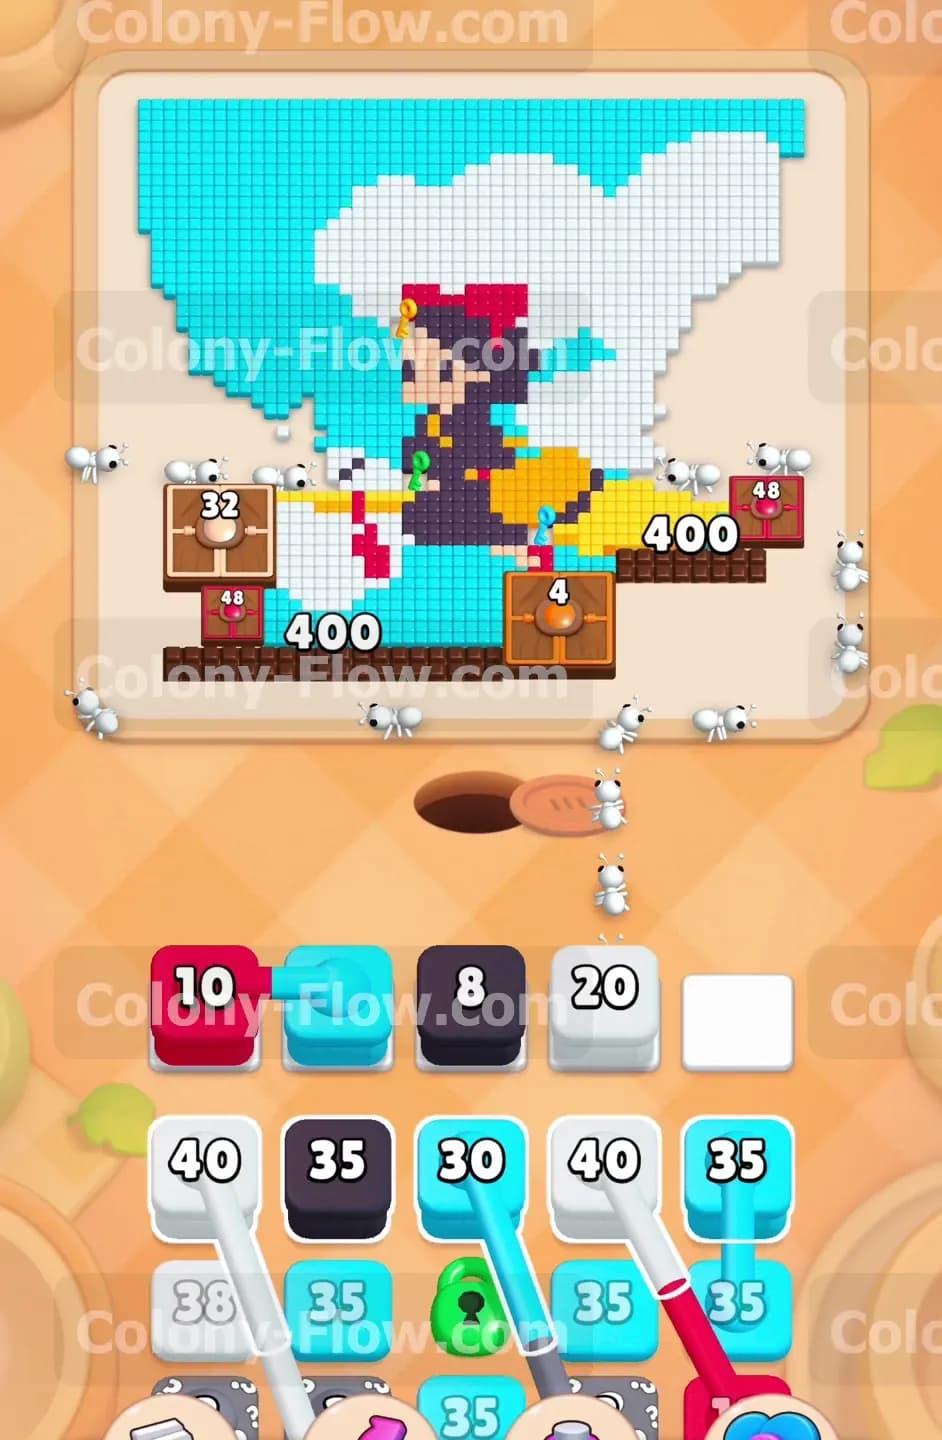
Once your first blocks empty out, pull the next Light Blue 35 and White 38 blocks into the active slots. The ants will push further inward and carve away huge chunks of the background. You will notice a green key sitting on one of the tiles in the sky section. Your ants must eat the tile underneath this key to collect it. You need this key to unlock a Light Blue 30 block sitting in your tray with a green lock on it. Keep feeding the ants light blue blocks until they reach that specific tile. Do not pull any black blocks for the witch yet because the path to her dress is still blocked by the surrounding sky pixels. If you pull a black block now it will sit in your slot and take up valuable space.
Step 3: Collect the green key and deploy the locked block
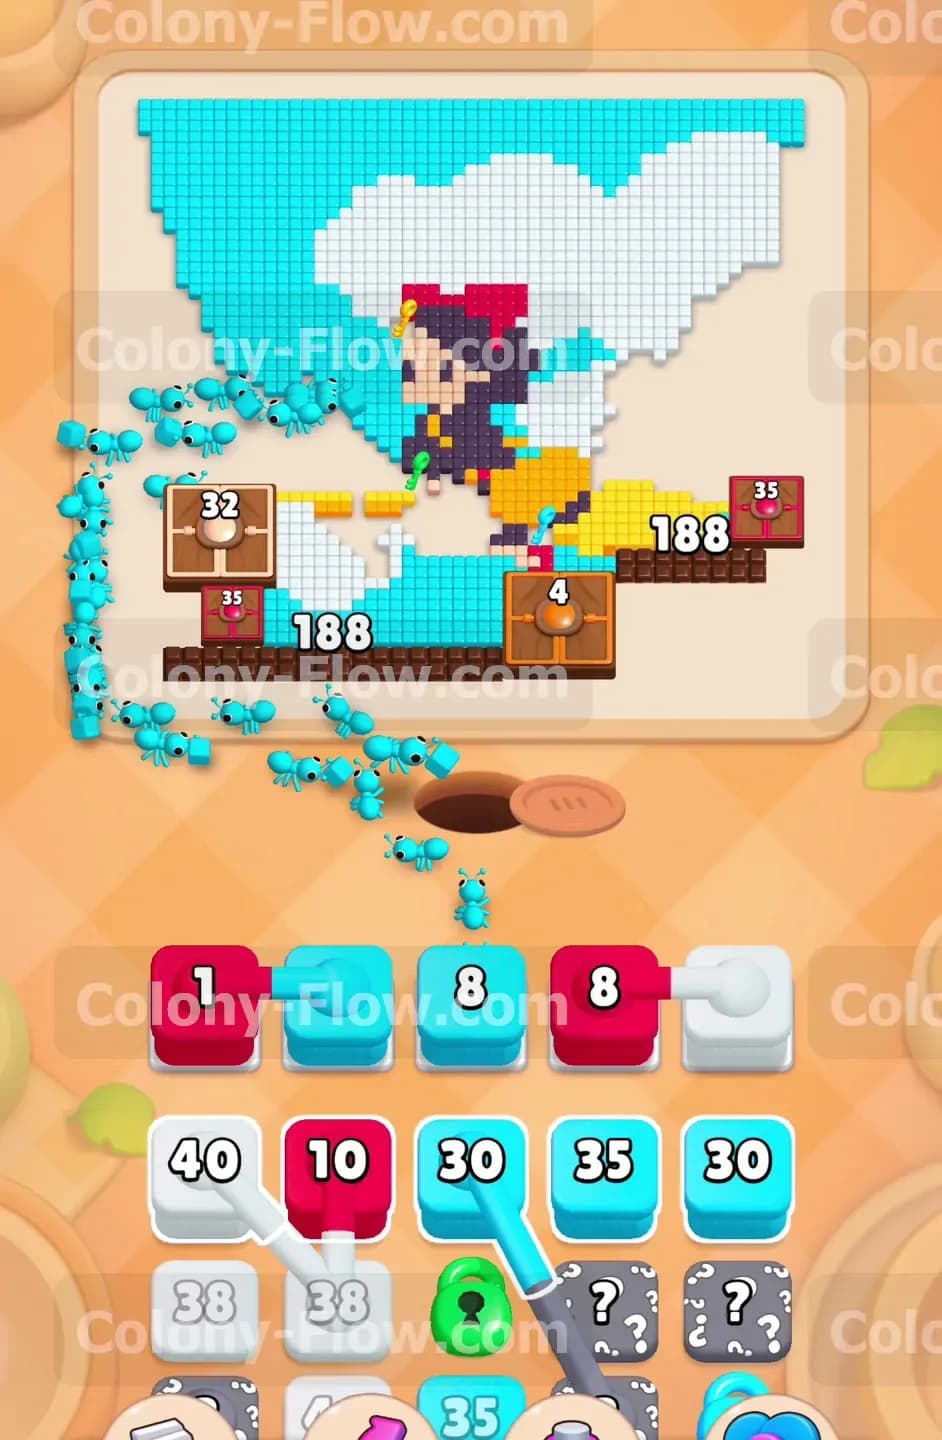
The swarm will eventually consume the tile holding the green key. The key flies down to your tray and shatters the green lock. Now you have access to that Light Blue 30 block. Pull it into a waiting slot immediately. Using this newly freed block keeps the momentum going and clears out more of the tight corners around the witch figure. The sky is massive and you will need every single light blue block you can get your hands on. Clearing this section also uncovers the top edges of the red bow on the head of the witch. Letting the ants focus purely on the sky right now prevents any unexpected dead ends.
Step 4: Pull the first red block for the bow
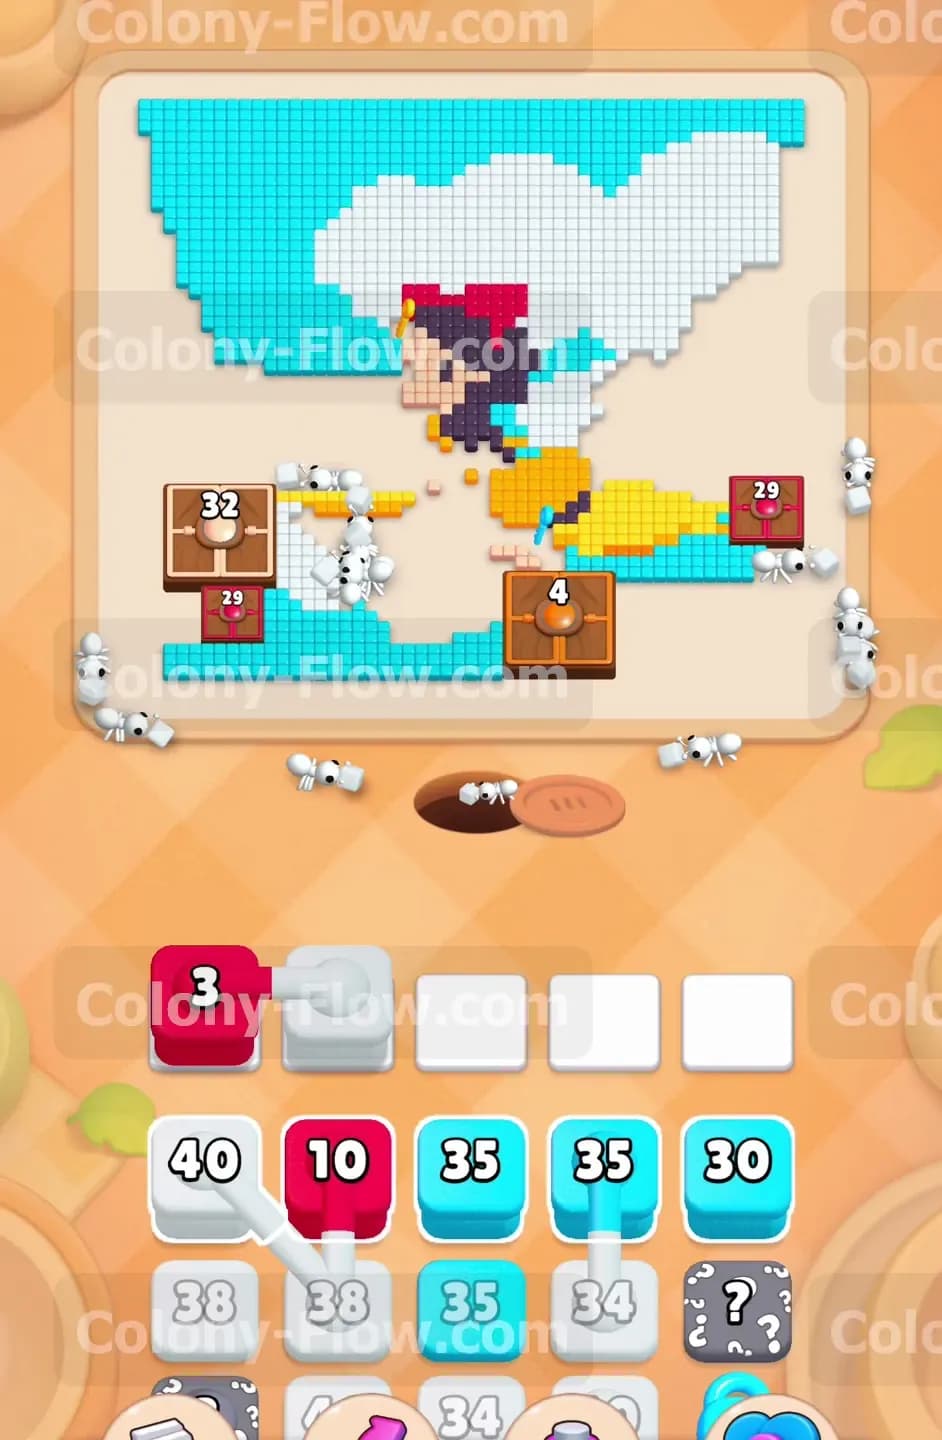
With the sky peeled back from the top of the witch, the red pixels of her bow are finally exposed. You can now safely pull a Red 10 block from your tray. The ants will break off from the sky and head straight for the red bow. This is a critical moment for slot management. You still have white and light blue blocks active. Adding the red block occupies a third slot. Make sure your ants have clear paths to all three colors so the numbers keep dropping across the board. If a block stalls, leave it alone and focus on clearing the colors blocking its path. The red bow is small but clearing it opens up access to the skin tone pixels and the top of the black hair.
Step 5: Manage the connected boxes carefully
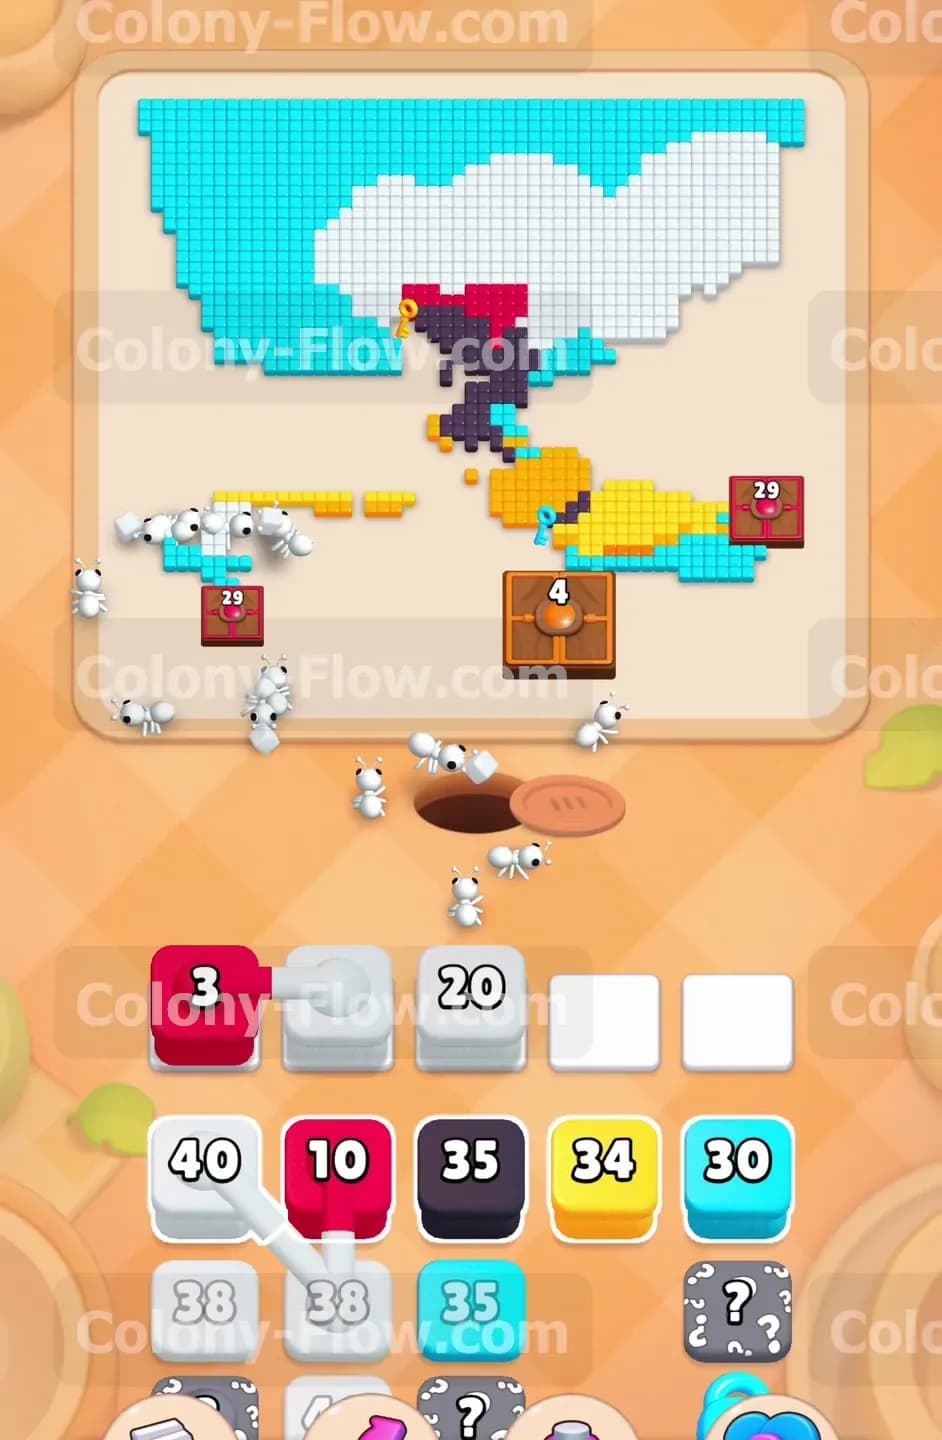
Your tray will soon present a pair of Connected Boxes. This specific pair links a Light Blue 8 block directly to a Red 8 block. You must treat these as a single unit. When you pull one into the active area the other comes with it and takes up an additional slot instantly. Only pull this connected pair when you are absolutely certain your ants can reach both light blue sky tiles and red bow tiles at the exact same time. If the red path is blocked the Red 8 block will sit in your slot and do nothing. This wastes precious space and puts you in danger of a fatal jam. Wait until the ants clear the surrounding clouds before making this move. Your patience here guarantees that both blocks will count down and leave the tray together.
Step 6: Expose the hidden boxes in the tray
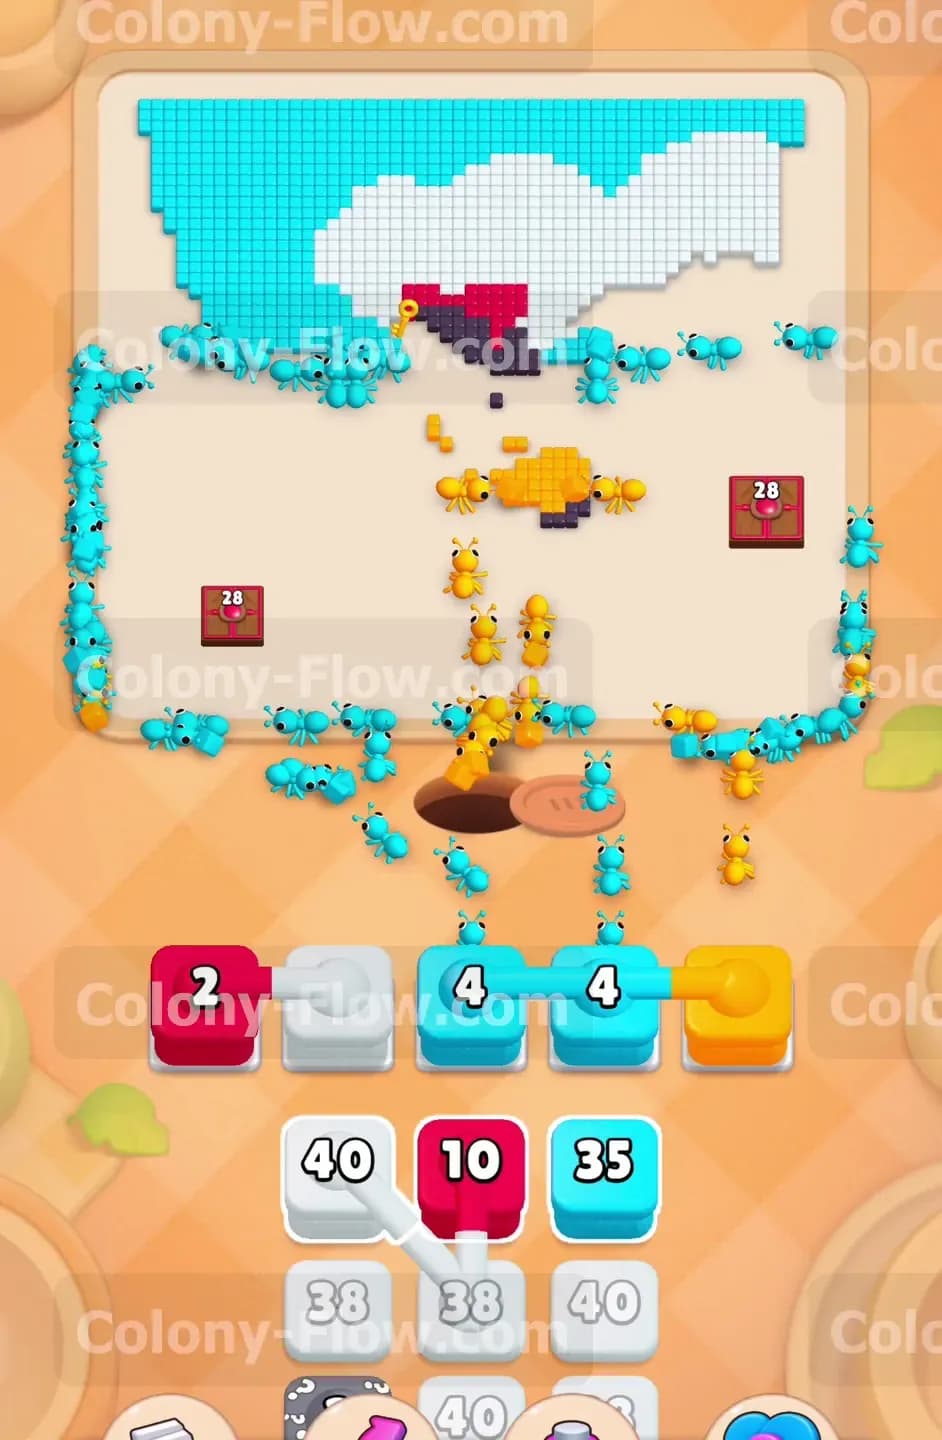
As you clear the connected boxes you will uncover grey Hidden Boxes marked with question marks in your tray. These blocks conceal their true color until they have a valid path to move into the slots. Once they flip they reveal more light blue or white blocks. Pull them as soon as you know their color and verify that the corresponding path on the board is completely open. The witch picture is starting to shrink rapidly now. The Hidden Boxes provide the exact colors you need to finish off the straggling cloud pieces on the right side of the screen. Keep a close eye on the remaining pixels. You never want to pull a massive white block if there are only a few white pixels left on the board.
Step 7: Clear the black dress and hair
The ants have now removed enough sky and clouds to fully expose the witch herself. Pull a Black 35 block into your waiting slots. A huge line of ants will rush toward the center of the board to dismantle her black dress and hair. You need a second black block to finish the job as the remaining tiles are densely clustered. Keep a white block active at the same time so your ants can continue eating the lower clouds while the black pixels disappear. Splitting the swarm between two different colors is the best way to prevent a bottleneck. The black pixels are tightly packed so the ants will tear through the Black 35 block at a very fast pace.
Step 8: Handle the yellow broom and final connected blocks
The last major element blocking your victory is the bright yellow broom spanning horizontally across the bottom. Pull a Yellow 34 block once the black dress is mostly gone. The ants will tear through the yellow pixels quickly. Right at the end you will face another set of Connected Boxes. This time you get a Light Blue 4 linked to another Light Blue 4 and a Yellow block. Pull this entire chain only when the final patches of broom and bottom sky are exposed. The ants will drain these low number blocks in a matter of seconds. Make sure you have at least three empty slots before you tap this chain.
Step 9: Sweep up the final remaining tiles
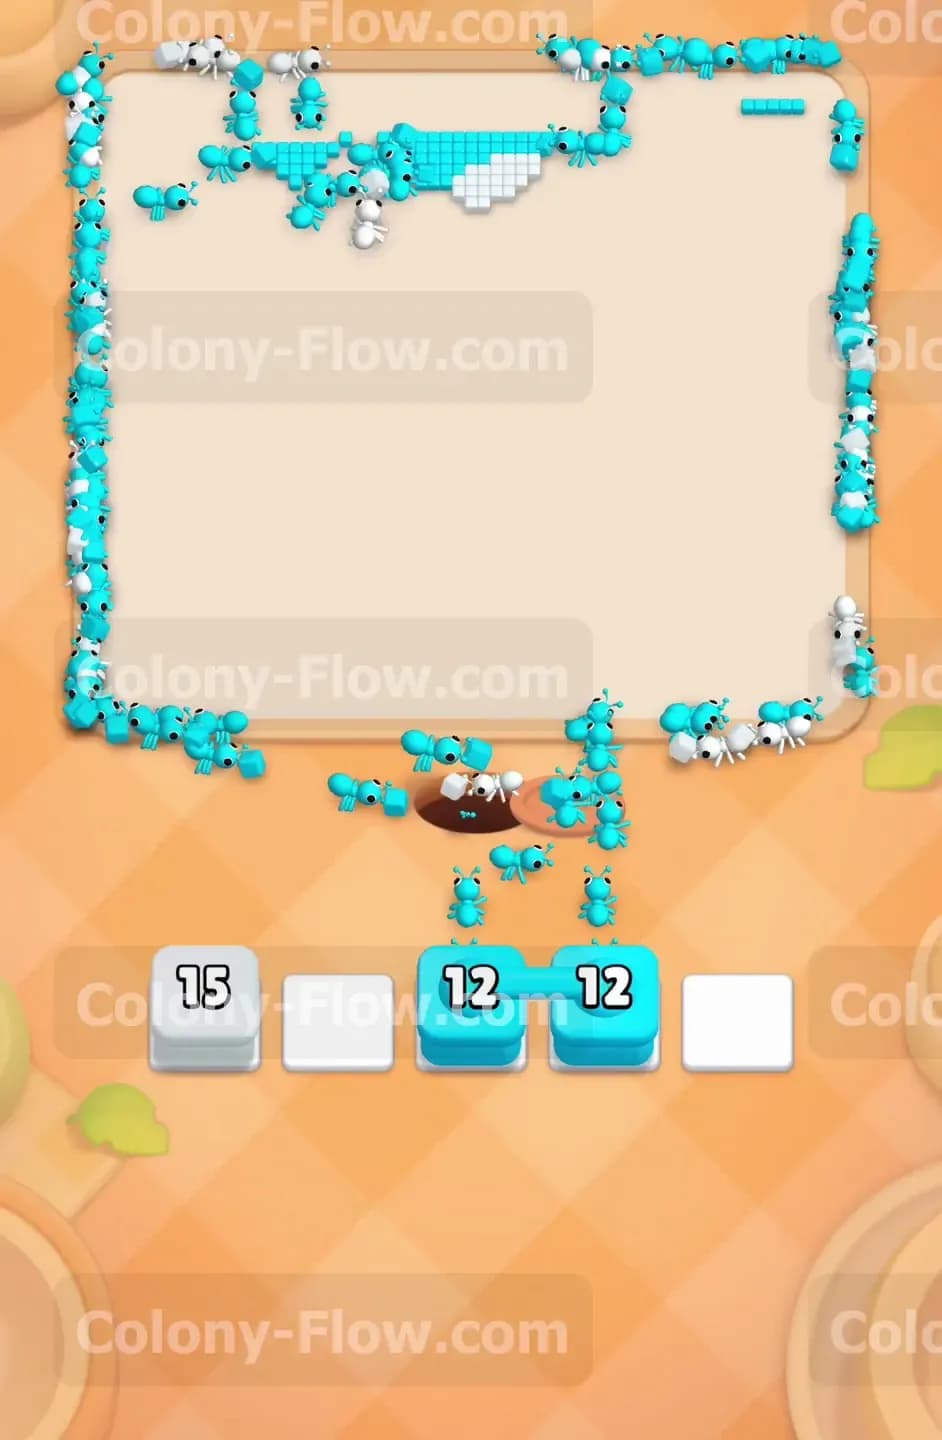
Your board is now mostly empty except for a tiny scattering of light blue and white pixels along the very bottom and top right edges. Pull your final White 15 and Light Blue 12 blocks into the slots. The ants will scatter to the far corners of the board to clean up these last remaining pieces. Keep your hands off the tray at this point. Let the ants finish their meal. The waiting slots will clear out naturally as the last few pixels vanish. You have successfully navigated all the tricky elements without a single jam.
Final Thought
This puzzle requires intense focus on path management and slot spacing. Opening the outer boundaries first is the key to surviving the massive sky blocks. If any step feels hard to picture in text form, please watch the video above this article. Seeing the ants in motion will clarify exactly when to pull those dangerous connected blocks.