Colony Flow Level 644 Walkthrough Solution & Guides | How to solve Colony Flow 644

Guide By Liam Stone
Updated on August 8, 2026
You don't have to read the whole guide. The video above shows you exactly how to clear Level 644.
Video doesn't match your screen?
Game updates frequently scramble layouts! Try our AI Screenshot Solver first to find your exact board instantly, or report broken guides to our team.
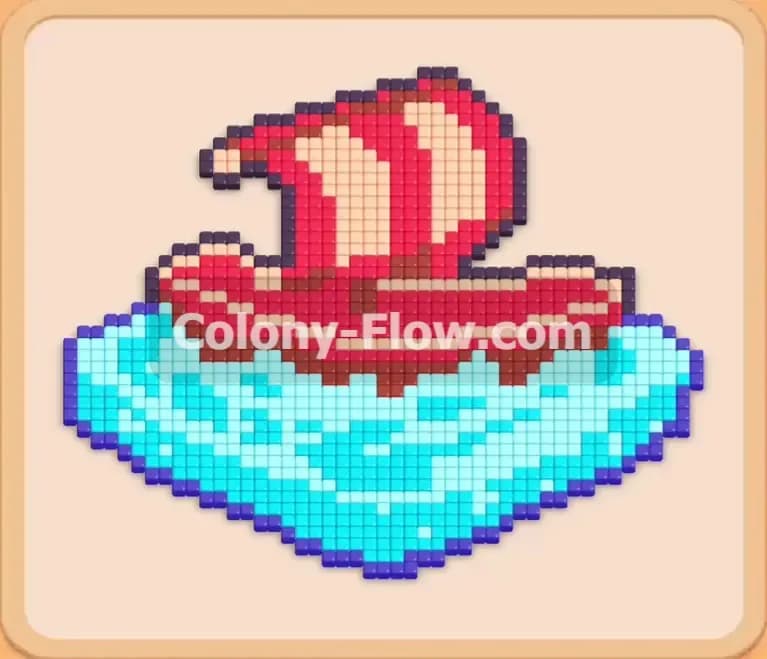
Welcome to another guide. Today we are looking at Colony Flow Level 644. This board gives you a beautiful pixel art picture of a ship riding on bright ocean waves. The water forms a wide base that you must clear before you can truly tackle the ship itself. It looks peaceful but the tray is packed with blocks that can easily clog your waiting slots. Let me show you how to navigate this level without getting stuck.
Colony Flow Level 644 Overview
What You Are Working With
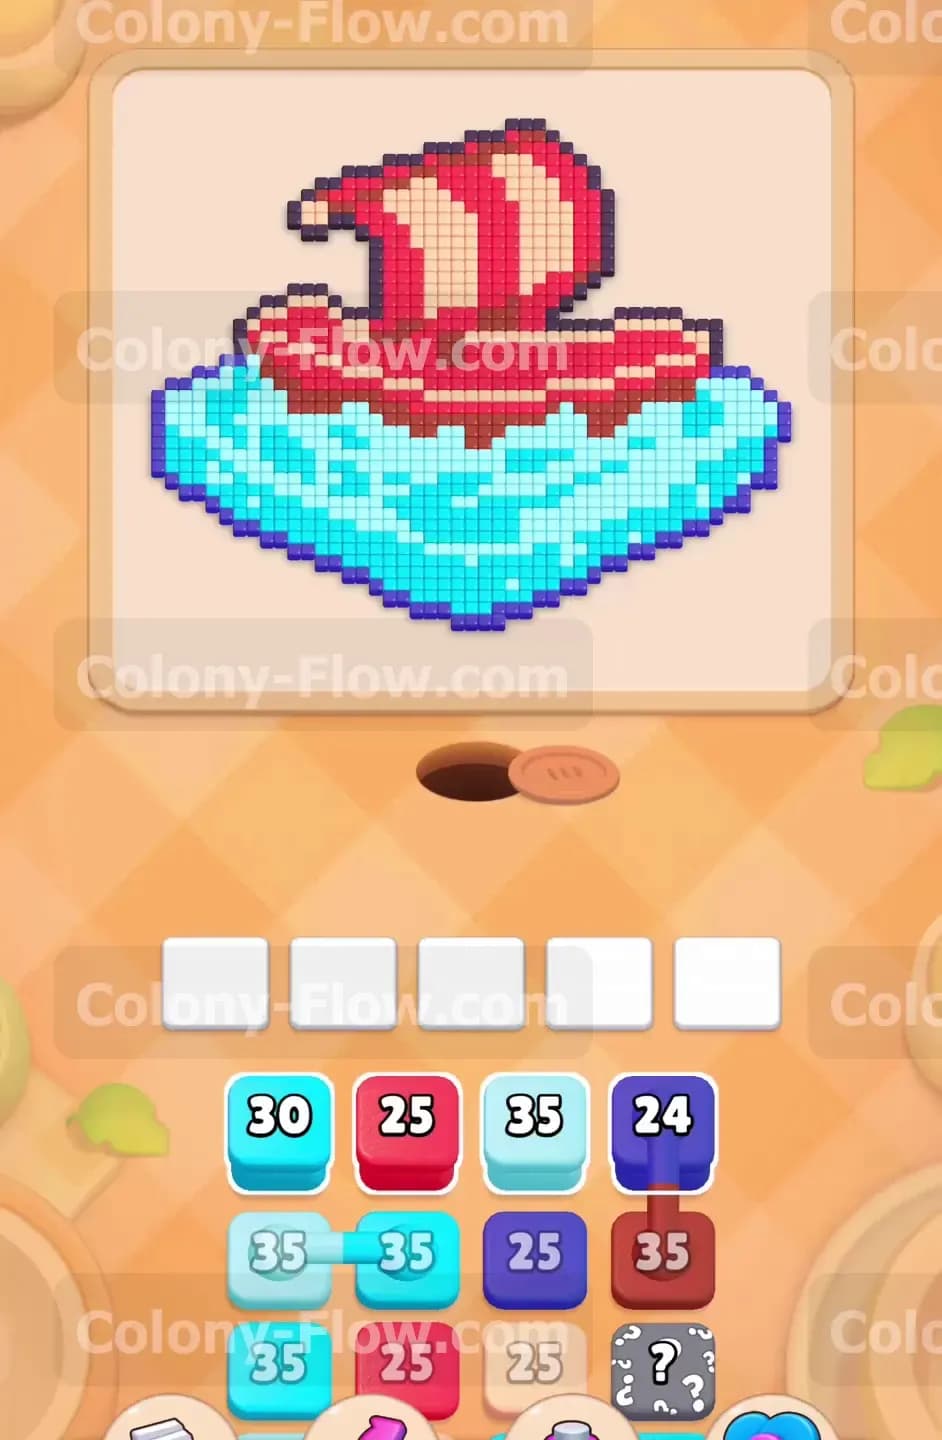
The picture is split into two main sections. The bottom half is the ocean waves made of cyan and dark blue tiles. The top half is the ship featuring a dark red base, a bright red hull, and large beige sails with red stripes. Your tray at the bottom holds blocks matching all these colors. This level includes a few special mechanics that complicate your strategy. You will encounter connected boxes in the tray. These are two blocks linked by a visible line. When you tap one you pull both into your waiting slots at the same time. You will also deal with a hidden box later in the tray. This box keeps its color a secret until you clear the blocks blocking its path.
What It Takes to Clear Level 644 Board
Your primary goal is to guide the ants to eat every single colored tile on the board. You win when the picture is completely gone and the ants finish their routes. The only way you lose is by filling all five of your waiting slots with blocks that have nowhere to go. To succeed here you must peel the picture layer by layer from the outside in. The ants start at the nest hole at the very bottom. This means they bump into the cyan water right away. You must clear a large amount of this water to open physical paths to the ship. You have to balance pulling exactly what you need to keep the ants moving while safely holding a few future blocks in your waiting slots.
Colony Flow Level 644 Step by Step Solution
Step 1: Pull the first cyan block to open the water paths
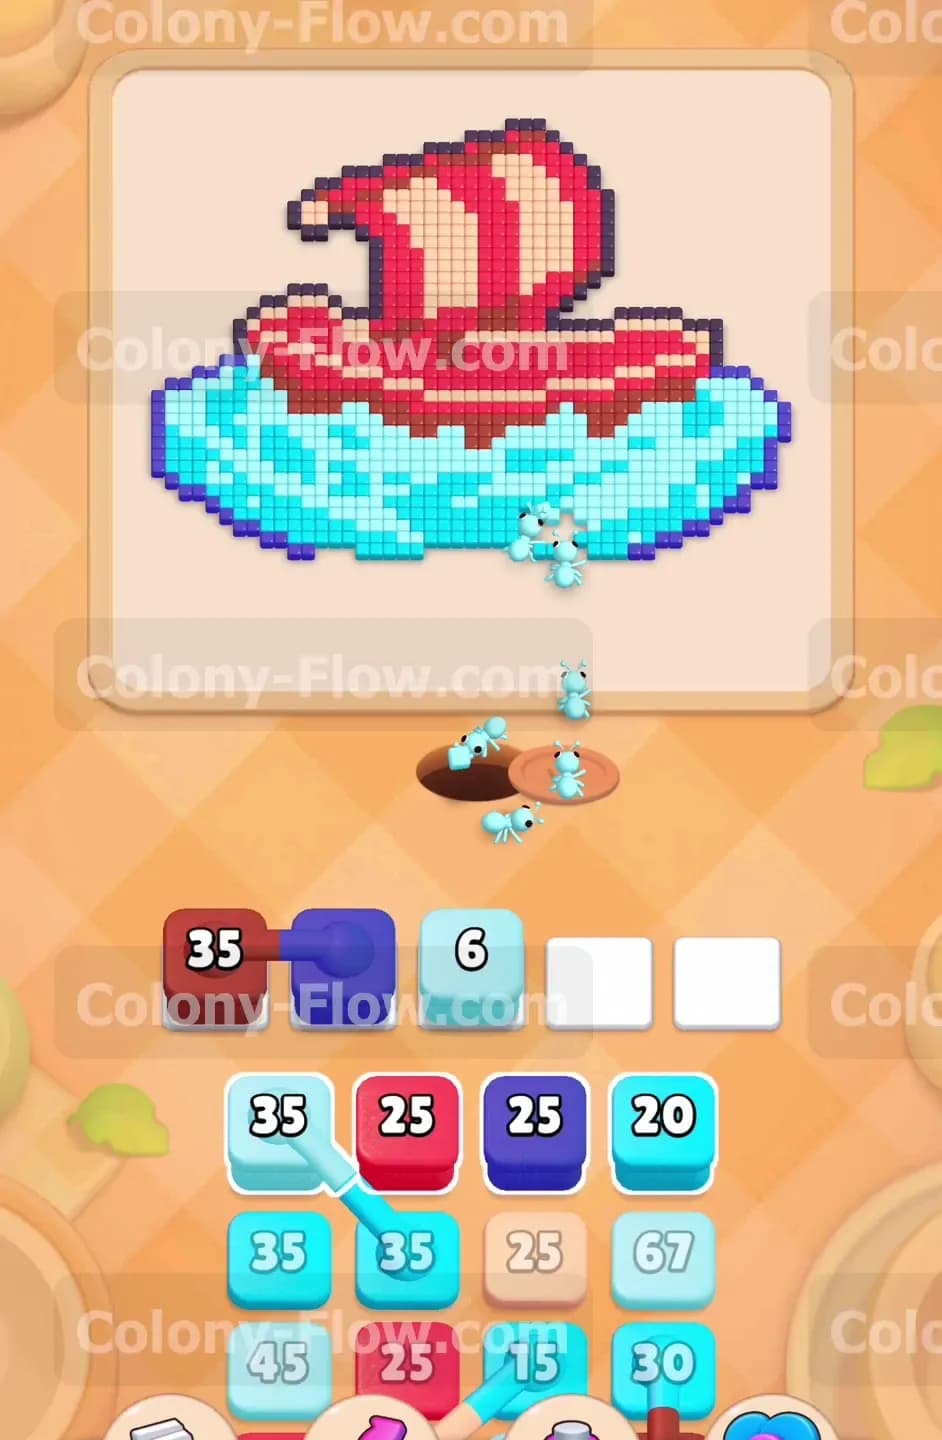
You start the level facing a solid wall of cyan water tiles at the bottom edge. Look at your tray and select the top cyan block. This block holds a large number and will send a massive stream of cyan ants onto the board. They will immediately start chewing through the outermost layer of the ocean. This action opens up the board and creates room for other colors to find their targets. While the cyan ants are busy you can safely pull the dark blue block and the dark red block into your waiting slots. You want to expose the blocks buried underneath them. The dark blue and dark red blocks will sit harmlessly in your slots because the active cyan block is constantly ticking down and keeping at least one slot moving. This guarantees you will not hit a dead end early on.
Step 2: Allow the dark blue and dark red blocks to activate
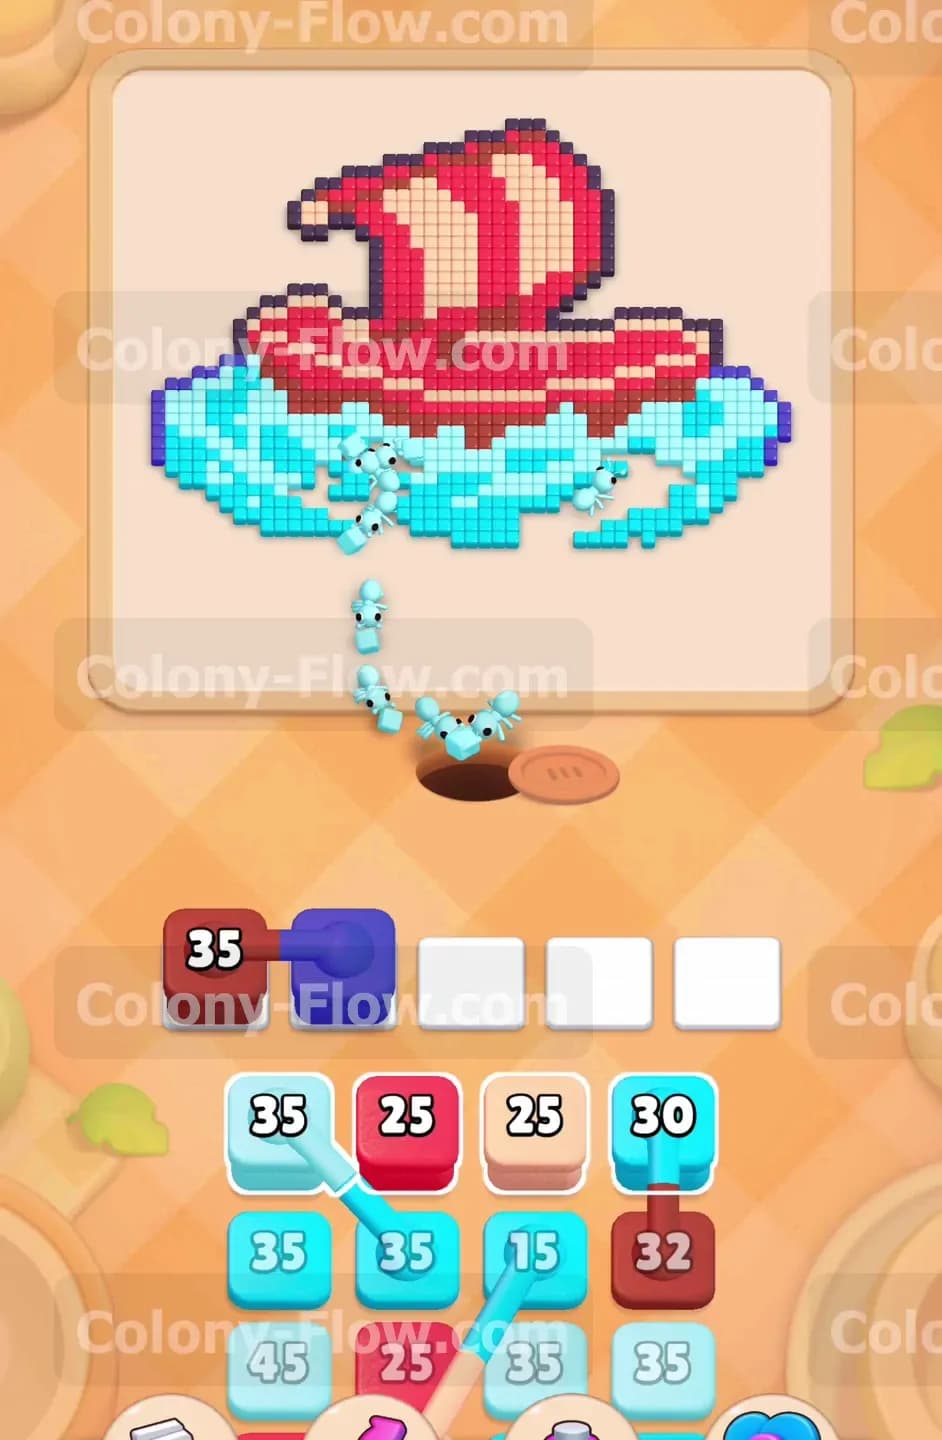
As your first wave of cyan ants clears the lighter water they will expose the darker waves hidden inside. This is exactly what your waiting dark blue block needs. The moment a dark blue tile touches an open path your dark blue block will spring into action. It will send out dark blue ants to handle those specific wave details. At the same time the water clearing will expose the very bottom of the ship. This allows your waiting dark red block to finally wake up and send ants to eat the dark red base of the hull. Letting these blocks wait in your slots was a smart move. It successfully cycled your tray and gave you immediate access to the next set of cyan blocks you desperately need to finish the massive ocean section. Watching the different colored ants weave around each other to find their specific targets is quite satisfying.
Step 3: Use the connected cyan blocks to clear the wide splash
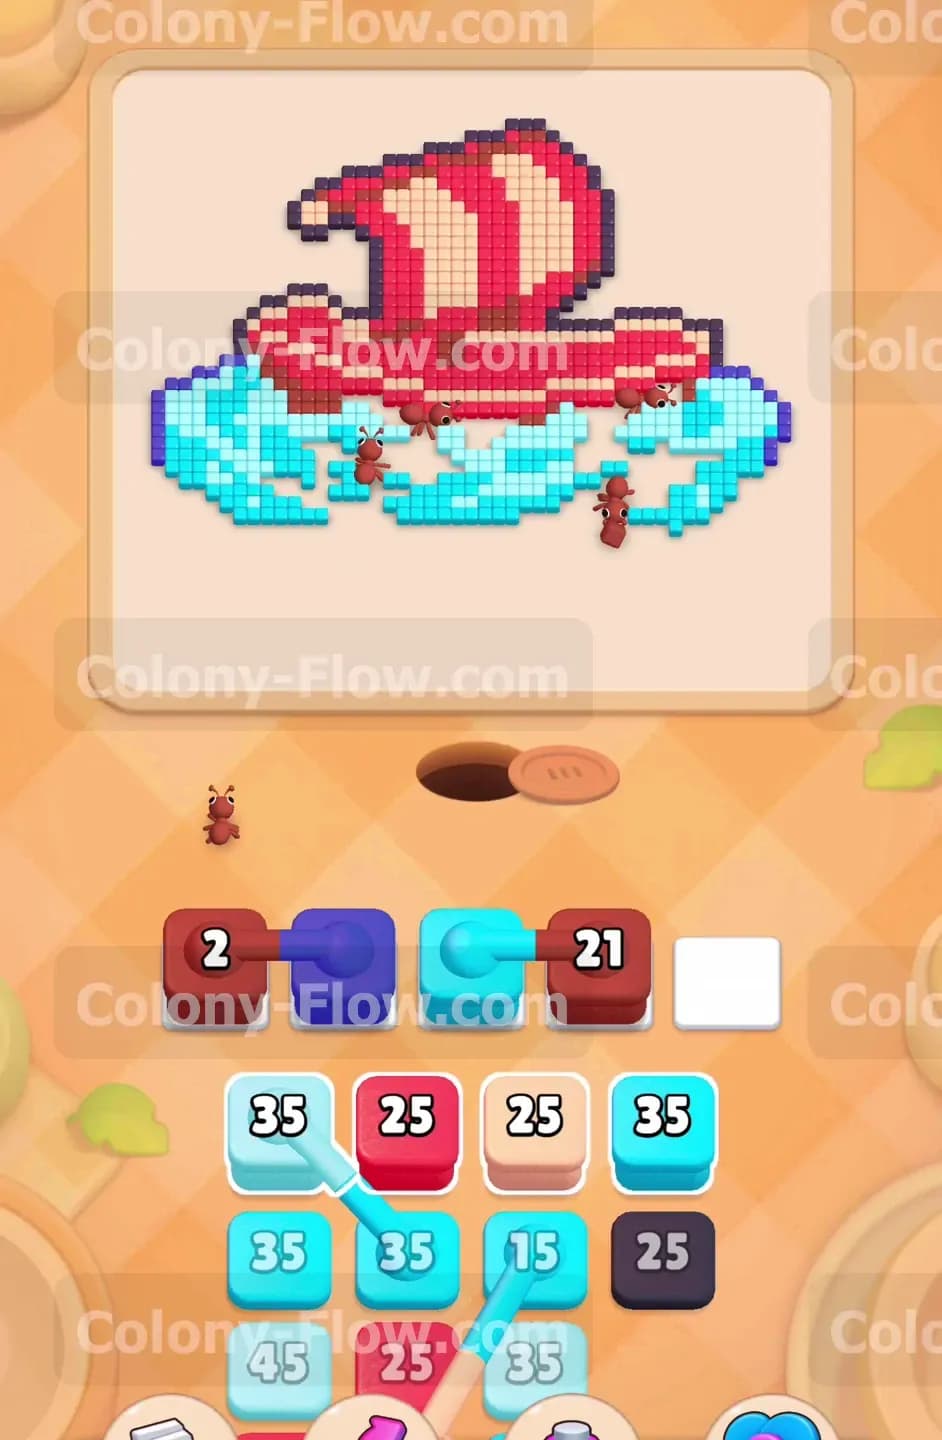
The water forms a wide splash on the left and right sides of the board. To clear this massive area you need more cyan power. Look at your tray and locate the two cyan blocks connected by a line. You must have at least two empty waiting slots to pull them safely. Because you already opened wide paths through the water you can tap these connected blocks without fear. They will drop into your slots and immediately start pouring ants onto the left and right edges of the water splash. The numbers on these blocks will drop rapidly as the ants find plenty of available cyan tiles. This clears the final major hurdle blocking the top half of the board.
Step 4: Shift your focus to the red hull of the ship
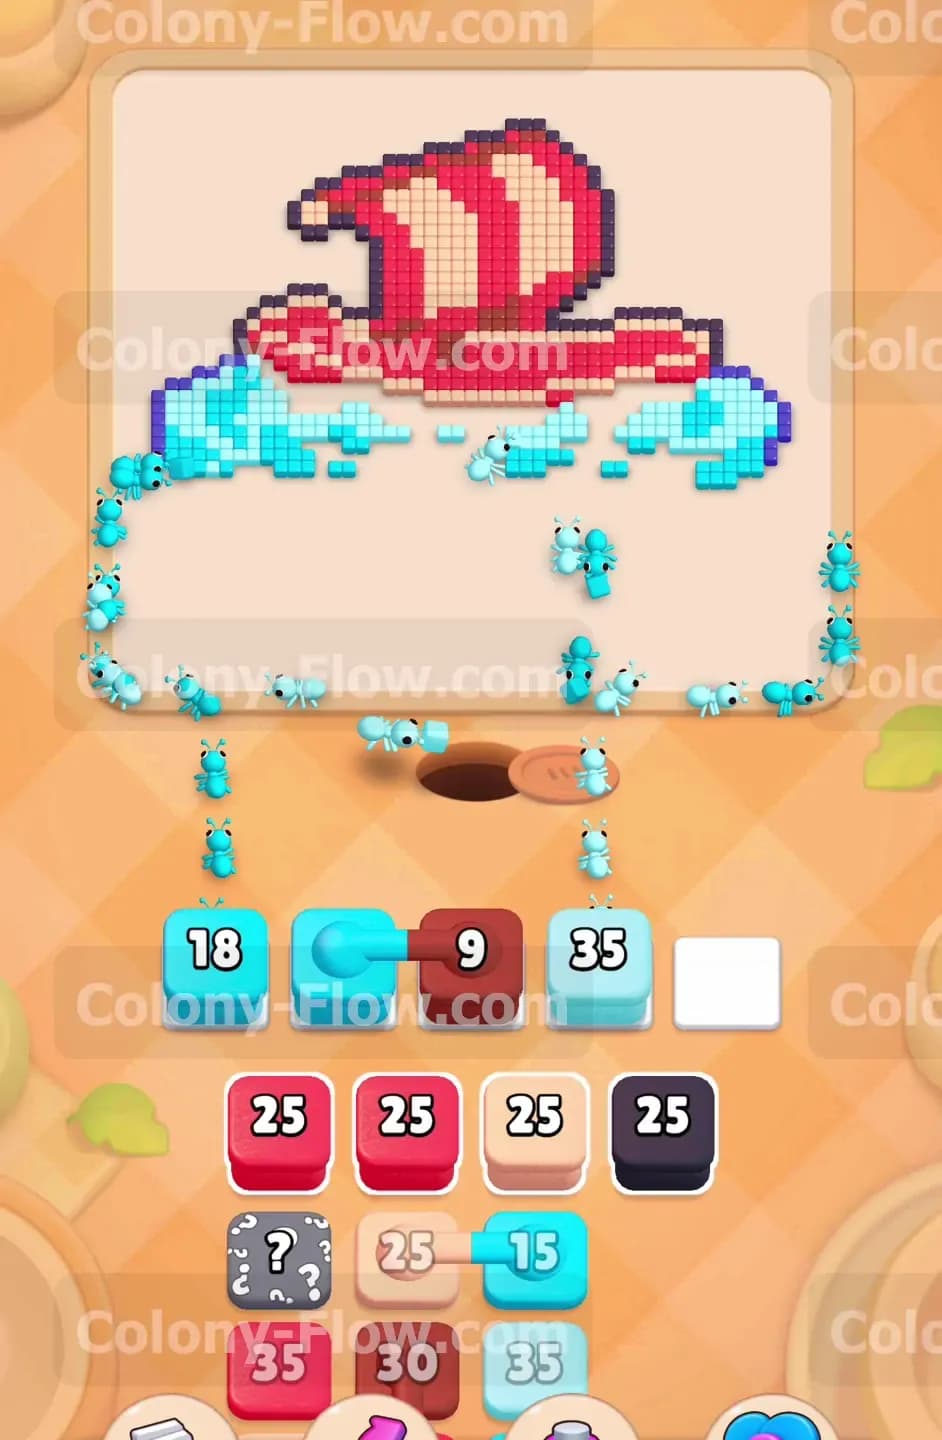
With the water almost entirely gone the physical paths to the ship are wide open. Your tray will now offer up several bright red blocks. Pull the first available red block to start clearing the main body of the ship. The red ants will march up past the empty area where the water used to be and begin dismantling the bright red hull. You want to keep feeding red blocks into your slots as long as the ants have clear paths. The ship has a large cluster of red tiles forming the main structure so these blocks will drain quickly. This continuous flow of red ants will keep your waiting area completely safe from jamming. Always verify that a path exists before pulling a new color but in this phase the red path is enormous and perfectly safe to target.
Step 5: Reveal the hidden box and start on the sails
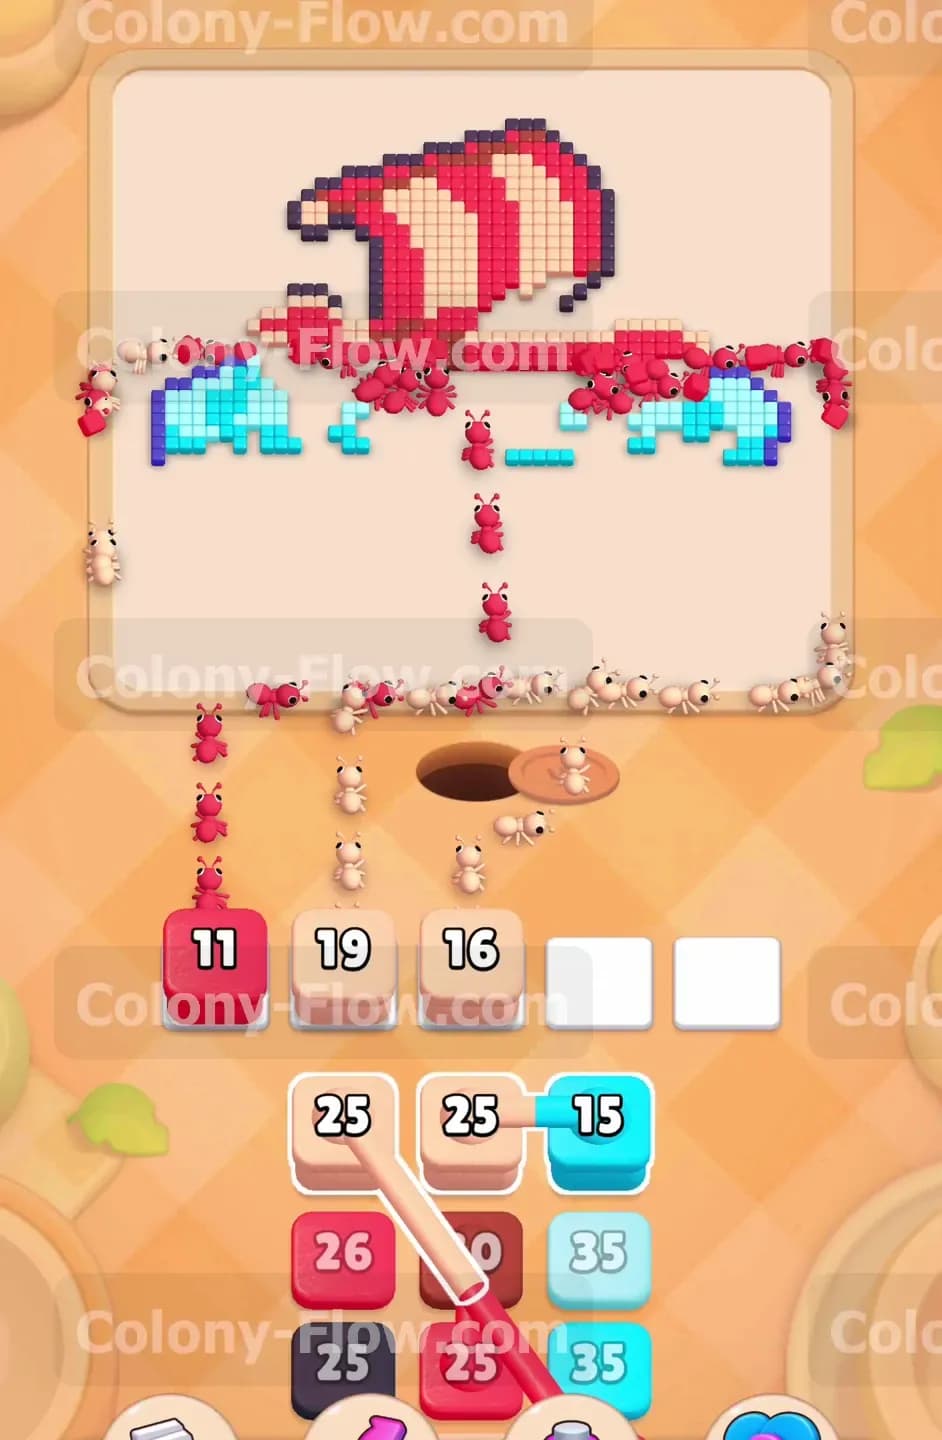
As you pull blocks from the tray you will uncover a hidden box marked with a large question mark. You cannot tell what color it holds right away. The best strategy is to keep pulling the normal visible blocks you need until the hidden box is forced to reveal itself by reaching the active top layer of the tray. While waiting for that to happen you should pull the available beige blocks. The beige ants will travel all the way up past the hull and start eating the lighter sections of the large sails. The sails are tall and require a lot of ants so get those beige blocks working early. The hidden box will eventually flip and reveal a color you need for the final cleanup phase so do not worry about it until it changes. Just focus on feeding the beige ants to clear the bulk of the sail canvas.
Step 6: Deploy the connected red blocks for the sail stripes
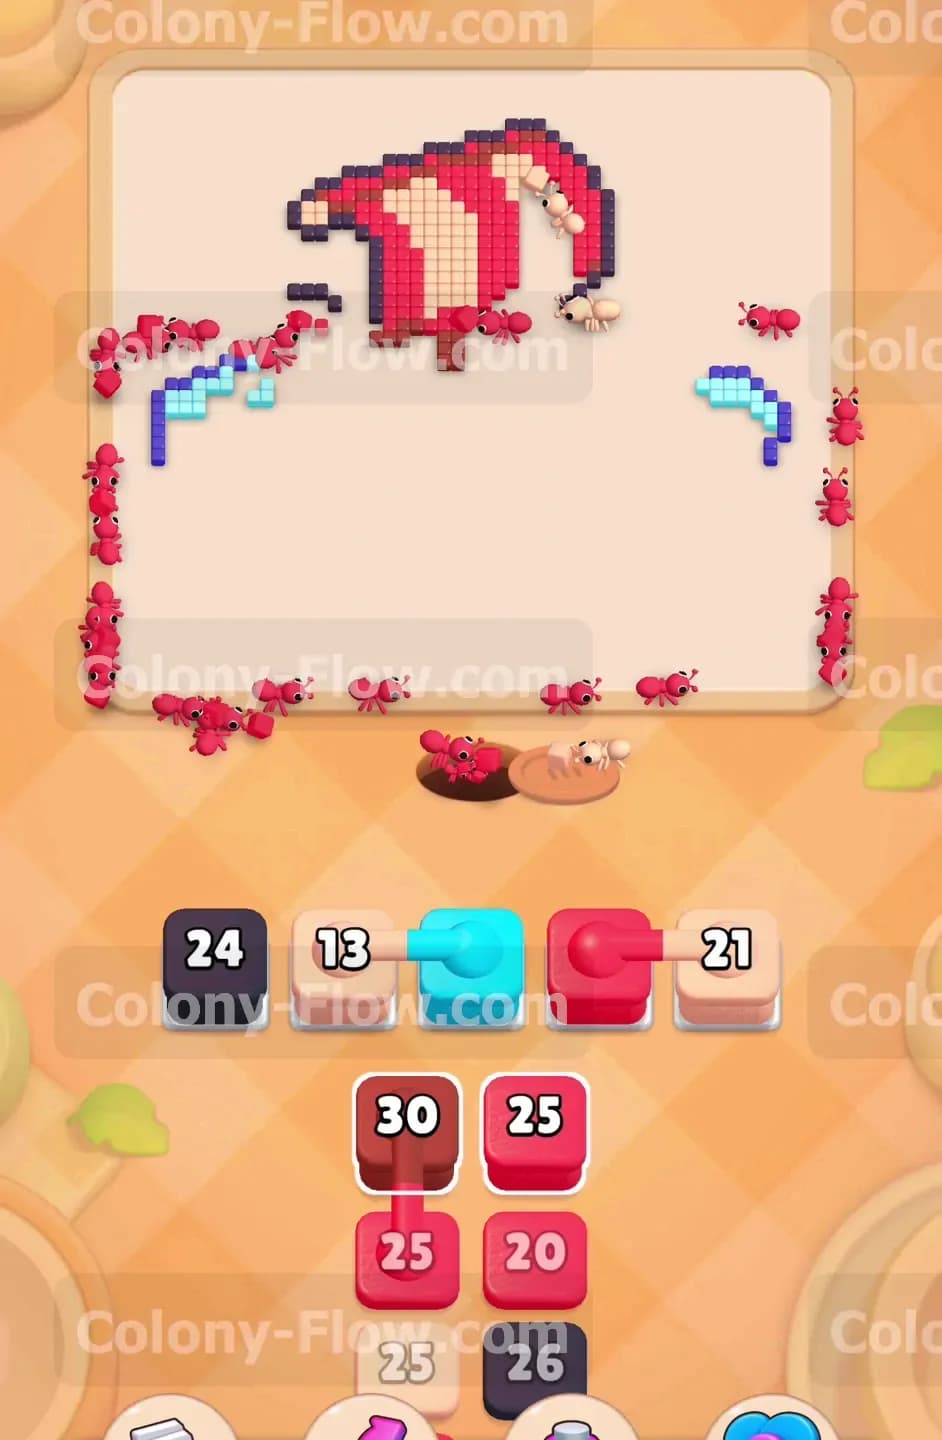
Deep inside your tray you will find another pair of connected blocks. This time they are bright red blocks linked vertically. You need these to clear the thick red stripes running across the beige sails. Check your waiting slots to ensure you have two empty spaces. Tap the connected red blocks to pull them both at once. Since the paths to the upper sails are completely open these red blocks will activate the second they hit your waiting area. You will see a huge swarm of red ants climb up the mast and tear apart the remaining red sections of the sails. This action destroys the last large solid chunks of color on the board.
Step 7: Manage the final scattered pieces along the edges
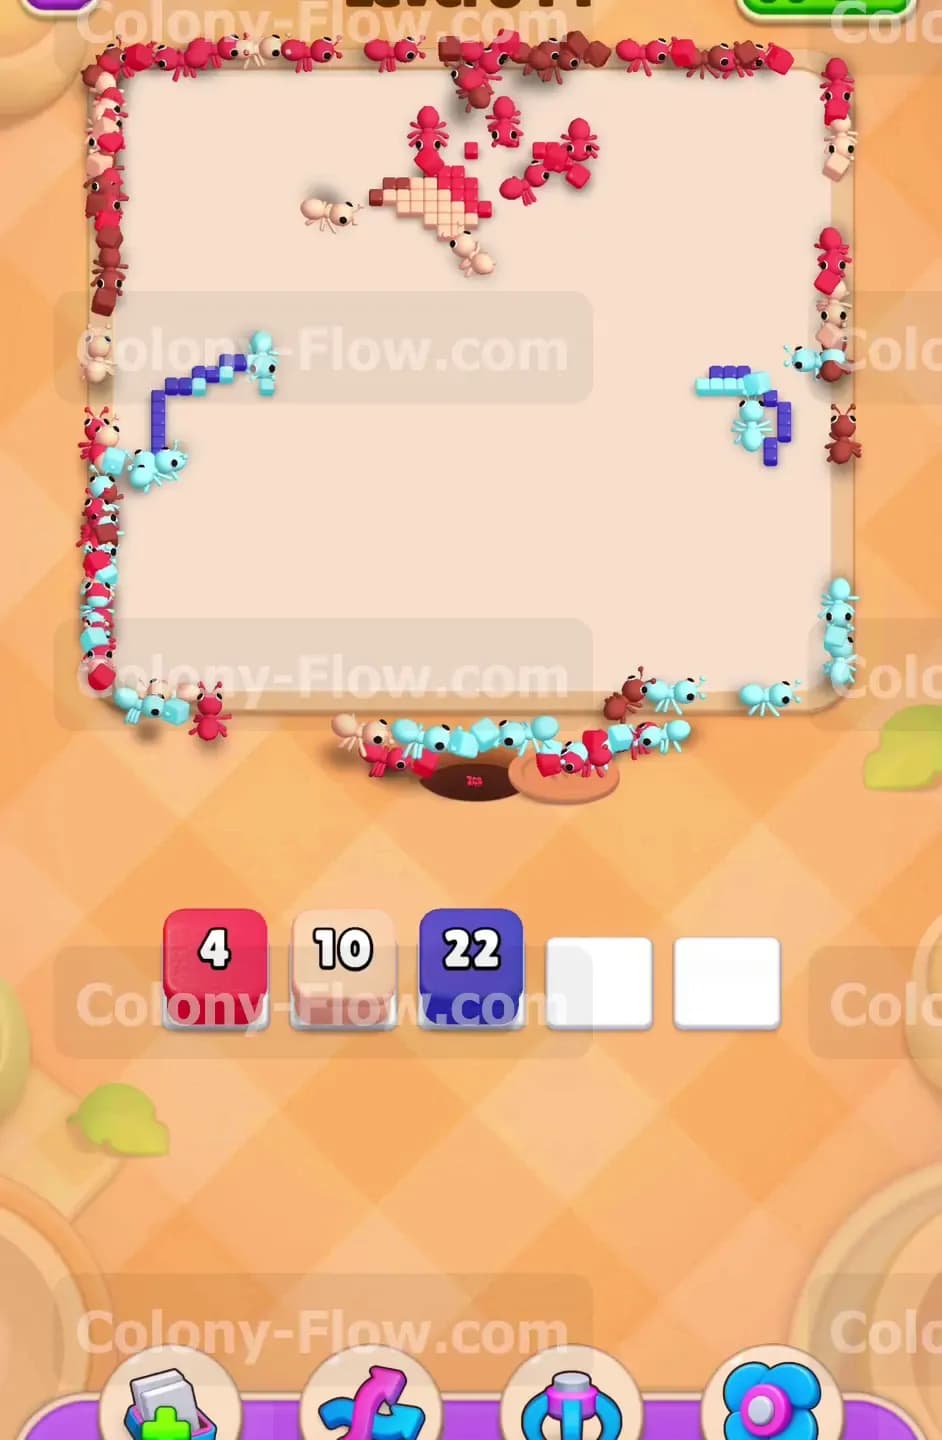
The main picture is gone and you are left with just a handful of scattered tiles around the very edges of the board. Your tray is empty and your waiting slots hold your final few blocks. You likely have a dark blue block a beige block and a red block sitting there with very low numbers. The paths are extremely long now because the ants have to walk around the entire empty space where the picture used to be. Do not panic if the numbers drop slowly. The ants are simply taking their time walking to the far corners. Just watch them work and wait for them to eat the final pieces. The board will clear completely and you will secure the win.
Final Thought
This board tests your patience with the massive water base but rewards you once you break through to the ship. Managing those connected blocks and the hidden box is the real trick to keeping your waiting slots clear. If you find any of these movements confusing in text I highly encourage you to watch the video above this article. Seeing the exact timing of when to pull the connected blocks makes a huge difference.