Colony Flow Level 434 Walkthrough Solution & Guides | How to solve Colony Flow 434

Guide By Liam Stone
Updated on July 29, 2026
Skip the article and watch the video above instead. It covers every move you need for Level 434.
Video doesn't match your screen?
Game updates frequently scramble layouts! Try our AI Screenshot Solver first to find your exact board instantly, or report broken guides to our team.
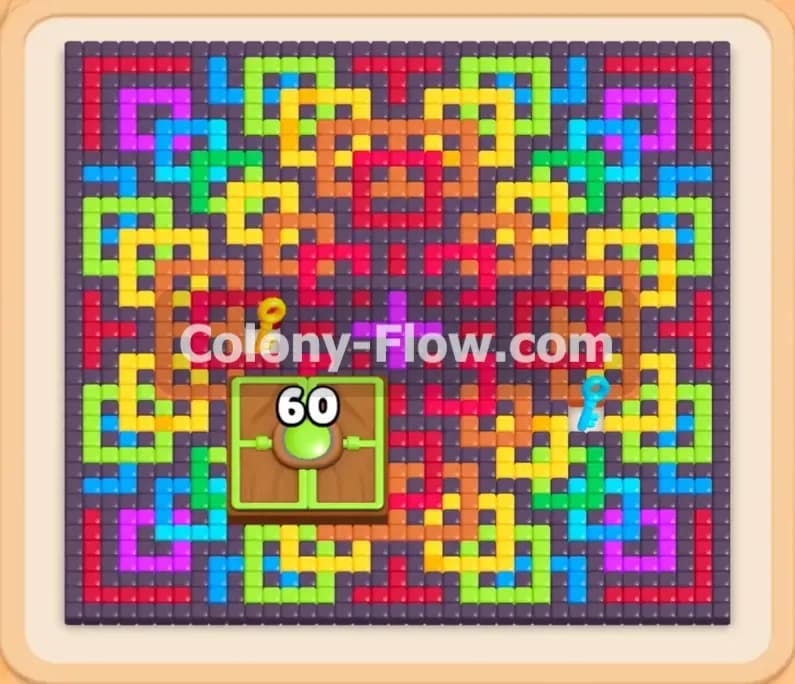
Colony Flow Level 434 presents a massive geometric knot pattern that fills almost the entire board. You face a dense interlocking web of black, red, yellow, green, blue, and purple tiles forming a highly complex design. This board requires careful tray management because the thick outer layers completely block your access to the inner colors. I played this level myself and found the safest route involves peeling the bottom layers first to keep the ant paths flowing smoothly. You have to maintain total control over your waiting slots to survive.
Colony Flow Level 434 Overview
What You Are Working With
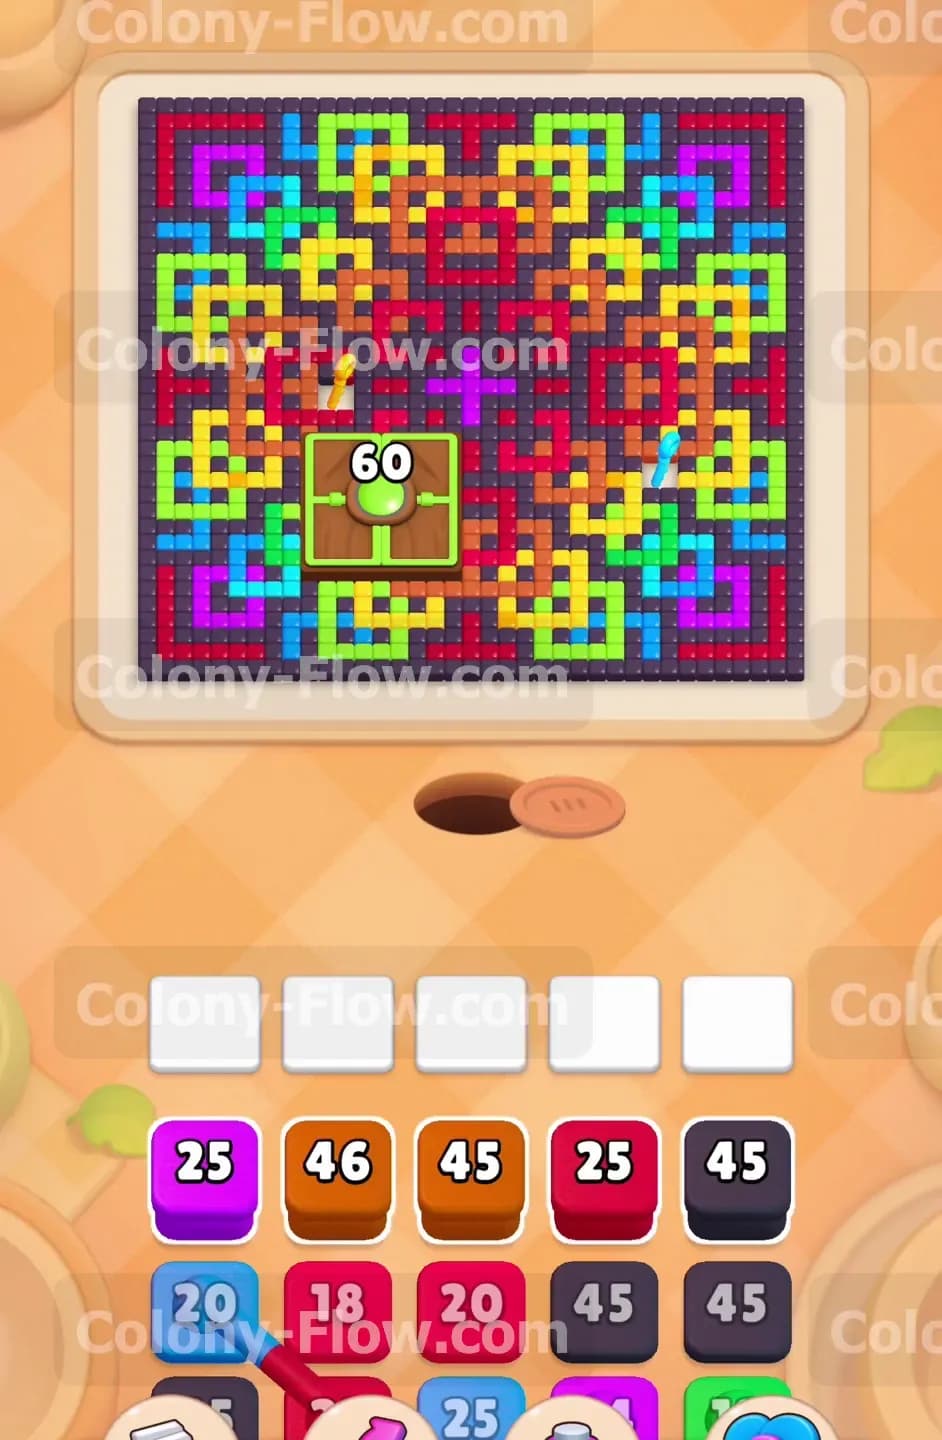
The picture on the board looks like a complicated mandala or a traditional Celtic knot. A thick black border wraps tightly around the top edge and cascades down both sides of the screen. Inside that protective border you will find intricately interlocking loops of green, yellow, light blue, and orange tiles. The dead center of the board holds a large red cross surrounded by dark purple shapes. You will also notice a giant green block sitting in the lower left section with the number 60 stamped right on its face. This massive block acts as a heavy obstacle that you must clear later in your game. Down in your tray you start with a diverse mix of purple, orange, red, and black numbered blocks. As you look deeper into your tray queue you will spot a yellow block with a heavy lock resting on it. You have to clear specific parts of the board to collect hidden keys and open that locked yellow block before you can finish the level.
What It Takes to Clear Level 434 Board
Winning this level means you must break down the intricate knot starting from the very bottom edge and slowly work your way up to the top row. The five waiting slots at the bottom of your screen are your absolute biggest risk. If you pull a color from your tray and the ants cannot reach that specific color on the board that block sits in a slot and just waits. If you fill all five slots with blocked colors you lose the level instantly. You have to plan every single pull to ensure the ants always have an open path to their target. You will strip away the bottom black border first to reveal the inner loops. Then you will open safe paths to the red, green, and purple sections. Finally you will swarm the giant green block and grab the required keys to unlock your yellow tray blocks. You win the level when every single colored tile vanishes and the final ants run completely off the empty screen.
Colony Flow Level 434 Step by Step Solution
Step 1: Clear the bottom black border first to open the outer paths
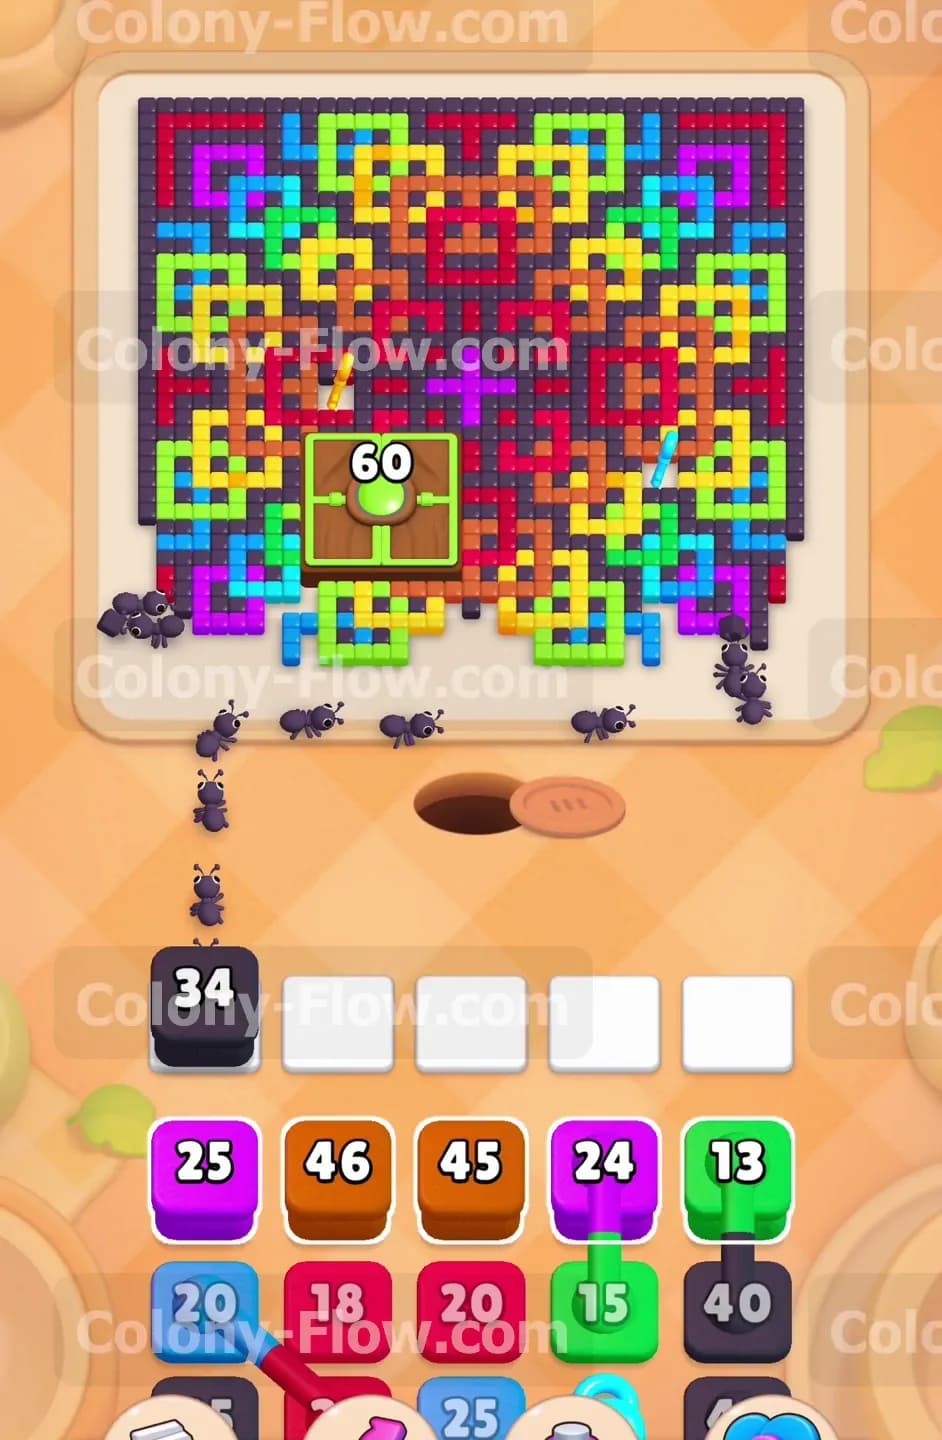
When the level begins the ants have extremely limited access to the main board. The bottom edge consists mostly of black tiles with just a few colored tips barely poking through the dark border. You need to pull a black block from the tray into your waiting slots to get the colony moving out of the nest. I recommend pulling the black 45 block first since it provides plenty of eating capacity for the initial wave. The ants will stream out of the nest hole and start eating the black border from the bottom corners straight up the sides of the knot. As the black block counts down from 45 to 34 you will clearly see the bottom edge of the board open up completely. This move exposes the light blue, green, and yellow loops that sit just inside the thick border. Keep a very close eye on the ant paths during this opening phase. You do not want to pull another color until the ants clear enough black tiles to actually reach the next layer safely. This strict patience keeps your waiting slots empty and completely safe from jamming early in the level. Waiting for the ants to finish their job sets up the entire board for success.
Step 2: Attack the exposed outer loops using green and red blocks
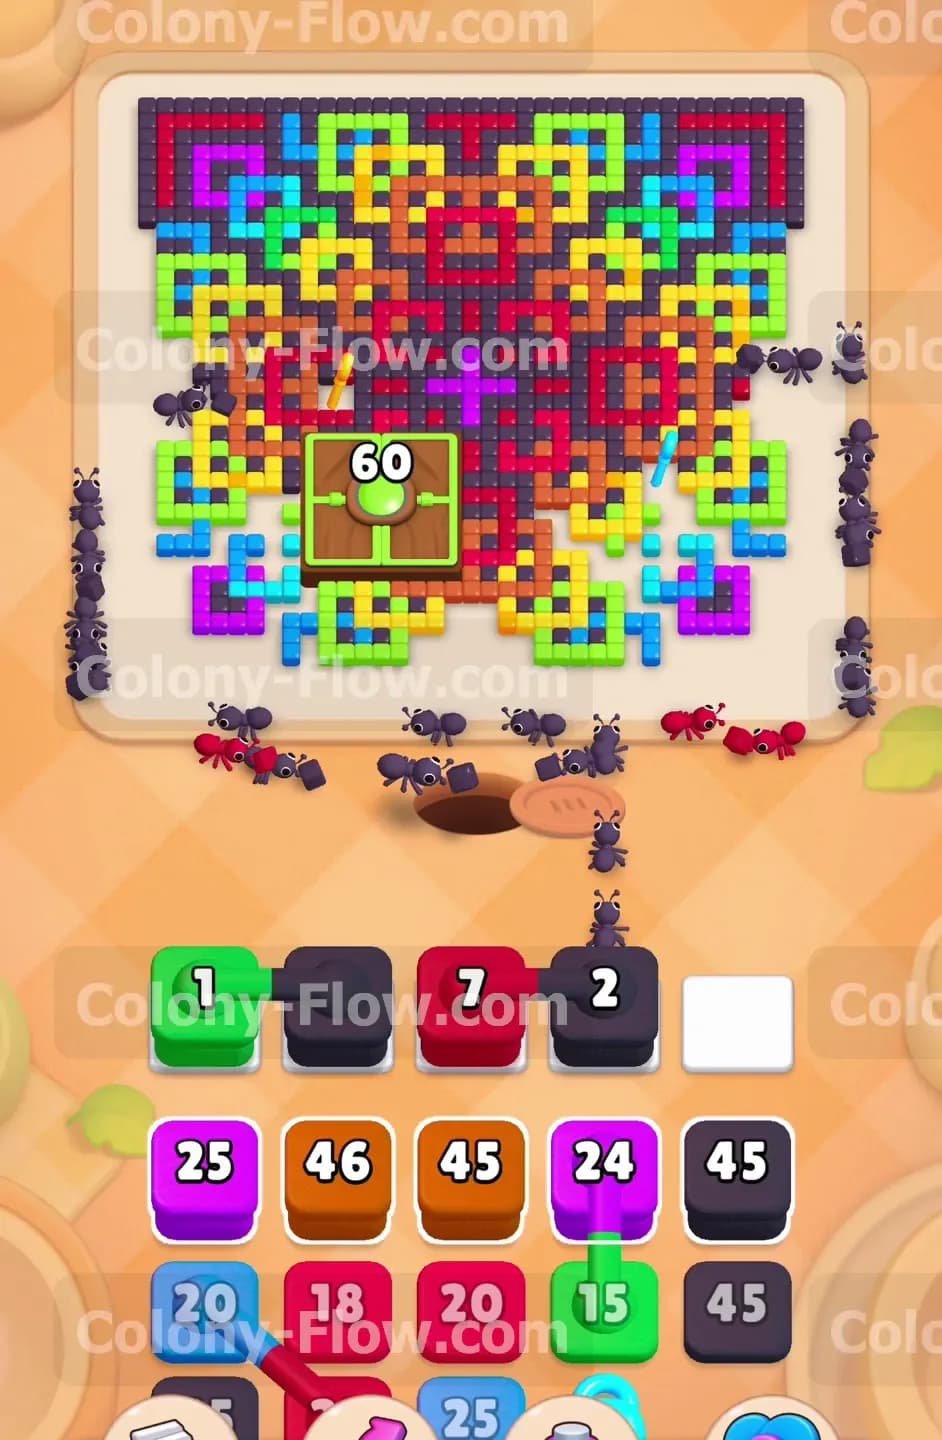
Once the bottom black border breaks away you gain direct access to the lower colored loops. It is time to pull a green block and a red block from your tray into the active slots. The tray offers a green 13 block and a red 25 block right near the front of your queue. Bringing these specific blocks up allows the ants to branch out in two totally different directions simultaneously. One group of ants will head for the green tiles isolated on the left side of the board. Another massive group will march toward the red tiles located near the bottom center near the giant green obstacle. You will see the waiting slots fill briefly as you pull these blocks up from the tray. The numbers will count down incredibly quickly as the ants consume the newly exposed paths. Your green block will drop down to 1 while a new black block drops to 7 as the ants continue spreading out. This continuous and rapid eating process prevents your five slots from jamming up with useless colors. You must always verify that a valid path exists before you touch any tray block. Pulling blind will ruin your run very quickly.
Step 3: Penetrate the purple and dark blue sections in the middle layer
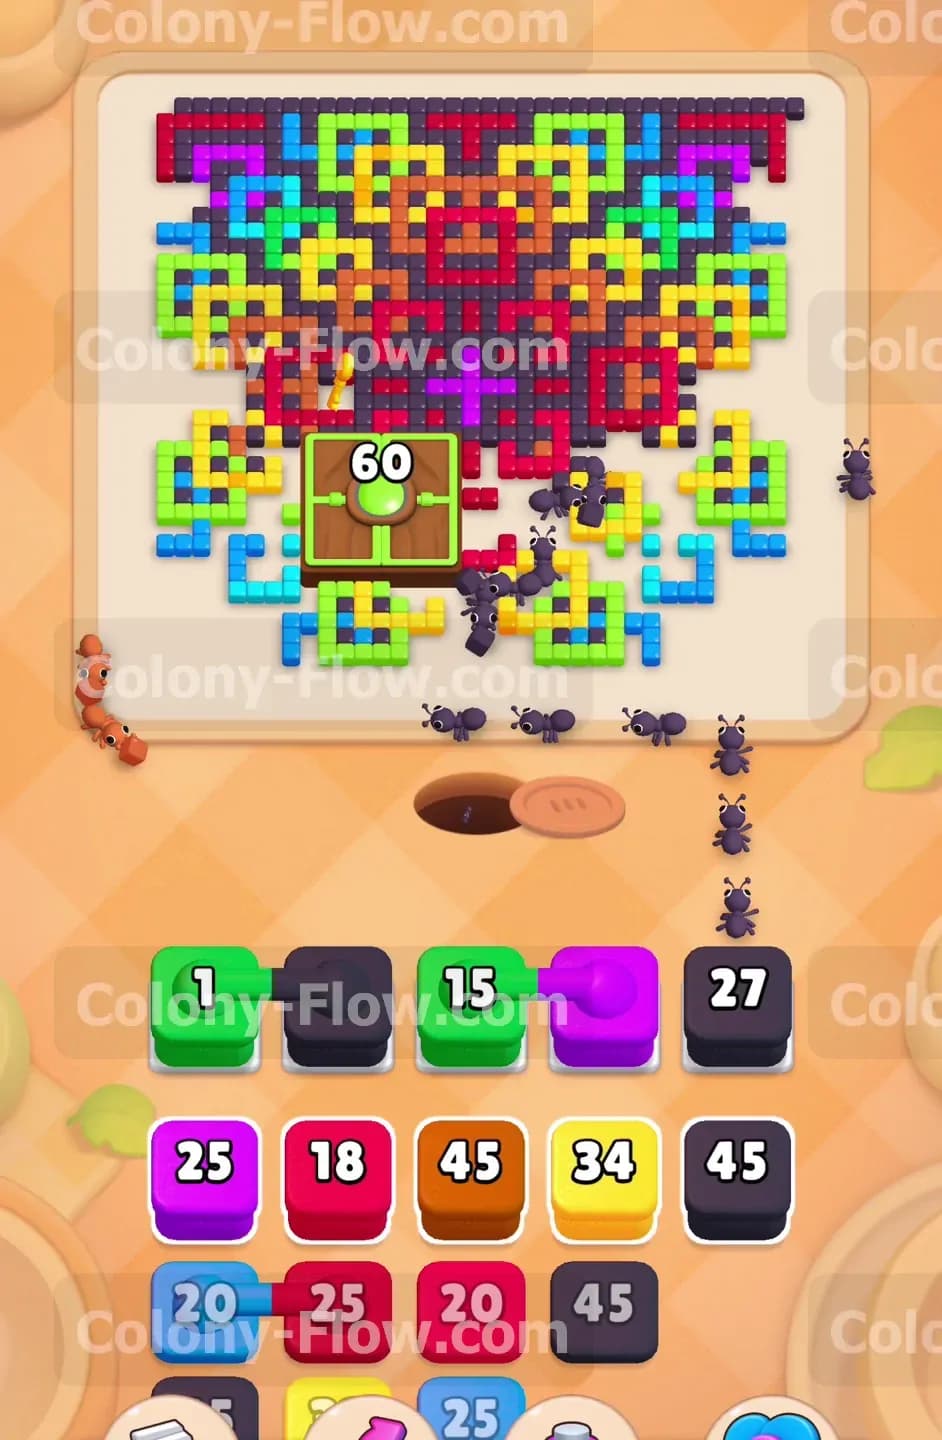
With the bottom outer loops completely gone your ants can finally reach the middle sections of the intricate knot. The board reveals a dense mix of purple, blue, and more black tiles situated further up the side columns. Pull a purple 25 block into the slots to target the dark inner shapes twisting through the design. The ants will climb higher up the board and begin dismantling the purple interlocking sections right away. At this exact point you bring up another black block to continue eating the thick border located on the upper half of the board. You will notice a black block count down from 27 to 15 as the ants aggressively chew through the top corners of the frame. Managing these two distinct colors at the exact same time is a necessary step for maintaining speed. The purple block clears the inner paths while the black block clears the outer boundary holding everything together. This simultaneous double action ensures a steady flow of ants and keeps the board shrinking evenly from all sides. A balanced attack prevents any one color from blocking the rest of the board.
Step 4: Destroy the central red cross to split the board into pieces
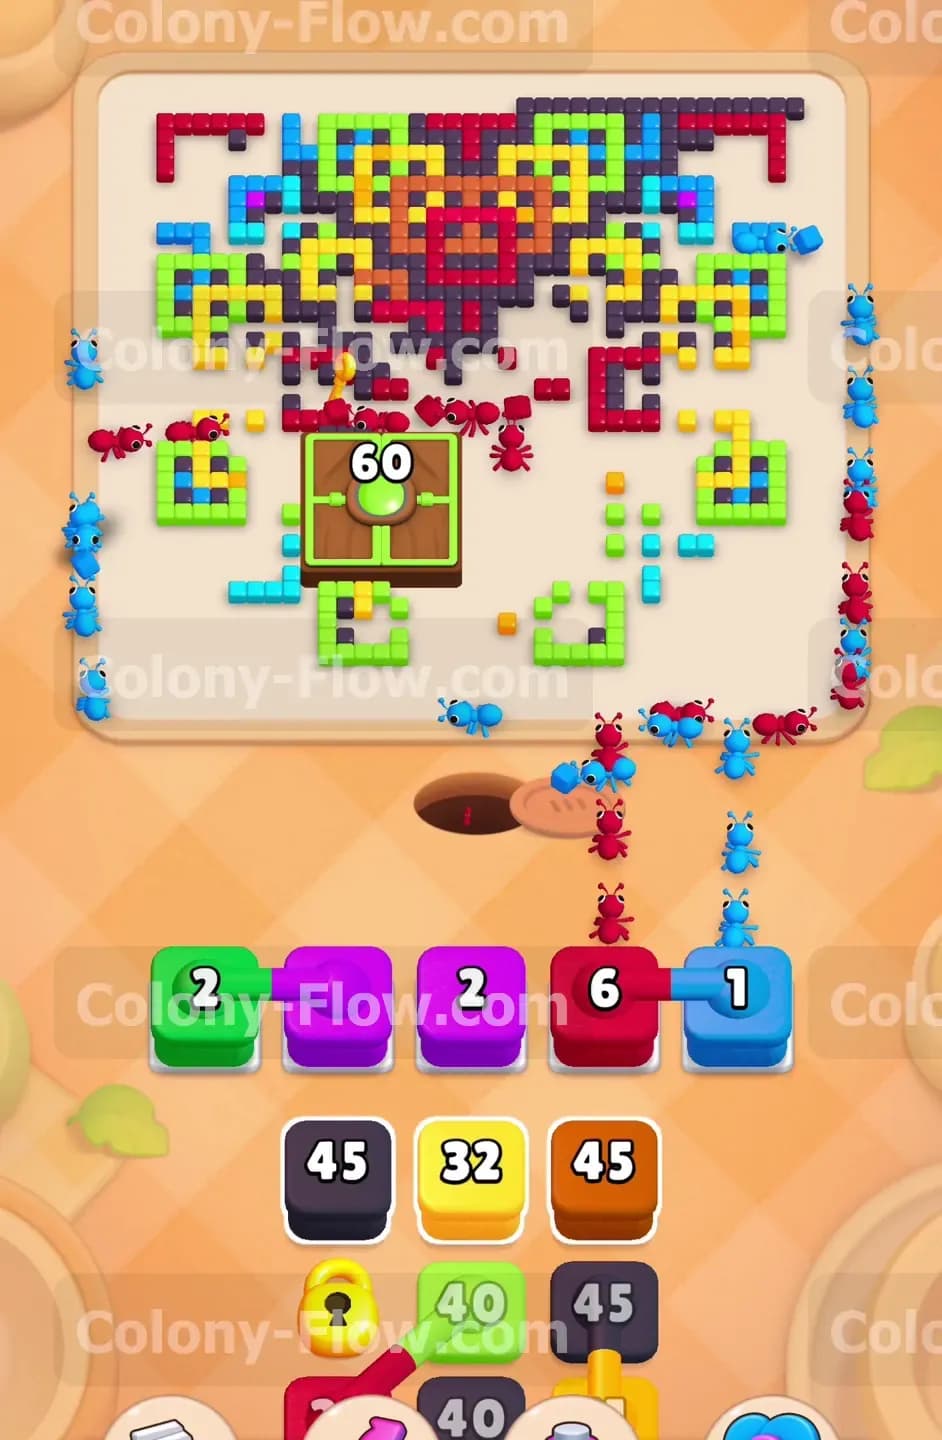
As you clear the middle layers the large red cross in the dead center of the board becomes totally exposed to your colony. You need to eliminate this red cross quickly to break the remaining knot into smaller isolated islands of color. Pull a red 18 block and immediately follow it with a red 20 block from your bottom tray. The ants will swarm the center area and rapidly eat away the entire cross structure holding the middle sections together. Once the red cross vanishes the entire board changes dramatically in layout. The massive interlocking pattern suddenly turns into separate upper clusters and a few scattered lower shapes sitting alone. This is a great moment in the level because the ant paths become much shorter and significantly more direct to their targets. Your slots will hold a green block at 1 and a black block at 10 during this transition phase. Just let the ants finish their current colors completely before you introduce anything new from the tray. Patience here ensures you do not crowd the board with unneeded bugs.
Step 5: Consume the giant green block on the left side
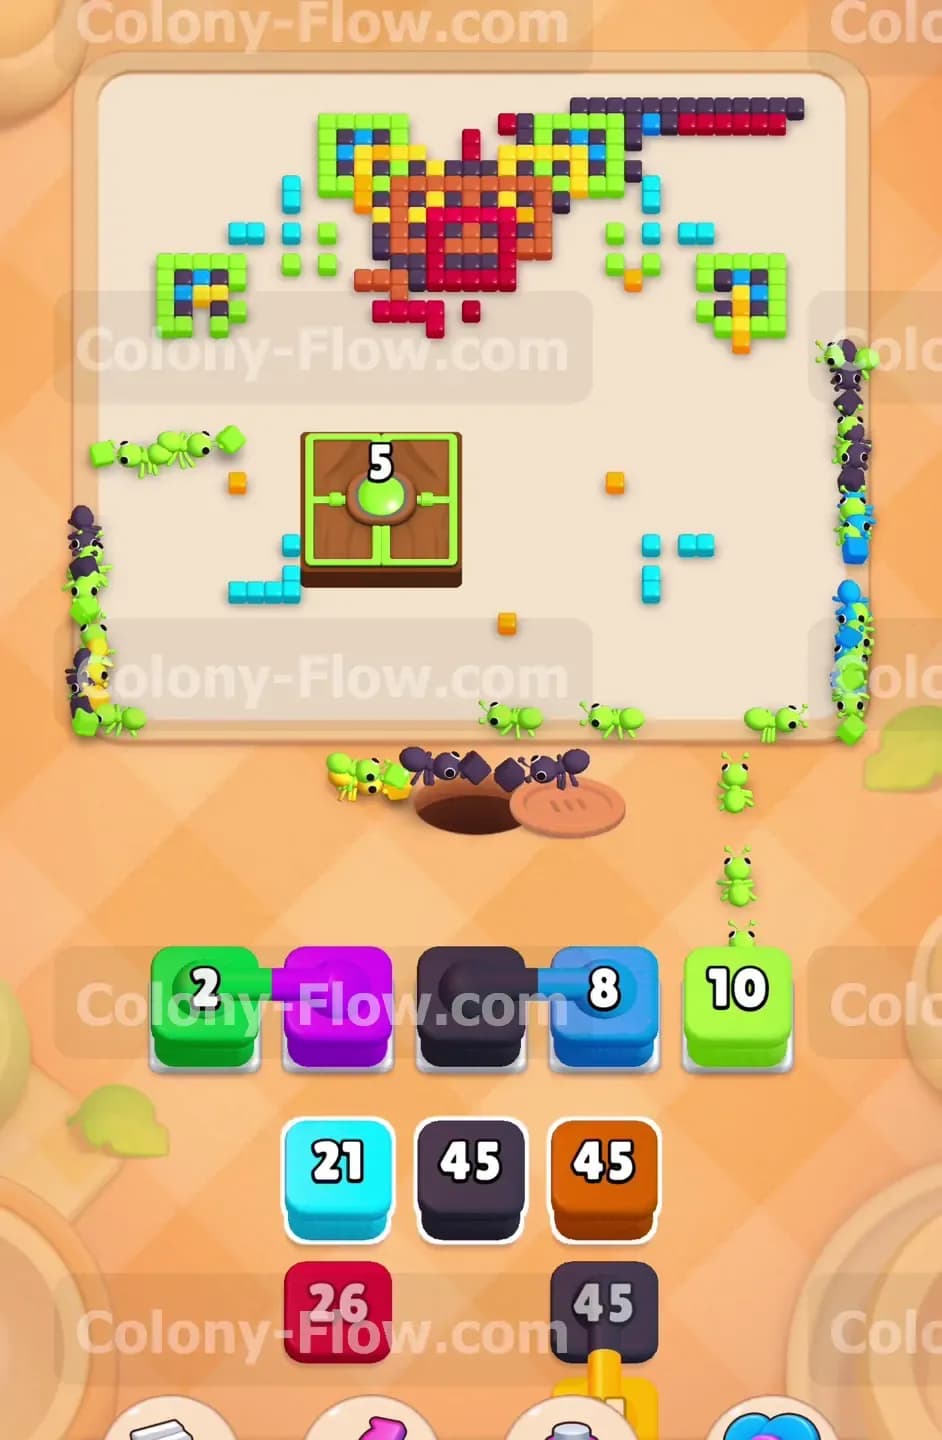
Now it is time to deal with the most stubborn obstacle on the entire board. The giant green block labeled 60 has been sitting quietly on the left side since the start of the level. Now that the surrounding tiles are gone the ants finally have a wide open path to reach it. Pull a green block from your tray to send your colony marching toward this massive target. Because this huge tile requires 60 ants to clear you need to use multiple green blocks or rely on a very large one to get the job done properly. The ants will march directly into the giant green tile and start dropping its number very quickly. You will watch the number fall heavily from 60 all the way down to 5 in just a few moments of focused eating. During this heavy eating phase you pull a blue block or a purple block to keep other ants busy on the right side of the board. Keeping multiple groups active prevents your ants from bottlenecking at the giant green tile and wasting valuable time waiting in line. A split focus keeps your slots rotating smoothly.
Step 6: Unlock the yellow blocks and clear the upper islands
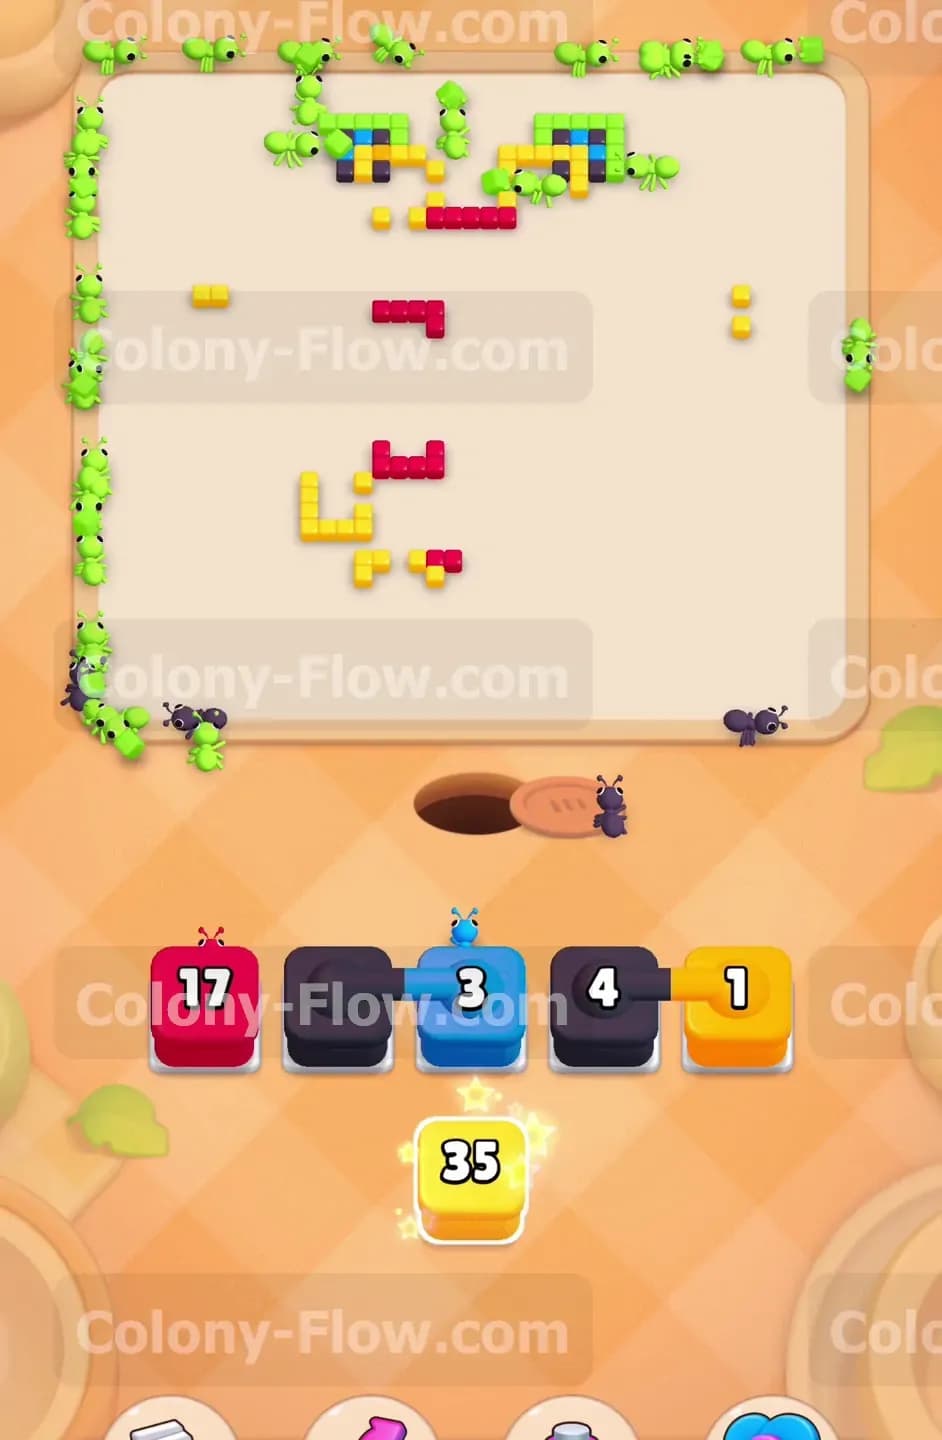
Clearing the central and lower sections allows your ants to finally reach the key tiles hidden on the board. Collecting these keys instantly removes the heavy lock from the yellow 40 block sitting down in your queue. As soon as the lock disappears you must pull that yellow block into an open waiting slot immediately. The ants will rush straight to the top of the board to eat the remaining yellow loops forming the upper canopy. You will also need to pull an orange block to clear the final orange sections tucked right near the top edge of the picture. The board looks very sparse at this late stage of the game. You will only see scattered pieces of green, yellow, and blue tiles remaining on the dirt background. Pull the exact colors you need to match these few remaining fragments one by one. A red block at 17 and a blue block at 3 will easily handle the last stragglers standing in your way. The glowing yellow 35 block in your tray provides the absolute final push you need to finish the job. Once the last colored tile completely disappears the ants will scurry off the screen and you win the level.
Final Thought
This level tests your ability to dismantle a complex shape without rushing your pulls from the tray. If you take your time and follow the exposed paths carefully you will avoid filling your slots with trapped colors. Be incredibly mindful of the locked yellow block and wait patiently for the ants to grab the keys to unlock it. I highly encourage you to watch the video above this article if any step is hard to follow in text format. Seeing the ants flow across the intricate knot in real time makes the correct order much easier to understand and execute. Good luck clearing the board and keeping your colony moving forward.