Colony Flow Level 350 Walkthrough Solution & Guides | How to solve Colony Flow 350

Guide By Liam Stone
Updated on August 1, 2026
The video above covers the entire Level 350 solution. Watch it if you want to skip the article and jump straight to the answer.
Video doesn't match your screen?
Game updates frequently scramble layouts! Try our AI Screenshot Solver first to find your exact board instantly, or report broken guides to our team.
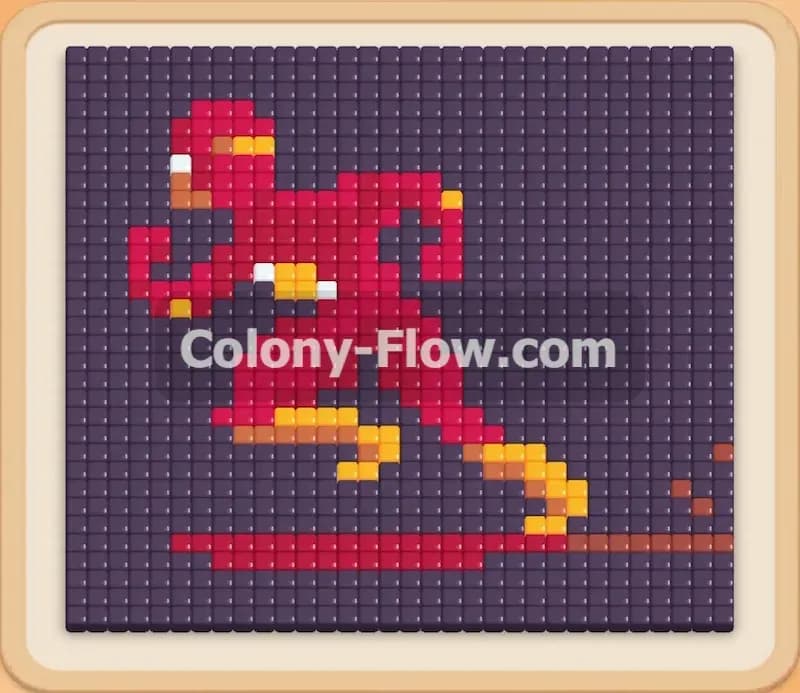
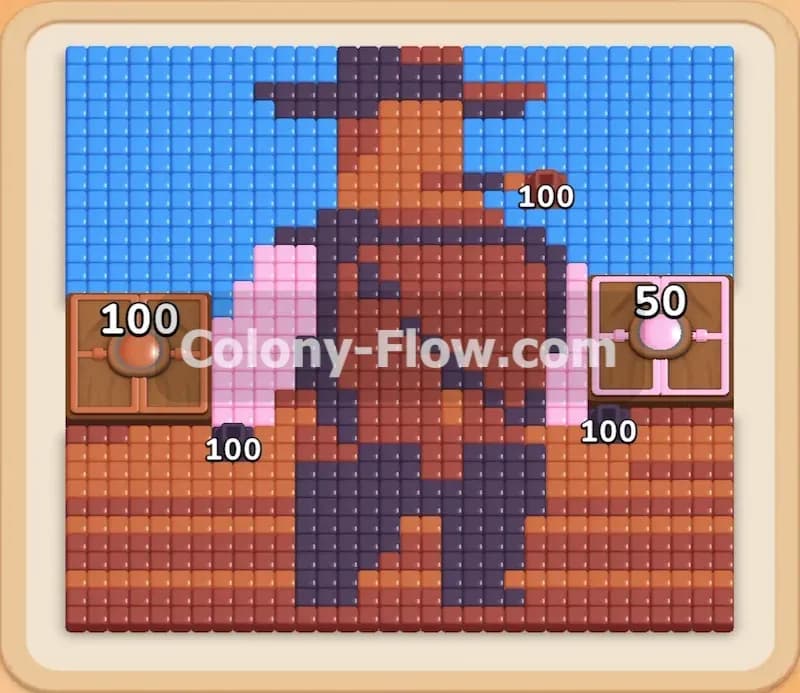
Welcome to Colony Flow Level 350. You are faced with a massive pixel art warrior character surrounded by a huge dark red background. I played this level and found that managing the sheer volume of dark red tiles is your biggest task. You must carefully balance clearing the character details while keeping a steady stream of dark red ants working on the background.
Colony Flow Level 350 Overview
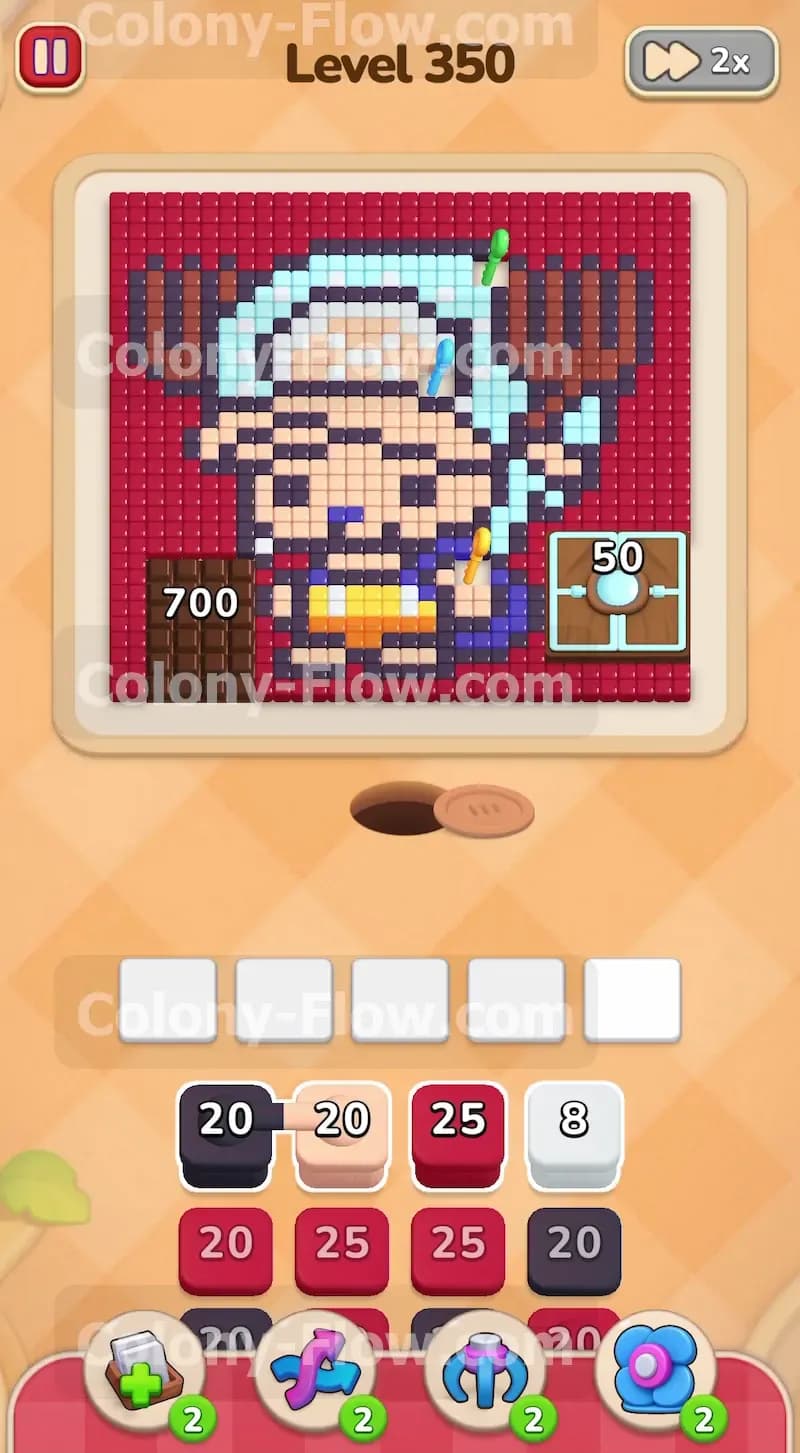
What You Are Working With
The board features a highly detailed pixel art picture of a warrior holding a light blue sword. A massive dark red background surrounds the entire character. Two Hungry Doors sit prominently on the board. The left Hungry Door displays the number 700 and requires you to clear that exact amount of dark red tiles to force it open. The right Hungry Door requires you to clear 50 tiles to open. Three different colored keys rest directly on the board. A green key sits at the top right corner near the warrior head. A blue key rests on the left side right next to the light blue sword. A yellow key sits at the bottom near the character feet. The tray at the bottom of your screen contains a large mix of black, skin, dark red, light blue, white, and yellow blocks. Many of these blocks appear as Connected Boxes. This mechanic means two or more blocks are permanently linked together by a visible line in the tray. They will pull into your waiting slots as a single group. Several colored locks block the lower layers of the tray. You must collect the matching keys on the board to remove these locks and reach the blocks trapped underneath.
What It Takes to Clear Level 350 Board
Winning this level requires a steady rhythm of feeding the dark red background while carefully picking apart the warrior details. You lose the game if your five waiting slots fill up with blocks that have no open paths to the board. Because the tray contains numerous Connected Boxes, you face a very high risk of jamming your slots. If you pull a connected group and just one of those colors has no exposed tiles on the board, that specific block will sit in your slot and permanently clog your tray. You must time your pulls so that every single block you move immediately finds an open path. You clear the board by unlocking all the tray locks, opening both Hungry Doors, and feeding the final ants to the remaining character tiles.
Colony Flow Level 350 Step by Step Solution
Step 1: Start clearing the massive dark red background and the black outline.
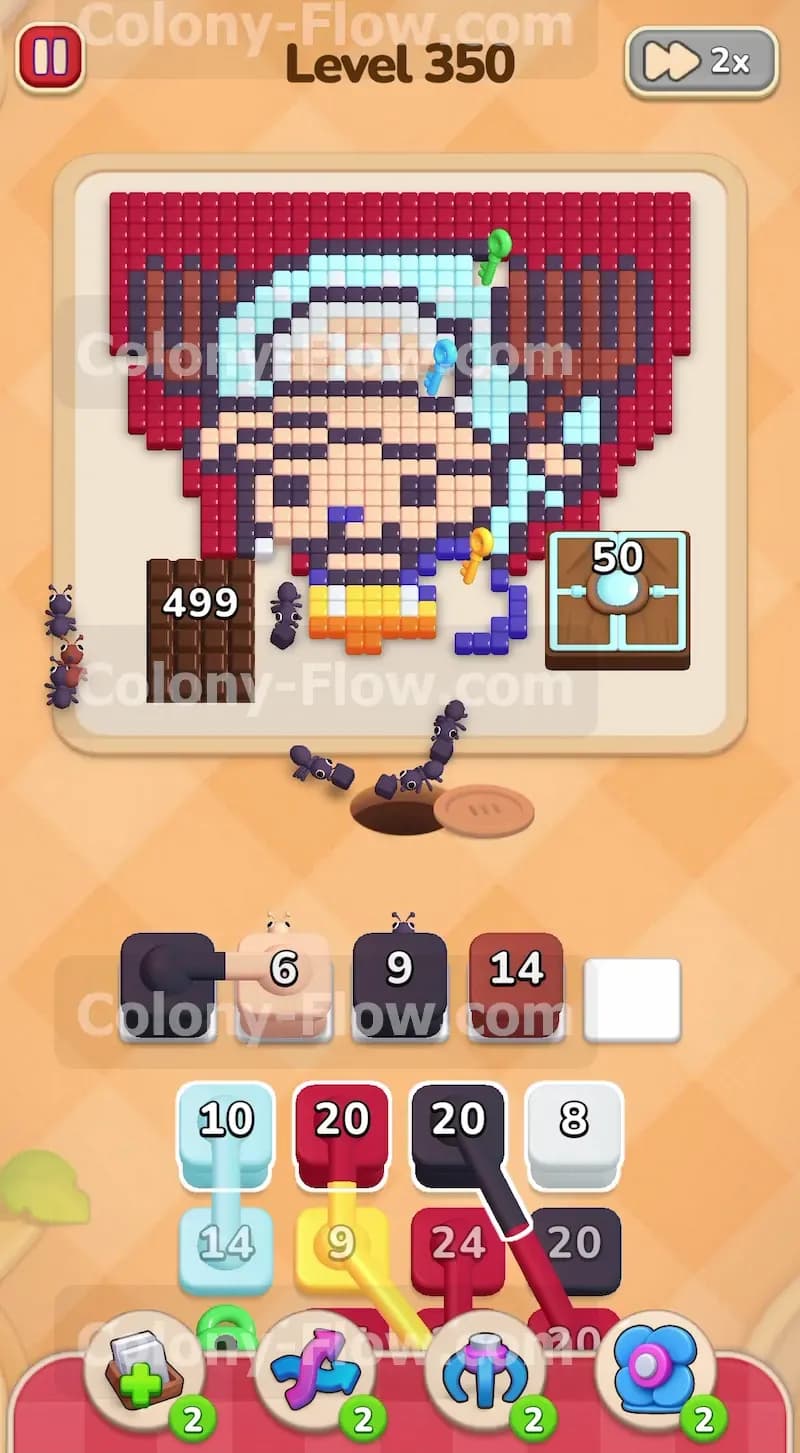
Your very first move is to pull the dark red block, the black block, and the skin block from the top row of the tray. The dark red ants immediately swarm the huge background section surrounding the warrior. This initial action starts counting down the massive requirement for the left Hungry Door from 700. The black ants attack the outer hair outline of the warrior head. The skin ants march straight toward the exposed sections of the face. You must keep the dark red ants flowing constantly throughout this entire level. Whenever a dark red block becomes available and you have an empty slot, pull it without hesitation. The background is so large that it will naturally absorb as many dark red ants as you can possibly send. This strategy keeps your slots clear while you focus your attention on the more complicated center picture. Clearing the perimeter early gives you much more room to operate.
Step 2: Collect the green key at the top right of the board.
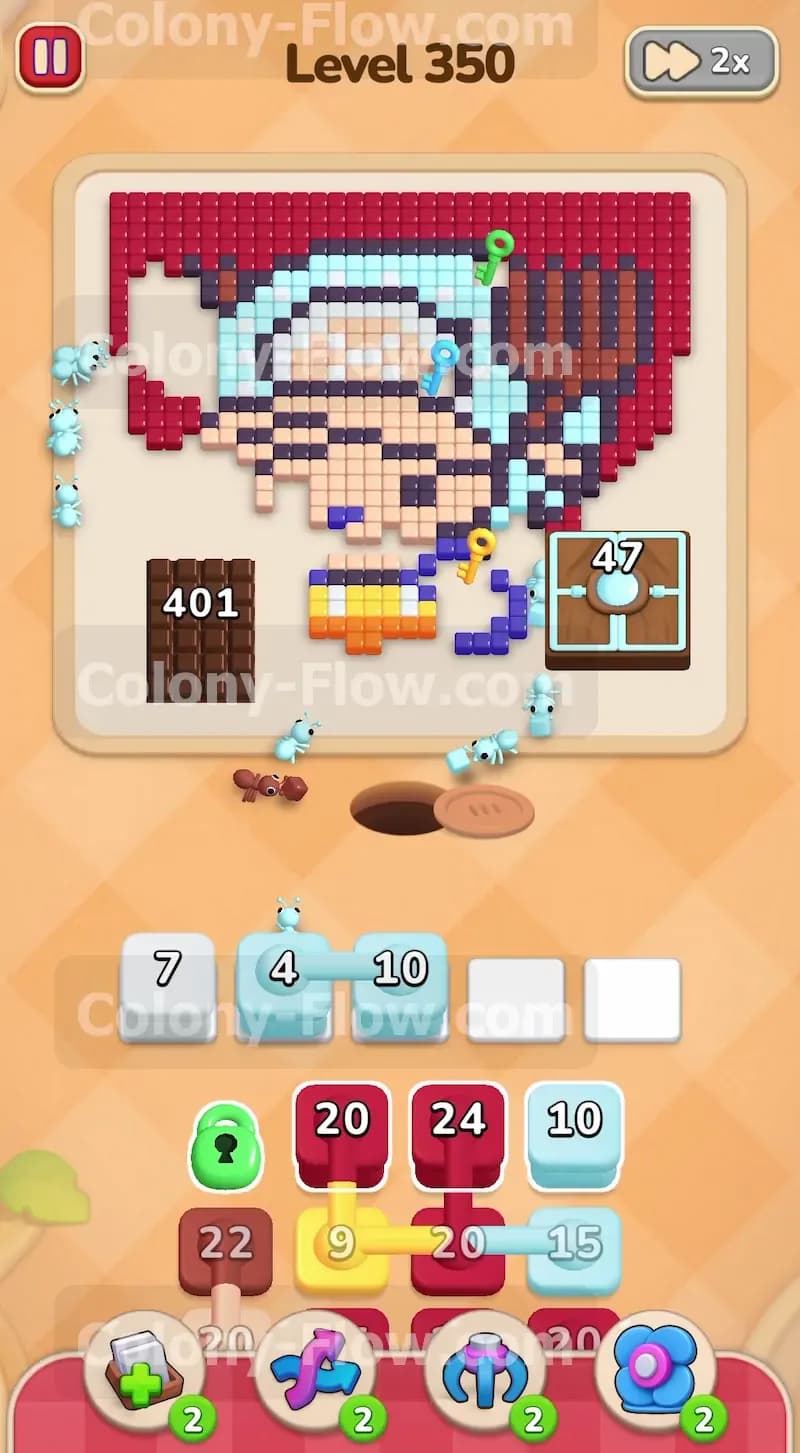
As the black outline clears away from the top edge, the path to the green key completely opens up. Pull the light blue block and the white block from the active tray layer. The light blue ants travel up to eat the outer sword tiles and the character accessories. The white ants head for the small details in the eyes and the bright weapon highlights. Clearing these upper details allows your next wave of ants to physically reach the green key located at the top right. Once the ants touch the green key, it flies down to the tray and unlocks the green lock instantly. This action reveals the next hidden layer of blocks in the tray. You now have full access to a new set of dark red blocks and your very first group of Connected Boxes. Planning your moves around these new blocks is critical for your survival.
Step 3: Pull the first set of Connected Boxes to clear the sword.
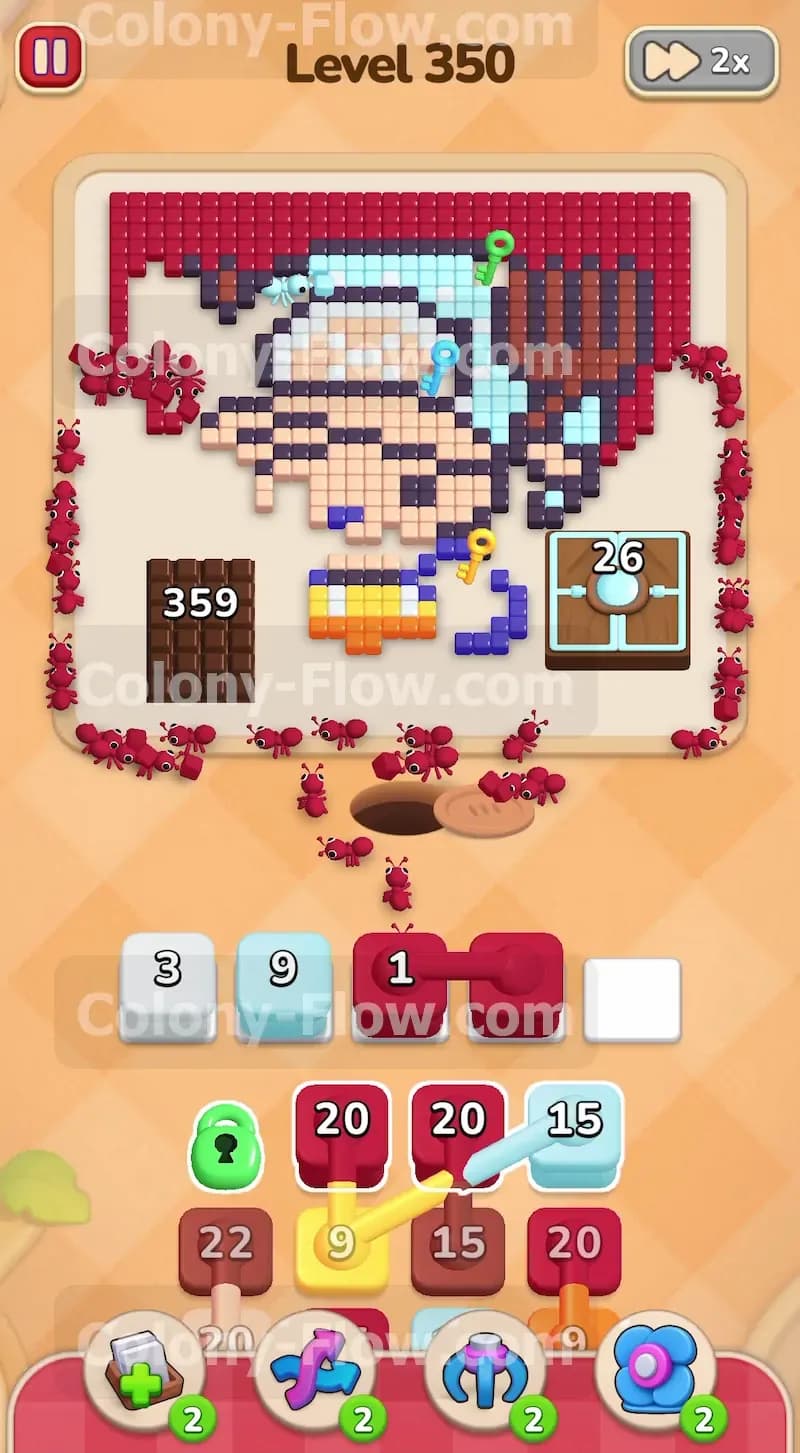
The tray now shows a light blue block physically connected to a dark red block. Before you pull them into your slots, look closely at the current board state. The dark red background remains wide open and ready to accept ants. The light blue sword also has plenty of exposed tiles ready to be eaten. Since both colors currently have valid open paths, you can safely pull this connected pair. The blocks move into your waiting slots and the ants immediately deploy to their targets. This keeps your waiting slots clear and prevents a catastrophic jam. The light blue ants continue eating the sword and clear a path toward the blue key on the left side of the warrior. Meanwhile, the dark red ants drop the left Hungry Door counter down into the 400 range. You must maintain this steady pace to keep the board moving.
Step 4: Send yellow ants to collect the yellow key at the bottom.
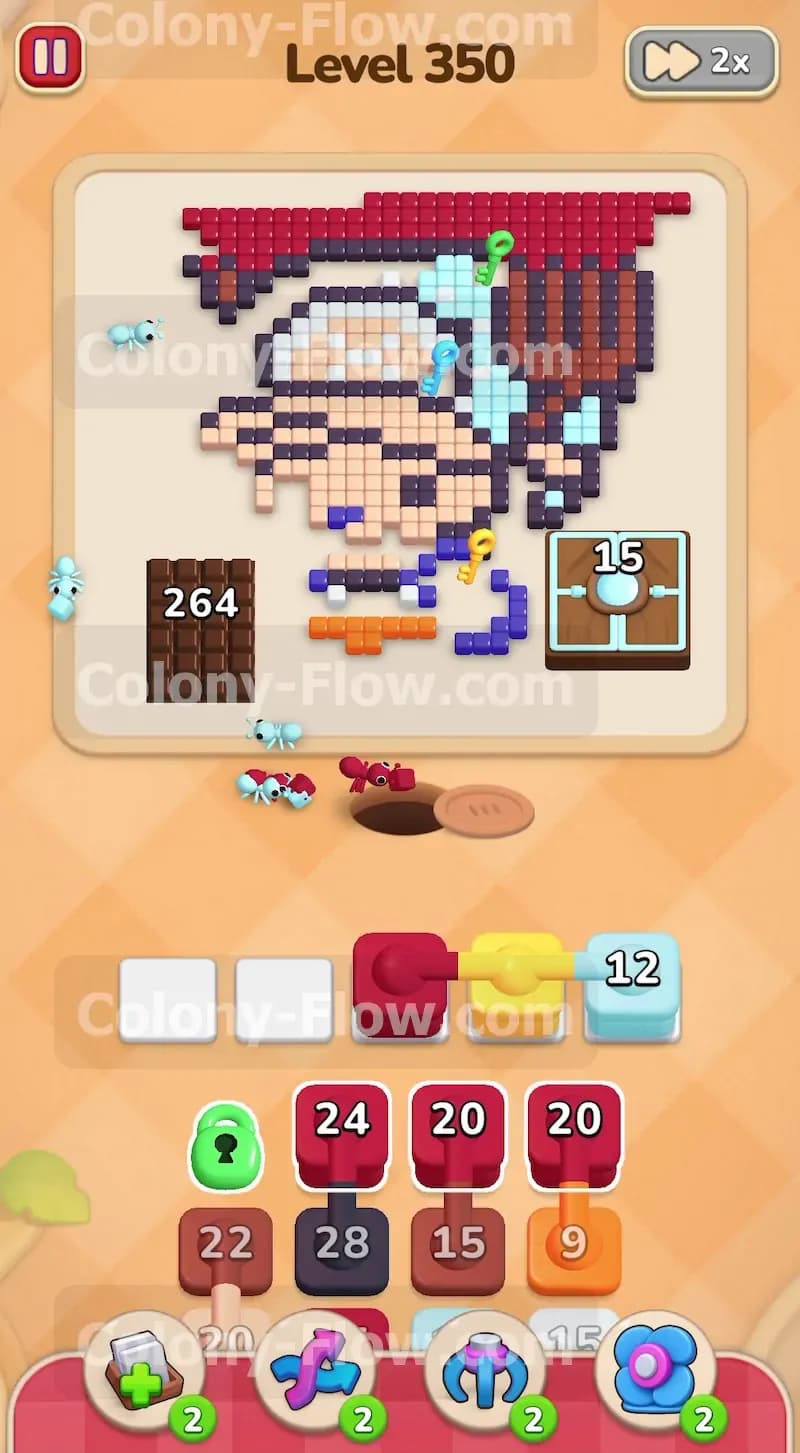
You need to unlock the yellow lock in the tray to access the deeper block layers waiting below. Pull the yellow block from the tray the exact moment it becomes available. The yellow ants march straight for the belt and boots of the warrior character at the bottom of the picture. These yellow tiles sit right next to the yellow key position. As the ants consume the belt tiles, they grab the yellow key. The yellow lock in the tray immediately vanishes. This opens up a crucial section of the tray containing more high capacity black and skin blocks. Pull a black block to continue chipping away at the thick hair and the lower body outline. The face and head shape will start to shrink significantly as the black ants clear the perimeter. This opens up even more paths for your other colored ants.
Step 5: Collect the blue key and open the right Hungry Door.
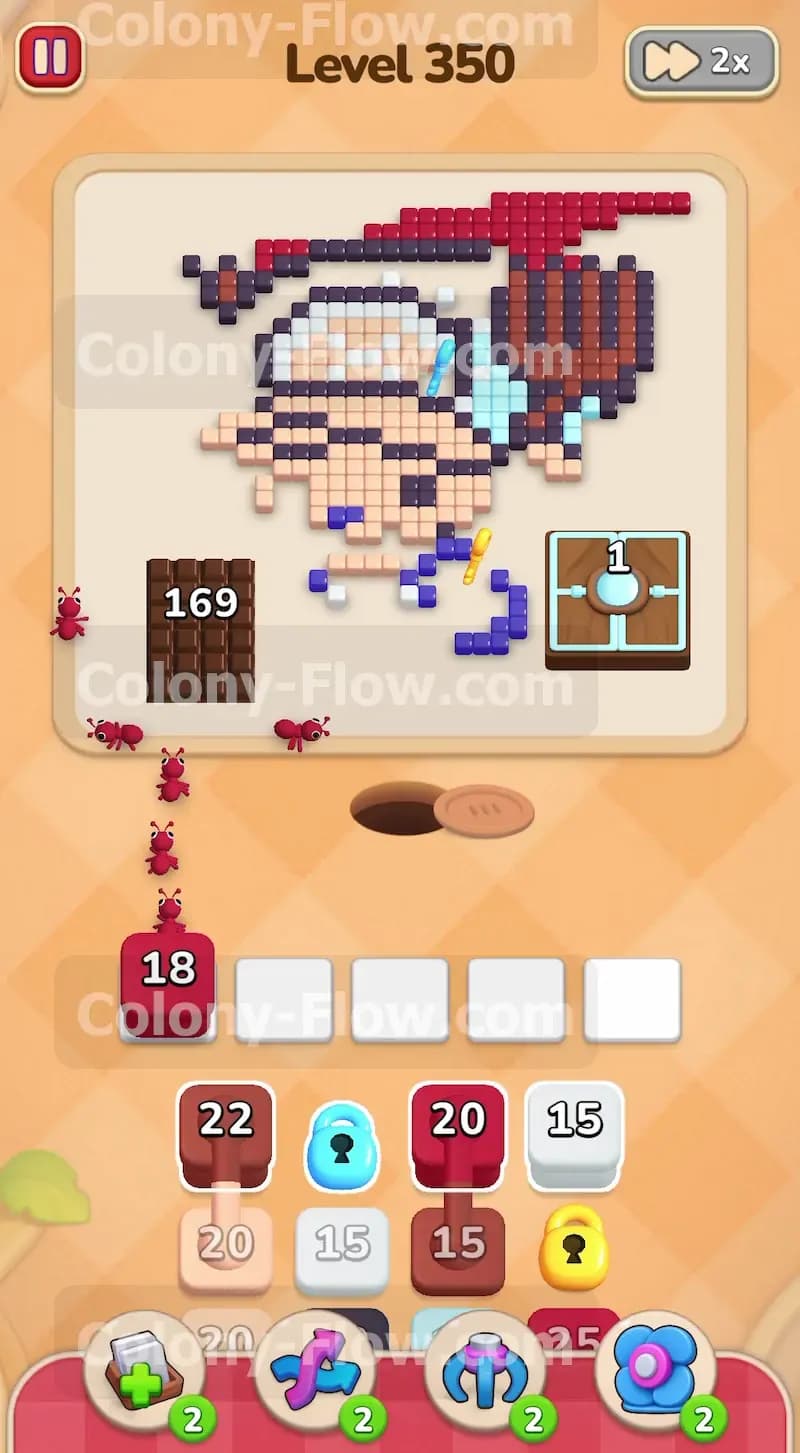
The right Hungry Door requires 50 tiles of the remaining character details to finally open. Pull the next available light blue and white blocks to feed the board. The light blue ants finish off the sword handle and grab the blue key resting on the left side of the board. The blue lock in the tray disappears completely. The white ants finish the remaining small highlights on the armor and face. As these details vanish, the right Hungry Door counter drops all the way down to 1. Pull the final corresponding color block to feed the last required tile. The right Hungry Door opens completely and clears itself from the board entirely. You now have full unobstructed access to the bottom section of the tray and all the remaining blocks.
Step 6: Manage the deep tray layers and avoid a slot jam.
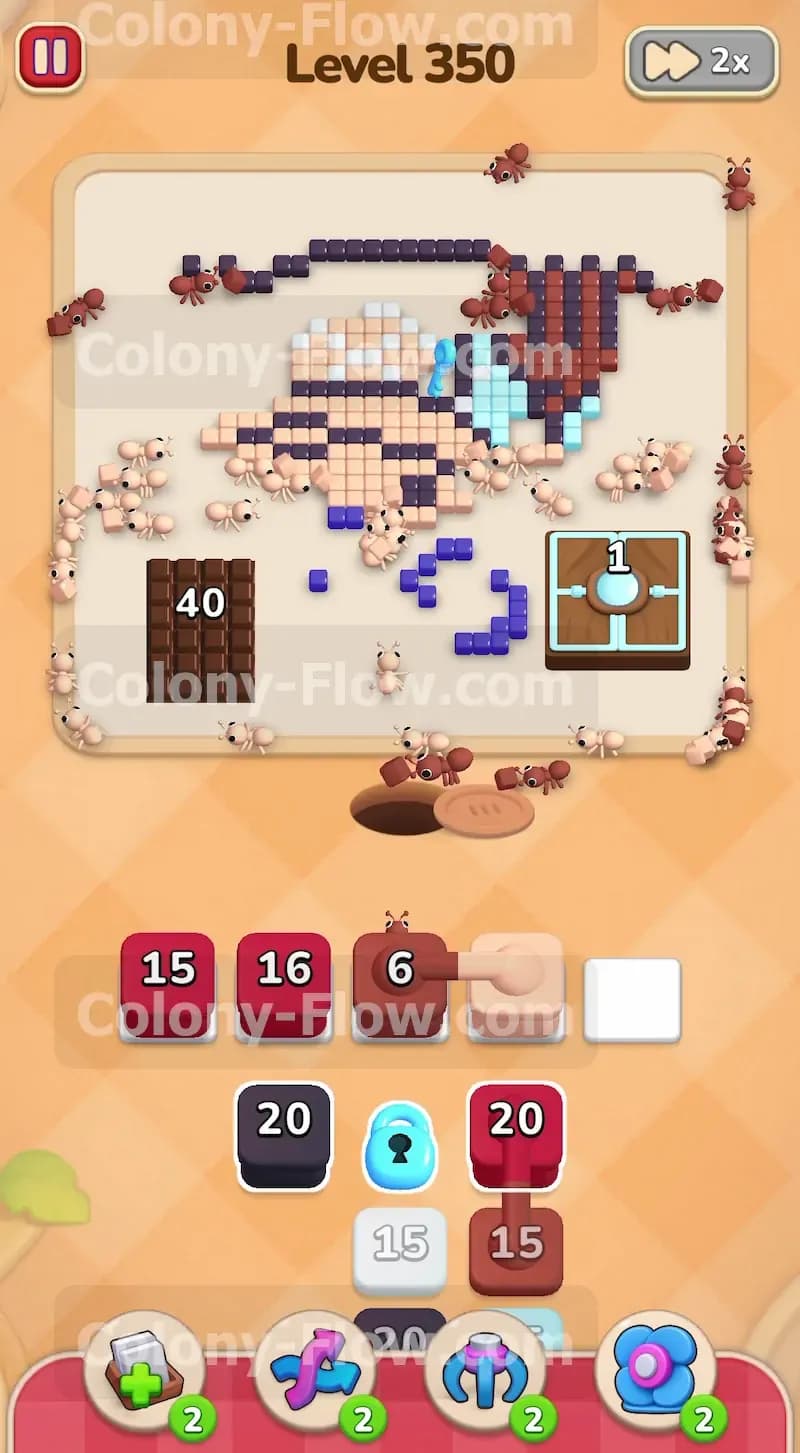
The bottom half of the tray is full of Connected Boxes mixing dark red, skin, and black blocks. This is the absolute most dangerous part of the entire level. If you pull a skin block but the face is temporarily blocked by black outline tiles, the skin block will stall in your slot. Always pull the black blocks first to strip away the protective outer outline from the warrior. Once the black ants clear a path to the inner face tiles, you can safely pull the skin blocks. Pair these deliberate moves with the dark red blocks. The dark red background is still huge and provides a safe dump for any connected dark red blocks you are forced to pull. Your left Hungry Door counter will drop below 200 during this careful phase. Keep your eyes on the board and never guess your moves.
Step 7: Finish the left Hungry Door requirement.
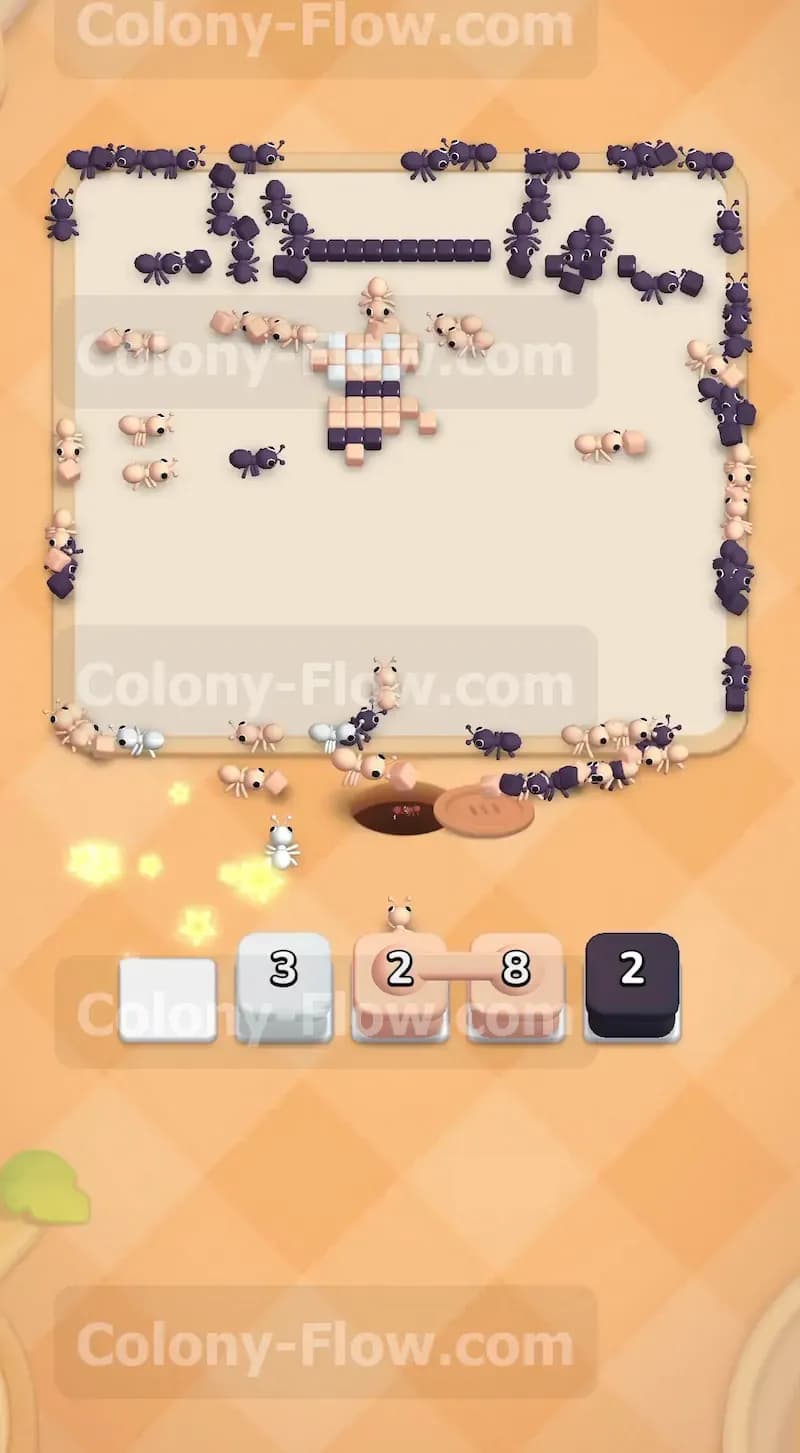
Only the bottom layers of the dark red background remain visible on the board. Pull the large capacity dark red blocks from the final row of the tray. The dark red ants swarm the bottom left and bottom right corners of the background picture. The massive counter on the left Hungry Door rapidly drops from 40 down to zero as the ants devour the tiles. The giant door finally opens and clears itself from the board forever. The only things left on the entire board are a few stray black outline pieces and a small patch of skin tiles sitting in the exact center of the character face. Your persistence with the dark red blocks has finally paid off and the board is almost clean.
Step 8: Clear the final character tiles to win the level.
Your tray is now almost completely empty. Pull the last remaining skin block and the final black block into your waiting slots. The black ants rush out to eat the very last pieces of the warrior hair outline. The skin ants swarm the absolute center of the face to finish the job. Because you managed your slots perfectly and never pulled a blocked color without a valid path, the final ants stream out smoothly and efficiently. The last tile vanishes from the screen and the board clears completely. You win the level and can confidently move on to the next puzzle challenge. Your mastery of Connected Boxes and Hungry Doors secured your victory.
Final Thought
Level 350 tests your patience and your ability to plan ahead with Connected Boxes. The massive dark red background acts as a great pressure relief valve for your waiting slots, but you still have to time your character detail pulls perfectly. If any of the lock and key sections give you trouble, watch the video above this article to see the exact order of moves.