Colony Flow Level 1130 Walkthrough Solution & Guides | How to solve Colony Flow 1130

Guide By Liam Stone
Updated on August 12, 2026
Watch the video above for a faster look at how Level 1130 gets solved.
Video doesn't match your screen?
Game updates frequently scramble layouts! Try our AI Screenshot Solver first to find your exact board instantly, or report broken guides to our team.
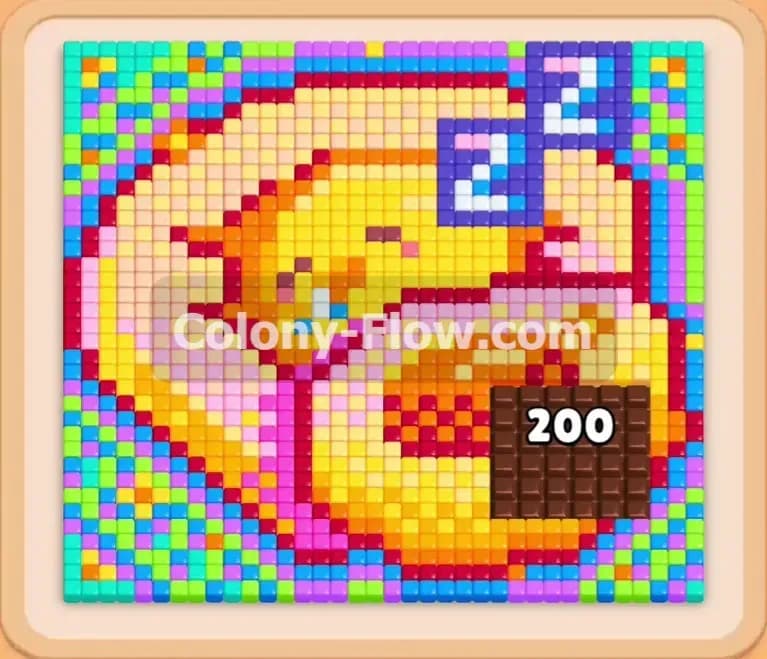
Colony Flow Level 1130 presents a charming pixel art scene of a sleeping chick nestled inside a cozy blanket. You will notice right away that a massive chocolate blocker sits squarely over the bottom right corner of the image. Your main challenge involves managing your tray slots carefully while chewing through that thick chocolate layer. You need a solid strategy to keep the ants moving and prevent a dead end. I played this level multiple times to find the safest route through the color layers. The key is prioritizing the outer borders before diving into the core of the picture.
Colony Flow Level 1130 Overview
What You Are Working With
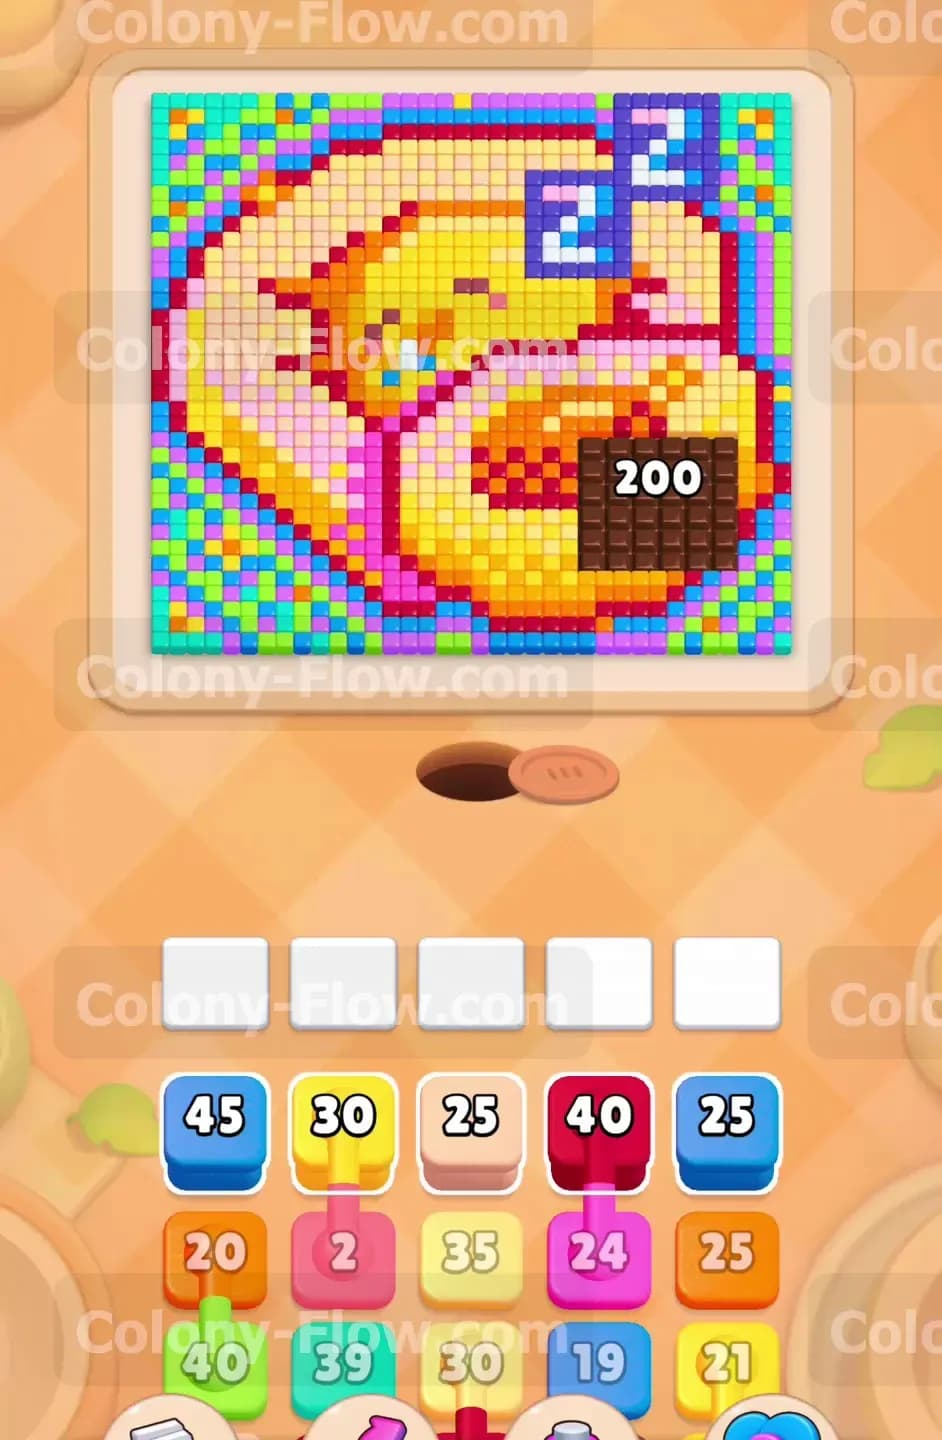
The picture features a bright yellow chick with orange shading resting inside a thick red and pink blanket. Above the chick you can see two blue sleeping letters floating in the air. The background consists of a repeating pattern using blue and yellow and white and green pixel tiles. A giant brown chocolate square dominates the lower right quadrant. This chocolate block displays a starting number of 200 right on its face. The tray at the bottom of the screen holds a massive supply of colors. You have large blocks like a blue 45 and a red 40 alongside many others in the queue. You also have five empty waiting slots just above the tray. The nest hole sits directly between the slots and the picture.
What It Takes to Clear Level 1130 Board
Clearing this board requires you to systematically strip away the background tiles and the outer red blanket outline. Exposing these outer edges allows your ants to reach the inner sections of the pixel art. You must break the chocolate block down from its starting count of 200 all the way to zero so you can uncover the hidden food tiles underneath. Success happens when every single pixel tile is completely removed from the board. You win when the picture is gone and your five waiting slots never fill up with blocked colors. If you pull the wrong block and trap your ants you will lose the level instantly.
Colony Flow Level 1130 Step by Step Solution
Step 1: Start chewing on the red blanket outline to reach the chocolate block
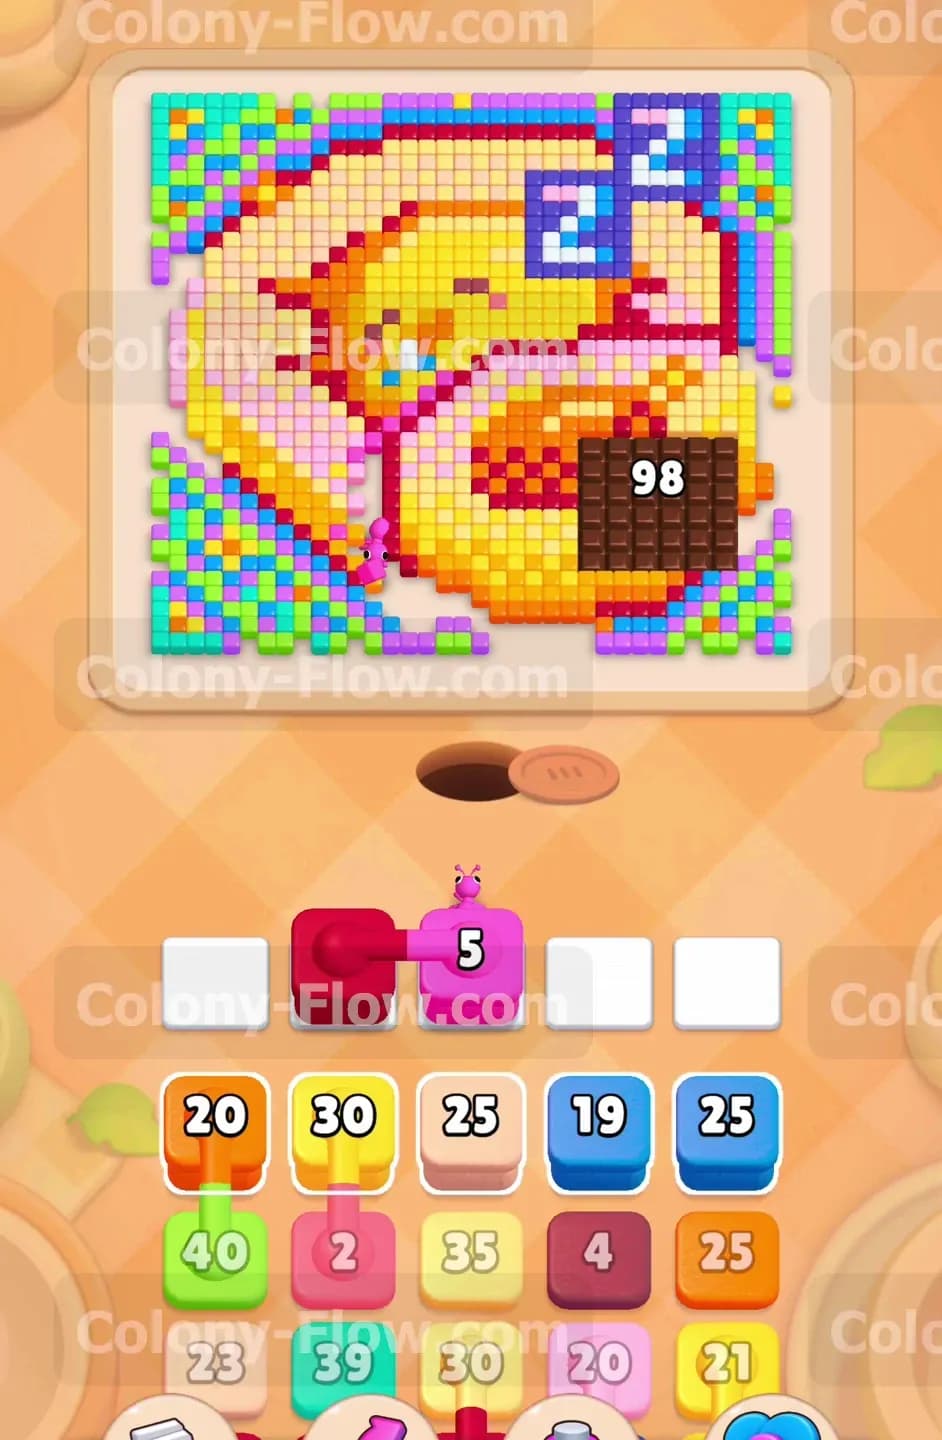
Pulling the red block from the tray is your very best opening move for this layout. The red tiles form a thick border around the sleeping chick and provide a direct path for your ants to start working immediately. When you tap the red block the ants pour out of the hole and march straight for that bold red outline. As they eat the red tiles they also bump into the large chocolate blocker sitting on the bottom right. The game registers these hits and reduces the chocolate number. The red block drops down to a count of five while the chocolate block takes heavy damage. You will see the chocolate counter drop quickly from 200 down to 98 in this initial assault. This aggressive first move keeps your waiting slots mostly empty and prevents an early game over.
Step 2: Clear the top left background pattern to open more eating paths
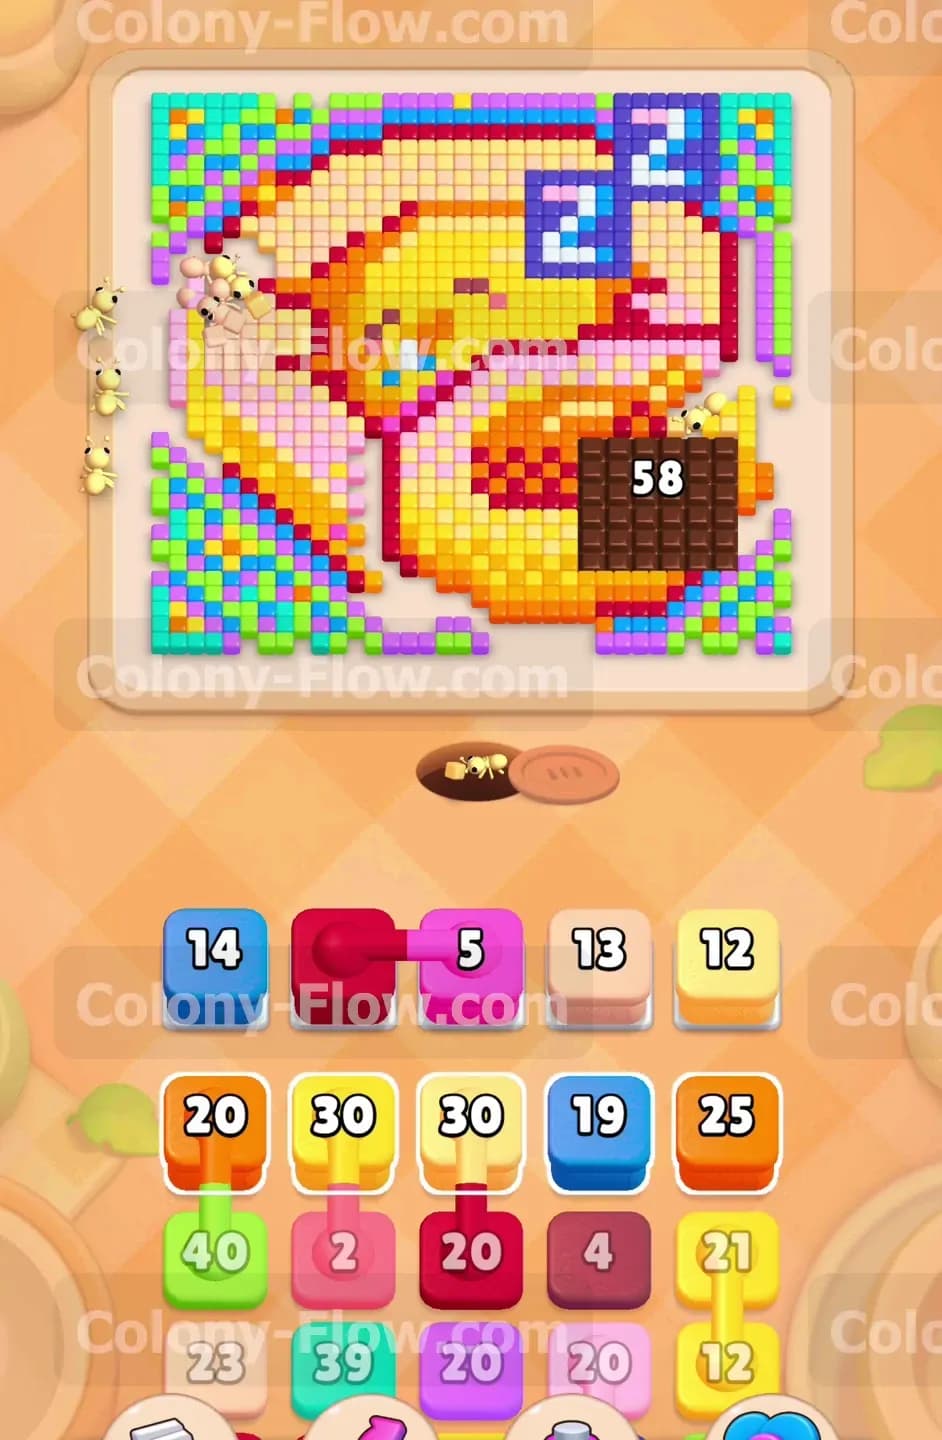
Now you need to target the patterned background filling the upper left and top edges of the board. Pull a blue block and a white block and a yellow block up into your active slots. The ants will split their focus and tackle the alternating colors of the background pattern simultaneously. The blue block drops to a count of 14 while the white block drops to 13 and the yellow block drops to 12. Removing these outer background tiles is highly important because it exposes new angles for your ants to attack the center image. The ants also continue to chip away at the top edges of the chocolate blocker as they clear the adjacent pixels. The chocolate counter falls down to 58 during this busy phase. Keeping three active blocks in your tray means the ants stay busy and your paths remain wide open for the next wave.
Step 3: Finish breaking the chocolate layer to expose the hidden bottom section
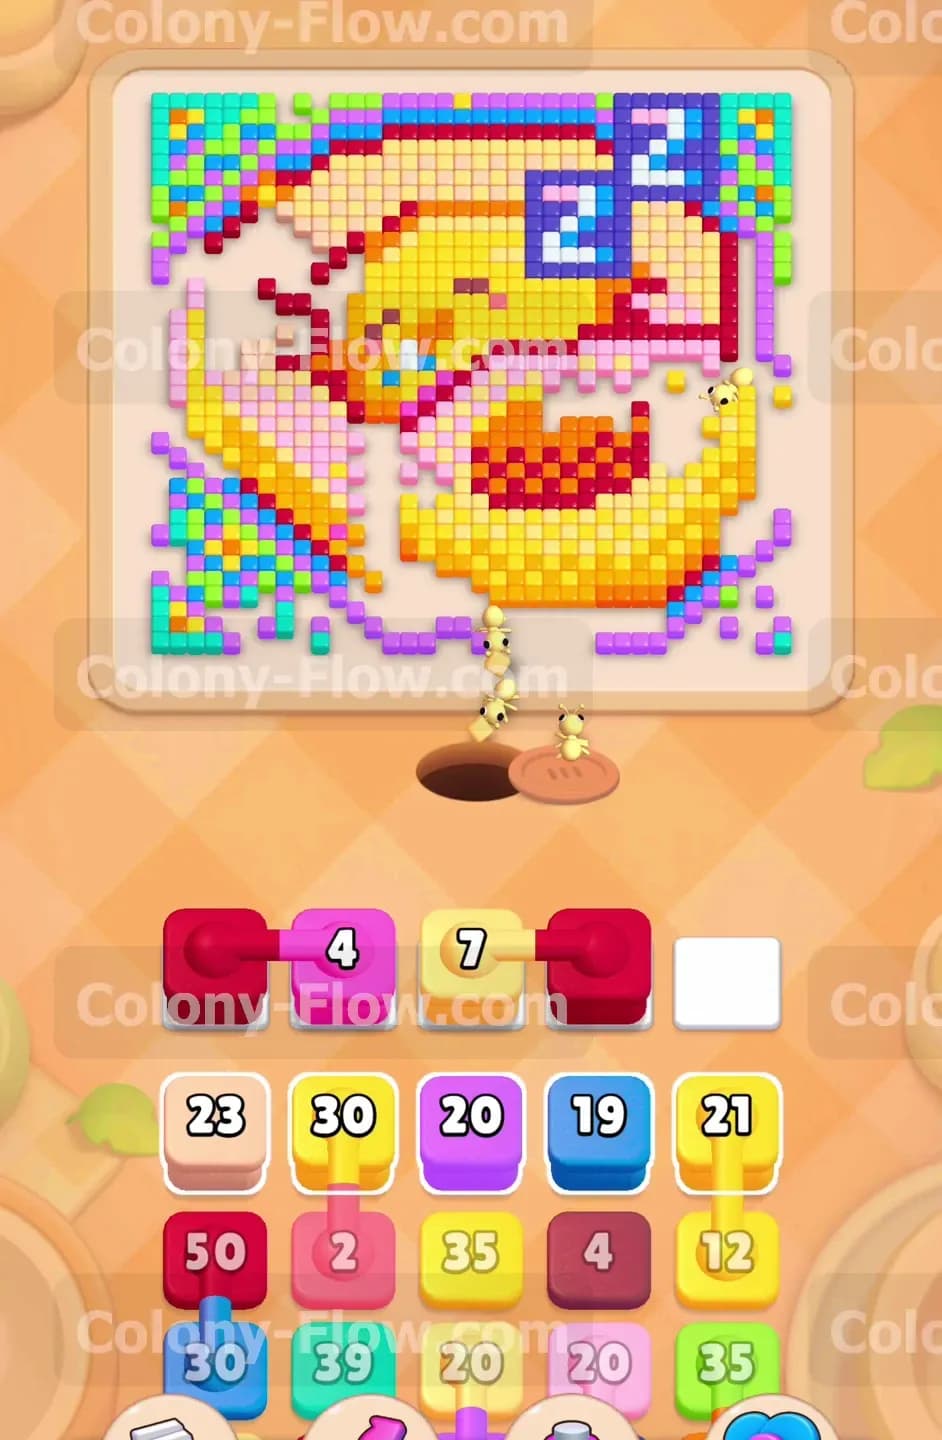
It is time to completely destroy the remaining pieces of the chocolate layer. Bring another red block and a fresh yellow block up into the waiting slots. The ants flood the lower right area of the board where the chocolate sits. They hammer the final 58 points of the blocker until it completely shatters and disappears from the screen. This action reveals a large section of bright yellow food tiles belonging to the chick body and the lower blanket parts that were hidden underneath. The red block count goes down to four and the yellow block goes down to seven. You now have a huge open space on the right side of the board. This newly opened space guarantees your ants have plenty of clear paths to reach the inner colored tiles without getting stuck.
Step 4: Consume the pink inner border and the yellow body of the chick
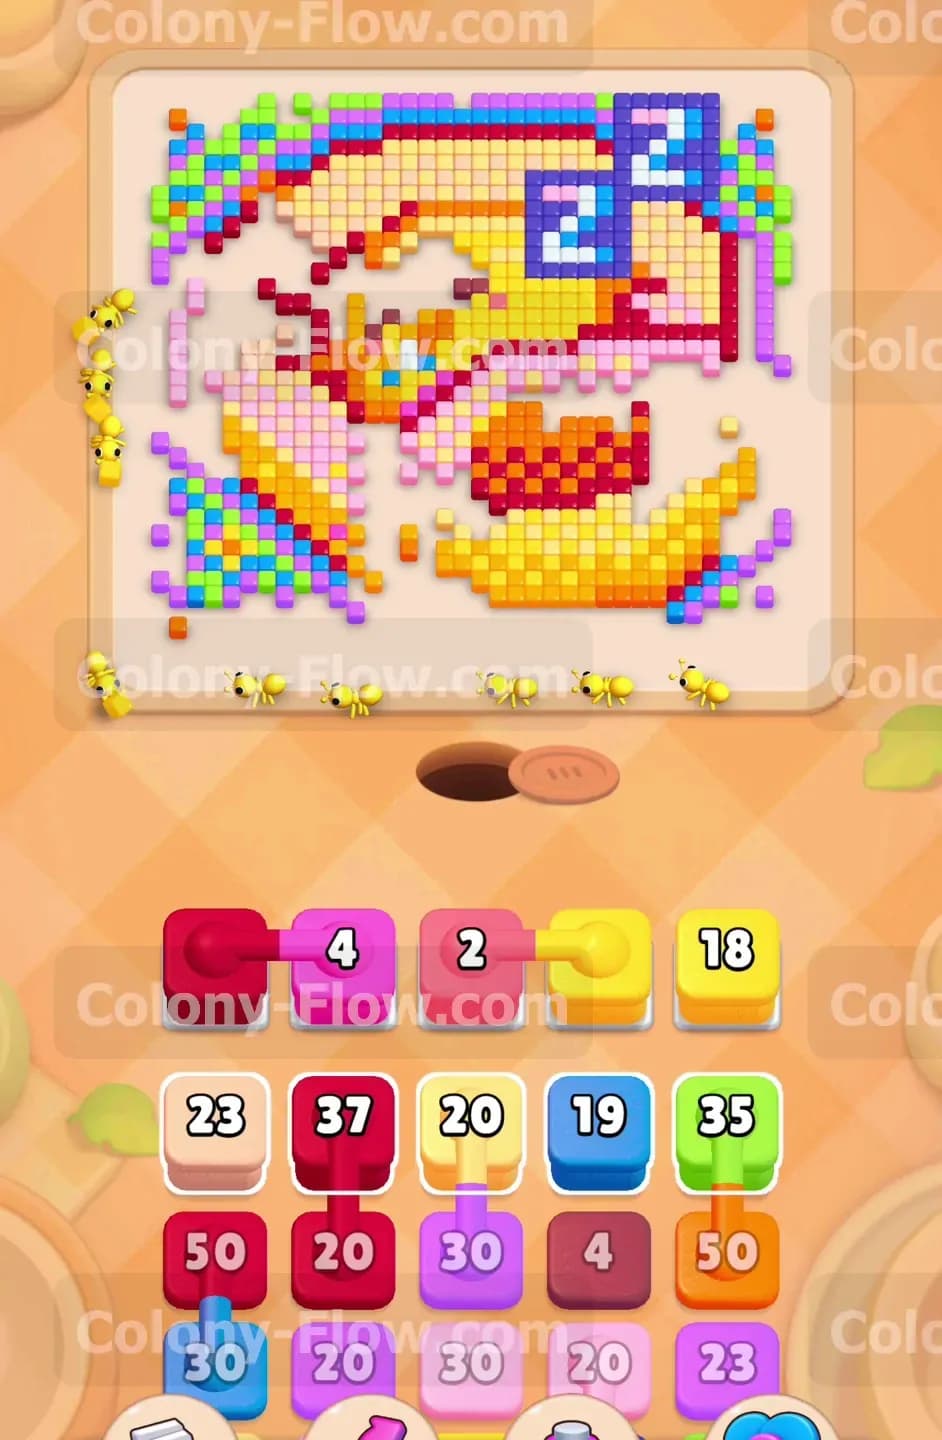
With the heavy chocolate obstacle finally out of the way you can focus on the main character in the picture. Pull a pink block and a new yellow block into your tray slots. The pink ants rush in to eat the bright pink outline that defines the round shape of the sleeping chick and the inner folds of the blanket. The yellow ants swarm the massive block of yellow tiles making up the main body of the bird. The yellow block count drops down heavily to 18 while the pink block drops to two. The overall picture shrinks significantly as the bulk of the central image disappears into the nest hole. You are managing the flow perfectly right now by matching your active colors to the largest available exposed sections.
Step 5: Clear the remaining outer background corners to isolate the center
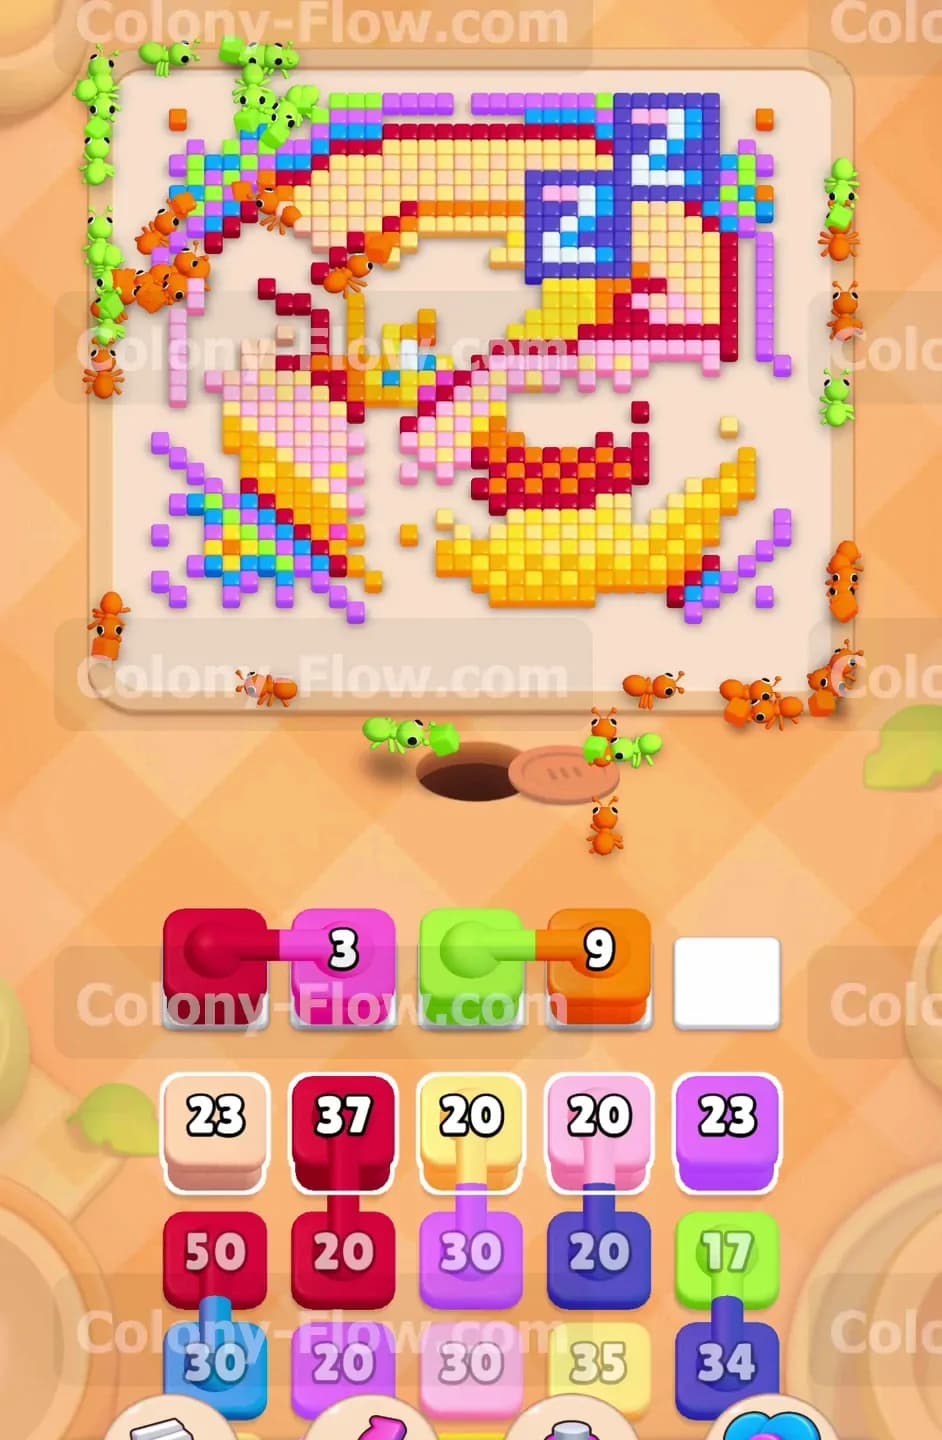
The top right corner and the bottom left corner still hold small clusters of patterned background tiles. Pull a green block and an orange block from the lower section of your tray. The green ants head straight for the top right area to eat the remaining green pattern tiles. The orange ants target the bottom left edge and begin eating the orange shading details scattered across the nest. The green block drops to nine and a nearby pink block sits at three. You only have a few active slots filled right now so there is absolutely zero risk of hitting a dead end. Clearing these isolated corners cleans up the edges and makes the final cleanup process much easier to manage.
Step 6: Remove the blue sleeping letters and the dark red interior shadows
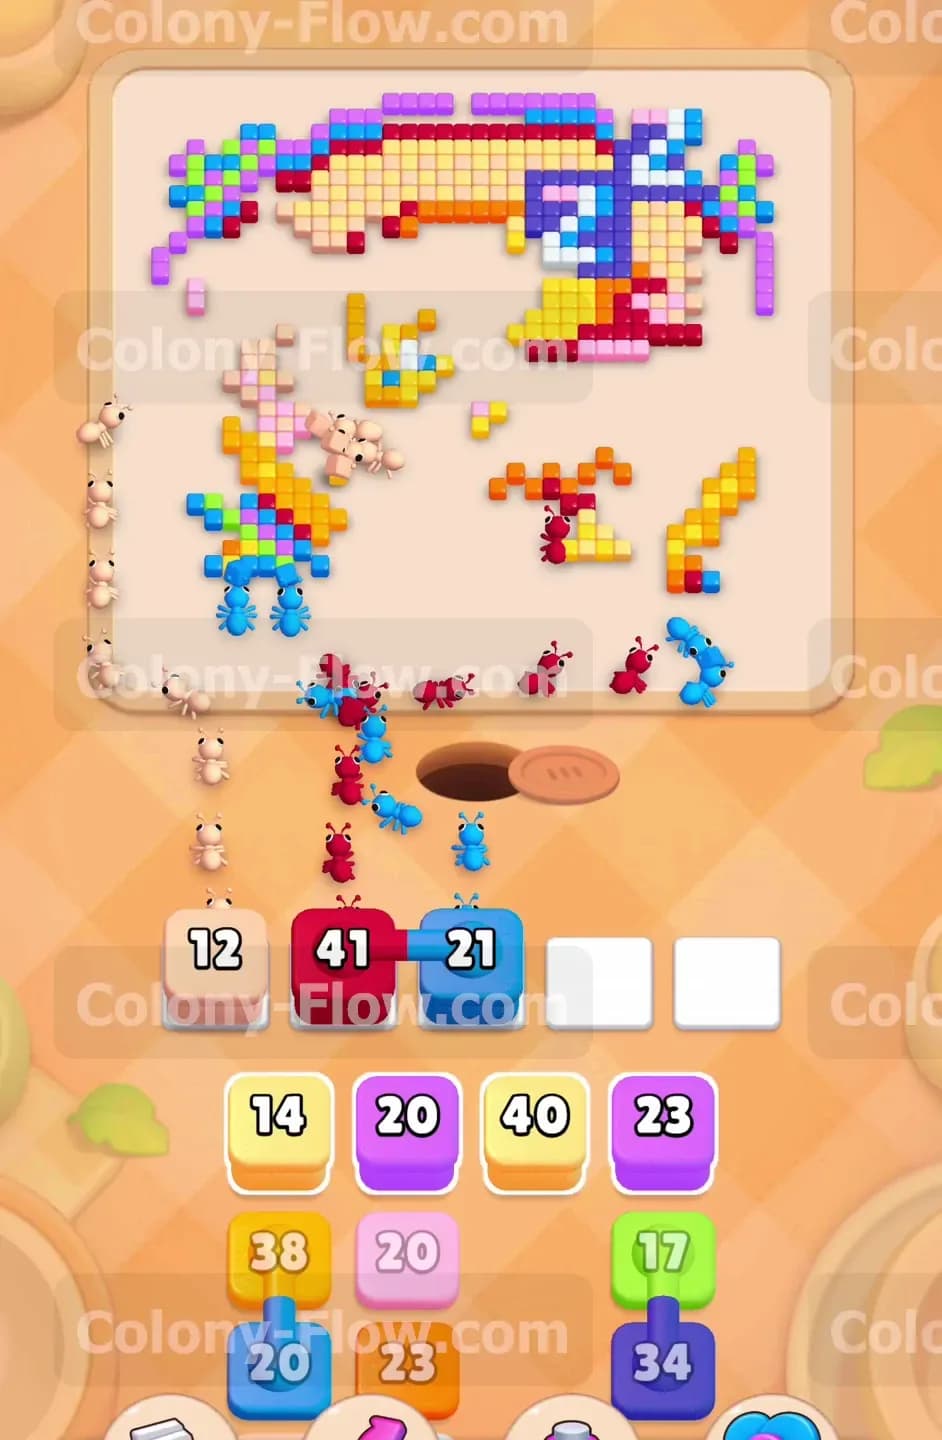
The sleeping chick image features two distinct blue snoring letters floating just above its head along with some dark red shading deep inside the nest. Bring up a dark red block and a blue block to handle these specific details. The dark red block starts with a very high number at 41 but drops steadily as the ants eat the shadow tiles. The blue ants focus entirely on those floating letters and the blue count drops to 21. A white block sits in the tray at a count of 12 to handle the pale highlights left behind in the blanket. The picture is now mostly empty space with only very small clusters of color remaining. The ants have direct straight lines to every single remaining tile on the screen.
Step 7: Clean up the final scattered pixel groups to finish the board
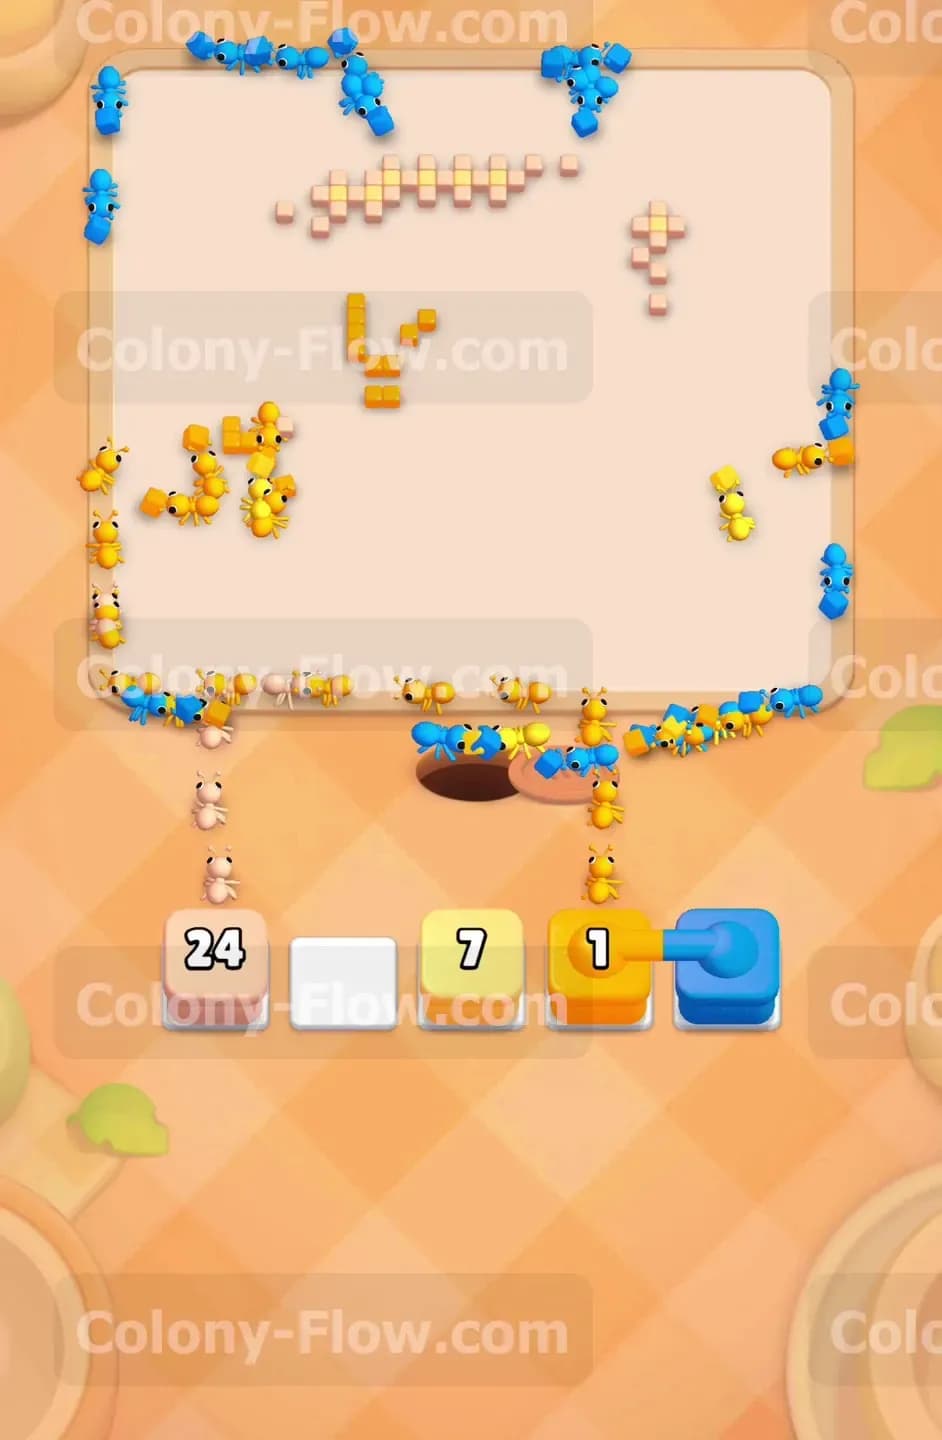
Only a small handful of stray tiles remain scattered across the board at this late stage. You will see a tiny cluster of white tiles and a few yellow pieces and one single isolated orange pixel. Pull a white block and a yellow block and your final orange block into the active tray. The white block drops to 24 as the ants finish off the pale dots. The yellow block drops to seven and the orange block finishes exactly on a count of one. The final group of ants carries away the very last pieces of food and vanishes back down into the nest hole. The board is completely clear of all colors and your slots are totally safe. You have successfully conquered this puzzle.
Final Thought
Colony Flow Level 1130 requires patience and a steady targeted attack on that massive chocolate blocker. Managing your tray slots early on makes the second half of the board incredibly smooth and stress free. If you find yourself getting stuck or filling your waiting slots too quickly you should absolutely watch the video above this article. The video shows the exact block order in real time so you can match the pacing and clear the picture without any frustration.