Colony Flow Level 383 Walkthrough Solution & Guides | How to solve Colony Flow 383

Guide By Liam Stone
Updated on July 19, 2026
If skimming isn't enough, watch the video above for the full Level 383 walkthrough.
Video doesn't match your screen?
Game updates frequently scramble layouts! Try our AI Screenshot Solver first to find your exact board instantly, or report broken guides to our team.
Welcome to Colony Flow Level 383. You are about to tackle a beautiful pixel art picture of a white puppy sitting in a grassy field under a bright blue sky. This level introduces a fun mix of lock and key mechanics alongside connected boxes that require careful slot management. I play every level myself and build these walkthroughs to help you clear the board without getting stuck. You will need to plan your moves carefully so your ants always have an open path to their food. The board starts off looking very dense and slightly intimidating. Do not worry though because we will break it down piece by piece.
Colony Flow Level 383 Overview
What You Are Working With
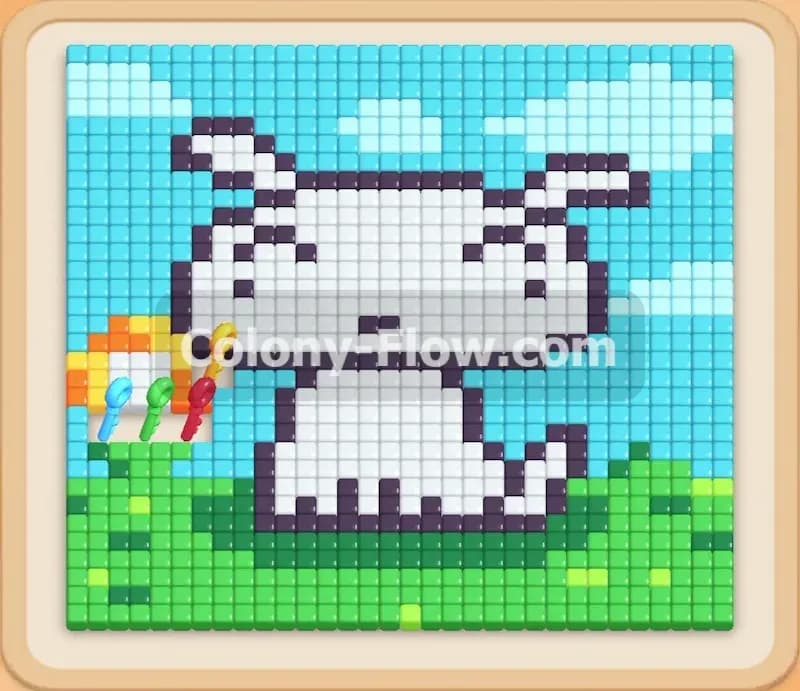
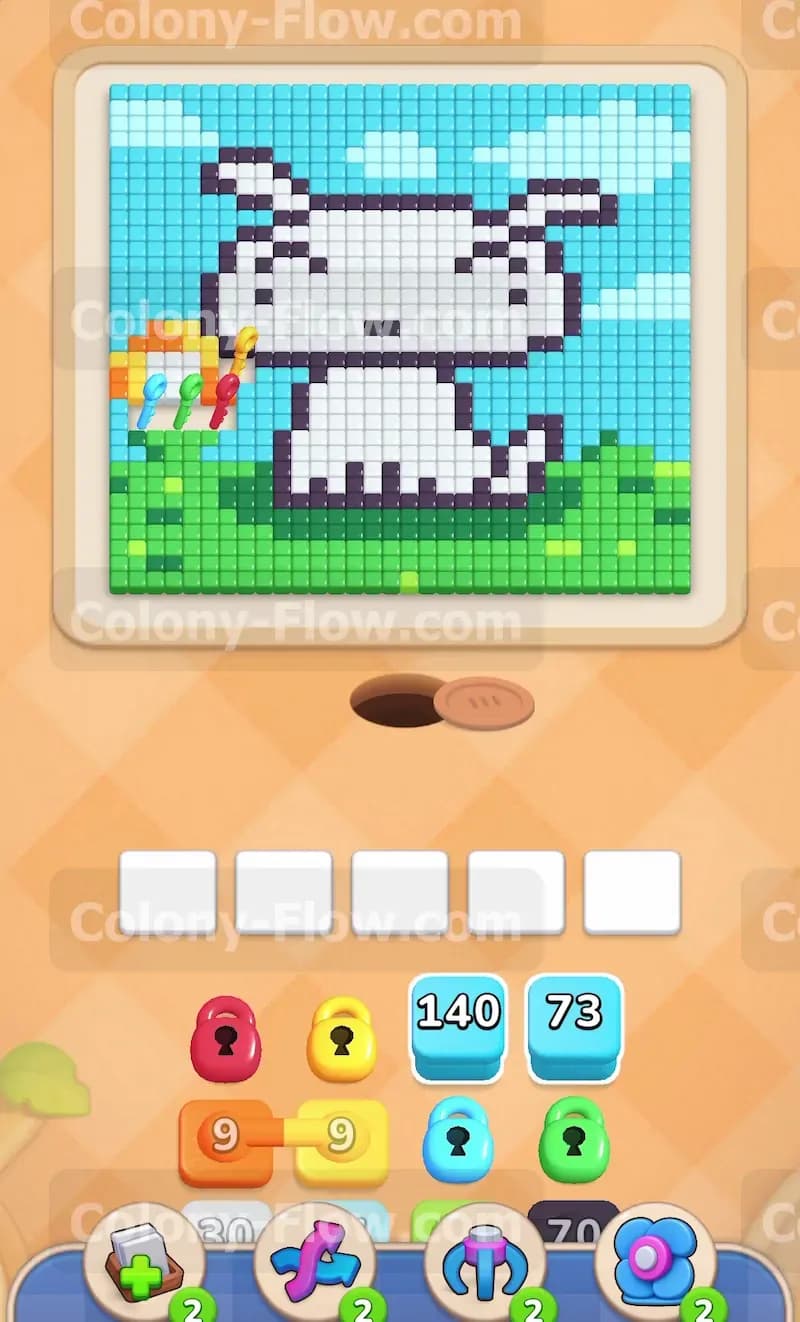
The pixel art picture at the top of your screen features a large white puppy with a dark purple outline. The puppy sits squarely on a field made of light green and dark green grass tiles. A massive blue sky fills the entire background behind the dog. Over on the far left side of the grass sits a small colorful shape resembling a flower or a bright bundle of balloons. This small shape holds four distinct colored keys. You will see a red key, a yellow key, a cyan key, and a green key nested in the pixels.
Down in your tray at the bottom of the screen you have a variety of numbered color blocks ready to deploy. You will immediately notice several blocks are restricted by colored padlocks. A cyan padlock and a green padlock secure some of the blocks in the middle rows of your tray. You will also see an orange 9 block and a yellow 9 block sitting together. These two blocks are linked together as connected boxes. They also feature a red padlock and a yellow padlock. You cannot pull any of these locked blocks up into your active slots until you collect the matching keys from the pixel art board above.
What It Takes to Clear Level 383 Board
Winning this level requires you to clear every single pixel art tile from the screen while managing your five waiting slots perfectly. If you pull blocks into all five waiting slots and none of the ants can reach their matching colors on the board your slots will jam. A jammed board means you instantly lose the level. You must always maintain at least one open path for your ants to travel. In this specific level you must clear the outer sky first to access the locked keys. Collecting those keys systematically unlocks the rest of your tray so you can dismantle the puppy and the grass safely.
Colony Flow Level 383 Step by Step Solution
Step 1: Clear the outer sky to open the board.
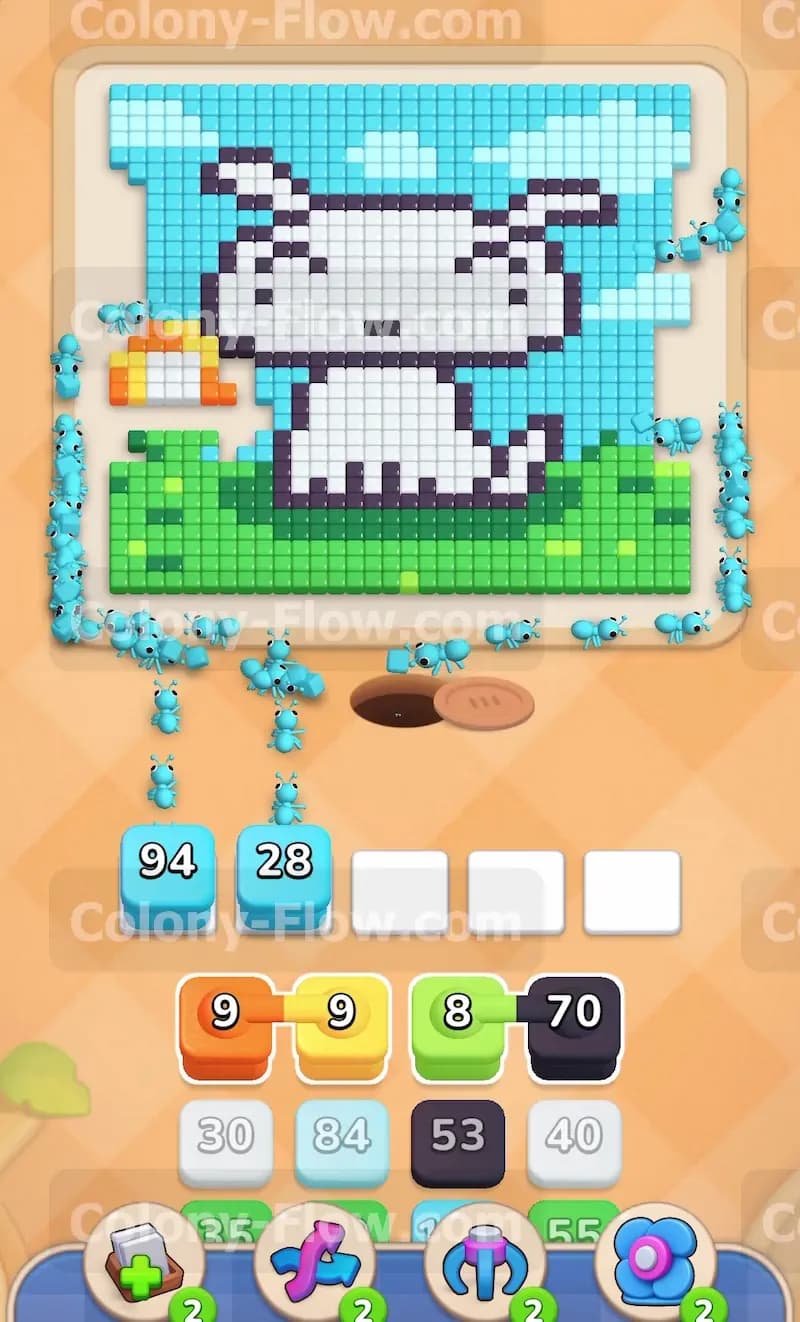
Your very first move is completely dictated by the layout of the board and the locks sitting in your tray. You must begin by pulling the completely unlocked cyan 140 block and the unlocked cyan 73 block into your waiting slots. The ants will stream out of the round nest hole and travel all the way up to the top edges of the picture. They will begin rapidly eating away the massive blue sky. The cyan 140 block holds a huge amount of ants and will slowly count down to 94 as the sky starts to disappear. The cyan 73 block will drop down to 28 during this initial wave. Keeping these two cyan blocks active ensures your waiting slots stay clear while creating a wide open path to the left side of the board. Eventually the cyan 140 block will drop all the way down to 45 as the sky recedes.
Step 2: Collect the colored keys on the left side.
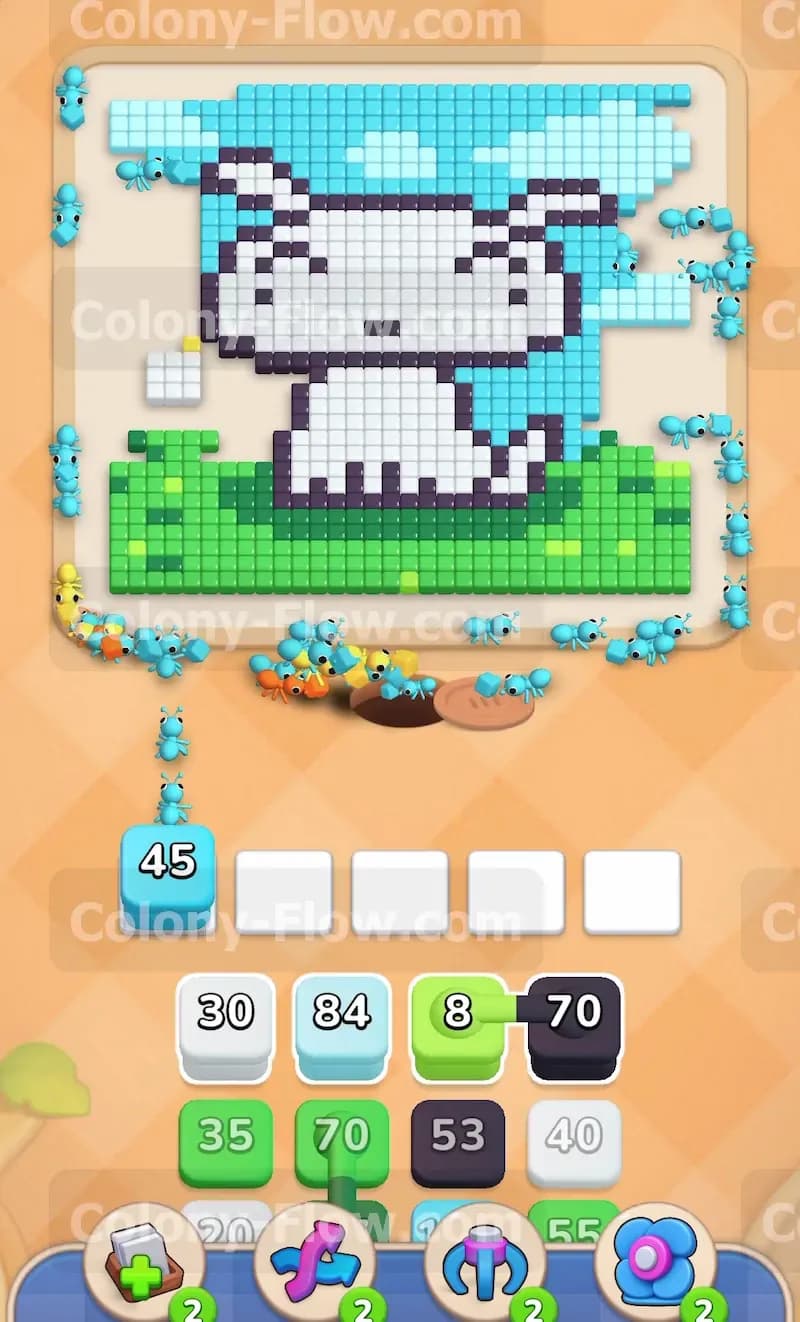
As the cyan ants continue clearing the expansive sky background they will expose the left side of the grassy field. This specific area contains the colorful shape holding the four critical keys. The ants will eventually consume the tiles surrounding the cyan key and the green key. Collecting these keys instantly removes the cyan padlock and the green padlock from the blocks resting in your tray below. With those locks completely gone your ants will then clear the red key and the yellow key. Collecting all four keys is absolutely mandatory before you can progress to the connected boxes waiting in your tray. This sequence happens naturally as long as you keep the cyan ants flowing.
Step 3: Deploy the connected boxes to clear the flower shape.
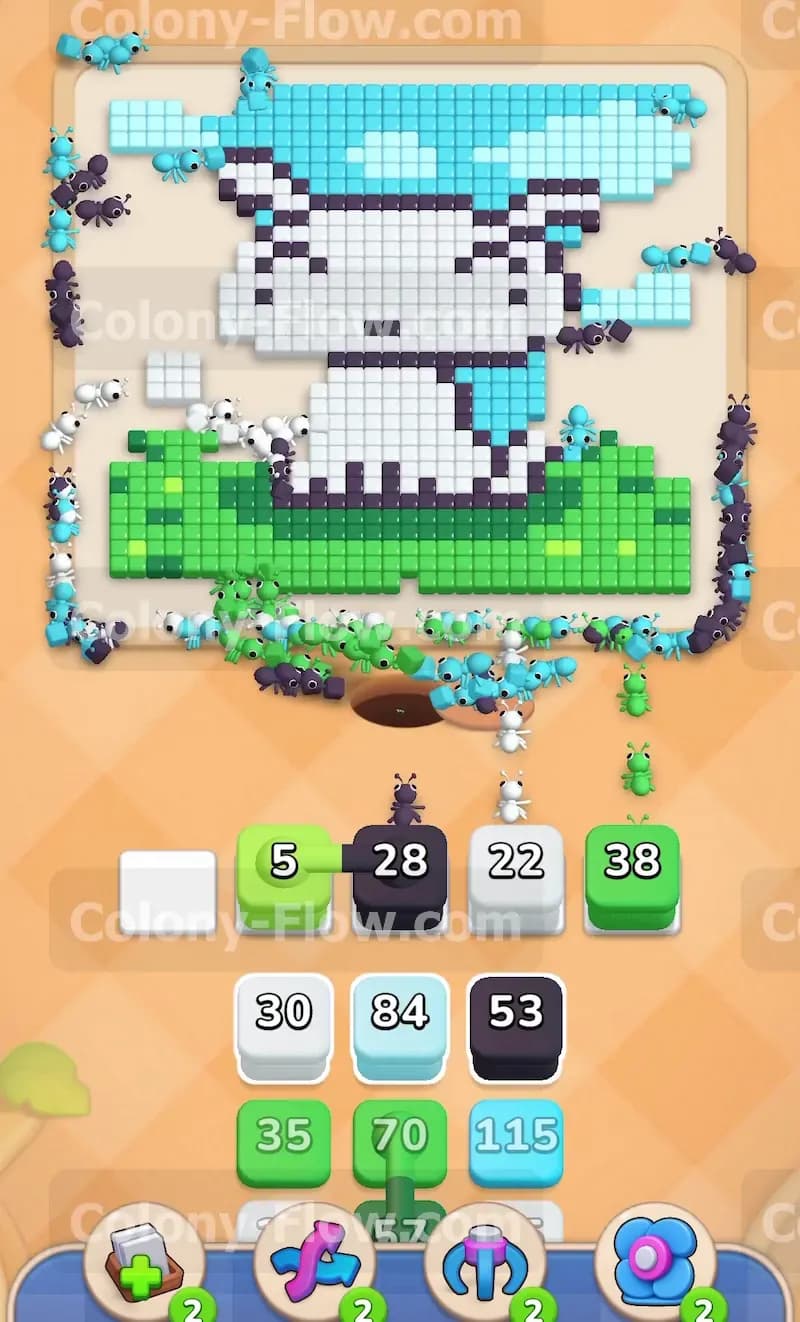
Now that the red and yellow padlocks have vanished completely you can finally use the orange 9 block and the yellow 9 block. These two blocks function as connected boxes. Because they are permanently linked together they will pull up into your waiting slots at the exact same time. You must have at least two empty slots available in your lineup to pull them safely. The orange and yellow ants will rush up the left side of the board and consume the remaining orange and yellow tiles from that small flower shape. This action clears the left obstacle completely and keeps your slot rotation moving smoothly without creating any dead ends.
Step 4: Start dismantling the top layer of grass and the puppy outline.
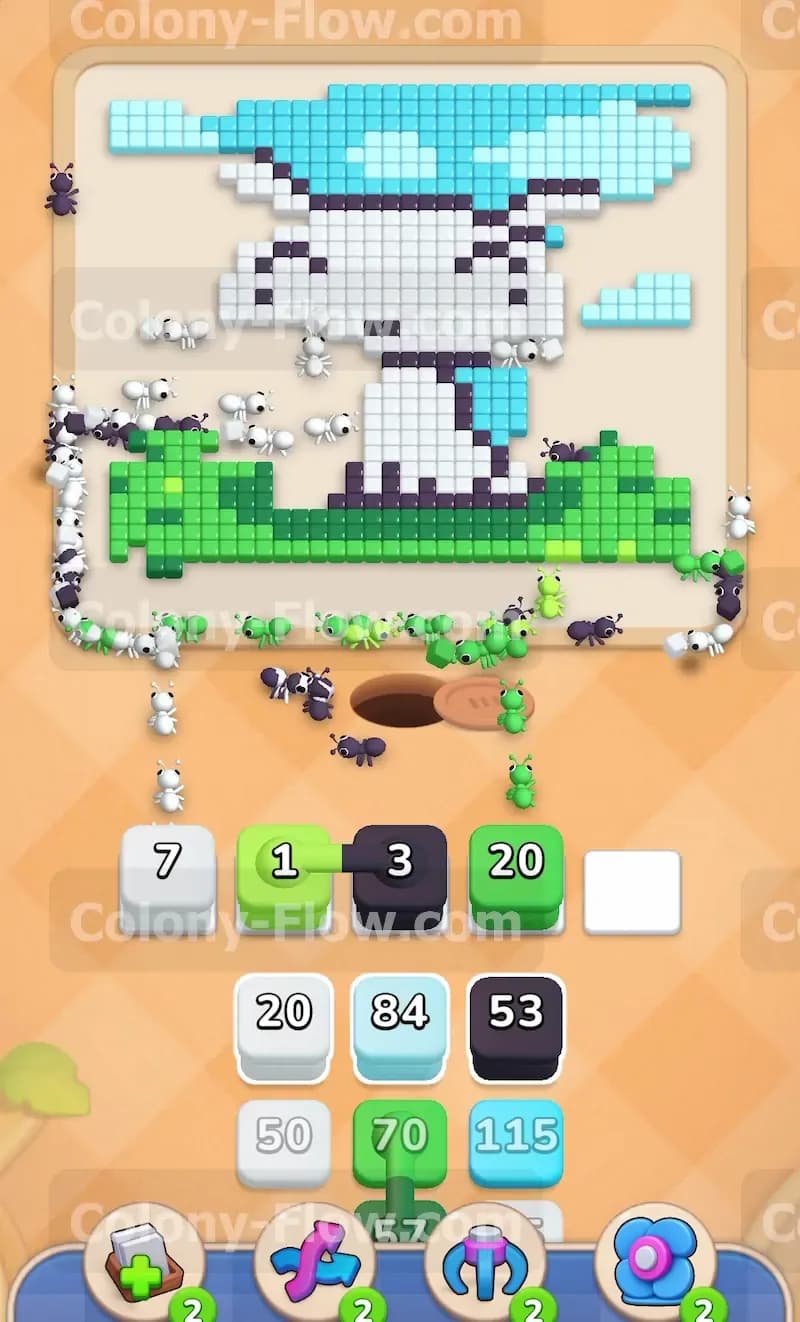
With the sky heavily reduced and the left side totally cleared you can turn your attention to the main puppy figure. Pull the light green 8 block into a waiting slot to start clearing the top layer of the pixelated grass. Next you should pull the dark purple 70 block. The dark purple ants will travel up and begin tracing the dark purple outline of the puppy ears and head. You can also pull the white 30 block to send ants straight into the solid white puppy face. All three of these colors have wide open paths right now. Your ants will flow easily and your slots will remain completely safe from jamming.
Step 5: Cycle fresh blocks for the grass and puppy body.
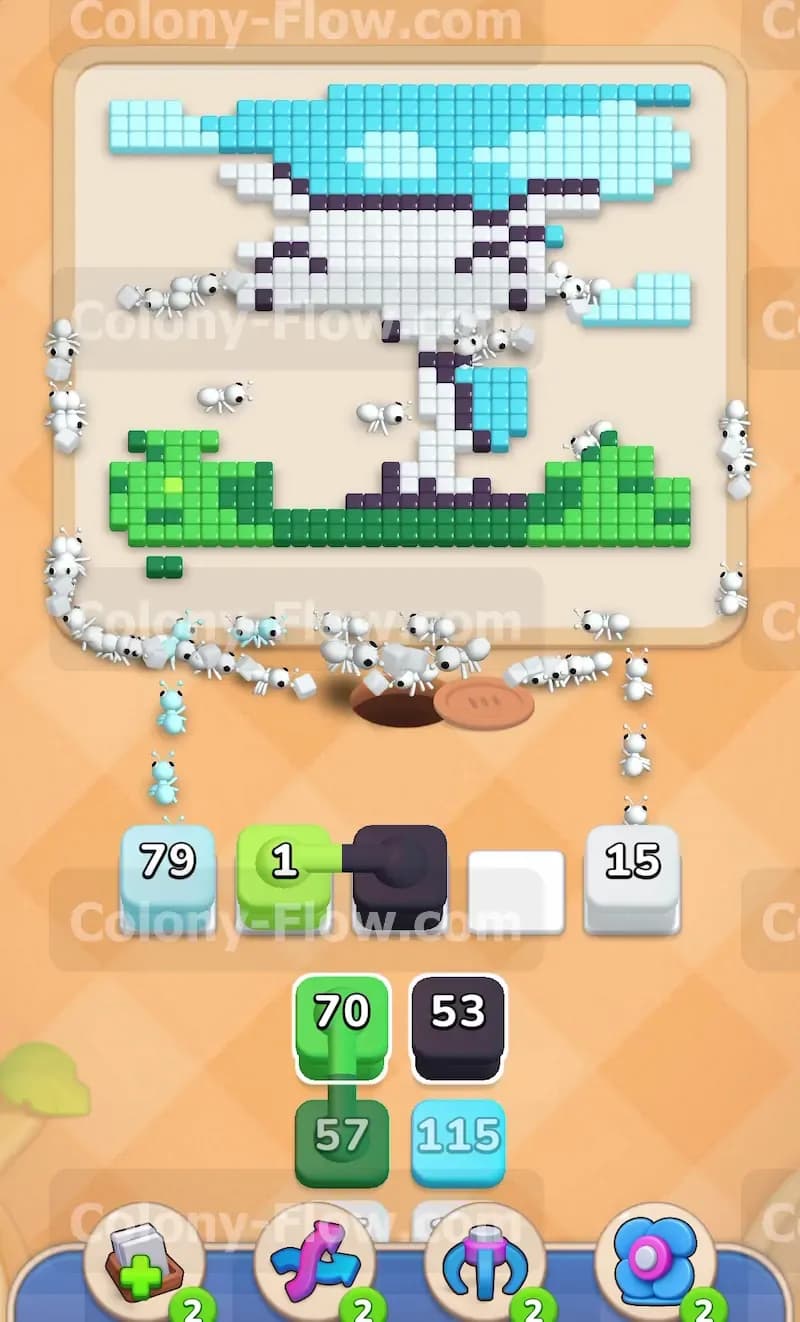
The initial blocks will finish their count and disappear from your waiting slots. The light green 8 block will drop to 5 and then empty out quickly. Replace it by pulling the light green 38 block from your tray. As the white 30 block empties out and drops down to 22 you should bring up the massive white 84 block. The board will become very busy as white ants swarm the large body of the puppy and green ants chew through the thick grass below. The dark purple 70 block will slowly count down to 28 as the ants continue outlining the puppy. Monitor your five slots closely during this heavy clearing phase. Only pull a new block when you see a completely empty slot ready and waiting.
Step 6: Dig deeper into the grass and cycle new white blocks.
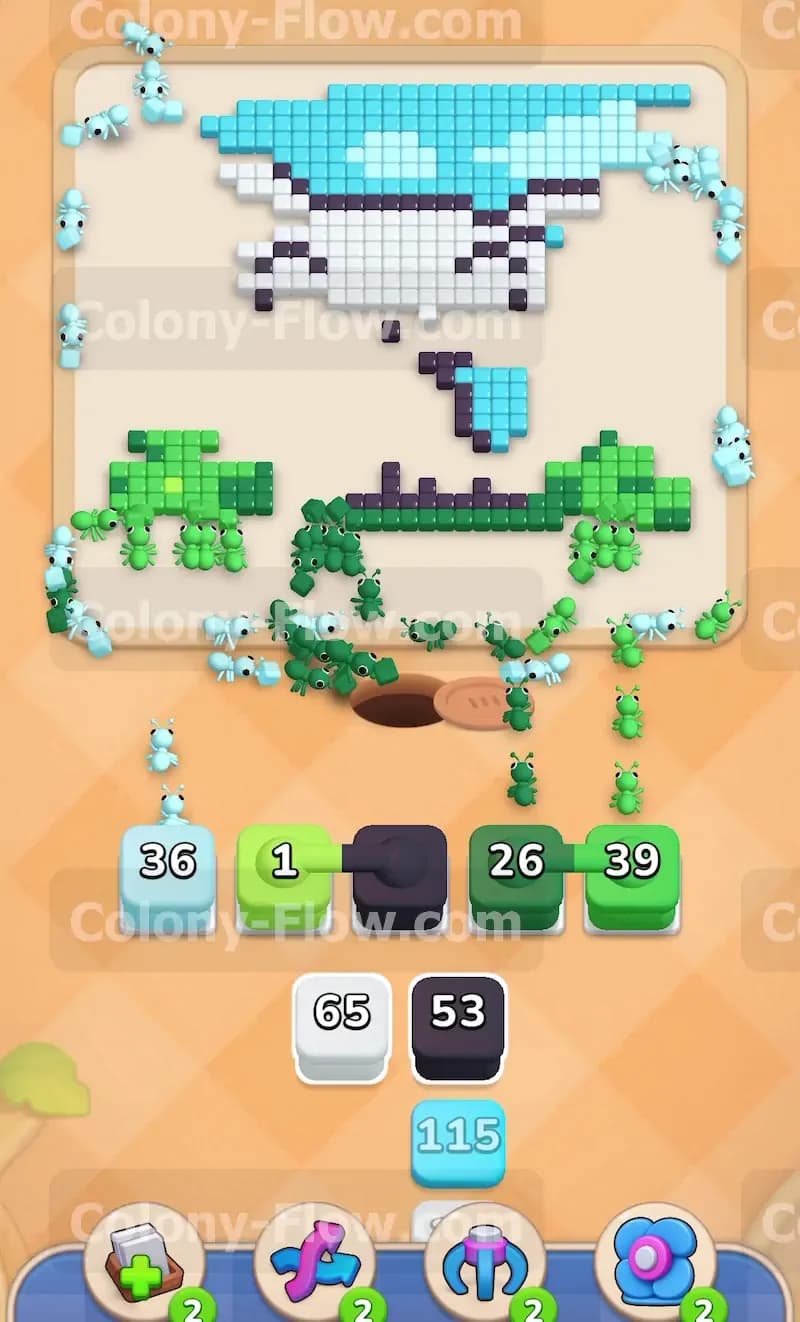
The board will start to look much emptier now. Your slots will process a lot of blocks very quickly in this phase. You will see a white 7 block and a dark purple 3 block finish up and vanish. Bring up the white 20 block and watch it count down to 15 as it clears more of the chest area. You will also need to pull the light green 70 block to handle the massive middle section of the grass. This block will run all the way down to a single 1 before vanishing. Always prioritize the white and green blocks here because they make up the largest solid areas of the remaining picture.
Step 7: Introduce the dark green blocks for the shadow patches.
As the light green grass disappears entirely you will expose the darker patches of grass underneath the puppy paws. Pull the dark green 57 block from your tray. The dark green ants will weave through the newly cleared spaces to reach these specific shadow tiles located near the bottom of the board. At this same time you will notice scattered chunks of blue sky still clinging to the edges of the puppy head and ears. Pull the cyan 115 block into an open slot. The cyan ants will surge up and hunt down these remaining sky tiles. The cyan 115 block will count down to 36 as it clears out the upper corners.
Step 8: Finish the remaining puppy details and outline.
The dark purple outline will need one final push to clear away the borders of the ears and paws. Pull the dark purple 53 block to send reinforcements to the puppy edges. This dark purple 53 block will slowly count down to 26 as the last pieces of the outline vanish. You should also bring up a light green 39 block to handle the very last pieces of the grass floating near the right side of the screen. Keeping your colors varied in your waiting slots ensures that every ant has a unique path to follow.
Step 9: Clean up the final white tiles to win the level.
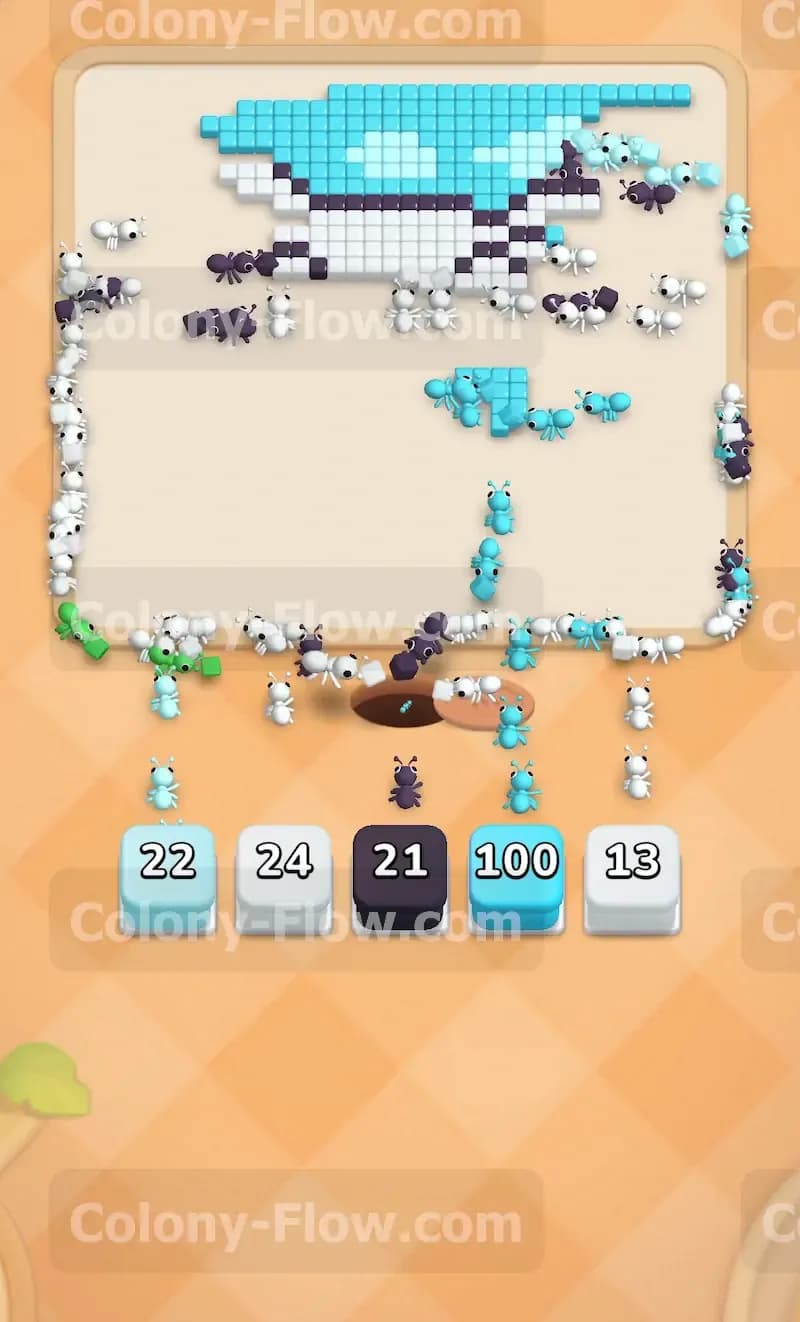
Your final moves require absolute precision to avoid a last minute jam. The board is mostly empty now with just a few disconnected tiles remaining. Only a small cluster of white tiles remains on the puppy face and a few scattered blue sky tiles linger at the very top. Pull the white 24 block and the white 13 block into your tray. You will also need the cyan 100 block and the cyan 22 block to finish the absolute last pixels of the sky. If you need a tiny bit more help with the outline you can bring up the dark purple 21 block. The ants will march straight across the empty board and consume the final pixels. Once the very last white tile disappears into the round hole your board is clean and you win the level.
Final Thought
Colony Flow Level 383 is an excellent test of how well you can manage colored padlocks and connected boxes while keeping your limited slots completely clear. Always remember to prioritize the outer sky first so you can reach those crucial keys hidden on the left side of the screen. Taking your time and watching the ant paths will guarantee your success. Feel free to watch the video above this article if you find any of the specific block movements tricky to picture in your head.