Colony Flow Level 707 Walkthrough Solution & Guides | How to solve Colony Flow 707

Guide By Liam Stone
Updated on August 8, 2026
If skimming isn't enough, watch the video above for the full Level 707 walkthrough.
Video doesn't match your screen?
Game updates frequently scramble layouts! Try our AI Screenshot Solver first to find your exact board instantly, or report broken guides to our team.
Welcome to Colony Flow Level 707. This level presents a beautiful pixel picture of a rose that you must break down piece by piece. The main challenge lies in balancing the massive background sections with the delicate inner details of the flower. I will guide you through exactly how to feed your colony and clear the board without ever filling up your waiting slots.
Colony Flow Level 707 Overview
What You Are Working With
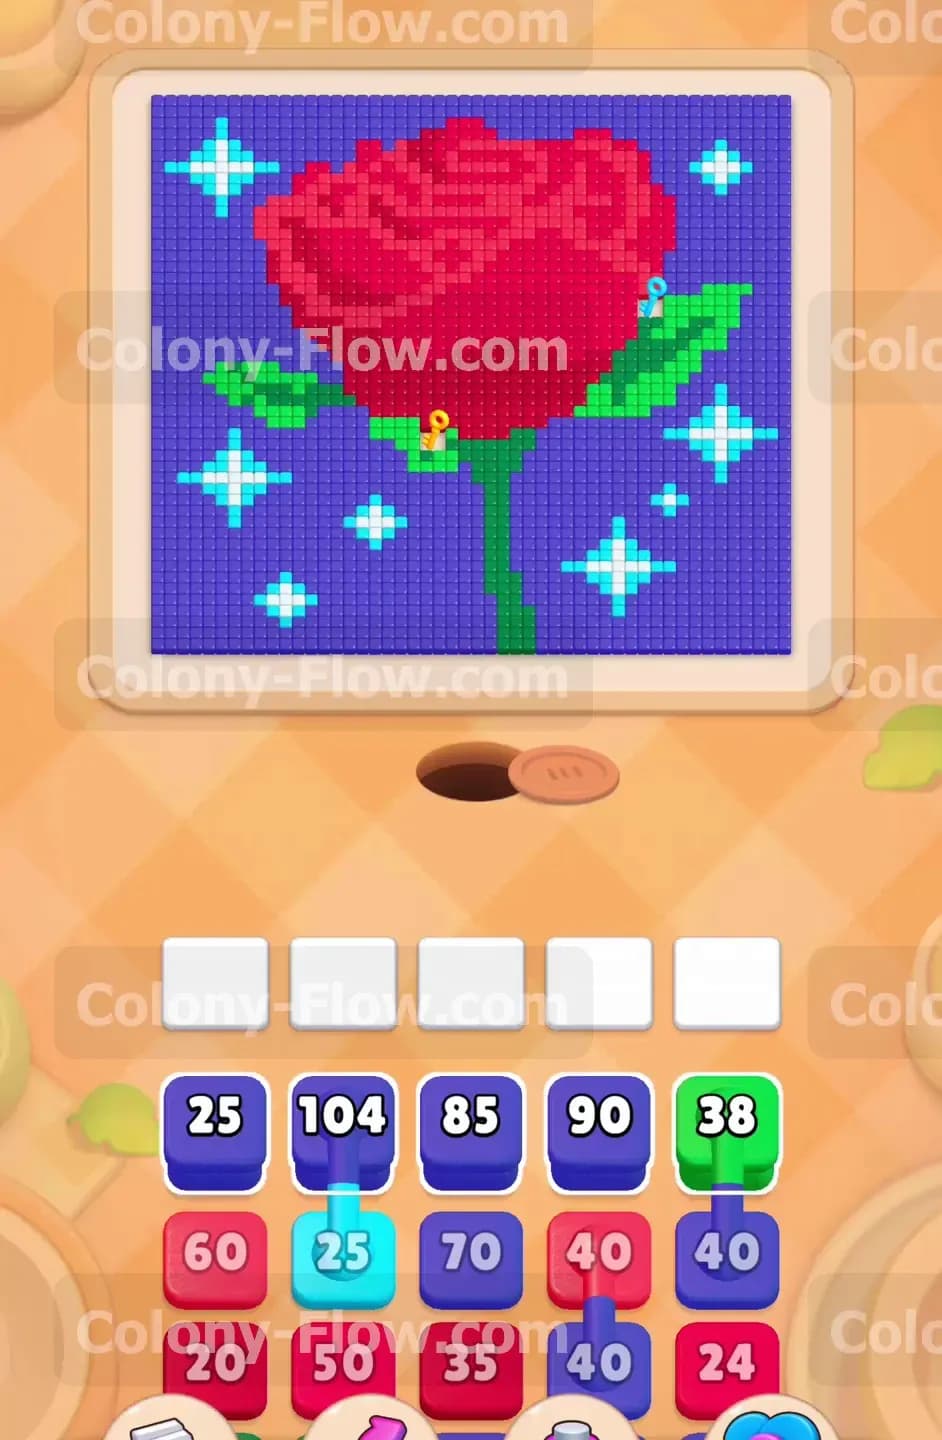
The picture on your screen is a large red rose complete with a green stem and several leaves. The flower sits against a vast dark blue background. Scattered across this background are several light blue stars with bright white centers. A special yellow key rests right on the lower section of the green stem. Down in your tray you have a wide variety of numbered blocks waiting to be used. You will see dark blue blocks for the background along with red blocks for the petals and green blocks for the stem. Some dark blue blocks are connected together meaning they move up to the slots as a single pair. You will also notice a light blue block with a lock icon sitting in the tray. This locked block cannot be played until you collect the yellow key from the board.
What It Takes to Clear Level 707 Board
To achieve victory on this board you must clear every single colored tile from the picture. The dark blue background takes up a huge amount of space so your ants will spend plenty of time chipping away at those tiles. You need to carve an open path through the dark blue sections to reach the light blue stars and the green stem. Reaching the green stem is your top priority early on because eating those green tiles allows you to collect the yellow key. Collecting the yellow key opens the locked light blue block in your tray so your ants can finish the star outlines. The biggest danger is pulling too many large numbered blocks at the exact same time. If your five waiting slots fill up and the ants have no open path to eat those specific colors you will fail the level. You must always watch the active edges of the picture and only play colors that the ants can physically reach.
Colony Flow Level 707 Step by Step Solution
Step 1: Focus on the initial dark blue background blocks to open the bottom edge.
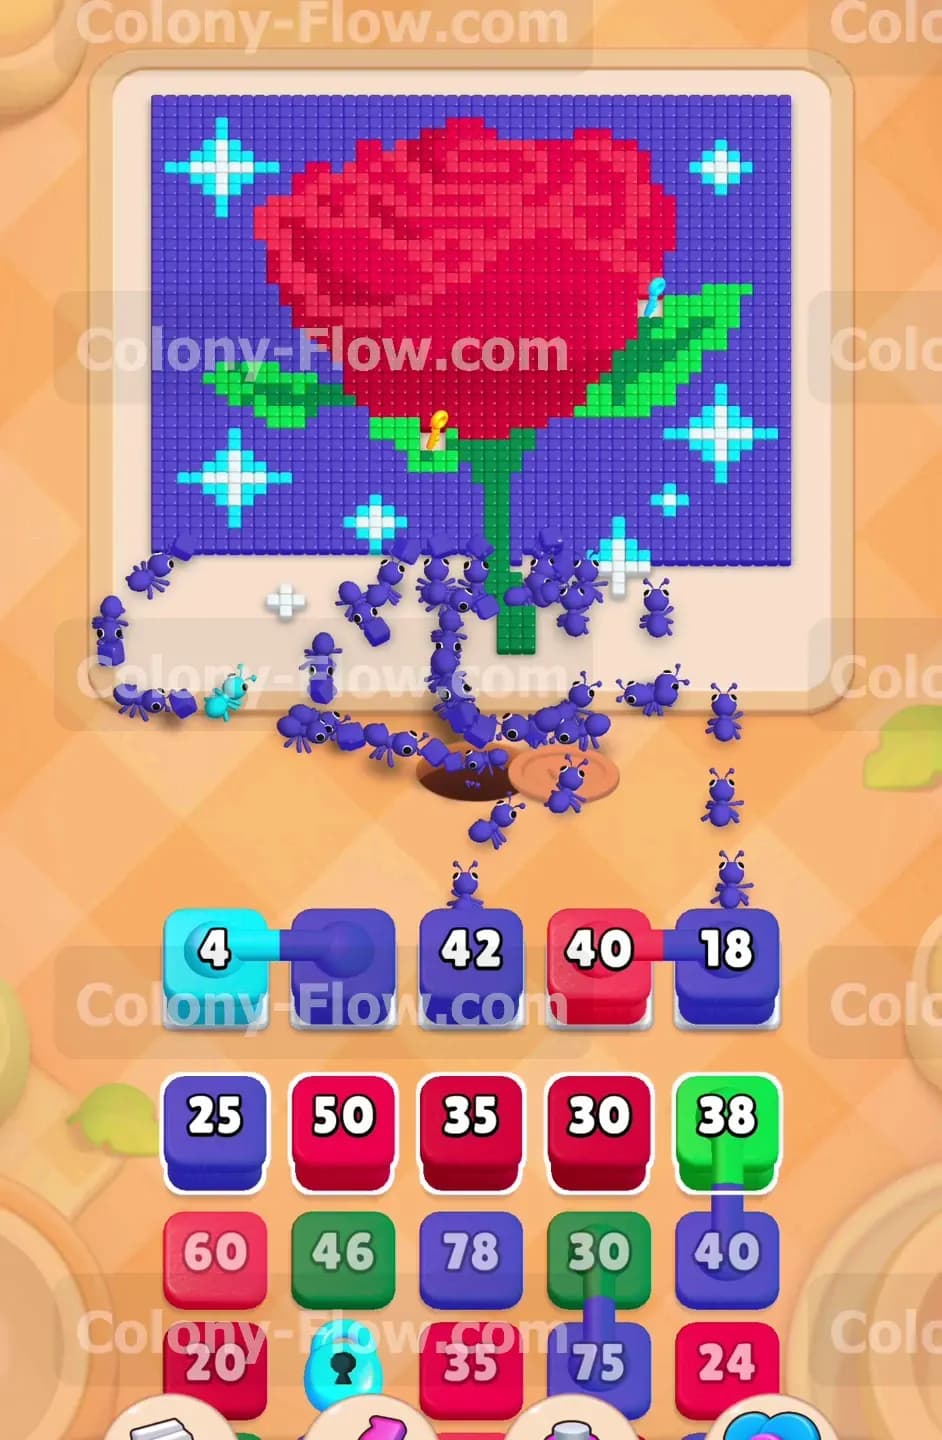
When the level begins the only color accessible to your ants is the dark blue background at the very bottom of the picture. Start by pulling the available dark blue blocks from the top row of your tray. You will see a pair of connected dark blue blocks sitting there. Pulling them brings a massive amount of eating power to the board because both blocks move to the slots together. The ants stream out of the nest hole and immediately begin chewing away the dark blue tiles along the bottom edge. Every time an ant eats a tile the number on your dark blue block goes down by one. This action slowly exposes the bottom tips of the green stem and the lowest light blue star shapes. Let the ants work through these large dark blue numbers completely. Do not pull any other colors yet because the ants cannot physically reach them. Waiting patiently keeps your five slots clear and prepares the board beautifully for the next phase.
Step 2: Introduce the first light blue and green blocks to expand the work area.
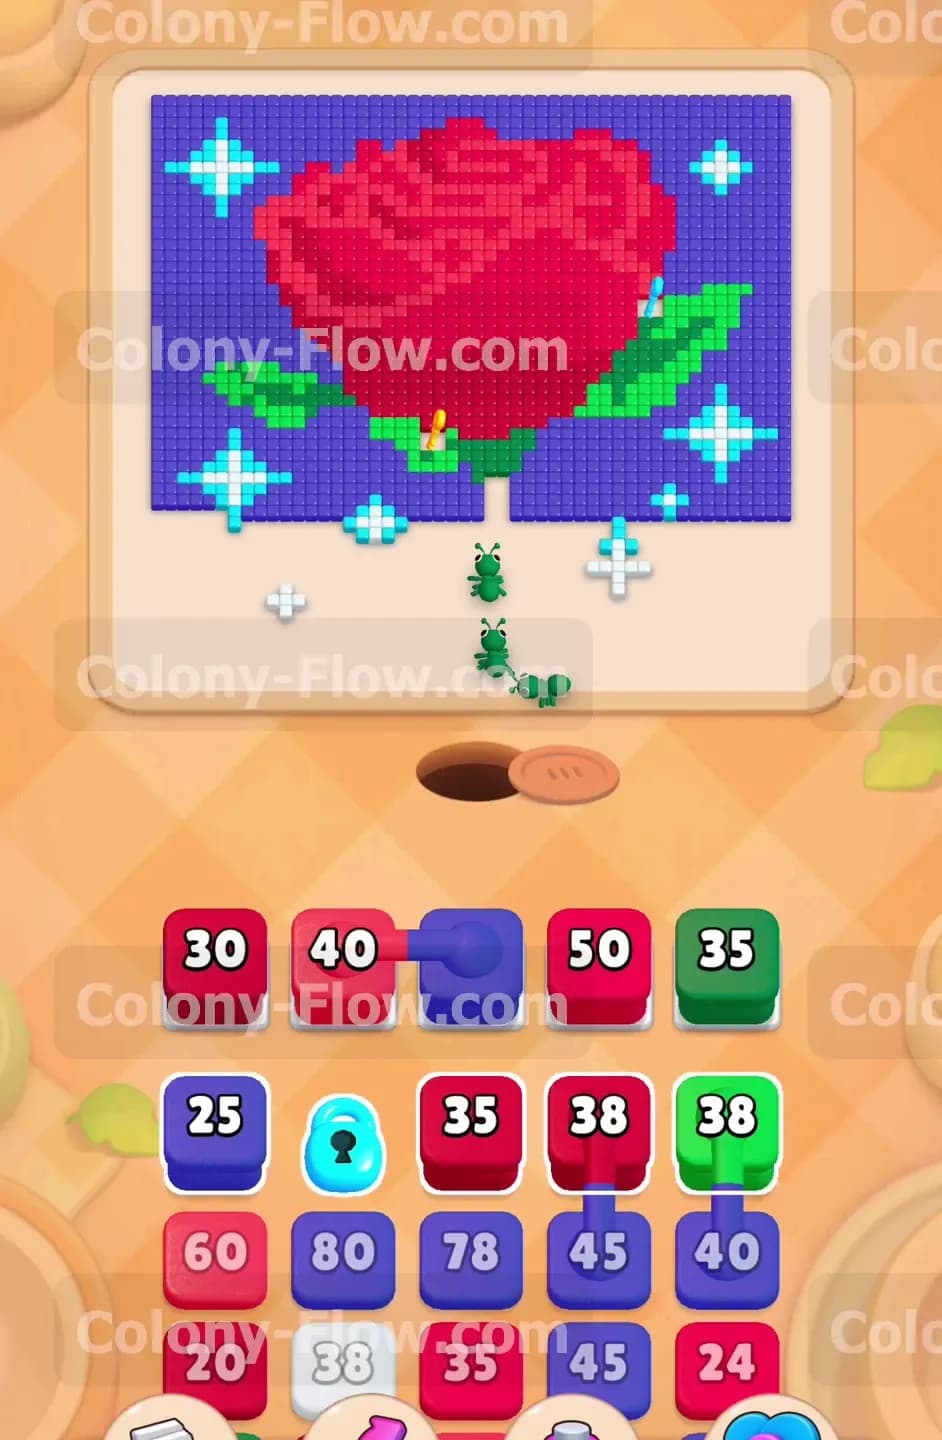
Once the ants clear enough dark blue tiles they expose the lower edges of the light blue stars and the green stem. Now you can safely pull a light blue block and a green block into your waiting slots. The ants will divide their attention naturally. Some ants will continue eating the dark blue background while a new group branches off to consume the light blue star points. A third group of ants will start munching on the green stem at the bottom center of the board. Pulling these different colors is perfectly safe right now because multiple distinct paths are completely open. Your waiting slots will cycle smoothly as the ants steadily reduce the block numbers across the board. Keeping a solid mix of dark blue and green active ensures continuous movement and prevents any single color from jamming your progression.
Step 3: Begin eating the red petals at the bottom of the rose.
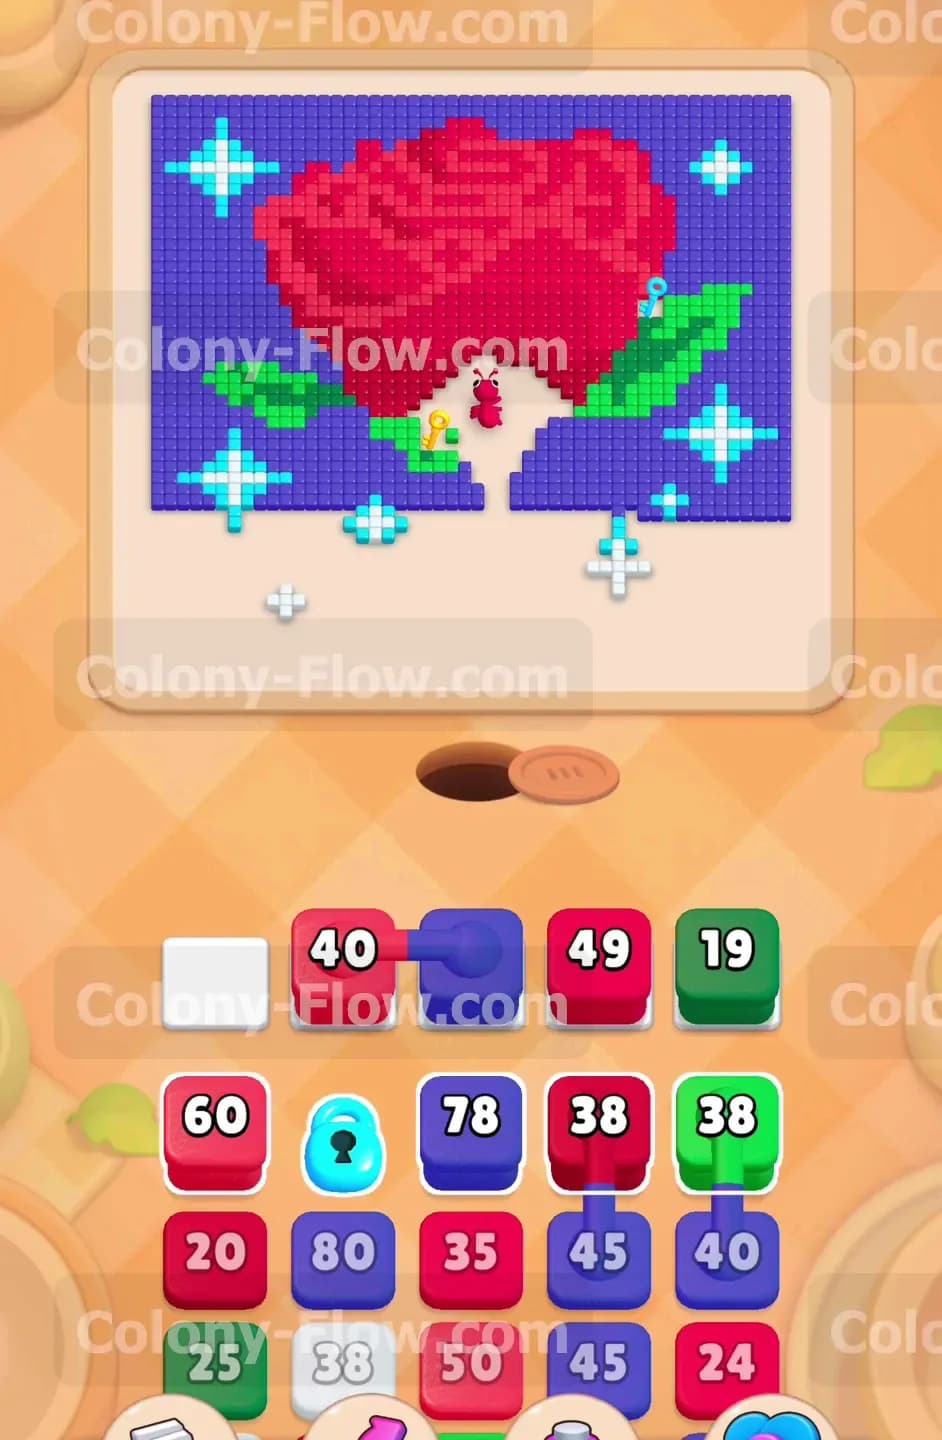
As the dark blue background clears higher up the board the ants finally touch the bottom edge of the large red flower. This is a fantastic moment to bring your first red block up from the tray. Pulling a red block sends a fresh wave of red ants straight into the massive red petal section. The red rose requires a huge volume of blocks to clear so starting early helps manage the heavy red numbers resting in your tray. At the same time you should pull another dark blue block to keep the background clearing process highly active. By balancing a red block with a dark blue block you guarantee that two completely separate groups of ants are always working on different areas. This strategy prevents any single color from stalling out in your waiting slots and guarantees a steady flow of hungry ants.
Step 4: Chipping away the green stem to approach the yellow key.
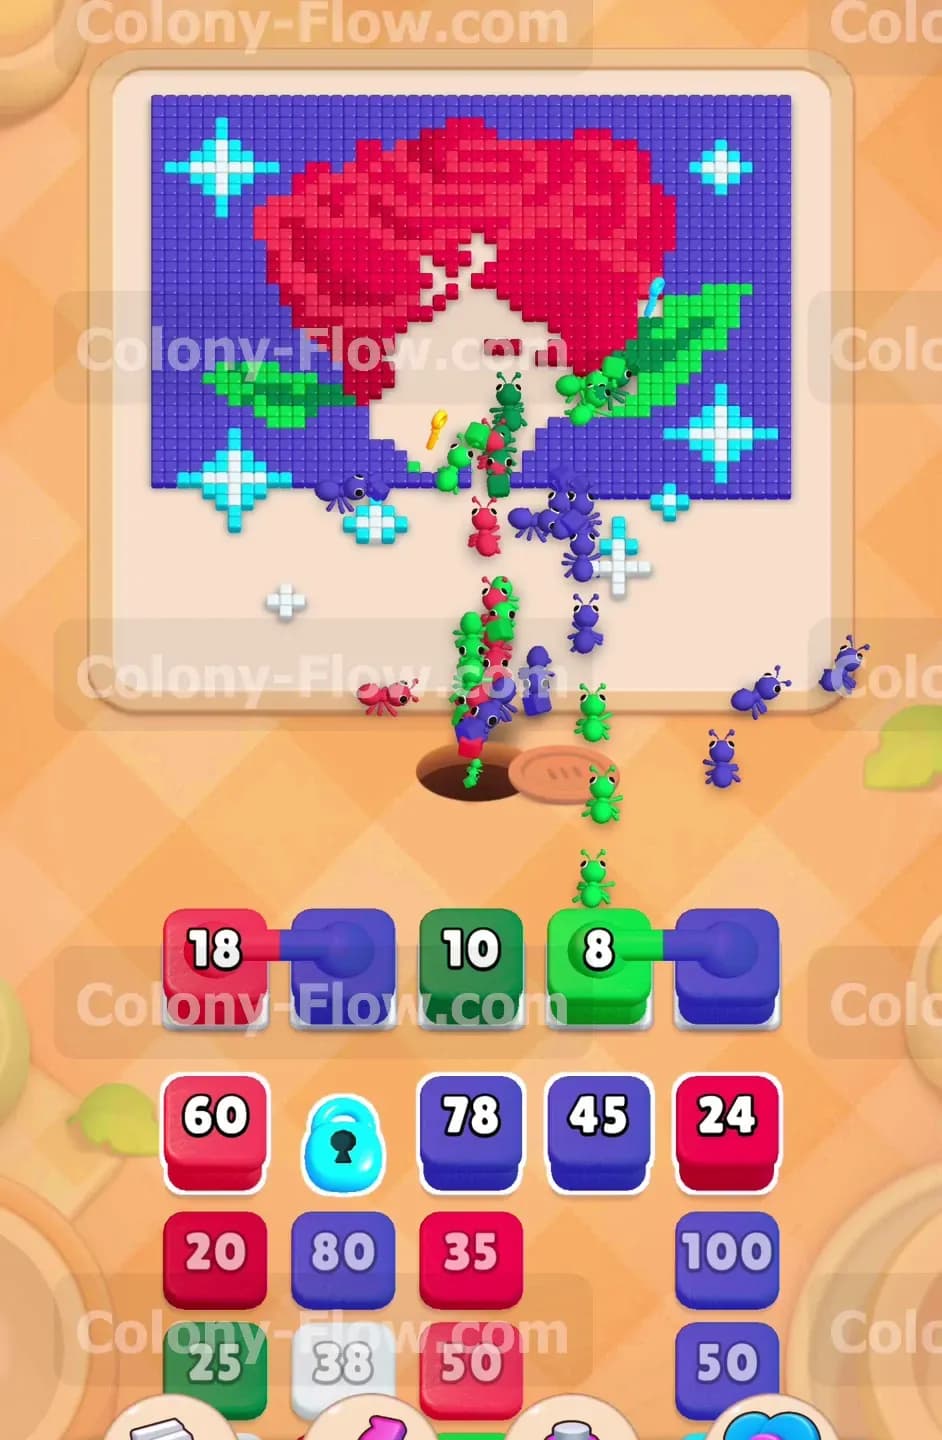
Your main objective right now is securing the yellow key located on the stem. The key sits right near the middle of the green stem leaves. Pull another green block from the tray to keep the ants moving up the central stem. As the ants eat the green tiles they strip away the lower leaves and move exactly one step closer to the key. You must ensure that the green block in your waiting slot has a high enough number to reach the key tile. If the green block runs out before the key is reached simply pull the next available green block from your tray. While the ants handle the intricate stem you can pull another red block to maintain progress on the giant rose above. Managing the green path and the red path simultaneously keeps the whole board flowing perfectly without any dead ends.
Step 5: Grabbing the yellow key to unlock the special tray block.
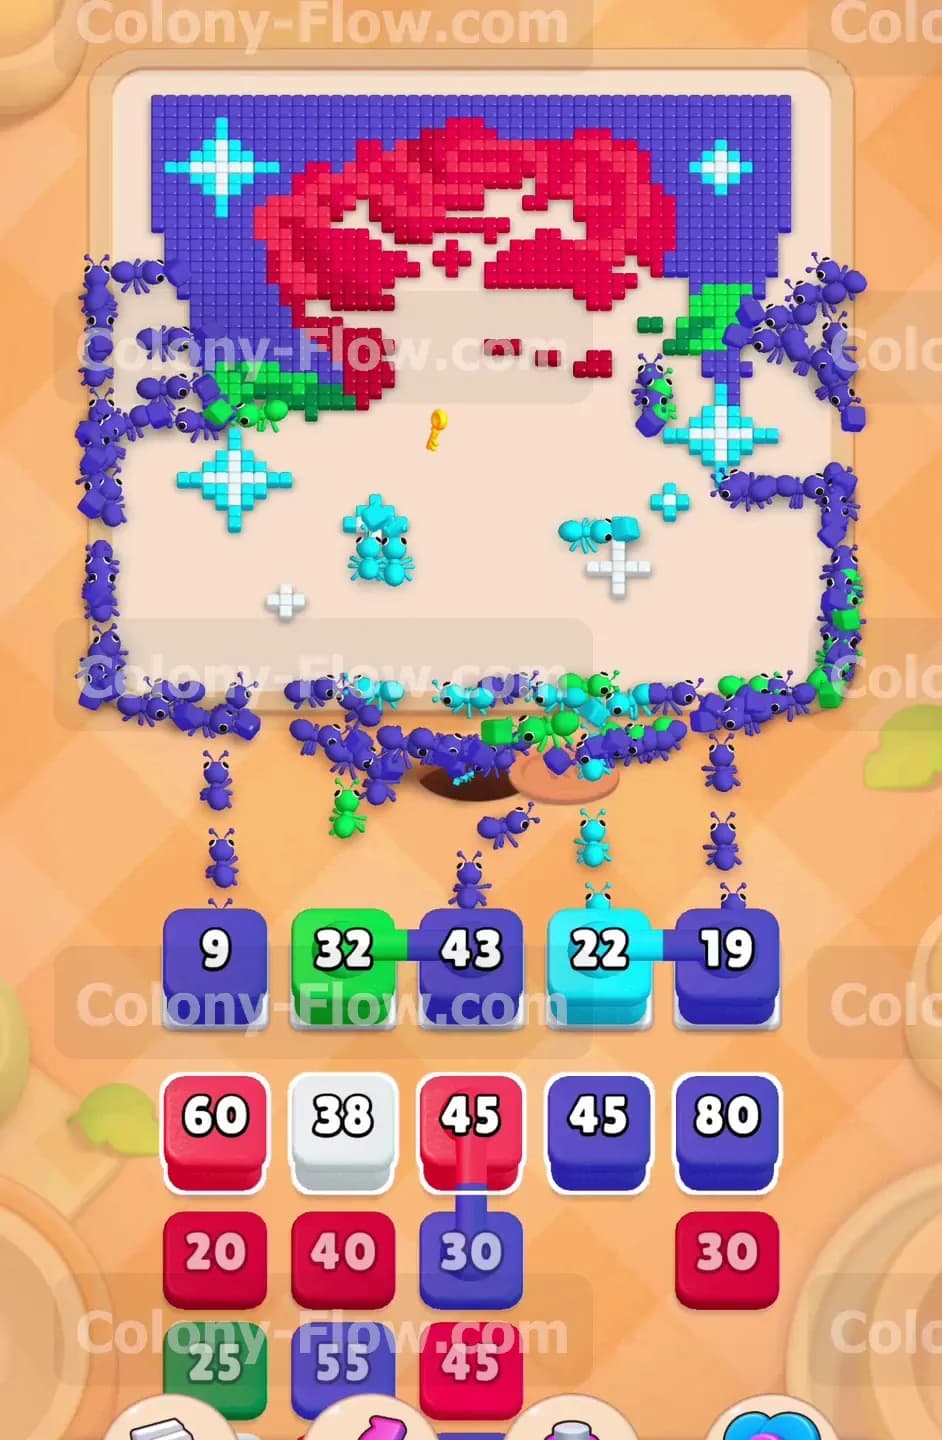
The exact moment the ants eat the green tile directly underneath the yellow key the key flies down to your tray. This action instantly unlocks the light blue block that has been stuck in your tray since the very beginning of the level. The lock icon vanishes completely and the block reveals its hidden number. This is a crucial turning point for the board dynamics. The light blue stars are currently blocking access to the white star centers and some deeper inner parts of the dark blue background. Unlocking this specific block means you can finally clear away the remaining star outlines. Let the current active blocks in your waiting slots finish their countdowns so you have plenty of room for the newly unlocked light blue block. Keeping the slots open here is vital for a smooth transition.
Step 6: Sending out the unlocked light blue block to clear the star outlines.
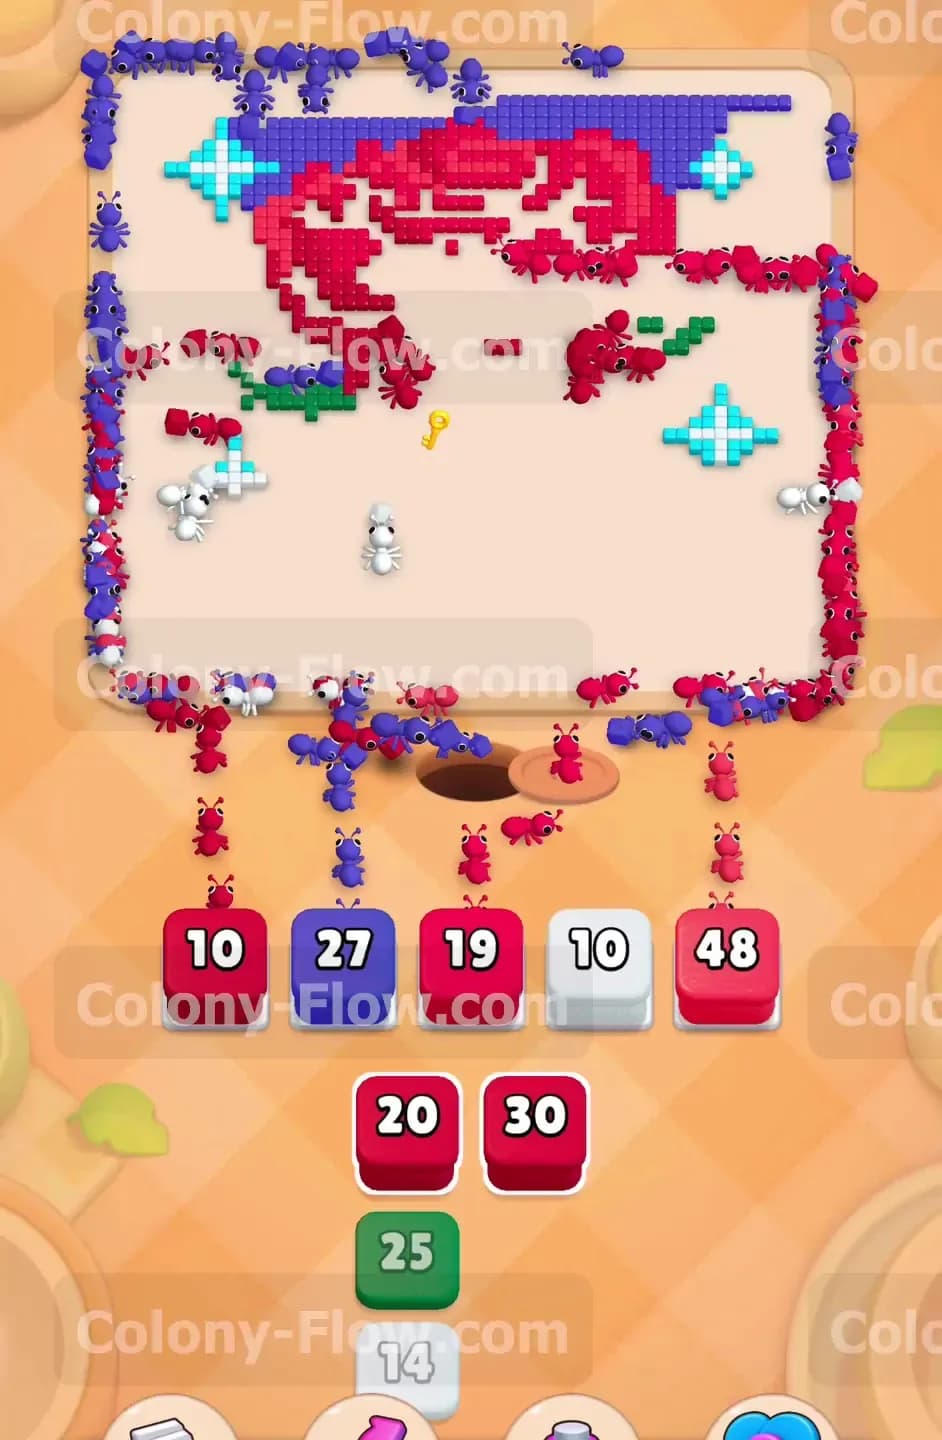
With the locked block now wide open pull it up into an empty waiting slot. Your ants will rush out of the nest and attack the remaining light blue tiles scattered across the board. The light blue stars are spread out across the sky so the ants will travel to several different spots all at once. Clearing these light blue tiles completely exposes the bright white centers of the stars. It also removes the annoying barriers that were protecting the deeper upper sections of the dark blue background. Keep a close eye on the waiting slots during this step. Because the ants are traveling much further across the board it takes slightly longer for the numbers to drop to zero. Be very careful not to pull extra blocks until the light blue number is almost entirely gone.
Step 7: Releasing the white blocks to consume the star centers.
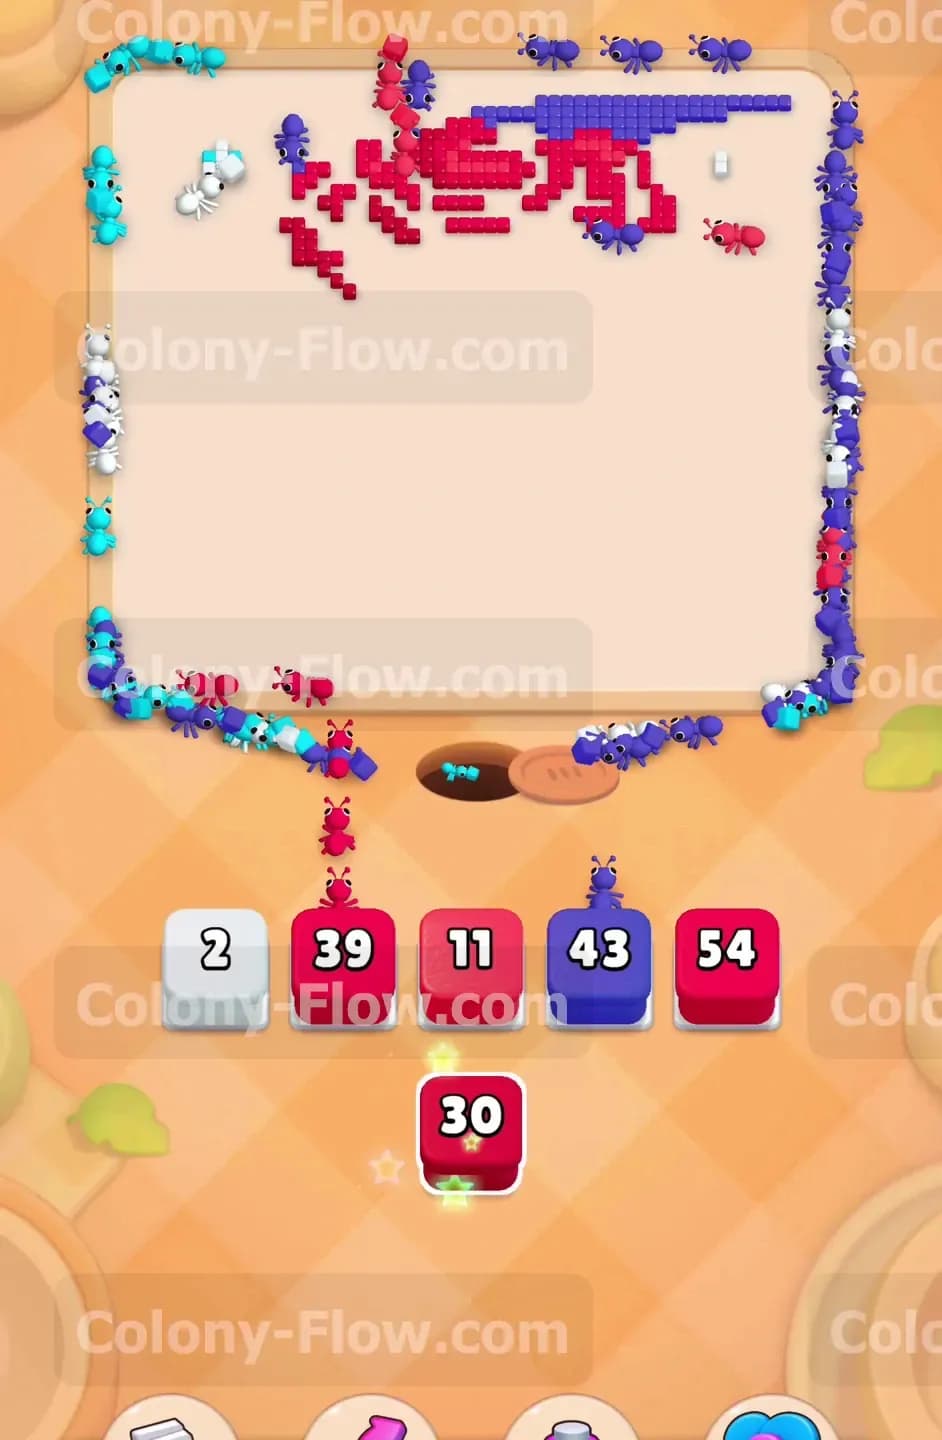
Now that the light blue outlines are completely gone the white star centers are entirely exposed and ready to be eaten. Look down at your tray and pull the available white blocks into the waiting slots. The white tiles are quite small but there are several of them scattered across the dark blue background area. The ants will quickly clear these small white clusters one by one. Doing this eliminates the absolute last of the star details from the picture. At the exact same time you should pull another dark blue block to tackle the top corners of the background. The board is now extremely open allowing the ants to reach almost any remaining tile with ease. Just remember to always verify that a clear path exists before pulling a new color into the slots.
Step 8: Finishing off the massive red rose and the remaining background.
The final phase of the level is all about clearing massive volume. You have a huge chunk of the red rose left and just a few remaining dark blue tiles around the very top edges. Your tray will be full of high numbered red blocks waiting to be used. Start pulling them into your waiting slots one by one. The ants will flood the red flower eating away the thick petals from all possible sides. Pull the last dark blue block to clear the final pieces of the night sky background. As the dark blue clears completely all your ants will concentrate purely on the giant red flower. Pull the remaining red blocks from the tray as slot space allows. The red tiles will vanish rapidly under the massive swarm of ants. When the final red tile disappears the entire picture is clear and you secure your hard earned victory.
Final Thought
Level 707 requires careful timing with the green stem and the yellow key. Never rush your pulls and always make sure you have an open path for your ants to travel. If you find yourself getting stuck or filling up your slots too fast please scroll up and watch the video above this article. Seeing the exact sequence of blocks in motion will help you master the board.