Colony Flow Level 1237 Walkthrough Solution & Guides | How to solve Colony Flow 1237

Guide By Liam Stone
Updated on August 12, 2026
Some readers just want to watch. The video above covers Level 1237 from start to finish.
Video doesn't match your screen?
Game updates frequently scramble layouts! Try our AI Screenshot Solver first to find your exact board instantly, or report broken guides to our team.
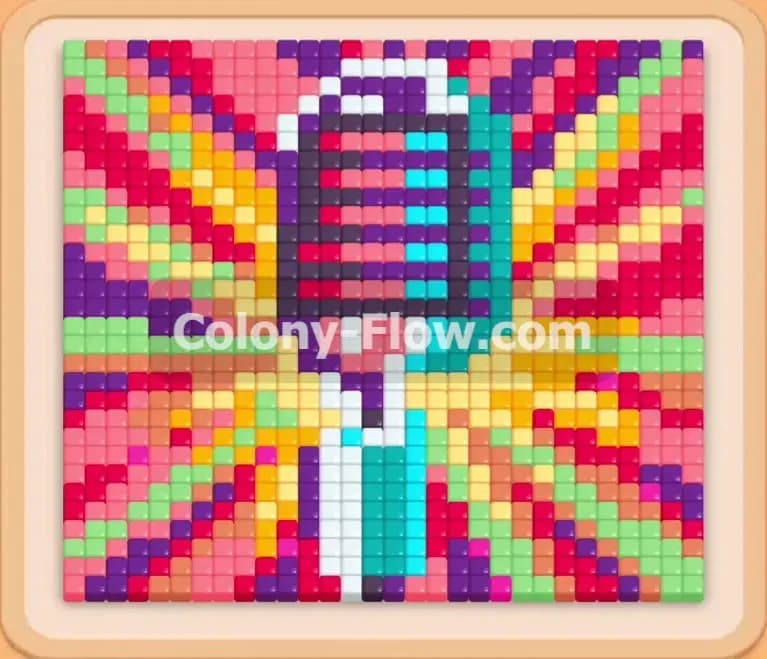
Welcome to another guide where we conquer Colony Flow Level 1237 together. This stage brings a dense and colorful picture to the board with a central shape that resembles a vintage microphone. You will face a lot of layers and need careful planning to keep the ants moving without clogging up your waiting area. Let me show you exactly how to break this stage down.
Colony Flow Level 1237 Overview
What You Are Working With
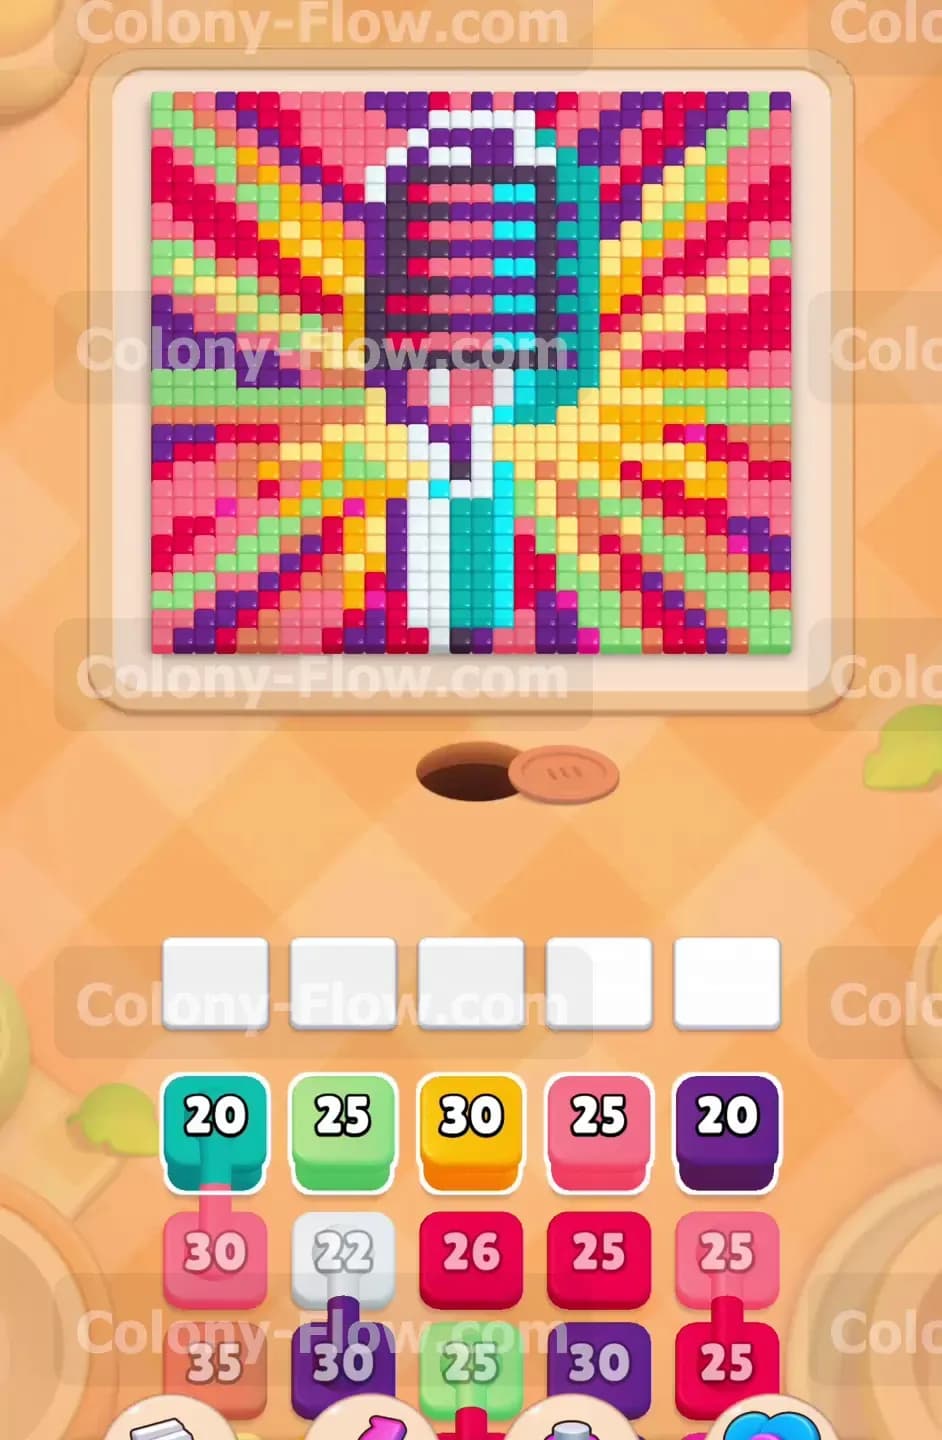
The picture in this stage sits squarely in the middle of the screen. Bright rays of yellow and pink and red explode outward from a dark central object. You have a tray at the bottom loaded with numbered colored squares. Some of these squares are Connected Boxes. A Connected Box means two or more colors link together and pull into your waiting area as a single package. You need an open path for both colors to start feeding the ants. You will see several pairs of Connected Boxes throughout this stage.
What It Takes to Clear Level 1237 Board
You win when every single colored square disappears from the picture and the ants return to their nest. The biggest trap is the waiting area at the bottom. It only holds five items. If you drag five items up and the ants cannot find a way to reach the matching colors on the picture you fail the stage. You must always pick a color that sits exposed on the outer edges of the shape. This guarantees the ants can reach their food and frees up a spot in your waiting line. You never want to dead end your board.
Colony Flow Level 1237 Step by Step Solution
Step 1: open the outer sunburst edge to clear the initial blockages
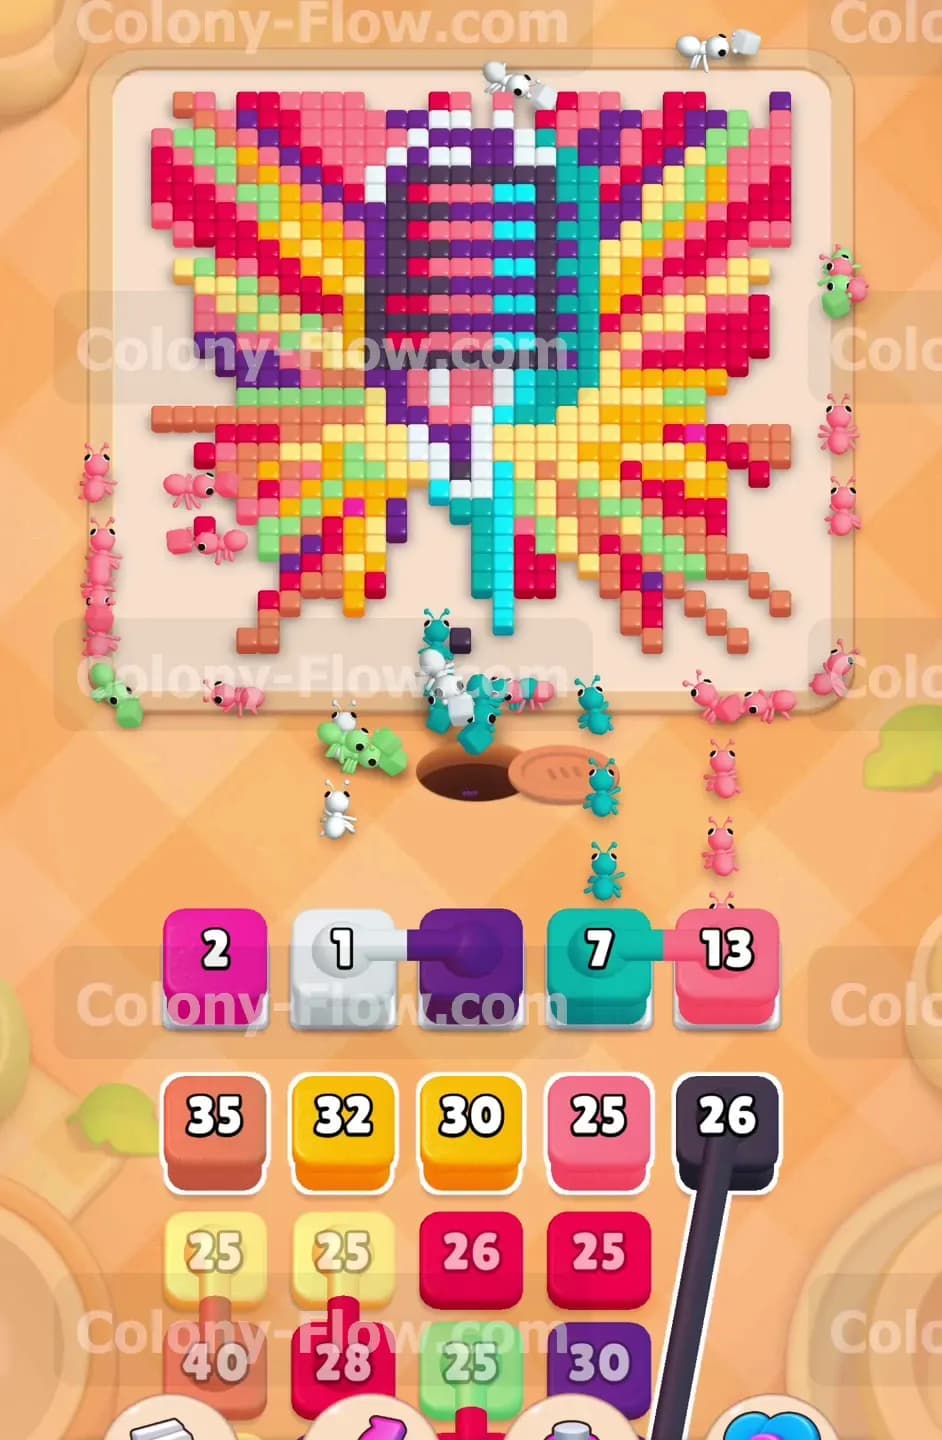
Start your game by focusing on the bottom left and right edges of the design. You need to create an opening so the ants can reach the interior colors later. Pull the turquoise square with the number twenty from your tray into an open slot. The ants will immediately flood out of the nest hole and march toward the exposed turquoise pieces on the bottom edges. You will see the number twenty tick down rapidly as the ants chew away the pixels. Next bring up the light green square which holds the number twenty five. This opens up enough space to reveal the white pieces tucked near the bottom center. By targeting these specific outer edges first you guarantee that your ants keep eating and your waiting slots never fill up. Your board begins to breathe as the outer layers melt away. Keeping those slots clear is the entire secret to this game.
Step 2: pull the connected white and purple blocks to clear the lower central area
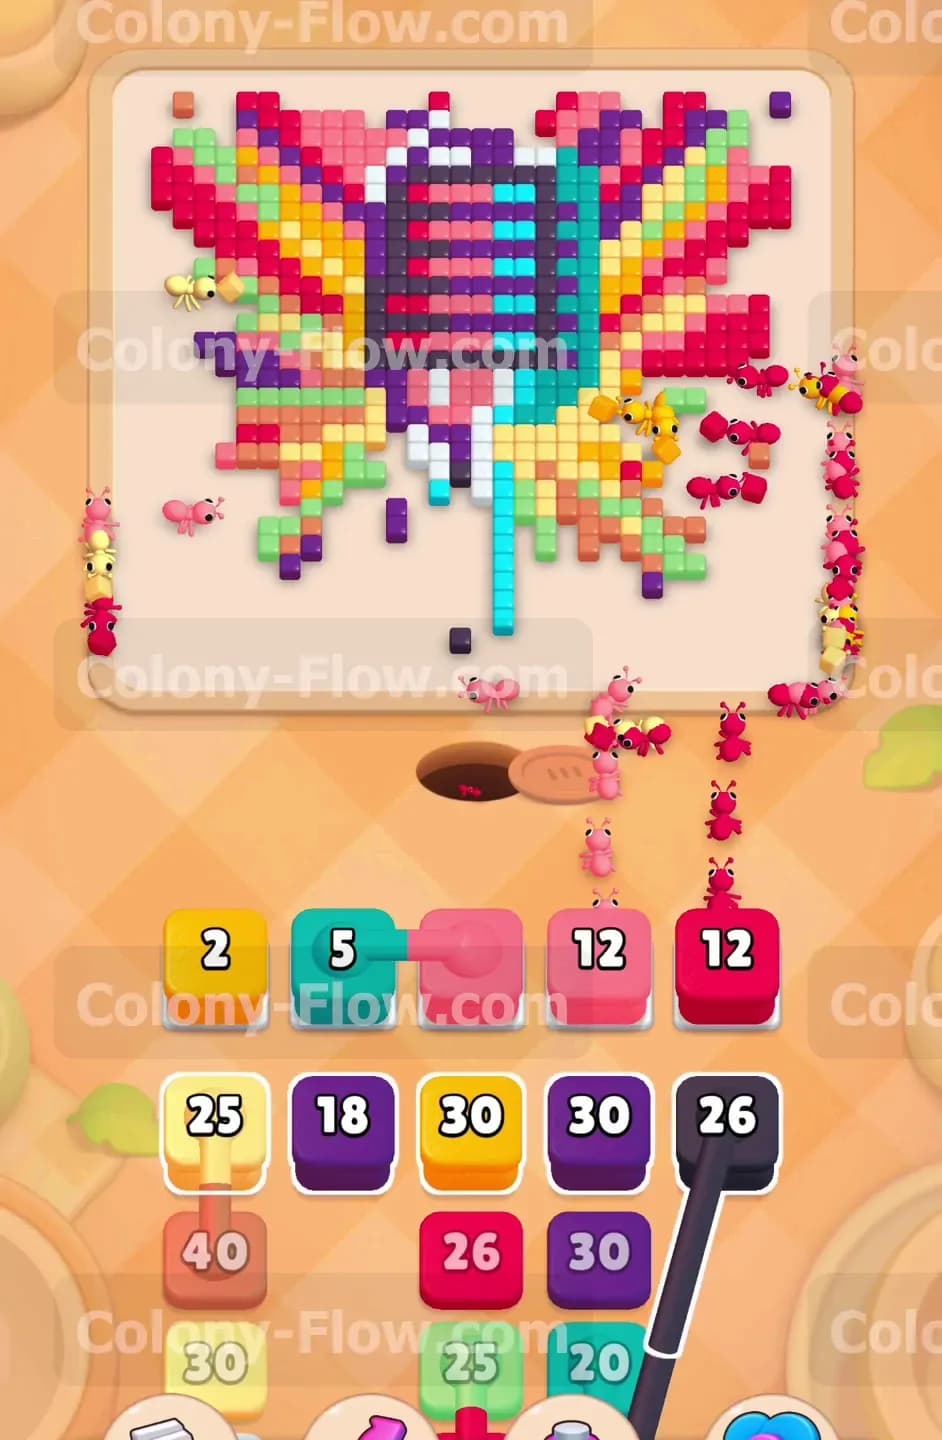
Now that the bottom edges have some breathing room you will notice a white block connected to a purple block in your tray. Drag this connected pair into your waiting slots. Since you already cleared the turquoise and light green barriers the ants have a clear road to reach both the white pieces and the purple pieces on the board. The white block demands exactly one pixel while the purple block needs several more. The numbers on these blocks will count down as the ants consume the matching pixels. Bringing up connected boxes early can be dangerous if the path is blocked but your previous moves made it completely safe. Watch as the ants strip away the lower middle section of the picture and return to the nest. Your slots empty out right away giving you total control over the next phase of the board.
Step 3: deploy the pink blocks to chew through the bright red and pink sunburst rays
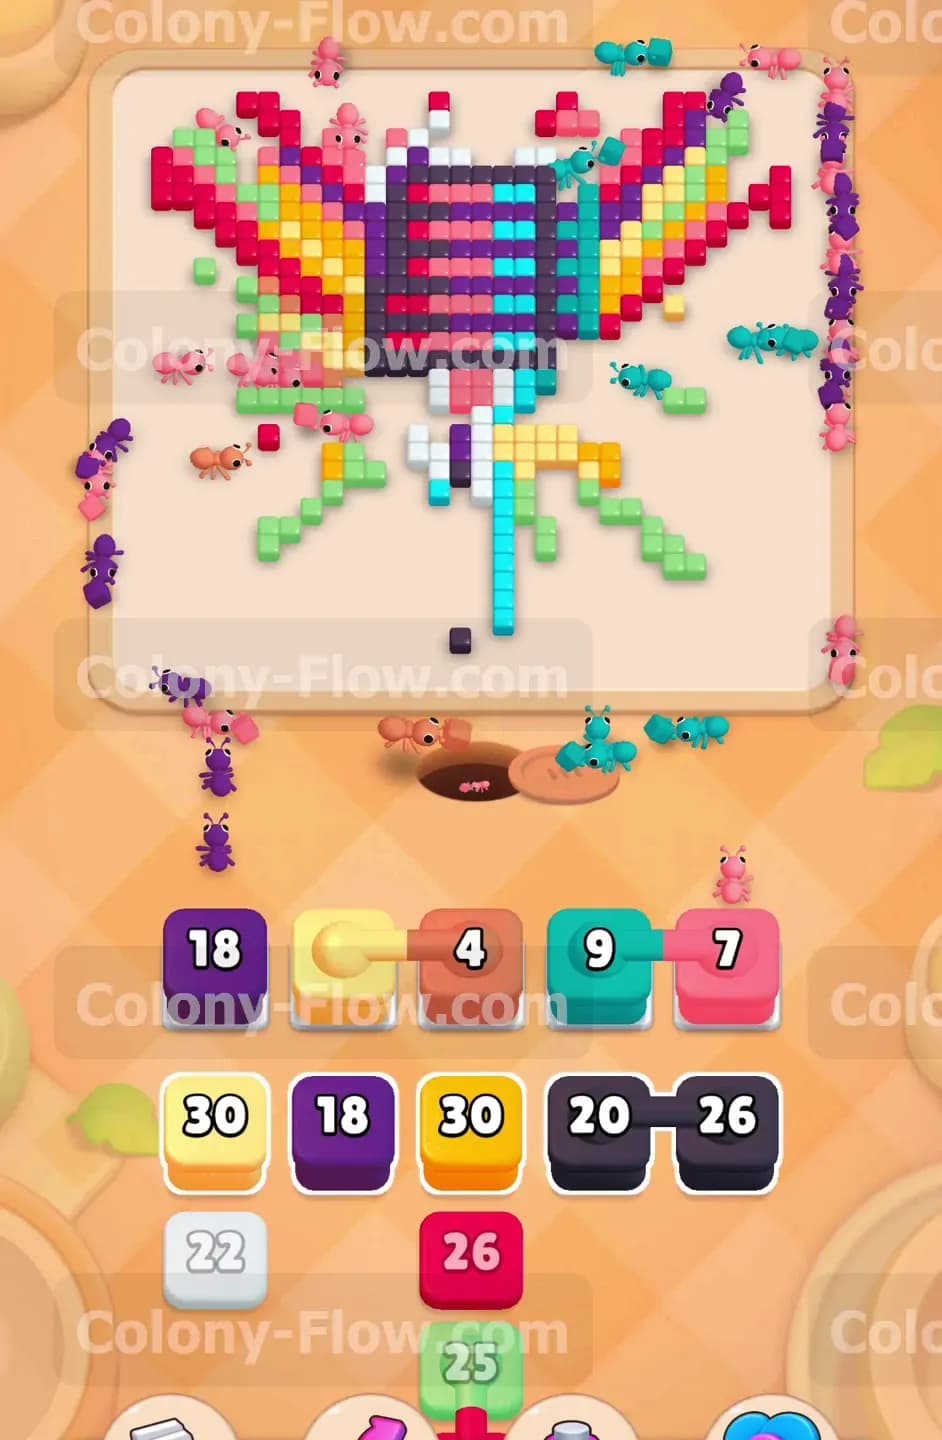
The left and right sides of the picture feature large bursts of pink and red. Find a pink block in your tray and slide it up into an active slot. You will see several pink blocks available including some that might be connected to other colors depending on how your tray shifts. Focus purely on feeding the ants the solid pink blocks first to carve through the outer boundaries. The ants will travel up the sides of the board and start carving out huge chunks of the bright sunburst pattern. This action heavily reduces the overall mass of the picture. Keep an eye on your slots and wait for the pink numbers to reach zero before you pull anything else that might block the flow. Patience here ensures you do not crowd your five available spaces.
Step 4: use yellow blocks to eliminate the remaining bright background colors
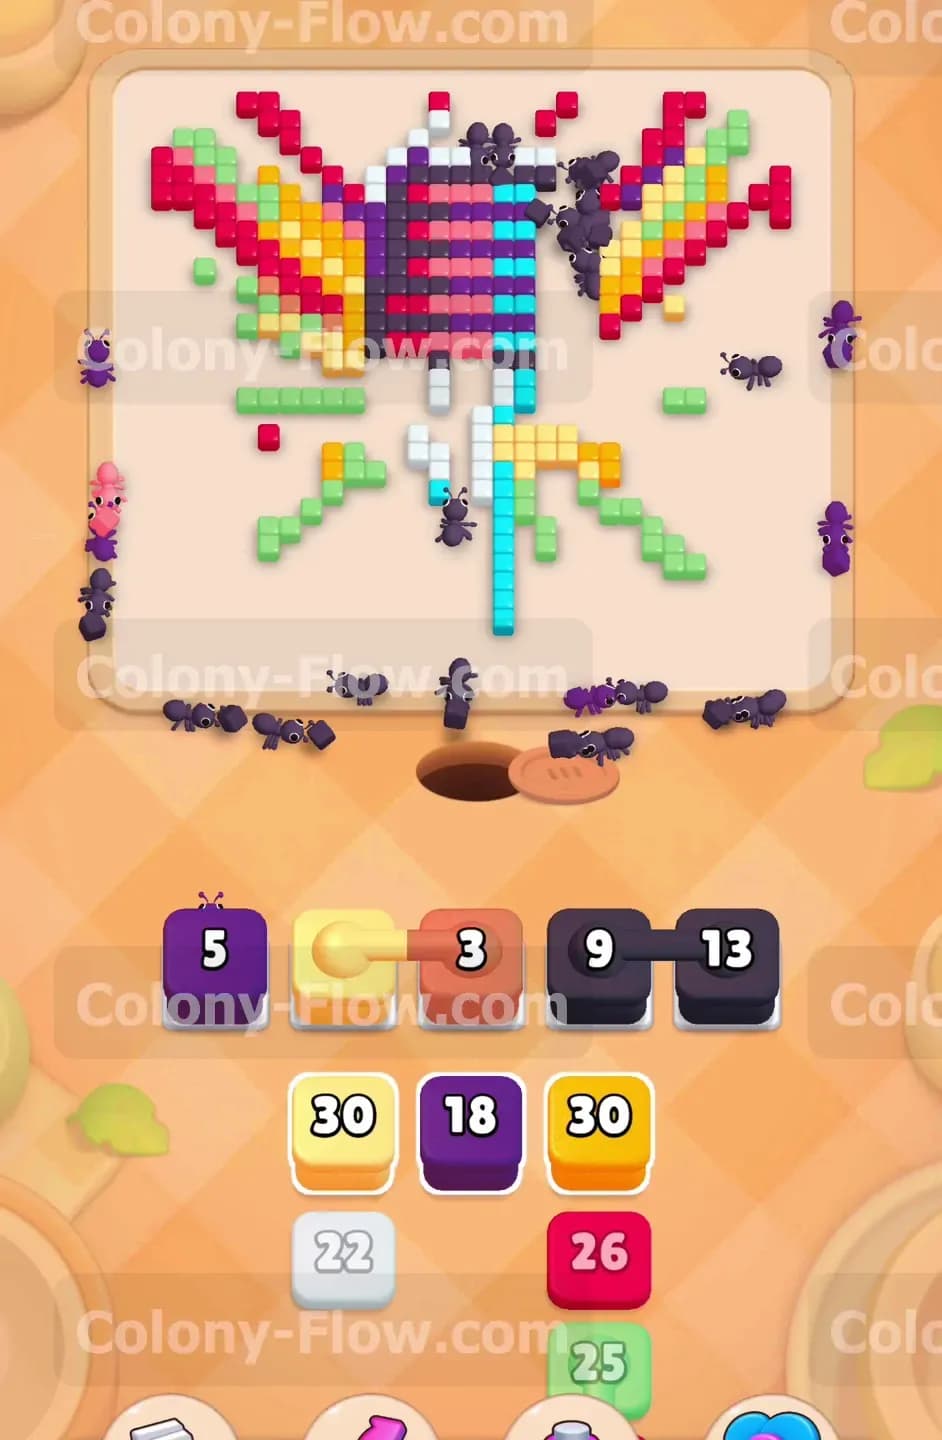
With the pink and red rays mostly gone the yellow sections of the background are completely exposed. Grab a yellow block from the tray and place it into a waiting slot. You have a thirty block of yellow waiting for action. The ants will quickly swarm the remaining bright rays on the outer perimeter of the design. Doing this strips away the entire backdrop and leaves only the dark central shape standing alone in the middle of the screen. You are keeping your pathways wide open by clearing the picture from the outside moving inward. You never have to worry about a clogged line when you follow this outside in method. Every yellow pixel disappears and leaves a massive empty area for your ants to navigate freely.
Step 5: bring up the connected dark purple blocks to break the microphone outline
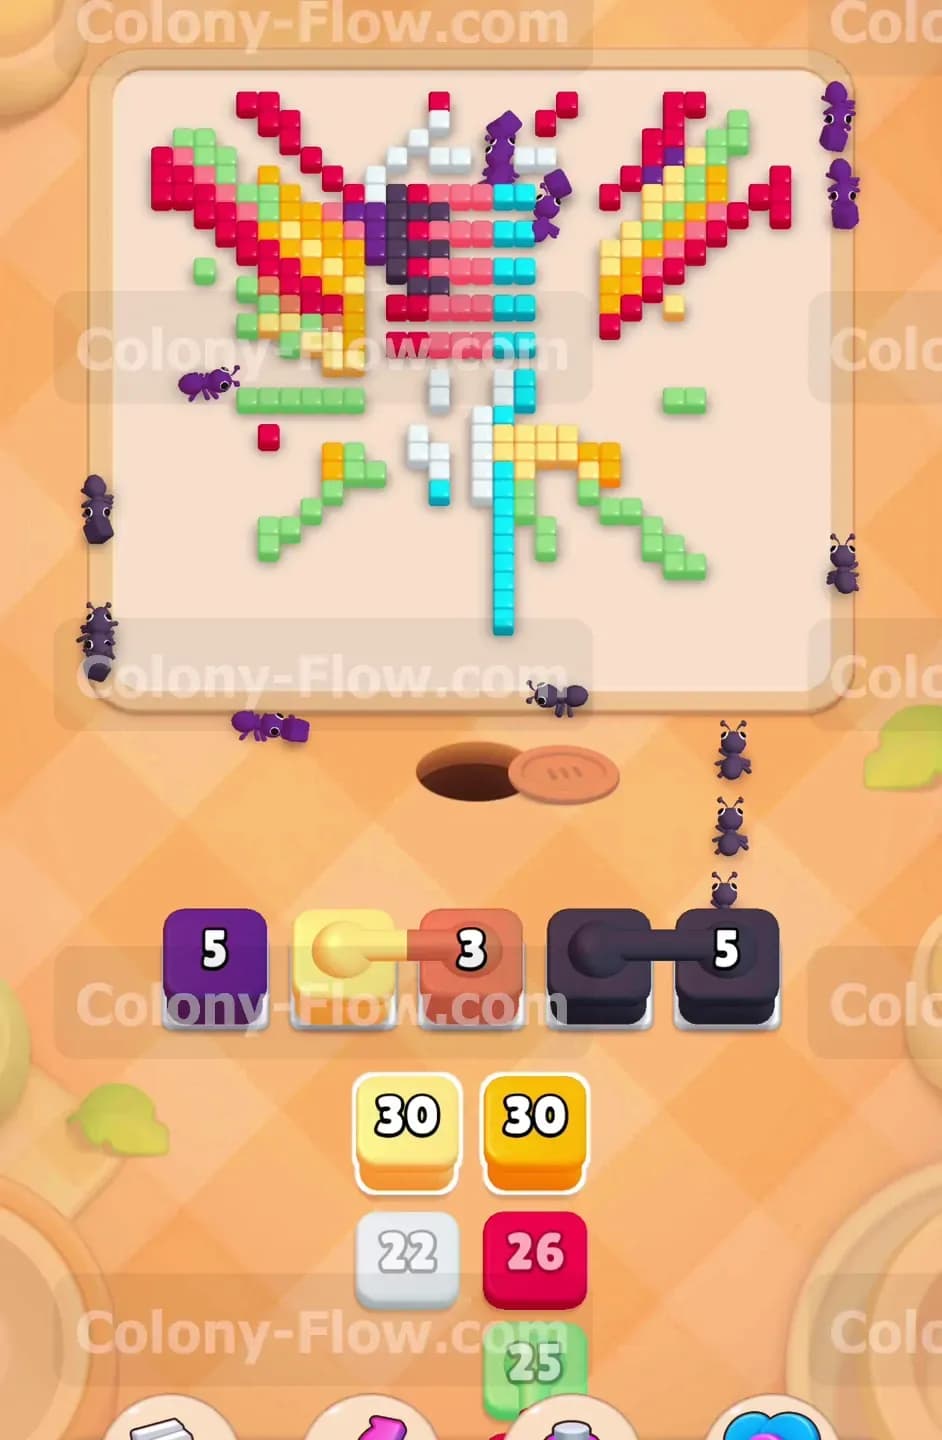
The central object looks like a classic microphone framed by a thick dark purple outline. Your tray holds connected dark purple blocks specifically meant for this section. Pull the connected pair of twenty six and twenty six dark purple blocks into your active slots. Because the yellow background is completely gone the ants easily surround the microphone shape and begin eating the dark purple border. The numbers on your blocks will steadily drop as the thick outline vanishes piece by piece. This is a key moment because breaking the outline exposes the inner core of the central object. The connected blocks clear out together and leave your waiting slots entirely empty once again.
Step 6: clear the inner yellow and orange sections with your next connected pair
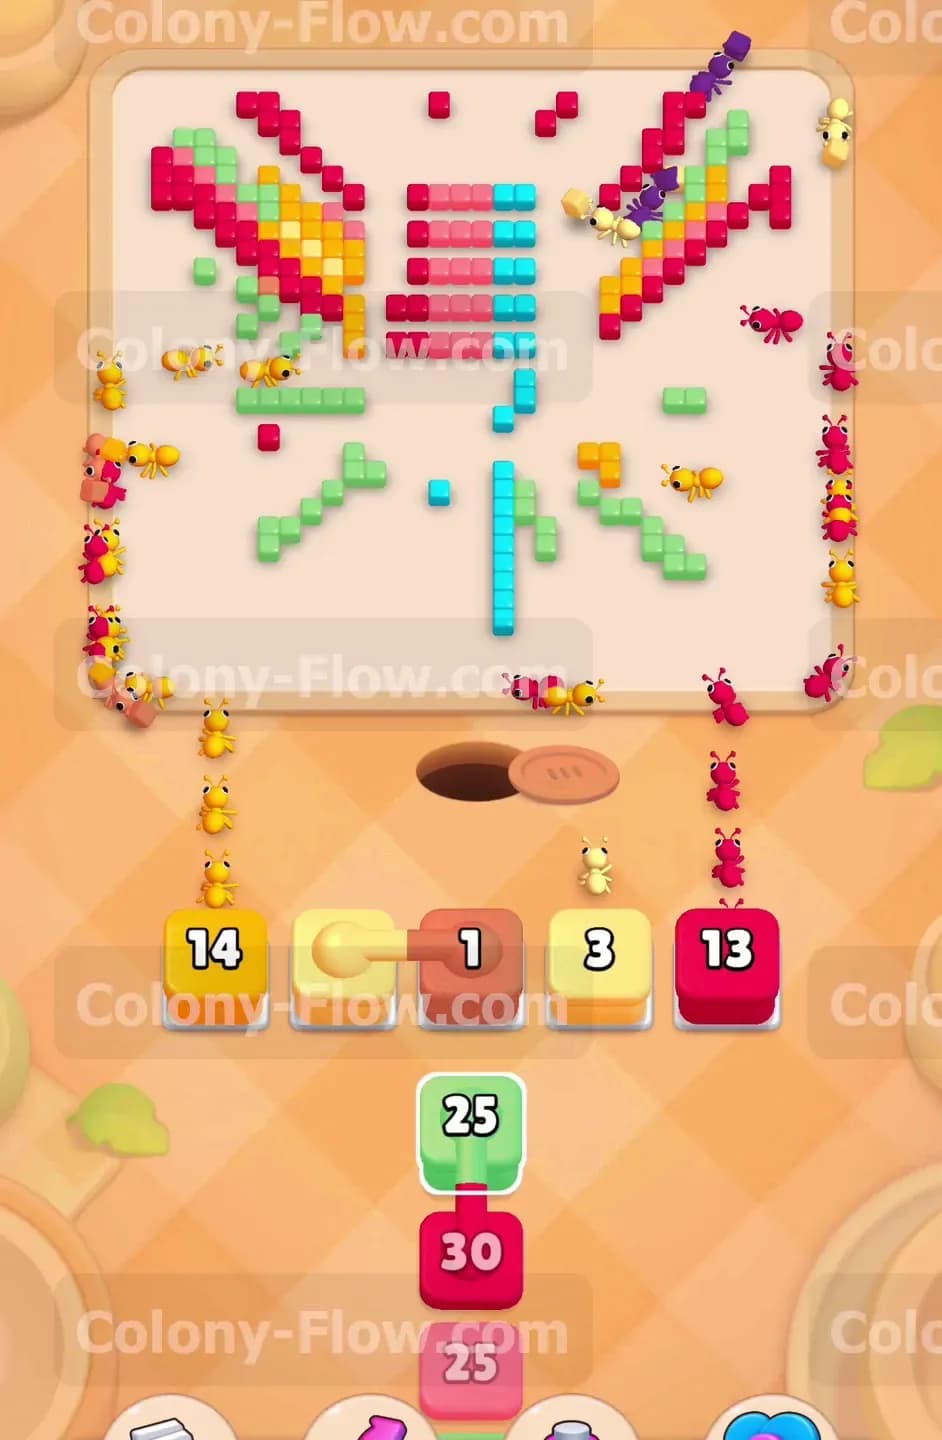
Look at your tray again and find the yellow block connected to the orange block. Drag this pair into the waiting area. The core of the microphone design features horizontal stripes of bright colors. Since you removed the dark purple shell the ants can dive right into the center and devour the orange and yellow stripes. The ants split their attention between the two colors flawlessly. They chew through the exact numbers required to empty those specific tray boxes. You are getting very close to the end of the stage now. The picture is shrinking rapidly and your waiting slots remain perfectly clear for the final push. Maintaining this steady flow guarantees you will not hit a sudden fail state.
Step 7: clean up the scattered purple and pink leftovers near the top
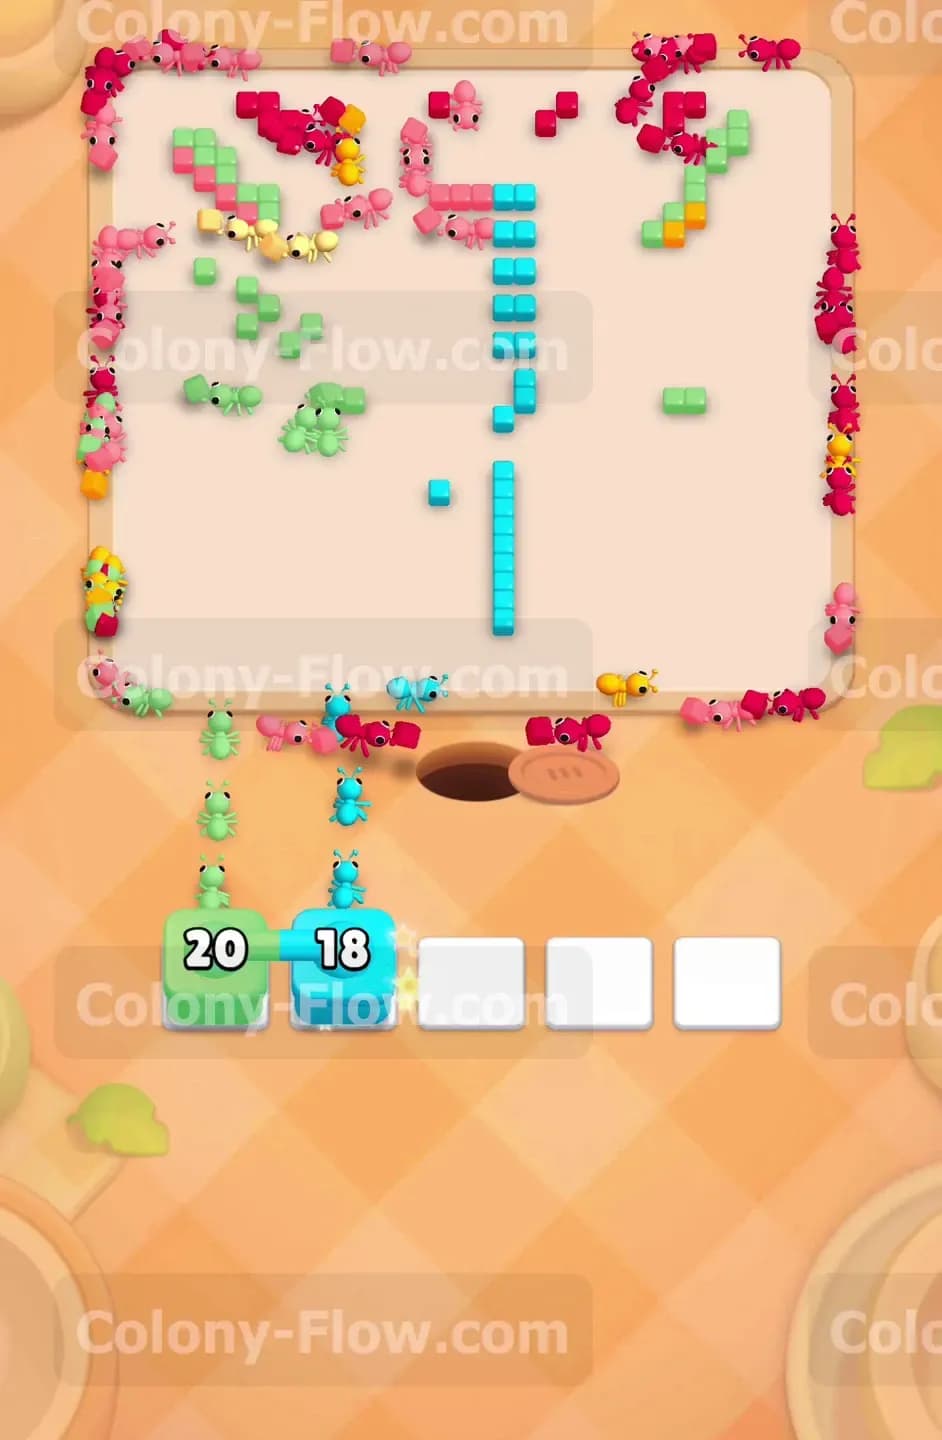
There are just a few isolated clusters of purple and pink remaining near the top of the design. Pull up your remaining single purple and pink blocks to handle these stragglers. The ants will march all the way to the top of the board to clear them out. You might notice the numbers on your blocks exactly match the number of leftover pixels up high. Let the ants finish their job and watch the top half of the board become completely empty. You only have a tiny fragment of the bottom stem left to deal with now. It feels great to see the board so clean after starting with such a dense wall of colors.
Step 8: finish the stage using the light green and light blue connected blocks
The only thing standing between you and victory is the bottom stem of the central shape. Find the light green block connected to the light blue block in your final tray options. Move this pair into your slots. The remaining pixels on the board perfectly match these two colors. The final wave of ants will rush out of the nest and consume the last bits of the stem. The light green and light blue squares hit zero and vanish from your tray. The picture disappears entirely and the ants return home. You complete the stage with zero risk of jamming your waiting area.
Final Thought
This stage demands patience and careful color selection to keep your paths free. I really enjoyed finding the rhythm of those connected boxes as the layers peeled back. If you lose track of any of these moves or just want to see the timing in action please watch the video above this article. You will have this level beat in no time.